Category Archives: Crochet

Safety Eyes for Amigurumi โ€“ A Few Things Iโ€™ve Learned

I use safety eyes in a lot of my amigurumi, and over the years I’ve ended up with quite a collection โ€“ different sizes, shapes and colours, some plain black and others a little more realistic.

They’re only a small part of an amigurumi, but they can completely change its face. Even moving the eyes by one stitch can make a surprising difference.

And then, of course, there comes the scary part – when you have to commit and put the washers on. Once that’s done, changing your mind isn’t quite so easy.

So I thought I’d share a few things I’ve learned from using them โ€“ as well as something I discovered while I was actually writing this post.


Choosing and positioning the eyes

I don’t really have a rule for which size eye to use. I normally try a couple and see which looks right.

Before putting the washers on, I insert both eyes and move them around until I’m happy with the position. Sometimes it’s only a matter of moving them one stitch closer together, or a row higher or lower, but it can completely change the expression.

I also prefer to have some stuffing in the head at this stage. The final shape can make quite a difference to how the eyes sit.

Something else I do quite often is take a photo before committing. I don’t know why, but sometimes I don’t notice that something is slightly off until I see it in a photograph. It’s a useful little trick when you’ve been staring at the same face for too long.
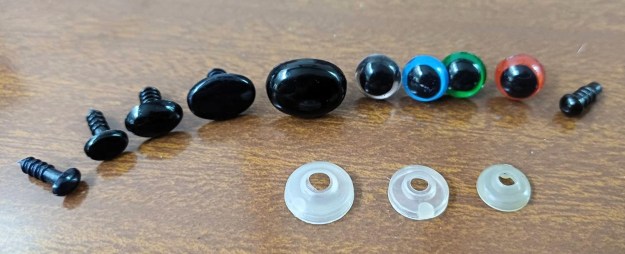
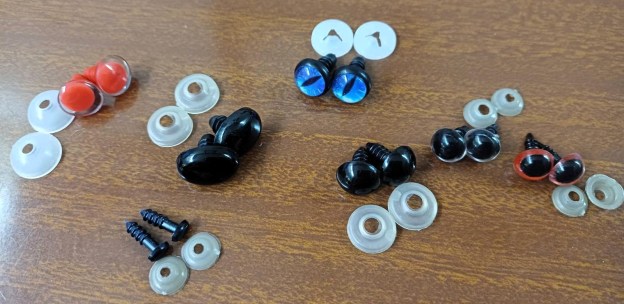
Some of the safety eyes I’ve collected over time, together with the cupped plastic washers I use.


Different eyes give very different results

Plain black eyes are probably the ones I use most often, but there are lots of other options.

I have round and oval ones in different sizes, coloured ones, and some with an iris around the black centre. The brown ones, for example, can give a much more realistic-looking eye.
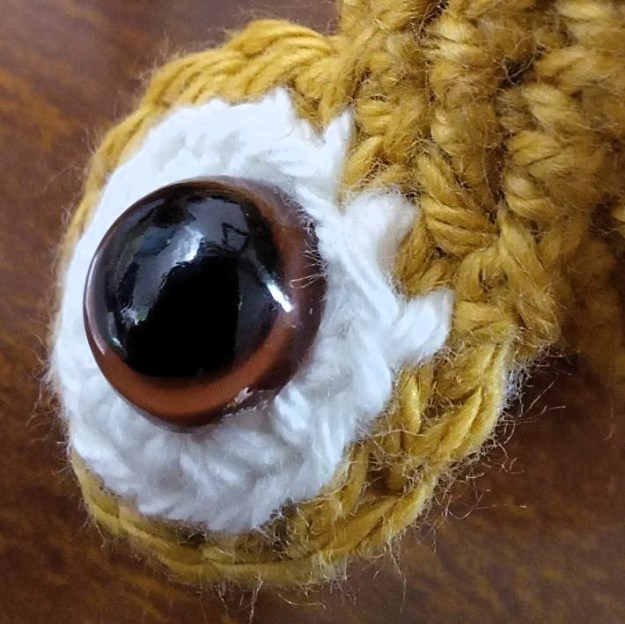
The brown iris gives a very different look from a plain black safety eye.

Some safety eyes also have a clear or transparent area around the black centre. I like these because you can change the effect yourself by putting a piece of felt behind the transparent part. It means you can experiment with colour without needing a different pair of eyes every time. A little piece of blue, green, brown or whatever suits the character will show through the clear part of the eye.

Felt can also become part of the eye itself. On my penguin, I used white felt that was deliberately larger than the safety eye. Instead of being hidden behind it, the felt shows all the way around and gives the eye a white border, which helps it stand out against the black crochet.
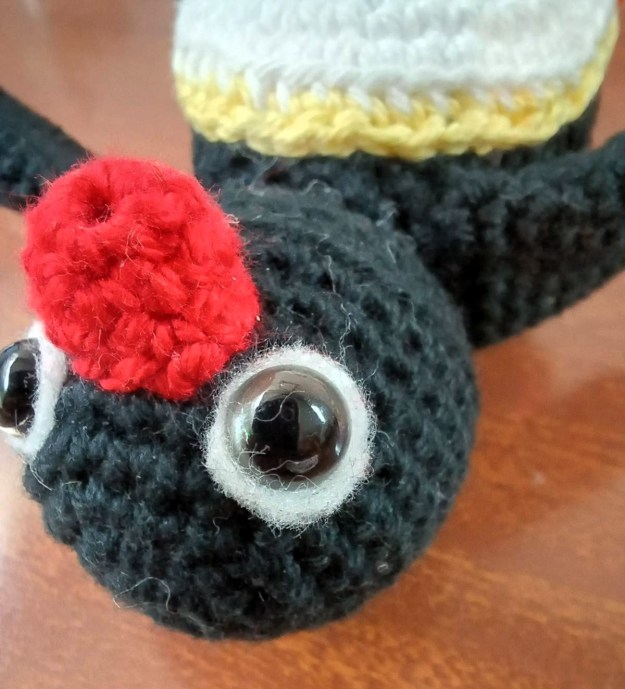
Here I’ve deliberately left the white felt showing around the safety eye.

The felt doesn’t have to be a perfect circle either. You can change the shape, make it oval or slightly pointed, and play around until you get the expression you want.

Just do all that playing around before the washer goes on!


And then there’s the washer…

This is something I’ve wondered about for quite a while. Most of my safety eyes come from China in larger packs. The washers I’ve always received with them are the little translucent cupped ones you can see in the photograph above. There are no instructions.

Which leaves one rather obvious question:

Which way round is the washer supposed to go?

Look online and you’ll find both answers. Some people put the domed side towards the eye; others put it the other way round.

For a long time, I’ve been fitting mine with the flat side towards the eye and the dome facing away. And then, while writing this post, I decided to have another play with them.


The tool I had almost given up on

Some time ago I bought a tool specifically for attaching safety eyes.
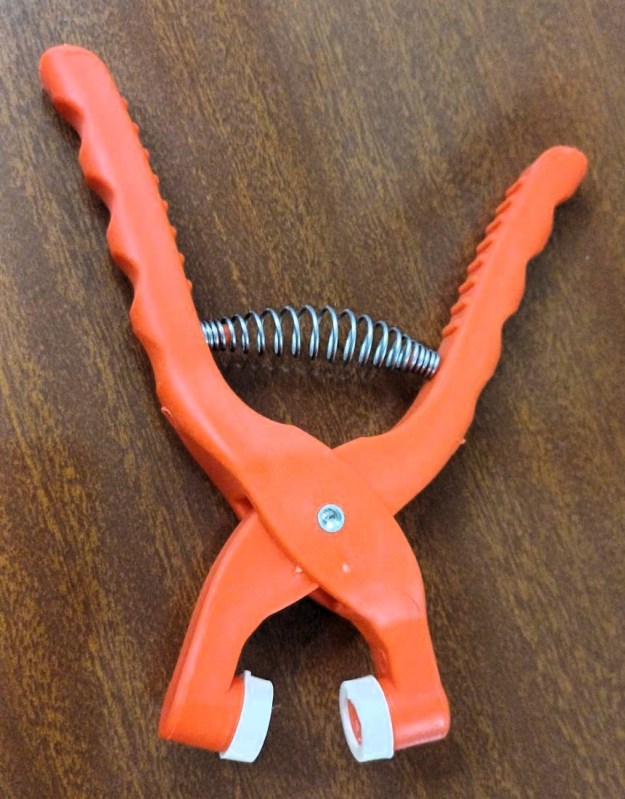
I thought it would save my fingers, particularly when I was attaching washers that needed quite a bit of pressure.

It didn’t quite work out that way. Every time I tried using it, it seemed to break the stem of the safety eye. I have quite a few different sizes of eyes and the stems are all fairly long, so I concluded that the stems were simply too long for the tool.

But while I was working on this article, I decided to experiment again. This time I turned the washer around so that the domed side was facing towards the eye.

And it sort of worked! It’s still not perfect, and you have to be careful when applying pressure as it doesn’t need much to push the washer over the ridges on the stem – the washer actually travelled down the stem instead of the stem simply snapping. So perhaps the problem wasn’t the length of the stem after all โ€“ or at least, not entirely.

Does this mean that the domed side is definitely the correct way to fit every cupped safety-eye washer? I don’t know. Mine are unbranded, they don’t come with instructions, and I’m certainly not going to claim I’ve settled a debate that seems to have been going on amongst amigurumi makers for years.

What I have discovered is that with my washers and my tool, putting the domed side towards the eye works much better.

I’m going to keep experimenting with it.


One extra thing I do

Once I’ve got the washer firmly in place, I usually take one extra step.

I carefully use a lighter to soften just the very end of the plastic stem and then flatten the softened tip slightly behind the washer. I’ve been doing this for quite some time. For me, it gives an extra little physical stop behind the washer and a bit more reassurance that it isn’t going to work its way back over the end of the stem. This isn’t something that came from the manufacturer’s instructions โ€“ as I said, I don’t actually have manufacturer’s instructions for mine. It’s simply something I do with my own amigurumi.

If you decide to try something similar, obviously be very careful. I only soften the very tip of the stem and keep the heat well away from the yarn and stuffing. Different plastics may also react differently to heat, so it’s not something I’d treat as a necessary part of fitting a safety eye.

Come to think of it, if I start attaching the washer with the domed side towards the eye, softening just the tip of the stem may become much harder, as the washer will be very much in the way. More experimentation needed, for sure!


A note if you’re making for young children

Despite the name, using “safety eyes” doesn’t automatically make a handmade toy suitable for a baby or very young child.

The washer makes the eye difficult to pull from the stem, but it’s still a small plastic component attached through crocheted fabric. Crochet can stretch and, with enough wear or damage, small parts can potentially come loose.

If I’m making something for a baby or very young child, I prefer to embroider or crochet the eyes instead.


Take your time with the eyes

If there’s one thing I’ve learned, it’s not to rush this part.

I’ll try different sizes, move the eyes around, add some stuffing, look at the face from different angles and sometimes take a photo before I decide.

I’ve already spent hours crocheting the thing. Another few minutes getting its expression right isn’t going to hurt.

And only when I’m happy do the washers go on.

Because then thereโ€™s really no going back… I must confess, I have a number of heads lying around that Iโ€™ve had to abandon simply because I didn’t spend enough time getting the eyes right.

Small Doesn’t Mean Simple: My Adventures in Amigurumi

If my last post about the Downtown Blanket was at one end of my crochet scale, it’s time to go right to the other.

Because while Manjri’s Place was quiet, I developed a bit of an obsession.

Amigurumi.

Lots and lots of amigurumi.

Over the past few years, I’ve found myself making more and more of these little crocheted creatures and characters โ€“ animals, fantasy creatures, characters inspired by games, films and television, and occasionally things that are simply… odd.

And I absolutely love making them!

But one of the things I’ve discovered is that when it comes to crochet, small definitely doesn’t mean simple.

In fact, sometimes it’s quite the opposite.


Then my daughter introduced me to the Malta Comic Con…

Three years ago, my daughter encouraged me to take part in my first Comic Con. She’d been attending for years and knew the world well.

I’d already had little glimpses of it through her. Every time she came home from Comic Con, she’d bring back some fantastic artwork she’d discovered, along with quirky accessories and other treasures she’d picked up from the artists and creators there. I always loved seeing what she’d found.

But actually being part of Comic Con myself?

That was completely new territory. I wasn’t entirely sure what I’d got myself into.

And then I went.

I absolutely loved it!

The people. The atmosphere. The costumes. The other artists and creators. The stalls full of things people had designed, drawn, built, sewn, painted and made.
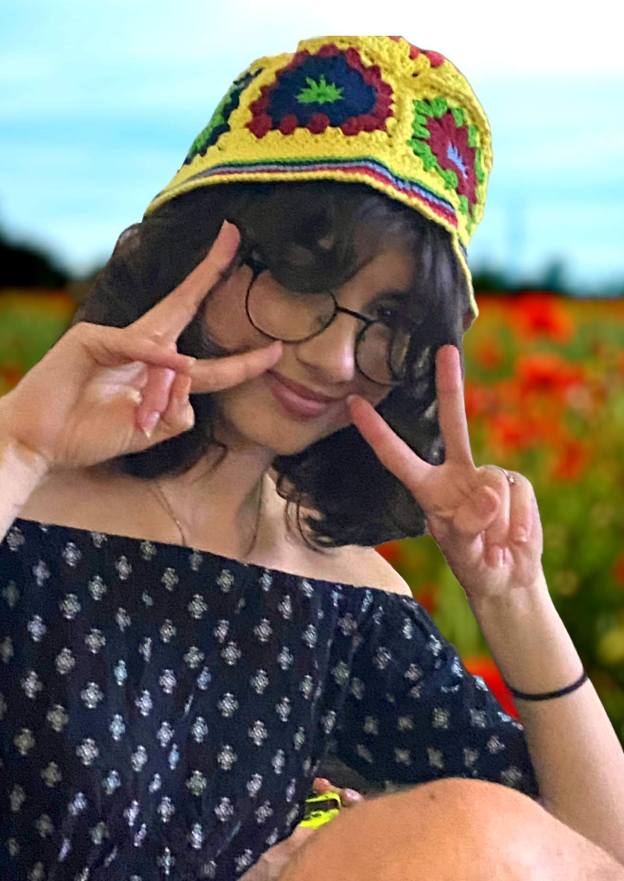
It felt like stepping into another world for a couple of days.

And I have to stop here and give some serious RESPECT to the cosplayers.

Some of the costumes are absolutely incredible. I’m not talking about simply putting on an outfit that looks vaguely like a character โ€“ some are accurate down to the tiniest detail. The clothes, armour, props, wigs, makeup… everything.

And they don’t always just dress as the character either. Some of them become the character. The poses, the mannerisms, the expressions โ€“ they’ll happily stop for a photograph and suddenly you’re no longer standing in a convention hall in Malta. ๐Ÿ˜„

I can only imagine how many hours of work go into making some of those costumes, never mind how long it must take to actually get dressed and do all that hair and makeup on the day.

And then they come back and do it all over again the next day.

Even more impressive when you consider that some of those costumes look decidedly uncomfortable! Heavy armour, enormous props, elaborate wigs, layers of clothing… while I’m standing (or sitting) comfortably behind my table with a crochet hook wondering how they’re still going.

Honestly โ€“ respect. โค๏ธ

I think that’s one of the things I love most about Comic Con: everybody is allowed to be enthusiastic there. Really enthusiastic.

Games. Comics. Anime. Films. Fantasy. Sci-fi. Webcomics and webtoons โ€“ which, I have since discovered, are a whole world of their own! There are independent artists creating and publishing their own characters and stories online, building entire worlds and communities around them.

And then there are characters you’ve loved since childhood as well as characters that I’ve never heard of, but someone else can apparently tell me the entire life history of. ๐Ÿ˜„

There’s something magical about being surrounded by people who are completely unapologetic about loving the things they love.

And everywhere you look, someone is creating something โ€“ drawing, writing, designing, illustrating comics, creating characters, and bringing to life what they have in their imagination.

I think that’s the part of Comic Con that surprised me most when I first took part. It isn’t only about popular culture, but it’s all about creativity. And, of course, for a crocheter who likes making little characters…Comic Con is dangerous territory.


Amigurumi belongs at Comic Con

Characters inspired by games, comics, anime, films and television lend themselves beautifully to amigurumi. All it takes is a particular colour….a pair of ears….a hairstyle….a strange expression….sometimes just a few tiny details – this is enough to make someone walking past your table suddenly stop and say:

โ€œOh! I know who that is!โ€

I absolutely love that moment!

There are other crochet makers at Comic Con too, and you’ll often see the big, wonderfully squishy plushies made with chenille or very thick acrylic yarn. I make some chenille pieces myself โ€“ and I completely understand the appeal. They’re ridiculously soft and cuddly. But most of my amigurumi is rather different. I tend to work in cotton. And usually on a much smaller scale.


Why cotton?

Cotton gives me something I particularly enjoy with amigurumi: detail.

The stitches are crisp and clearly defined. Small changes in shaping show. Tiny features remain visible. I can play with little pieces, embroidery and colour changes without everything disappearing into fluffy yarn. The result is very different from a big chenille plushie. It’s firmer. Smaller. More detailed. And often rather fiddly.

Which brings me to something people don’t always realise…


Small does NOT mean quick

I think there’s an understandable assumption that a little crochet character must take less time to make than a large one. After all, there’s less of it. Right?

Unfortunately, crochet doesn’t quite work like that.

When I’m working with cotton, I’m using a much finer yarn and a smaller hook.

That means more individual stitches are needed to create the same amount of fabric.

Then there are all the little pieces. An arm. Another arm. A leg. Another leg. Ears. Eyes. Horns. Wings. A tail. Hair. Clothes. And so on.. whatever peculiar anatomy that particular little creature has decided it requires, each piece has to be crocheted.

Then there are ends to deal with, pieces to position, features to embroider and everything to sew together. And when something is only a few centimetres across, being one stitch out can actually matter.

Sometimes a tiny cotton amigurumi can take considerably longer than somebody looking at the finished piece would ever imagine. It’s one of the strange things about handmade work. We tend to judge objects by their physical size. But what you’re really looking at is time.

As an example, a detailed 10cm character can take anything between 8 to 16 hours to make – and that’s not including frogging! It depends on the amount of details. Whereas a 10cm character done in chenille may only take 2-3 hours.


The details are the fun part

Having said all that…the fiddly bits are probably exactly why I enjoy it. ๐Ÿ˜‚

I love watching the personality appear.

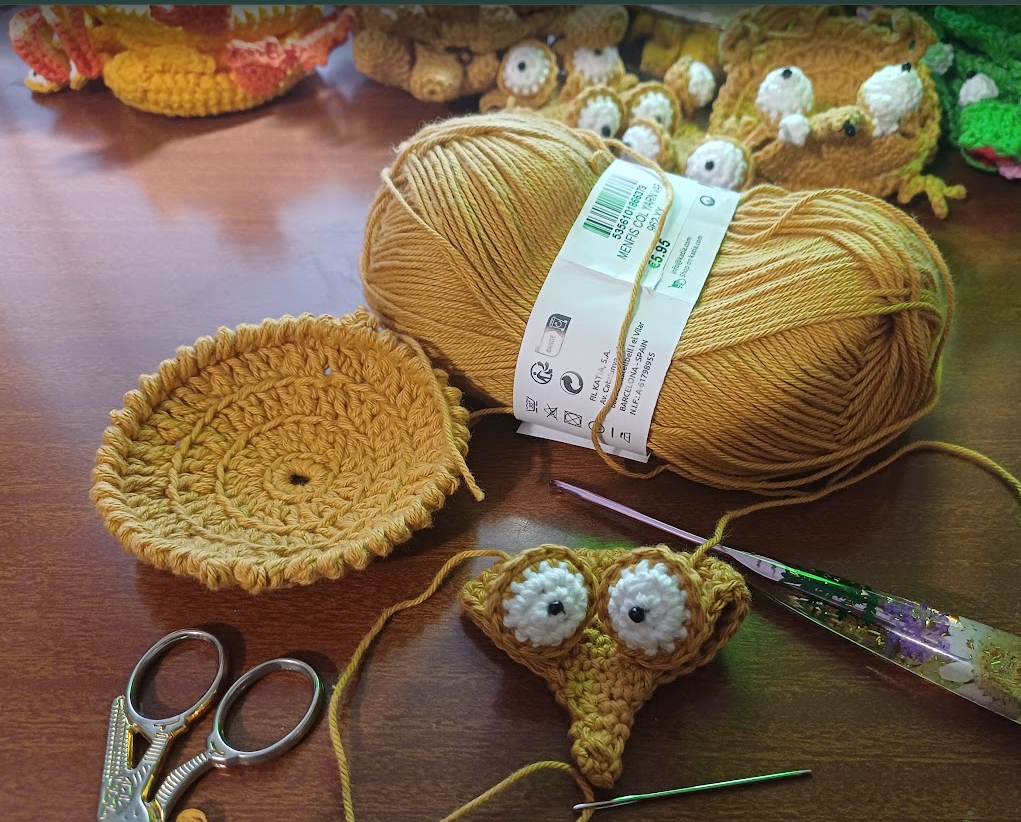
There is usually a slightly alarming stage where I’ve made a head and several unidentified body parts and they’re all sitting on the table looking vaguely disturbing.

Then the pieces start coming together. The eyes go on. Perhaps a little embroidered expression. An ear sits at just the right angle.

And suddenly…

There it is. A character.

That’s probably the bit that keeps me making them.


And I’m doing it all again

Because Comic Con has now become something I look forward to, at the moment, my worktable has been taken over as I prepare for this year’s Comic Con on 10โ€“11 October. There are hooks, there is cotton, there is chenille, there are partially constructed creatures…. There are probably several pairs of unattached eyes staring at me from somewhere….

At times my workspace looks less like a crochet studio and more like Frankenstein’s laboratory โ€“ assorted body parts everywhere, creatures in various stages of assembly, and me hunched over them muttering, โ€œNo, that arm definitely doesn’t go there…โ€

Thankfully, so far none of them has risen from the table shouting โ€œIt’s alive!โ€

Although with Comic Con approaching, I’m not ruling anything out. ๐Ÿ˜„

I’m building up my stock and deciding which characters and creatures should come along this year.

Some will be familiar, some new, and undoubtedly a few that haven’t occurred to me yet. There is still time …


There’s just one thing I haven’t done…

Cosplay.

At least, not yet.

I’ve admired some absolutely incredible costumes over the years. The amount of work, imagination and craftsmanship that goes into some of them is astonishing.

I haven’t quite mustered up the courage to join in myself. Although…

I do have a pretty good idea of what I’d wear.

I’m not telling you yet. ๐Ÿ˜‰ Perhaps next year.

For now, I’ll remain safely behind my table surrounded by small crocheted creatures….which, to be fair, is a pretty good place to be.


From enormous blankets to tiny creatures

It’s funny looking at the Downtown Blanket from my last post and then looking at the little characters currently appearing on my crochet hook.

They couldn’t seem more different. One took four months and eventually occupied most of my sofa. The others can sometimes sit comfortably in the palm of my hand. But they’re both part of what I love about crochet.

There are so few limits on what you can make with what is, fundamentally, a hook and some yarn.

You can make a blanket. You can make clothes. You can make jewellery. Or you can spend several hours making a tiny dragon with an attitude problem.

And I’m quite happy doing all of the above. โค๏ธ

Four Months, a Tangle of Yarn and a Crochet City: My Downtown Blanket

If you read my last post, you’ll know that although Manjri’s Place went rather quiet for a while, I certainly didn’t stop making things.

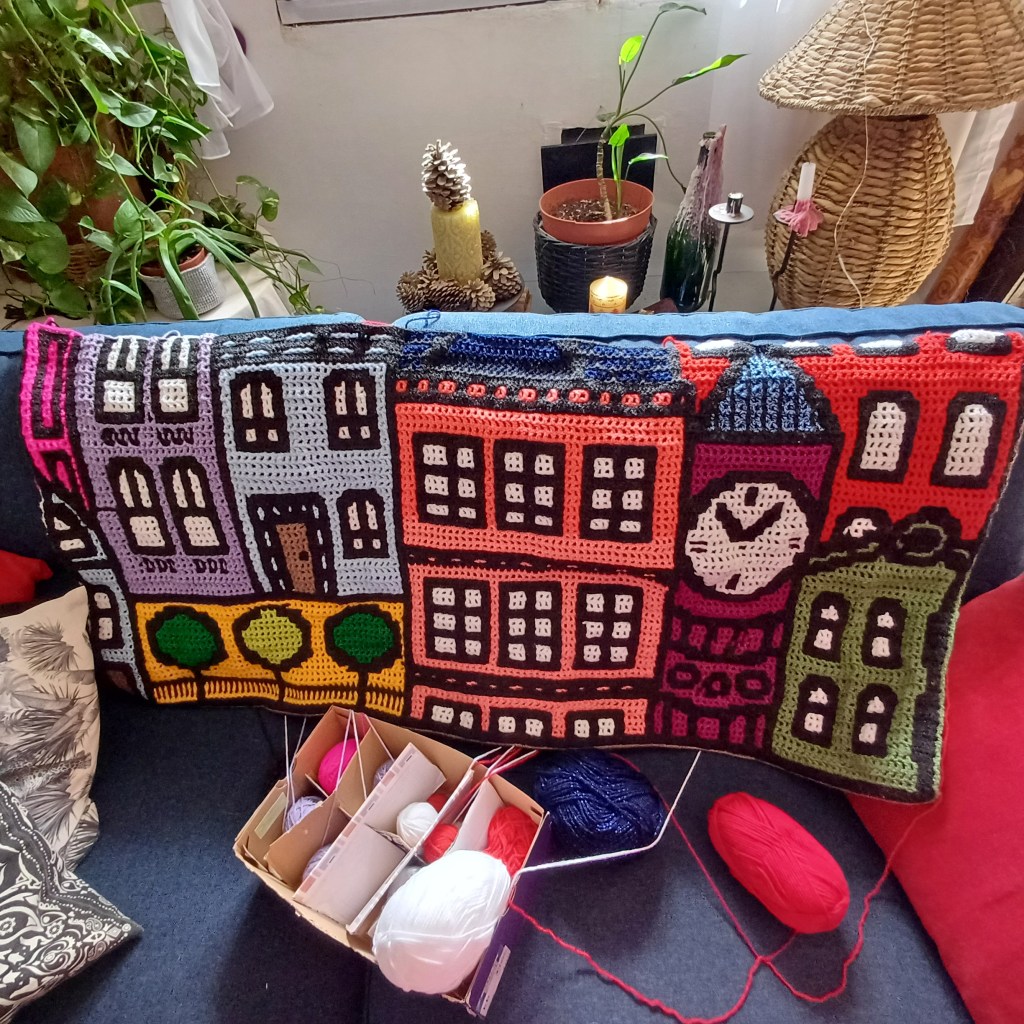
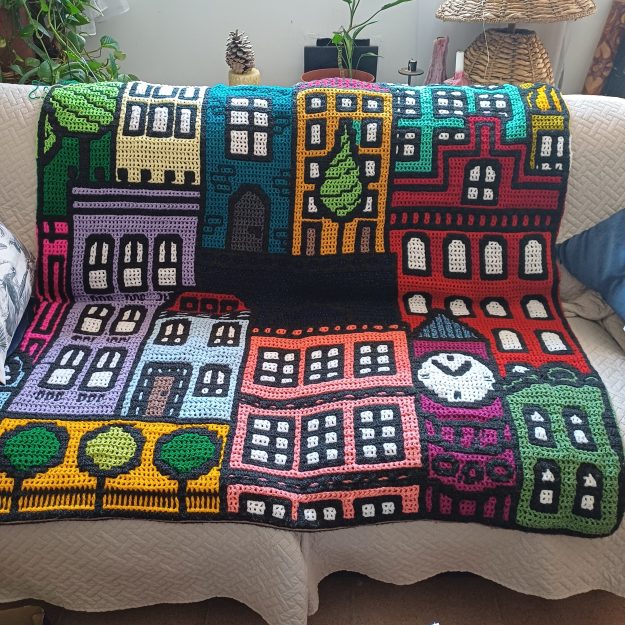
So, if I’m going to start catching you up on what I’ve been doing while I’ve been away, I thought I might as well start with one of the biggest. Quite literally! May I introduce you to my Downtown Blanket. And yes, this really is crochet.

The pattern is Astrid’s Downtown Blanket by Astrid Schandy, and this colourful city took me around four months to make.

It was also my very first attempt at interlocking crochet! Because apparently starting with something small and sensible would have been far too easy. ๐Ÿ˜„

Astrid’s design uses interlocking crochet โ€“ two filet-style crochet meshes worked together to create the wonderfully graphic design of buildings, windows, trees and architectural details.

And when I saw it, I knew I wanted to make it. Here is how my Downtown Blanket grew, one row at a time.

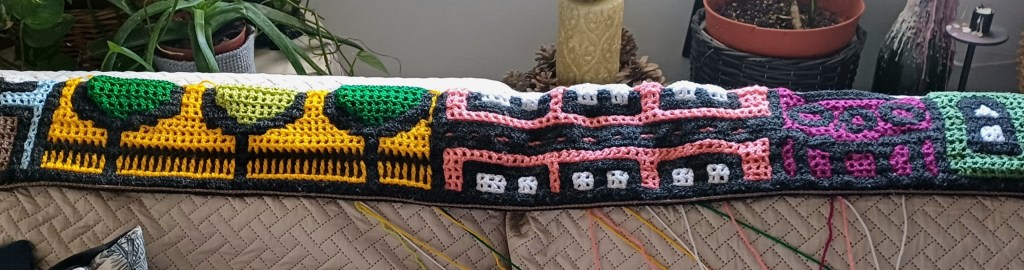
From one very long row…

Every city has to start somewhere…

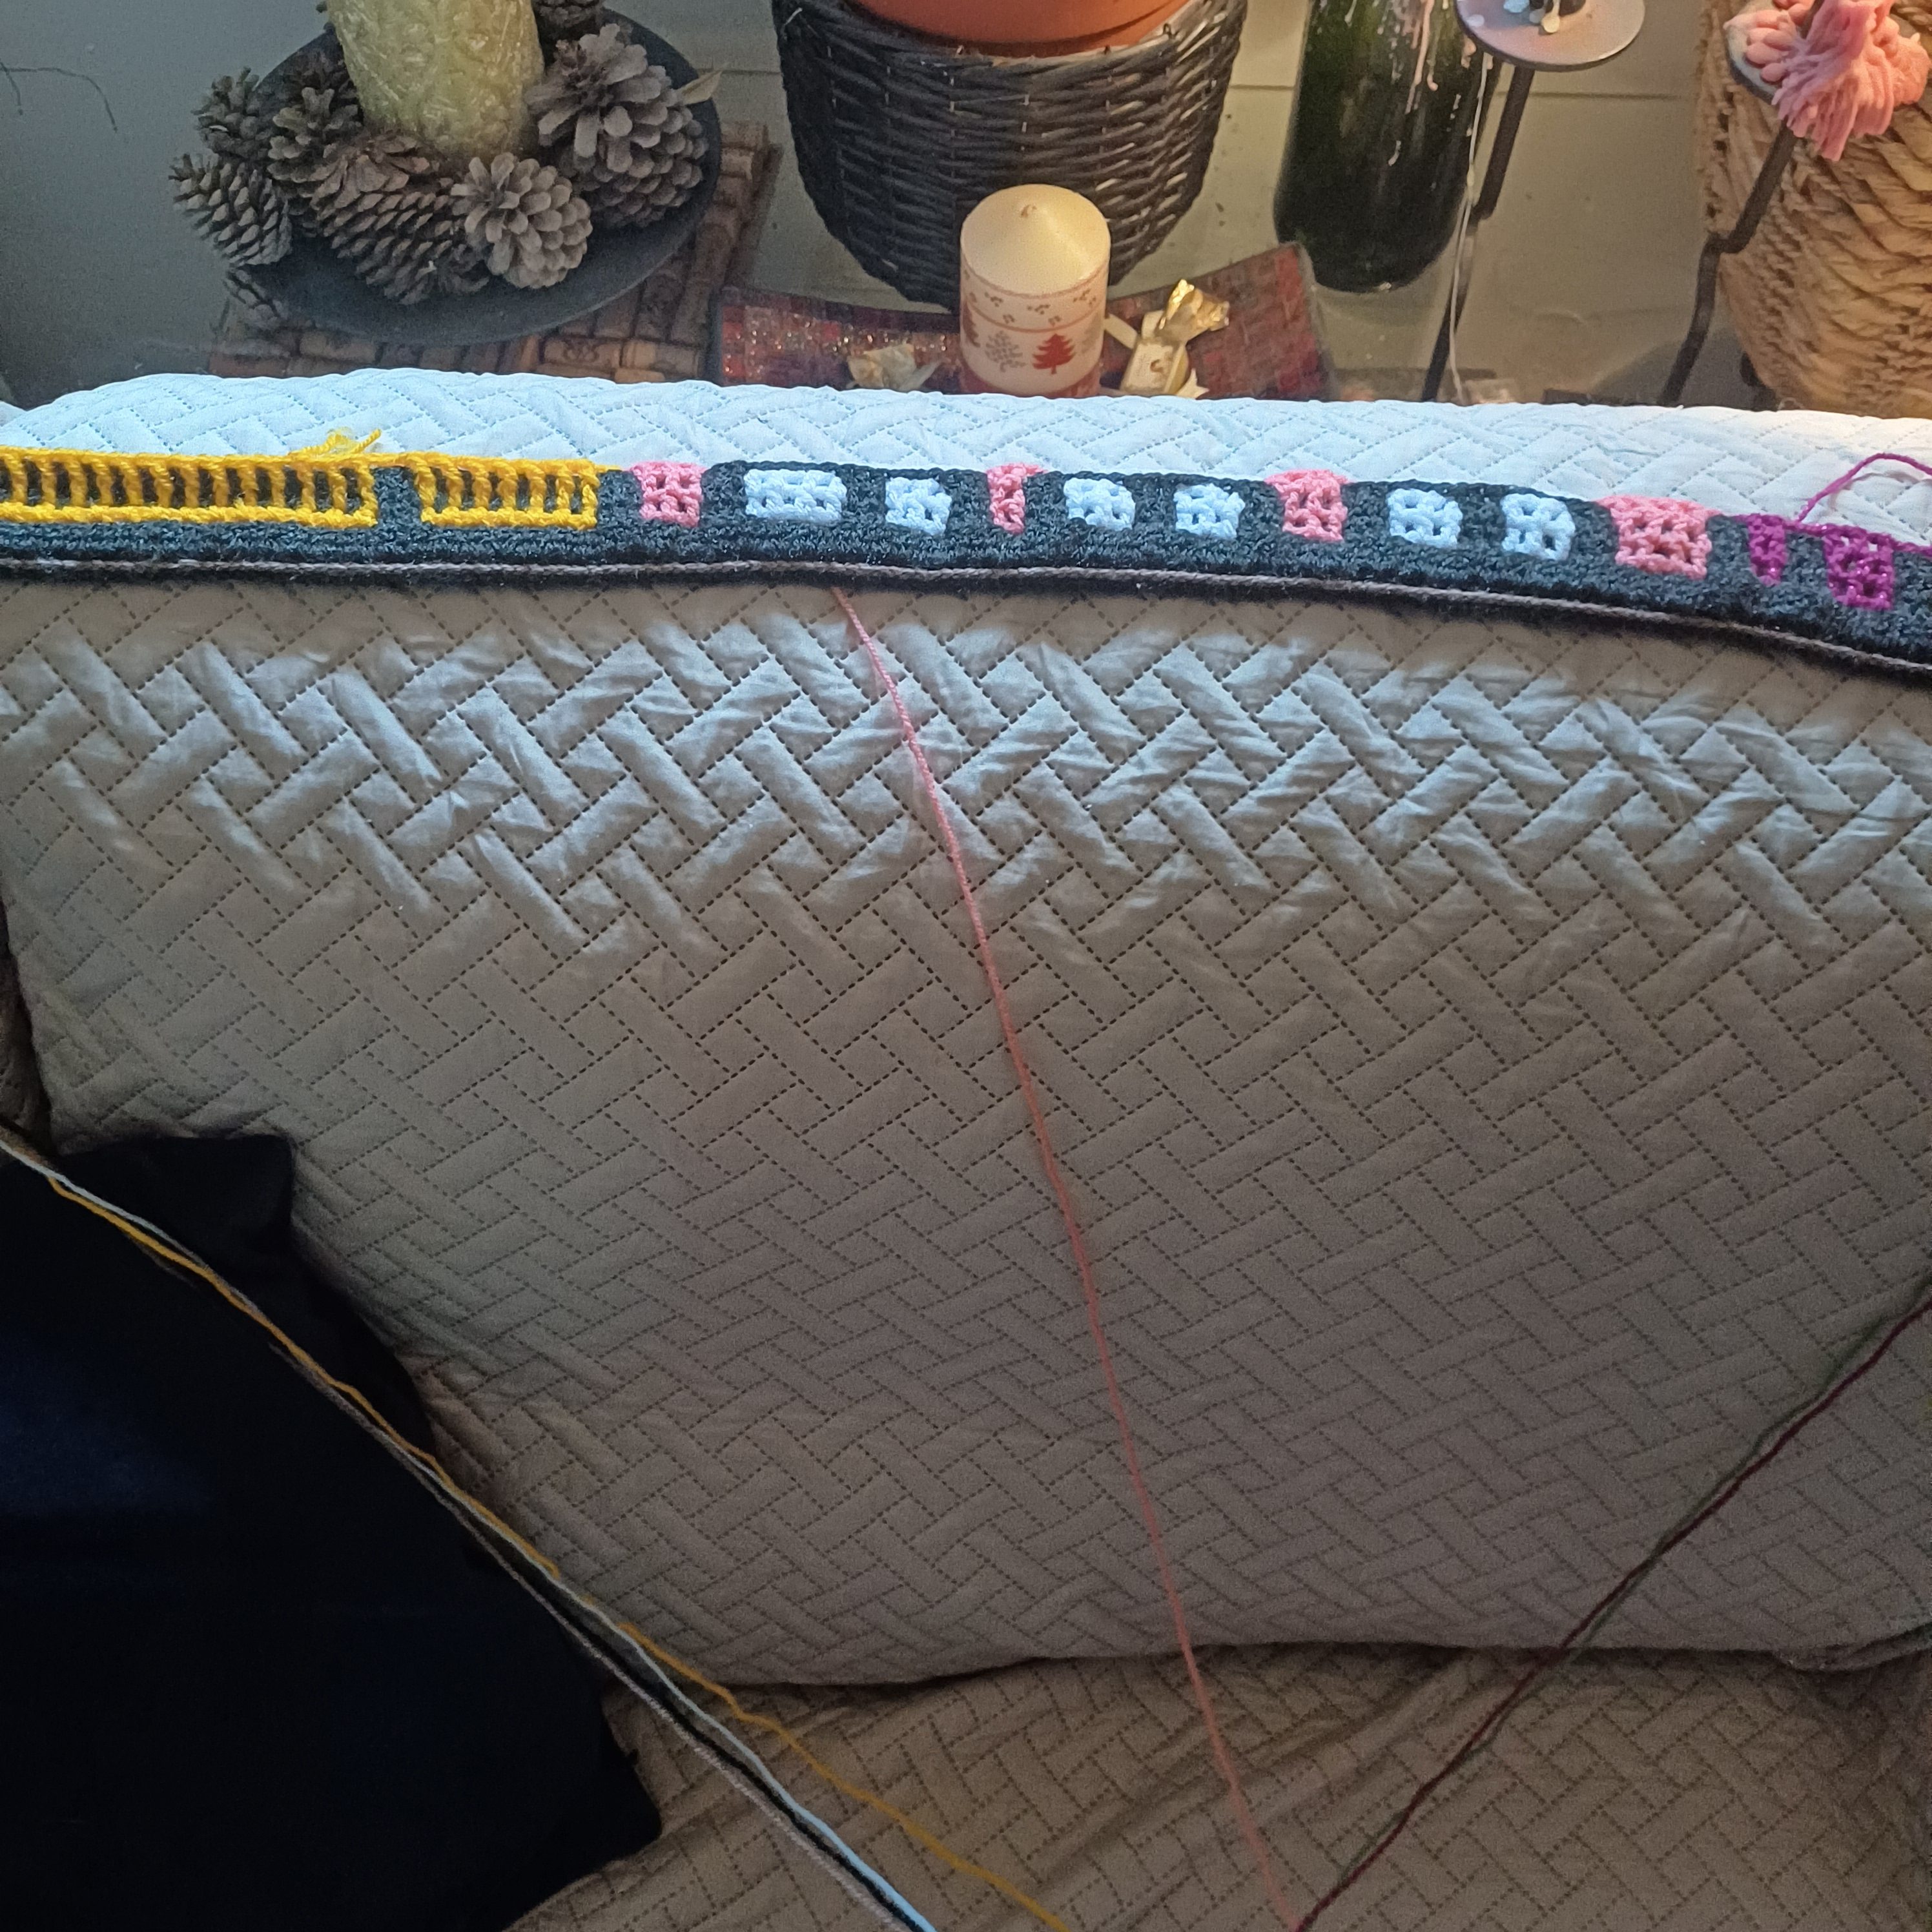
There’s hardly anything there! Just this long strip of crochet, the beginnings of a few buildings and an increasingly suspicious number of strands of yarn hanging off it. I had absolutely no idea how many more of those strands there would be before I was finished….but I can say that there were A LOT!

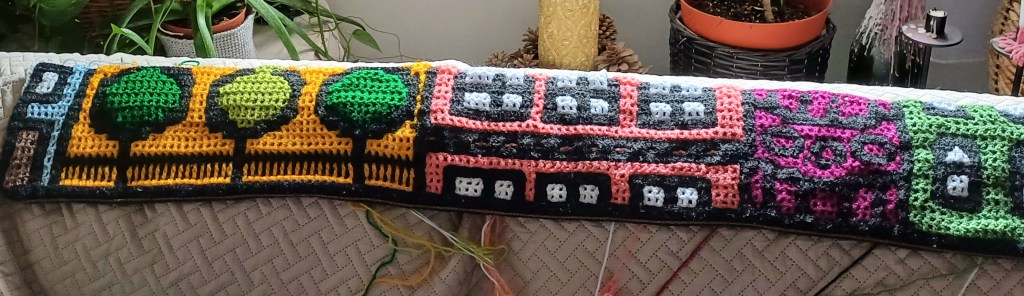
Learning interlocking crochet as I went

The first buildings and trees start to appear.

Before this, I’d never tried interlocking crochet, so I wasn’t just following a large and complicated pattern โ€“ I was learning the technique while making it…..perhaps not the most sensible introduction to interlocking crochet, but I definitely don’t regret it – it was an incredibly satisfying experience!

While working and concentrating on individual stitches, spaces and colour changes, and following the pattern diligently, every so often I’d spread it across the sofa, stand back and realise there was a building! Then another, and another – with windows and doors appearing. And even trees were growing. Yep – a city was emerging.

One of the things I particularly love about my finished blanket is that the colours are mine. I didn’t use the recommended yarn or follow the original colourway. Instead, I went shopping to a rather wonderful place…My own yarn stash. (And, I can assure you there was plenty to choose from.) Despite this using quite a lot of yarn, I’m not entirely sure it made a noticeable dent in my stash.๐Ÿ˜„

There is one exception – even my enormous stash didn’t have enough grey – I needed plenty of it for the edging and back, so that was the only yarn I actually had to go out and buy.

I used a mixture of acrylic yarns I already had, choosing colours from what was available and allowing my own version of Downtown to develop as I went. Some of the yarns even have metallic threads running through them, so little parts of the blanket catch the light and sparkle.

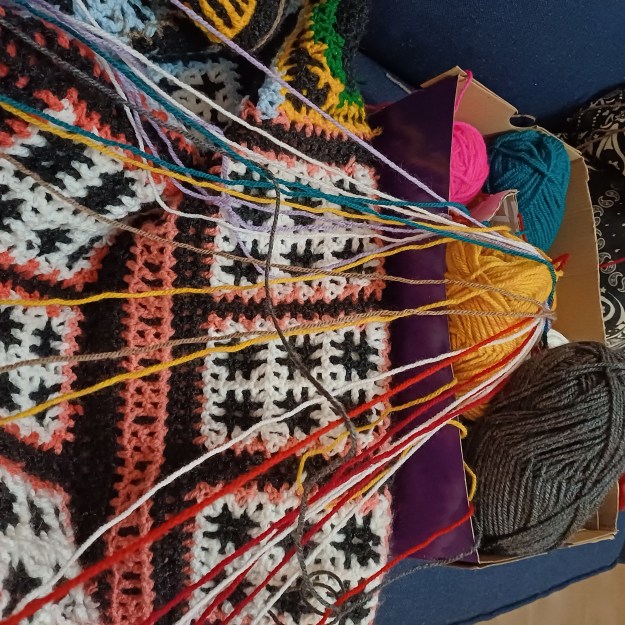
And then there was THIS.๐Ÿซฃ

Behind every beautiful crochet blanket… apparently there is a yarn monster.

I feel this photograph deserves a moment of its own. Because this is what the beautiful finished blanket doesn’t show you….every colour change meant another working strand to manage, and another, and another…to be honest, sometimes it was less like crochet and more like trying to negotiate with a yarn octopus ๐Ÿคช! Keeping all those strands organised was almost as important as making the stitches themselves….and I can assure you it was very challenging!

I very often multitask while crocheting – I’d be watching a video, reading something, or having a conversation while I crochet – this was most definitely not a project that allowed that! It was multitasking in its own right! I’d be counting, checking, following the chart, rechecking, finding the correct strand, untangling that strand from three other strands, checking again, and then crocheting a few more stitches – not recommended for the faint-hearted ๐Ÿ˜‚!

And getting up off the sofa was also a circus act โ€“ it was almost like the scene from the movie Entrapment, where Catherine Zeta-Jones is navigating through the laser beams. Okay, I exaggerate โ€“ I wasn’t blindfolded… but you get the gist. In case you haven’t seen the clip, here’s a link to it on Youtube.

Watching Downtown grow

Before I set up my dedicated space for crochet, I’d be sitting on the sofa in the living room when I crocheted. With this project, after a while, I couldn’t call it “a little work-in-progress” – it was taking over the sofa, and half the living room ! However, I persevered, and tried to contain this as much as possible (my dear family have been incredibly supportive and patient while I took over this space!)…It paid off โ€“ the project was coming together beautifully, and the whole cityscape was emerging.

Nearly there…

Whenever I am working on a big project, there comes a point when I desperately want to finish it…so I often end up burning the candle at both ends (and even the middle โ€“ ha ha) to get it done. But it’s a double-edged sword as, having spent so long working on it, I’d grown very attached to my blanket and I wasn’t entirely sure what I’d do once I finished it. But, finished it had to be as it was going to a very special home.

And finally…

N.B. In this photo, I’m actually holding the blanket up over my head. I’m around 5 ft 8 in tall and had to stand on tiptoes so that it wouldn’t touch the ground โ€“ that gives you an idea of the size!

Four months, countless colour changes, an alarming amount of time spent untangling and managing dangling strands, and one very occupied sofa and living room later… I made it.

And yes, I’m rather proud of this one. โค๏ธ

So, my words of wisdom would be that if you’ve ever fallen in love with a crochet pattern and immediately thought I could never make that, don’t dismiss it quite so quickly. You don’t necessarily need to know how to make the whole thing when you start. Sometimes you just need to work out the next stitch. Then the next one. And sometimes, four months later…you have a city.

I hope I’ve inspired you to have a go at something you love, even if you’re just a little afraid of trying it.

You can also see this featured on the Studio Manjri website.


Pattern details

Pattern: Astrid’s Downtown Blanket
Designer: Astrid Schandy
Technique: Interlocking crochet
Time taken: Approximately four months
My yarn: A mixture of acrylic yarns from my stash, including some with metallic thread
Colourway: My own

Astrid’s Downtown Blanket pattern on Ravelry

1970s Vintage-Style Crochet Waistcoat

Hey all!

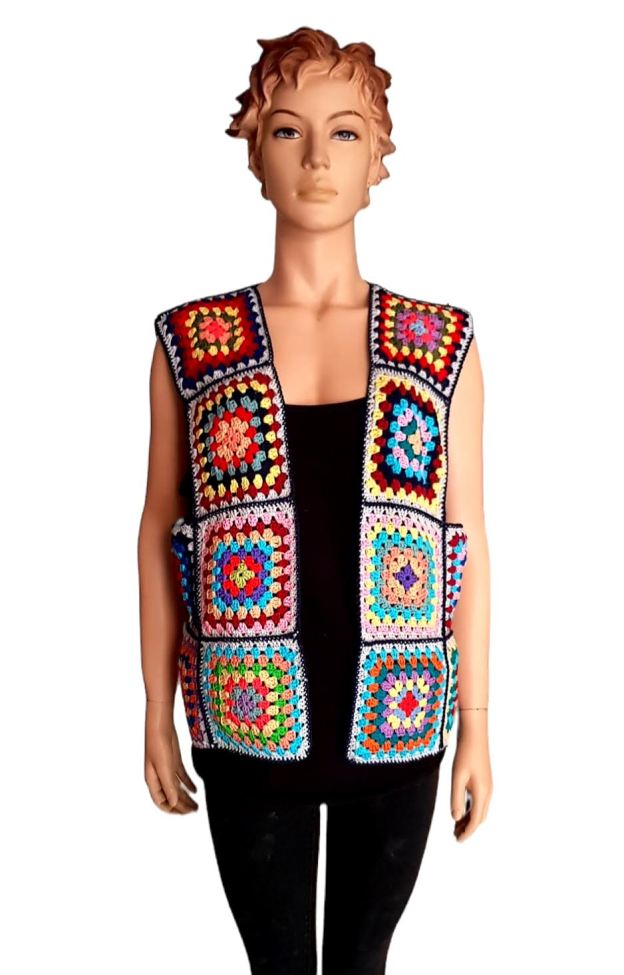
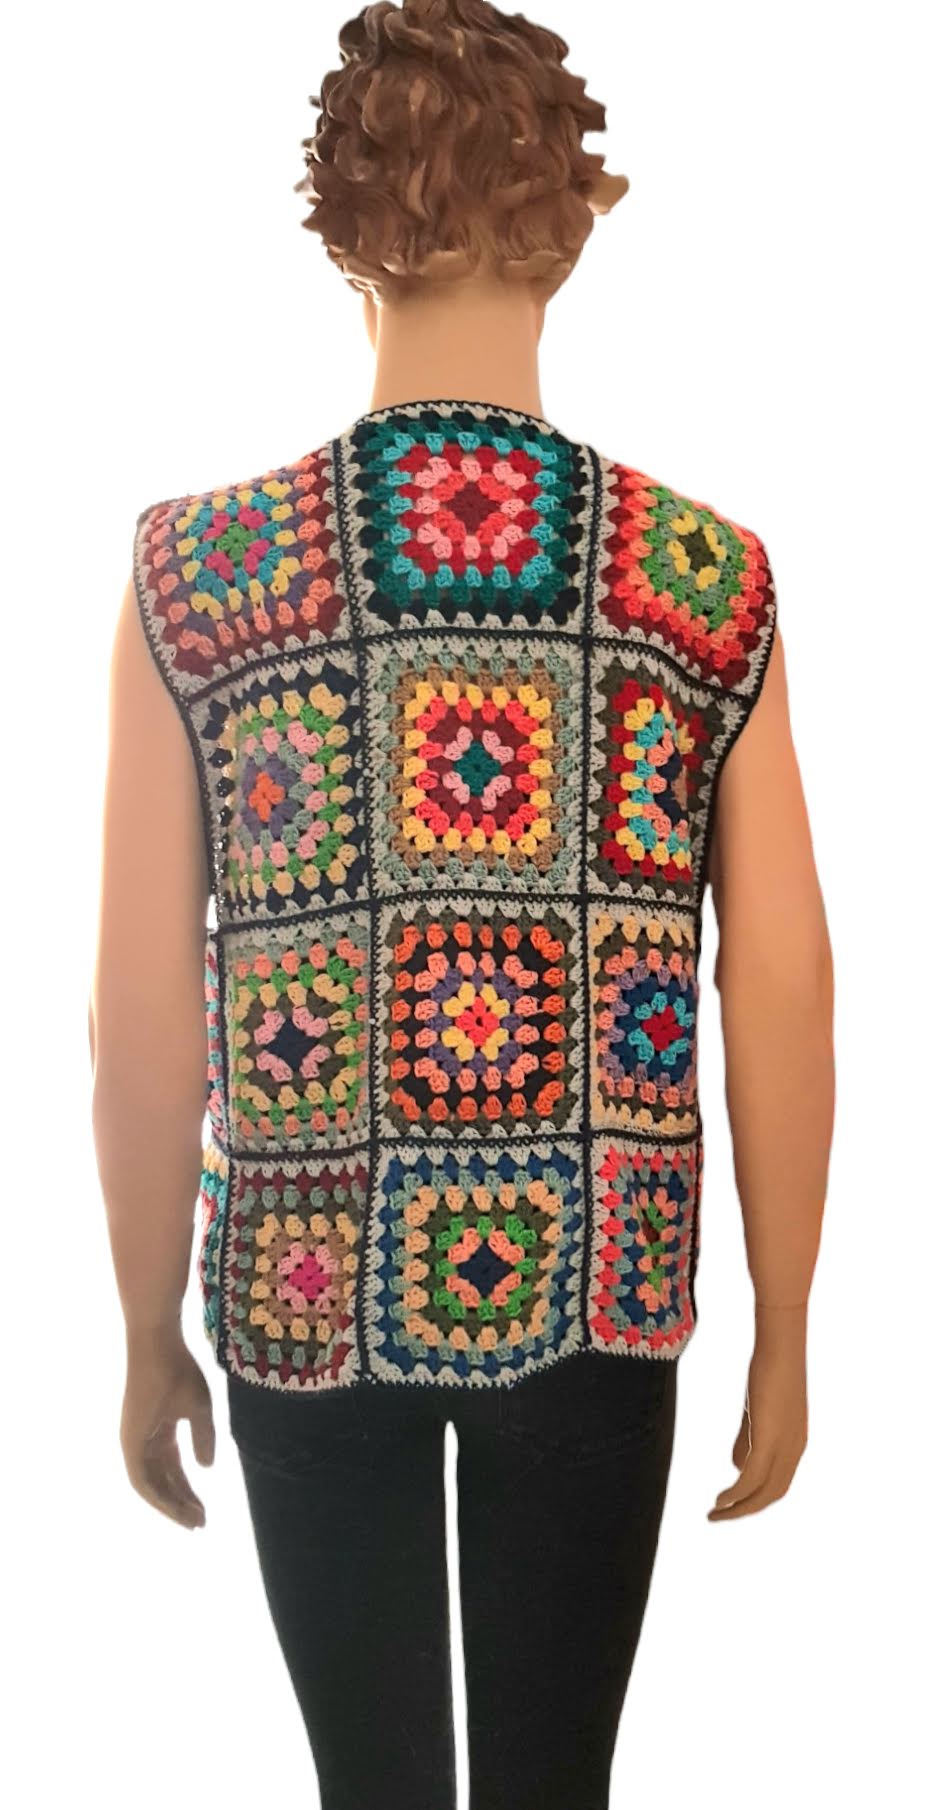
It’s festival season and my latest creation is a 1970s-inspired waistcoat. This style is very much in at the moment – and you can use whatever colours you like!ย 

The waistcoat has been made using cotton sport-weight yarn and a 4 mm hook. In all, the item is made using 24 unique individually made granny squares, each using 8 different colours.ย ย 

Hope you get inspired by this! Enjoy!

Beach / Sun Hat Crochet Pattern

With summer now in full swing, I decided to design my own sun/beach hat. It’s made using cotton yarn, and the pattern incorporates holes to keep it light and allow for good air circulation.

I originally made this in one colour, and the pattern has been written accordingly – however, you can choose to use more than one colour. Yarn used is sport weight cotton yarn – I once again used Katia Menfis . You will need just a bit over one 100g ball, so I recommend you get two.

The pattern is available in my Ravelry store โ†’

The hat will fit an adult. It is made in one piece, but has three distinct sections:

  • the top part, measuring approximately 6.5 inches,
  • a middle section measuring 3 inches in height and
  • the rim, which is 2.75 inches.

Plain Bucket Hat with Flowers Pattern

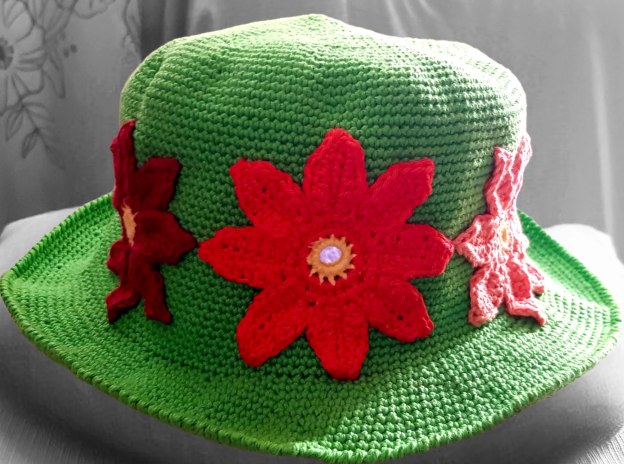
Here is another pattern I’ve designed โ€” this one is a plain bucket hat embellished with large flowers.

This beautiful bucket hat is made using one main colour in sport weight cotton yarn, and then embellished with flowers in three colours . The yarn I used is Katia Menfis cotton yarn. You will need just a bit over one 100g ball, so I recommend you get two. In addition, you will need four more colours for the flowers – one colour for the centre of each flower and three colours for the flowers.ย  I used three round mirror tiles in the centre of the flowers to give it a bit of sparkle.

The pattern is available in my Ravelry store.

The hat will fit an adult. It is made in one piece, but has three distinct sections:

  • the top part, measuring approximately 6.5 inches,
  • a middle section measuring 3.5 inches in height and
  • the rim, which is 1.5 inches.

Crochet Striped Bucket Hat

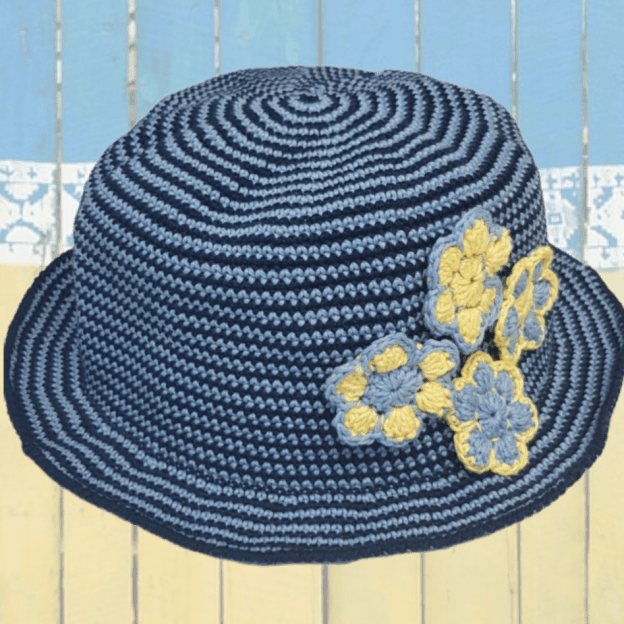
As I mentioned in my previous post, I have been working on my own pattern for a bucket hat. This is my striped bucket hat, embellished with flowers.

The pattern is available in my Ravelry store.

This beautiful bucket hat is made using 2 colours in sport weight cotton yarn. The yarn I used is Katia Menfis cotton yarn. This comes in 100 g balls, and you will need 1 ball in each colour.

The hat will fit an adult. It is made in one piece, but has stylistically three distinct sections:

  • the top part, measuring approximately 6.5 inches
  • a middle section measuring 3.5 inches in height and
  • the rim, which is 1.5 inches.

For the flowers, you can choose to make these in any other complementary colours, or stick with the two main colours of the hat.

Here are a couple of colour variations which I have made. Also, as the flowers are crocheted separately, you can decide to leave them out.

Crochet “Crown” Bucket Hat

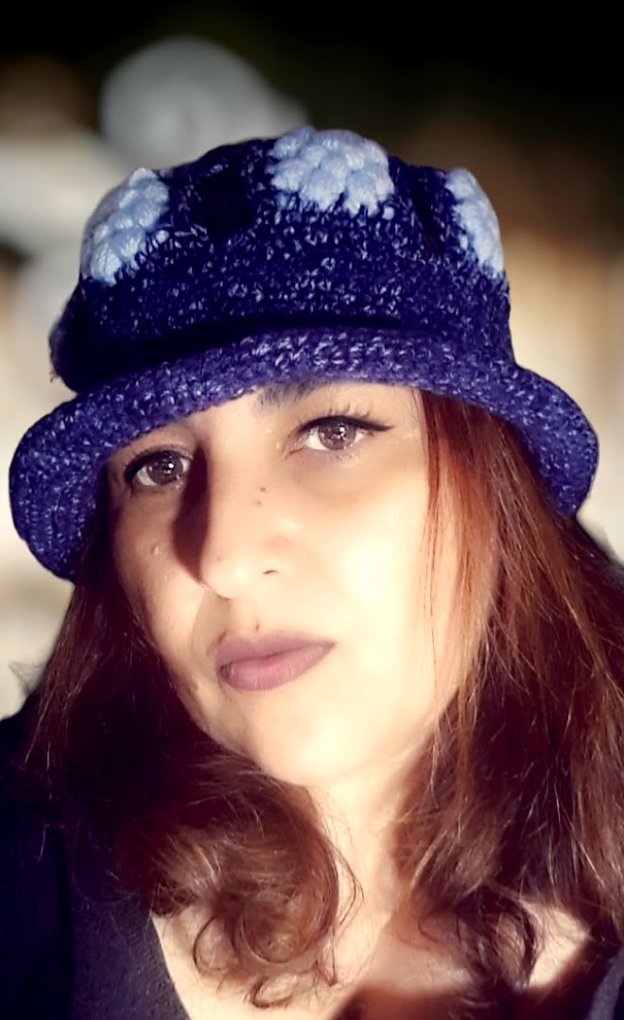
If you’ve seen my previous posts, you’ll know that I’m really into bucket hats at the moment. Here is an experiment which I actually quite like โ€” it reminds me of a crown. Basically, I made a few granny squares inspired by a granny square I have used a couple of times in the past (see Colourful Lined Baby blanket), and used these in the middle section of the hat. There is no pattern – again, it has been a bit of an experiment. I used single crochet for the rest.ย 

Hope you like it and it inspires you! Keep an eye out for the next post, where I will showcase a bucket hat in cotton. If you’d like to try making one yourself, I later designed a striped cotton bucket hat and published the pattern. You can see it in my Crochet Striped Bucket Hat post โ†’

Crochet Bucket Hat

Bucket hats are really cool โ€” and here are some of the ones I’ve made. There is no pattern, and each has been a bit of an experiment. Basically, I just winged it! ๐Ÿ˜Š

Essentially, there are three sections to the hat. The hat is made as one piece, so these sections aren’t crocheted separately and sewn together:

  • the crown,
  • the middle,
  • and the rim.

I used single crochet as the stitch of choice for the whole hat. I worked the crown in a circle, until it was around 6.5 inches in diameter.ย  For the middle part, I kept going until it was a band which reached the top of my ear. And then finally, I made the rim – approximately 2.5 inches, but it’s really up to you. As the rim is flared, it was also quite an experiment – and I undid and redid this part several times.

Below are some of the hats I made. Big thanks to Jamie for helping model one of them. These hats were made with acrylic yarn using a 4 mm crochet hook.

Enjoy the “Hatstravaganza!”

Crochet Flower Sun Hat – Free Pattern

Hey all!

Finally it seems like summer has made her appearance! The temperature here in Malta is in the high 20s (Celsius), there is a nice cool breeze, skies are blue and days are getting longer. No more COVID restrictions – life is good and it’s definitely the best time of the year!

In warmer weather, I normally switch to using cotton yarns for my projects – that way, I can continue crocheting all year round ๐Ÿ™‚

I have long wanted to make a granny square sun hat – and finally, I got round to it and have made a few. I used the Flower Sun Hat pattern by Natalie Beard for Hobbycraft, which is available free online:
Flower Sun Hat โ€“ Free Pattern โ†’

For my hats, I used Katia Menfis yarn and a 3 mm hook.

So, without further ado, here are the hats I have made so far. A great big thanks goes out to Ylenia and Alex for being such good sports and modelling them along with me!

This is just the beginning – I’ve got lots more bucket hats which I have been working on – so keep an eye out for more posts in the coming days.

And, don’t forget to use sunscreen and stay hydrated!