With summer now in full swing, I decided to designed a sun / beach hat. This hat is made using cotton yarn, and pattern incorporates holes, to keep it light and allow for good air circulation.
I originally made this in one colour, and the pattern has been written accordingly – however, you can choose to use more than 1 colour. Yarn used is sport weight cotton yarn – I used again is Katia Menfis . You will need just a bit over 1 100g ball, so I recommend you get 2.
Here is another pattern I have designed – this one is plain with large flowers.
This beautiful bucket hat is made using 1 main colour in sport weight cotton yarn, and then embellished with flowers in 3 colours . The yarn I used again is Katia Menfis cotton yarn. You will need just a bit over 1 100g ball, so I recommend you get 2. In addition, you will need 4 more colours for the flowers – 1 colour for the centre of each flower and three colours for the flowers. I used 3 round mirror tiles in the centre of the flowers to give it a bit of sparkle.
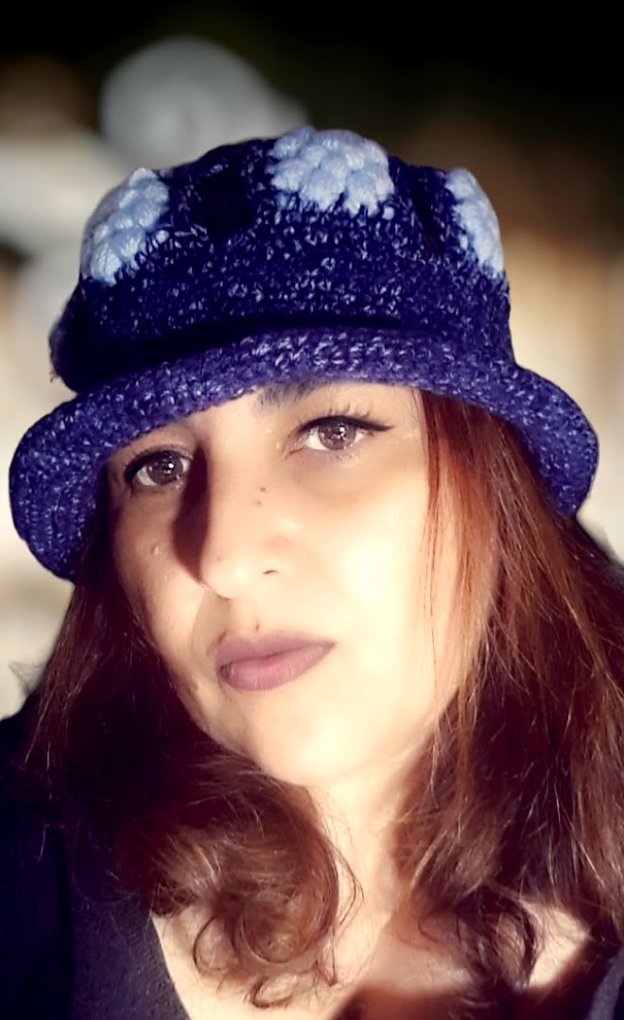
As I mentioned in my previous post, I have been working on the pattern for a bucket hat. This is my striped bucket hat embellished with flowers. The pattern is available in my Ravelry store.
This beautiful bucket hat is made using 2 colours in sport weight cotton yarn . The yarn I used is Katia Menfis cotton yarn. This comes in 100g balls, and you will need 1 ball in each colour.
The hat will fit an adult. It is made in one piece, but has 3 distinct sections:
the top part, measuring approximately around 6.5 inches,
a middle section measuring 3.5 inches in height and
the rim, which is 1.5inches.
For the flowers, you can choose to make these in any other complementary colours, or stick with the 2 main colours of the hat.
Here are a couple of colour variations which I have made. Also, as the flowers are crocheted separately, you can decide to leave them out.
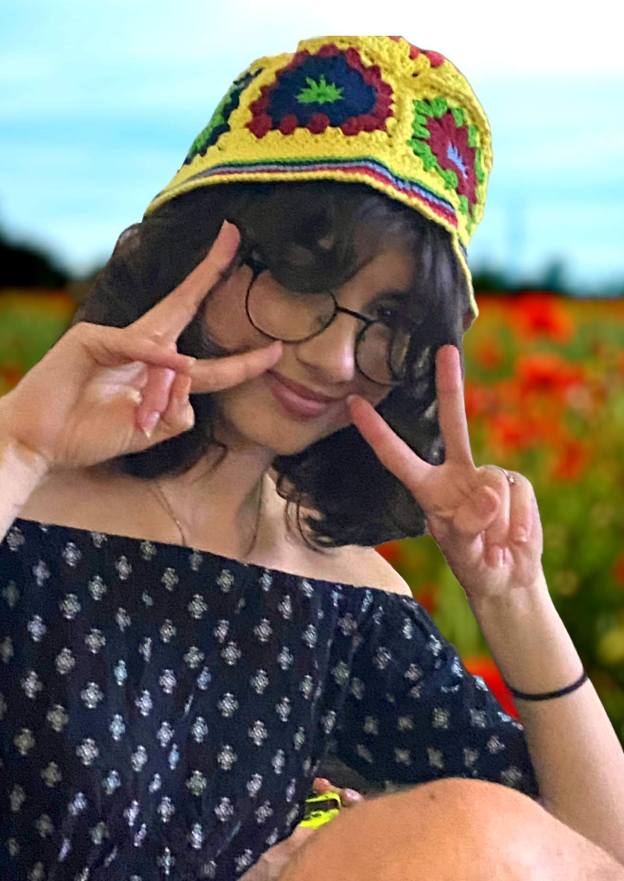
If you’ve seen my previous posts, you’ll know that I’m really into bucket hats at the moment. Here is an experiment which I actually quite like – reminds me of a crown. Basically, I made a few granny squares inspired by a granny square I have used a couple of times in the past (see Colourful Lined Baby blanket) , and used these in the middle section of the hat. There is no pattern, again it has been a bit of an experiment. I used single crochet for the rest.
Hope you like it and it inspires you! Keep an eye out for the next post – where I will showcase a bucket hat in cotton – I am working on the pattern for that and it will be available soon.
Bucket hats are really cool – and here are some of the ones I have made. There is no pattern, and each has been a bit of an experiment – basically, I just winged it . Essentially, there are 3 sections to the hat (note that the hat is made as a whole – so the 3 sections are not crocheted separately and sewn together – but as a whole) :
the crown,
the middle and then
the rim.
I used single crochet as the stitch of choice for the whole hat. I worked the crown in a circle, till it was around 6.5 inches in diameter. For the middle part, I kept going till it was a band which reached the top of my ear. And then finally, I made the rim – approximately 2.5 inches , but it’s really upto you. As the rim is flared, it was also quite an experiment – and I undid and redid this part several times .
Below are some of the hats I made. Big thanks to Jamie for helping model one of them . These hats were made with acrylic yarn using a 4mm crochet hook.
Finally it seems like summer has made her appearance! The temperature here in Malta is in the high 20s (Celsius), there is a nice cool breeze, skies are blue and days are getting longer. No more COVID restrictions – life is good and it’s definitely the best time of the year!
In warmer weather, I normally switch to using cotton yarns for my projects – that way, I can continue crocheting all year round 🙂
For my hats, I used Katia Menfis yarn and a 3mm hook.
So, without further ado, here are the hats I have made so far – A great big thanks goes out to Ylenia & Alex for being such good sports and modelling them along with me !
This is just the beginning – I’ve got lots more bucket hats which I have been working on -so keep an eye out for more posts in the coming days.
And, don’t forget to use sunscreen and stay hydrated!
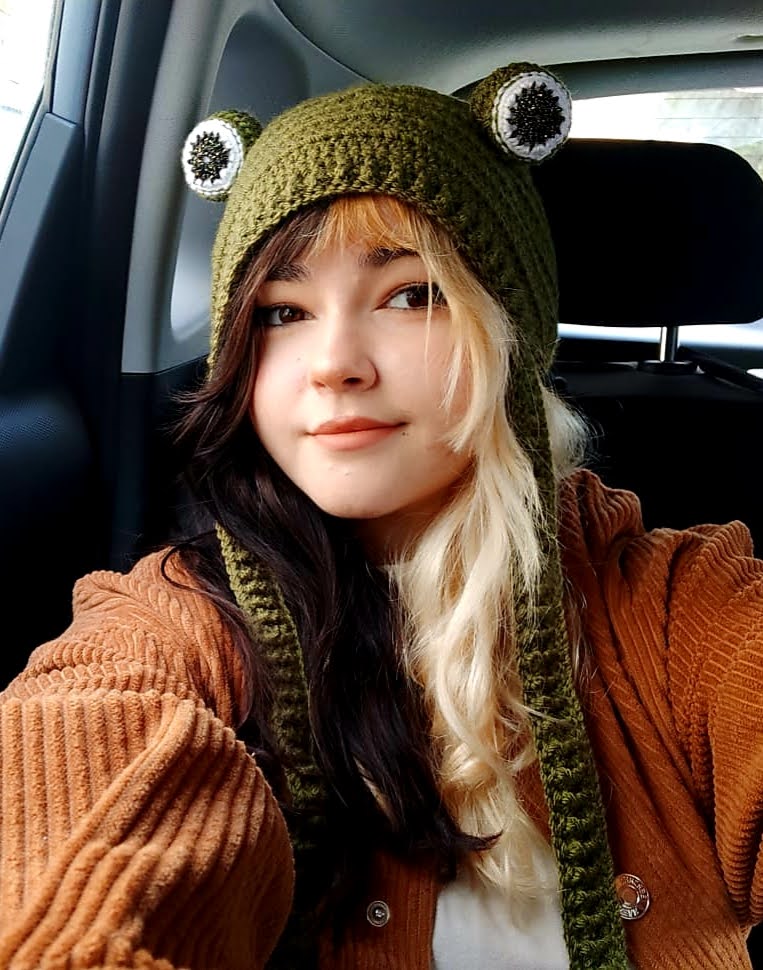
It’s been a while since I’ve published a post, but rest assured, I haven’t been crochet idle (ha ha – is that even a term?) – While I haven’t spent as much time as I would have liked on projects, here is a commission I recently completed.
A while back, I published a post with a free pattern for a froggie bonnet. I was asked if I could make a slight variation of that with the main differences being the straps are ribbed and are extension of the rib border. I also thought that the eye’s would look awesome with a bit of a sparkle, so decided to use a yarn with a gold strand through it.
The biggest challenge, believe it or not, was actually positioning the eyes. Once that was sorted, the bonnet finally made its way to it’s new owner, Amelie – and here she is!
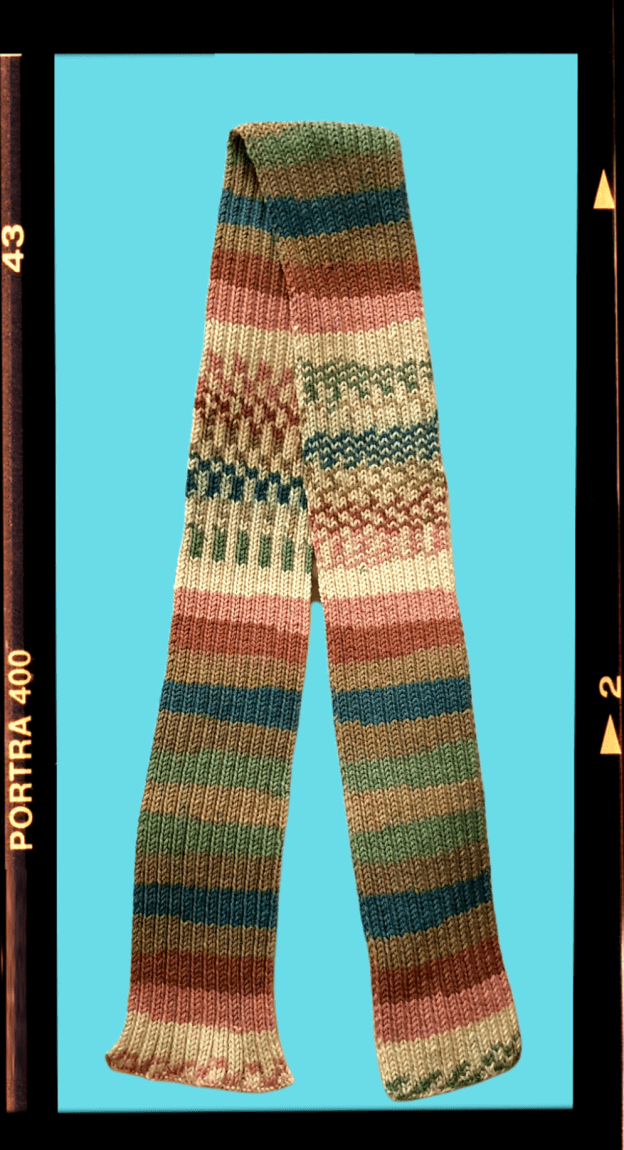
It’s been quite a few years since I last knitted anything, as normally I prefer crochet. But, I came across this lovely yarn, and needed a project to use it for (I know – that’s the wrong order of doing things – i.e. you should have a project in mind, and then you find the material – but I’m sure crafters know exactly what I mean and are likely guilty of the same!)
Anyhow, the yarn I used is Katia’s Easy Jacquard – and it came with a free pattern (you can find it here: https://www.katia.com/EN/patterns-autumn-winter-woman-set-8030-430.html) . My version is somewhat different as I wanted a thicker scarf. To achieve that, I worked the whole scarf in rib stitch. See below:
Instructions:
Using 4.5mm needles, Cast on 46 stitches. Row: Repeat (K2, P2) till end of the row. Make as many rows as you like till the scarf is of the desired length. (I used the entire ball, and my scarf is pretty long)
This is an ideal pattern to follow while watching your favourite shows – if you are like me, I can’t just sit and watch a show, I have to be doing something as well.
Hope this inspires you to pick up your hooks or needles and get crafting!
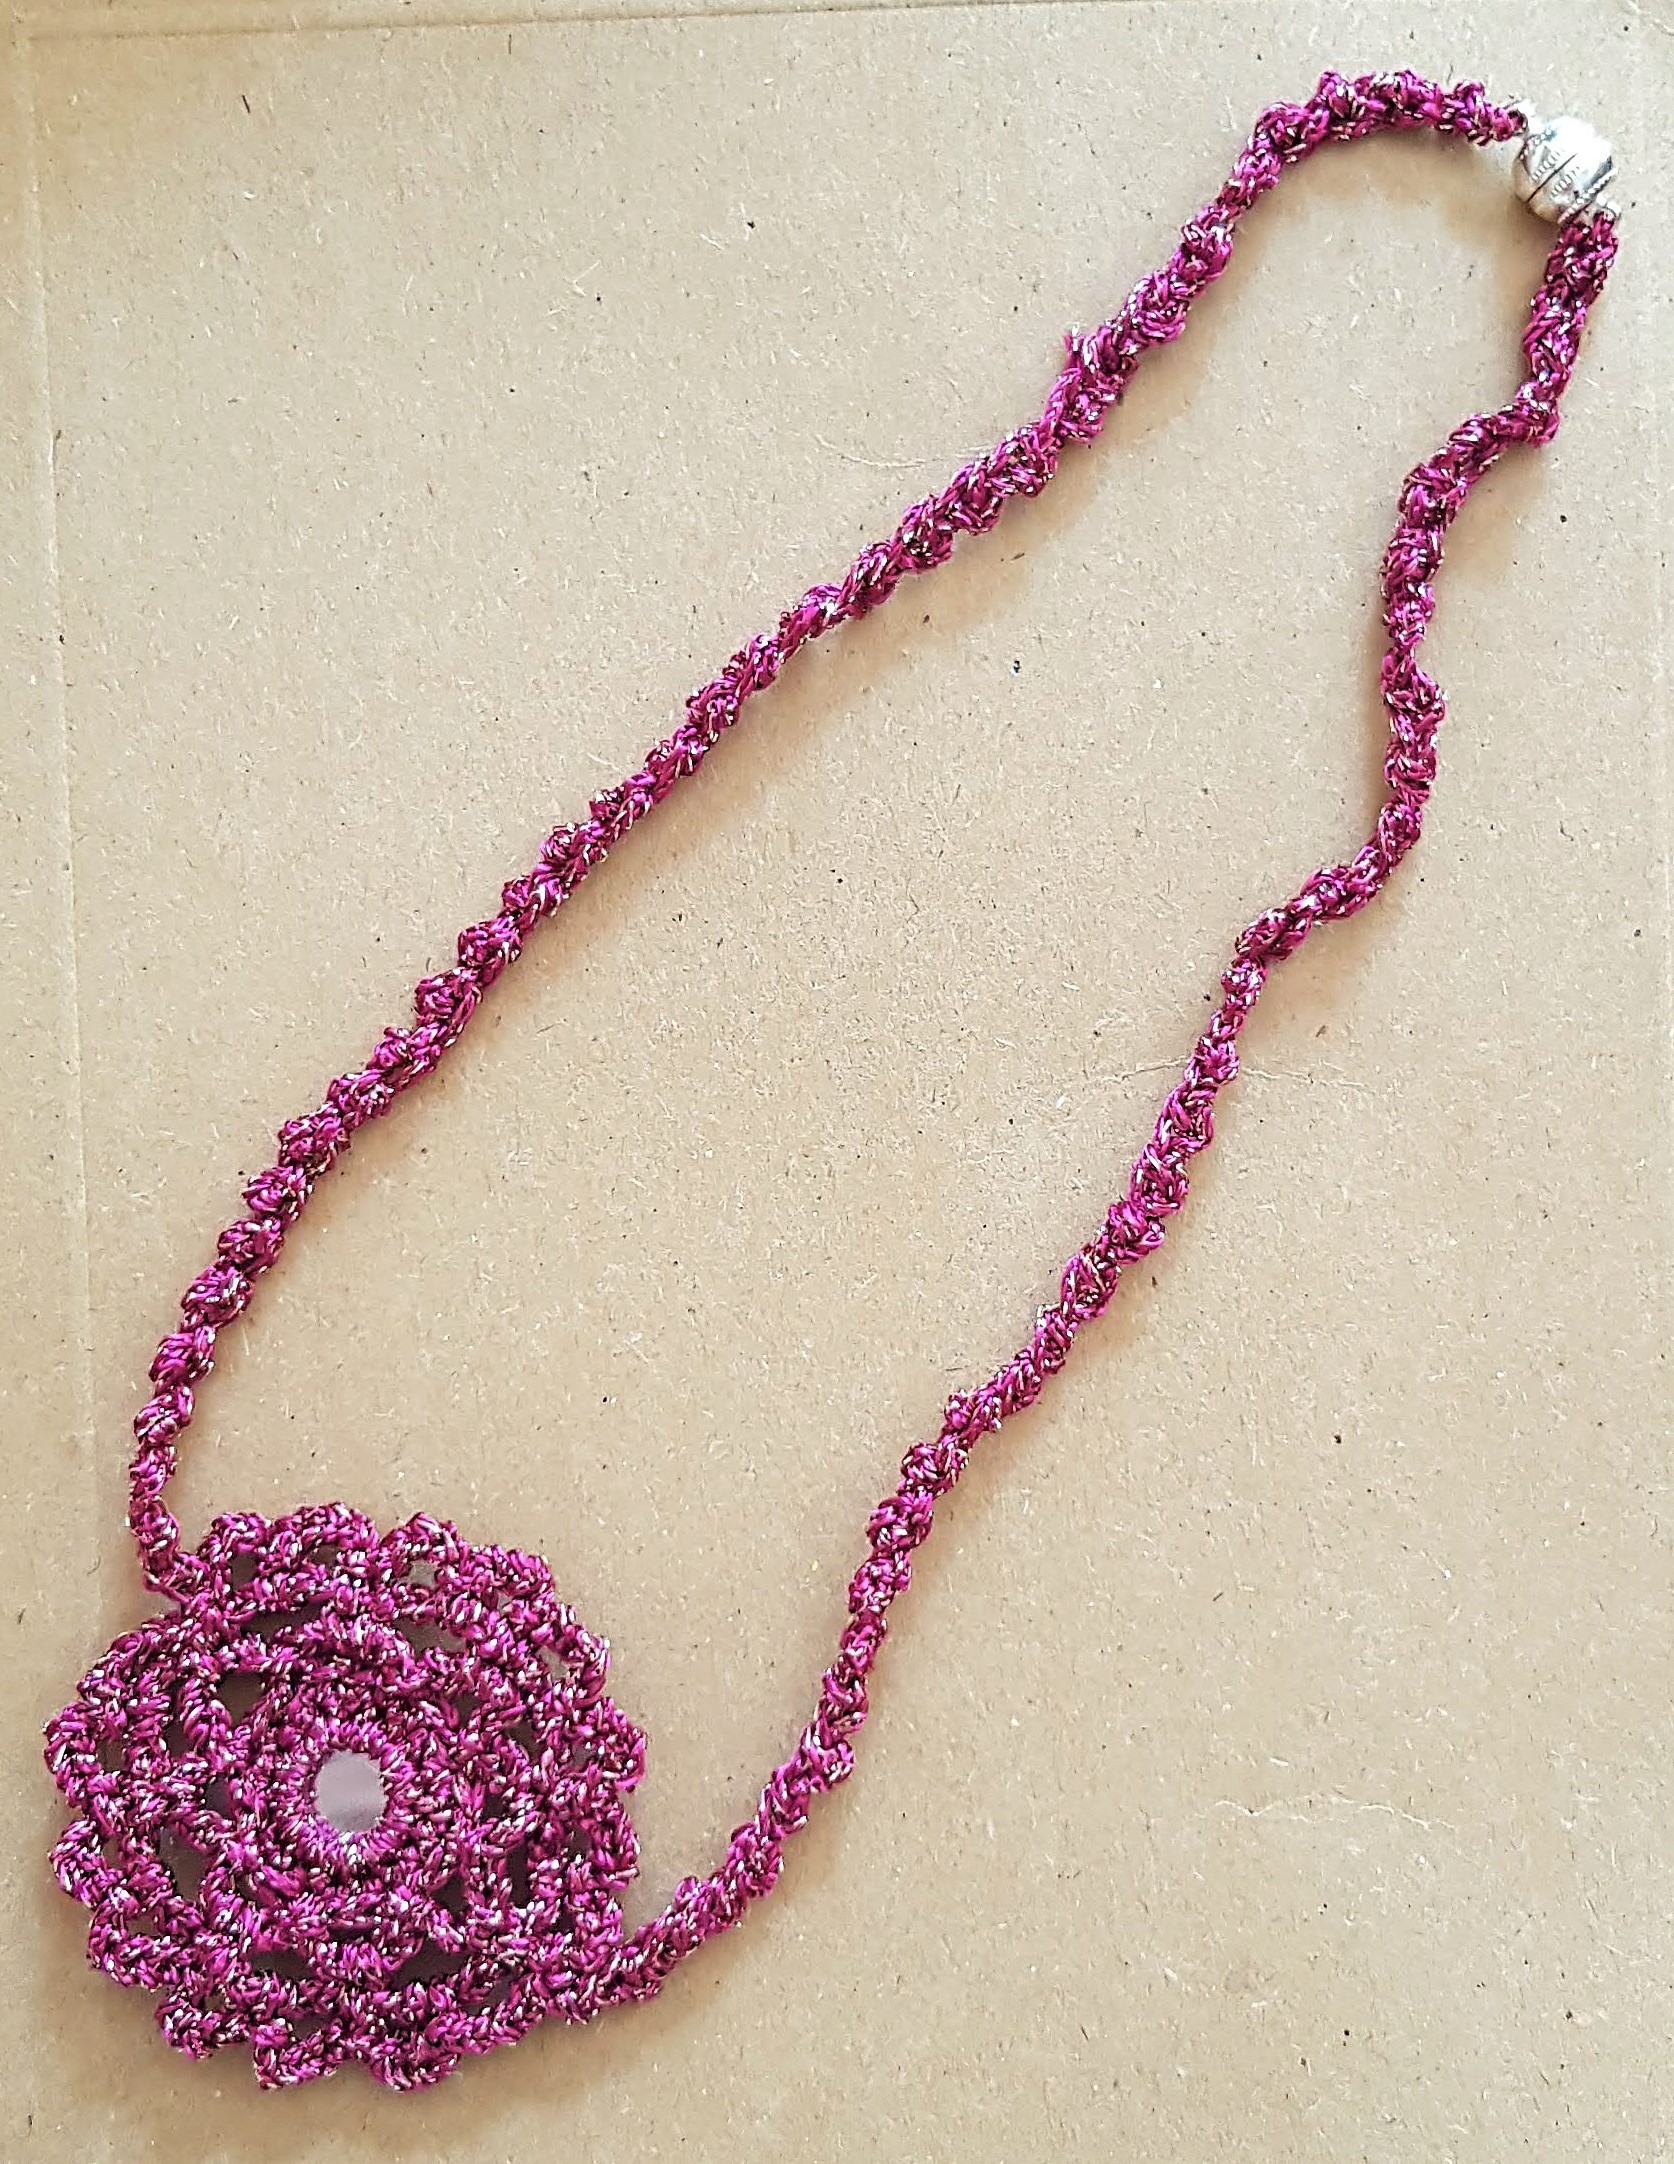
I have completed many a crochet project -, some big, some small, some straight-forward, others quite complex , but I have not tried crochet jewellery before. So, first things first, I need more YARN – something a bit sparkly! Off to the yarn shop I trotted – and bought one of each colour available in the metallic Katia Gatsby range – it was too difficult to choose just one or two only – and you can never have too much yarn anyway!
Here are a few necklaces I made so far. I have used glass beads and mirror tiles in the pendant. The clasp is a magnetic clasp – so very easy to wear – the magnet is surprisingly strong, but I wouldn’t advise relying on that if the pendant is heavy. In my case, as the necklaces are pretty lightweight, these work perfectly:
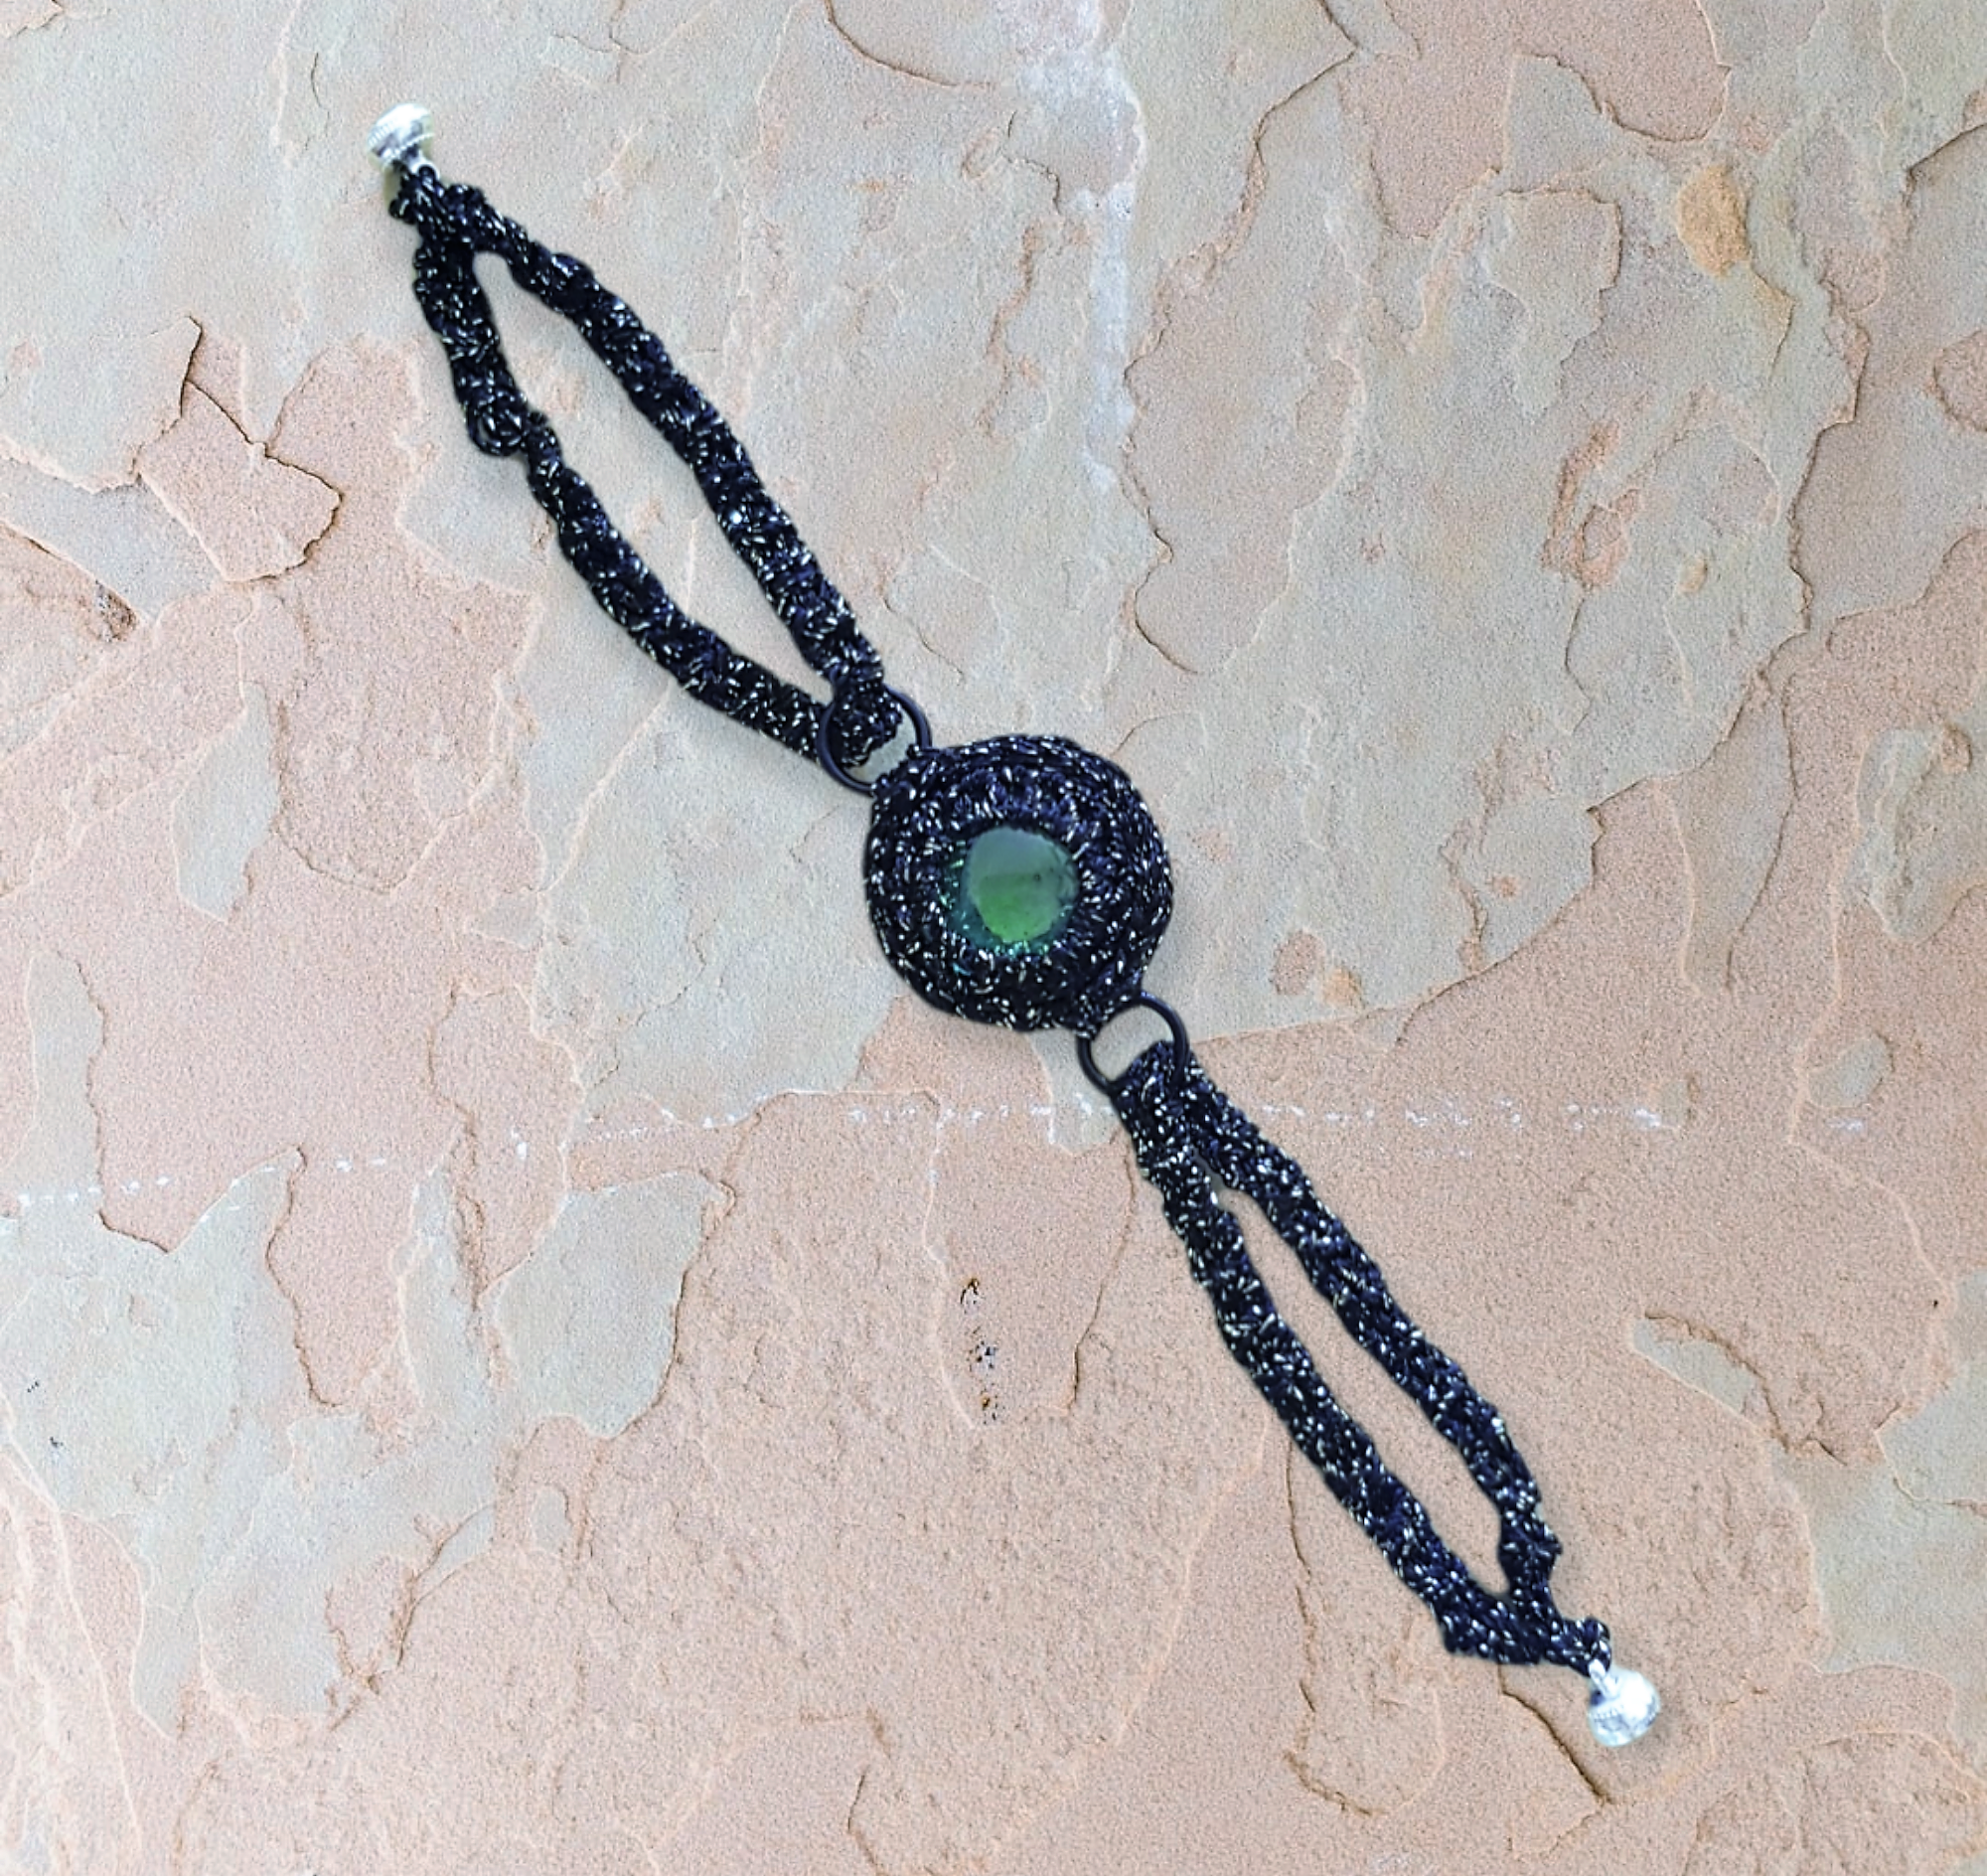
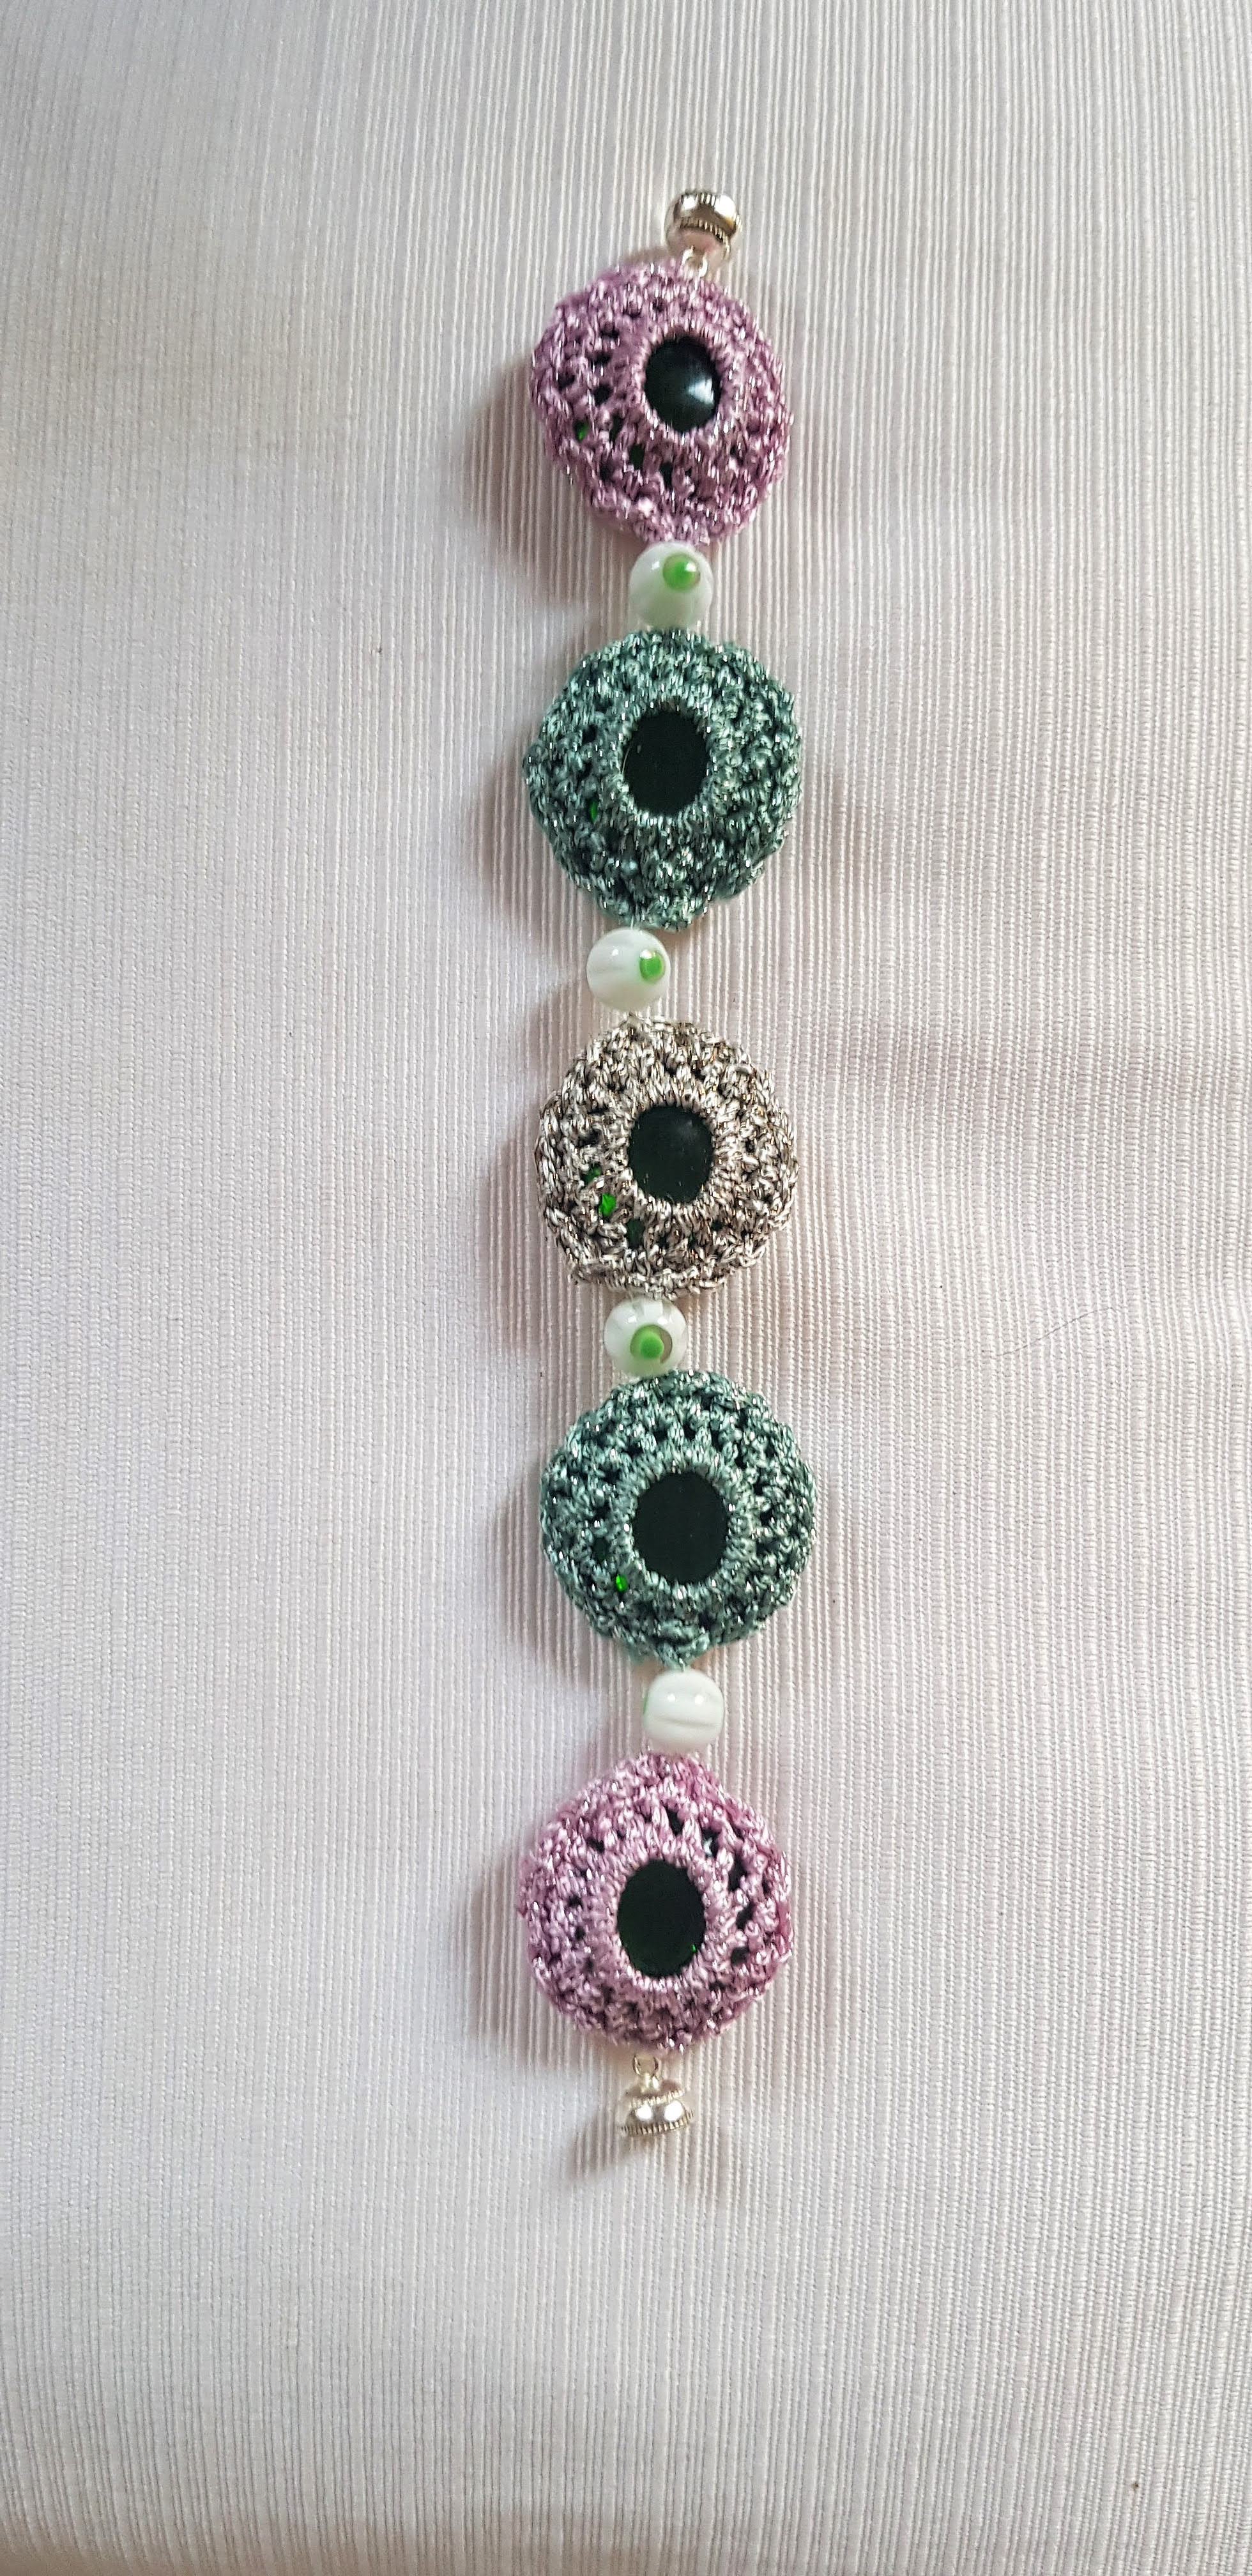
Below are a few bracelets I made. Again I used the magnetic clasp. Note that I also used very small metal rings to attach the straps in the first 2 bracelets (I found these at the haberdashers and they are actually used for bras!). In the third bracelet, I added small glass beads as spacers. I would recommend having beading needles available, especially as the bead holes can be quite small. :
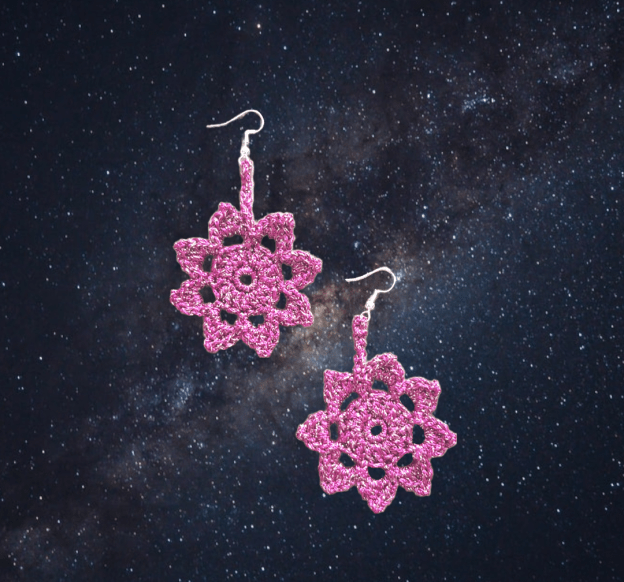
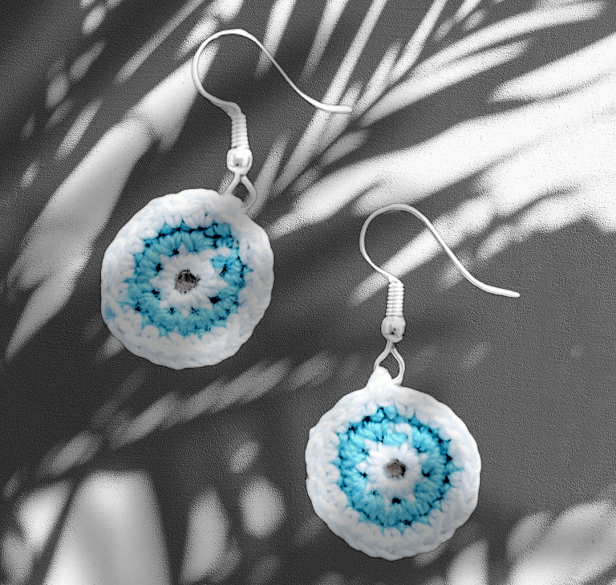
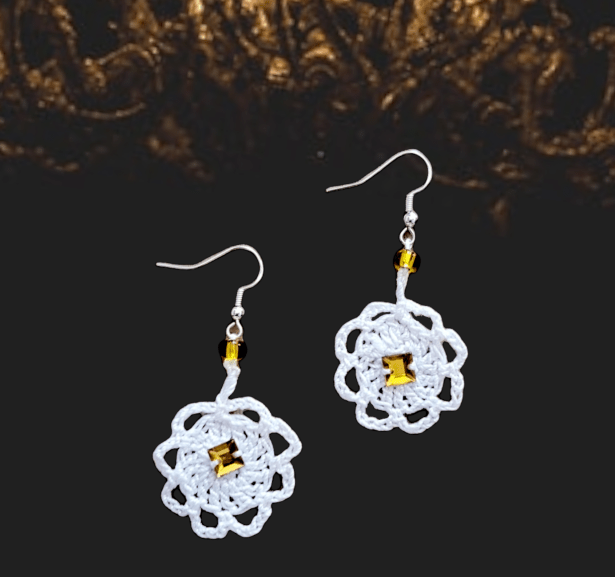
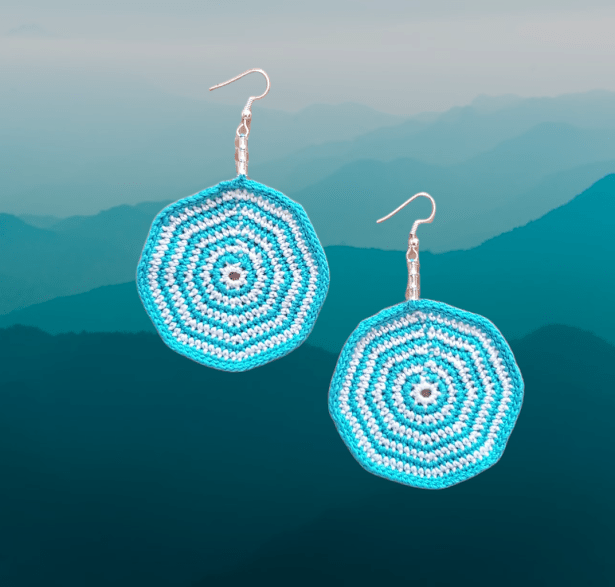
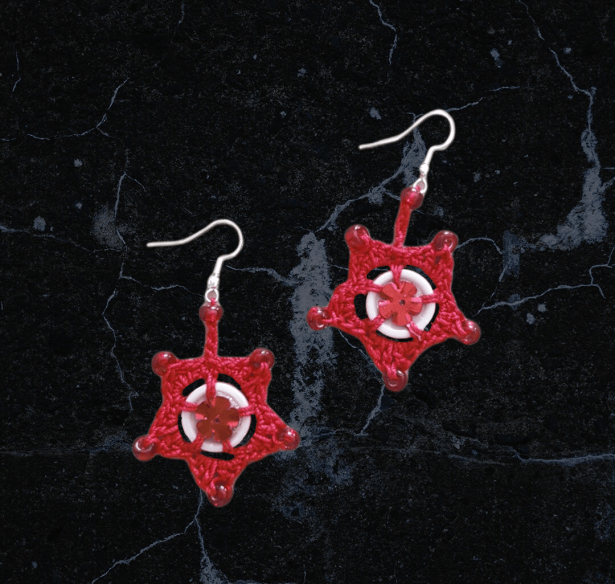
And finally, here are a few earrings I made. I used mostly cotton crochet yarn, and a 0.6 mm crochet hook for these. The very first pair I made can be seen in Picture 1 – I learnt a valuable lesson here – the earrings don’t “swing” and move as I would have liked them to. I added a few chains and created a long “neck” to the next pair (picture 3), but still didn’t get the desired movement. Next experiment was more successful and from that point onward, I added a bead between the hook and the earring – and this does the trick. All the earrings which have a bead straight after the hook have lovely movement. I have used sterling silver hooks for the earrings, and have used, mainly beads to add the “jewel” element. In Picture 6, you can see I have also included a button and a flower-shaped sequin to decorate further. Note, I crochet the beads in – i.e. I did not add these on later, but I must confess to gluing the sequin.
1
2
3
4
5
6
I hope you have enjoyed this post and hope I have inspired you to make some of your own jewellery! Would love to hear from you and see your creations!
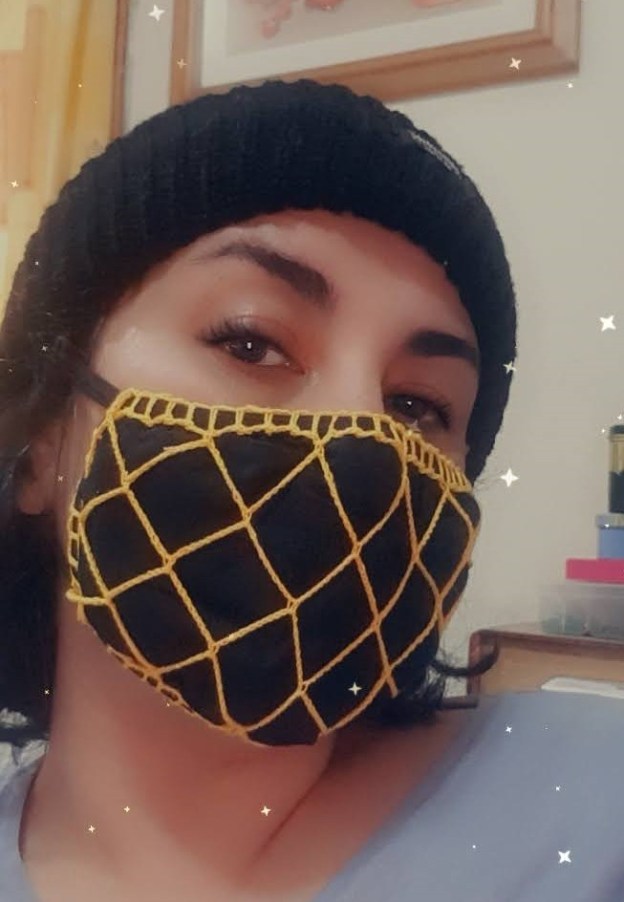
Who would have thought a year ago that masks would become staple wardrobe items?! There are so many different cloth masks available – plain ones, printed ones, even some bejewelled and lacy ones. Still, sometimes, its hard to find the perfect mask to go with your outfit…..and if you don’t want to make one from scratch, why not upgrade yours?
Here’s a one-of-a-kind “bumble bee” mask. I crocheted the yellow design using crochet thread and using a size 0.6mm hook, directly onto a shop-bought black fabric mask – to go with a black and mustard outfit.
Hope I’ve inspired you! Look forward to seeing some of your creations.