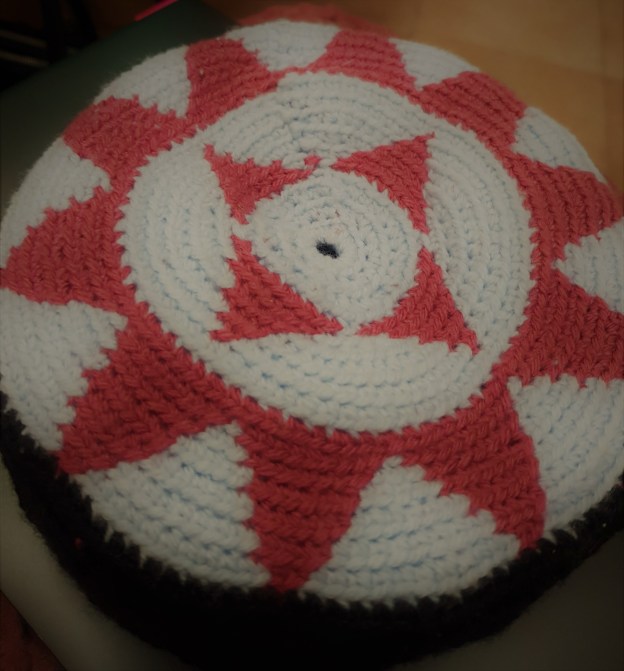
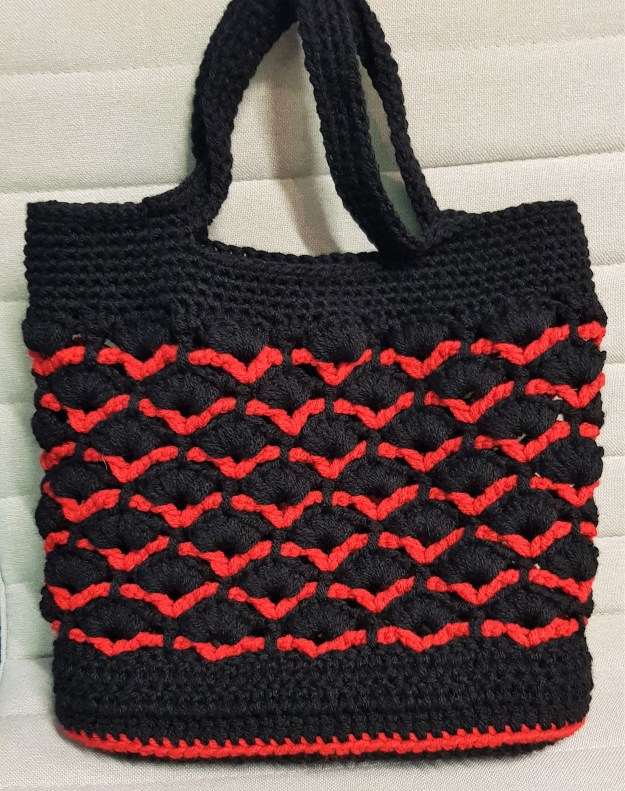
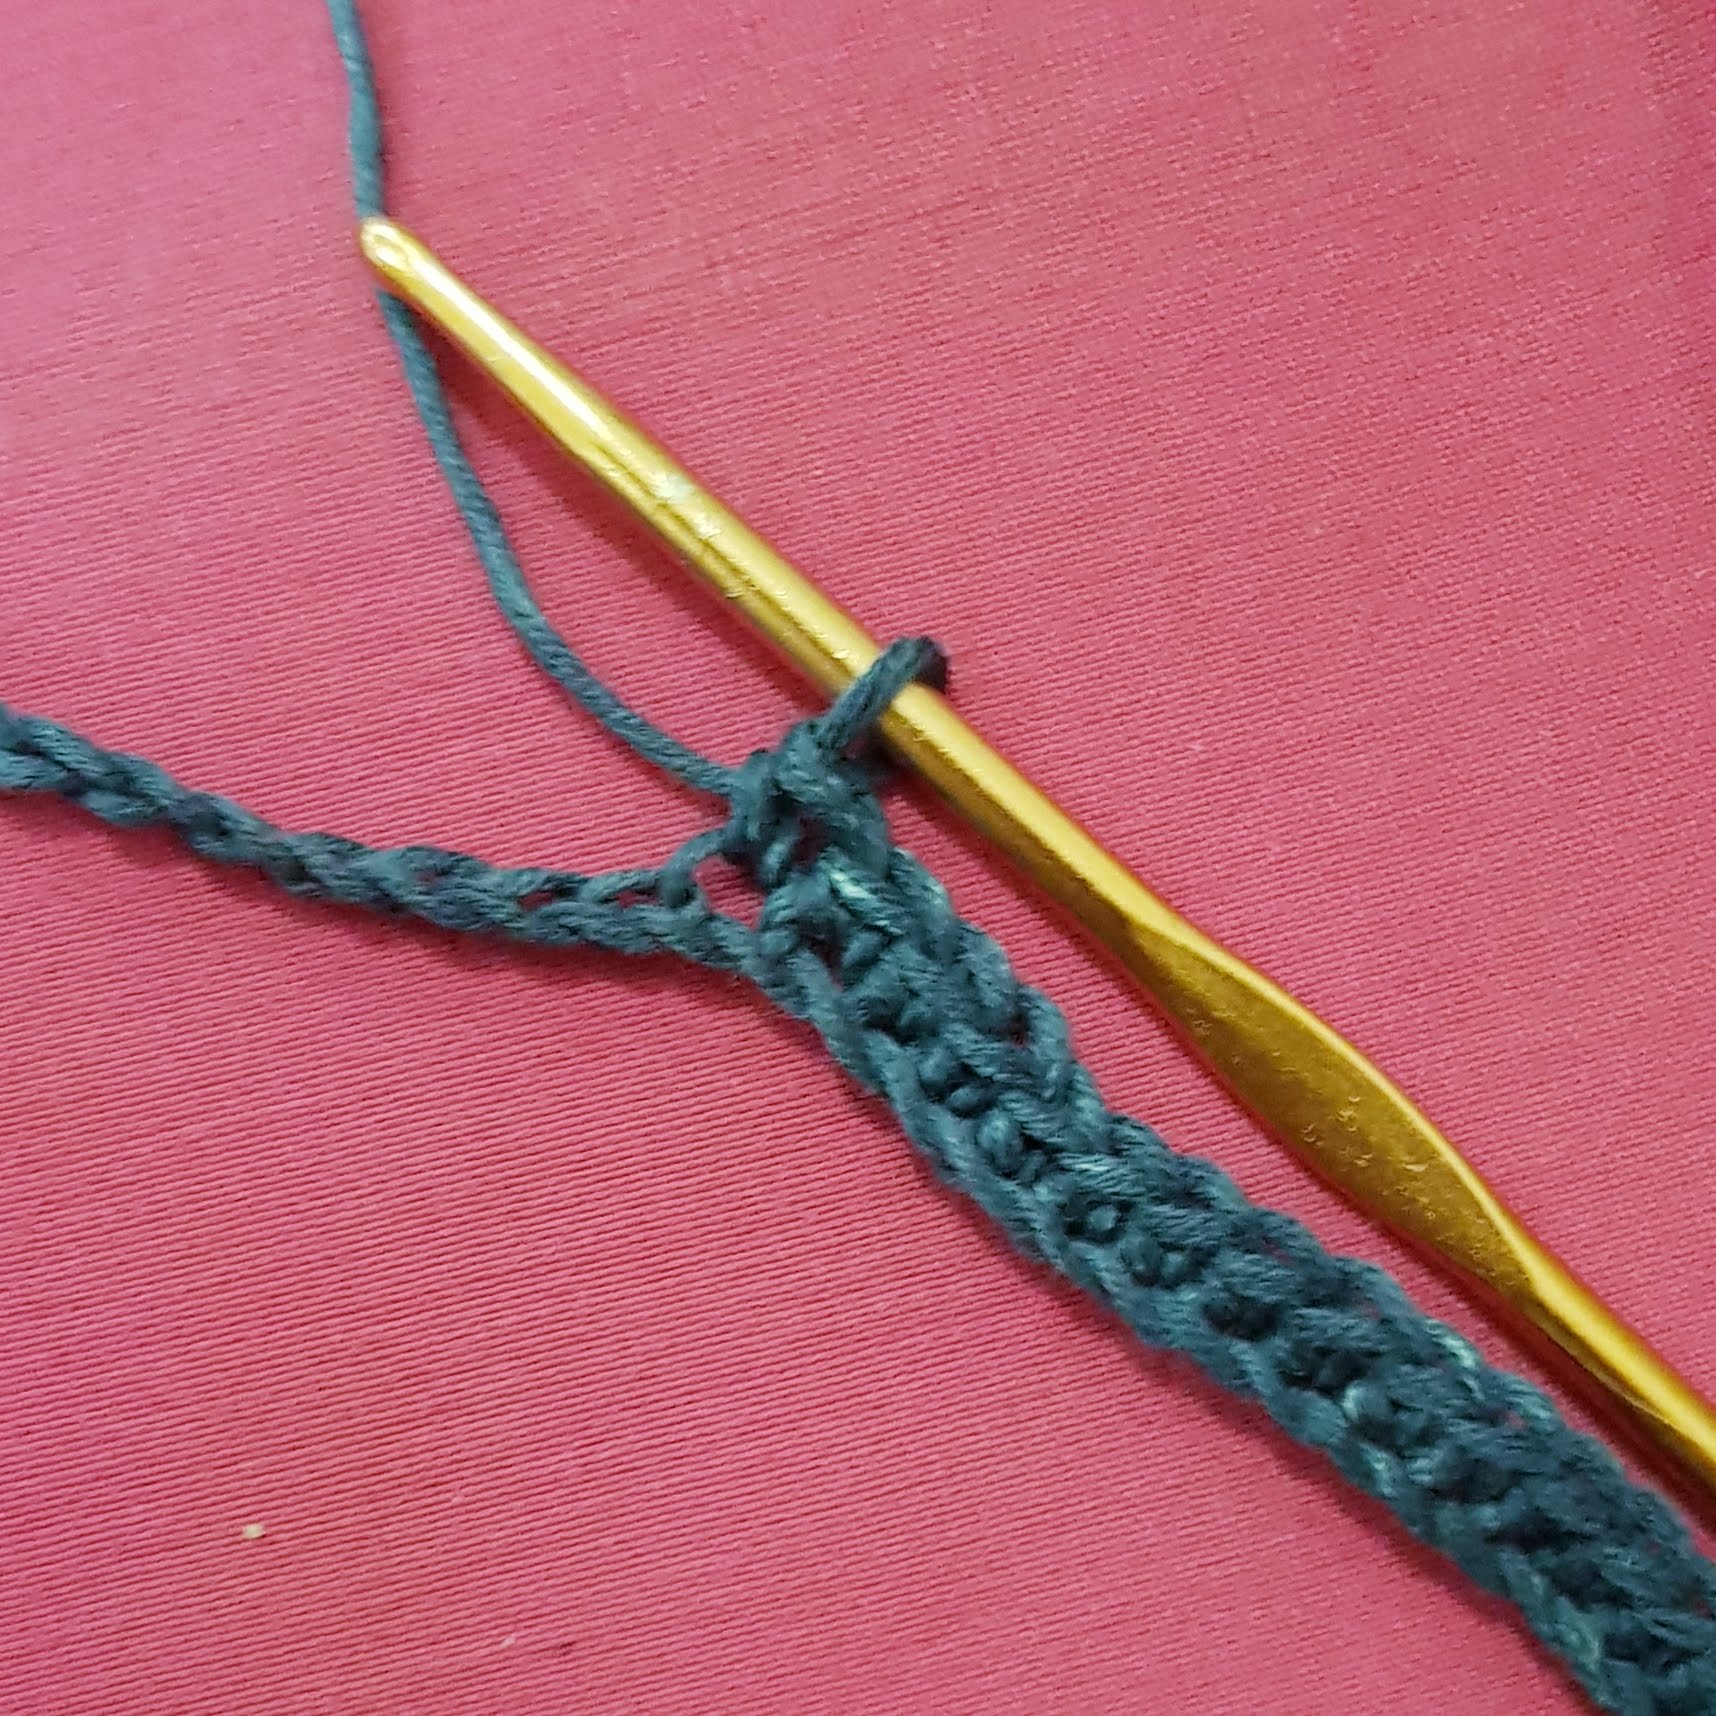
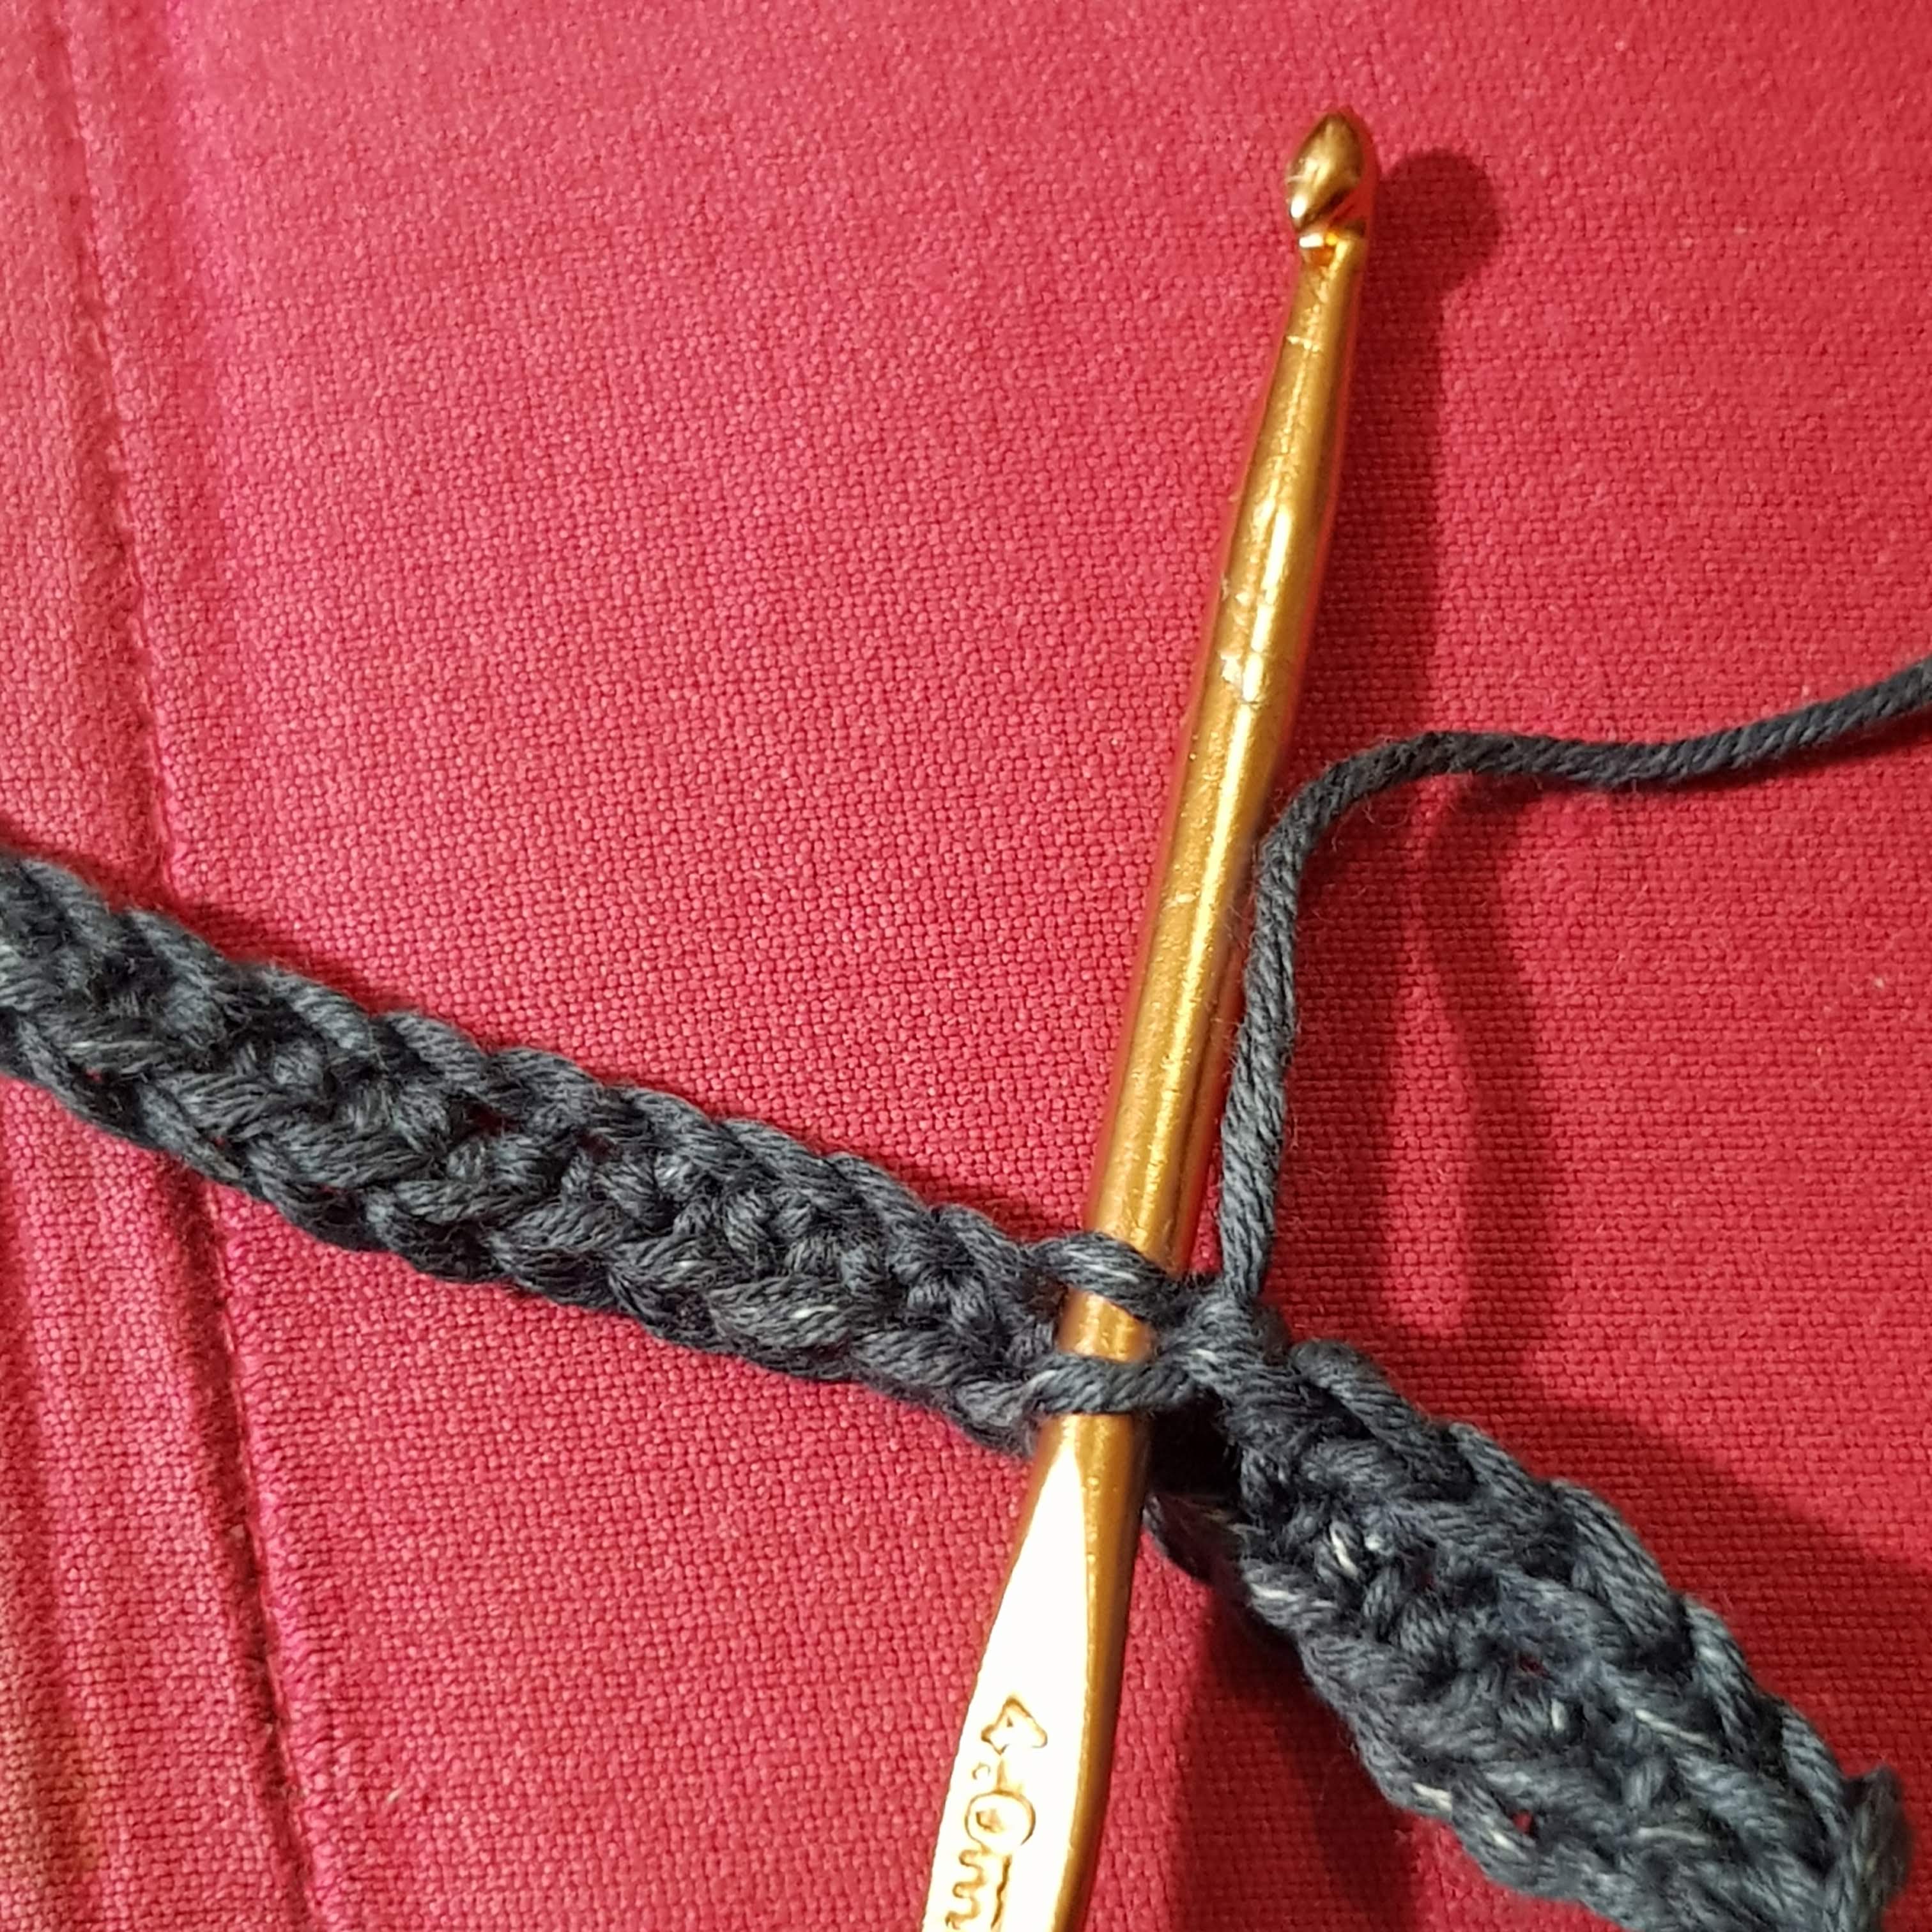
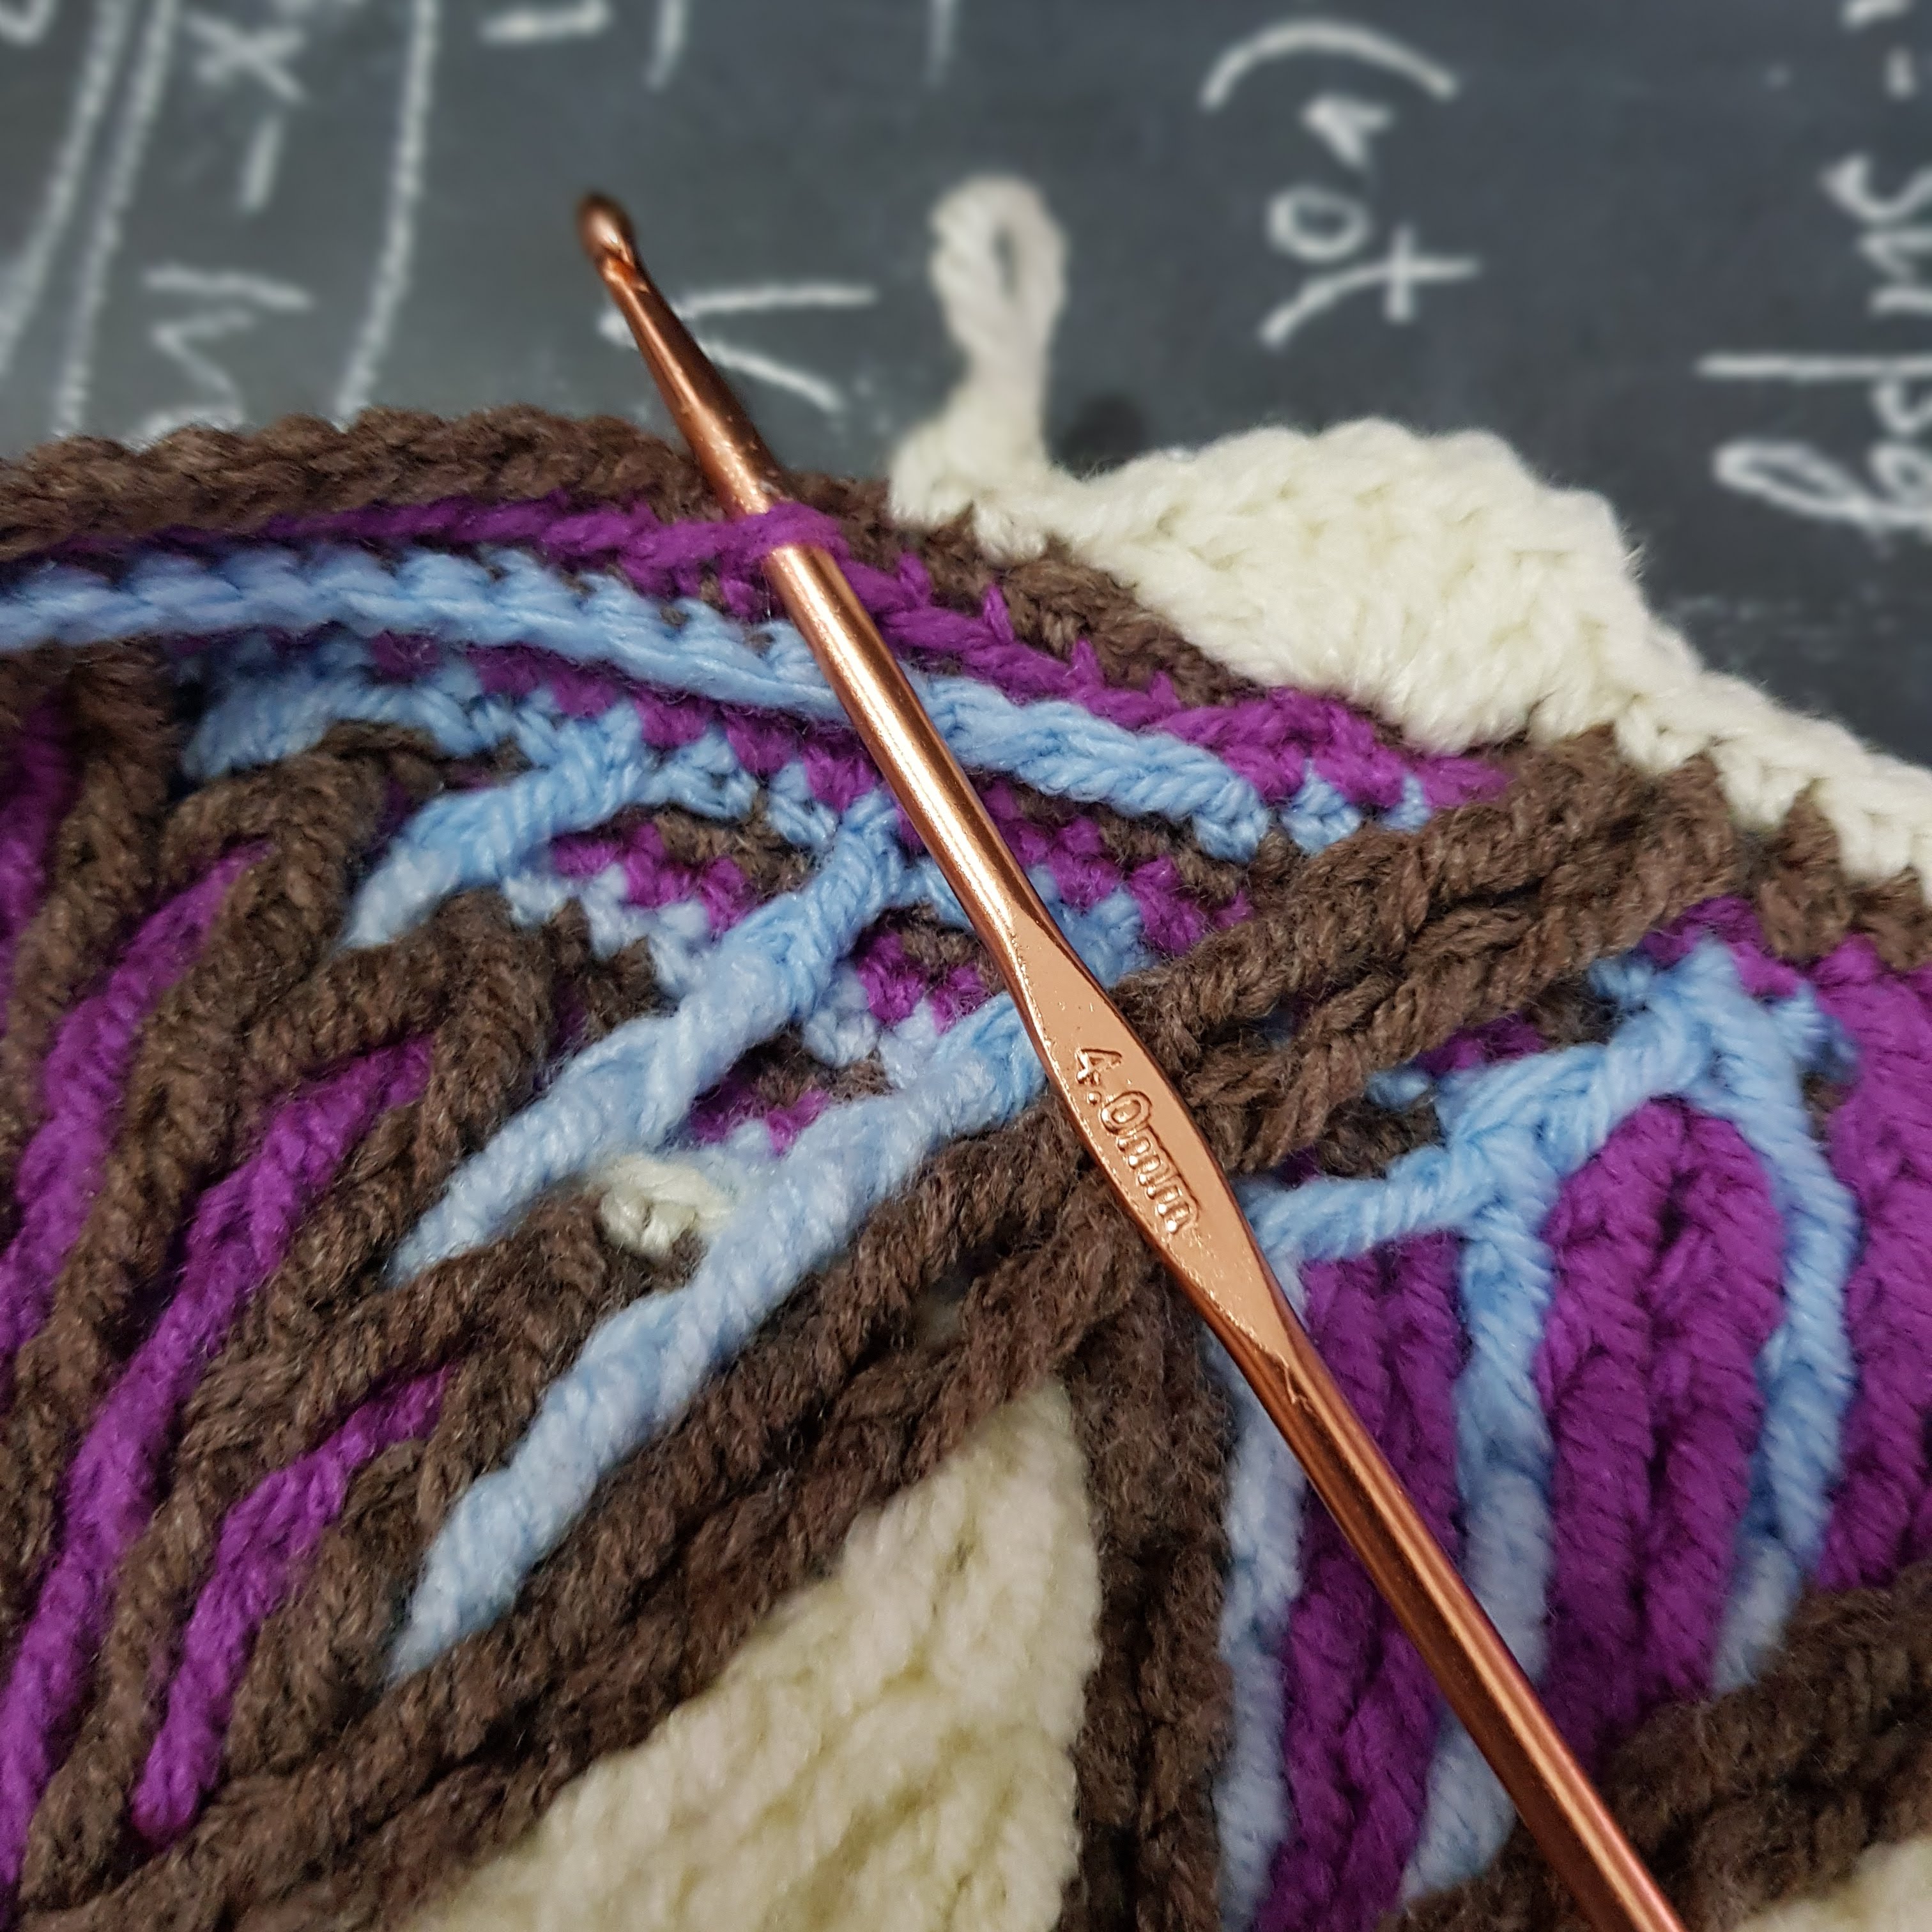
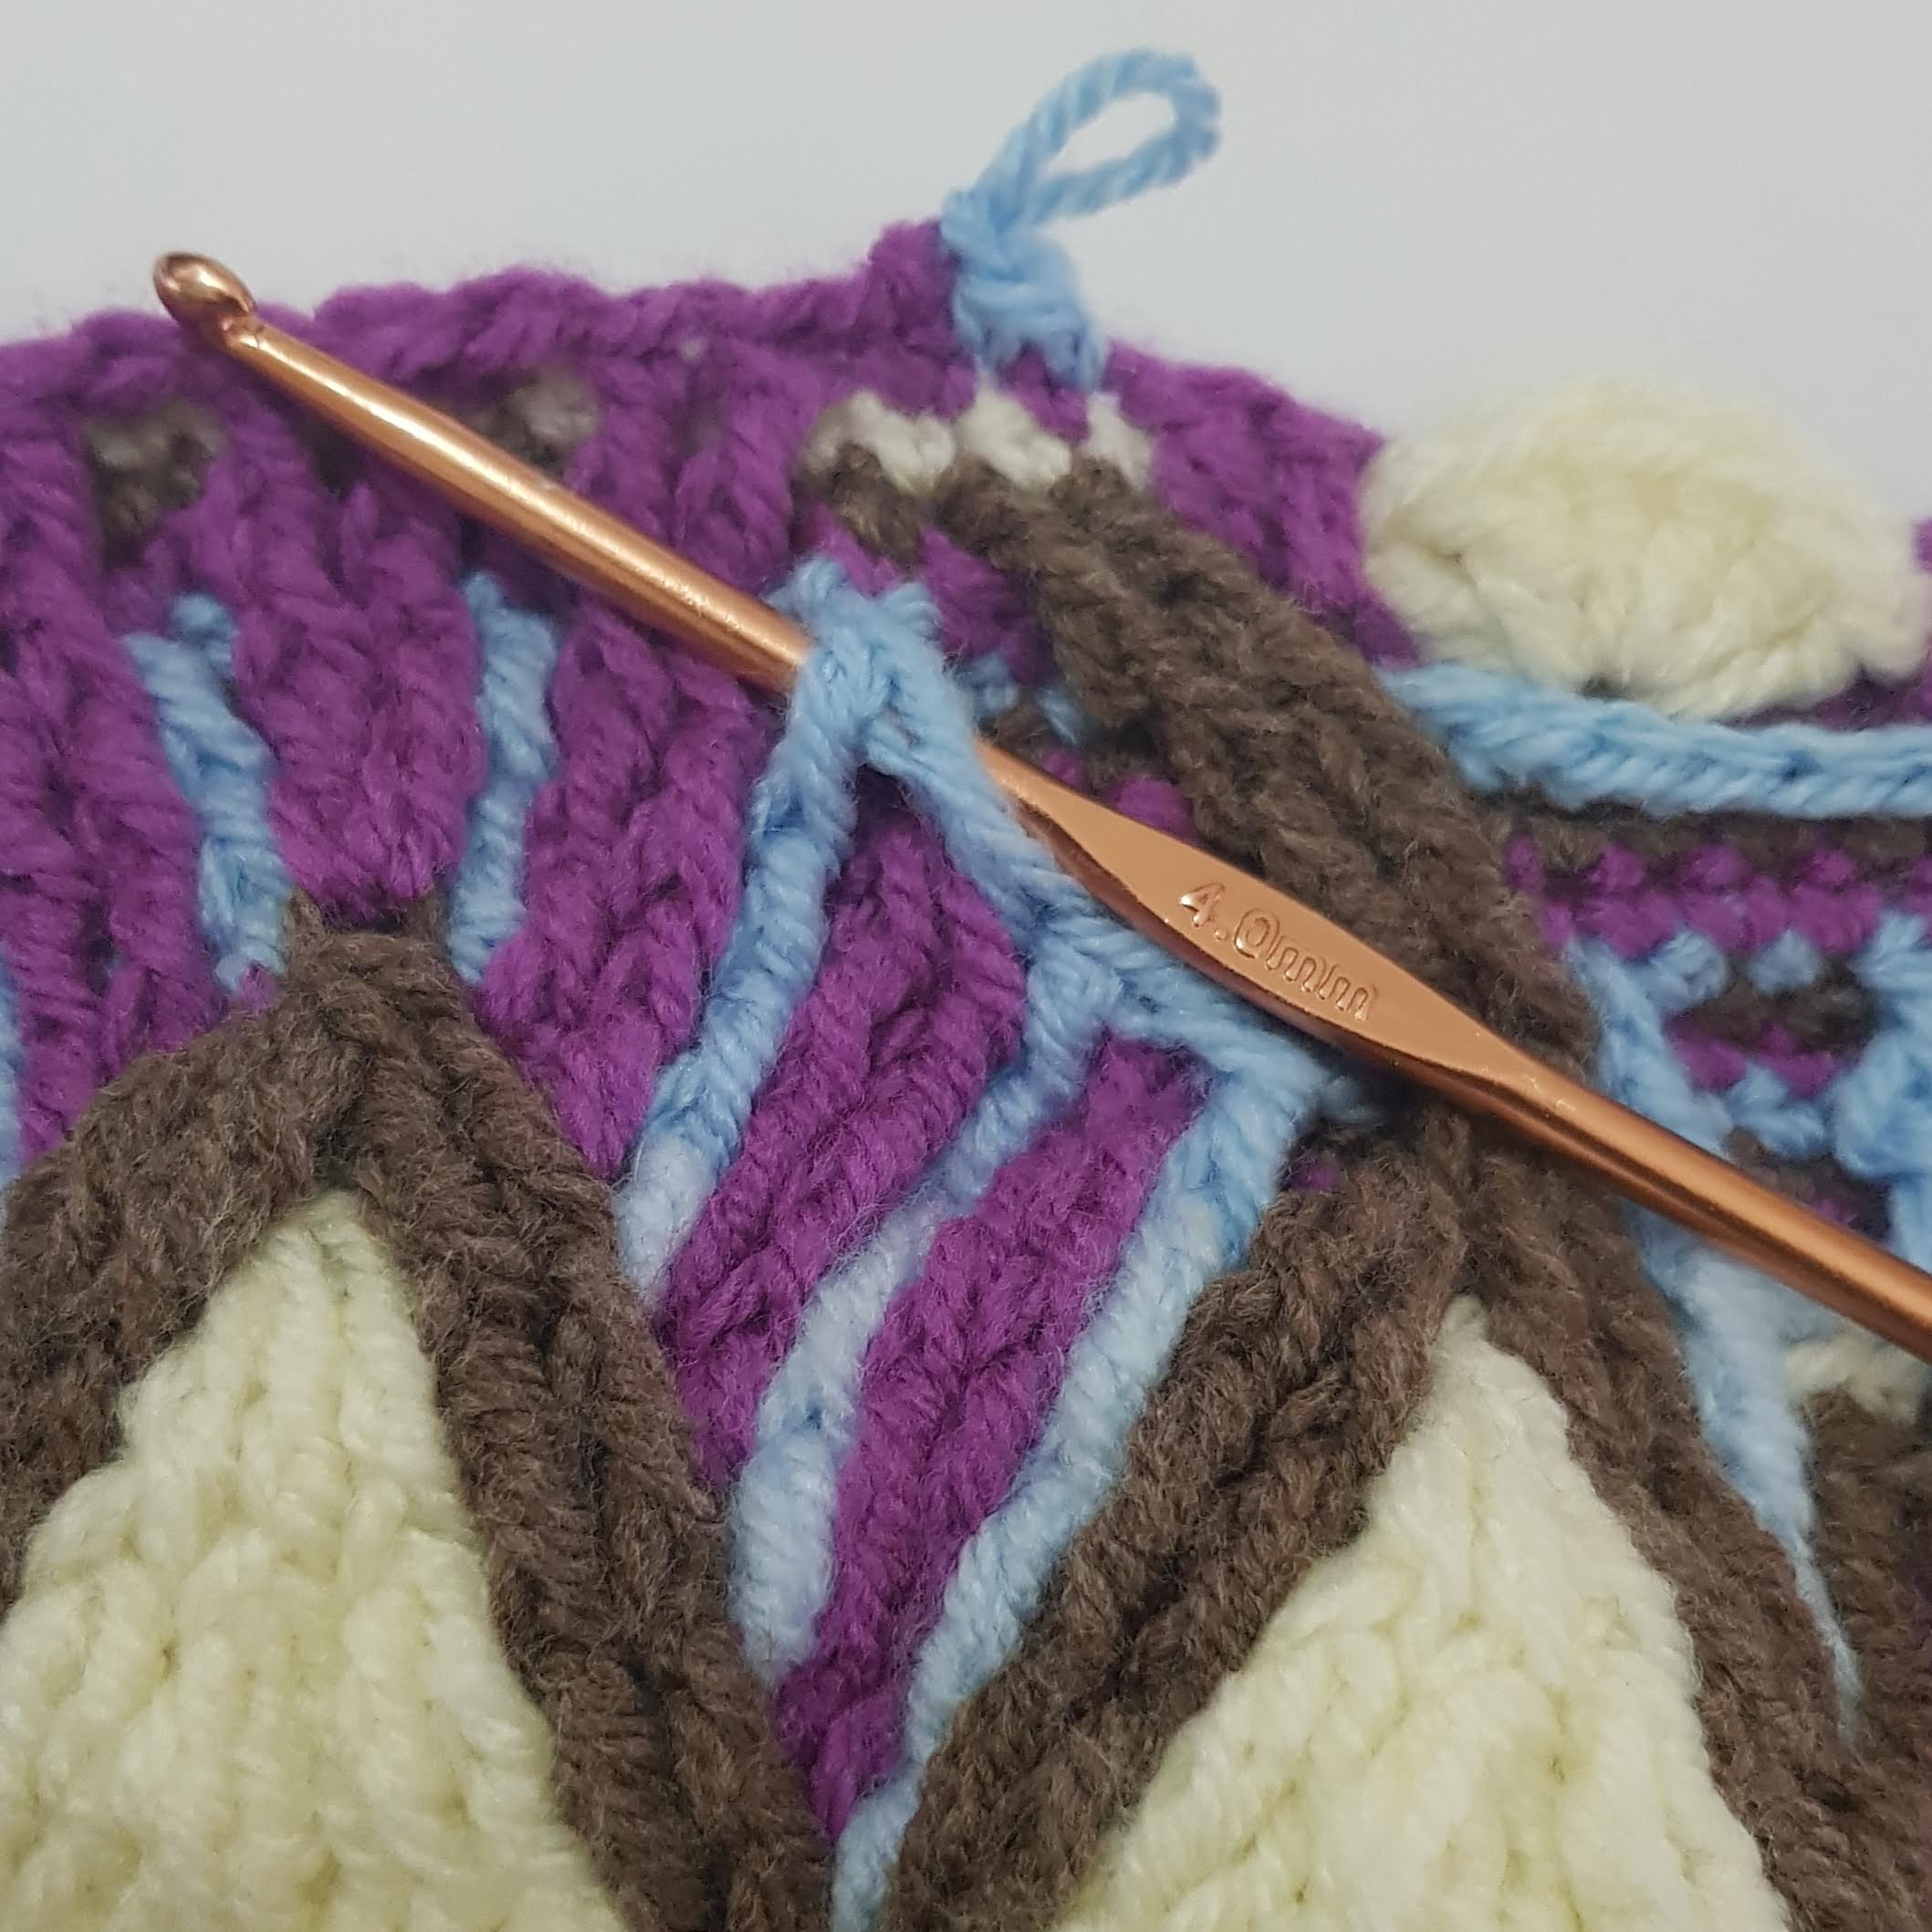
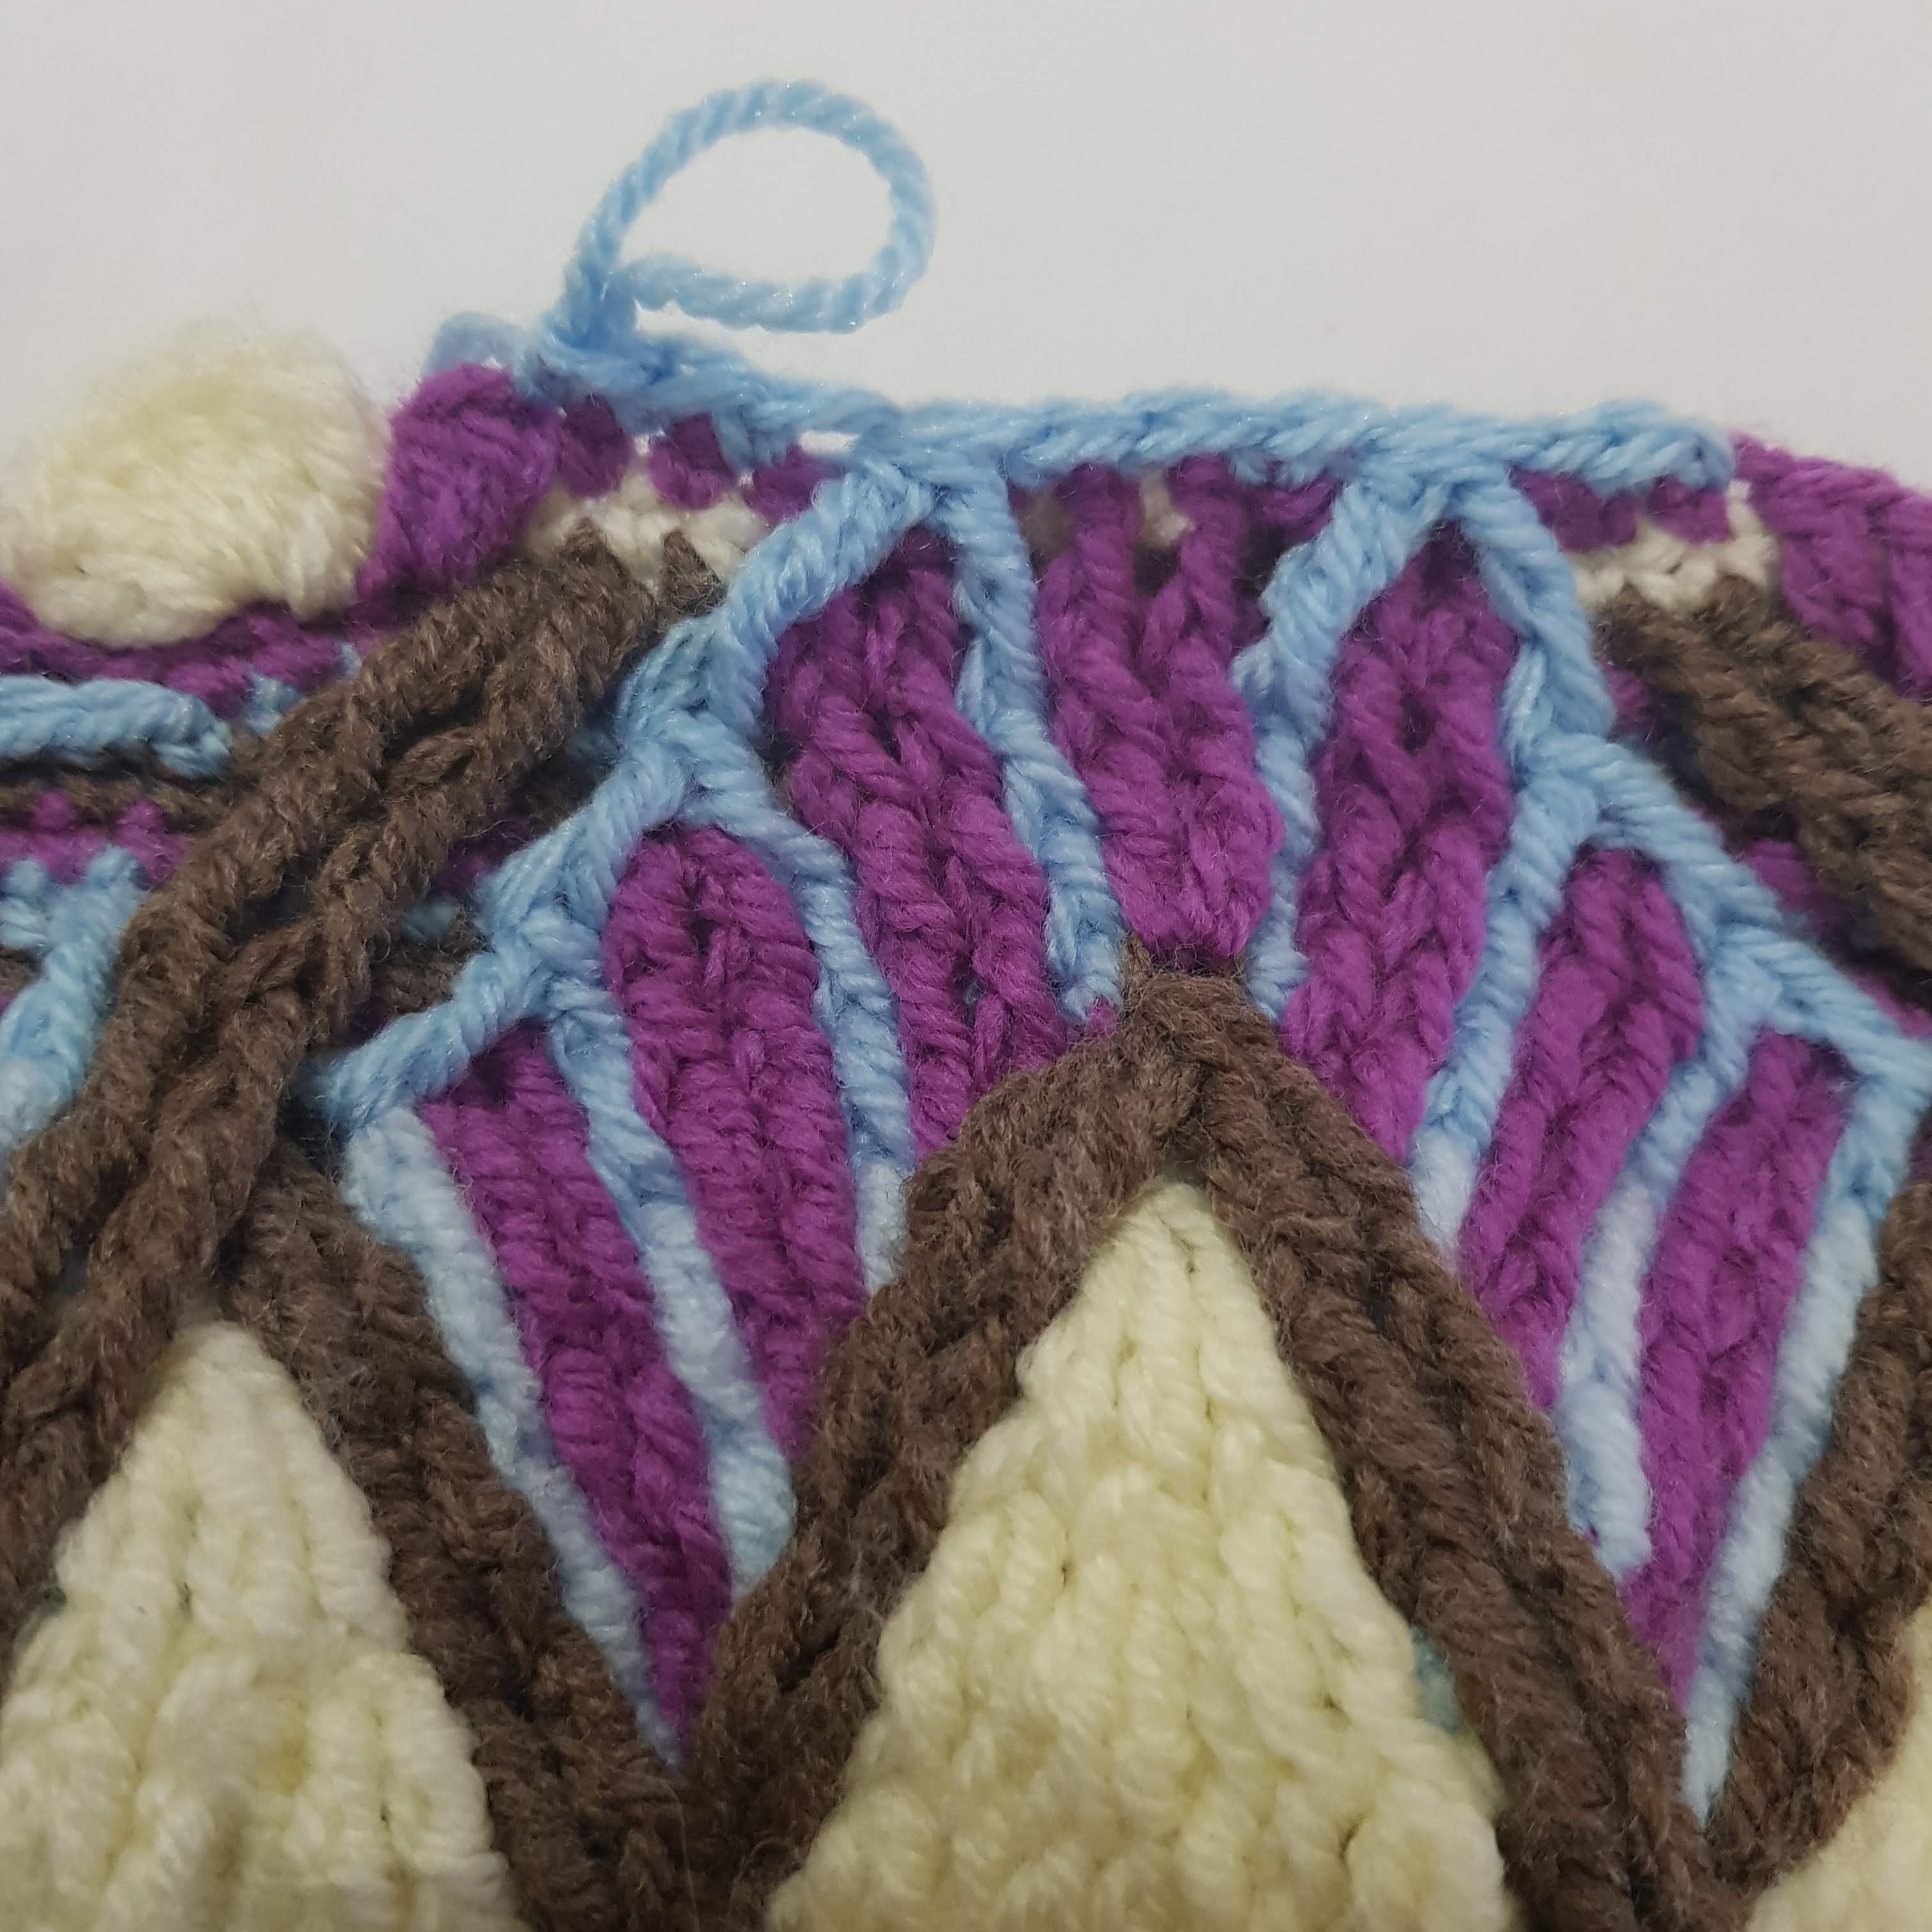
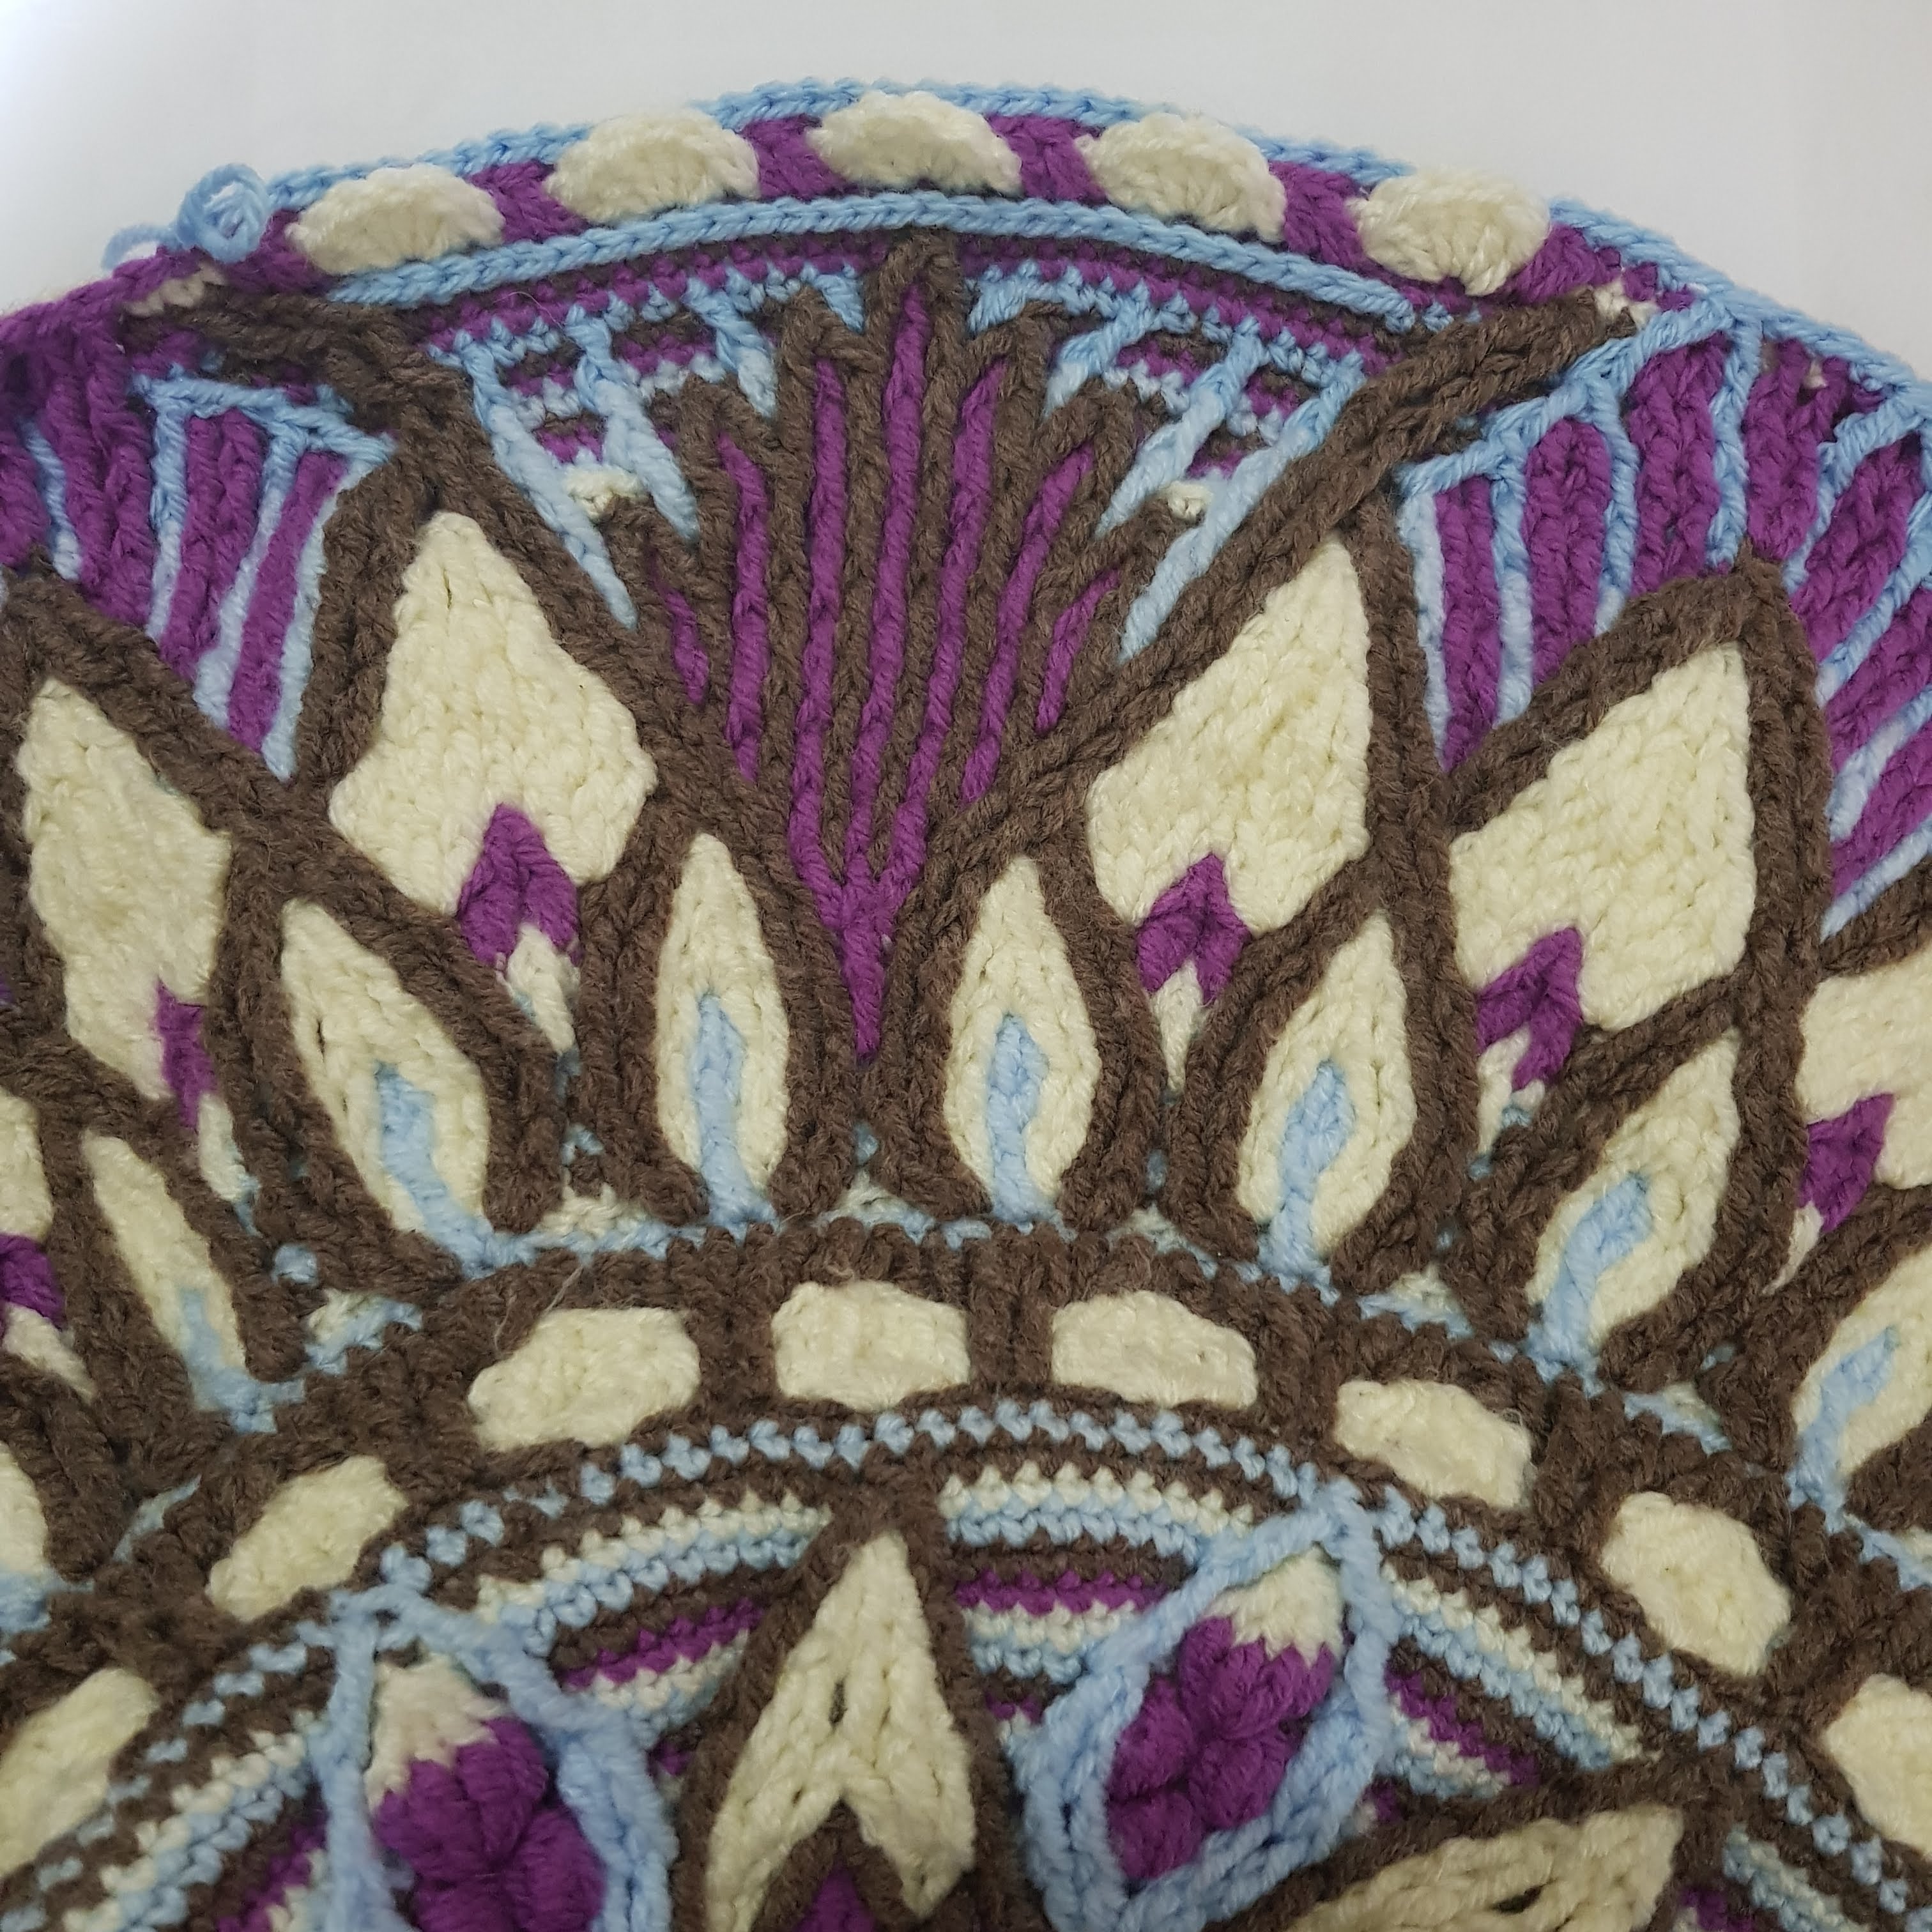
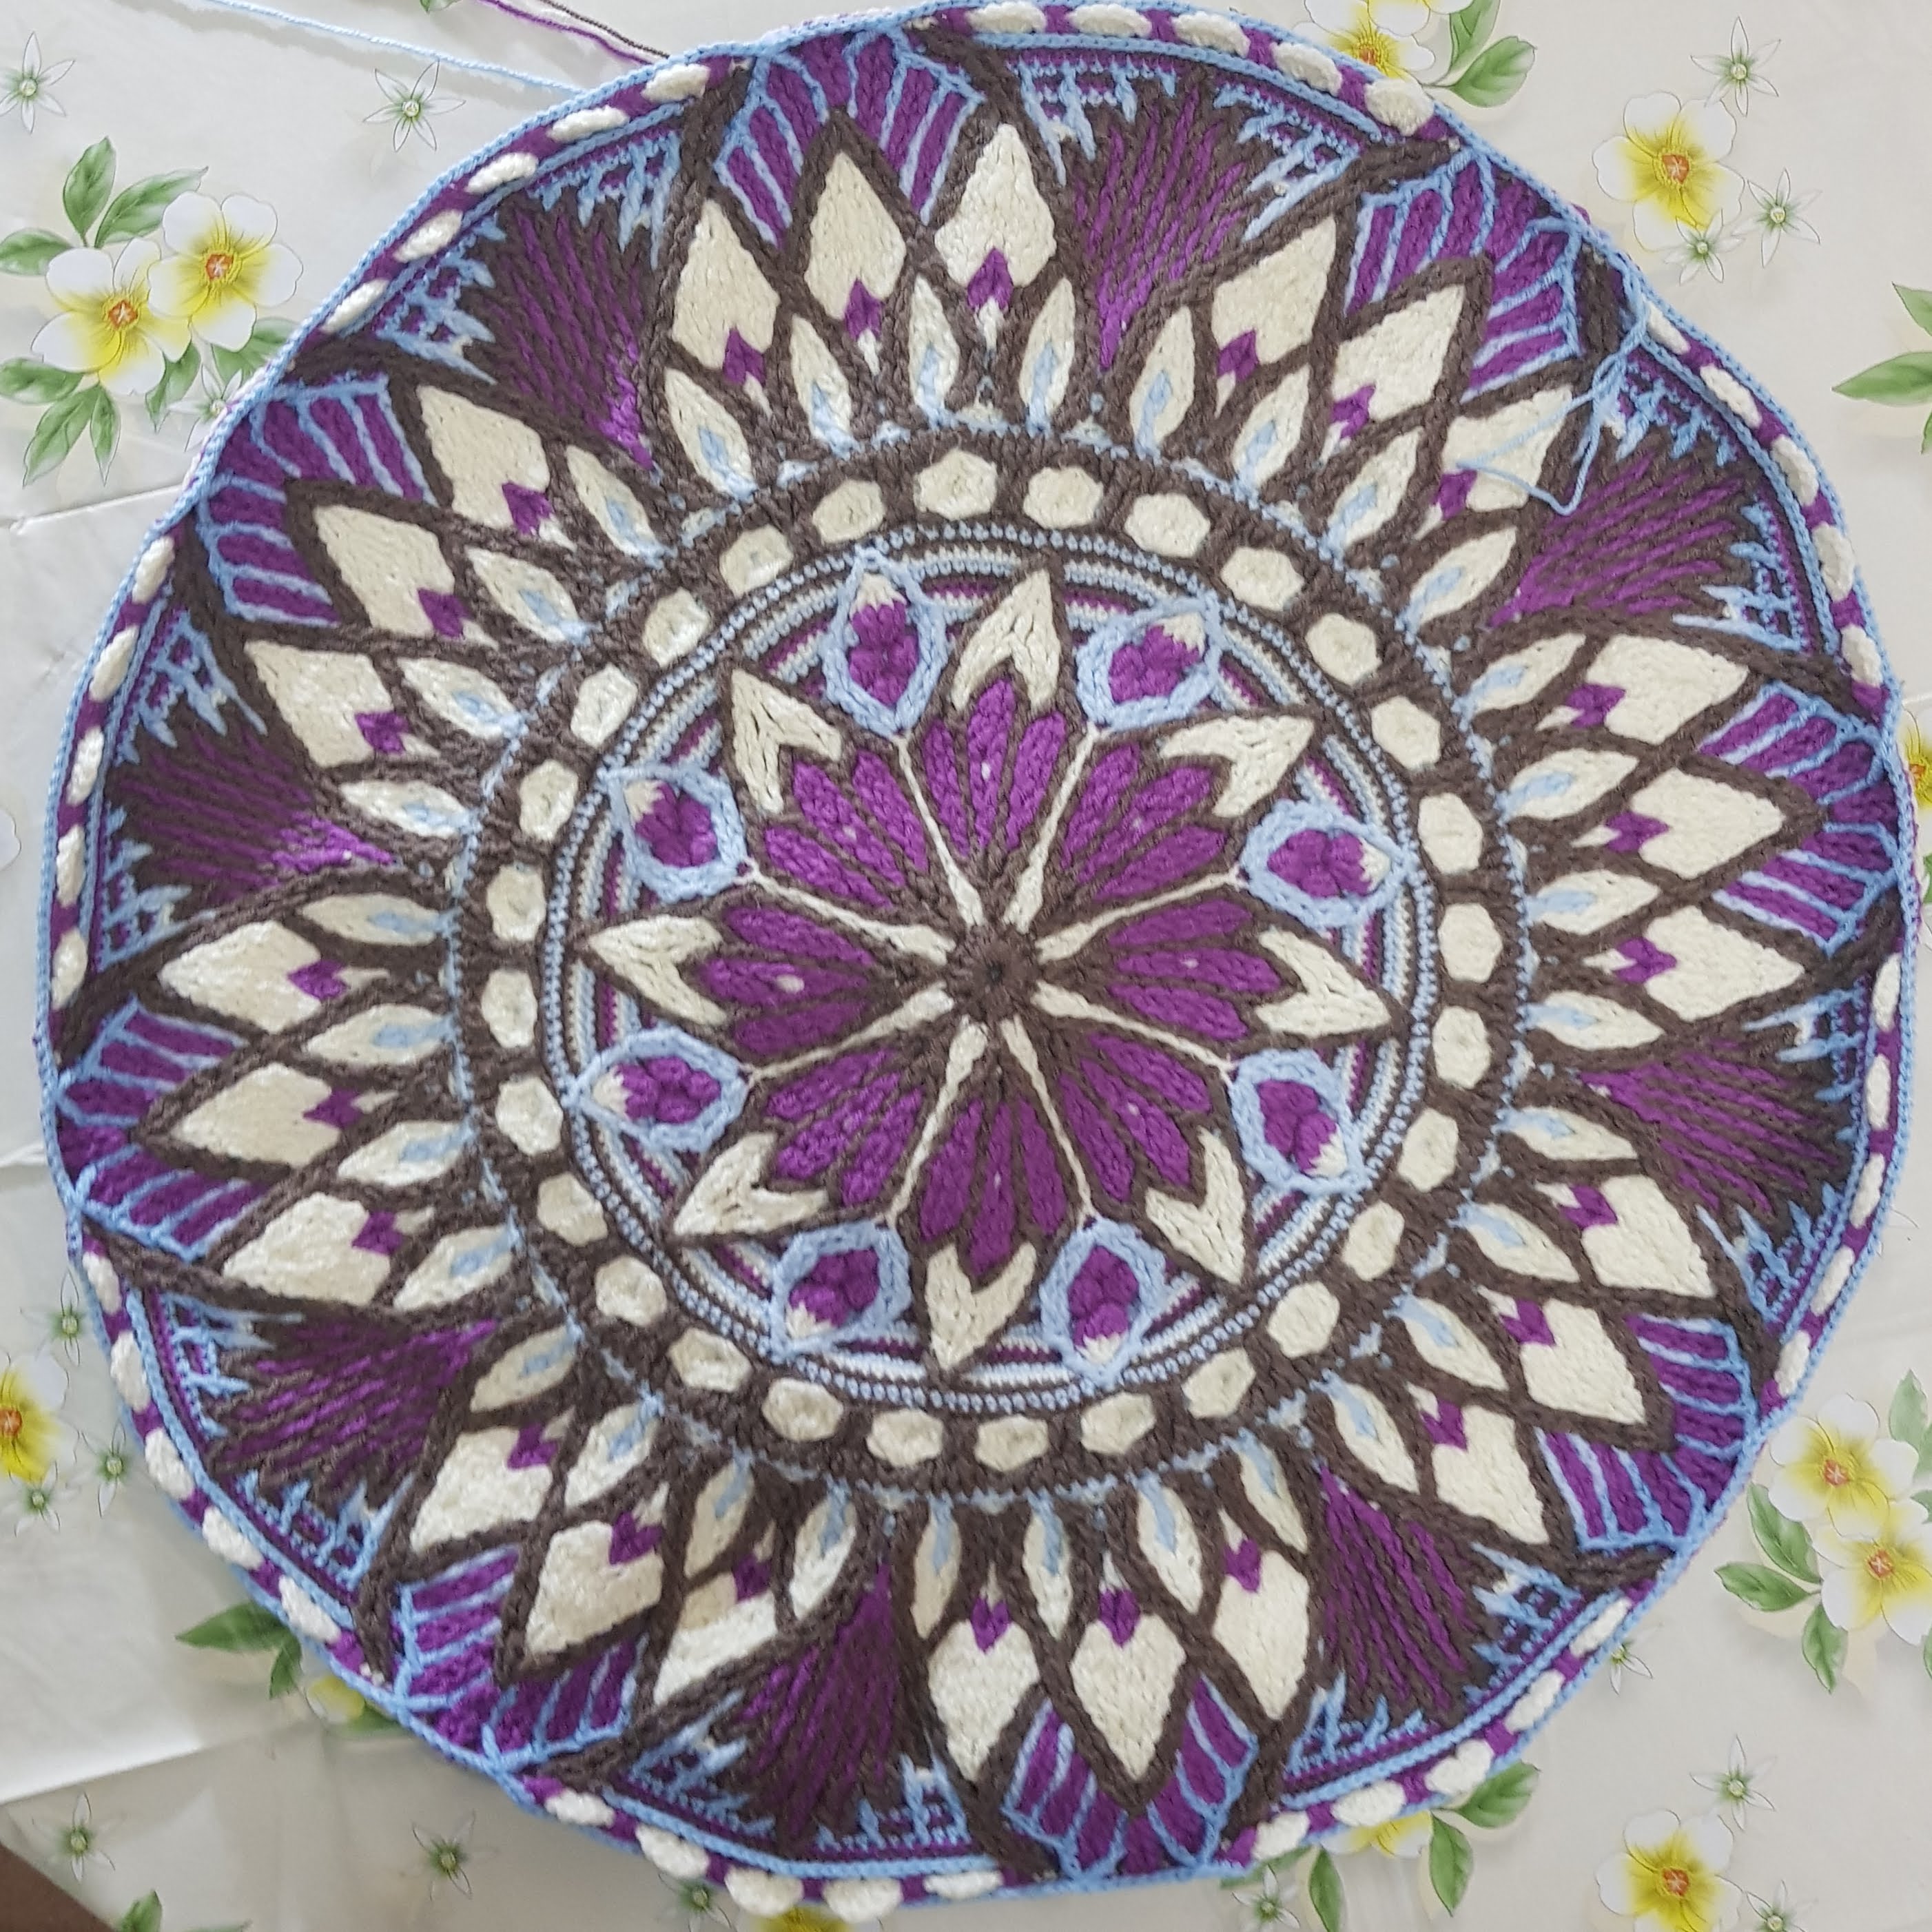
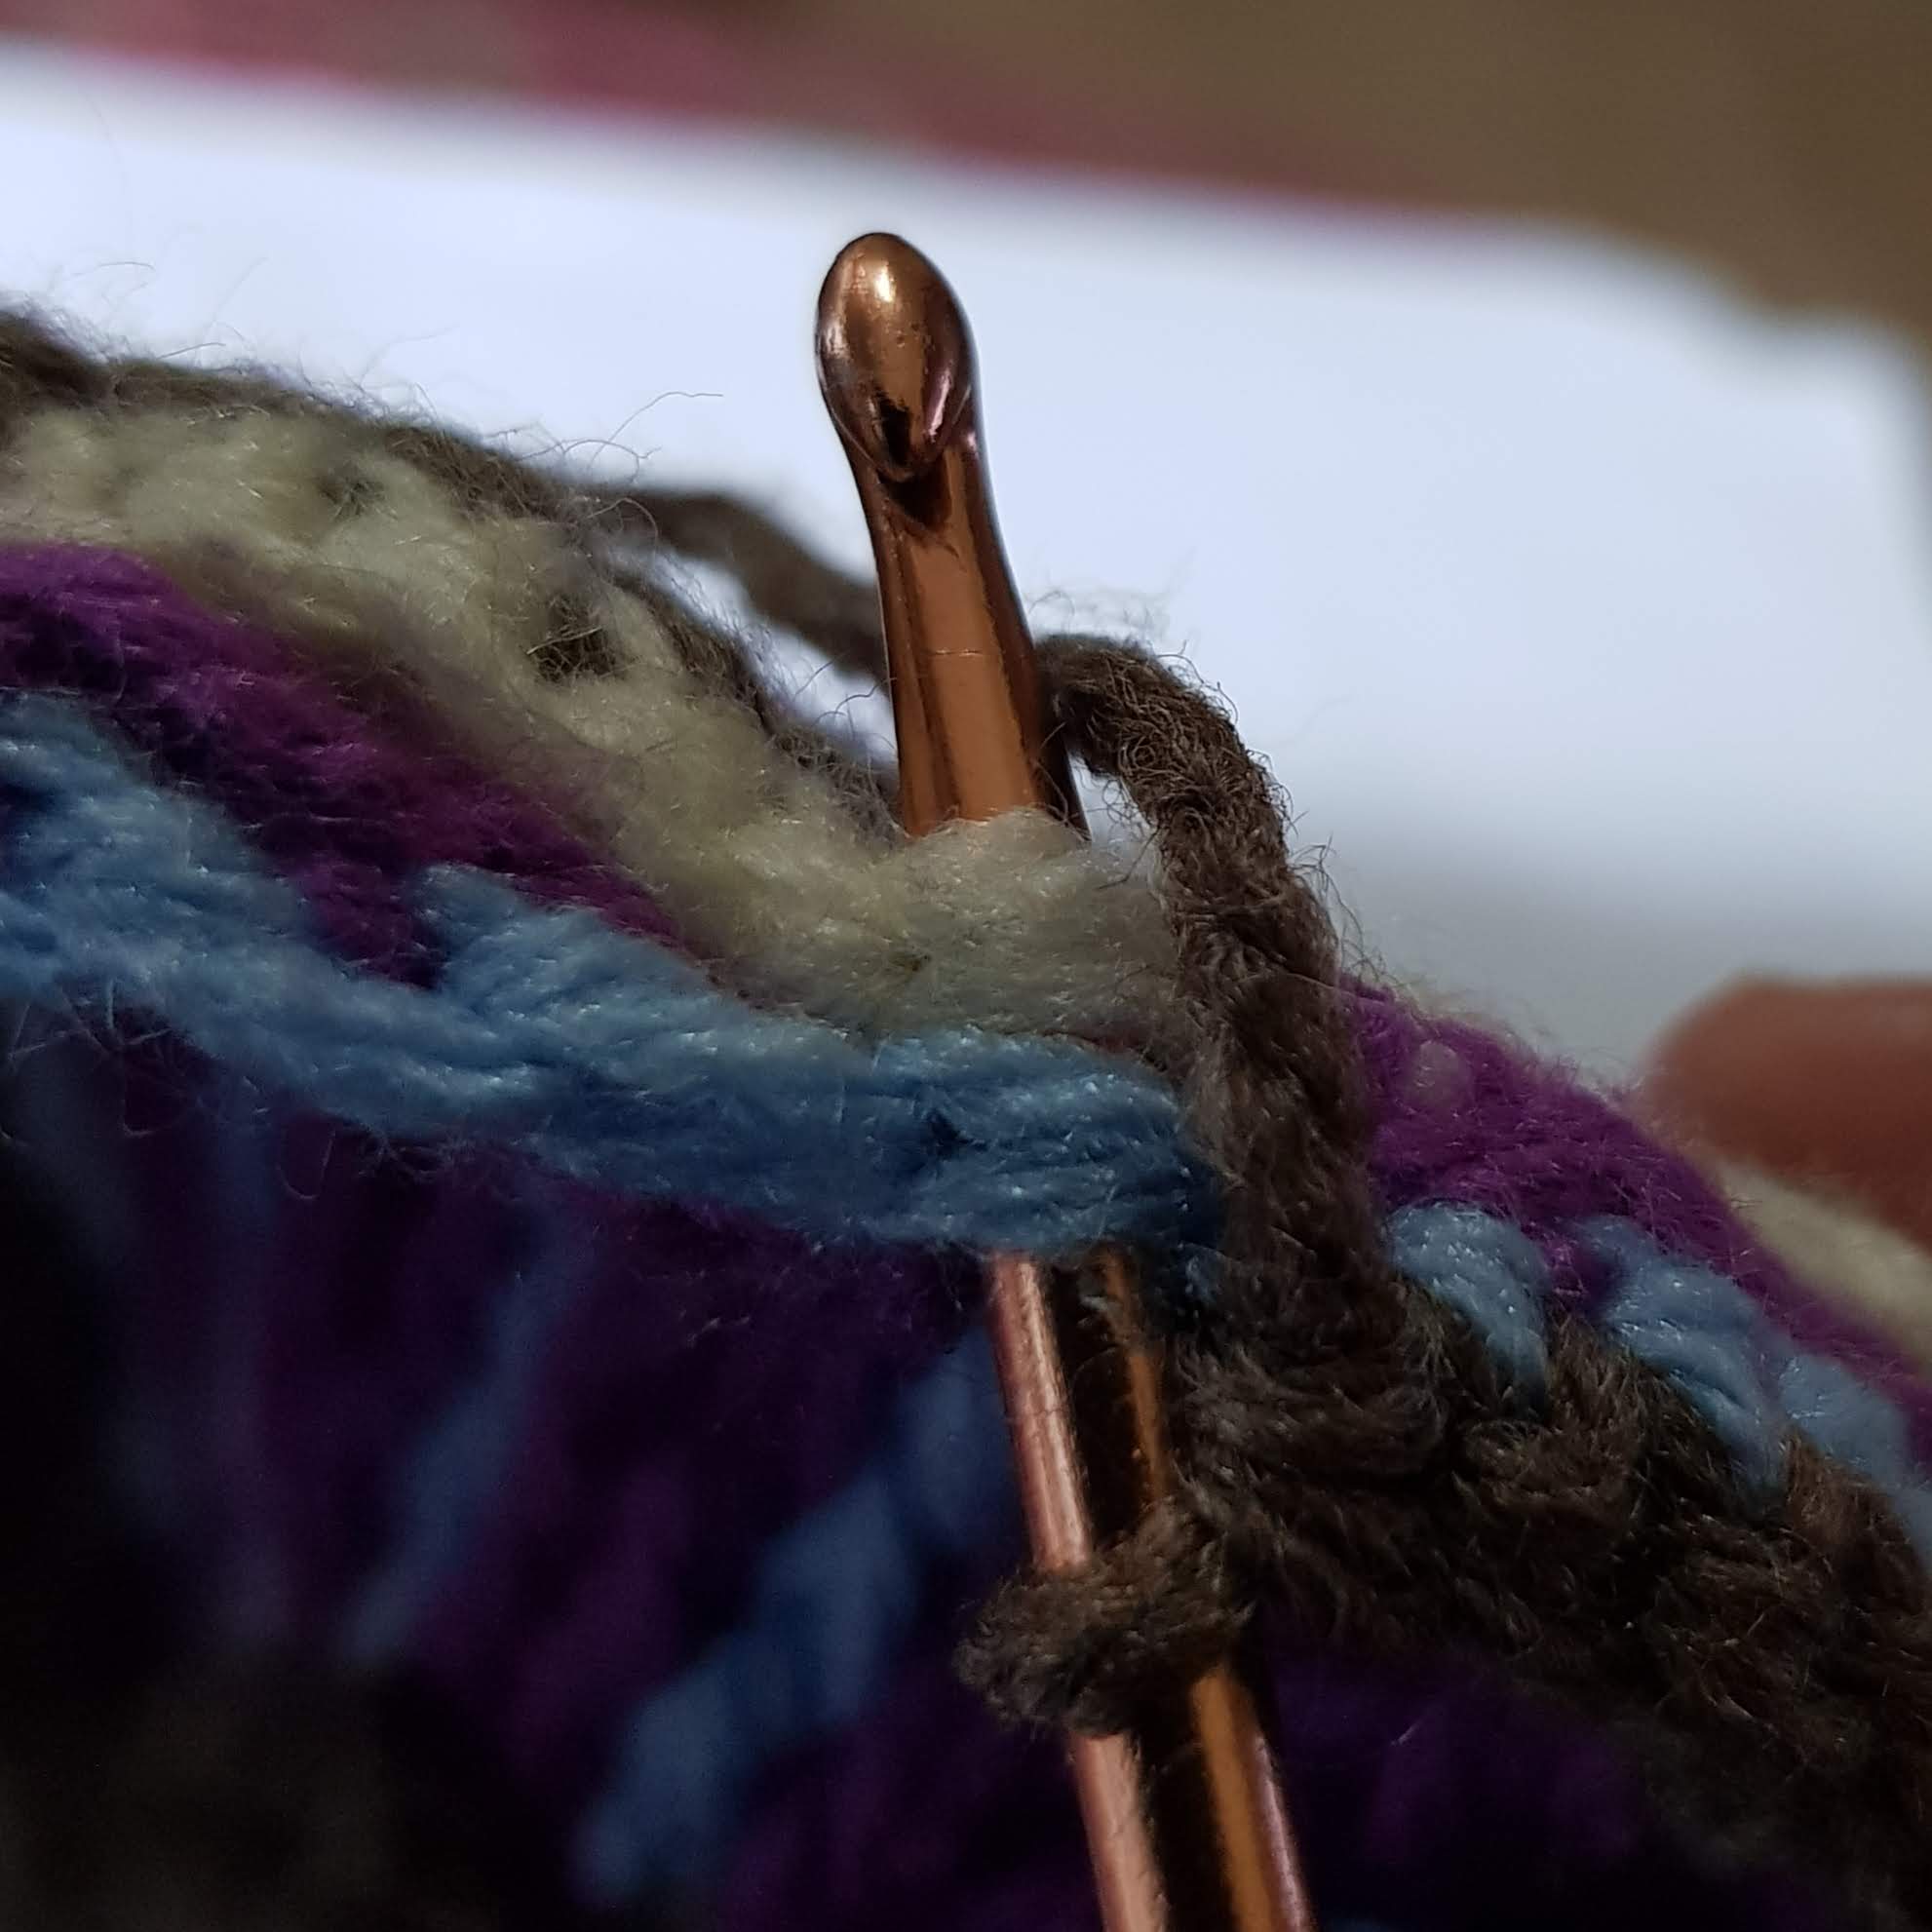
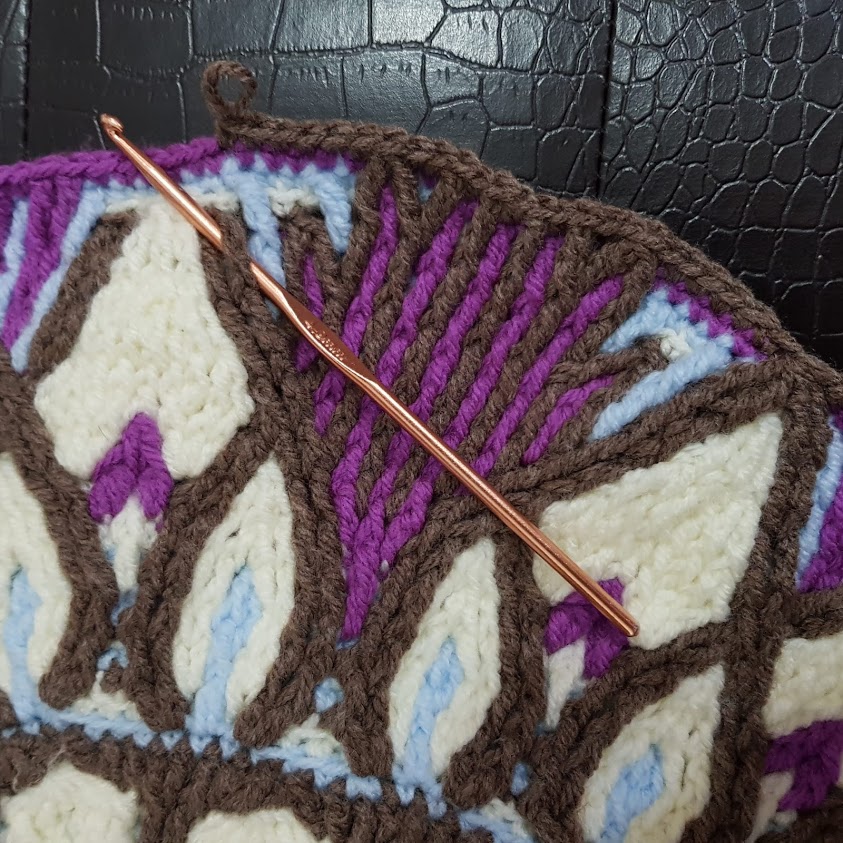
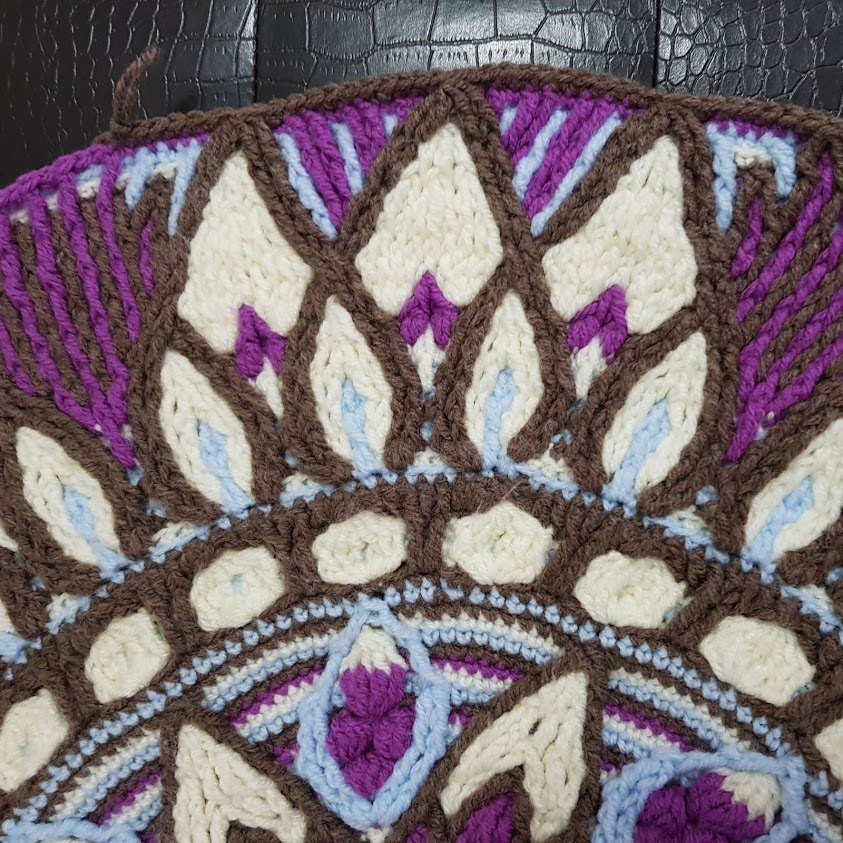
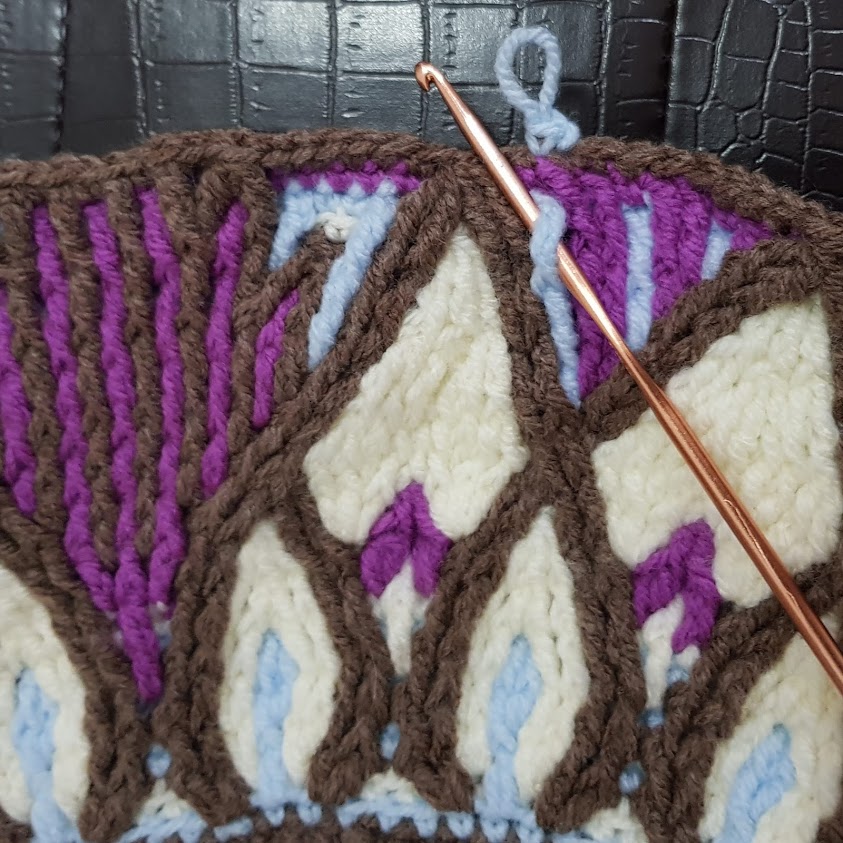
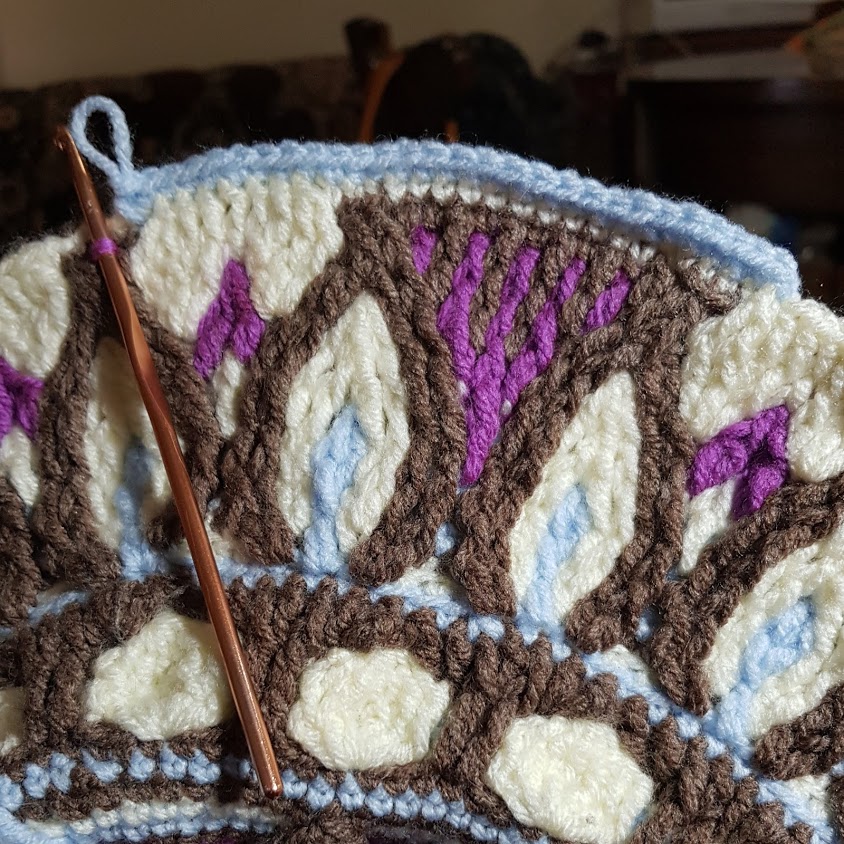
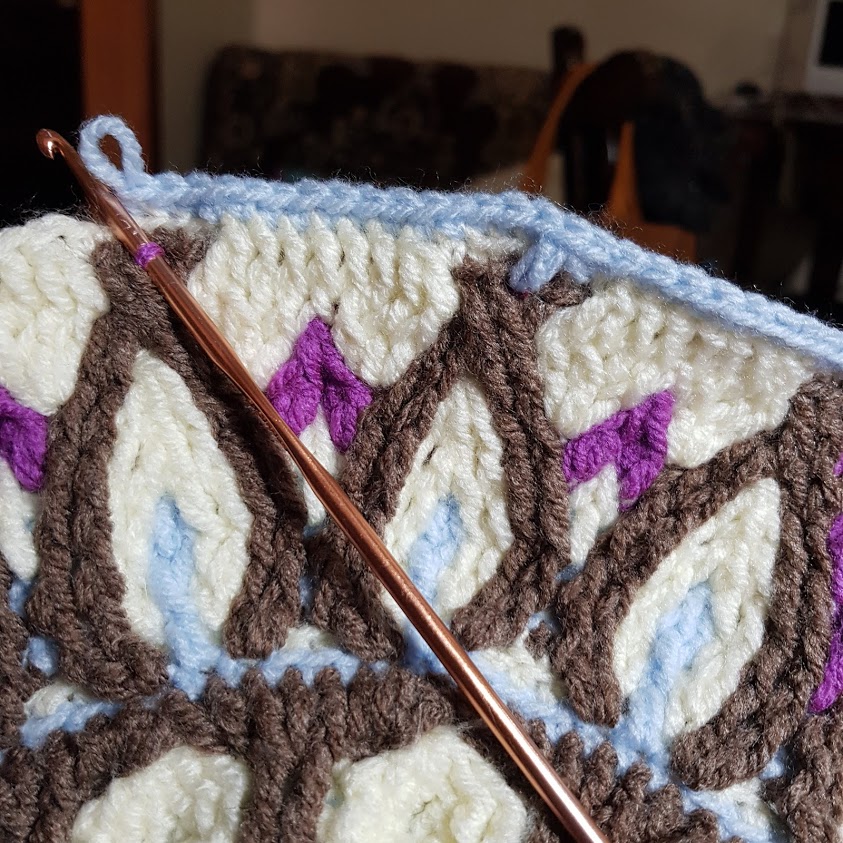
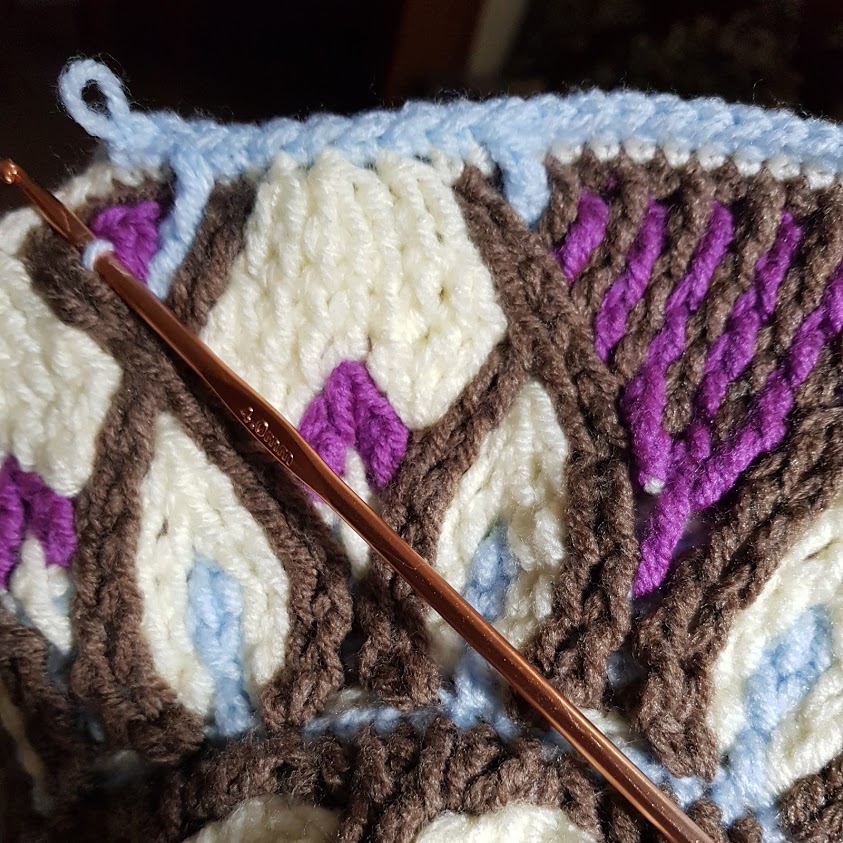
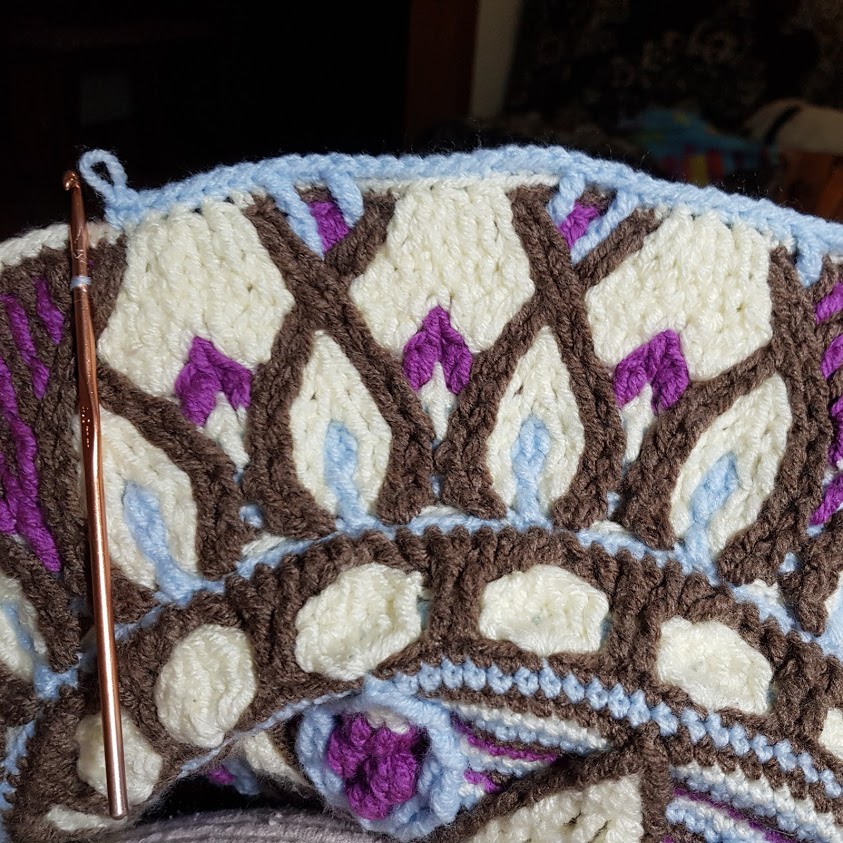
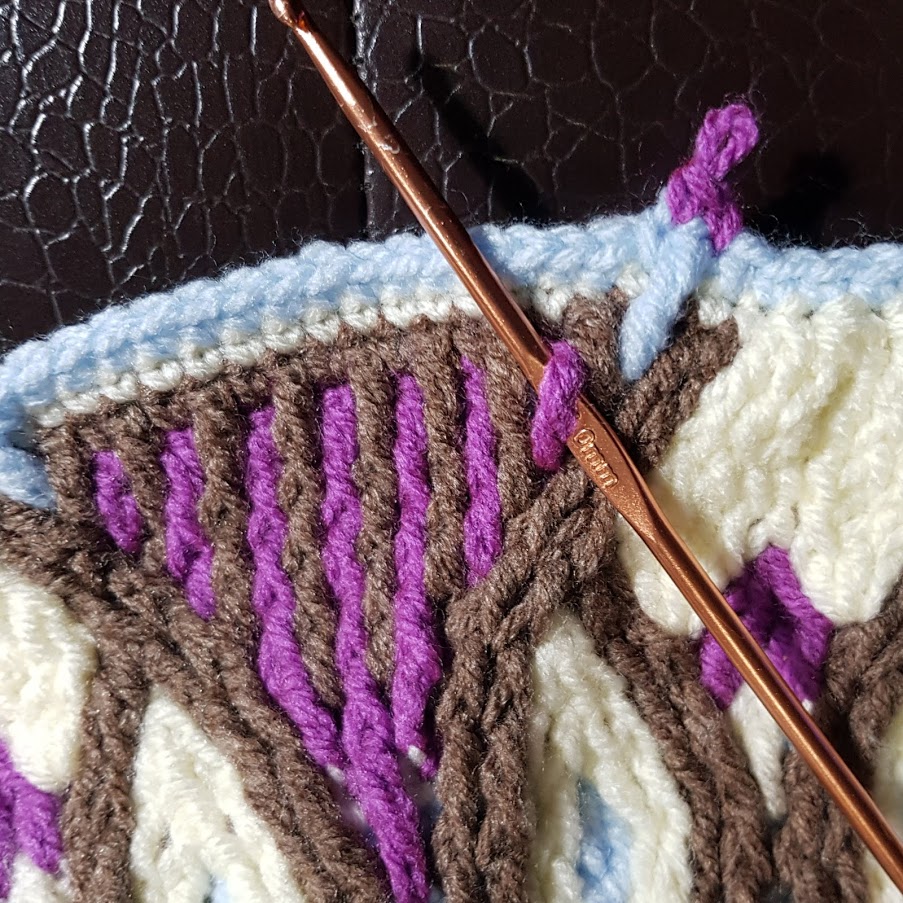
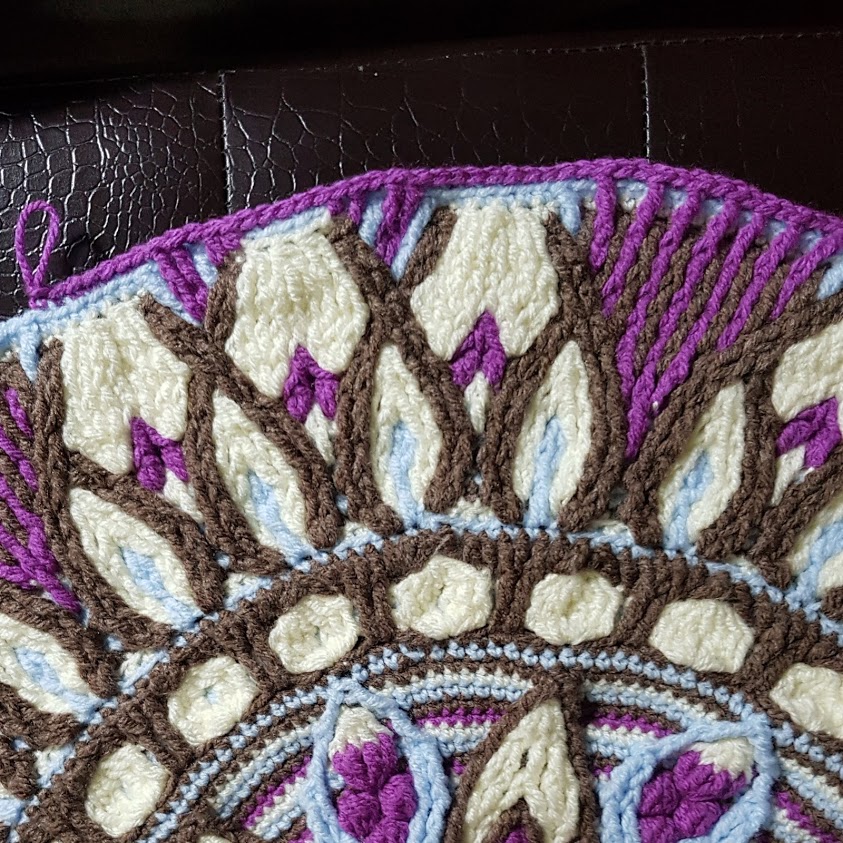
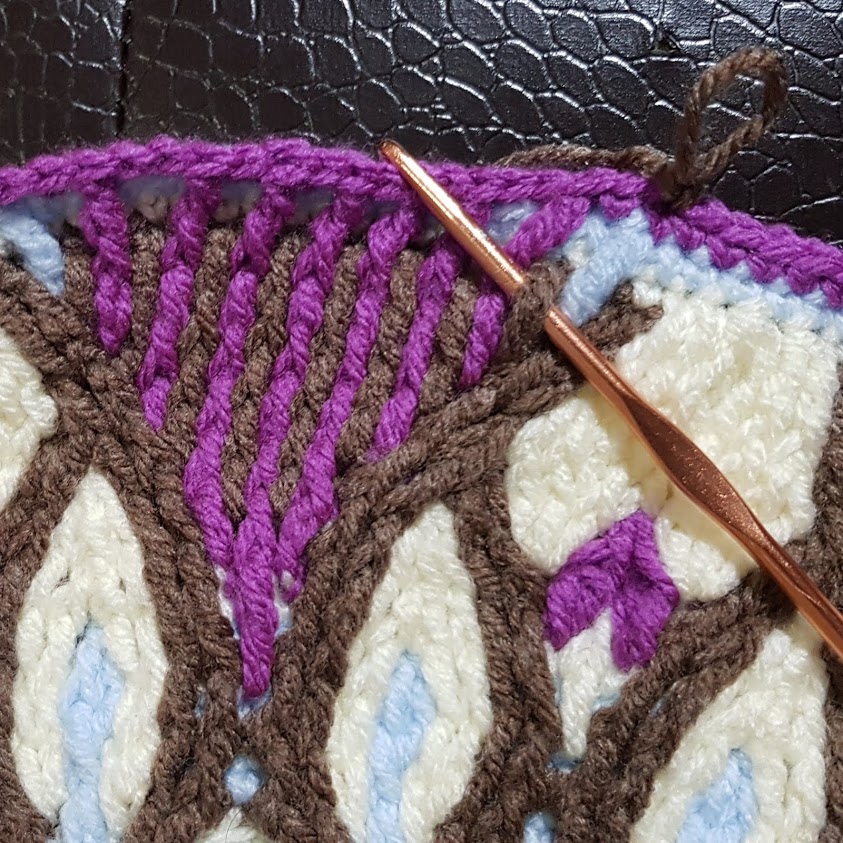
I am always on the lookout for new techniques and ideas when it comes to crochet and recently, I came across something called tapestry crochet. This technique will allow you to make the most beautiful and intricate designs – some can look very complex and you might think that they are for very experienced crocheters – but other than multiple colour changes, tapestry crochet is practically the same as normal crochet, using a single crochet as the main stitch, and using several colours of yarn at the same time. So give it a try!
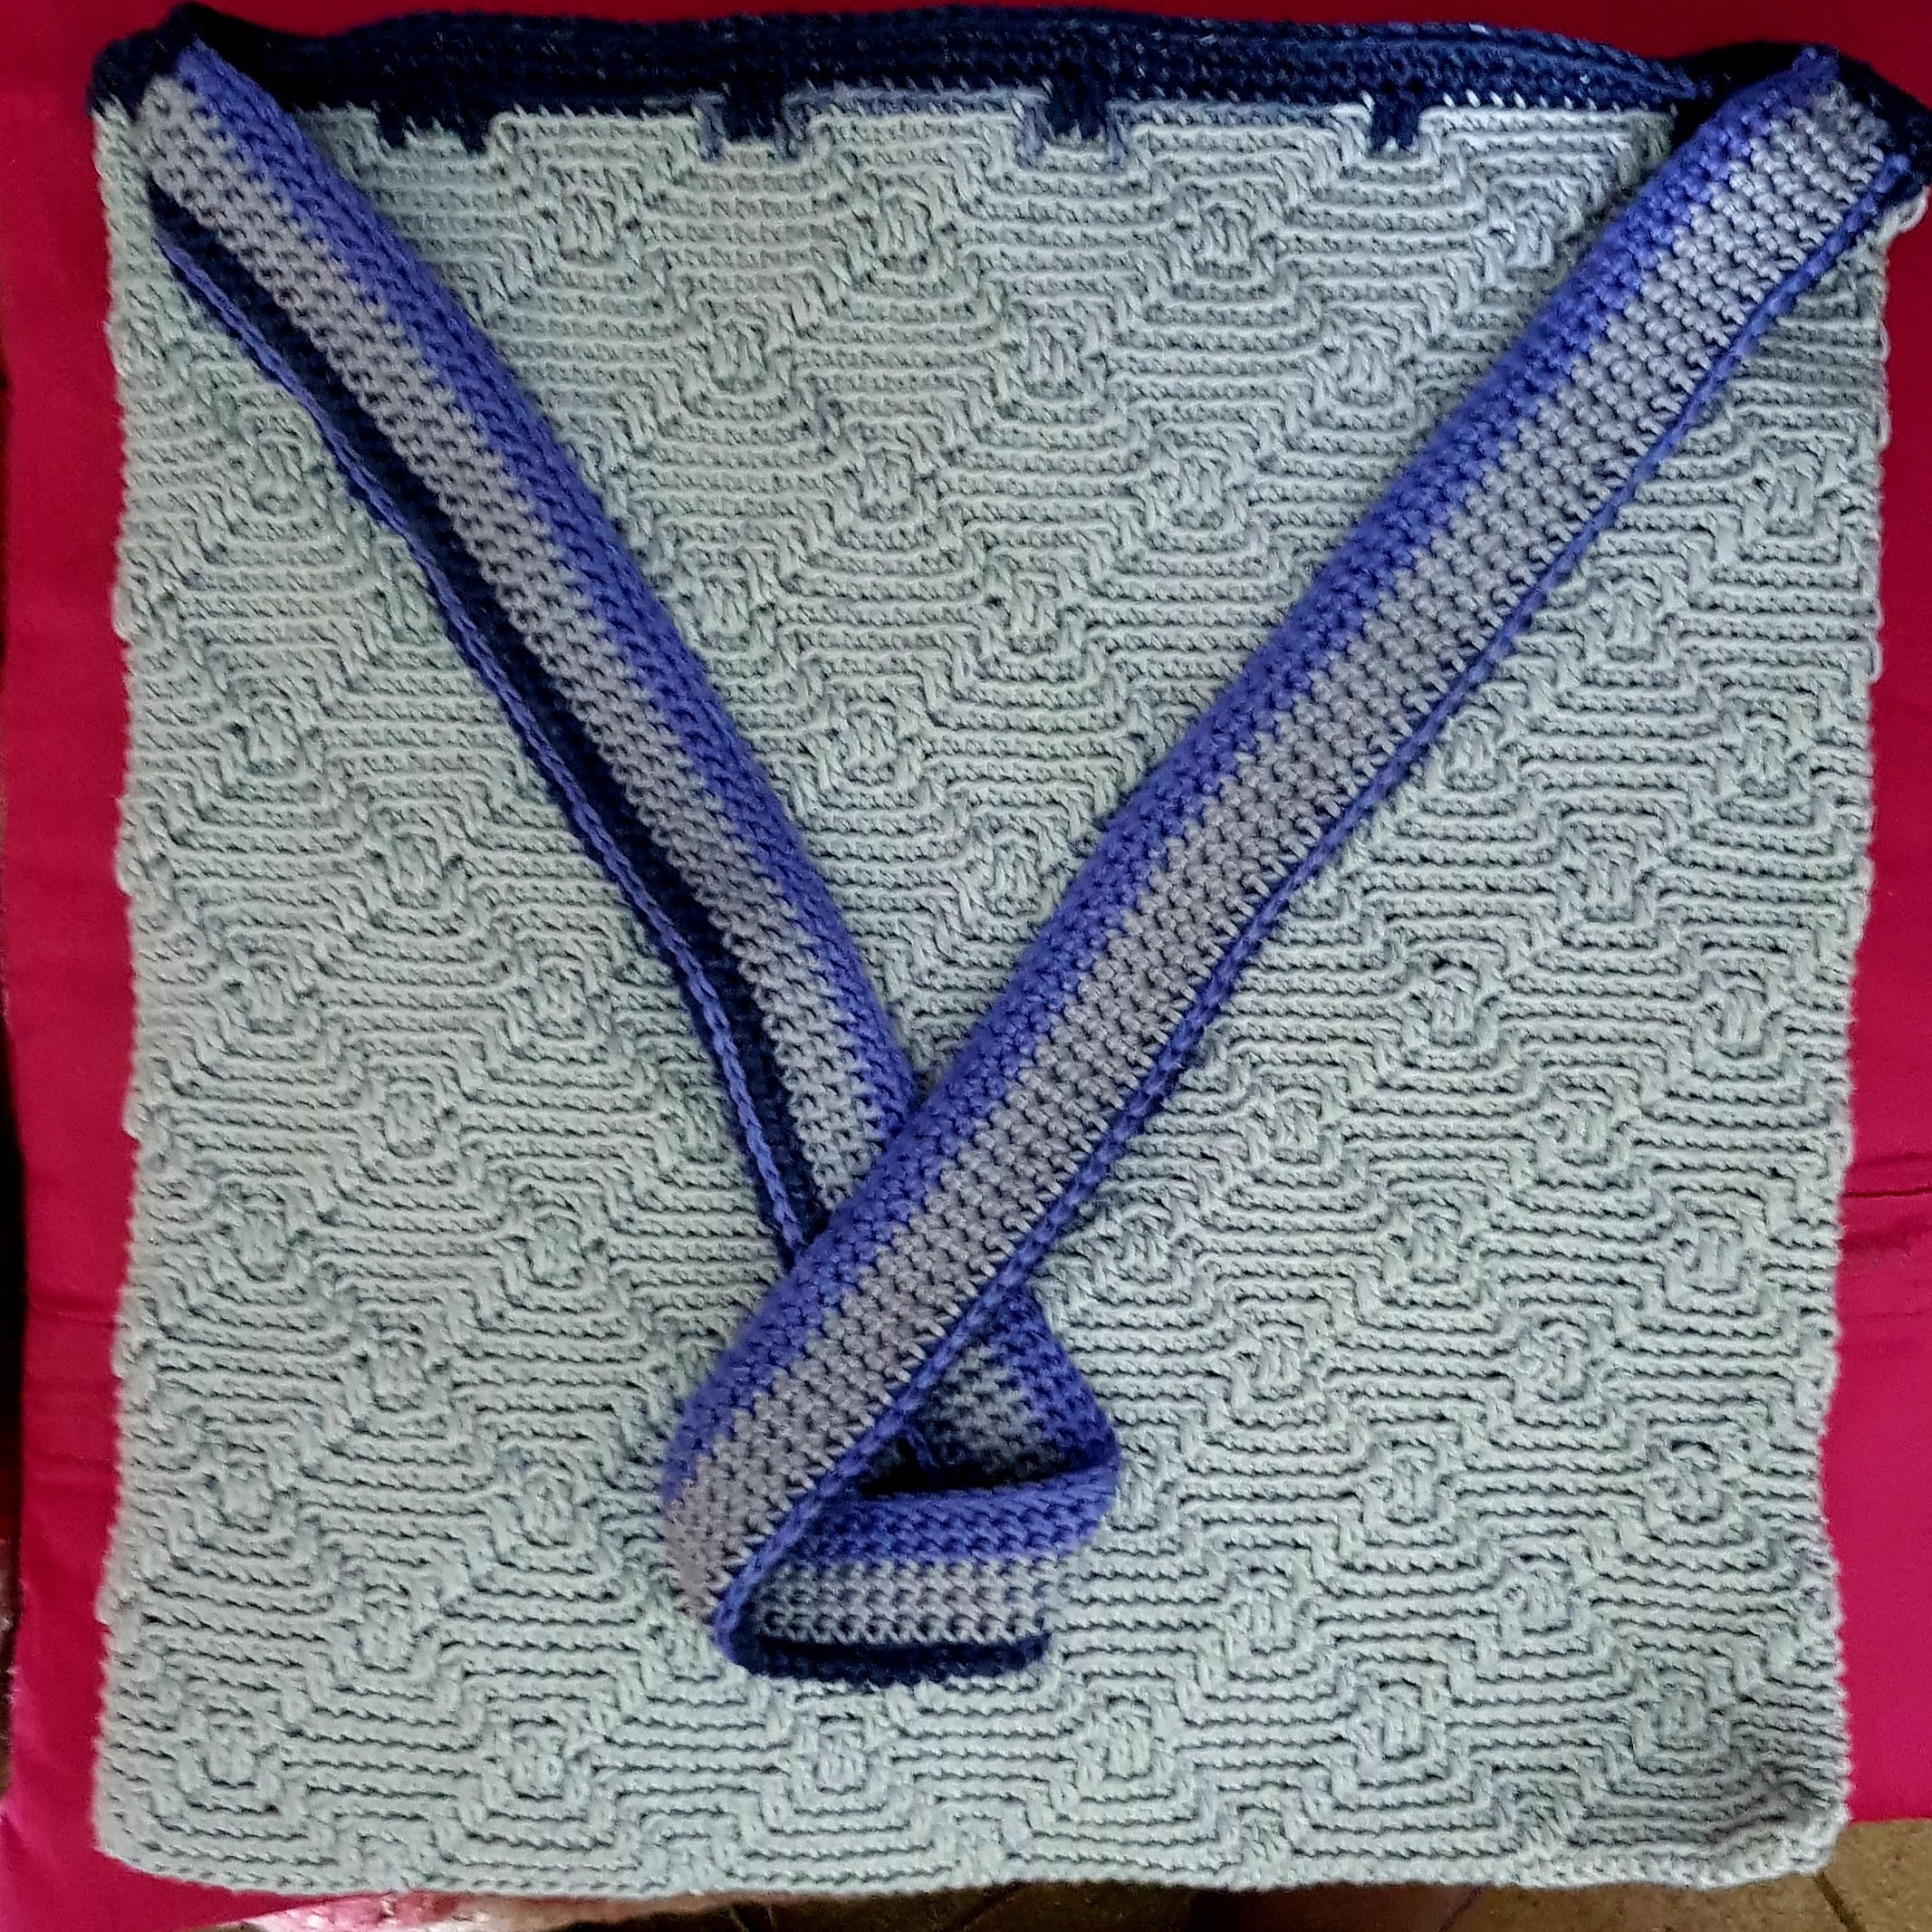
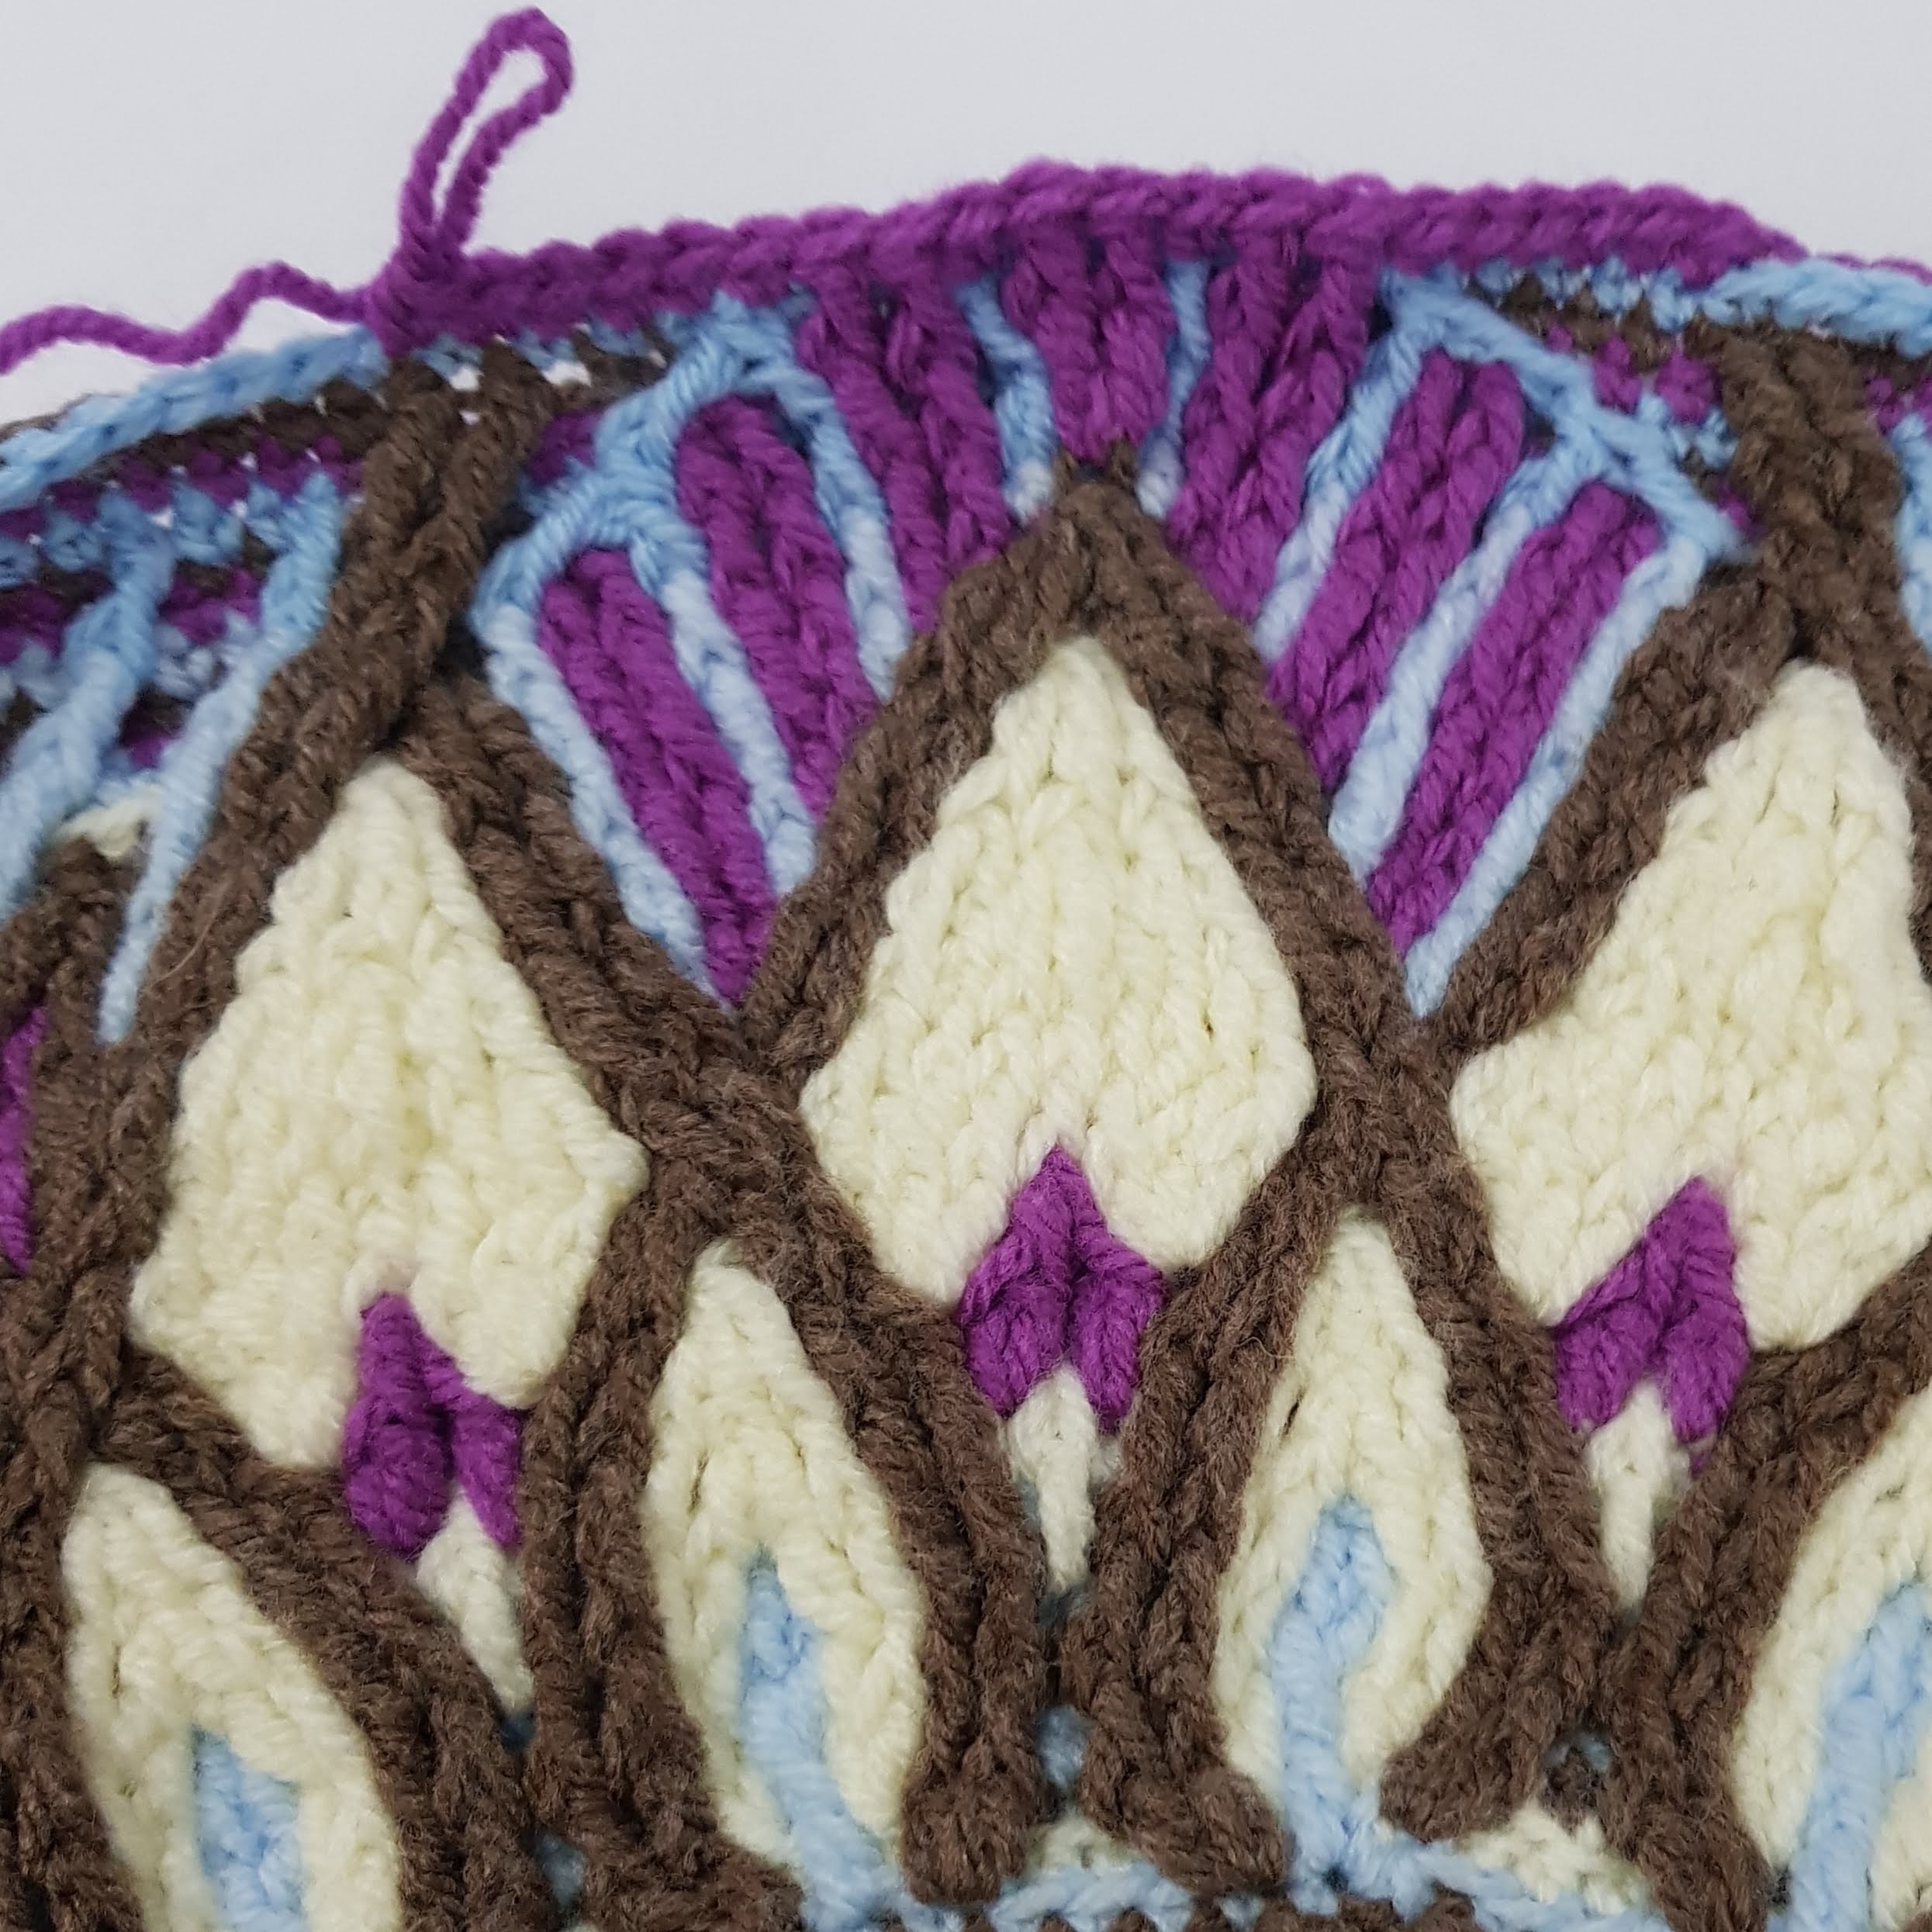
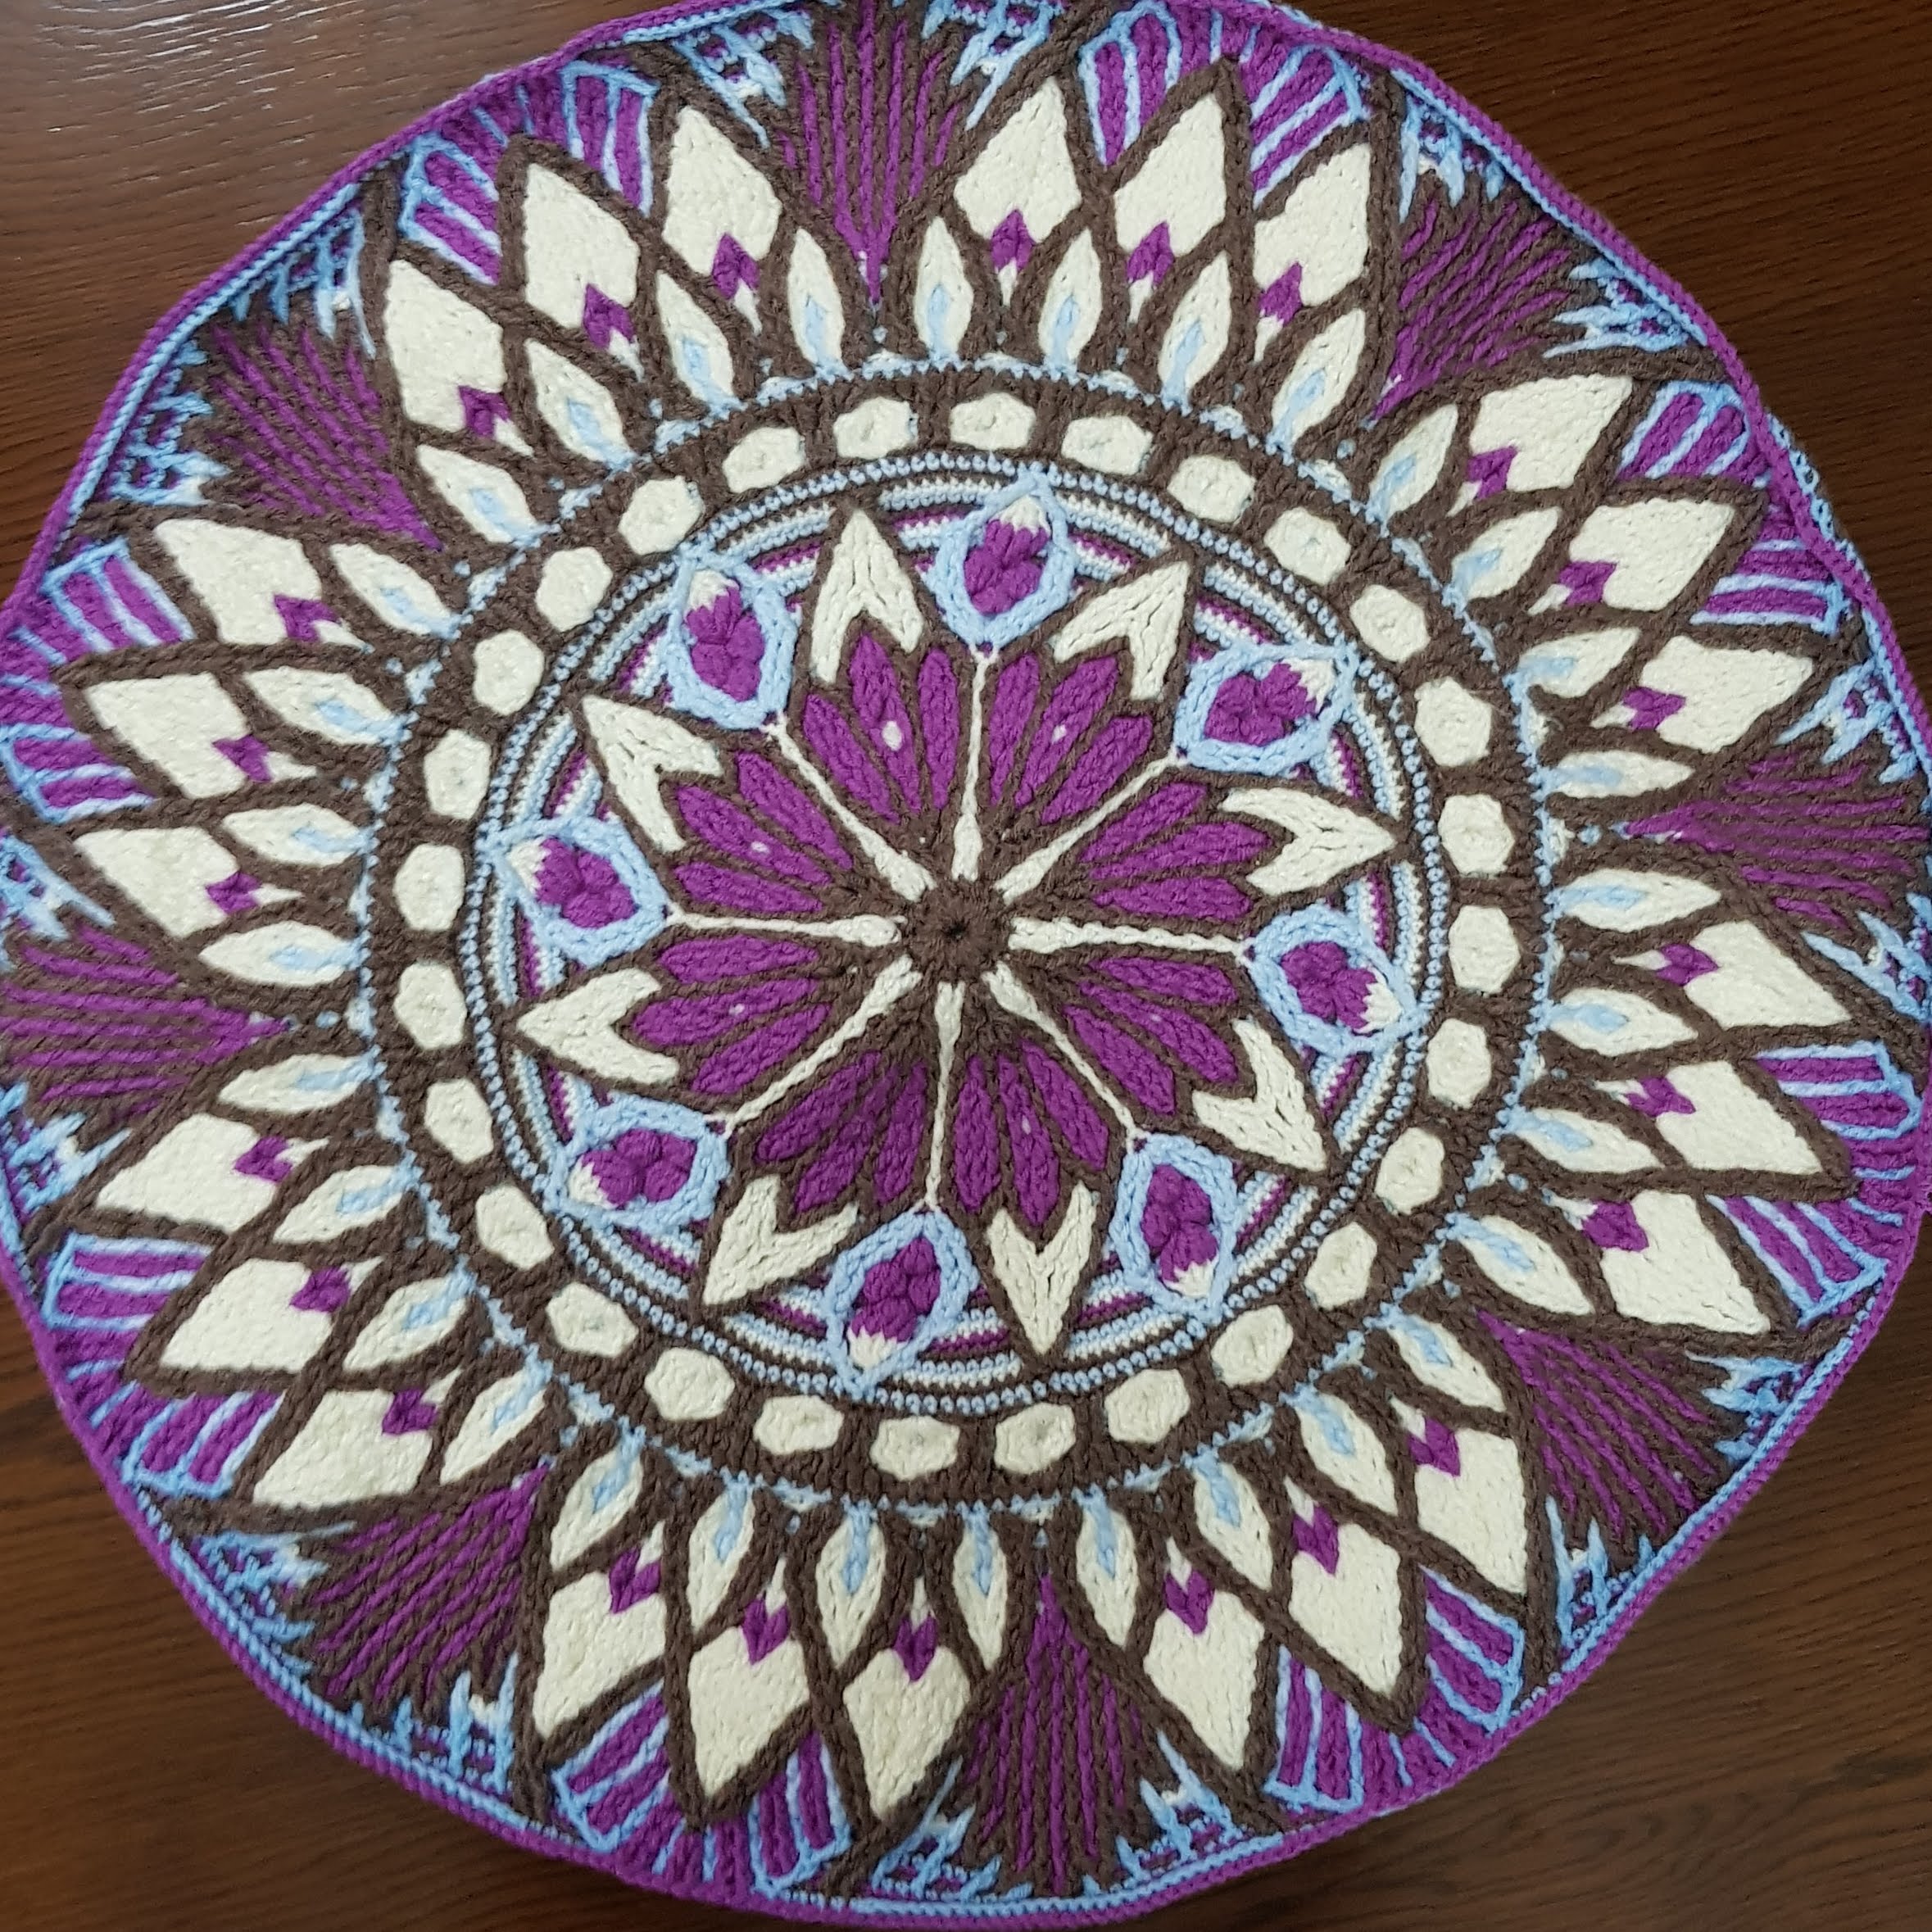
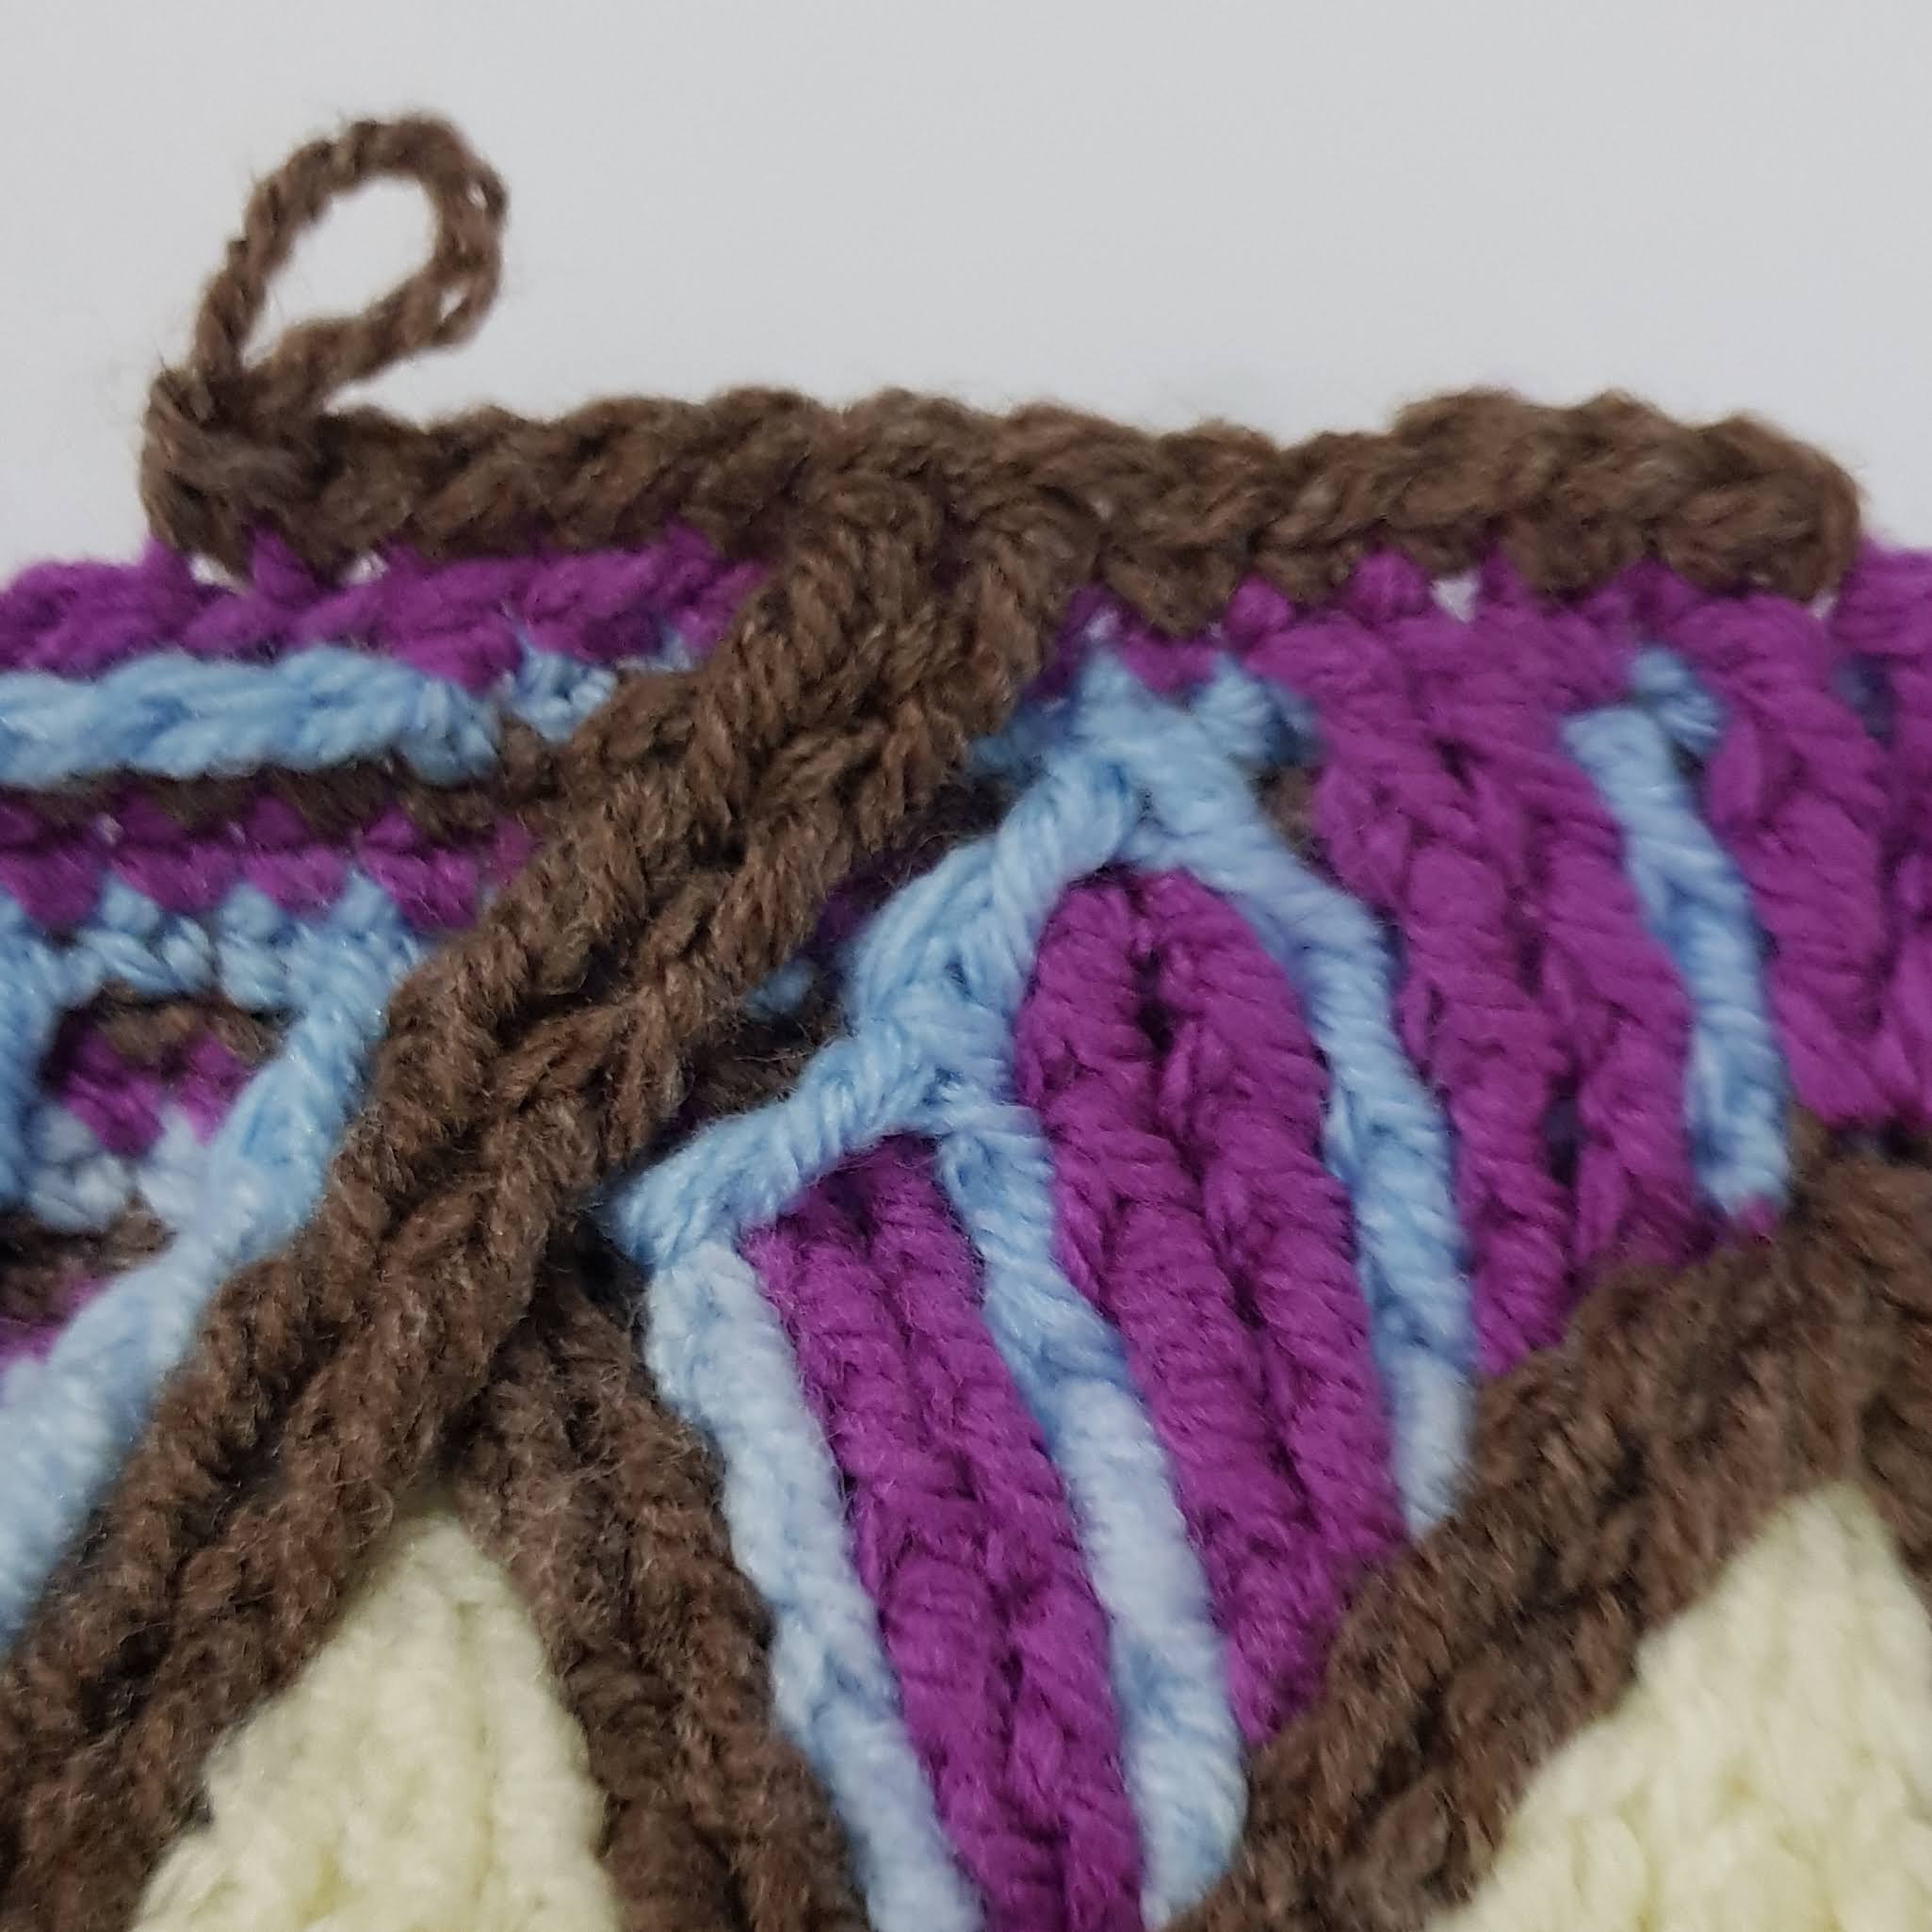
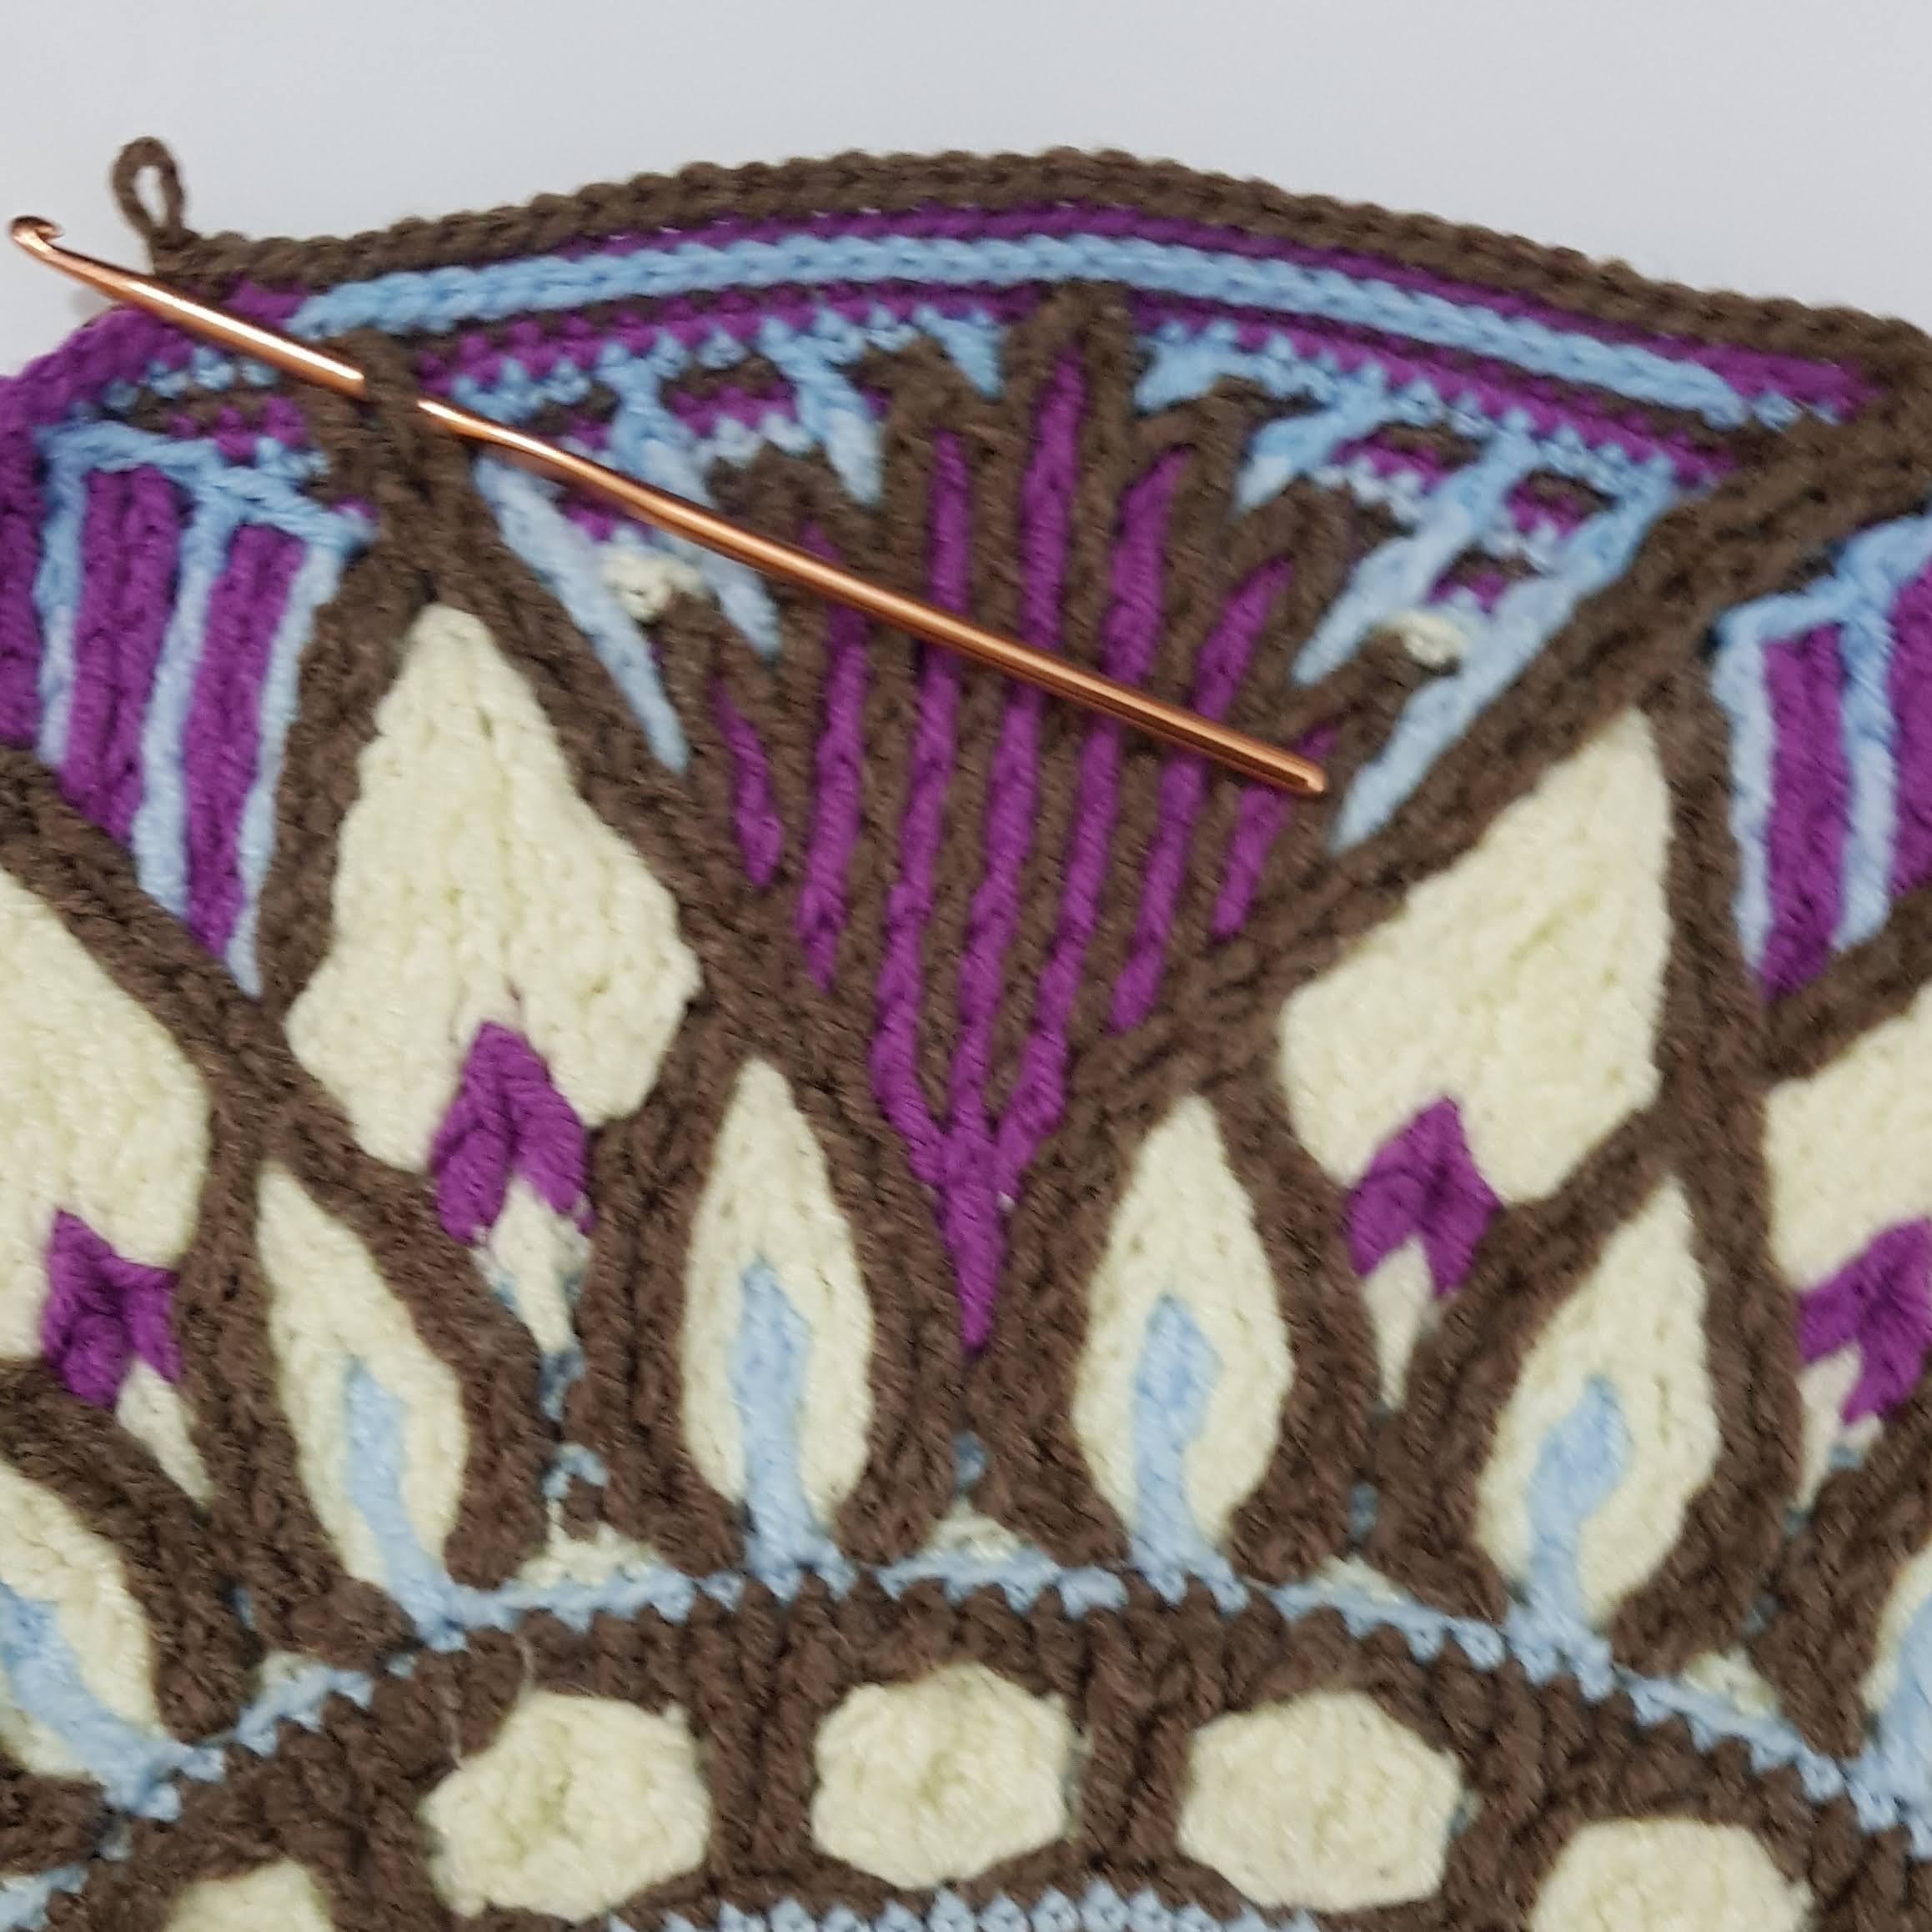
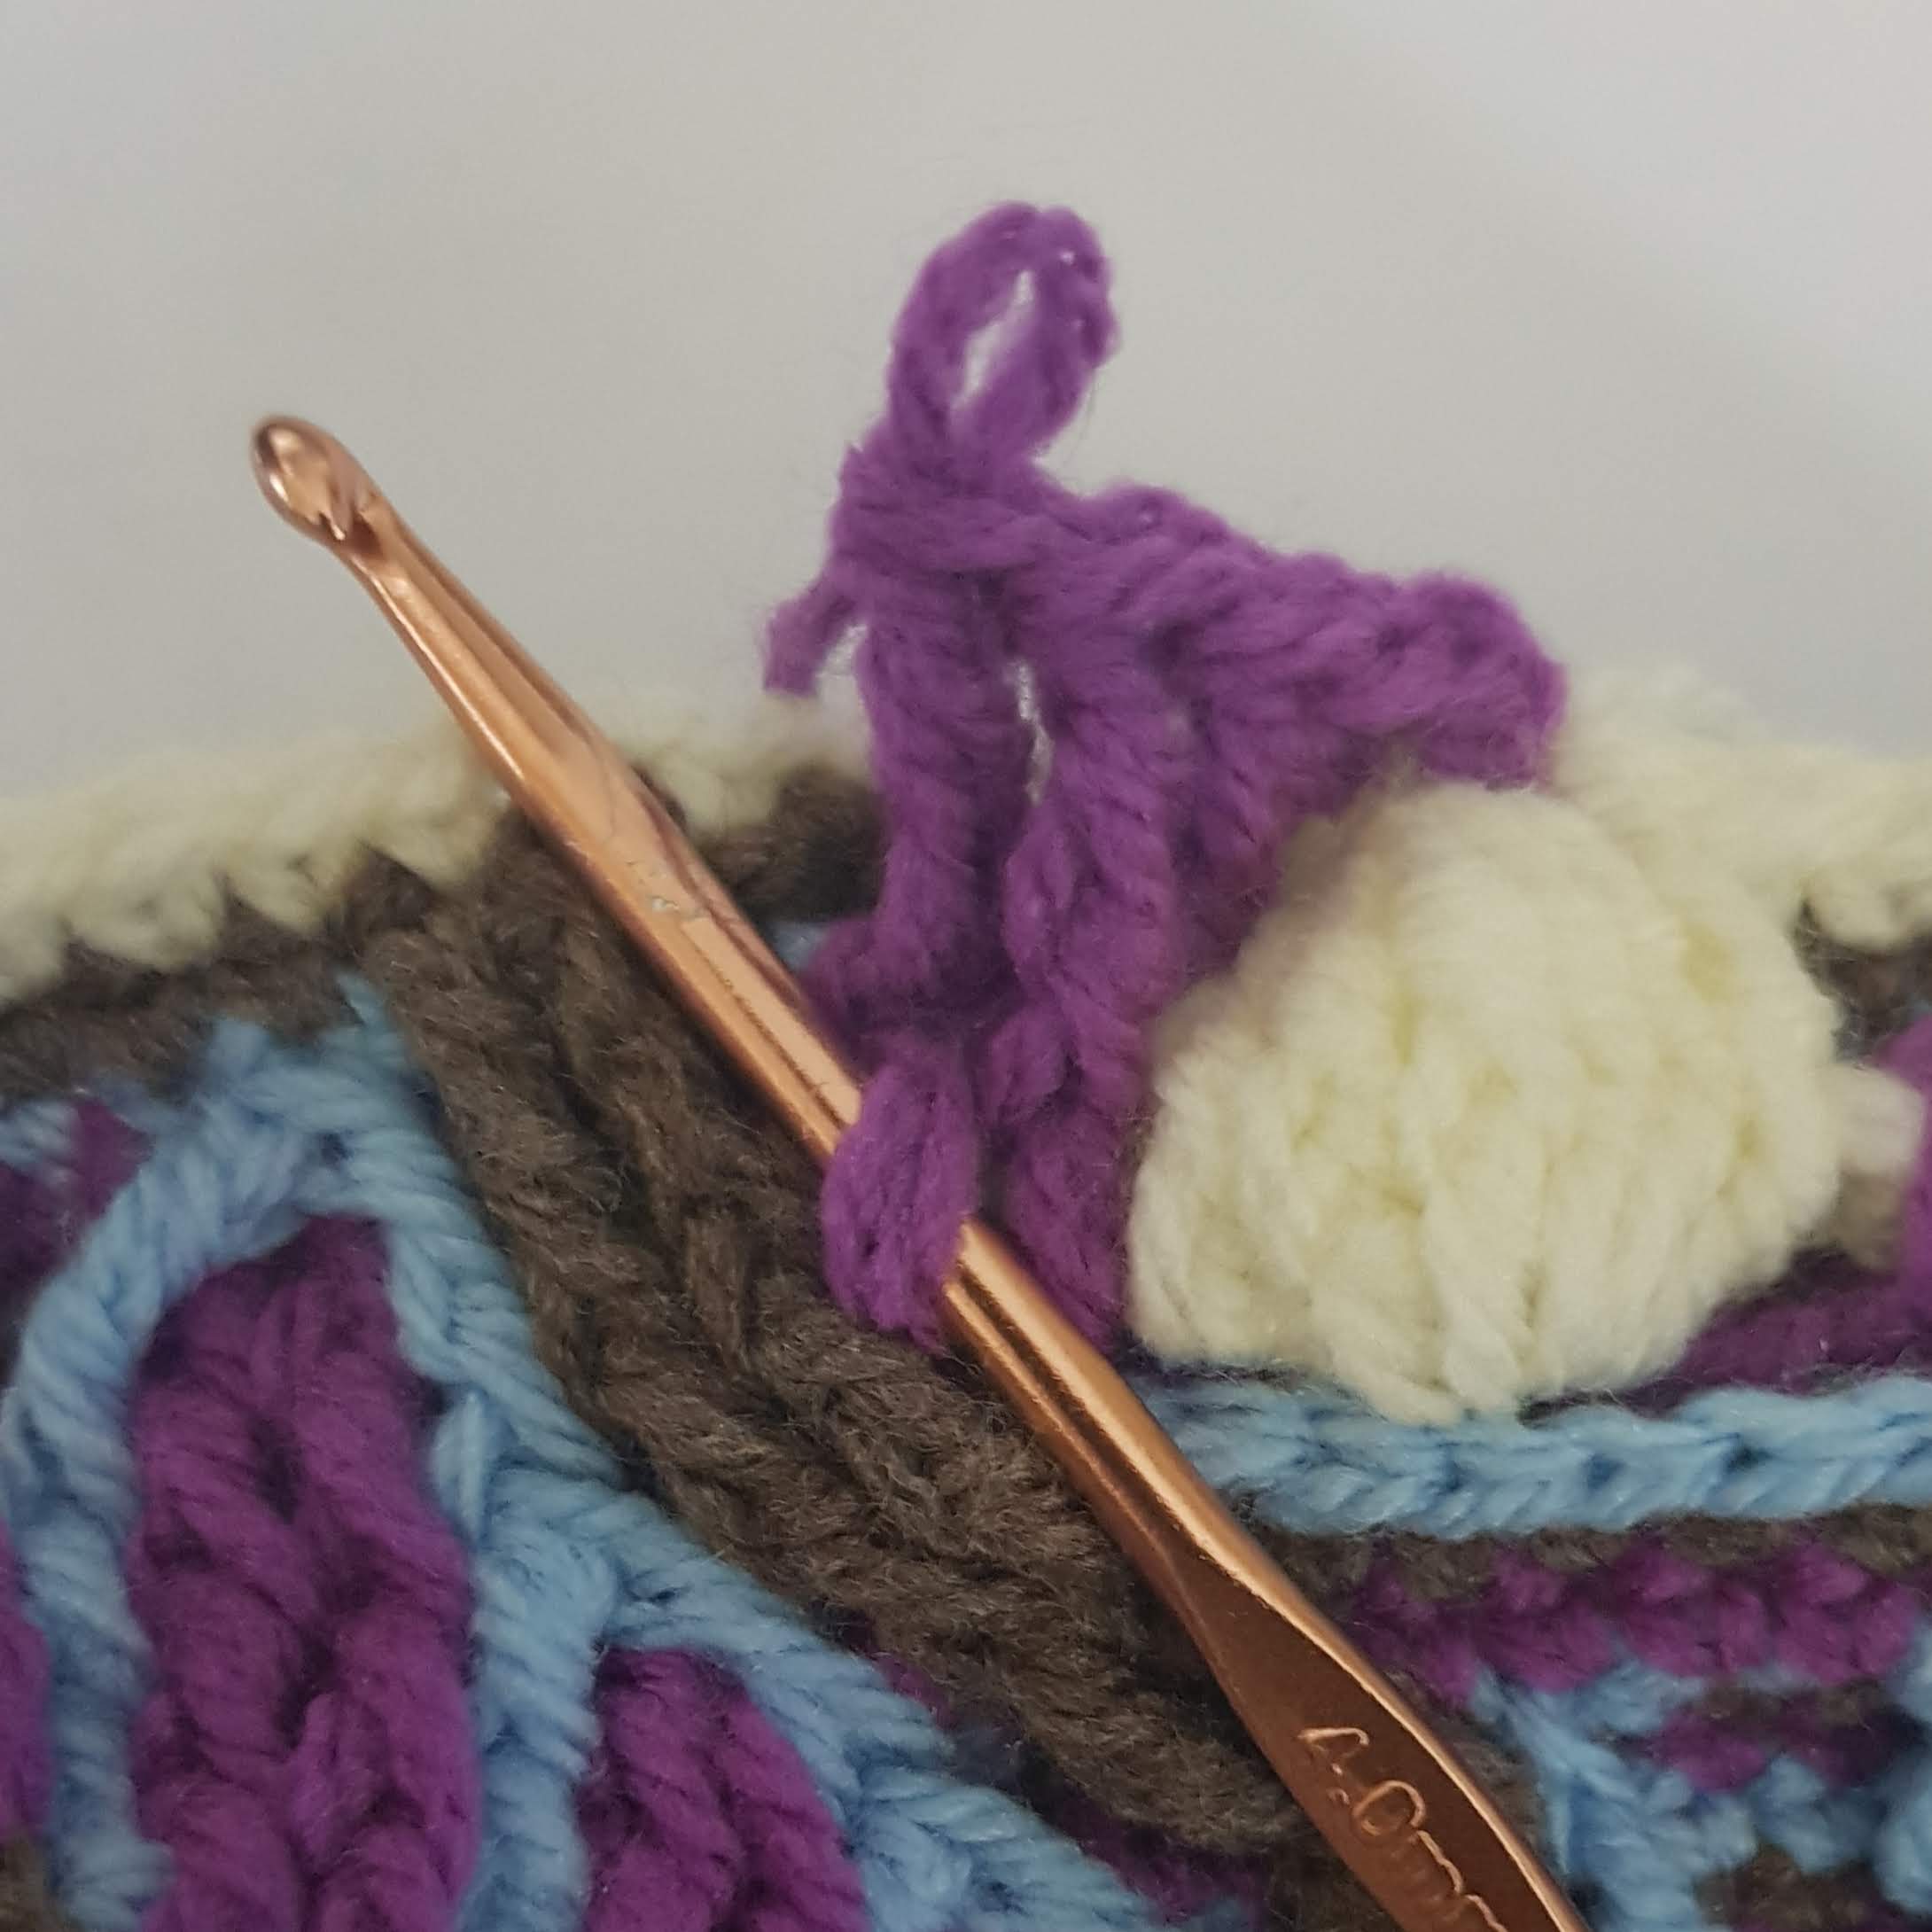
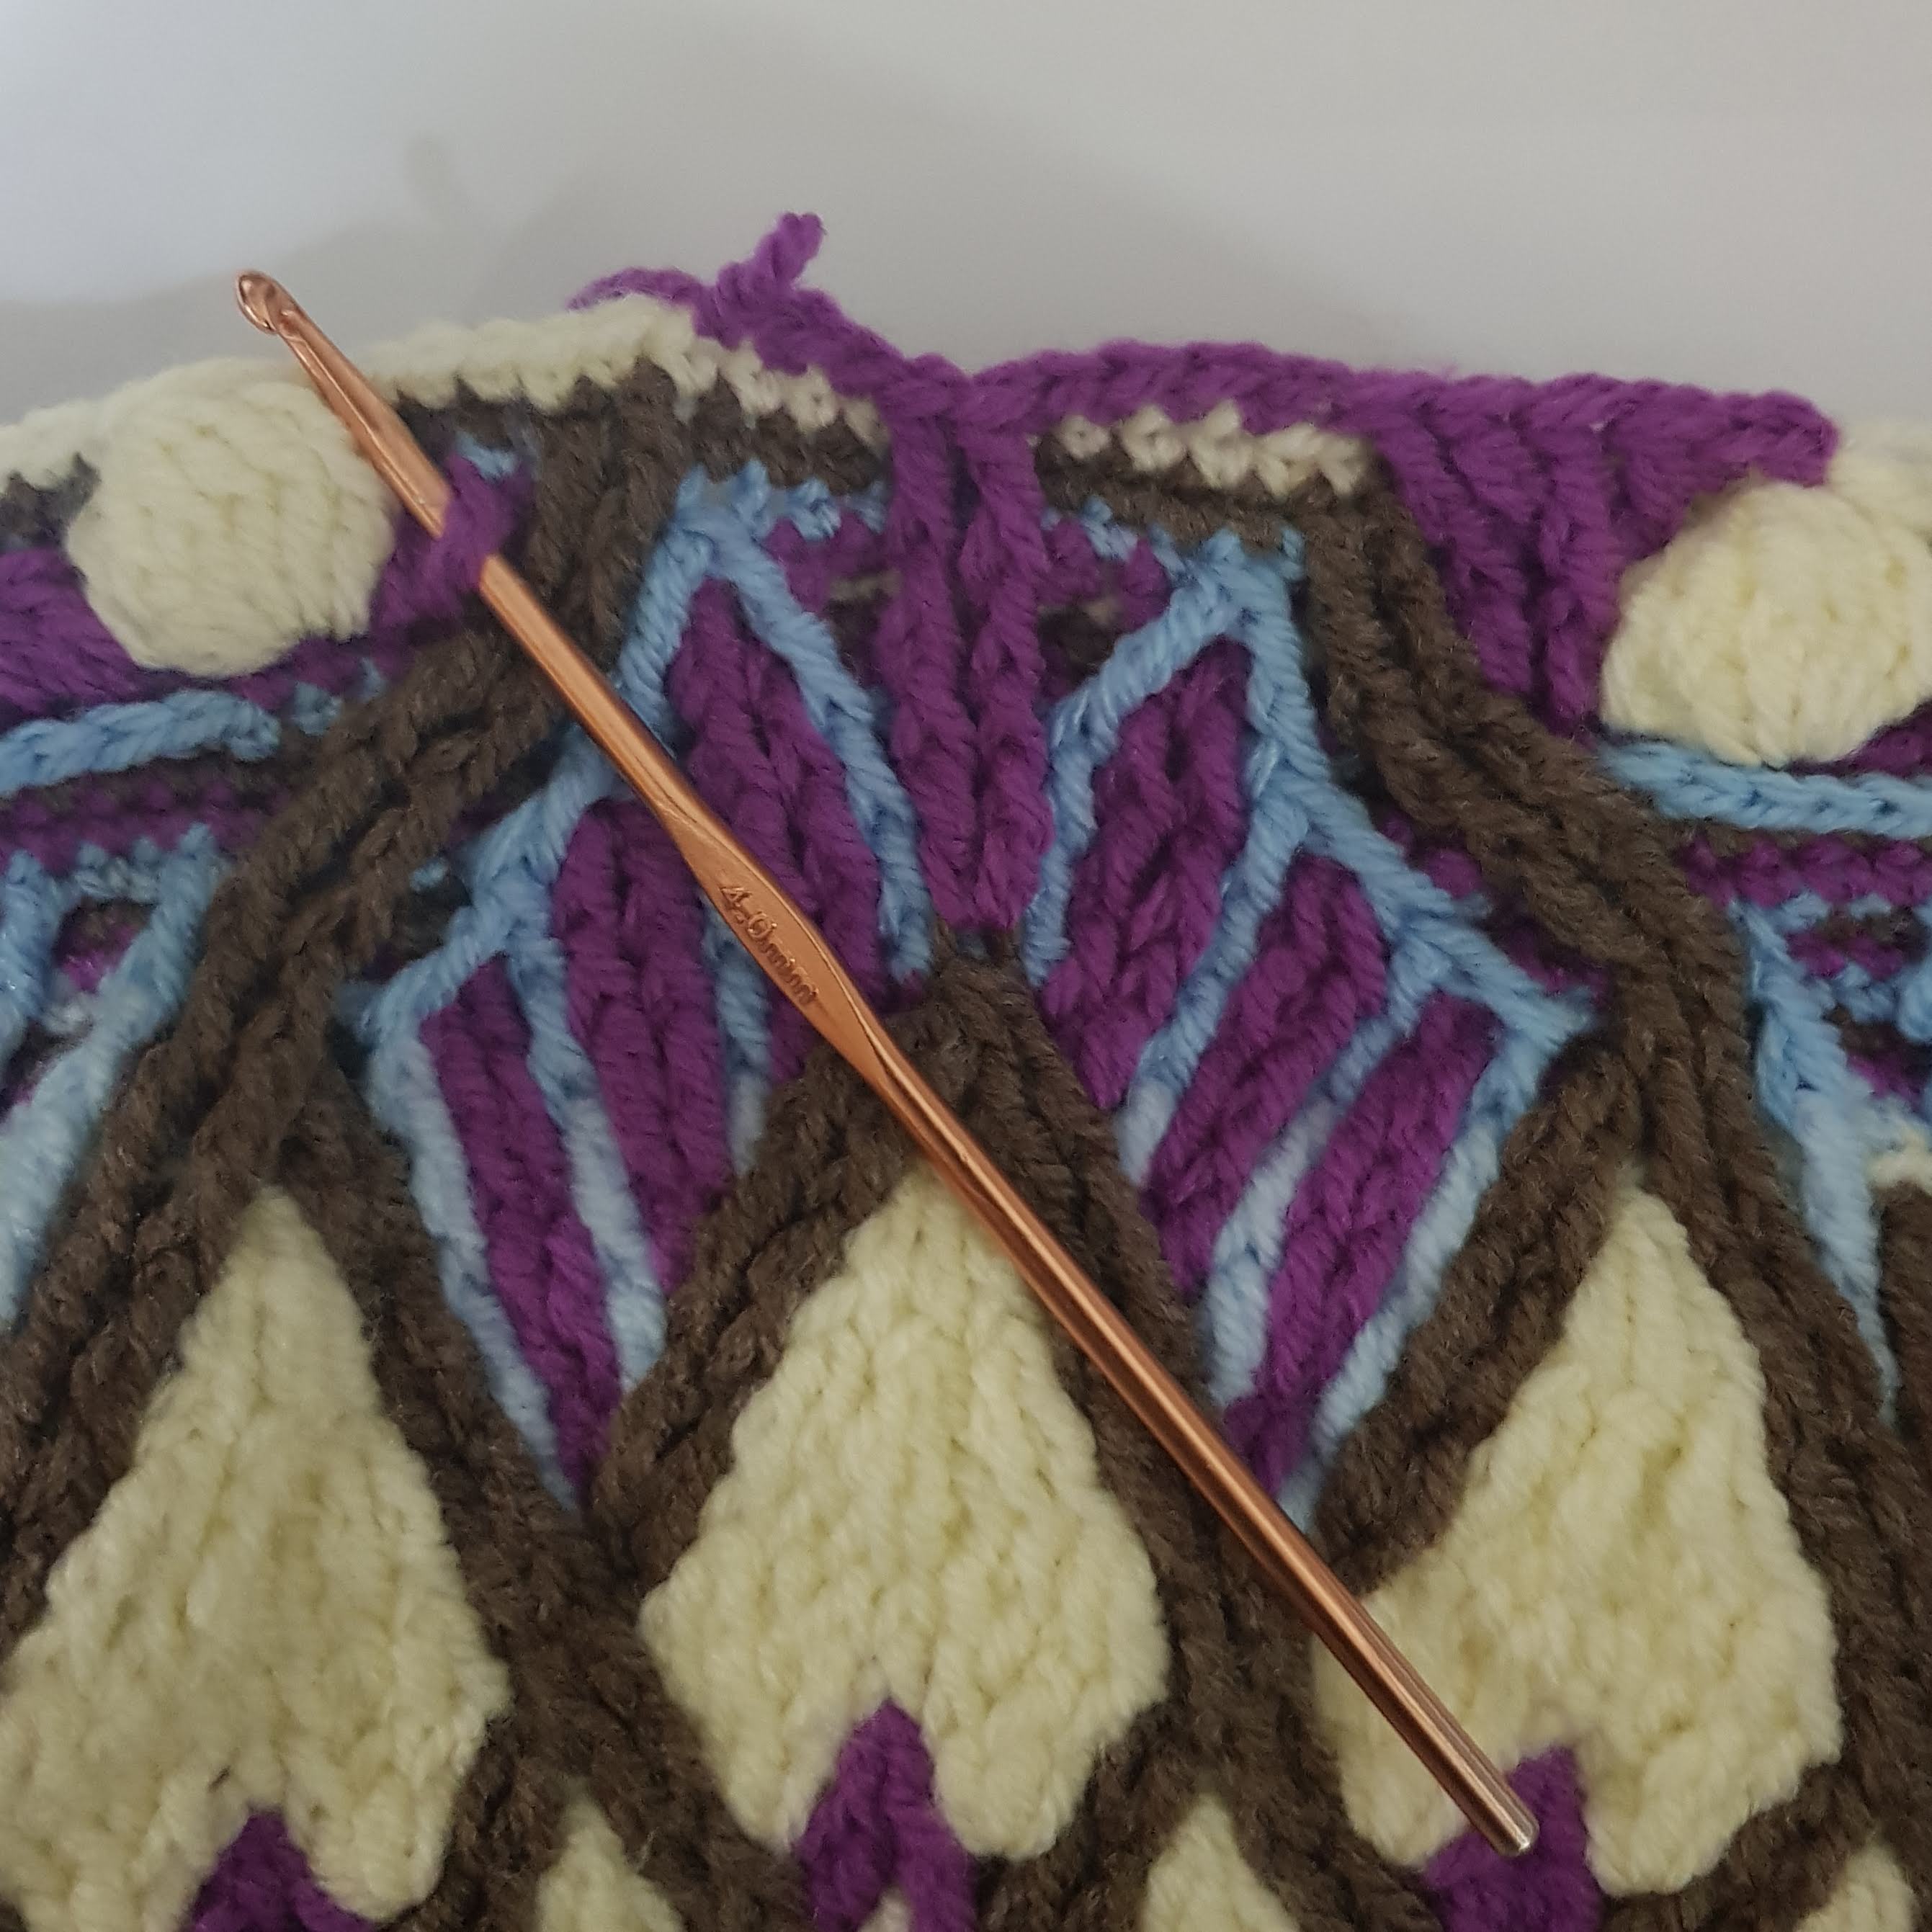
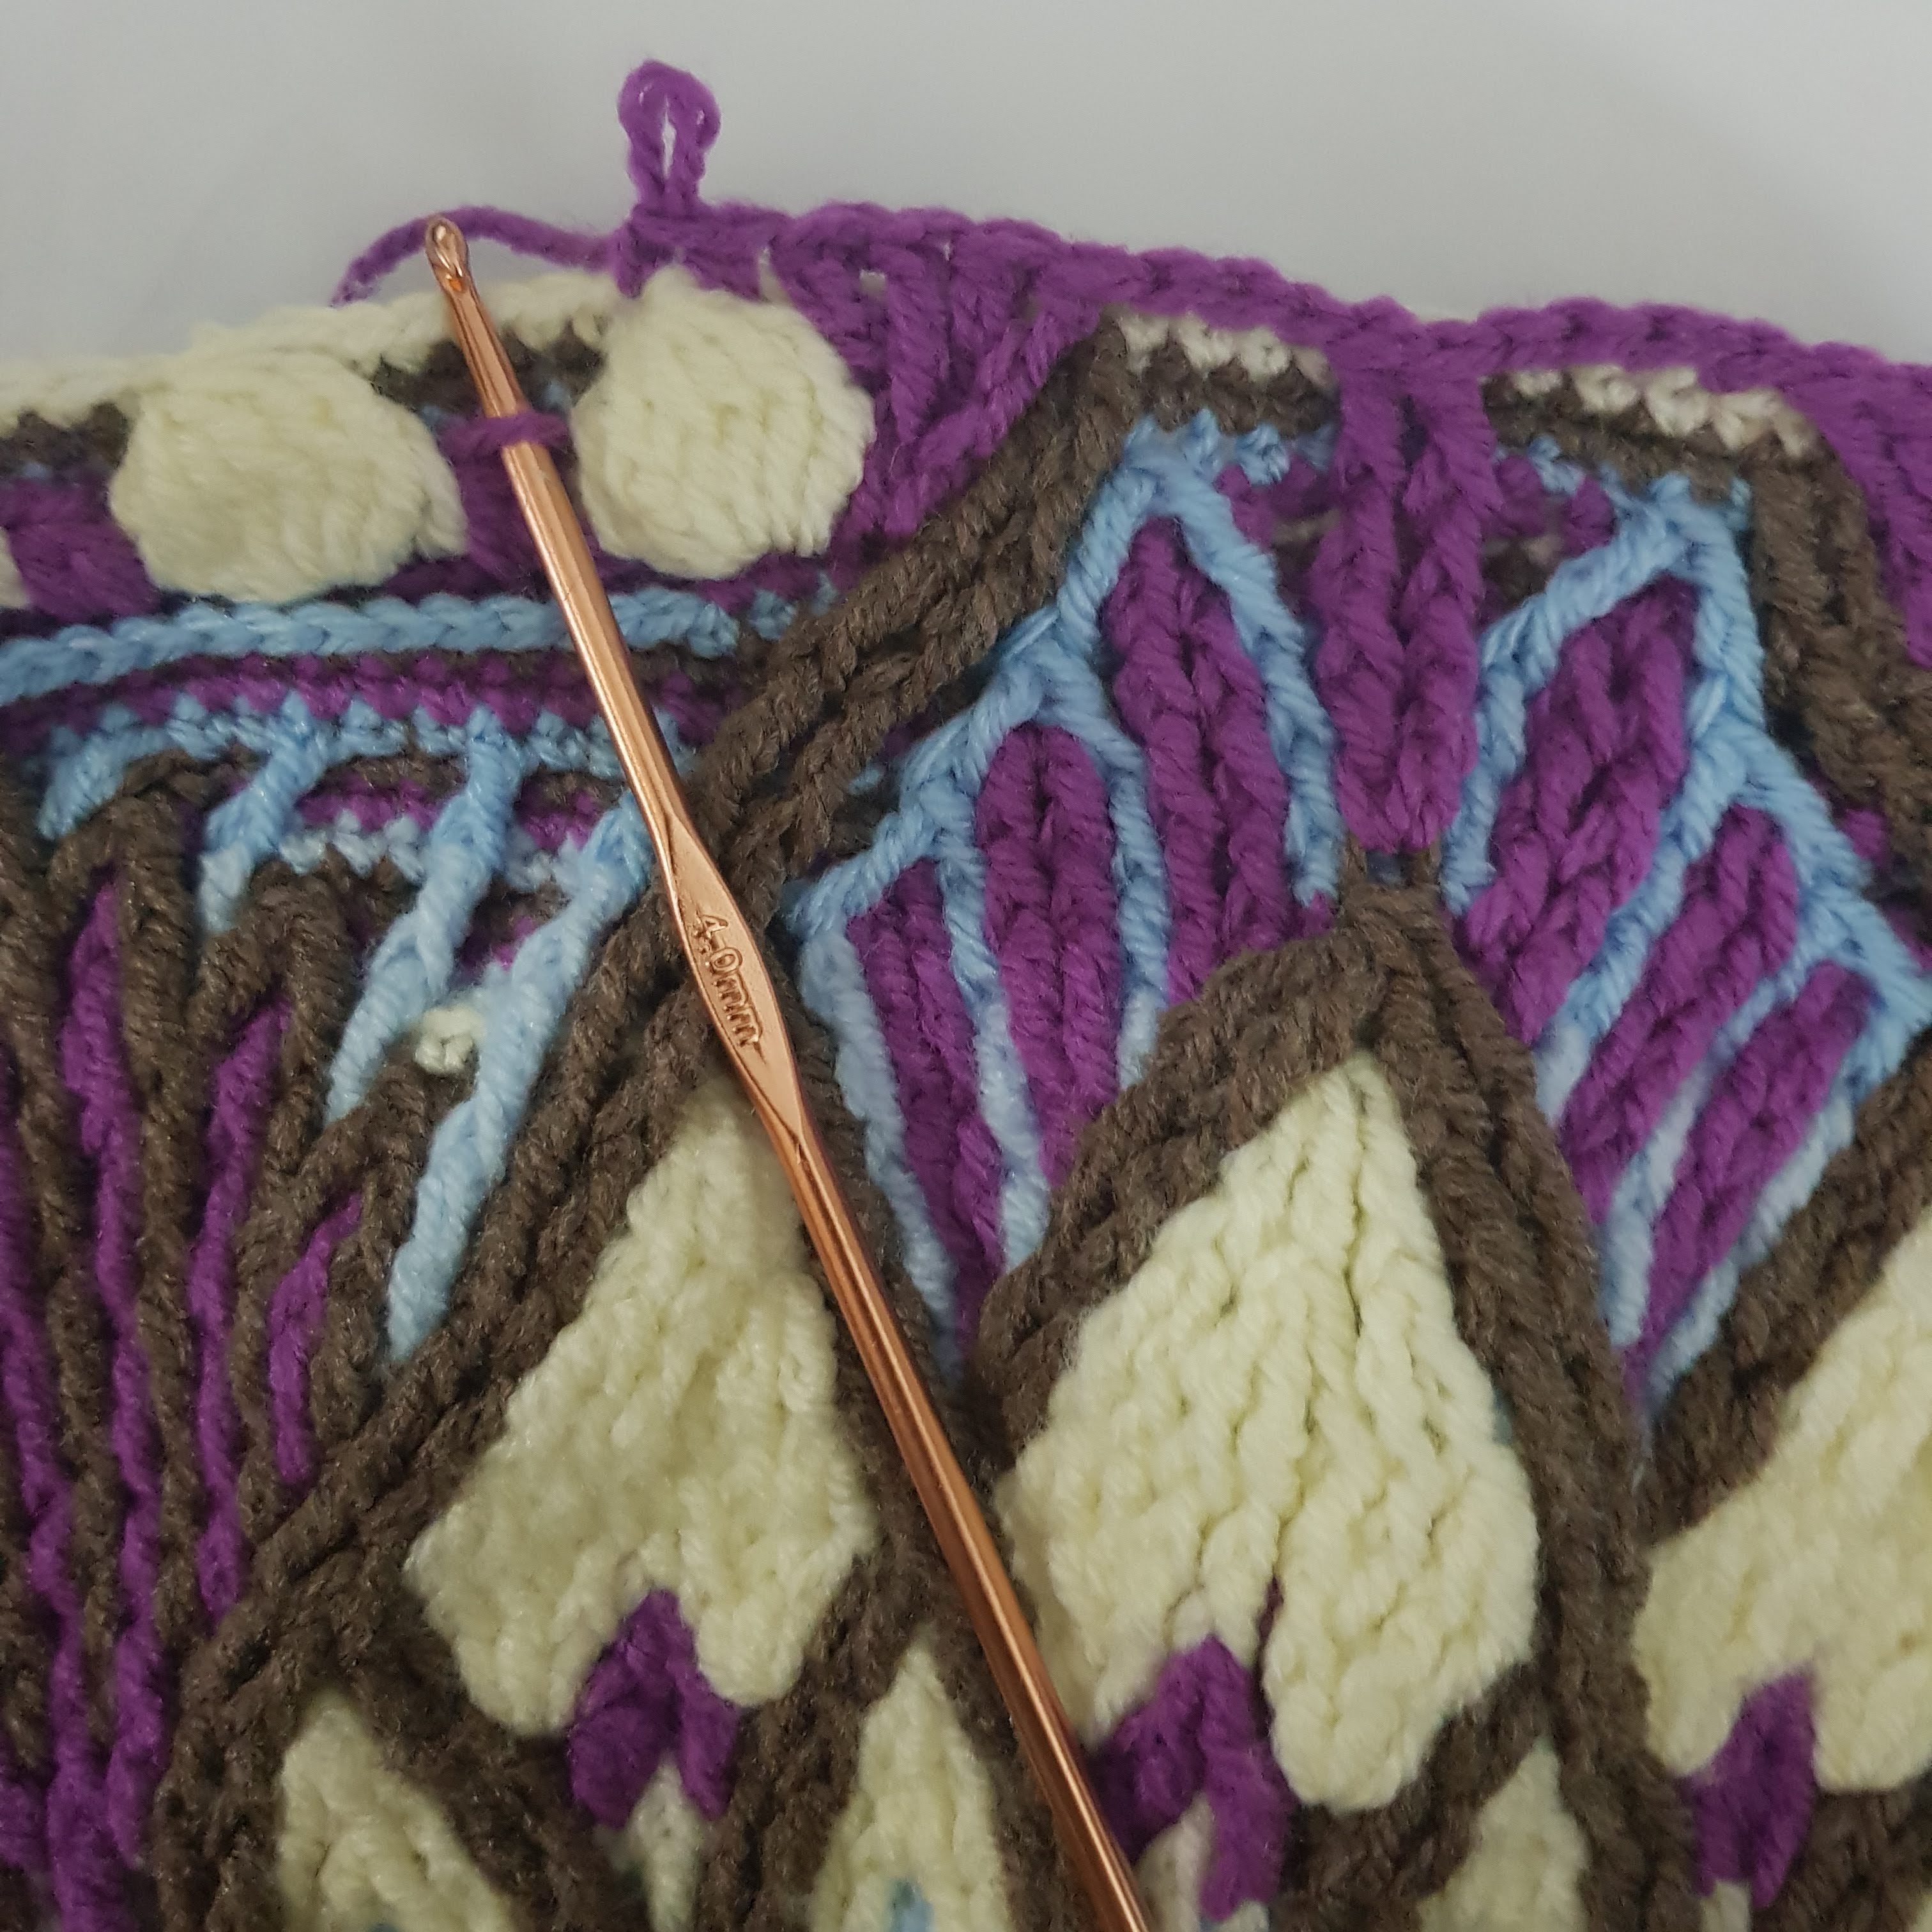
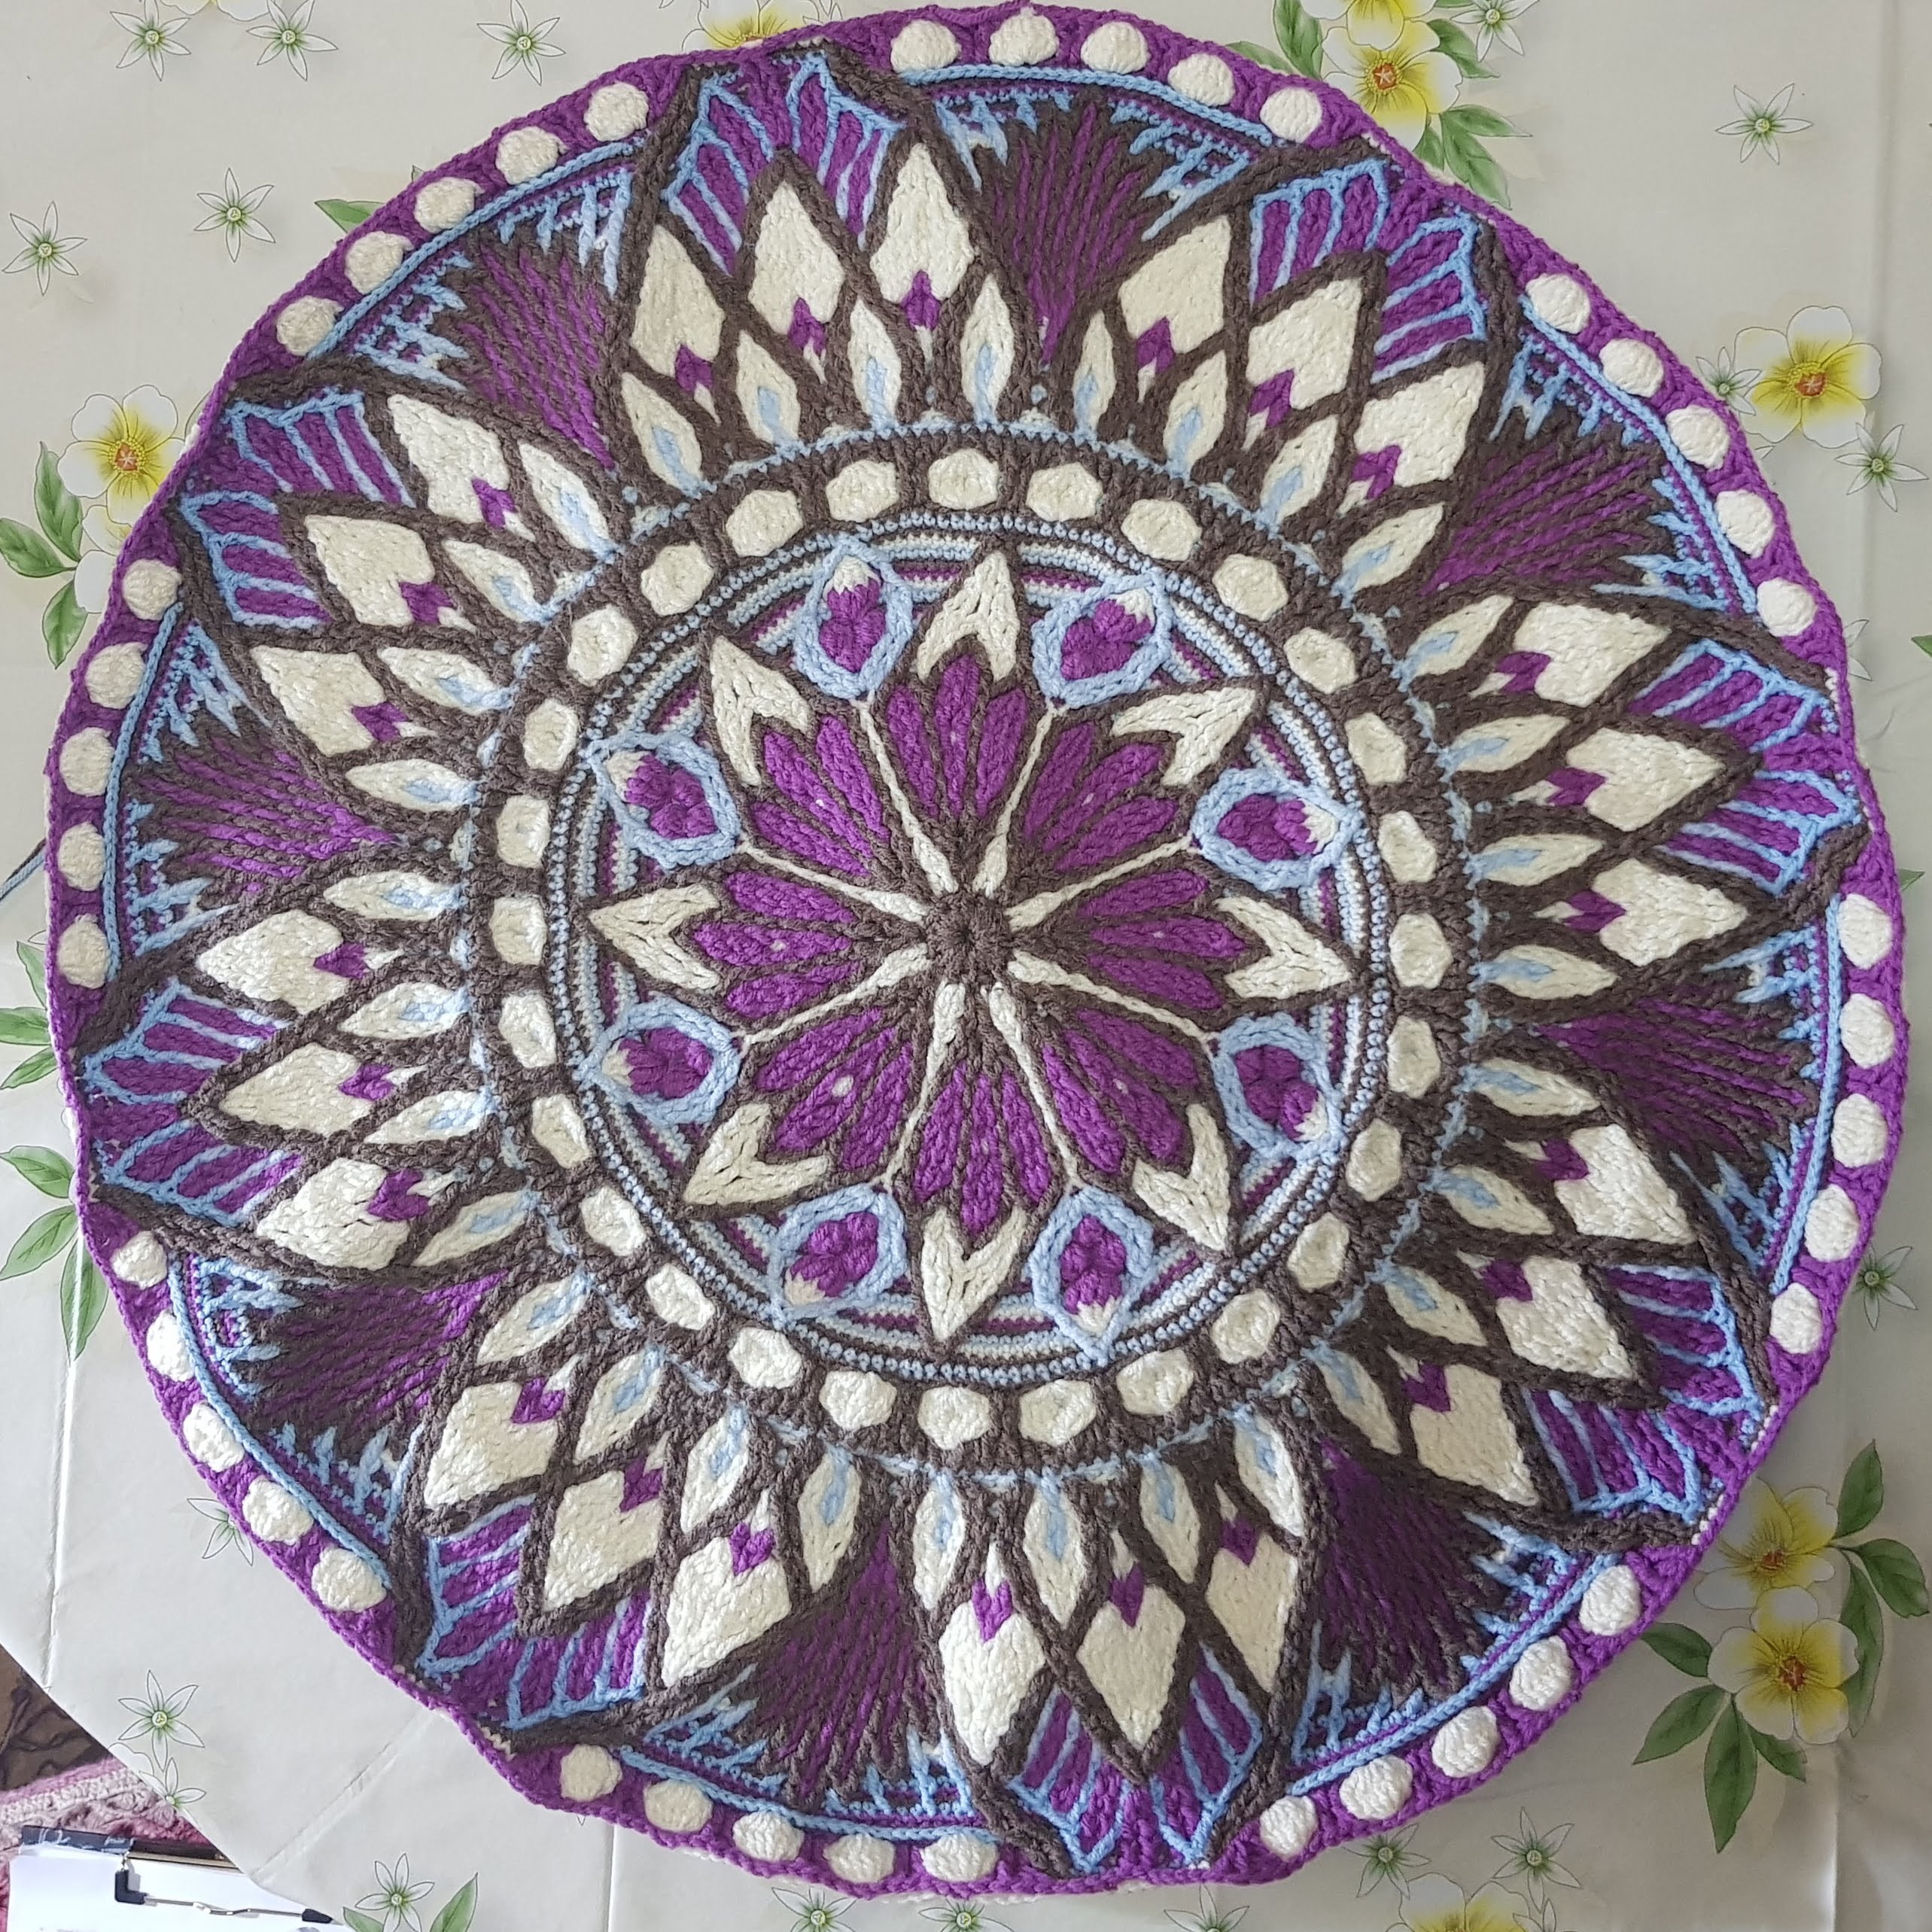
Here is my first attempt where I wanted to get a feel of the technique – the pattern I made up as I went long. It’s a little bowl 🙂
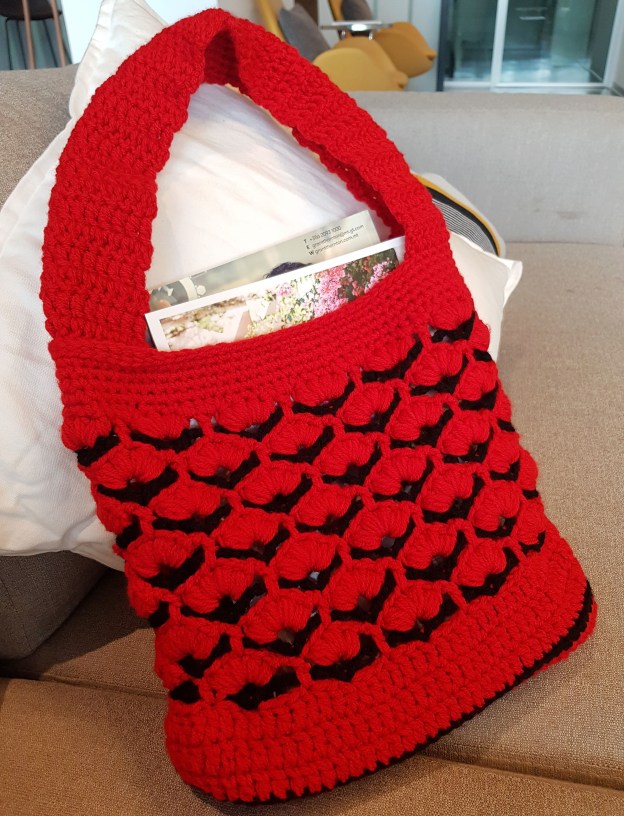
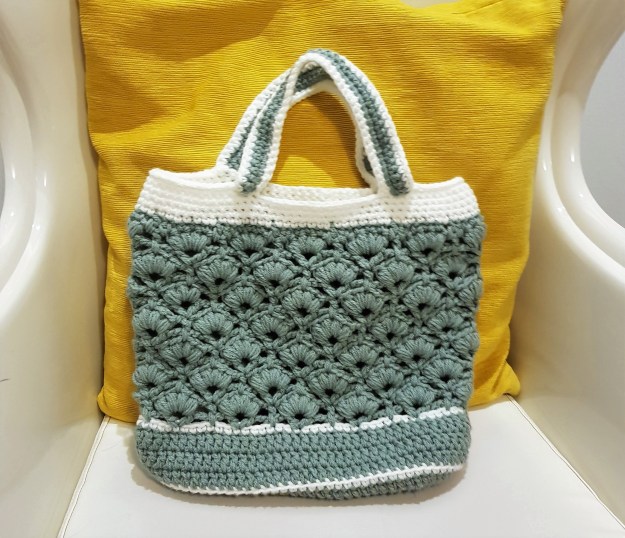
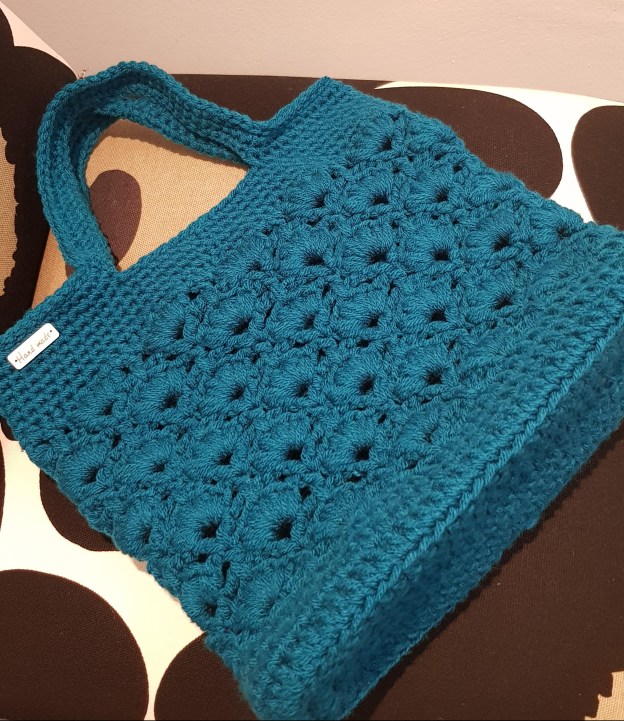
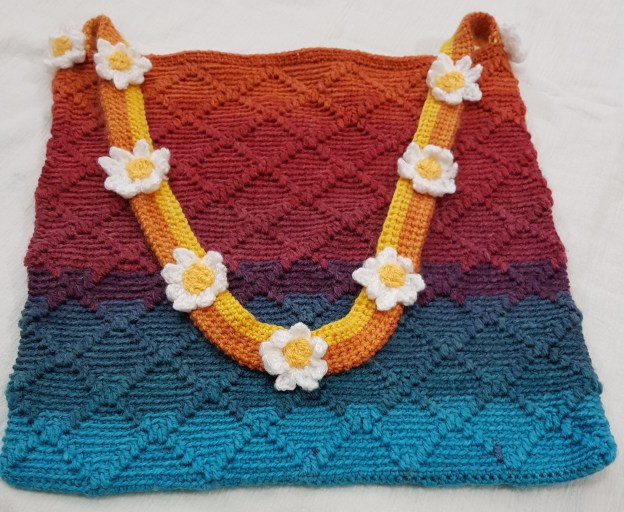
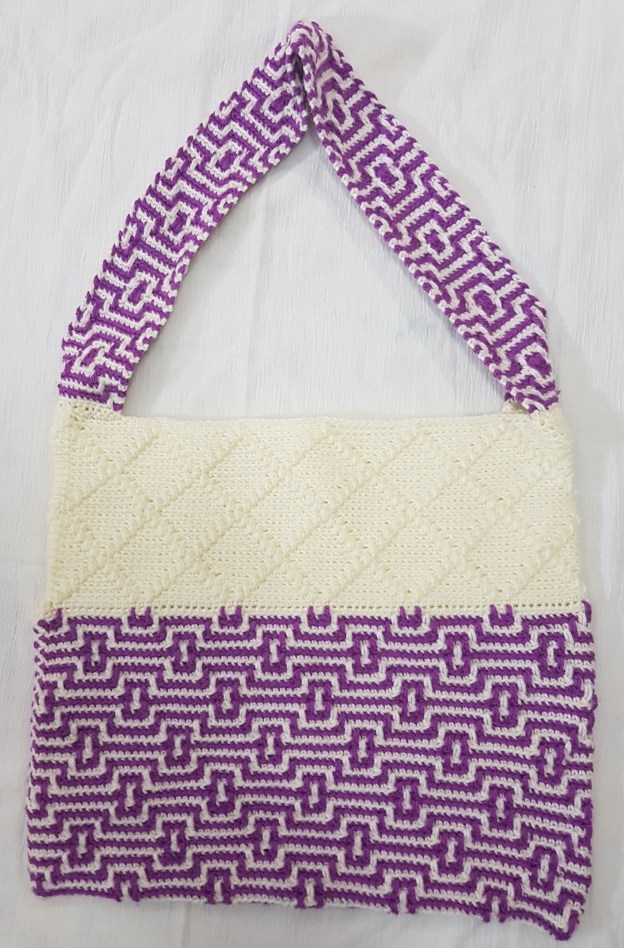
Did I mention I love bags? Well, I couldn’t help making this one and I am very pleased with how it turned out. I will be making more in different colours…..and maybe even mixing colours up a bit 🙂
TIP: While the pattern calles for a chunky cotton yarn, if you like, you can also crochet this using two strands of DK acrylic – and a 6.5mm hook. It will take amost 4 x 50g balls.
TIP 2: I cut out a piece of cardboard in the shape of the base of the bag (from a shoe box , which I was going to throw away), covered it nice fabric, and put it in the bag. That way, the base stays flat. It is not sewn in so you can easily remove it before washing the bag.
I love bags ! And when I came across this gorgeous bag by Christine Bateman – I could not resist! It’s so very cute! And a fantastic use for left over yarn. For the lining, I used a ready made fabric tote bag – which I adjusted to the correct size, however, it is not as stiff as I would like – so next time, I will try a hessian type stiff bag as suggested in the design.
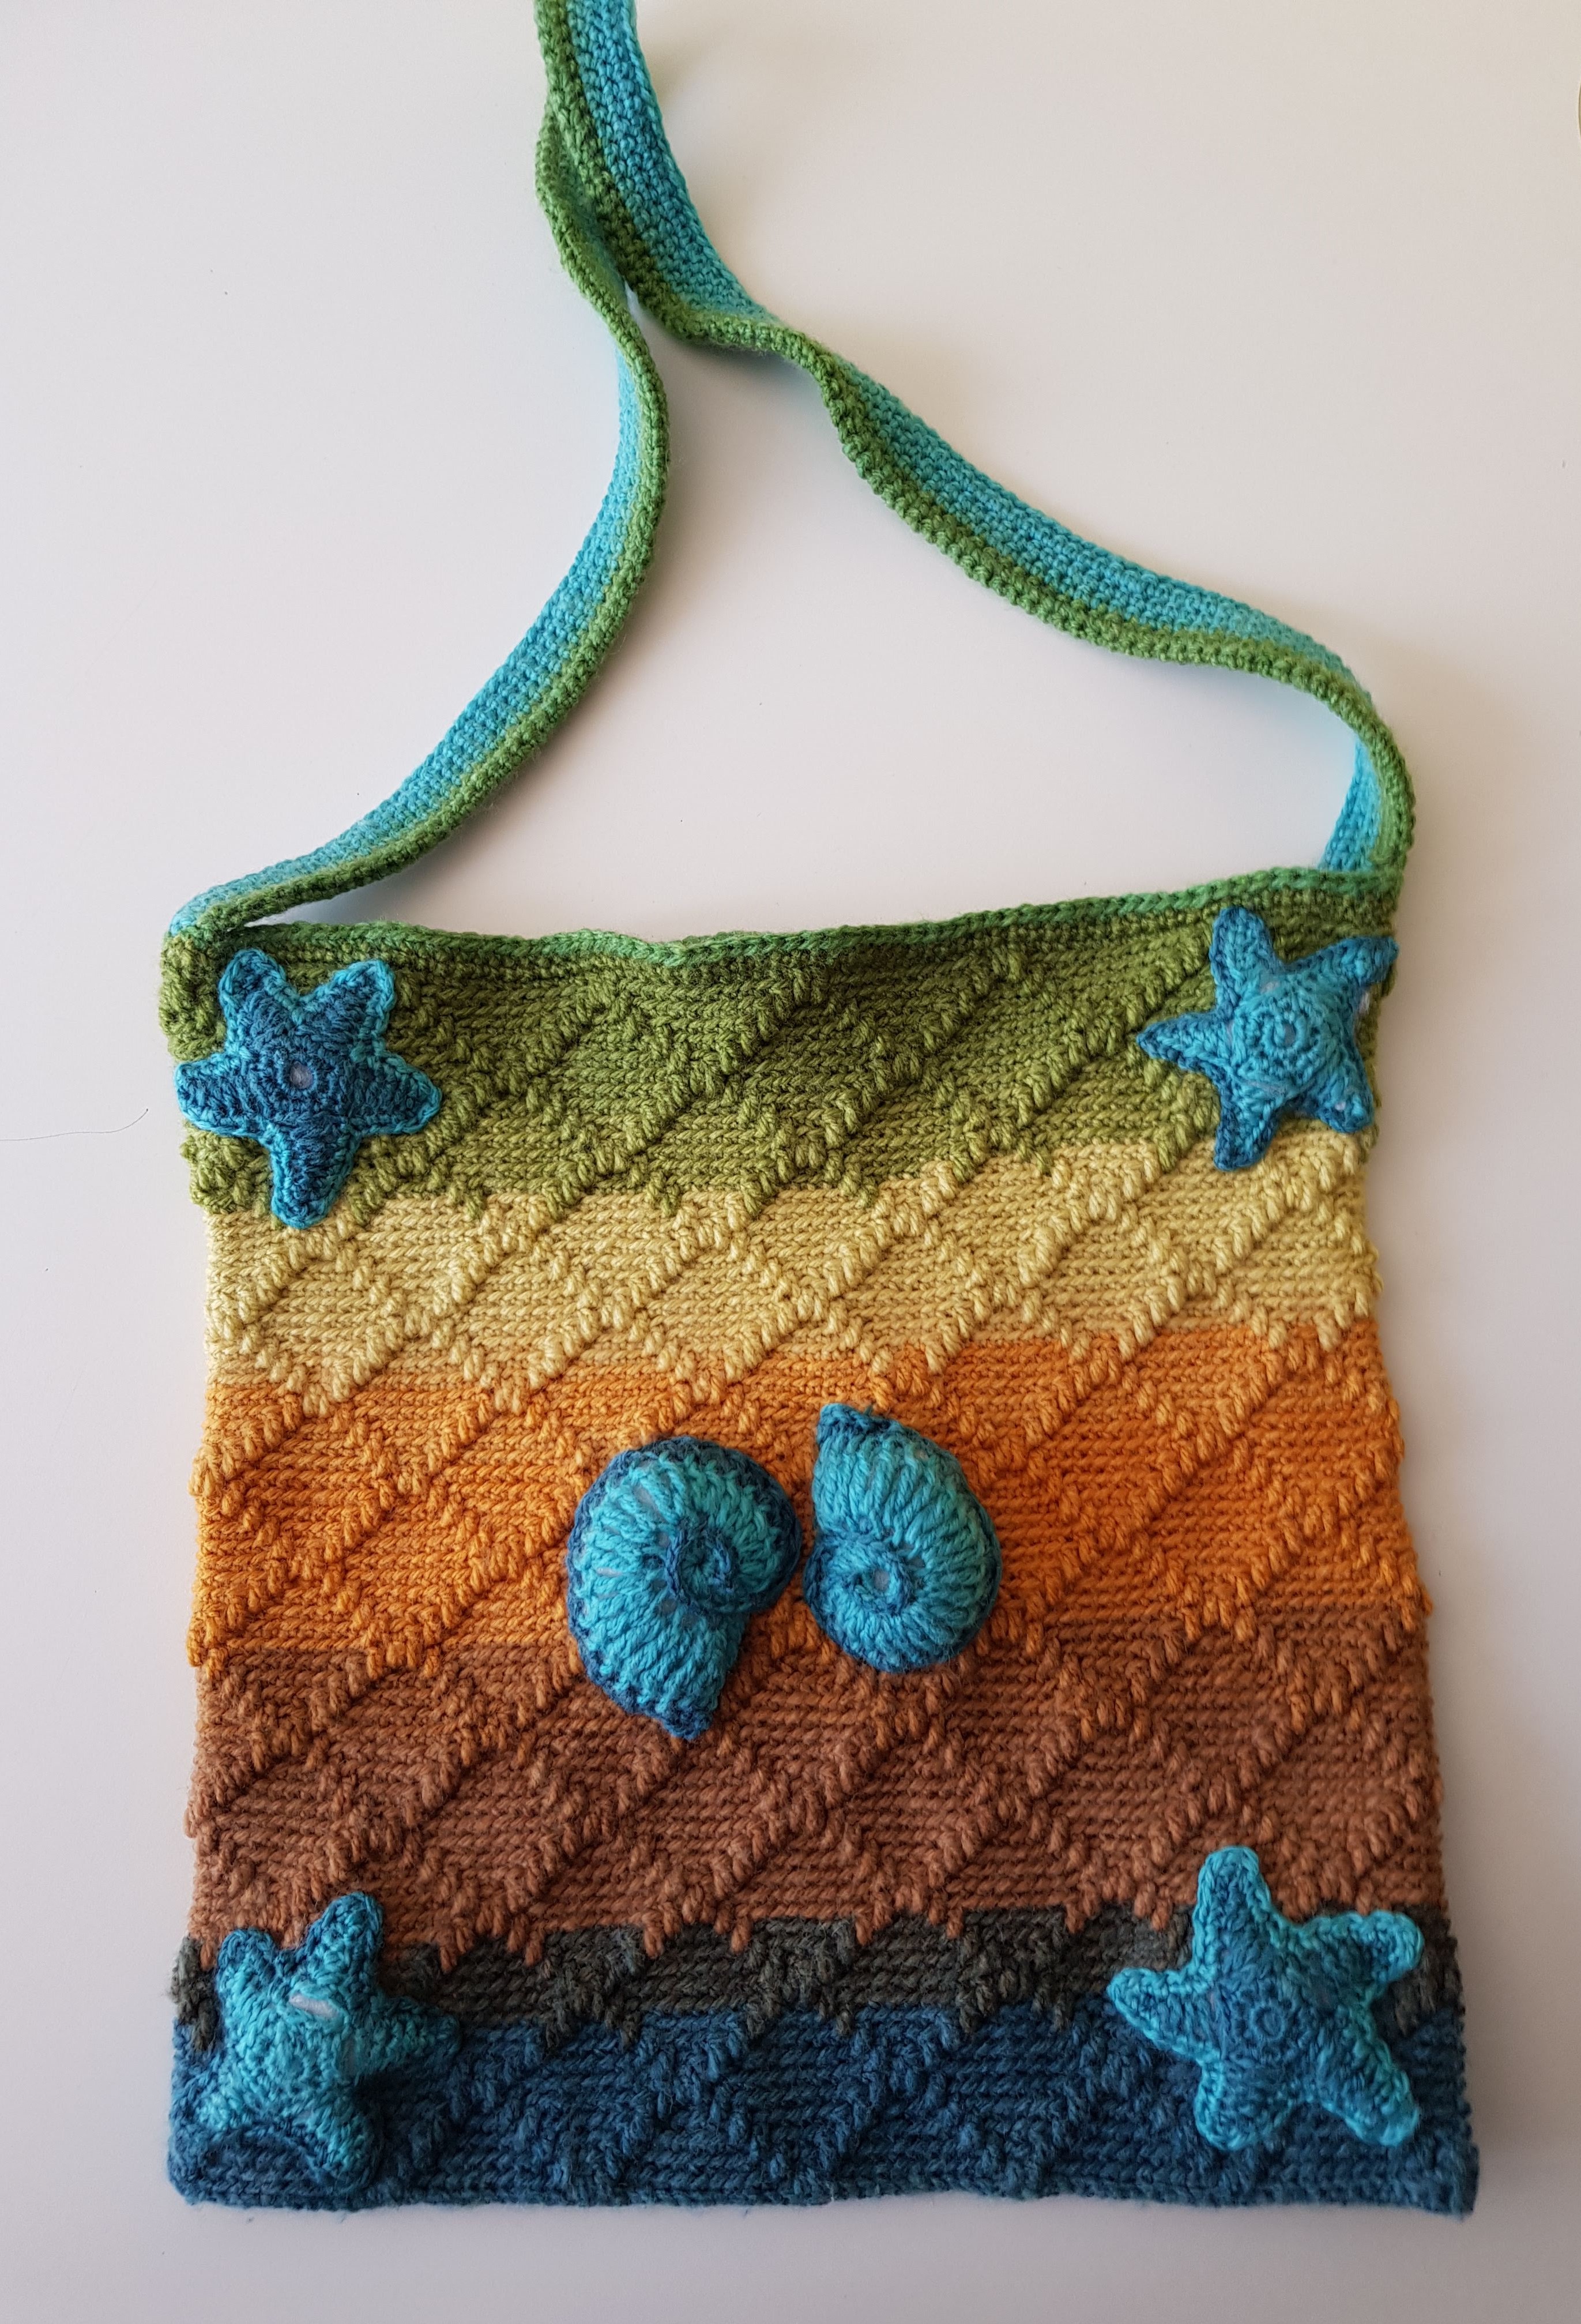
This beach themed bag reminds me of the sun & sea with it’s 3D starfish and conch shells as decorations. I was inspired by the Maltese summers an beaches in Malta.
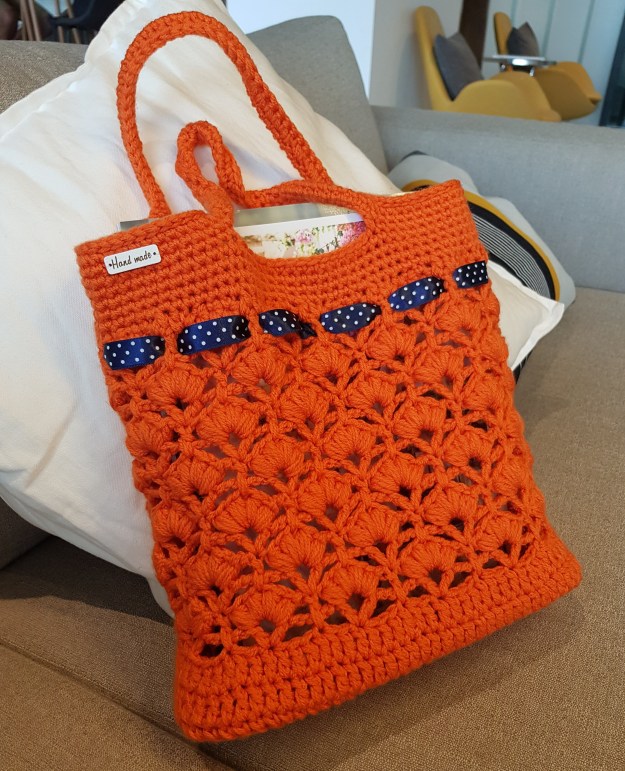
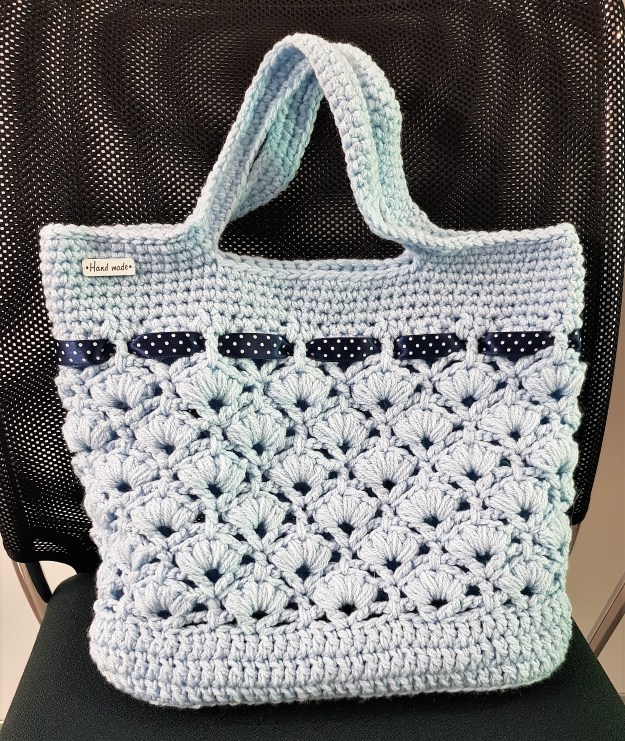
This tote bag design brings to my mind , the flower power generation, the 60s, hippies, Boho-chic – I think of music festivals, painted Volkswagon Beetles and vans – even the scoobie Doo mystery machine…..
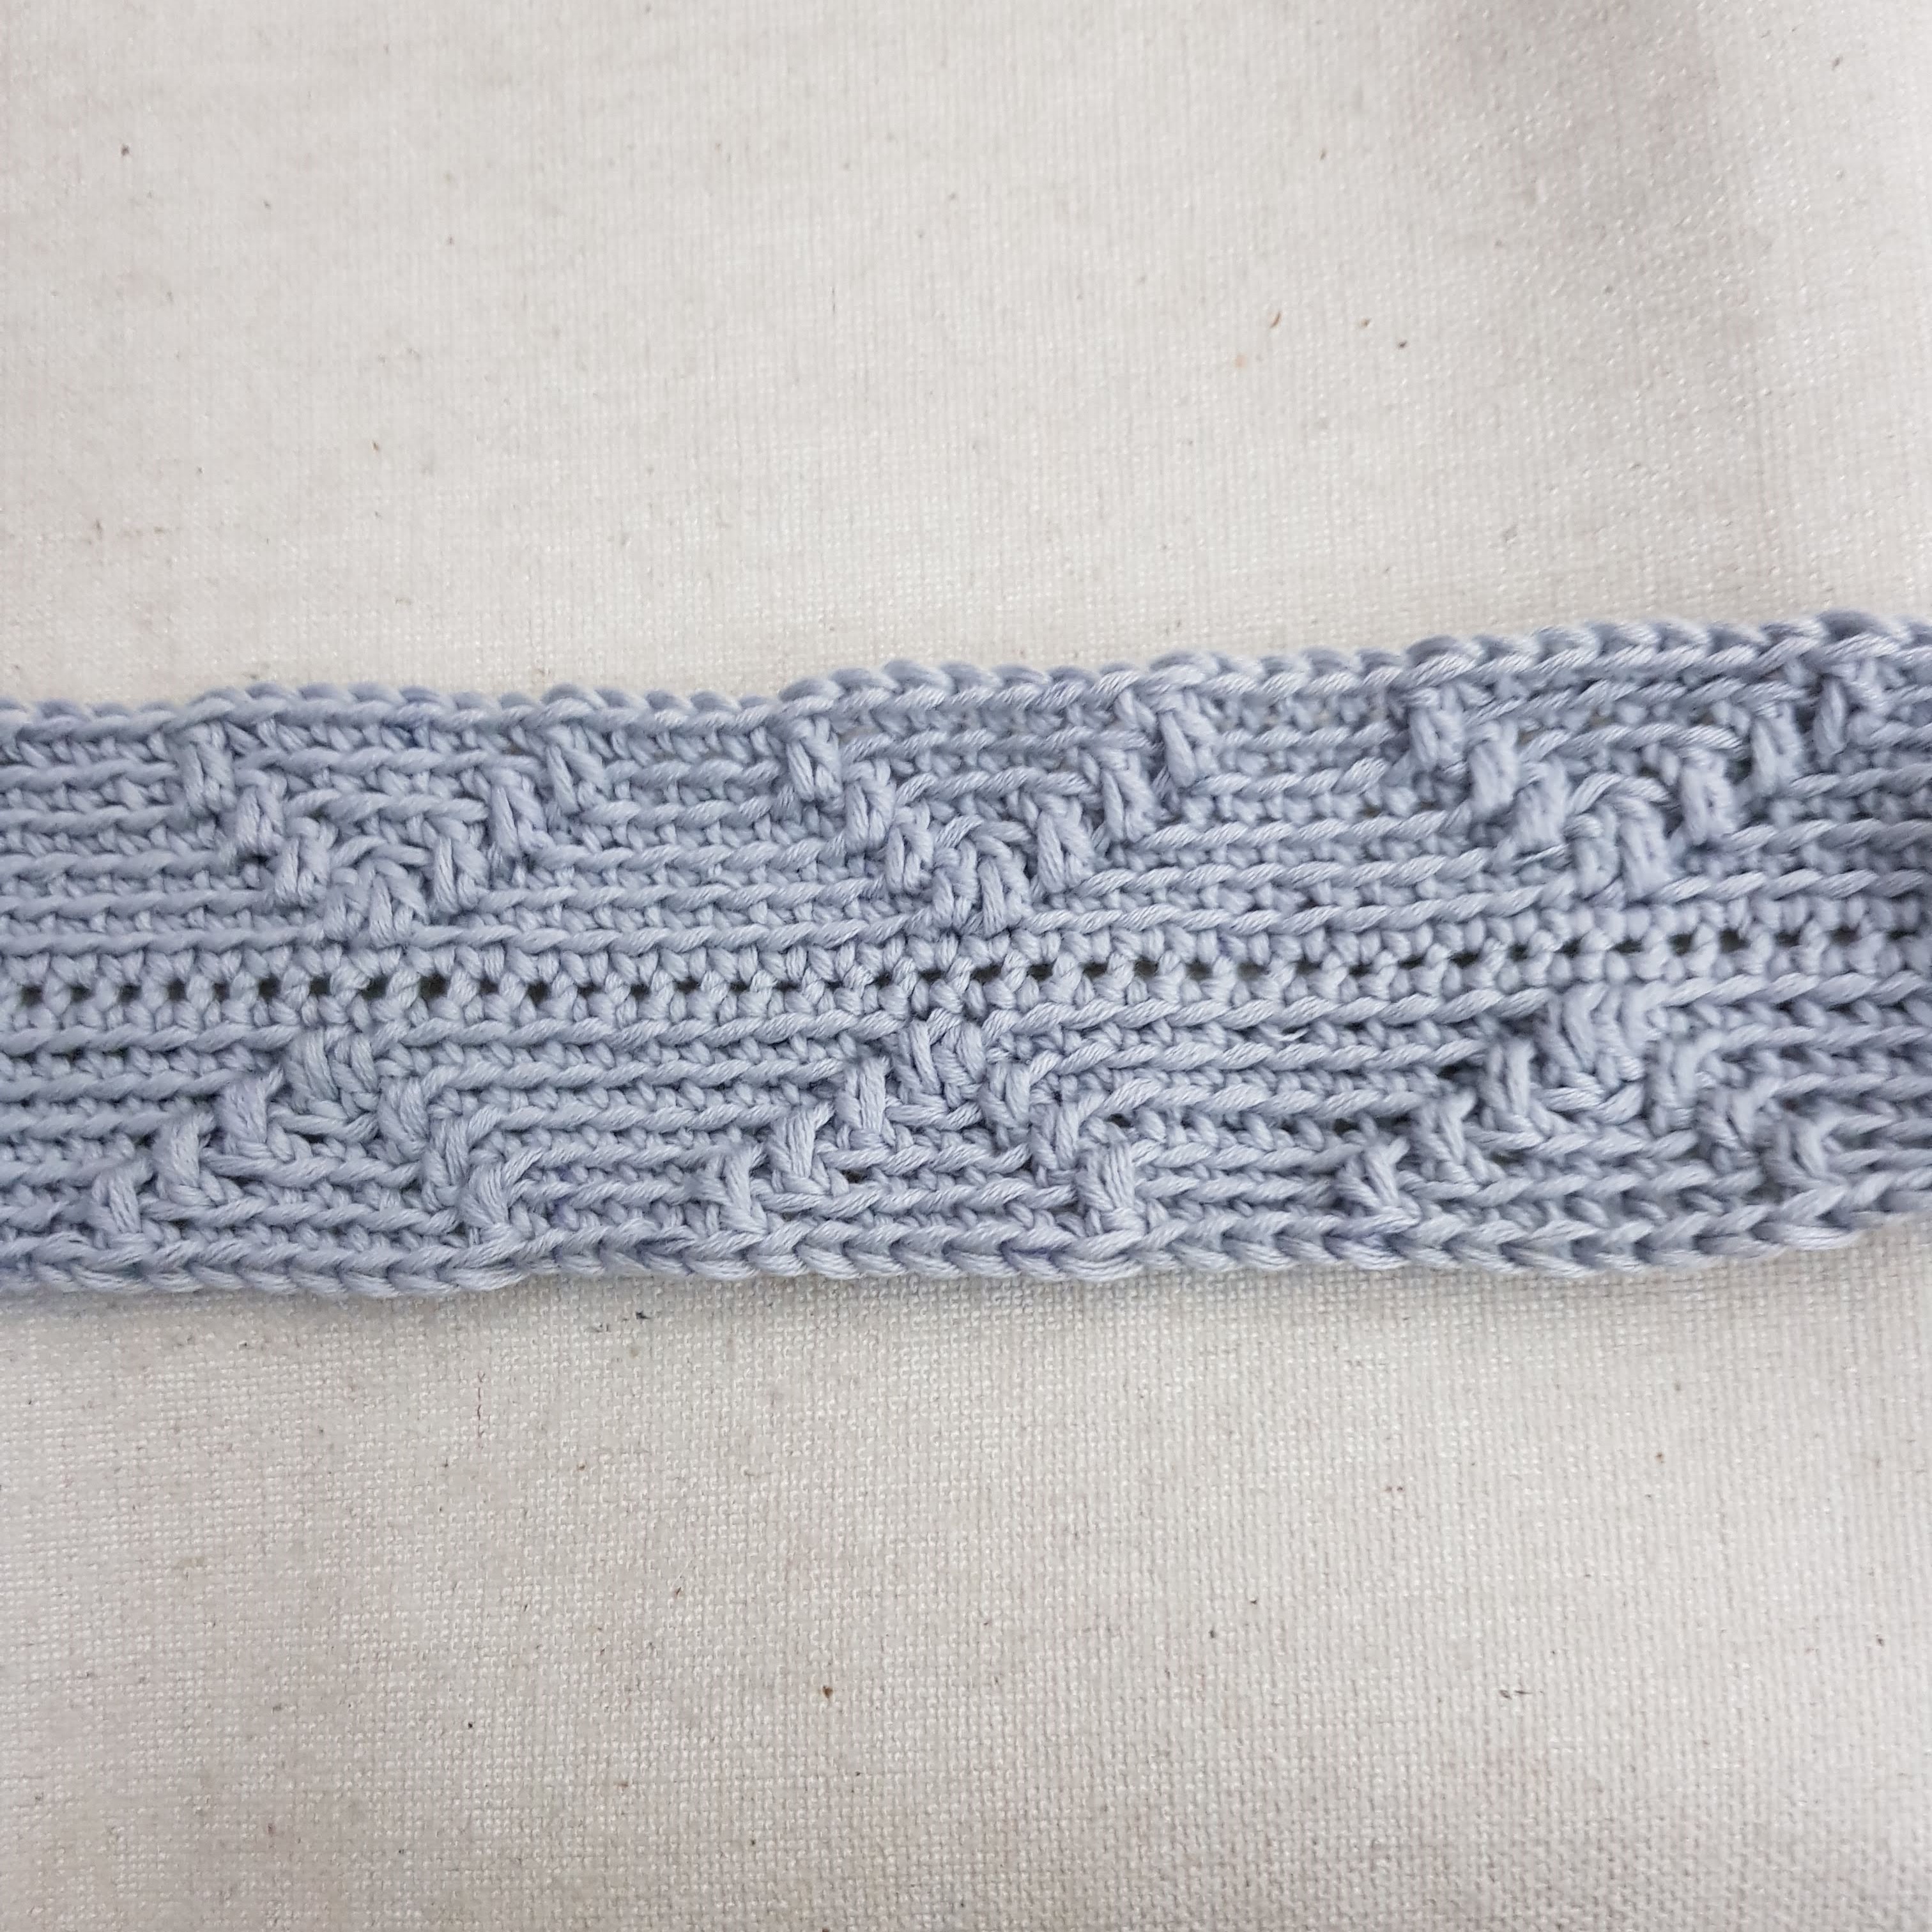
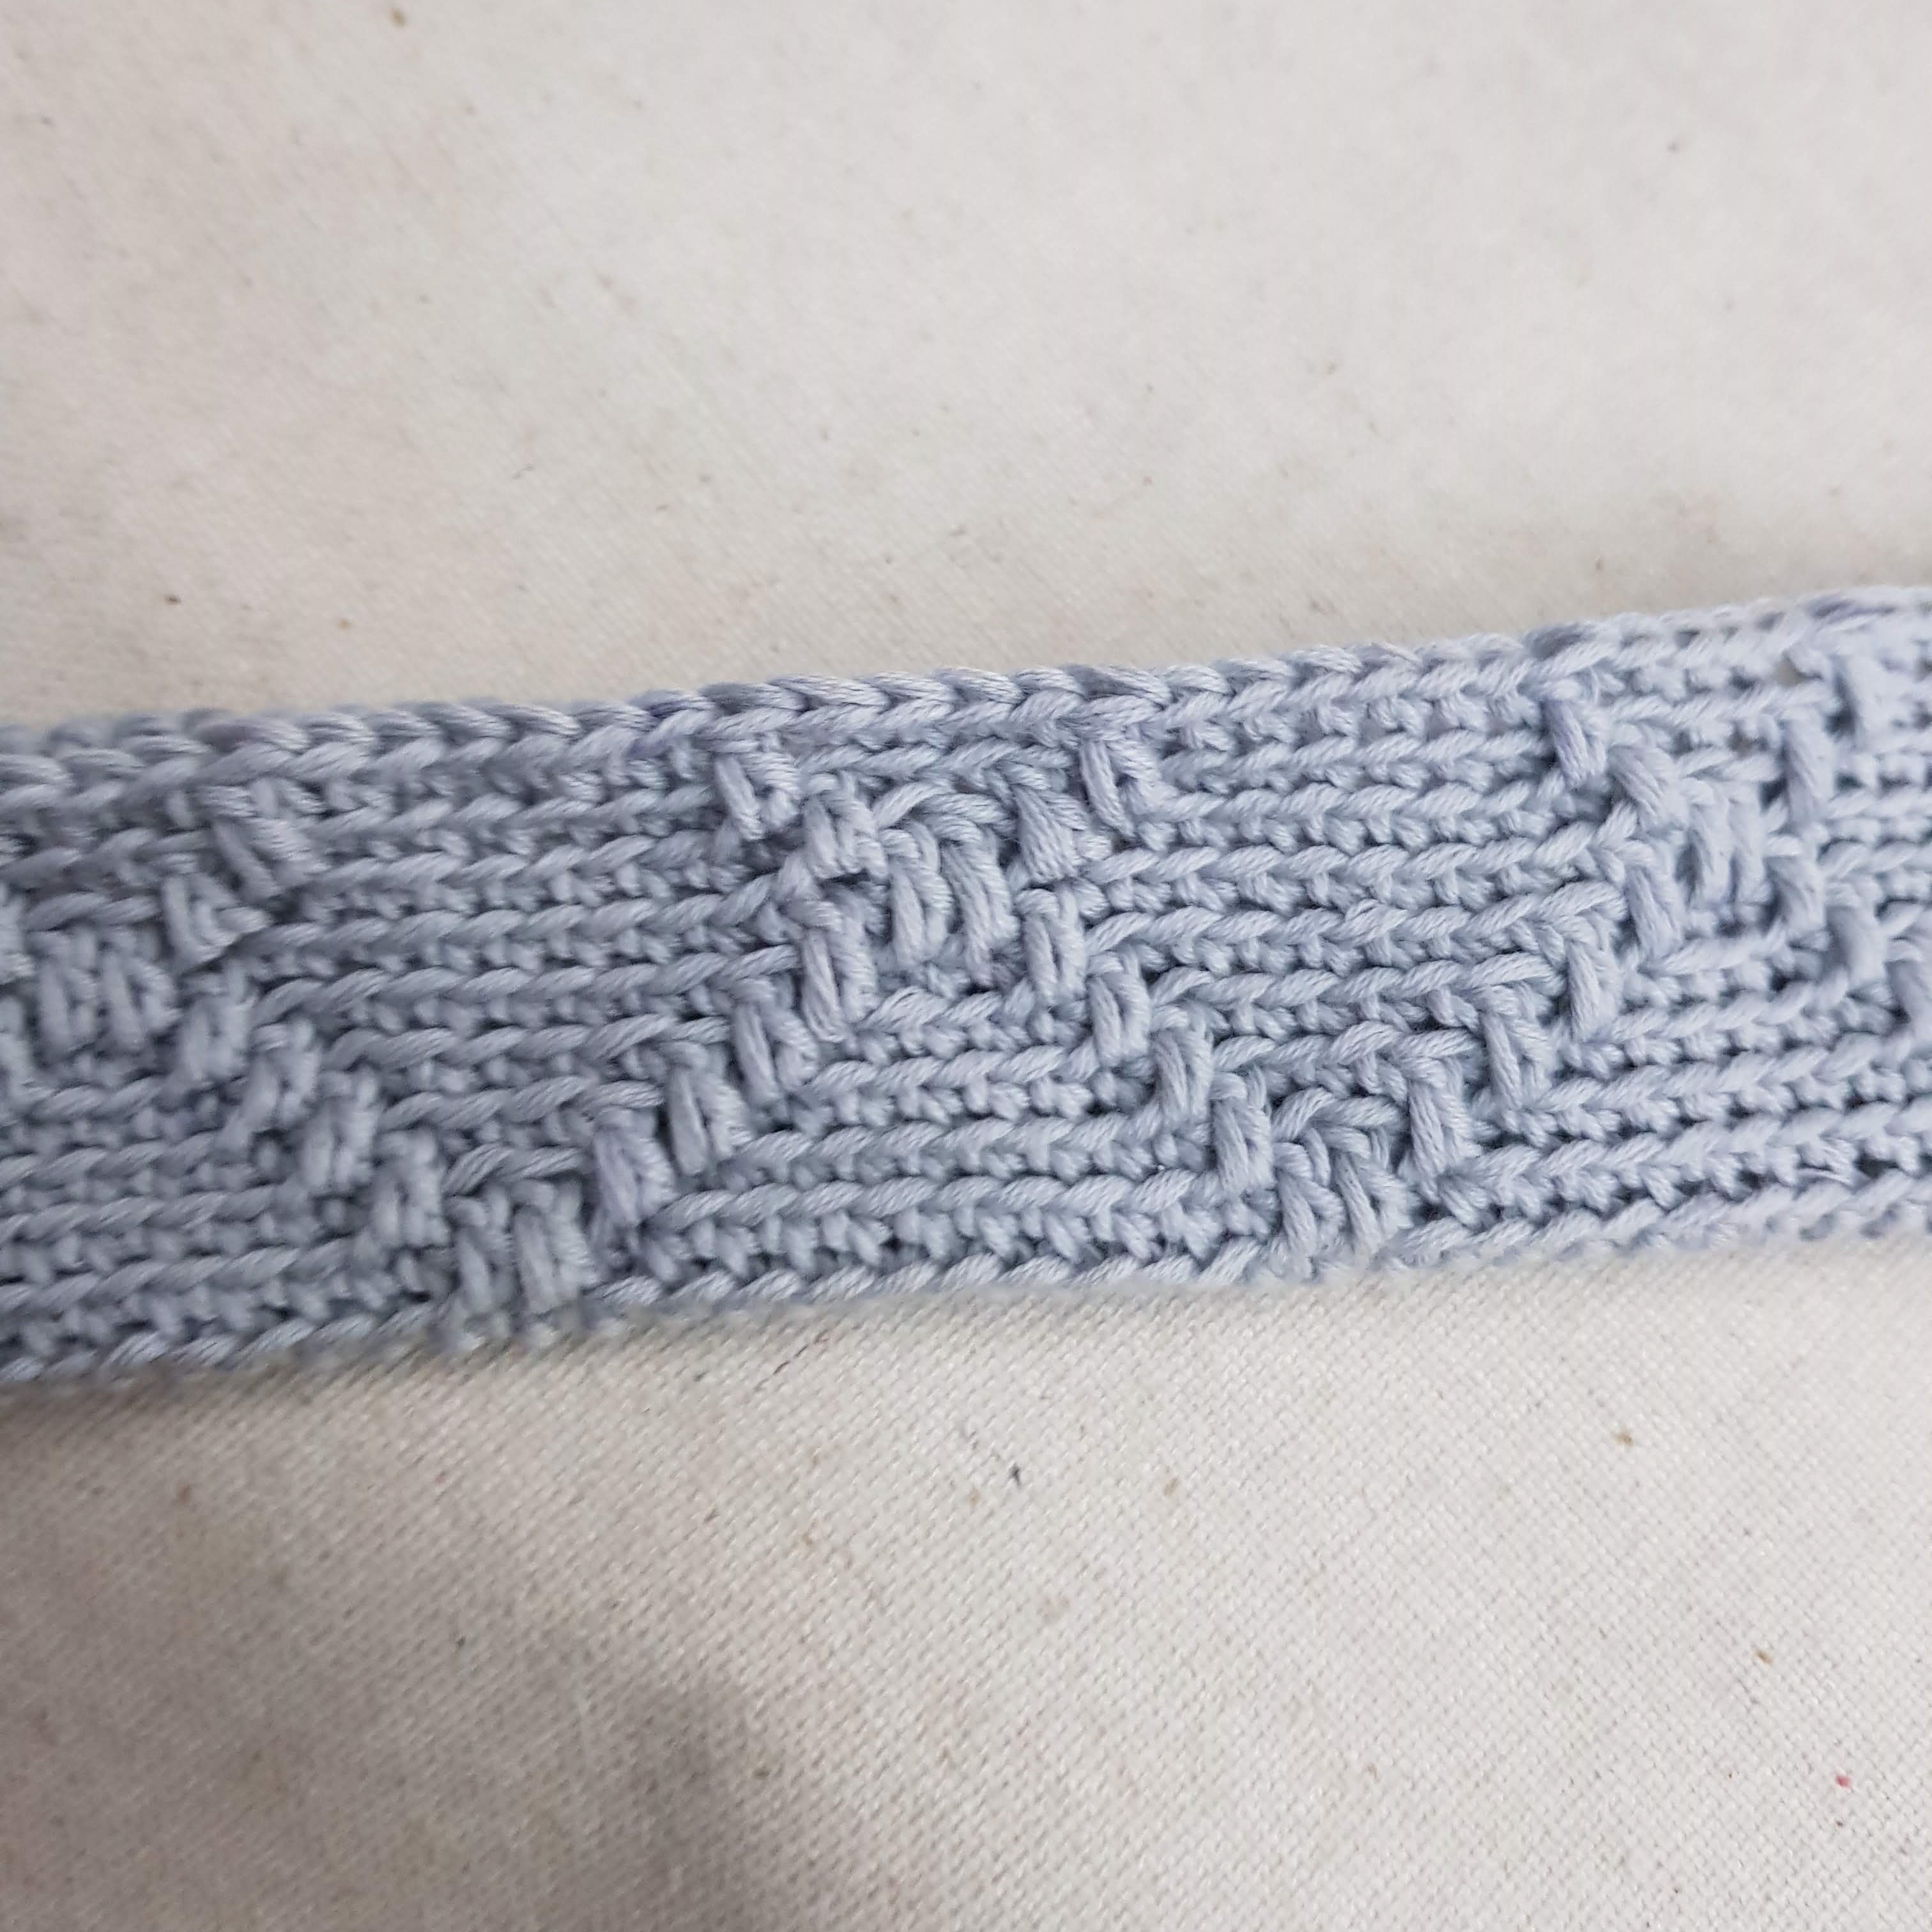
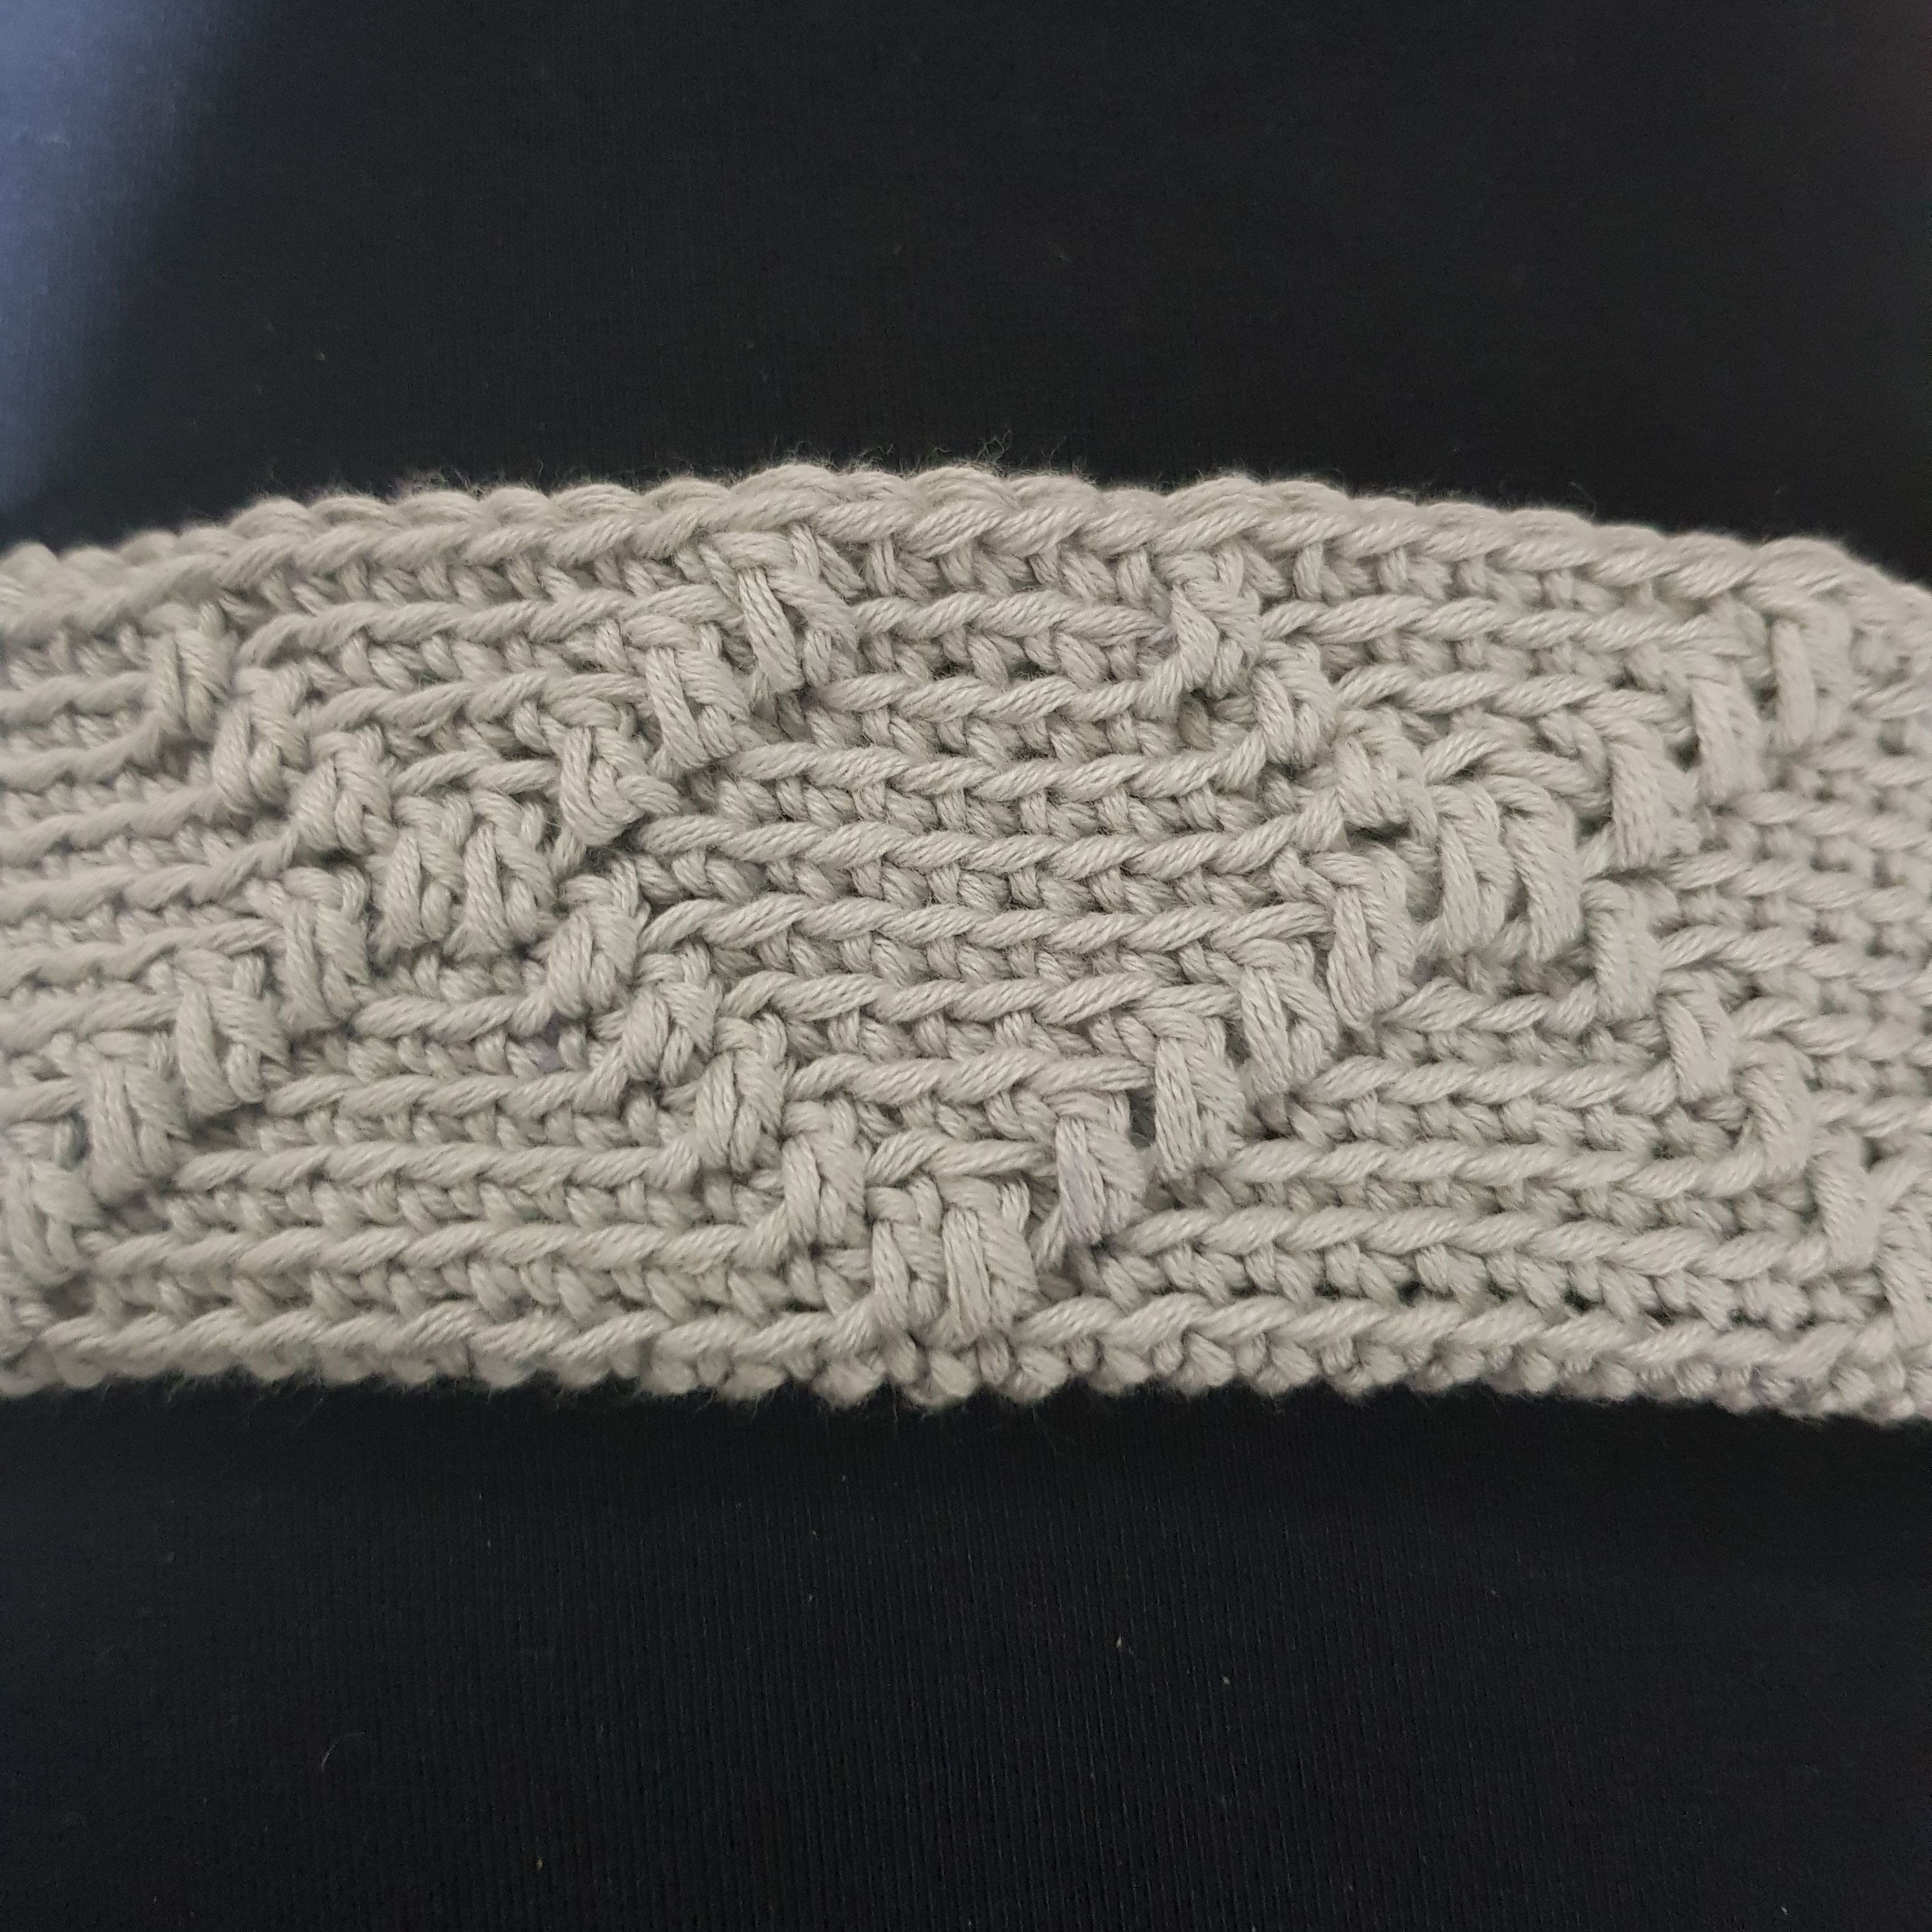
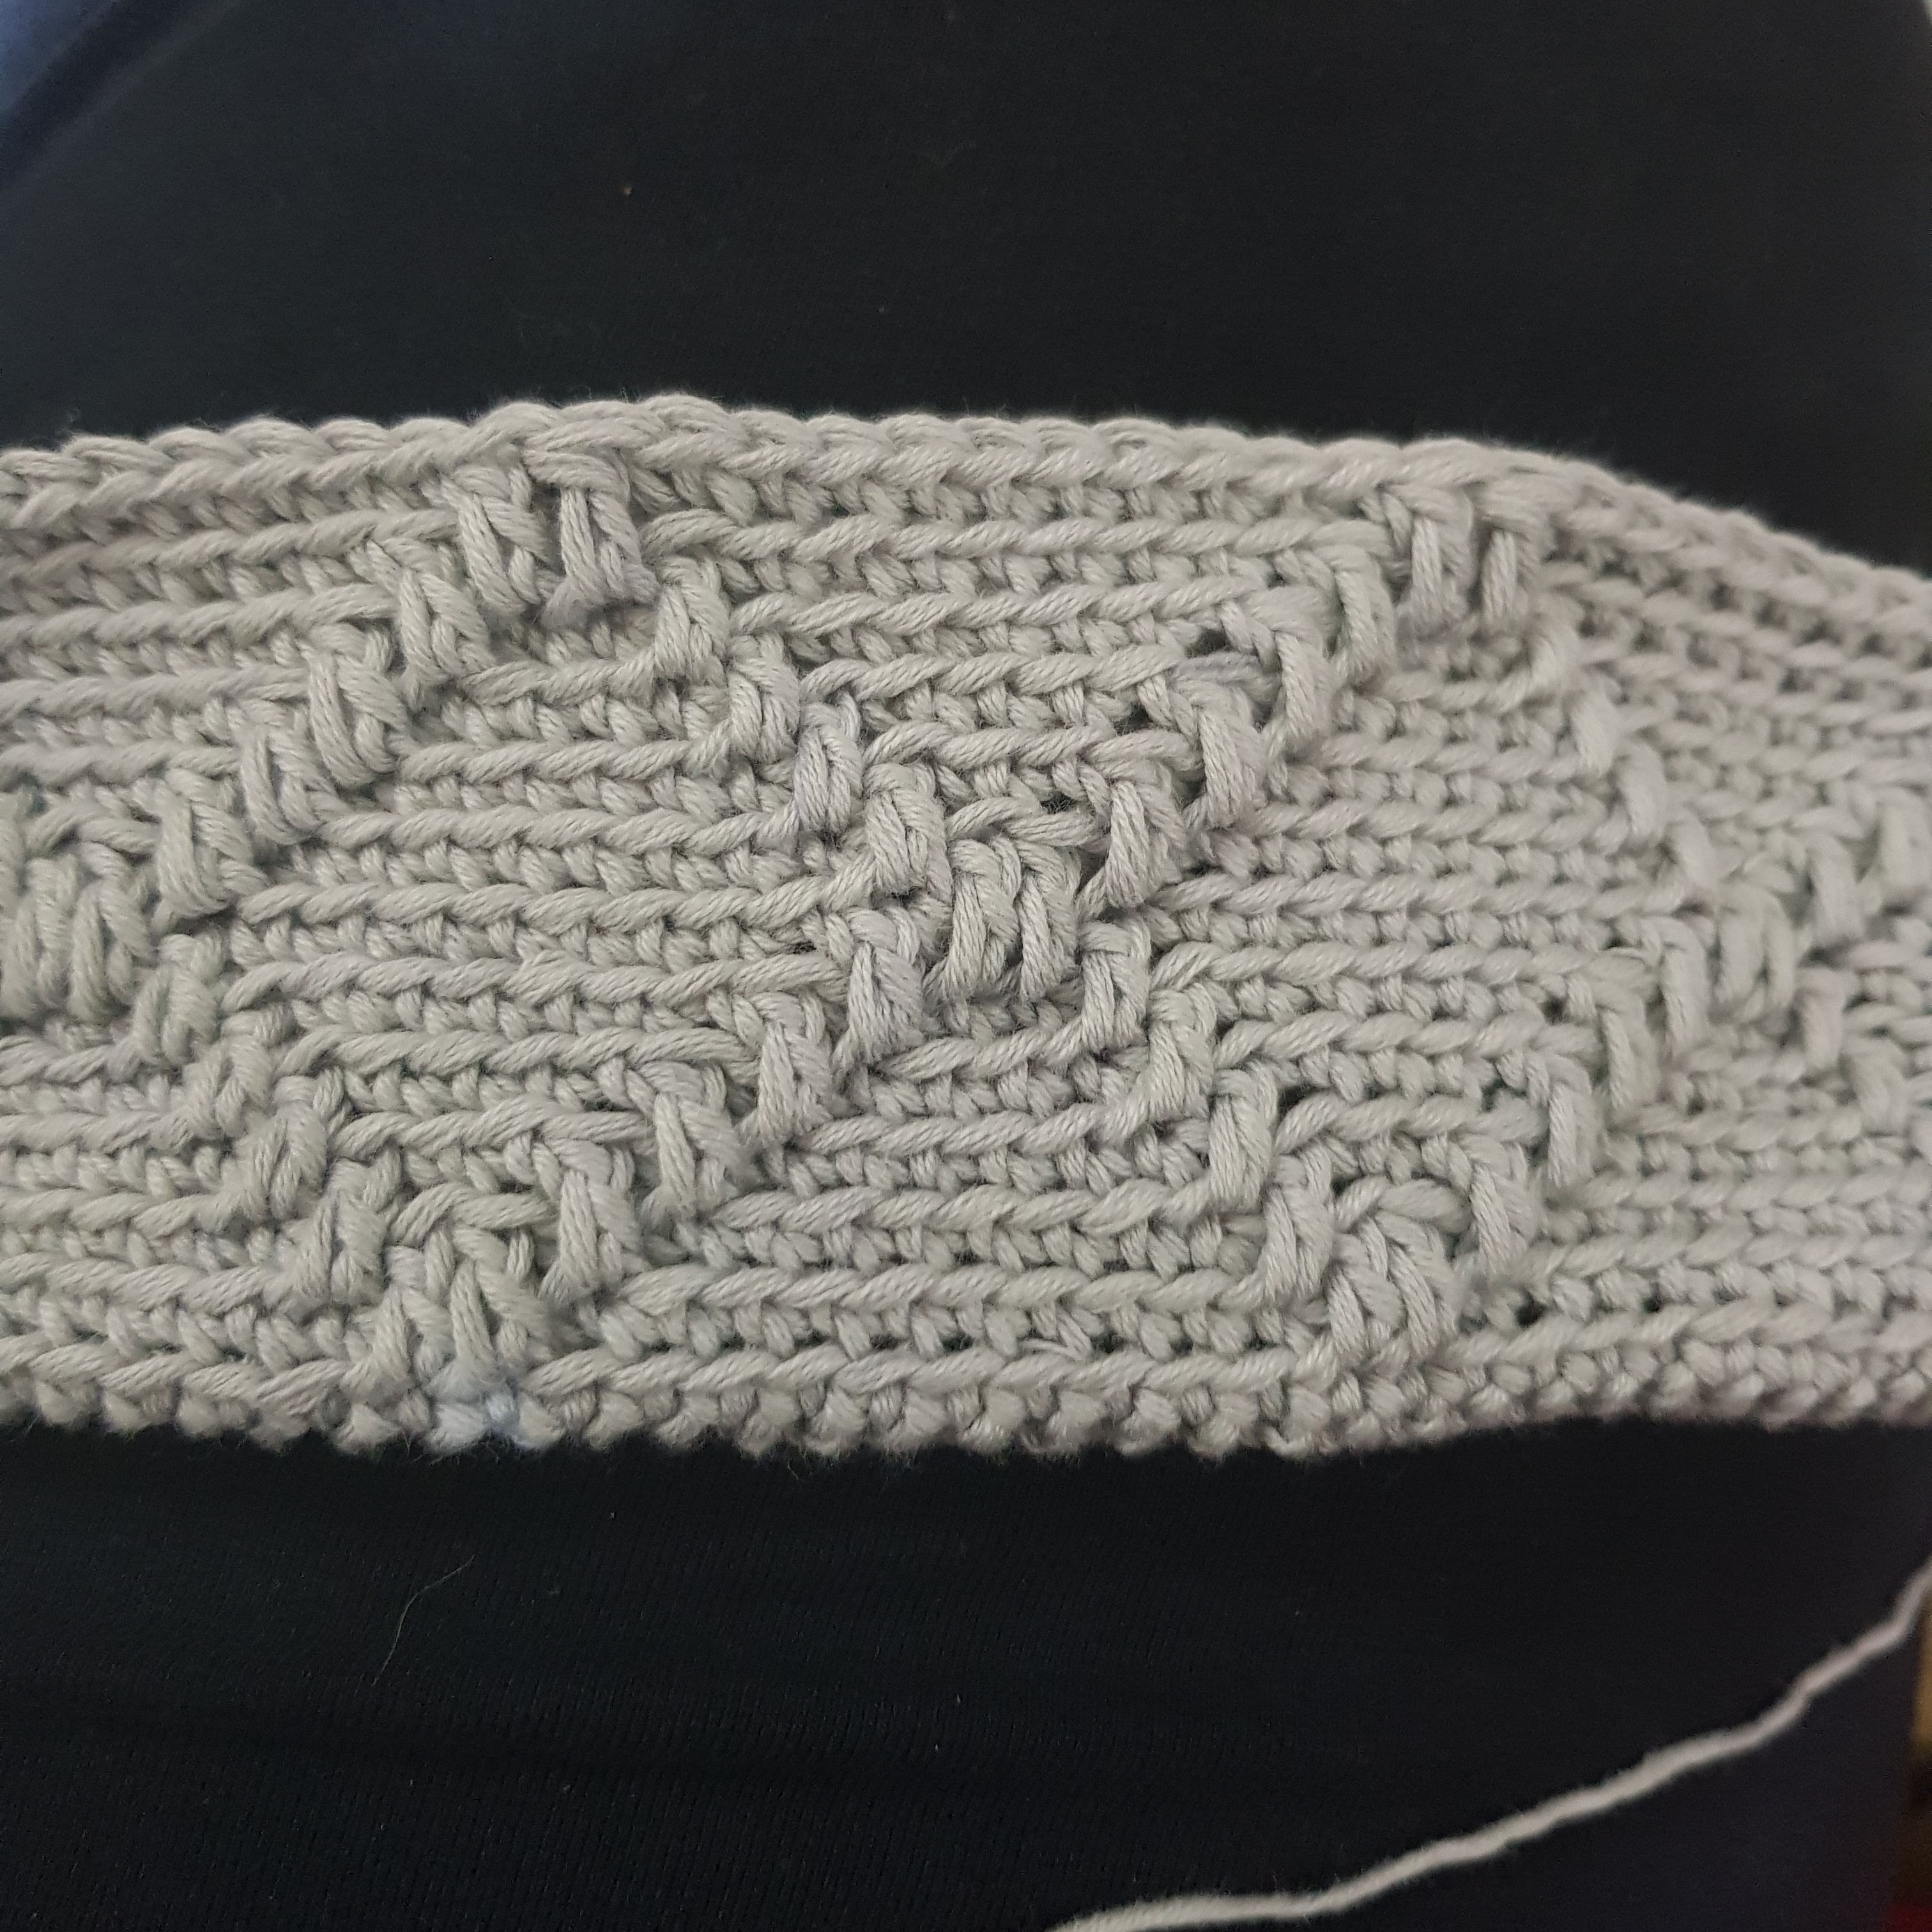
So now, I will share with you my pattern to make this gogeous tote. I used a variagated yarn by “Katia” to make the bag and handle, but you can mix your own colours. The little daisies were made using acrylic yarn. All in all, one ball of 150g (approx 540m) was sufficient to make the a bag measuring approx 32 x 32cm + handle with yarn left over. For the sake of illustrating the pattern, however, I decided to use a lighter colour yarn as the photos are clearer – but the pattern used for the main picture above is the same. You can then choose how you want to decorate it – be it with little flowers, beads or whatever you fancy.
N.B. this pattern is written using US terms.
ABBREVIATIONS
CH – chain
SC – single crochet
DC – double crochet
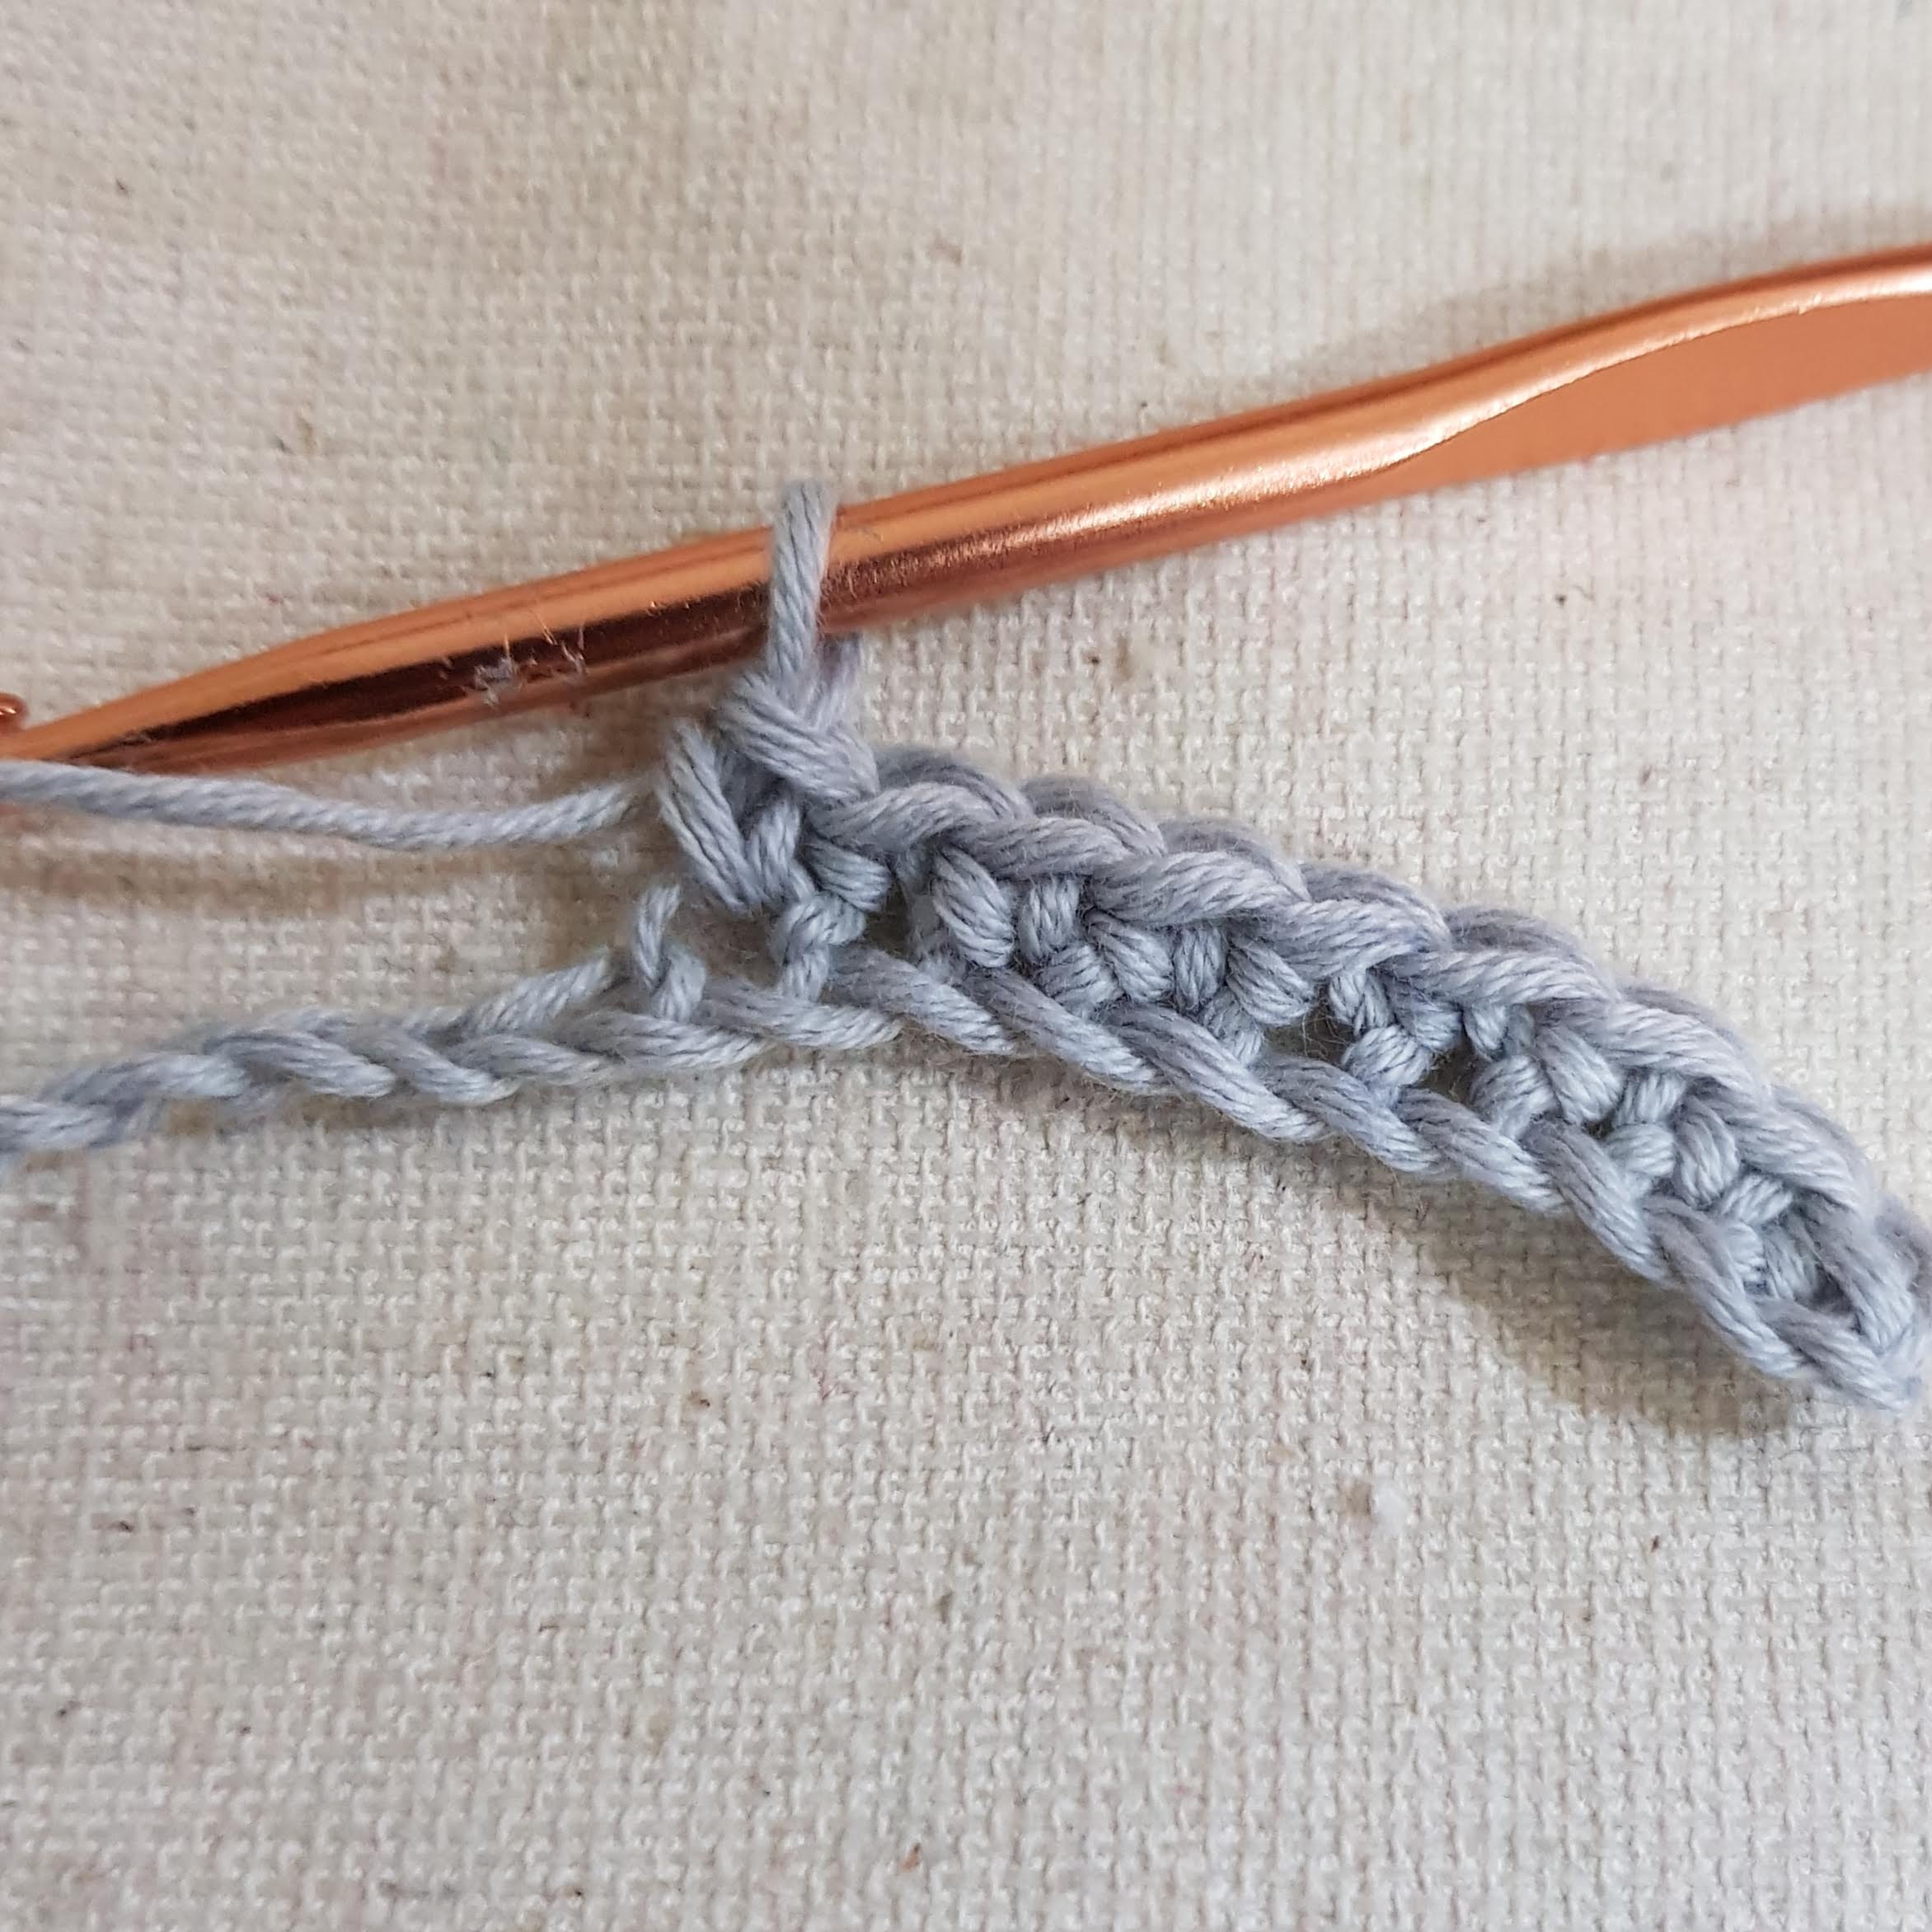
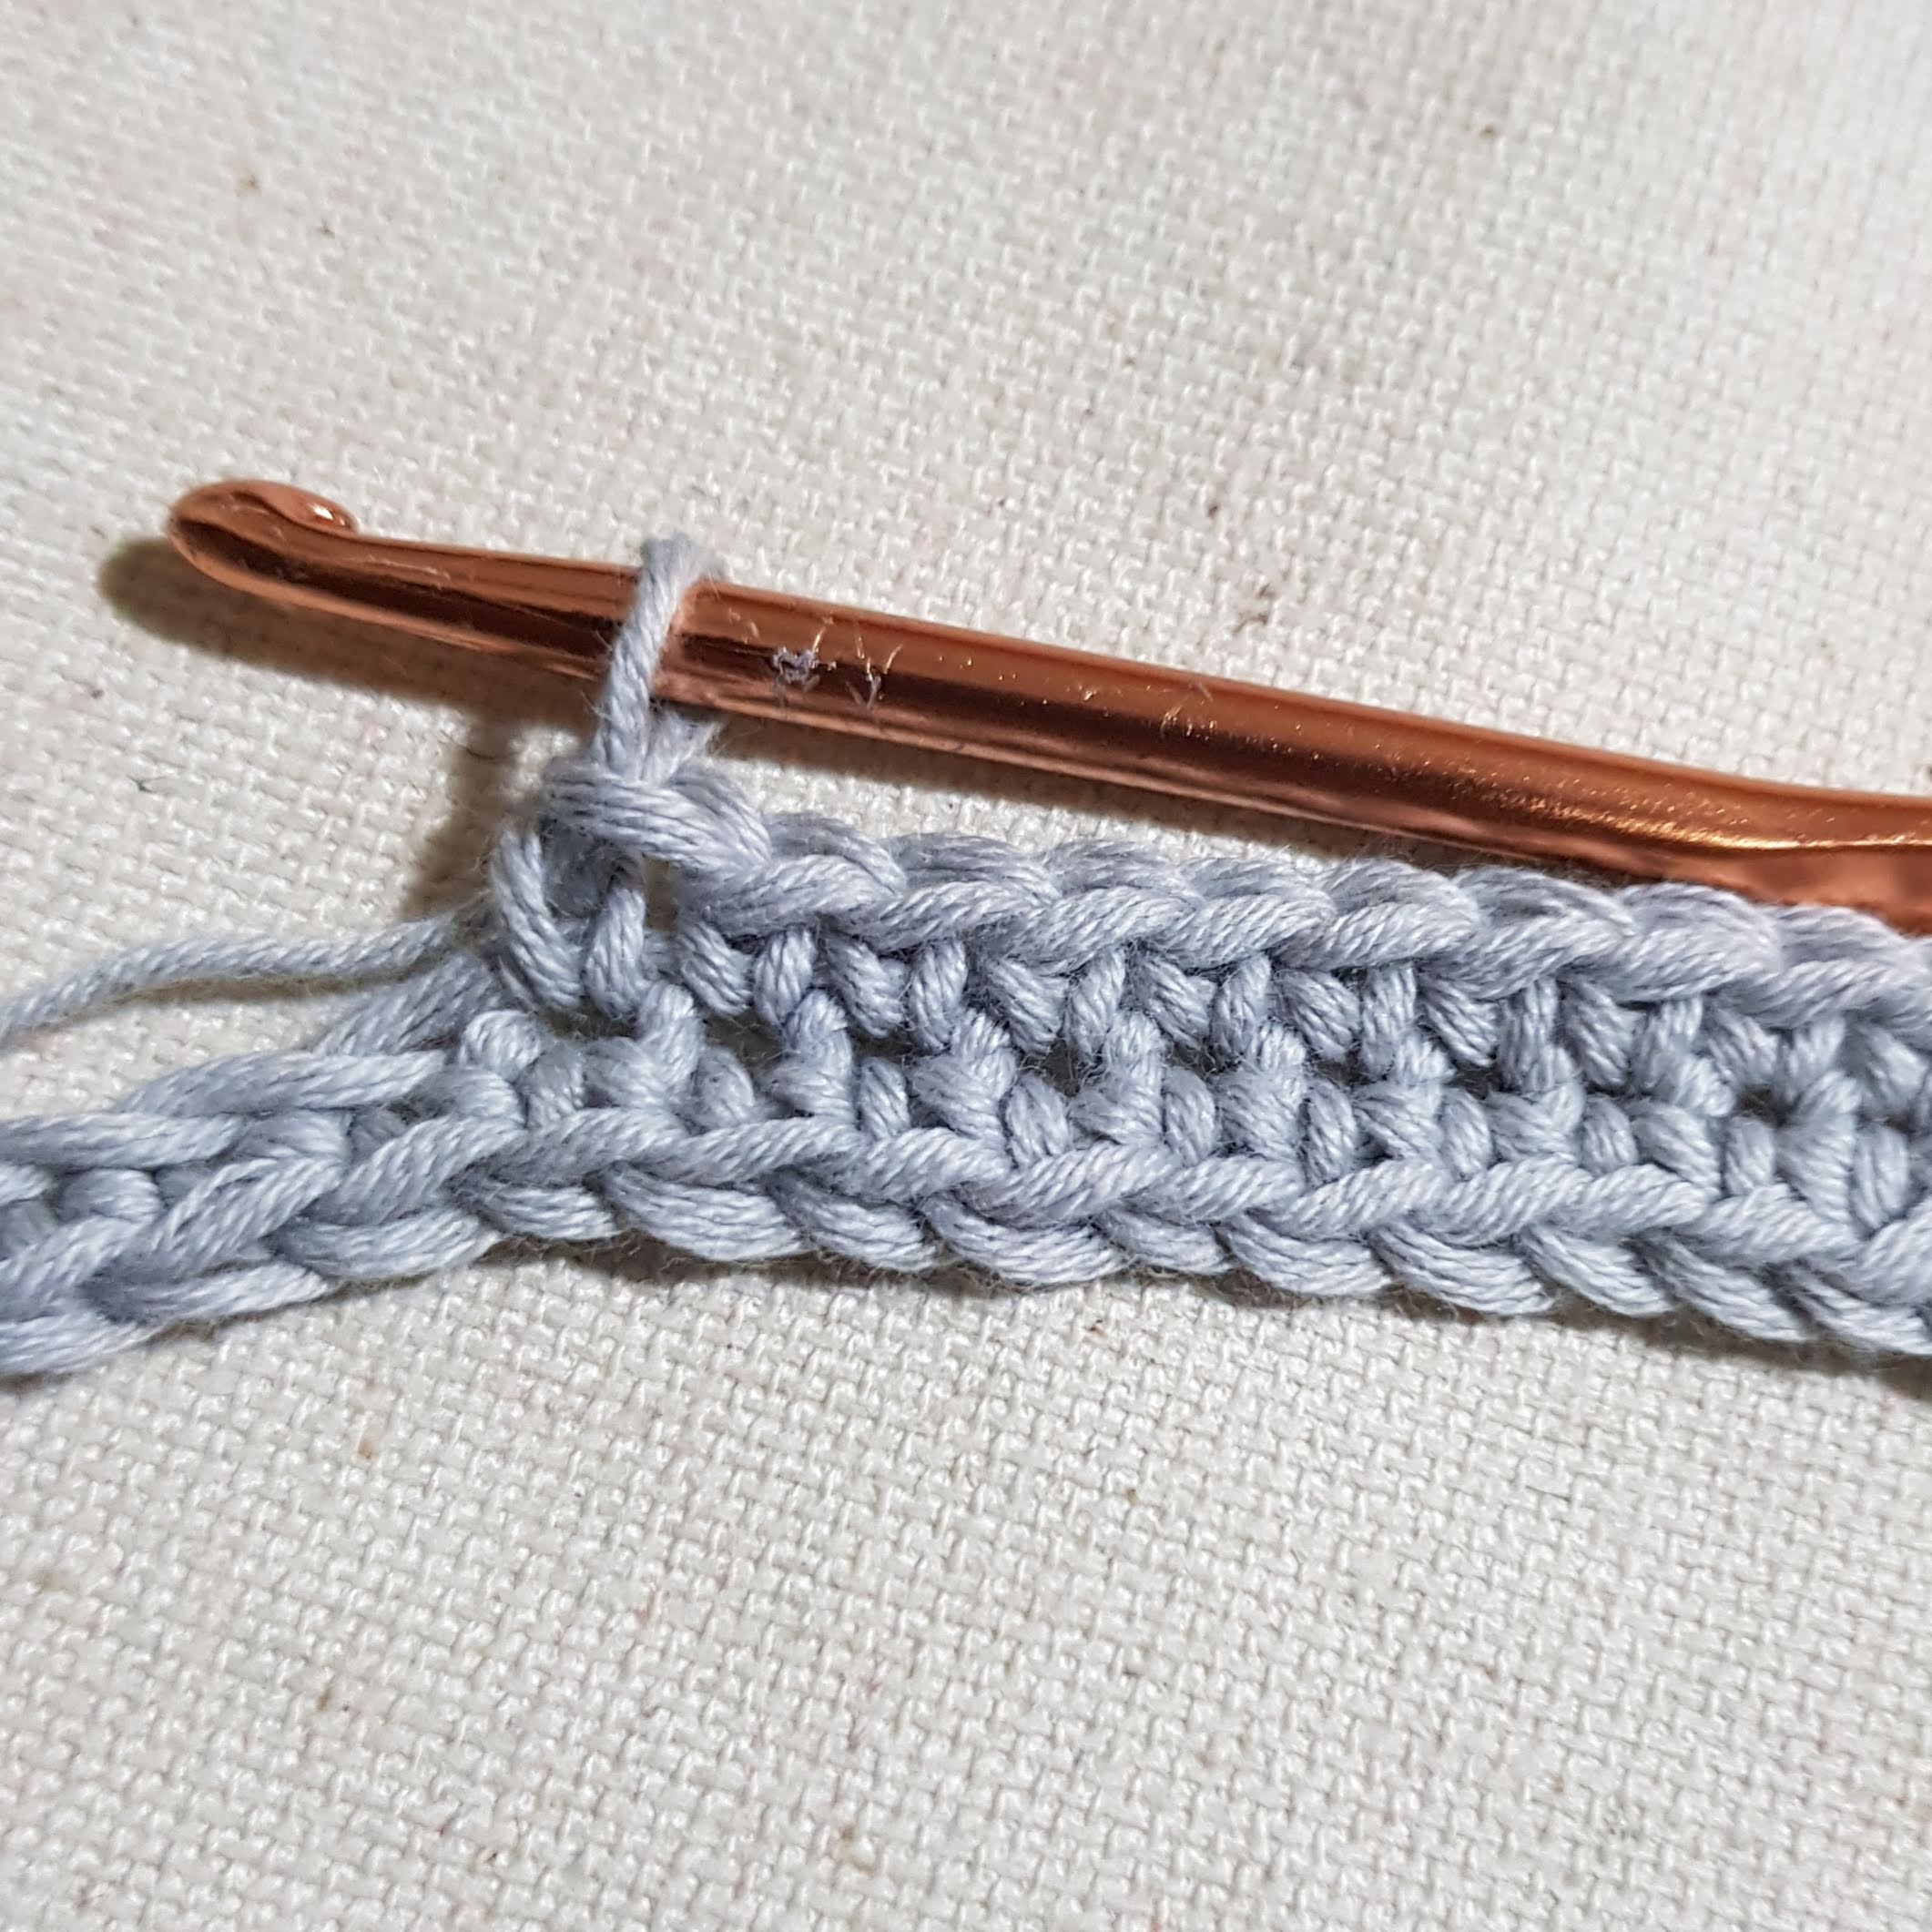
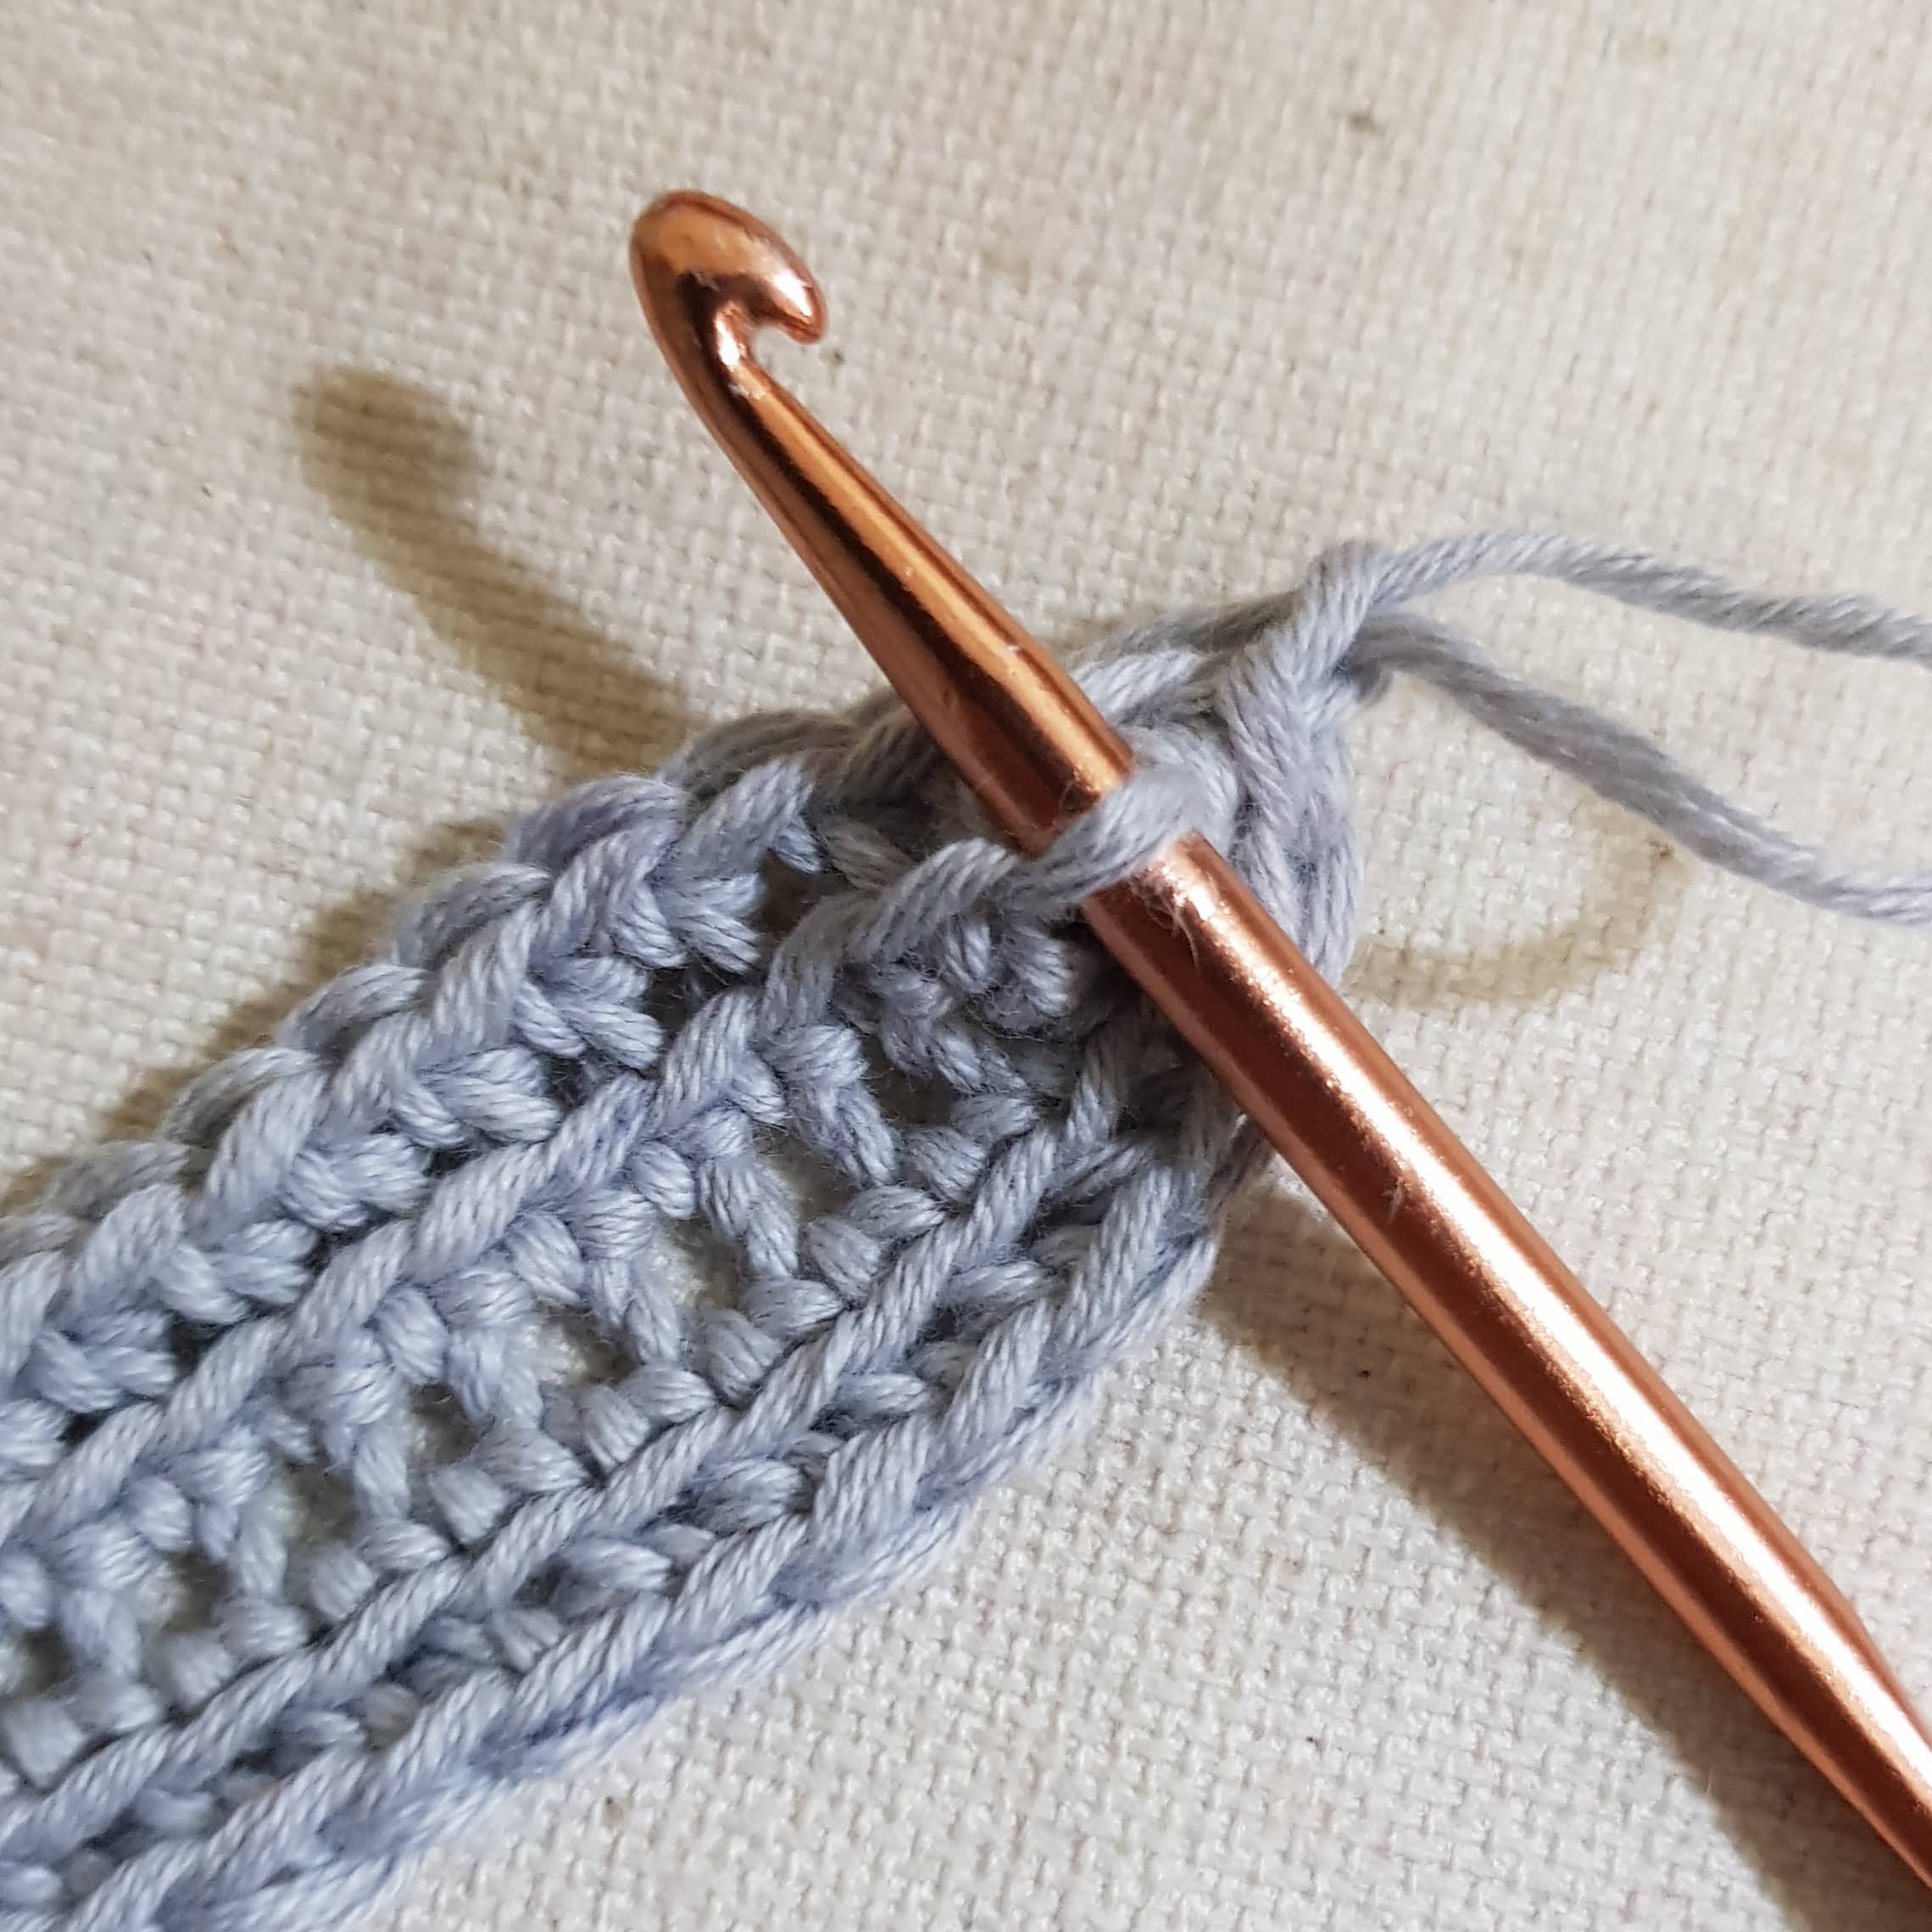
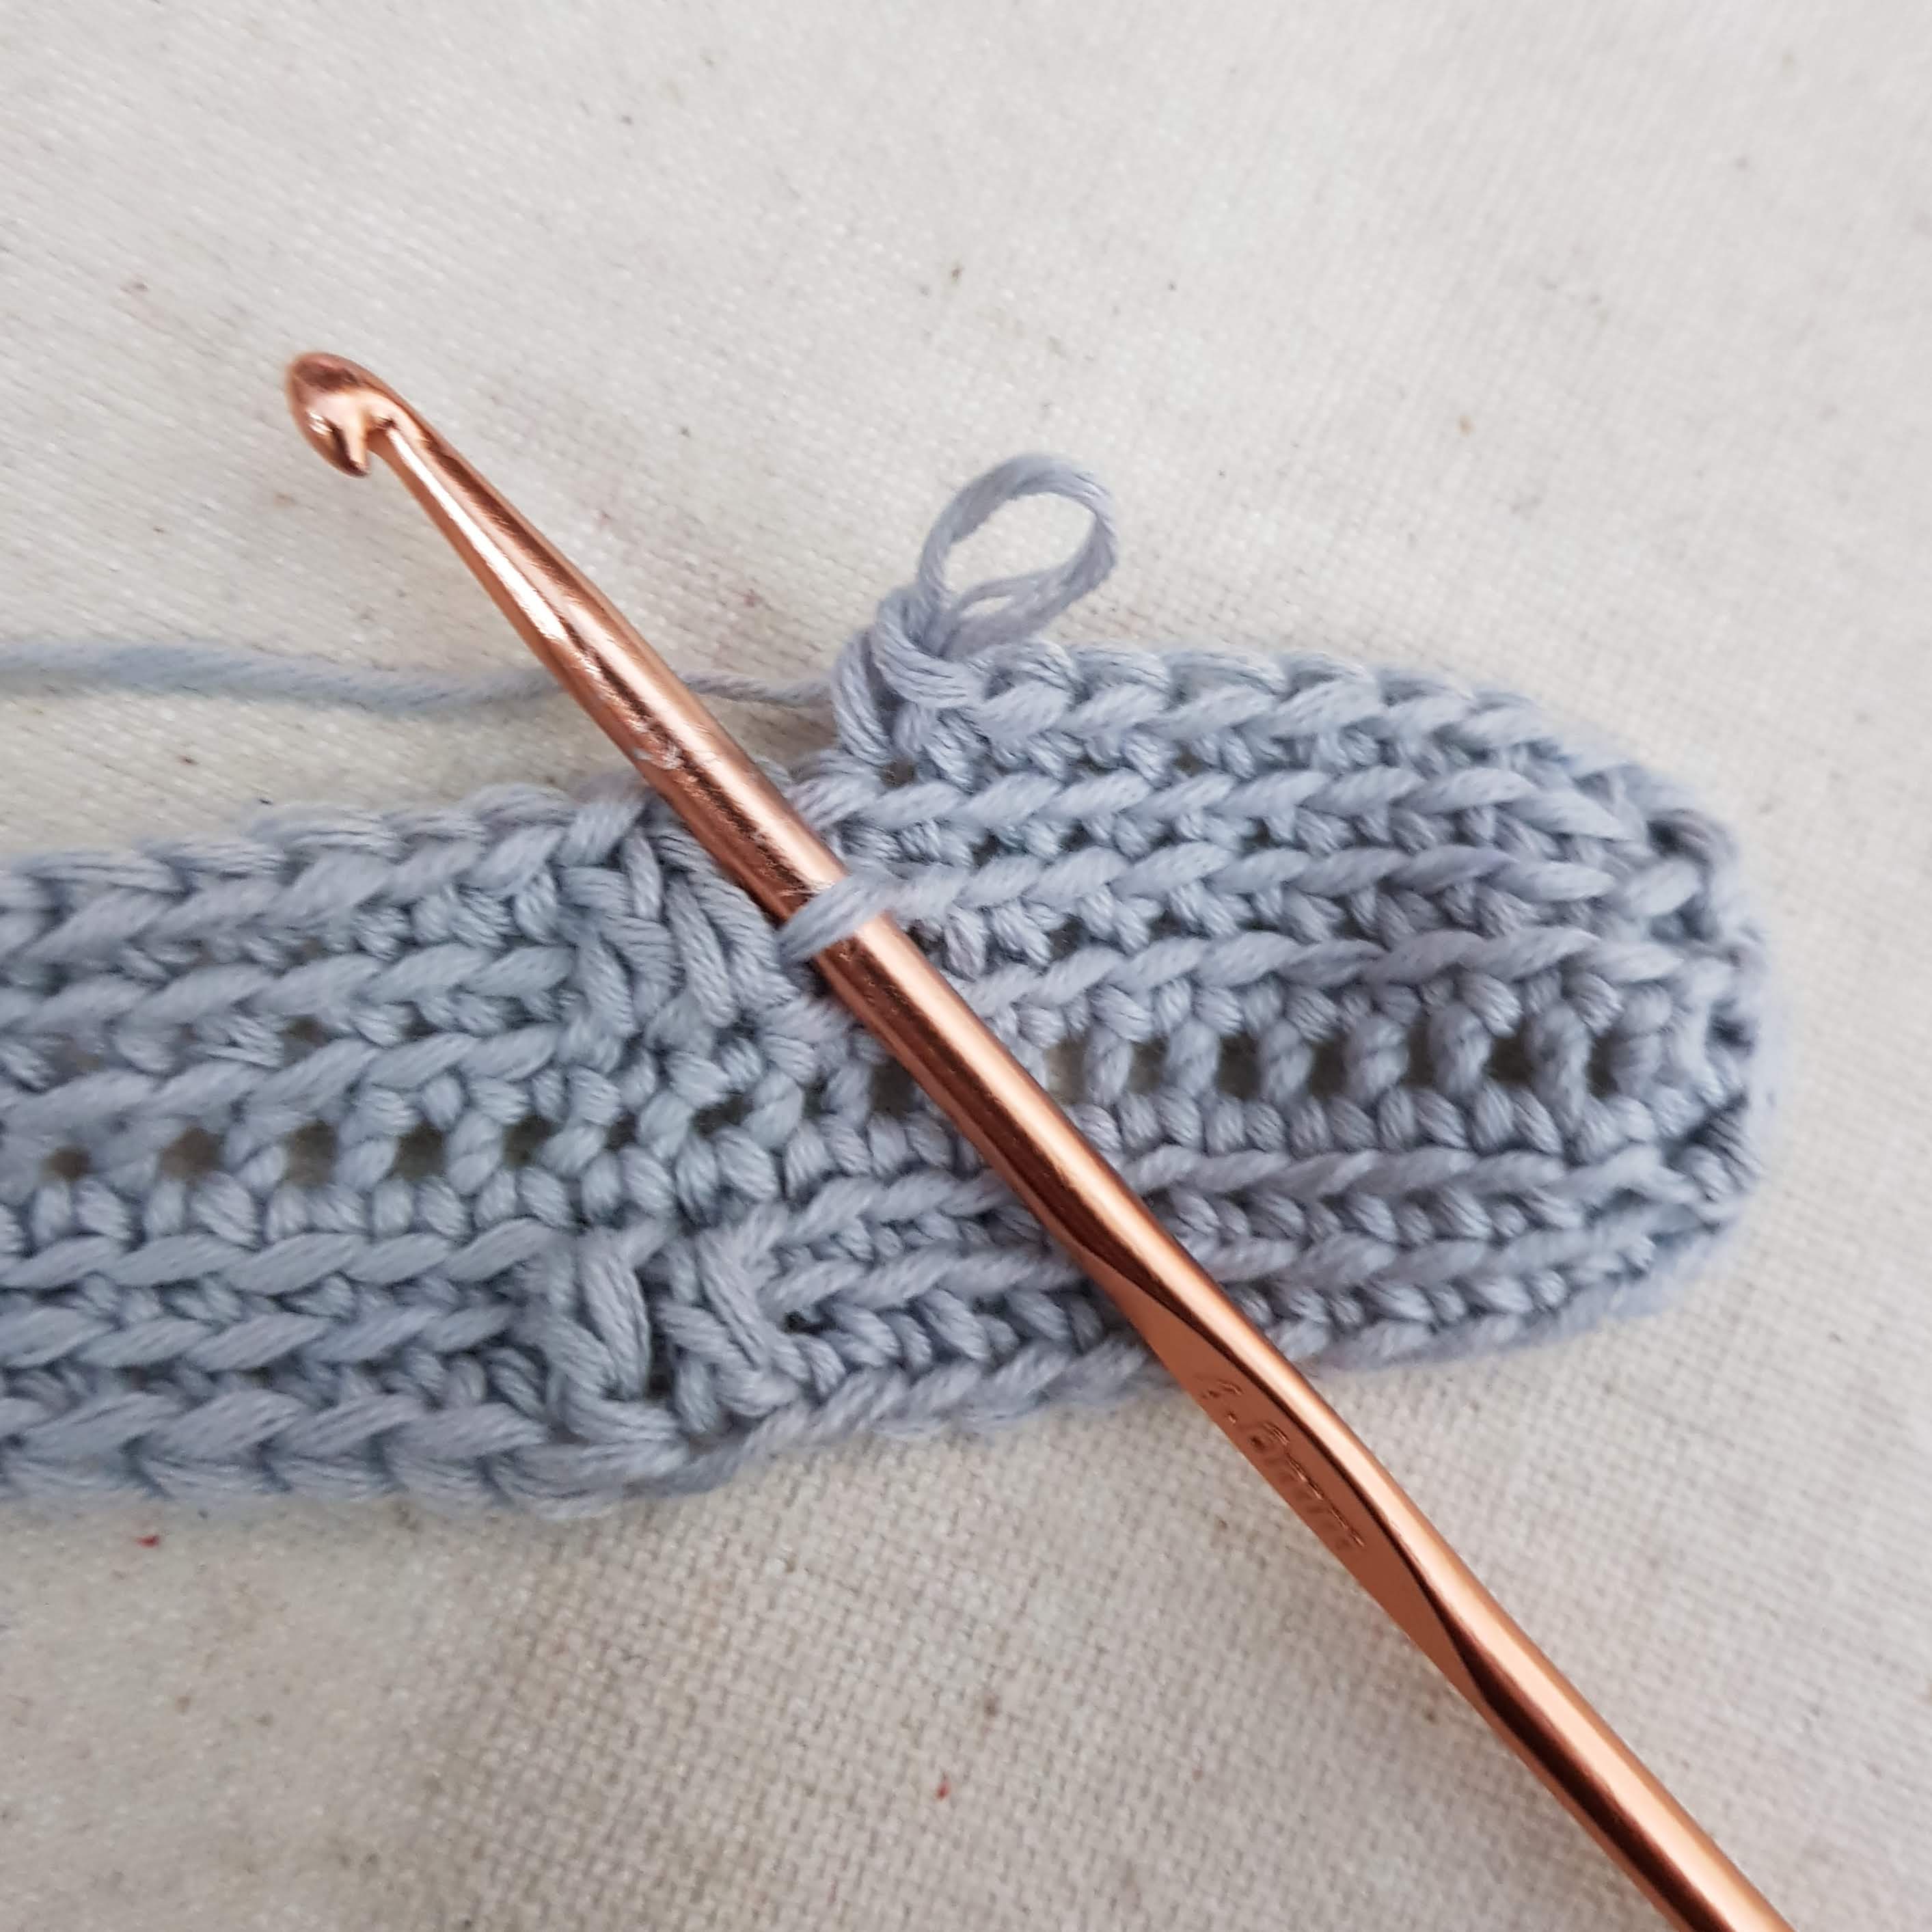
Step 1 – CH 73
Step 2 – 72 SC
Step 3 – Work all the way round the row from Step 1, making another 72 SC across from what you made in step 2. Join to first SC from step 2 with a slip stitch
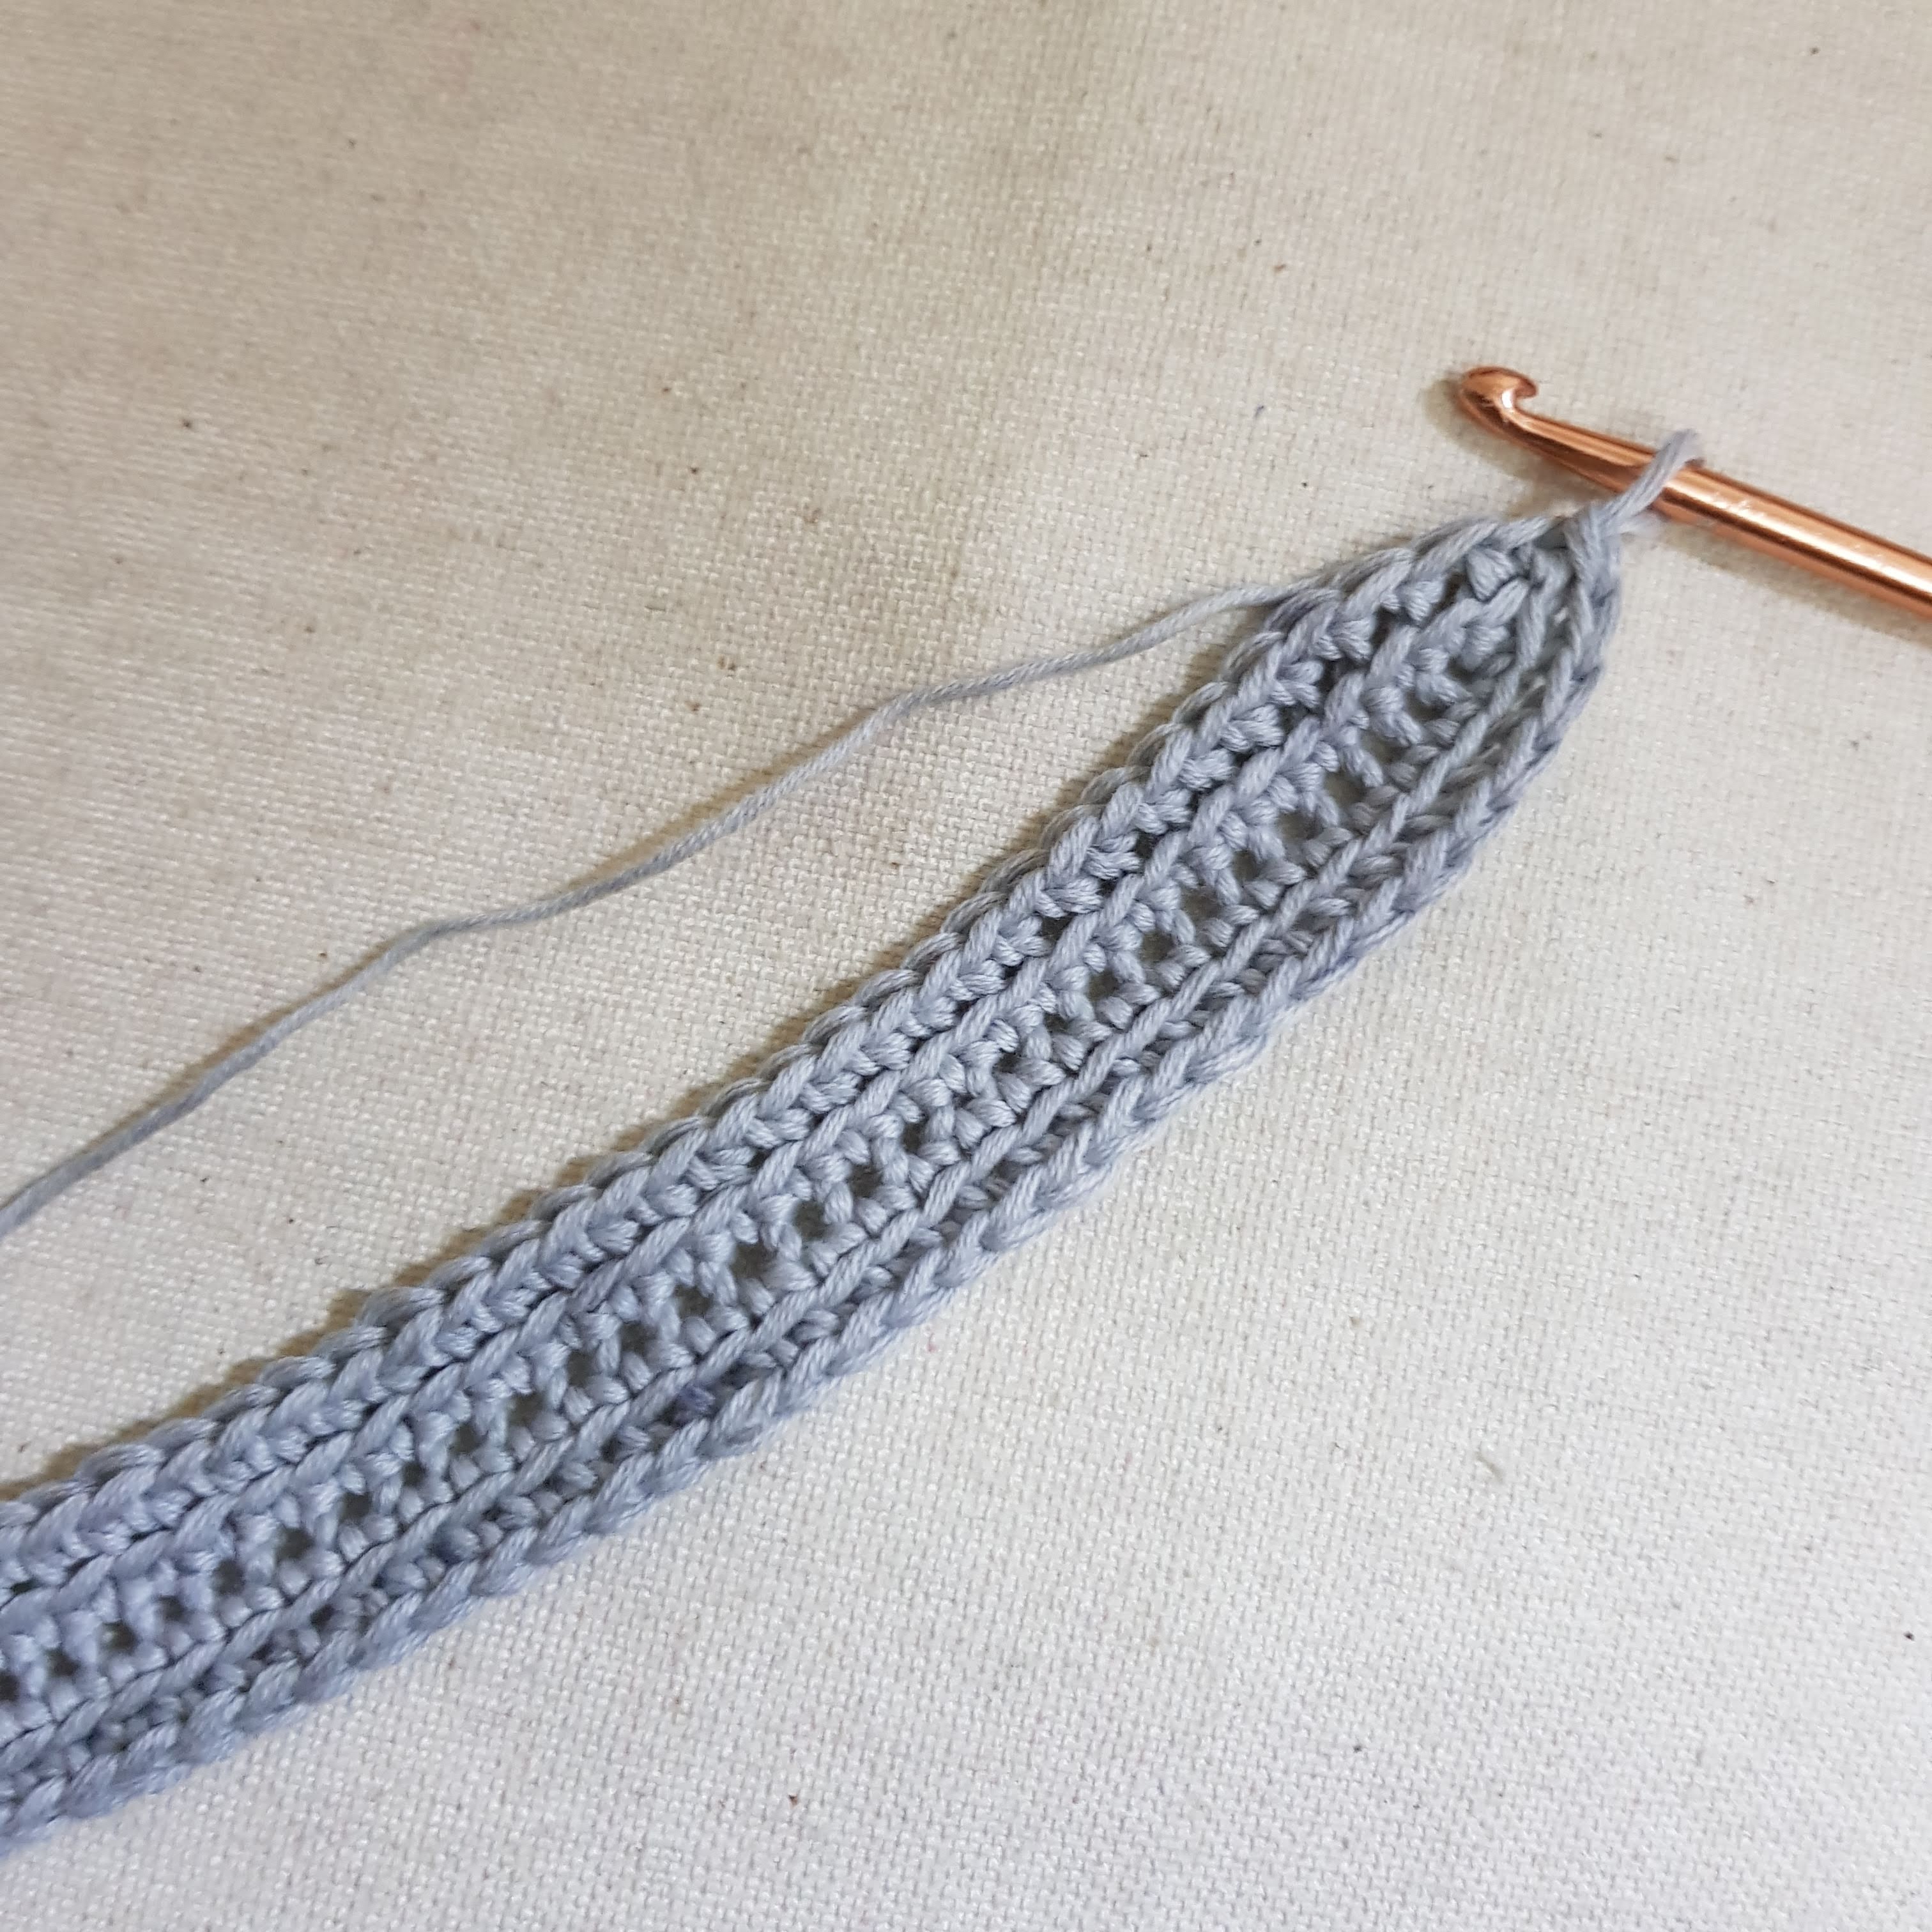
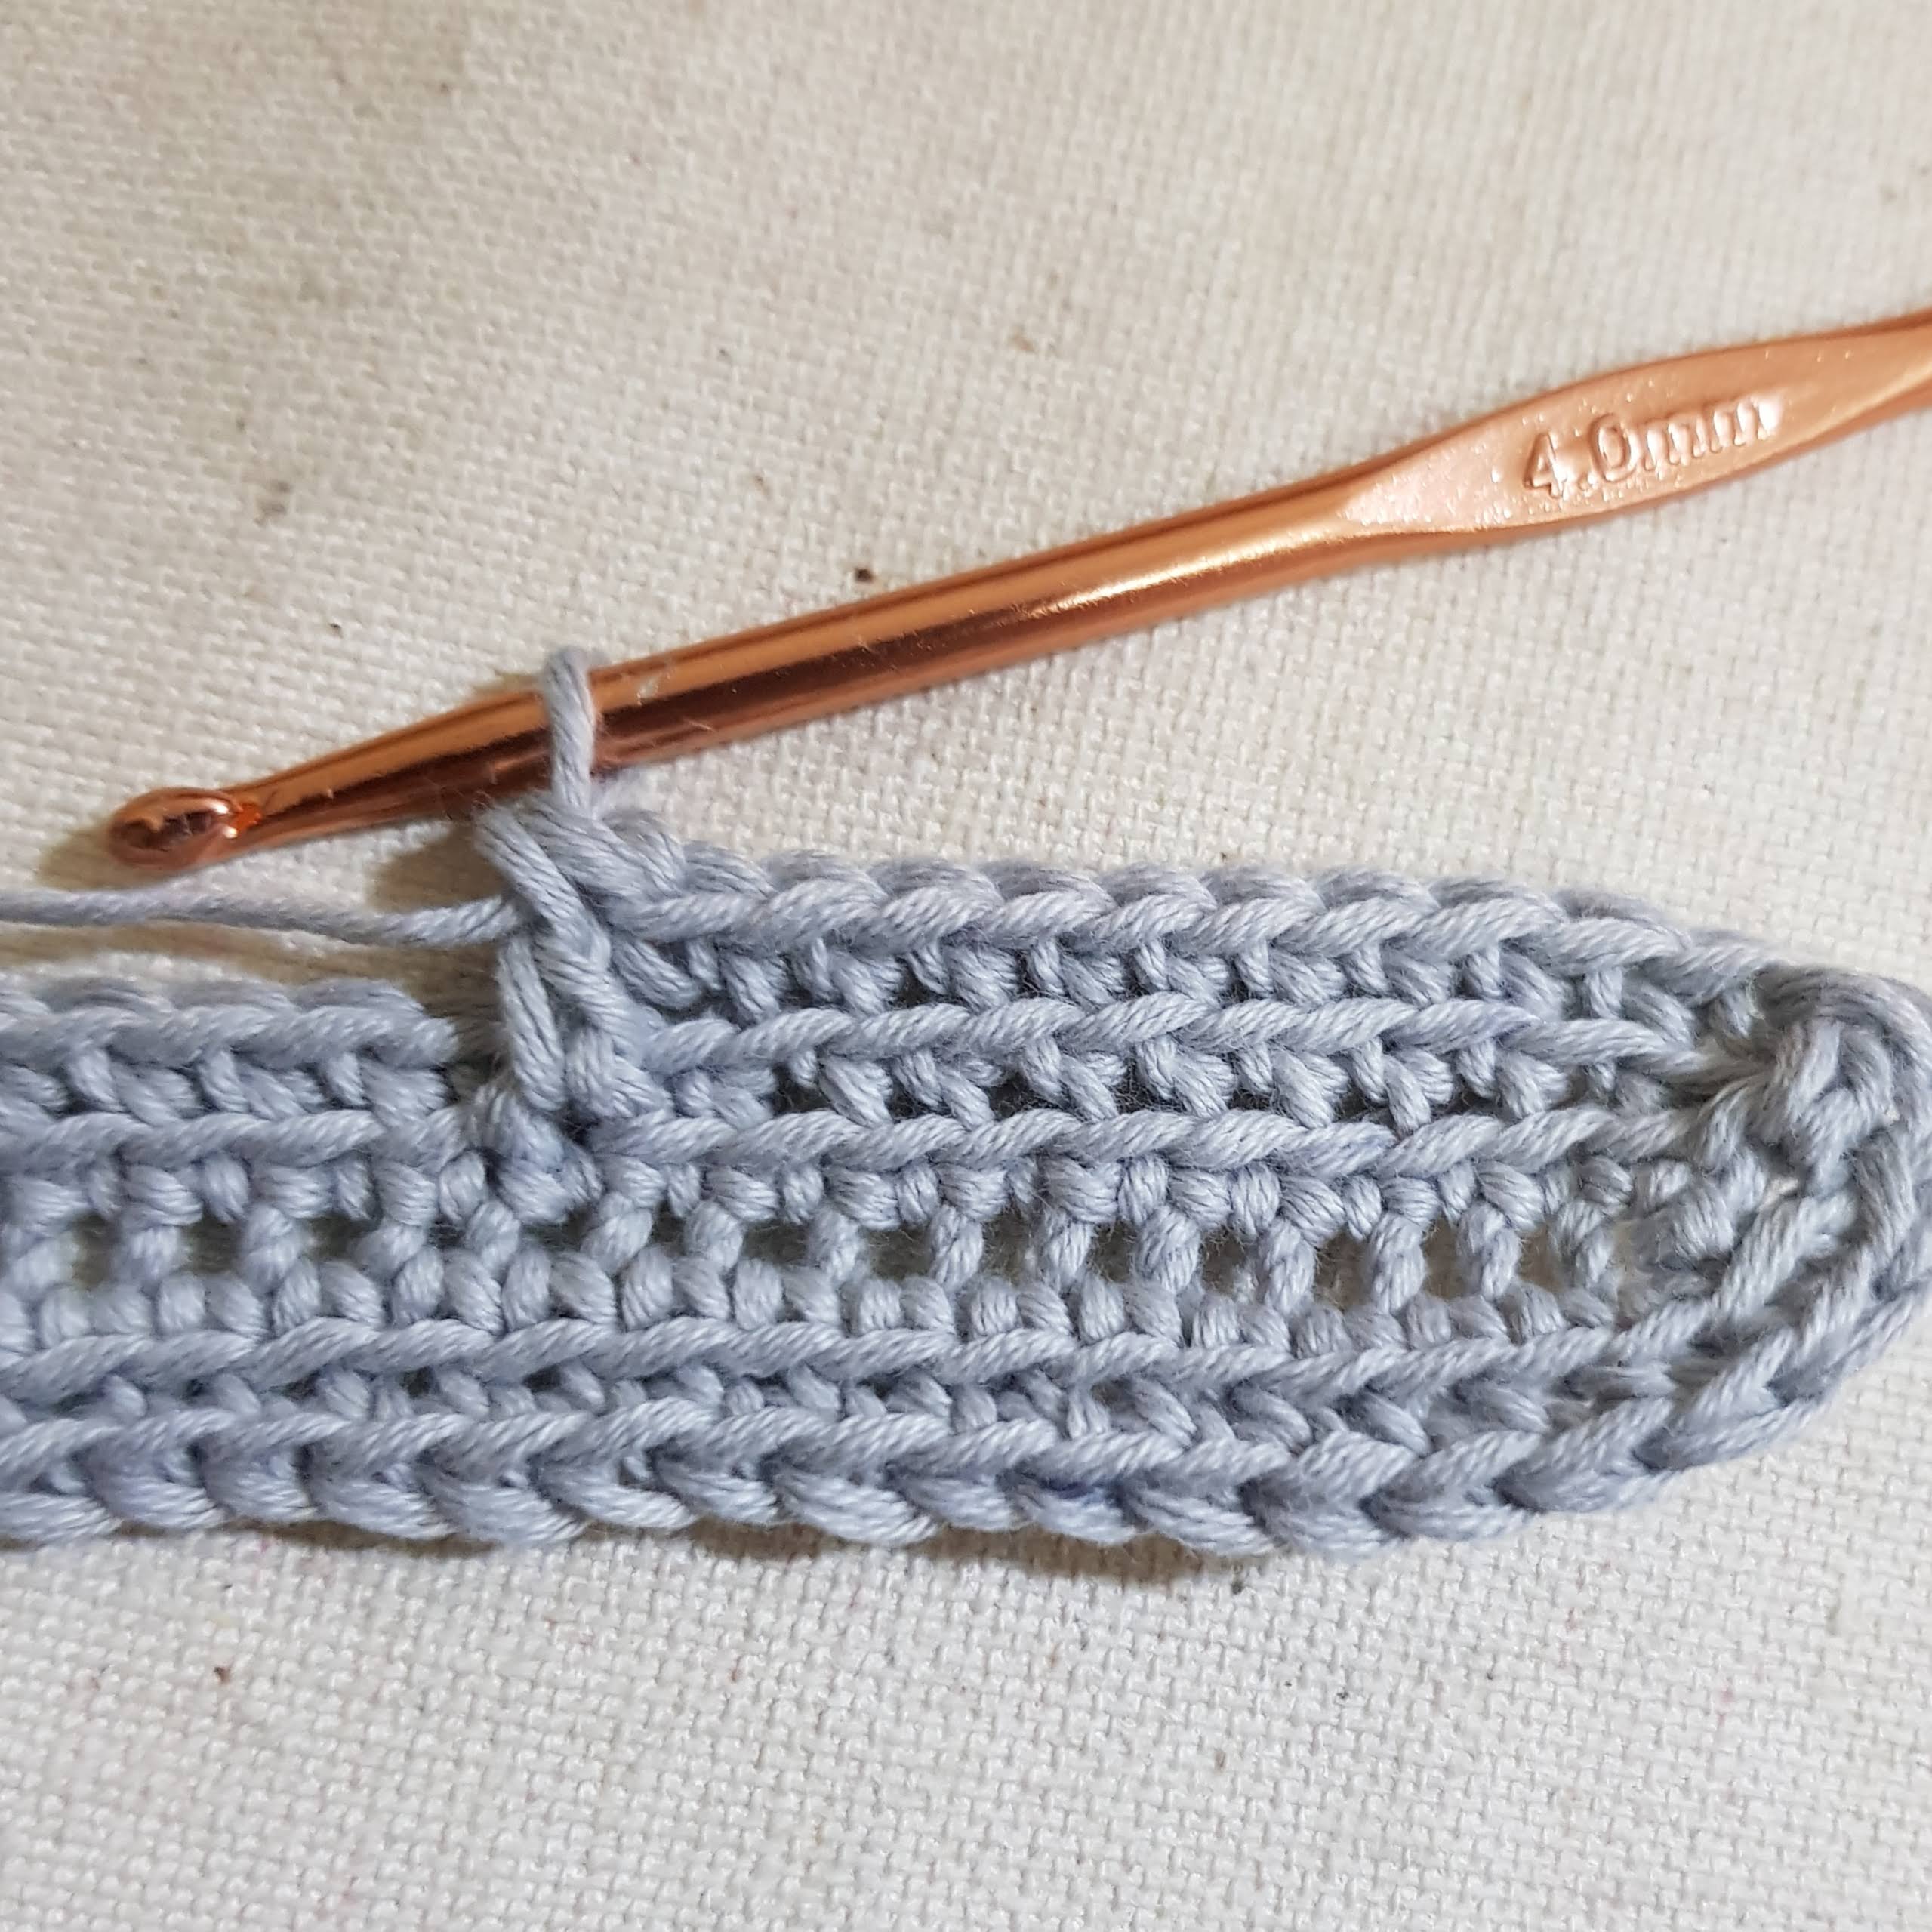
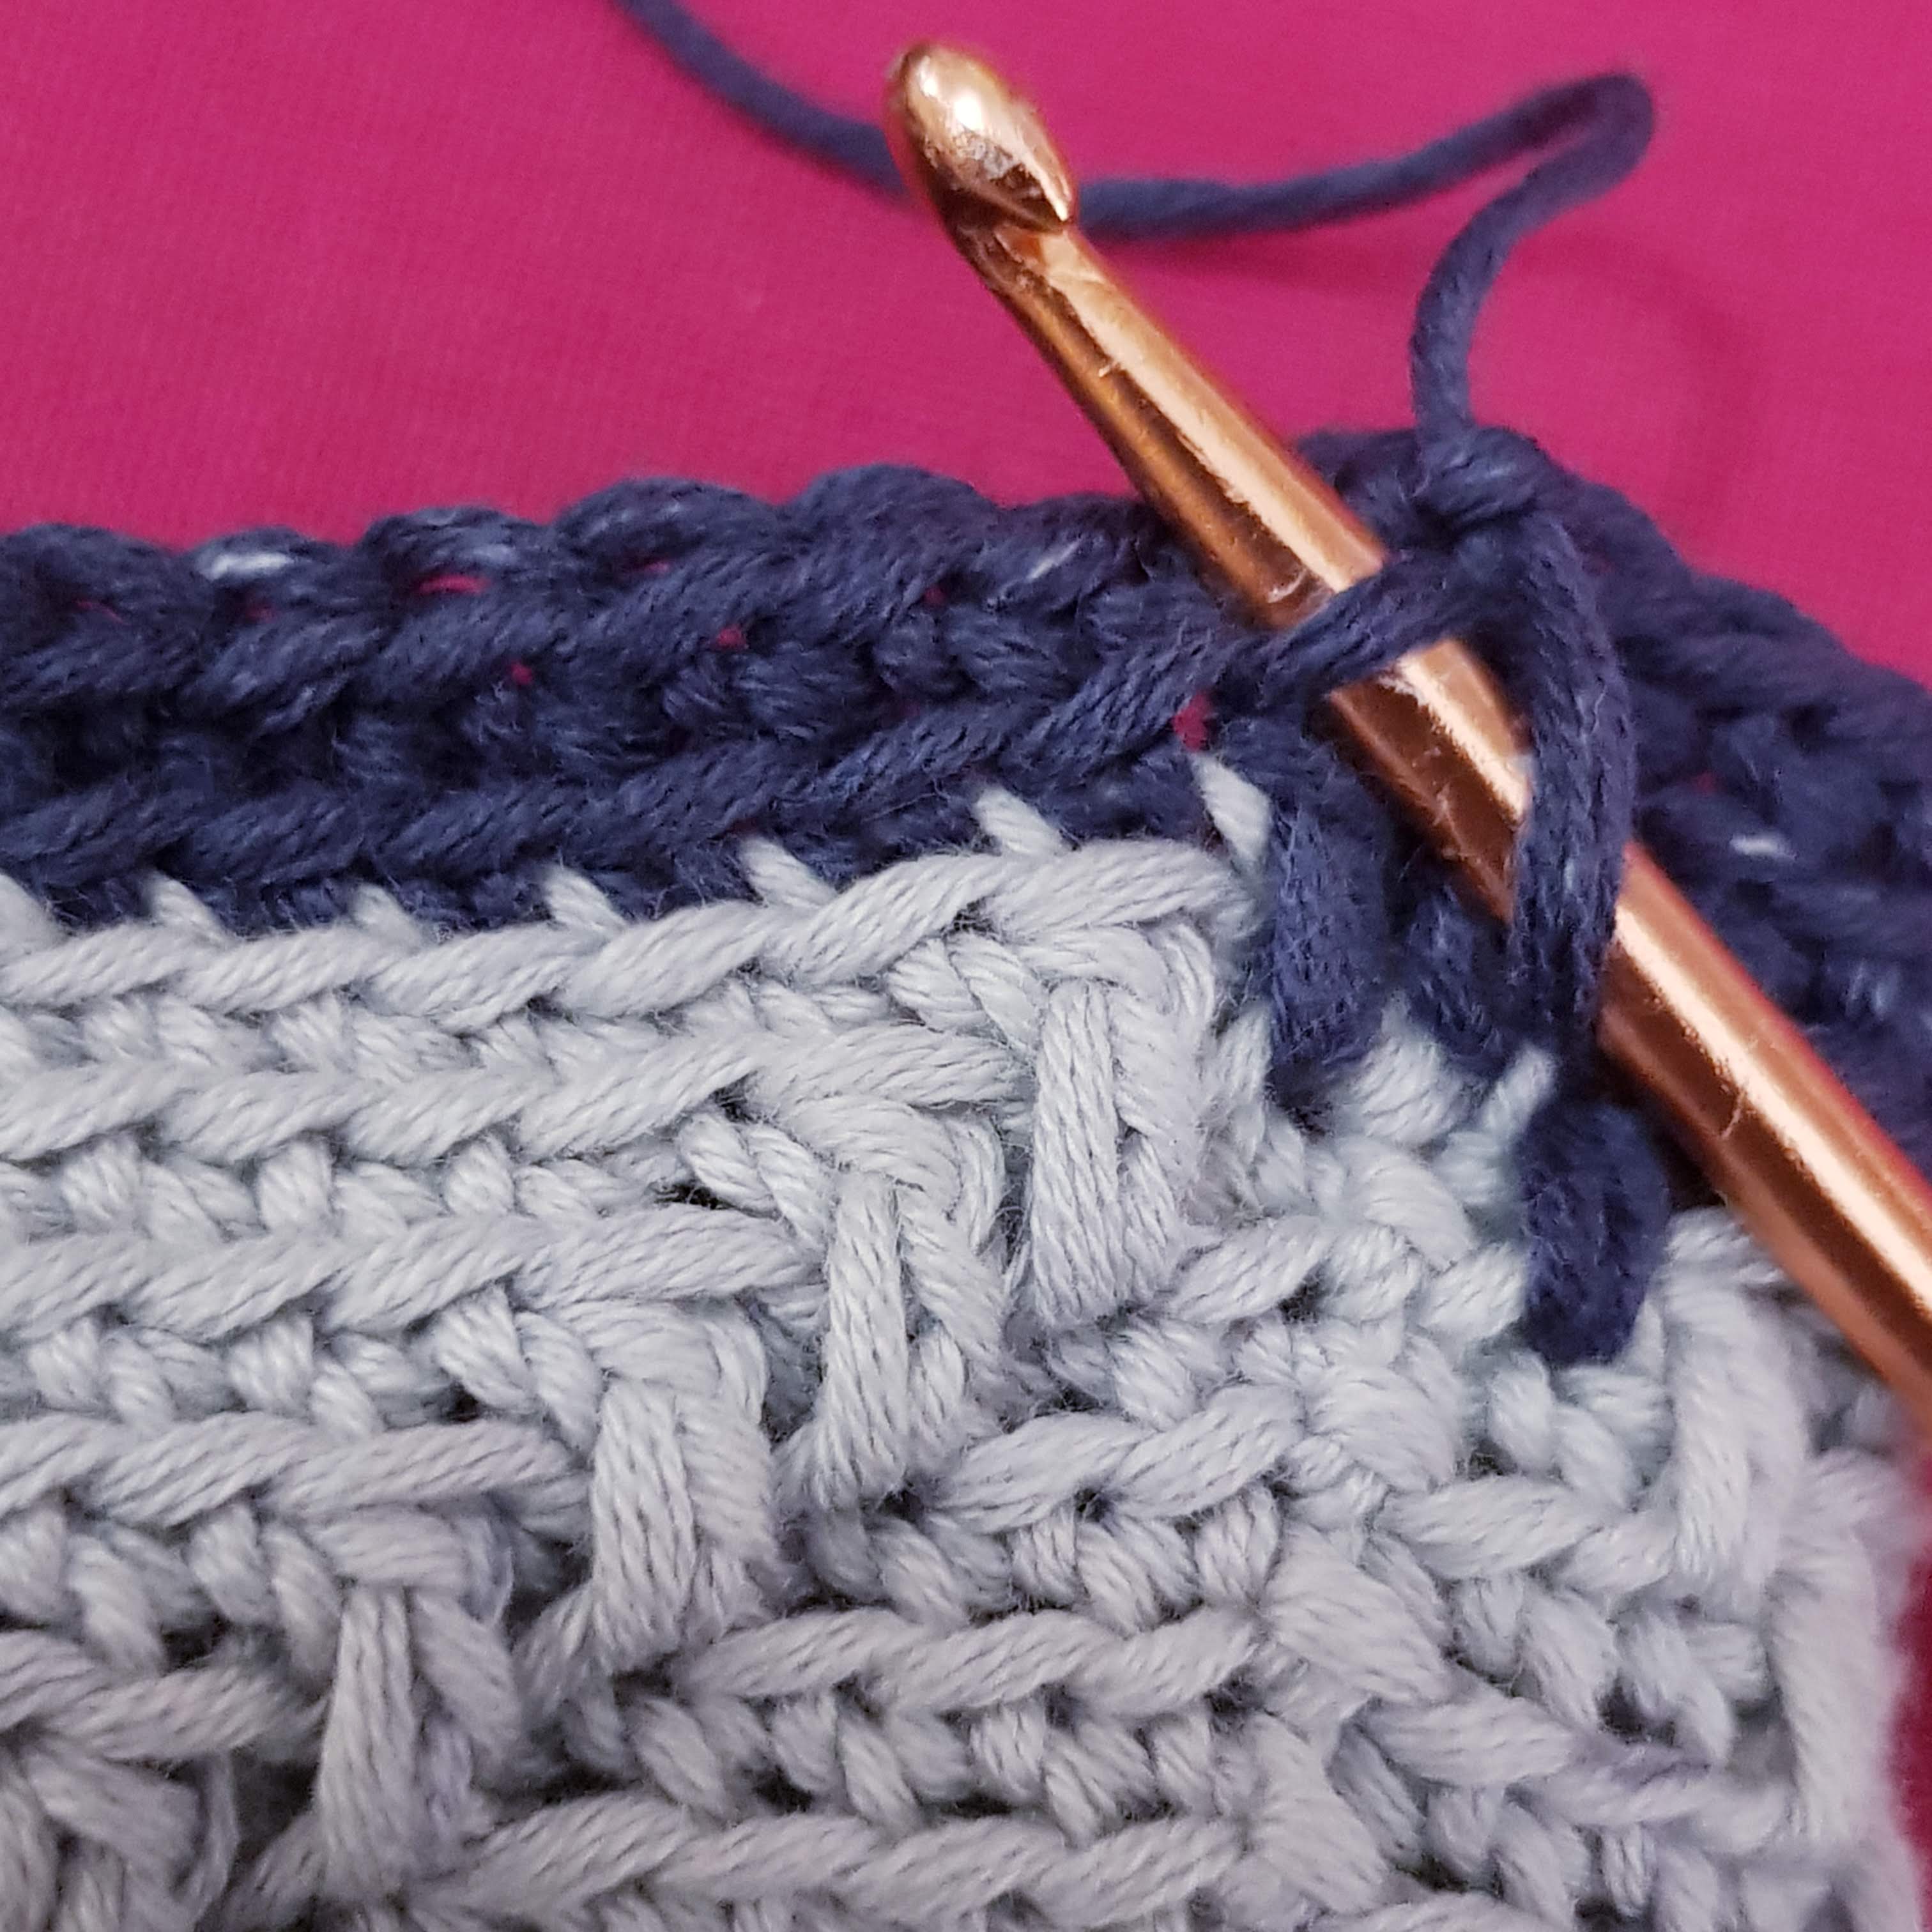
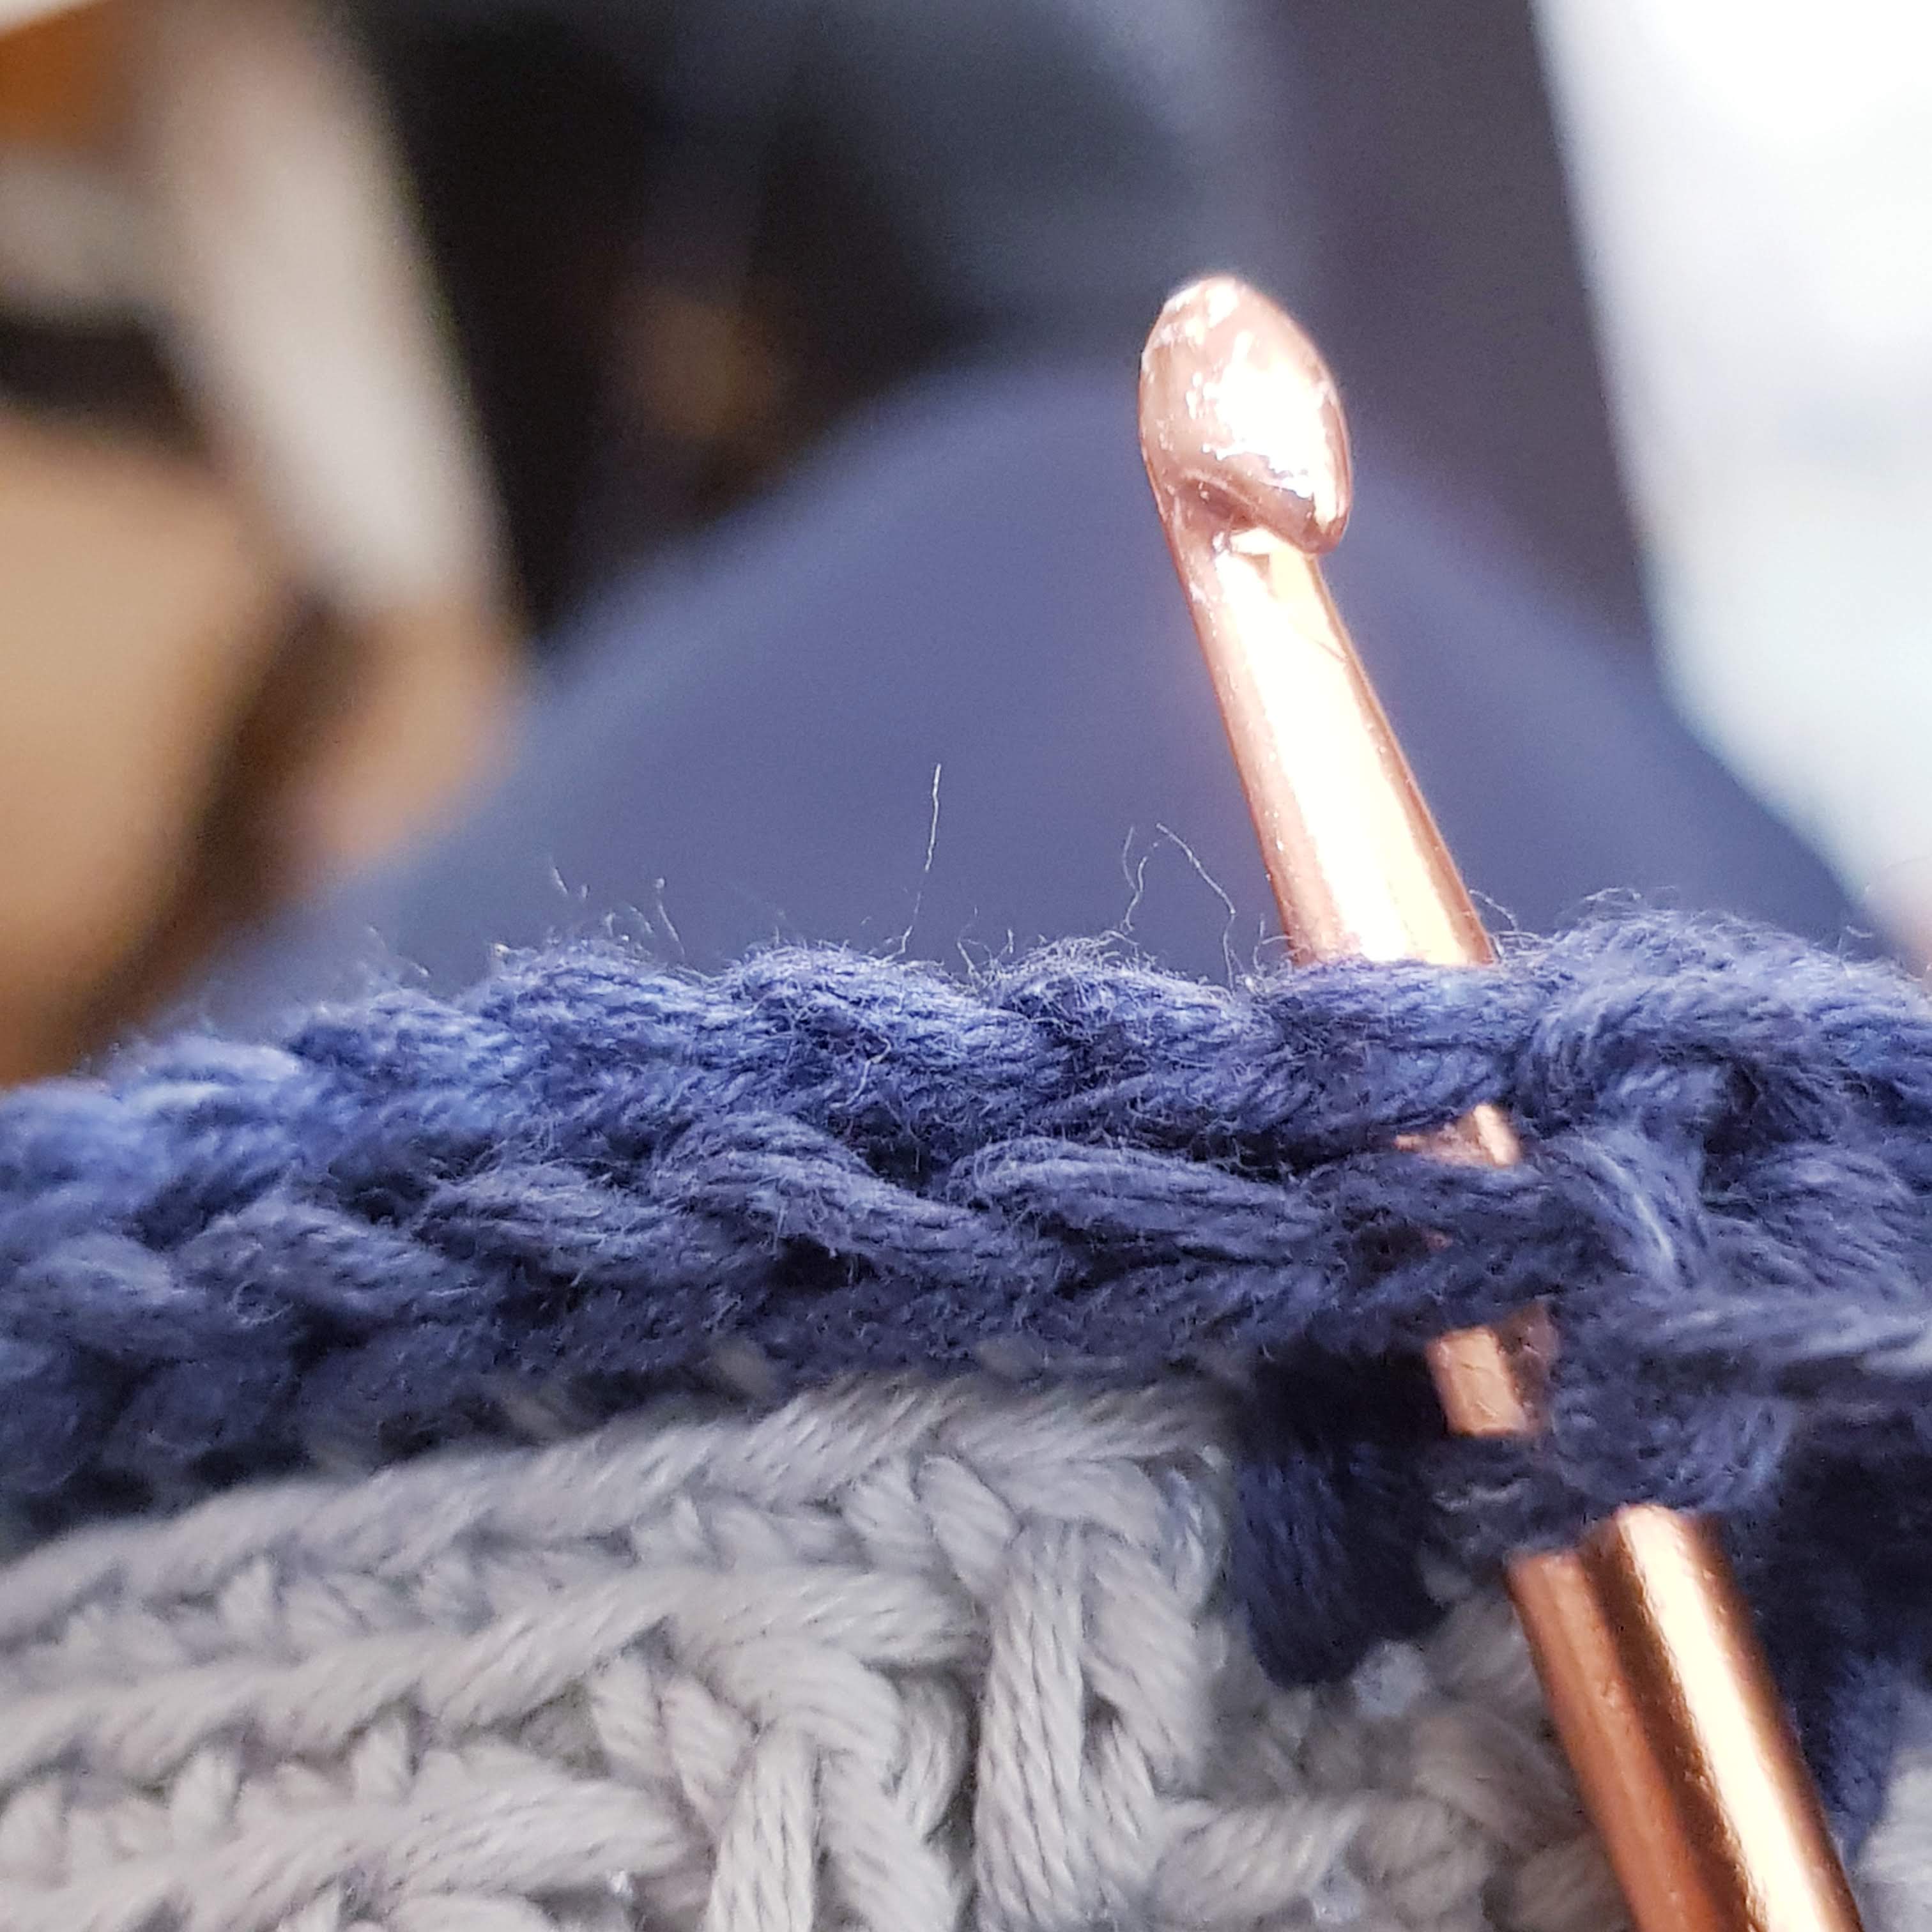
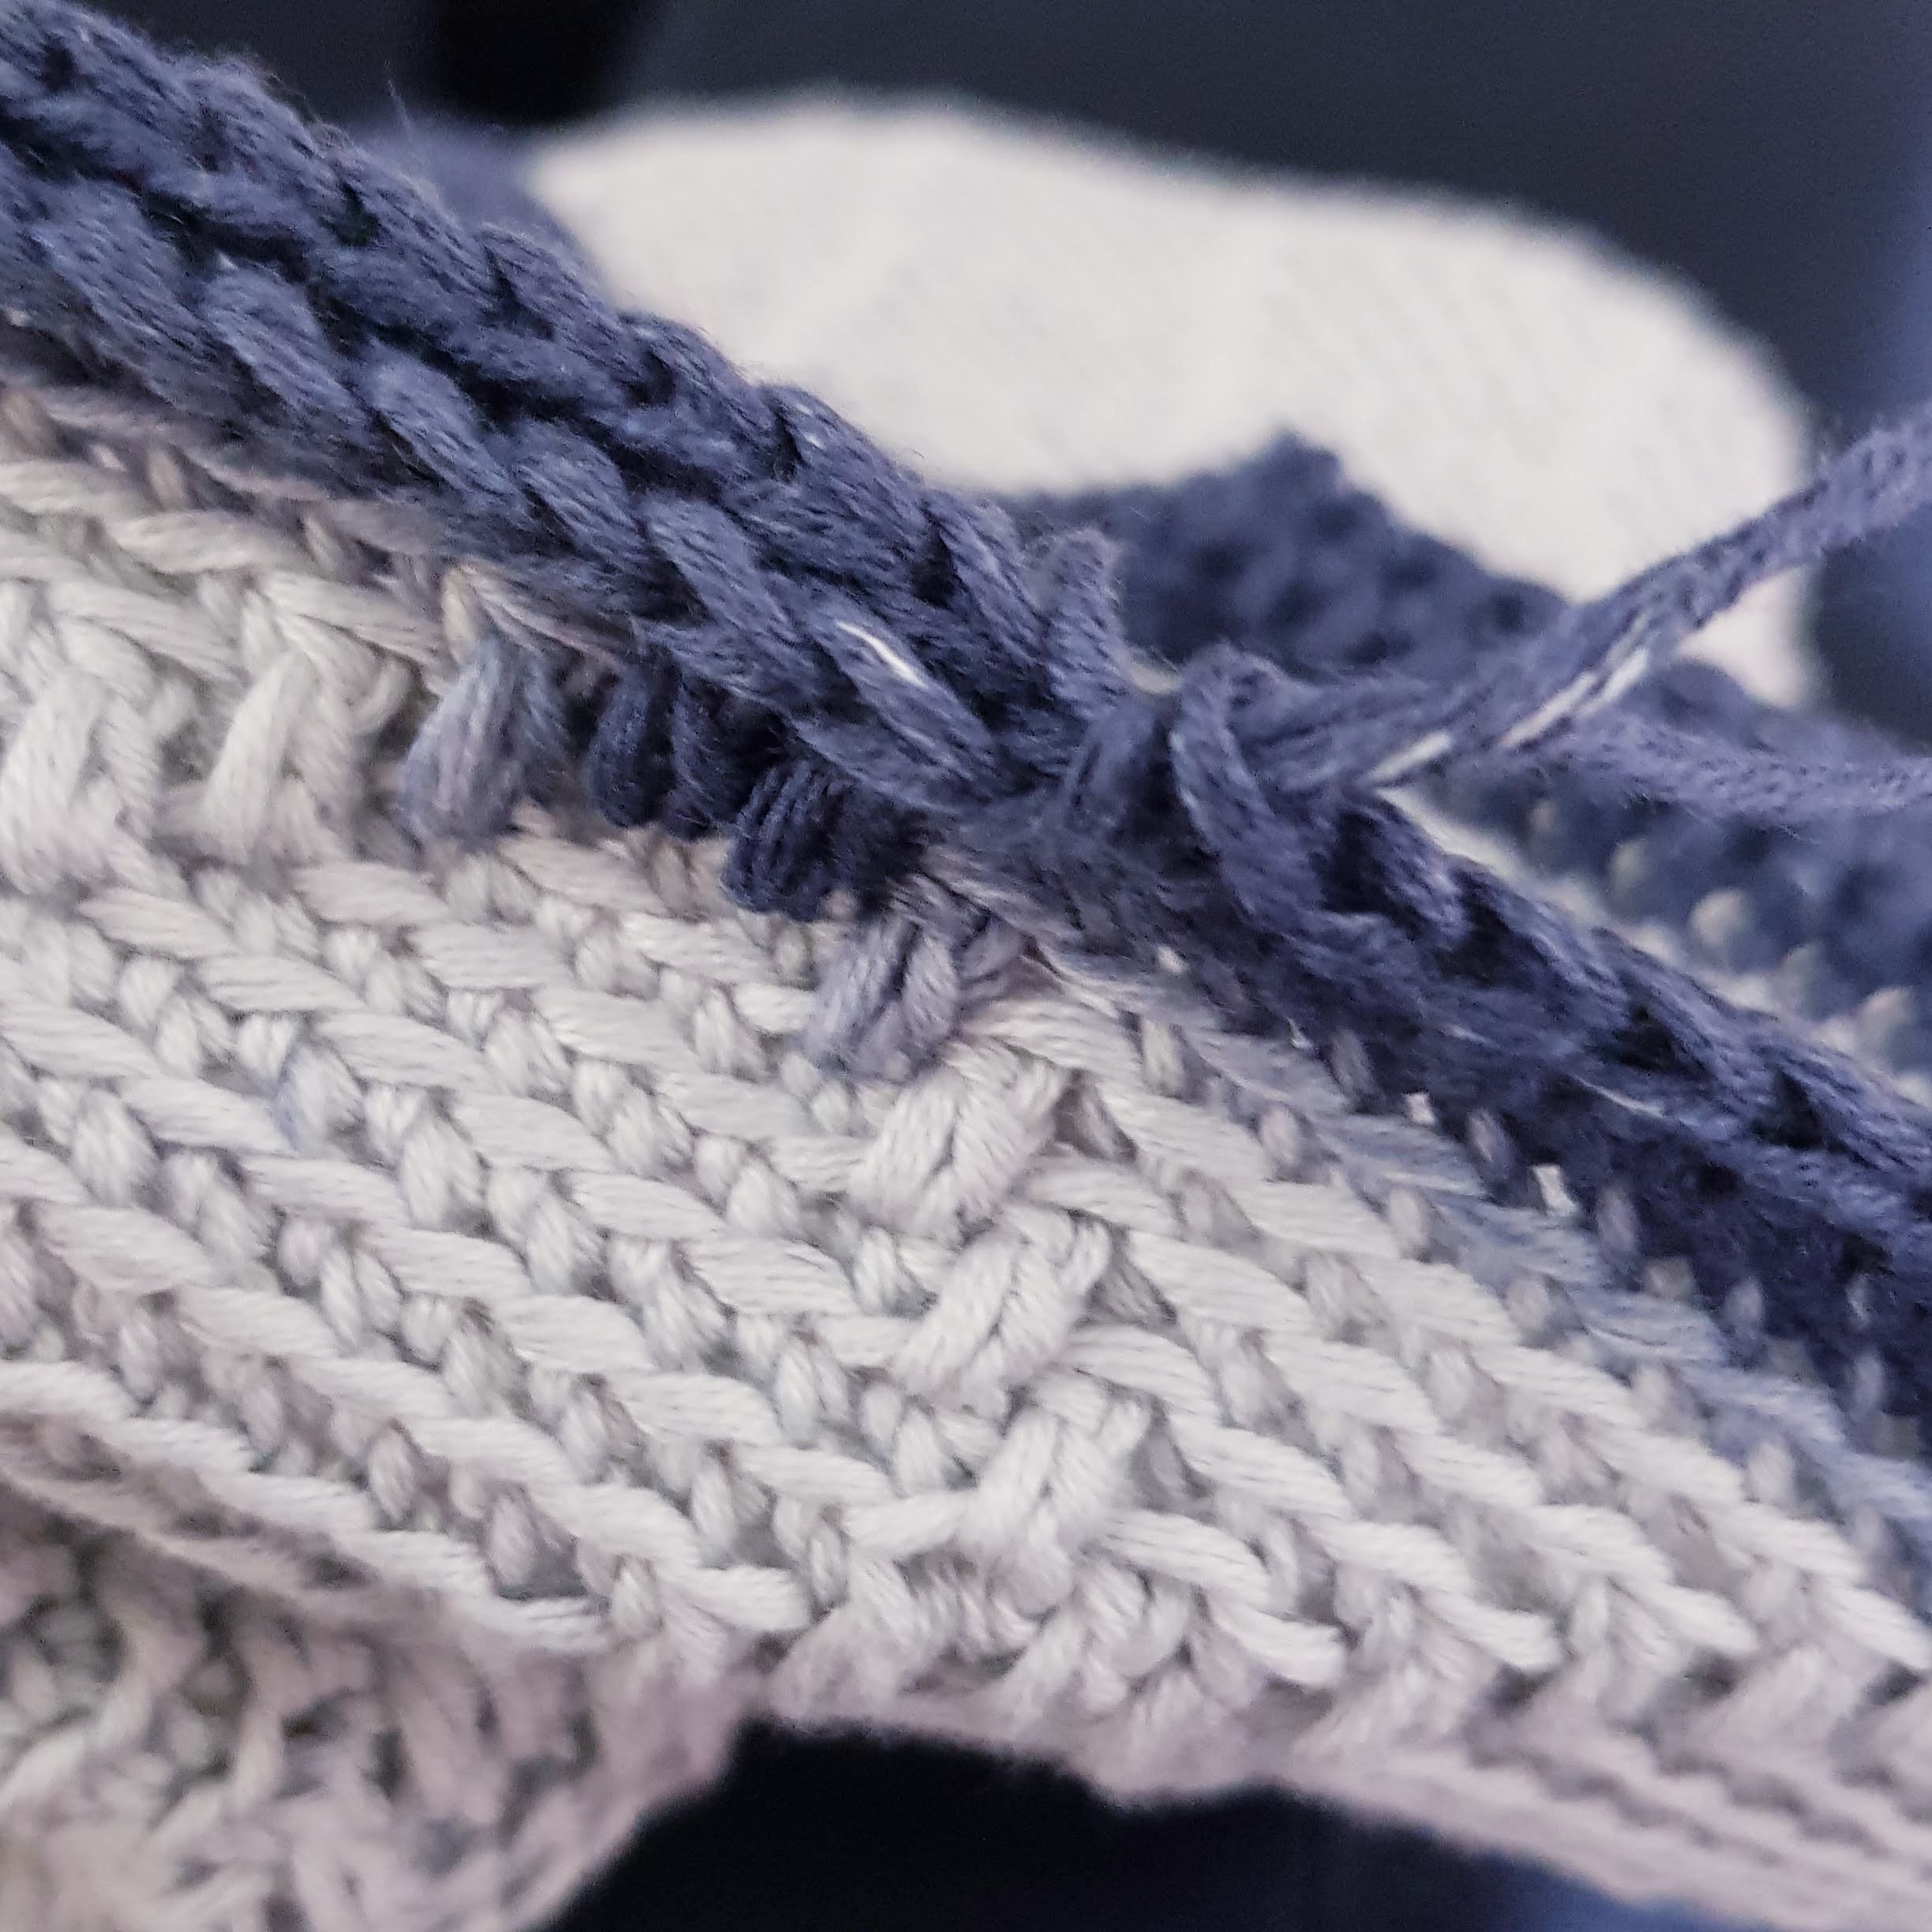
Step 4 – CH 1. 144 SC in the back loop of SC from steps 2 and 3. Join to first SC with a slip stitch.
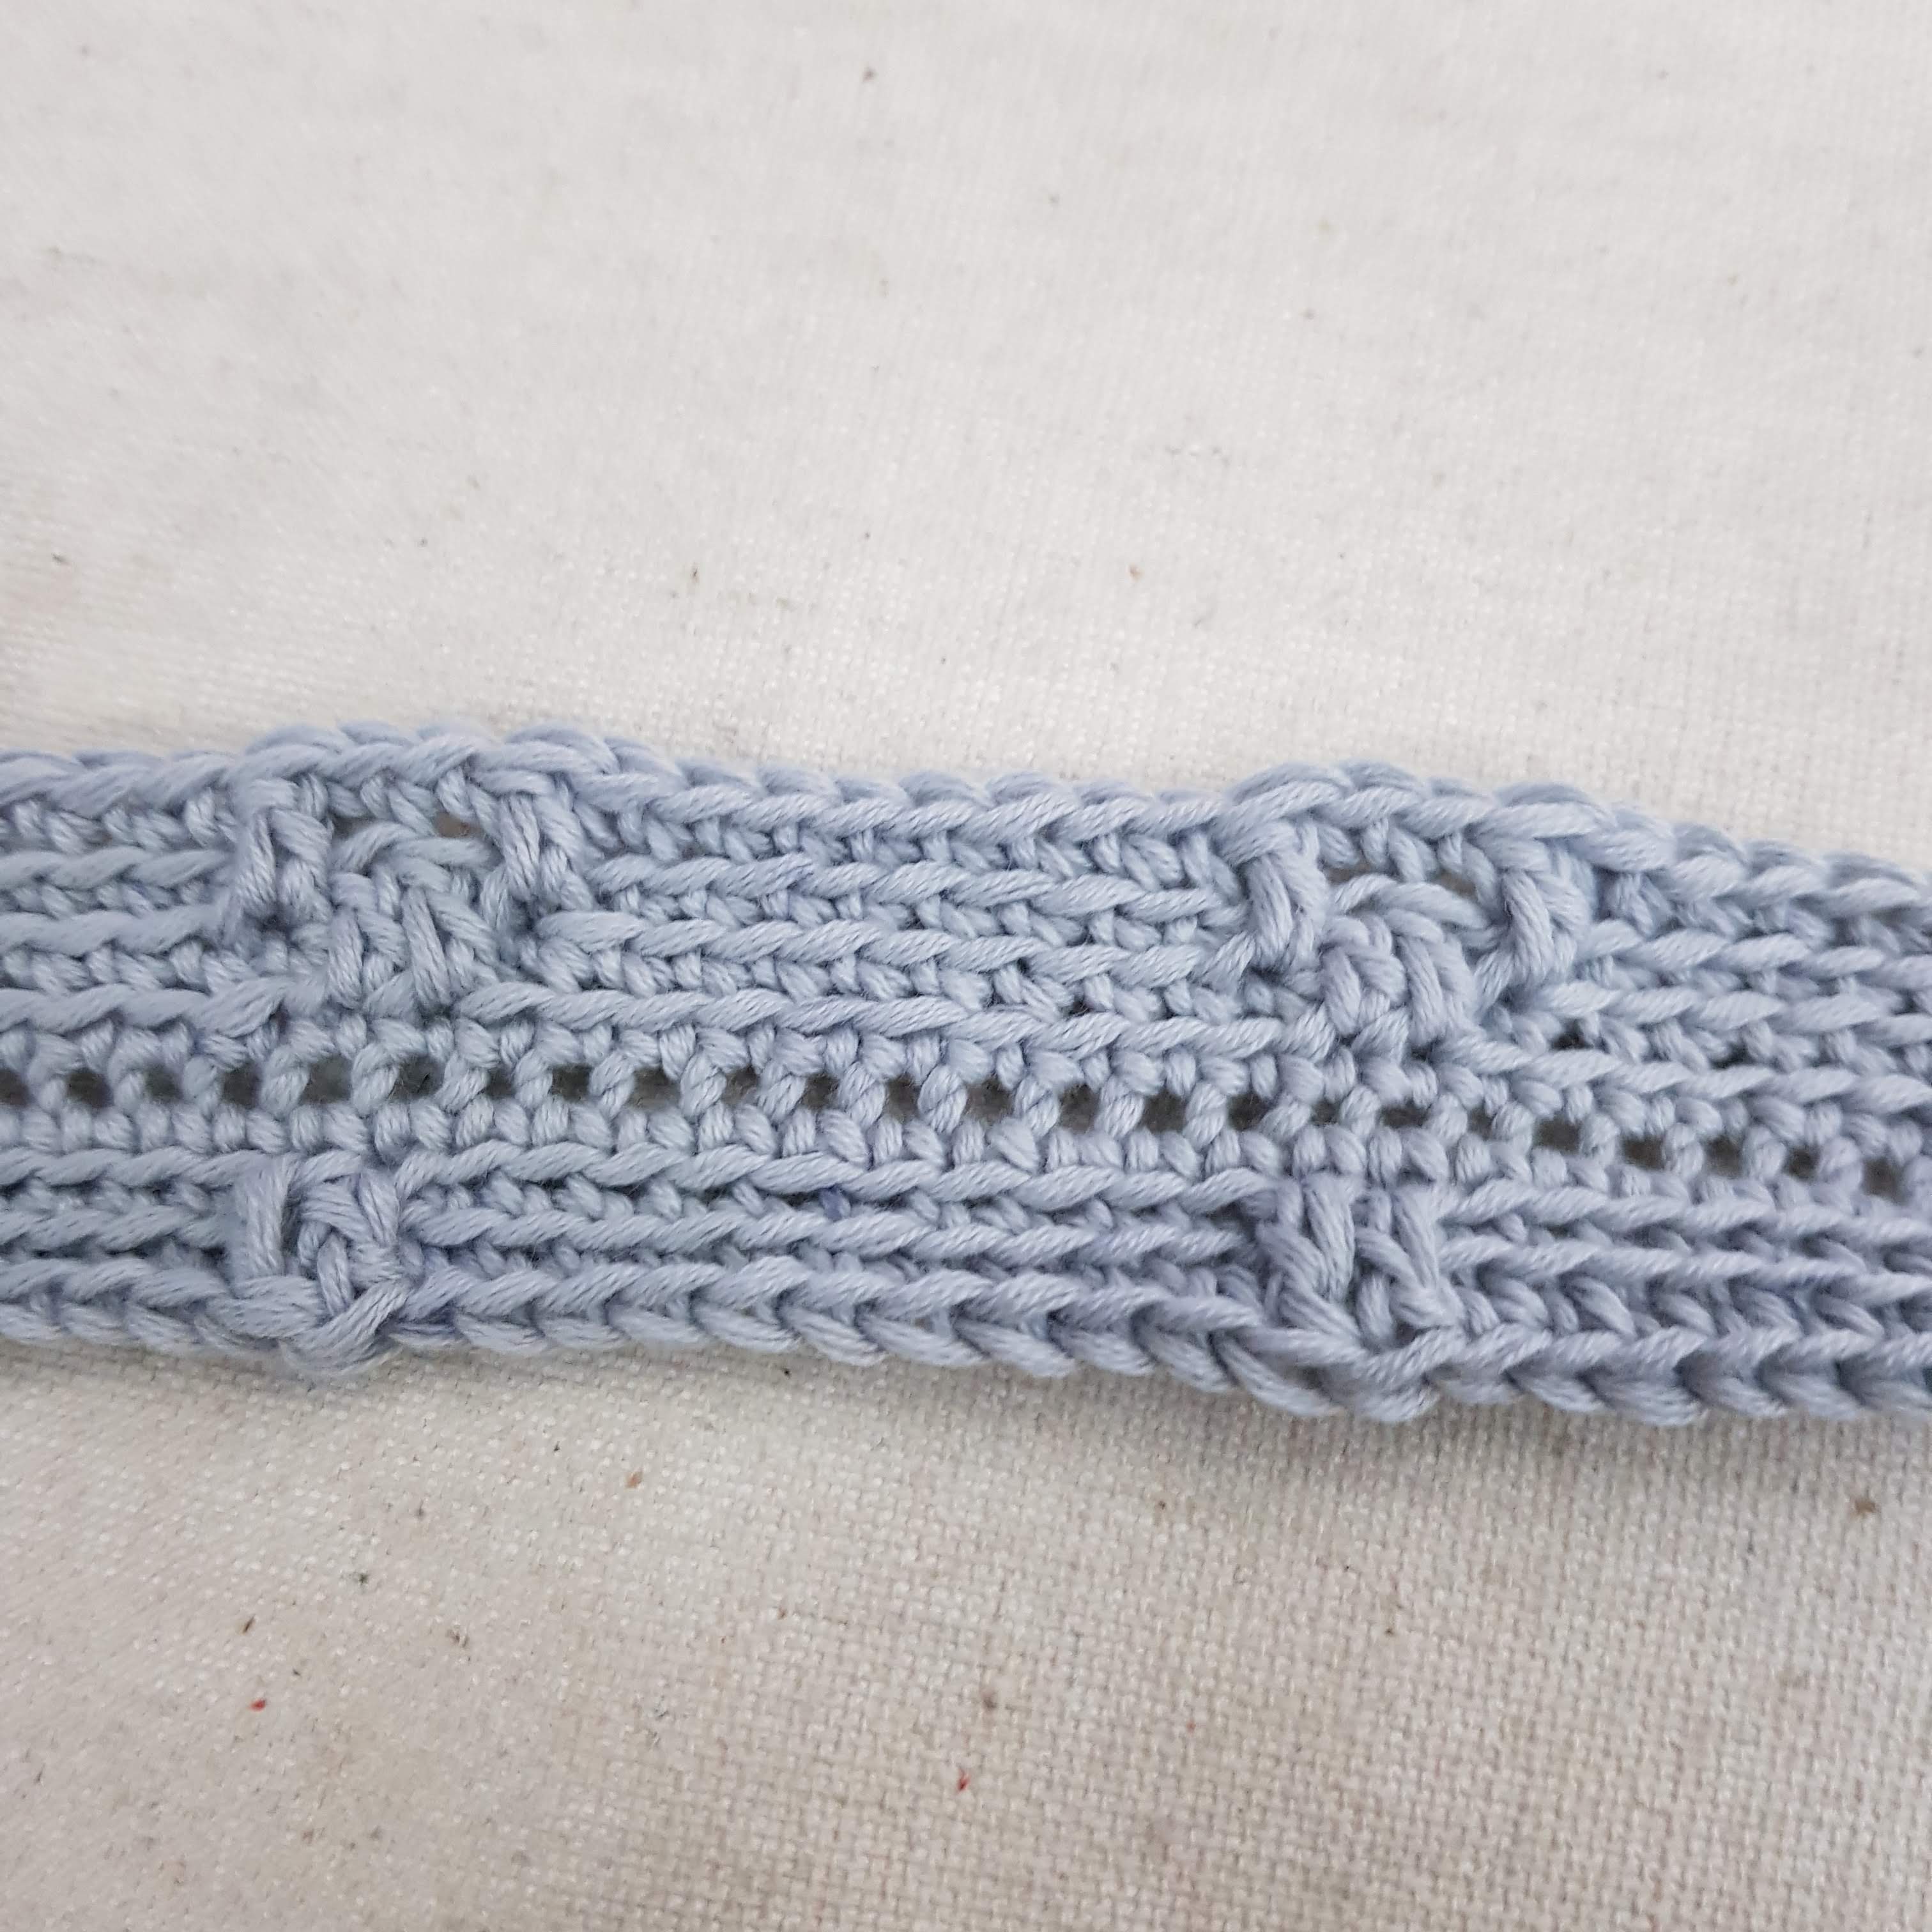
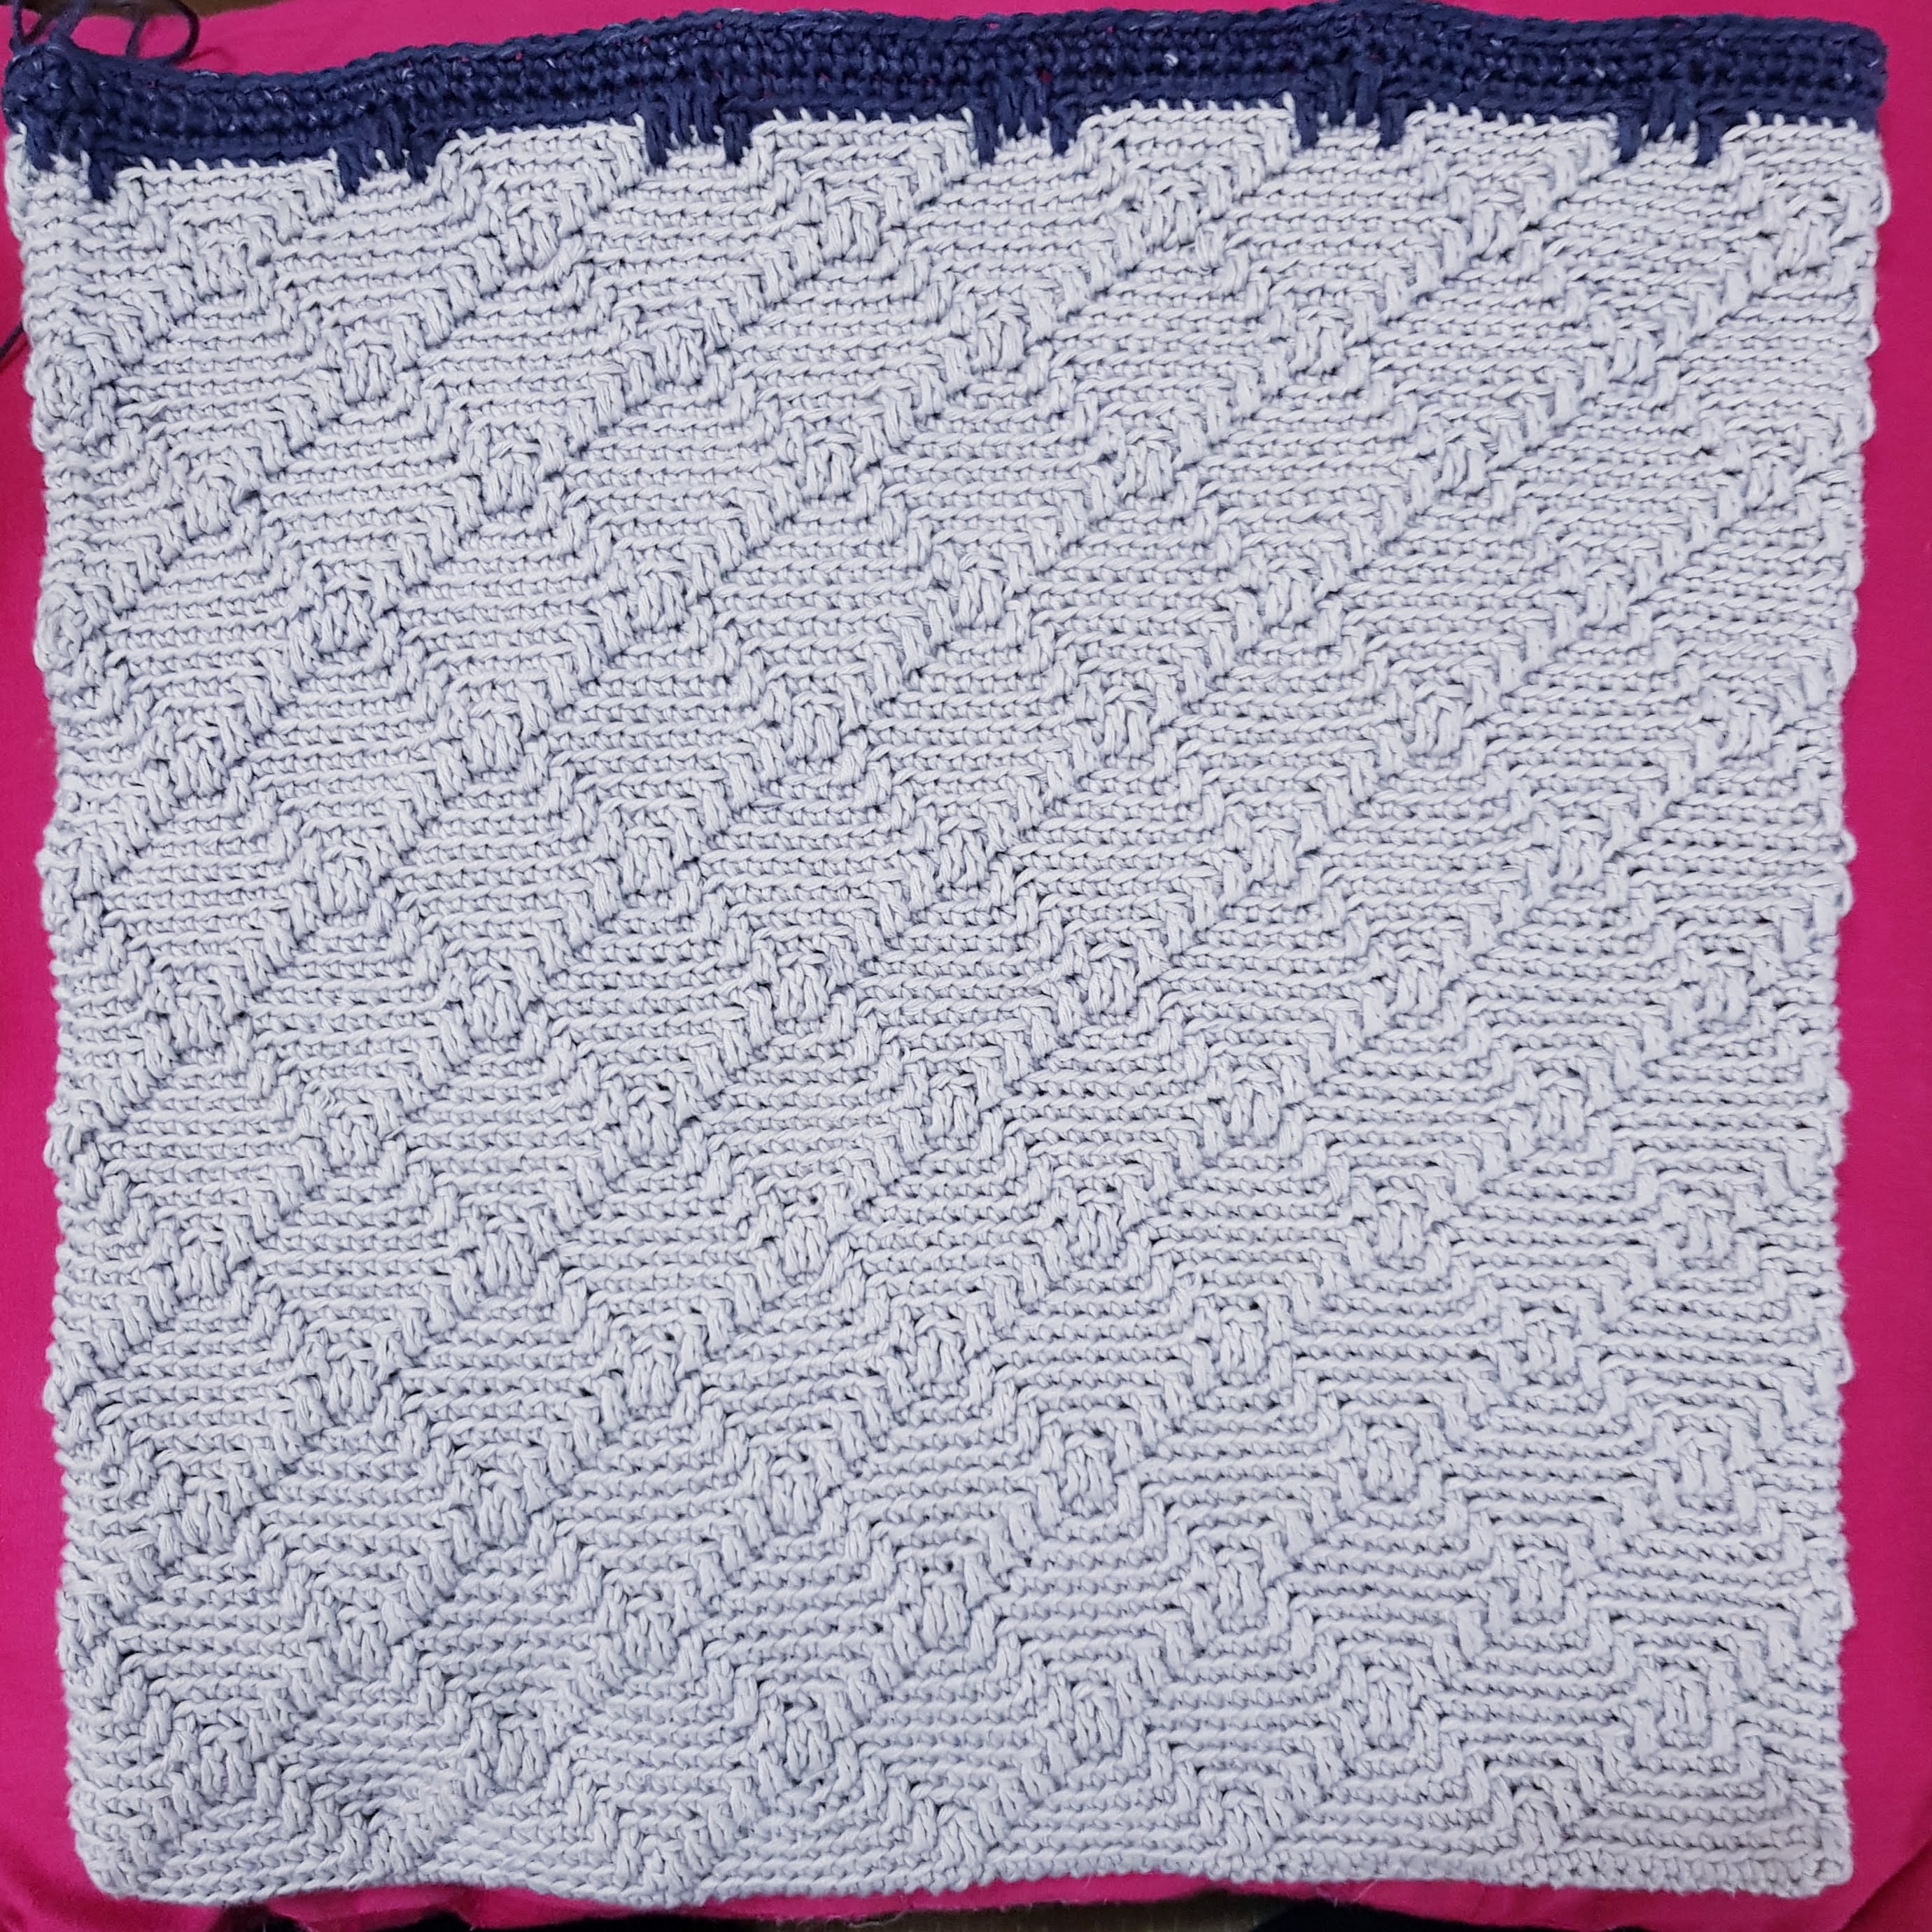
Step 5 – CH 1. Repeat (DC in front loop of SC from previous row. Skip 1 SC. 10 SC in back loop of SC. DC in front loop of SC under the next SC (i.e. DC is in SC from previous row)) 12 times. Join to first SC with a slip stitch.
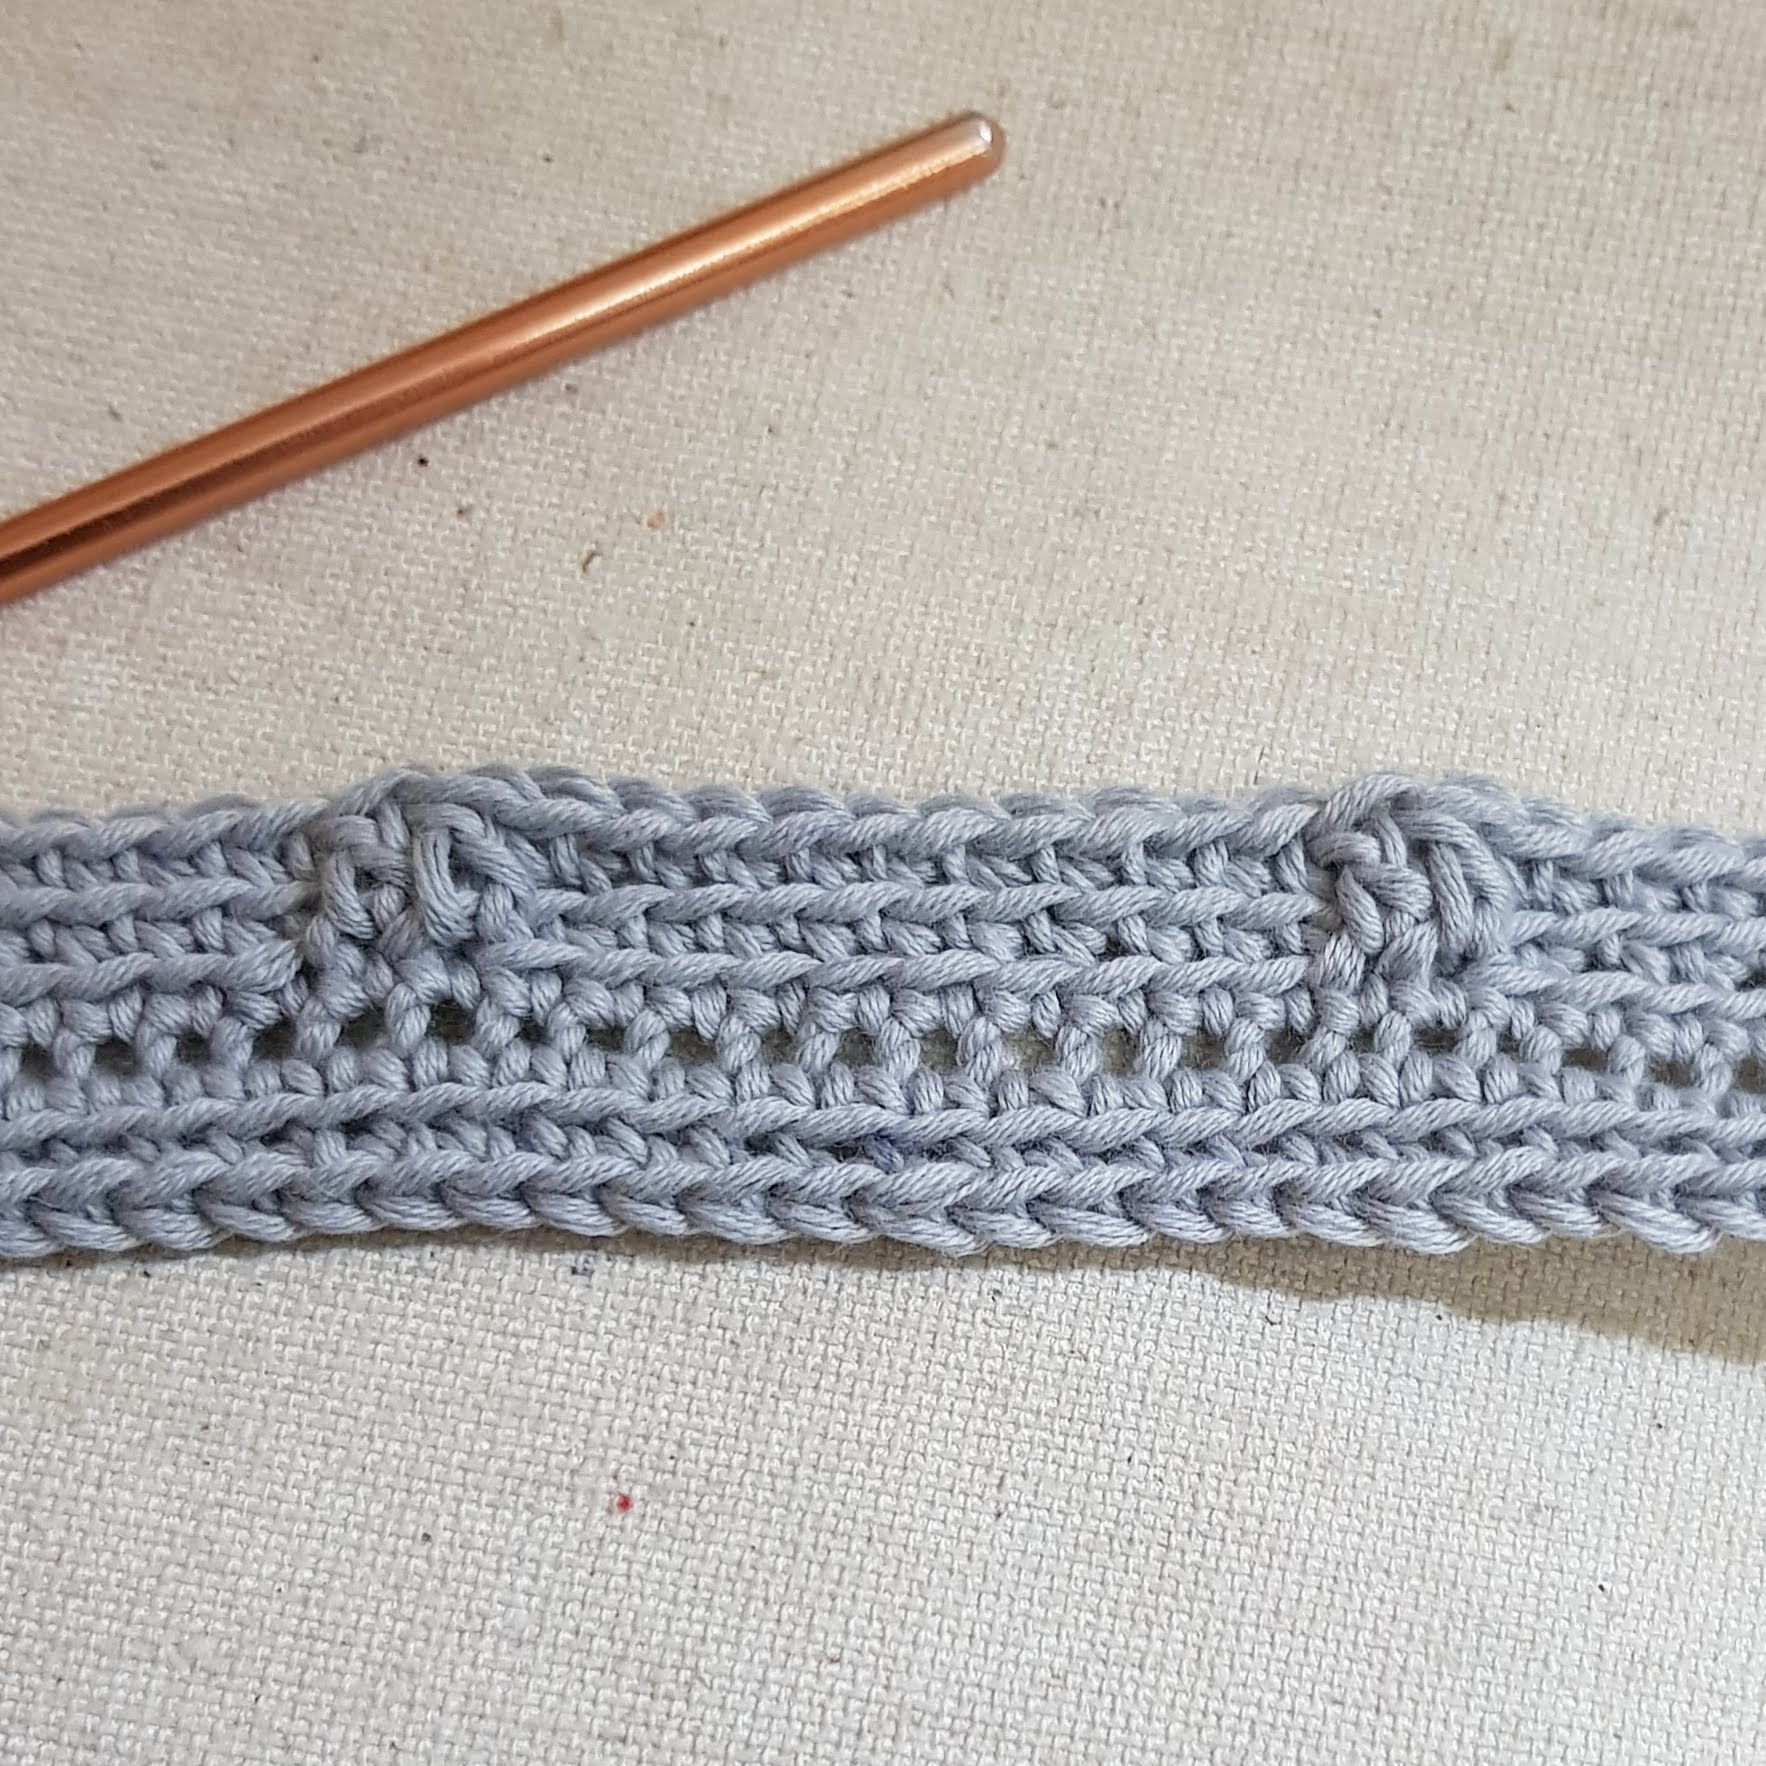
Step 6 – CH 1. Repeat (SC in back loop. DC in front loop of SC from previous row. Skip 1 SC. 8 SC in back loop of SC. DC in front loop of SC under the next SC (i.e. DC is in SC from previous row), skip 1 SC, SC in back loop) 12 times. Join to first SC with a slip stitch.
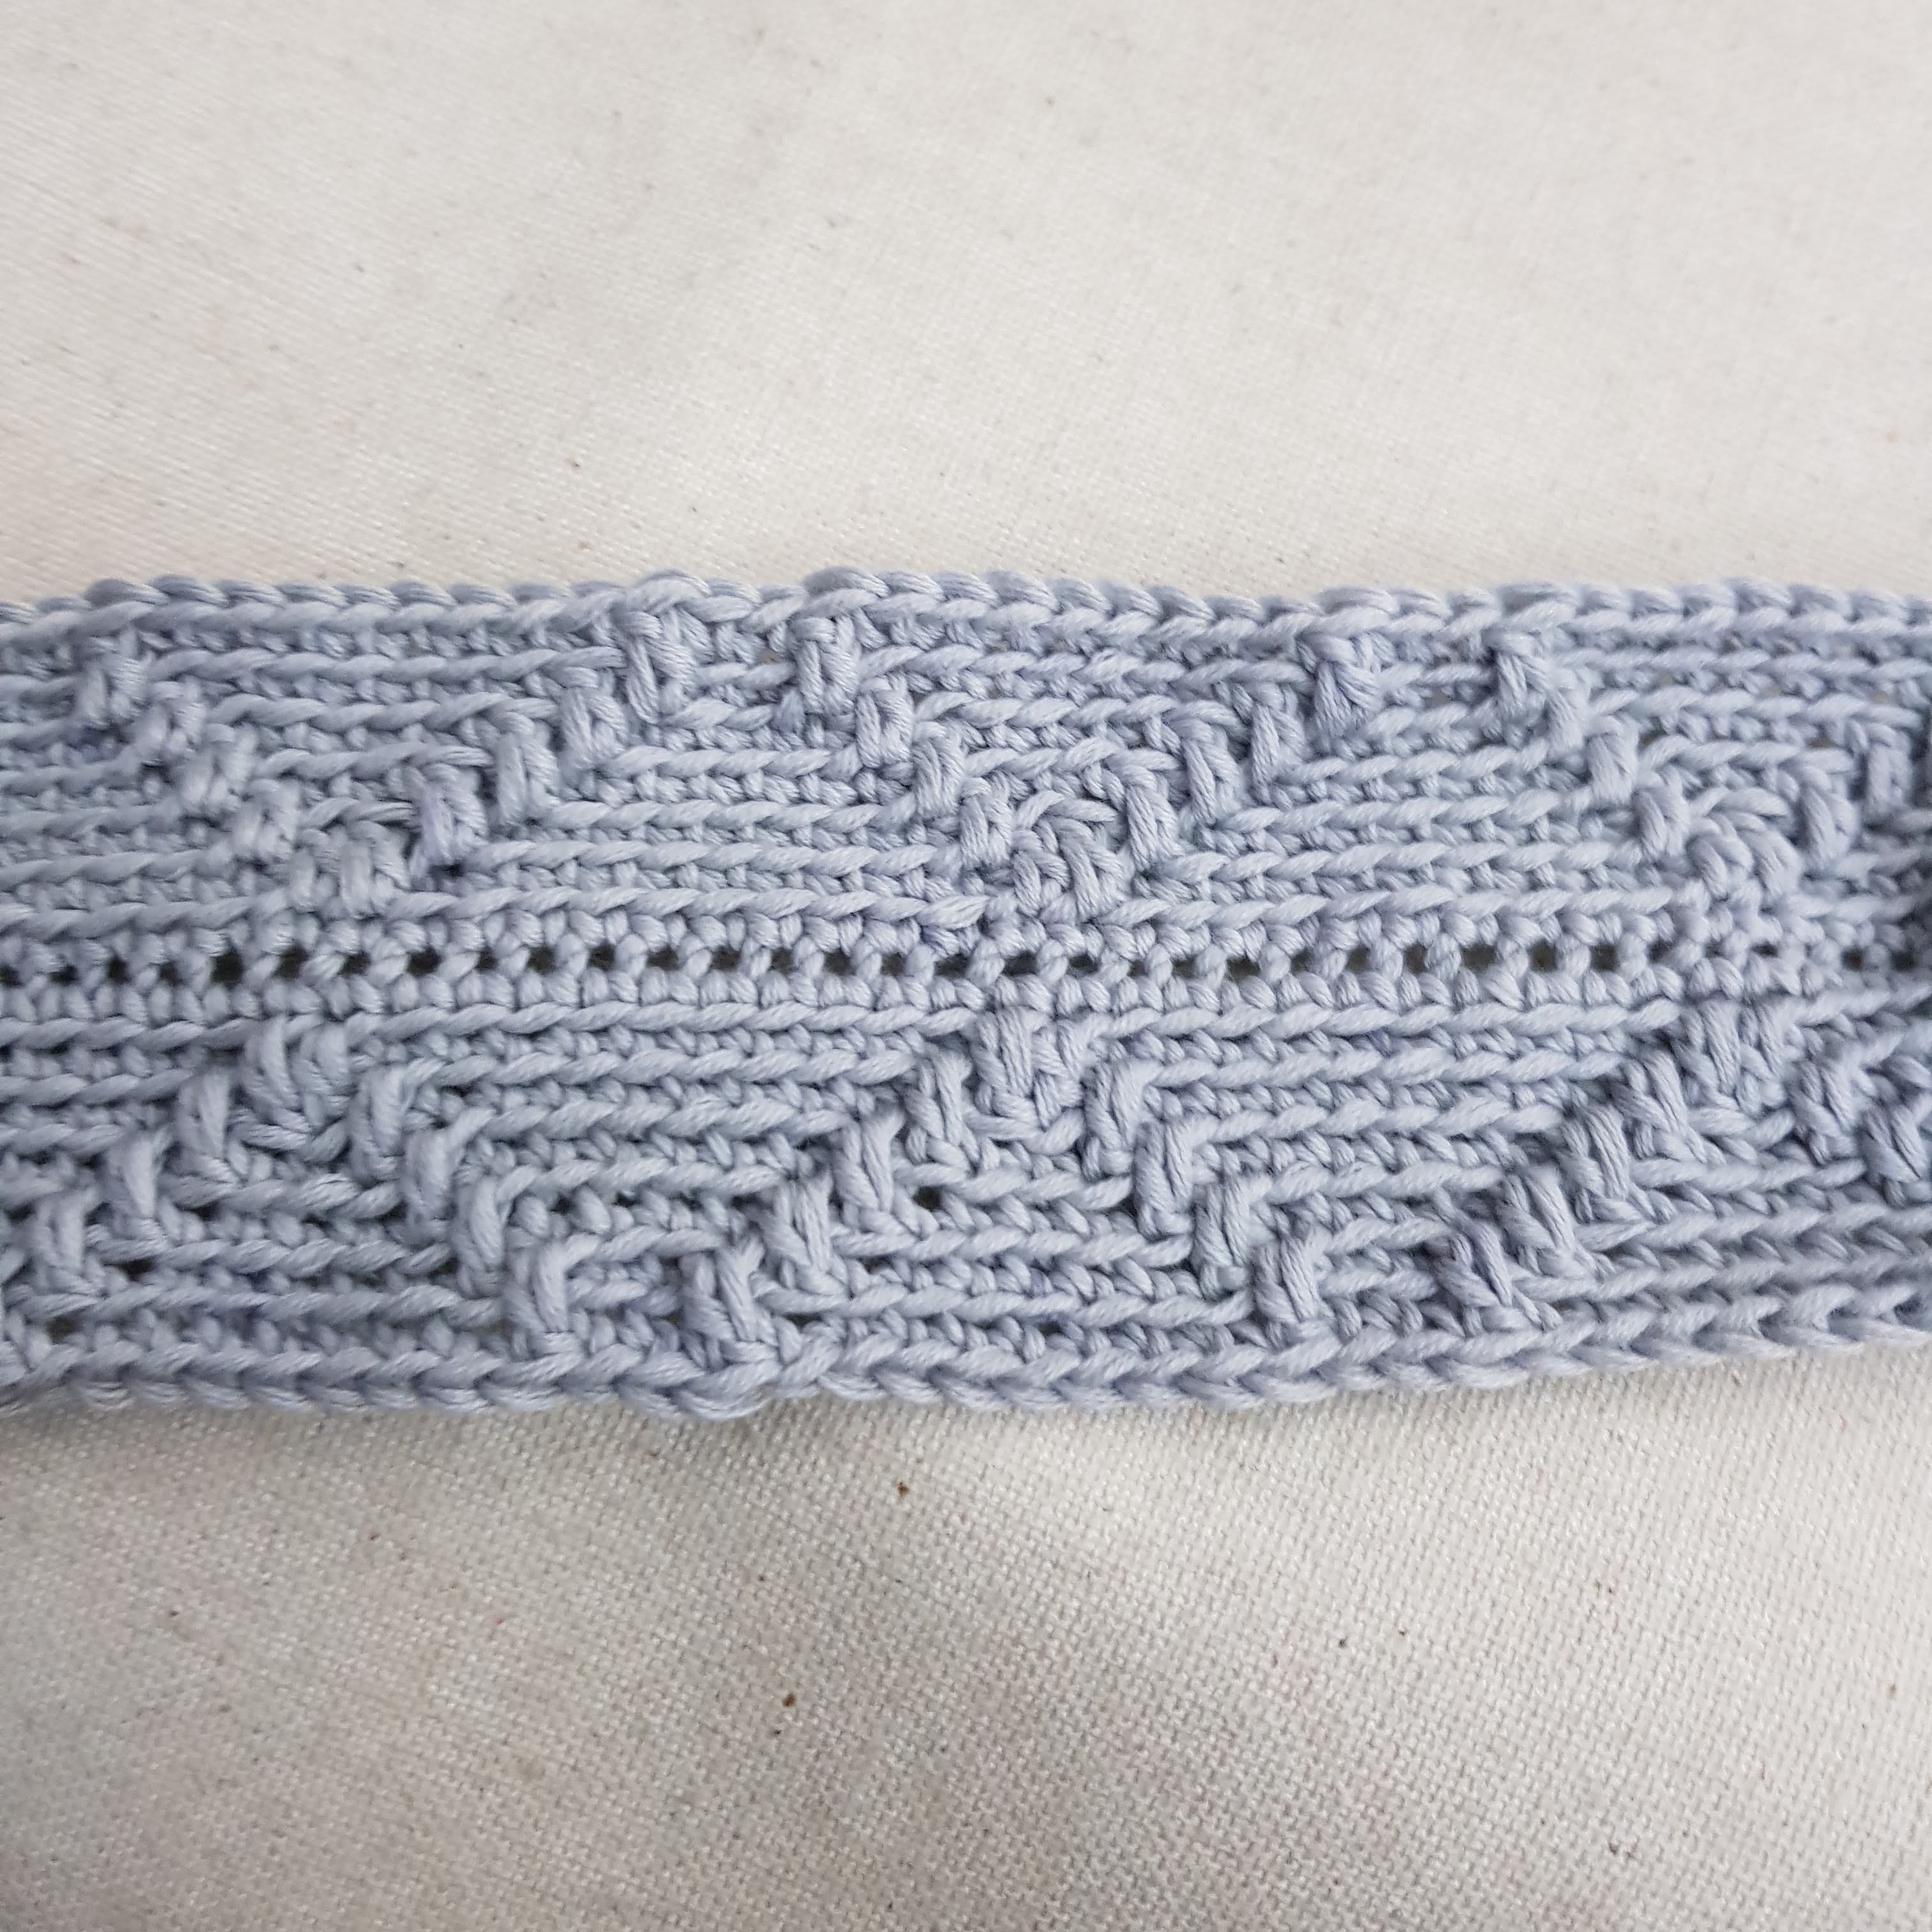
Step 7 – CH 1. Repeat (2 SC in back loop. DC in front loop of SC from previous row. Skip 1 SC. 6 SC in back loop of SC. DC in front loop of SC under the next SC (i.e. DC is in SC from previous row), skip 1 SC, 2 SC in back loop) 12 times. Join to first SC with a slip stitch.
Step 8 – CH 1. Repeat (3 SC in back loop. DC in front loop of SC from previous row. Skip 1 SC. 4 SC in back loop of SC. DC in front loop of SC under the next SC (i.e. DC is in SC from previous row), skip 1 SC, 3 SC in back loop) 12 times. Join to first SC with a slip stitch.
Step 9 – CH 1. Repeat (4 SC in back loop. DC in front loop of SC from previous row. Skip 1 SC. 2 SC in back loop of SC. DC in front loop of SC under the next SC (i.e. DC is in SC from previous row), skip 1 SC, 4 SC in back loop) 12 times. Join to first SC with a slip stitch.
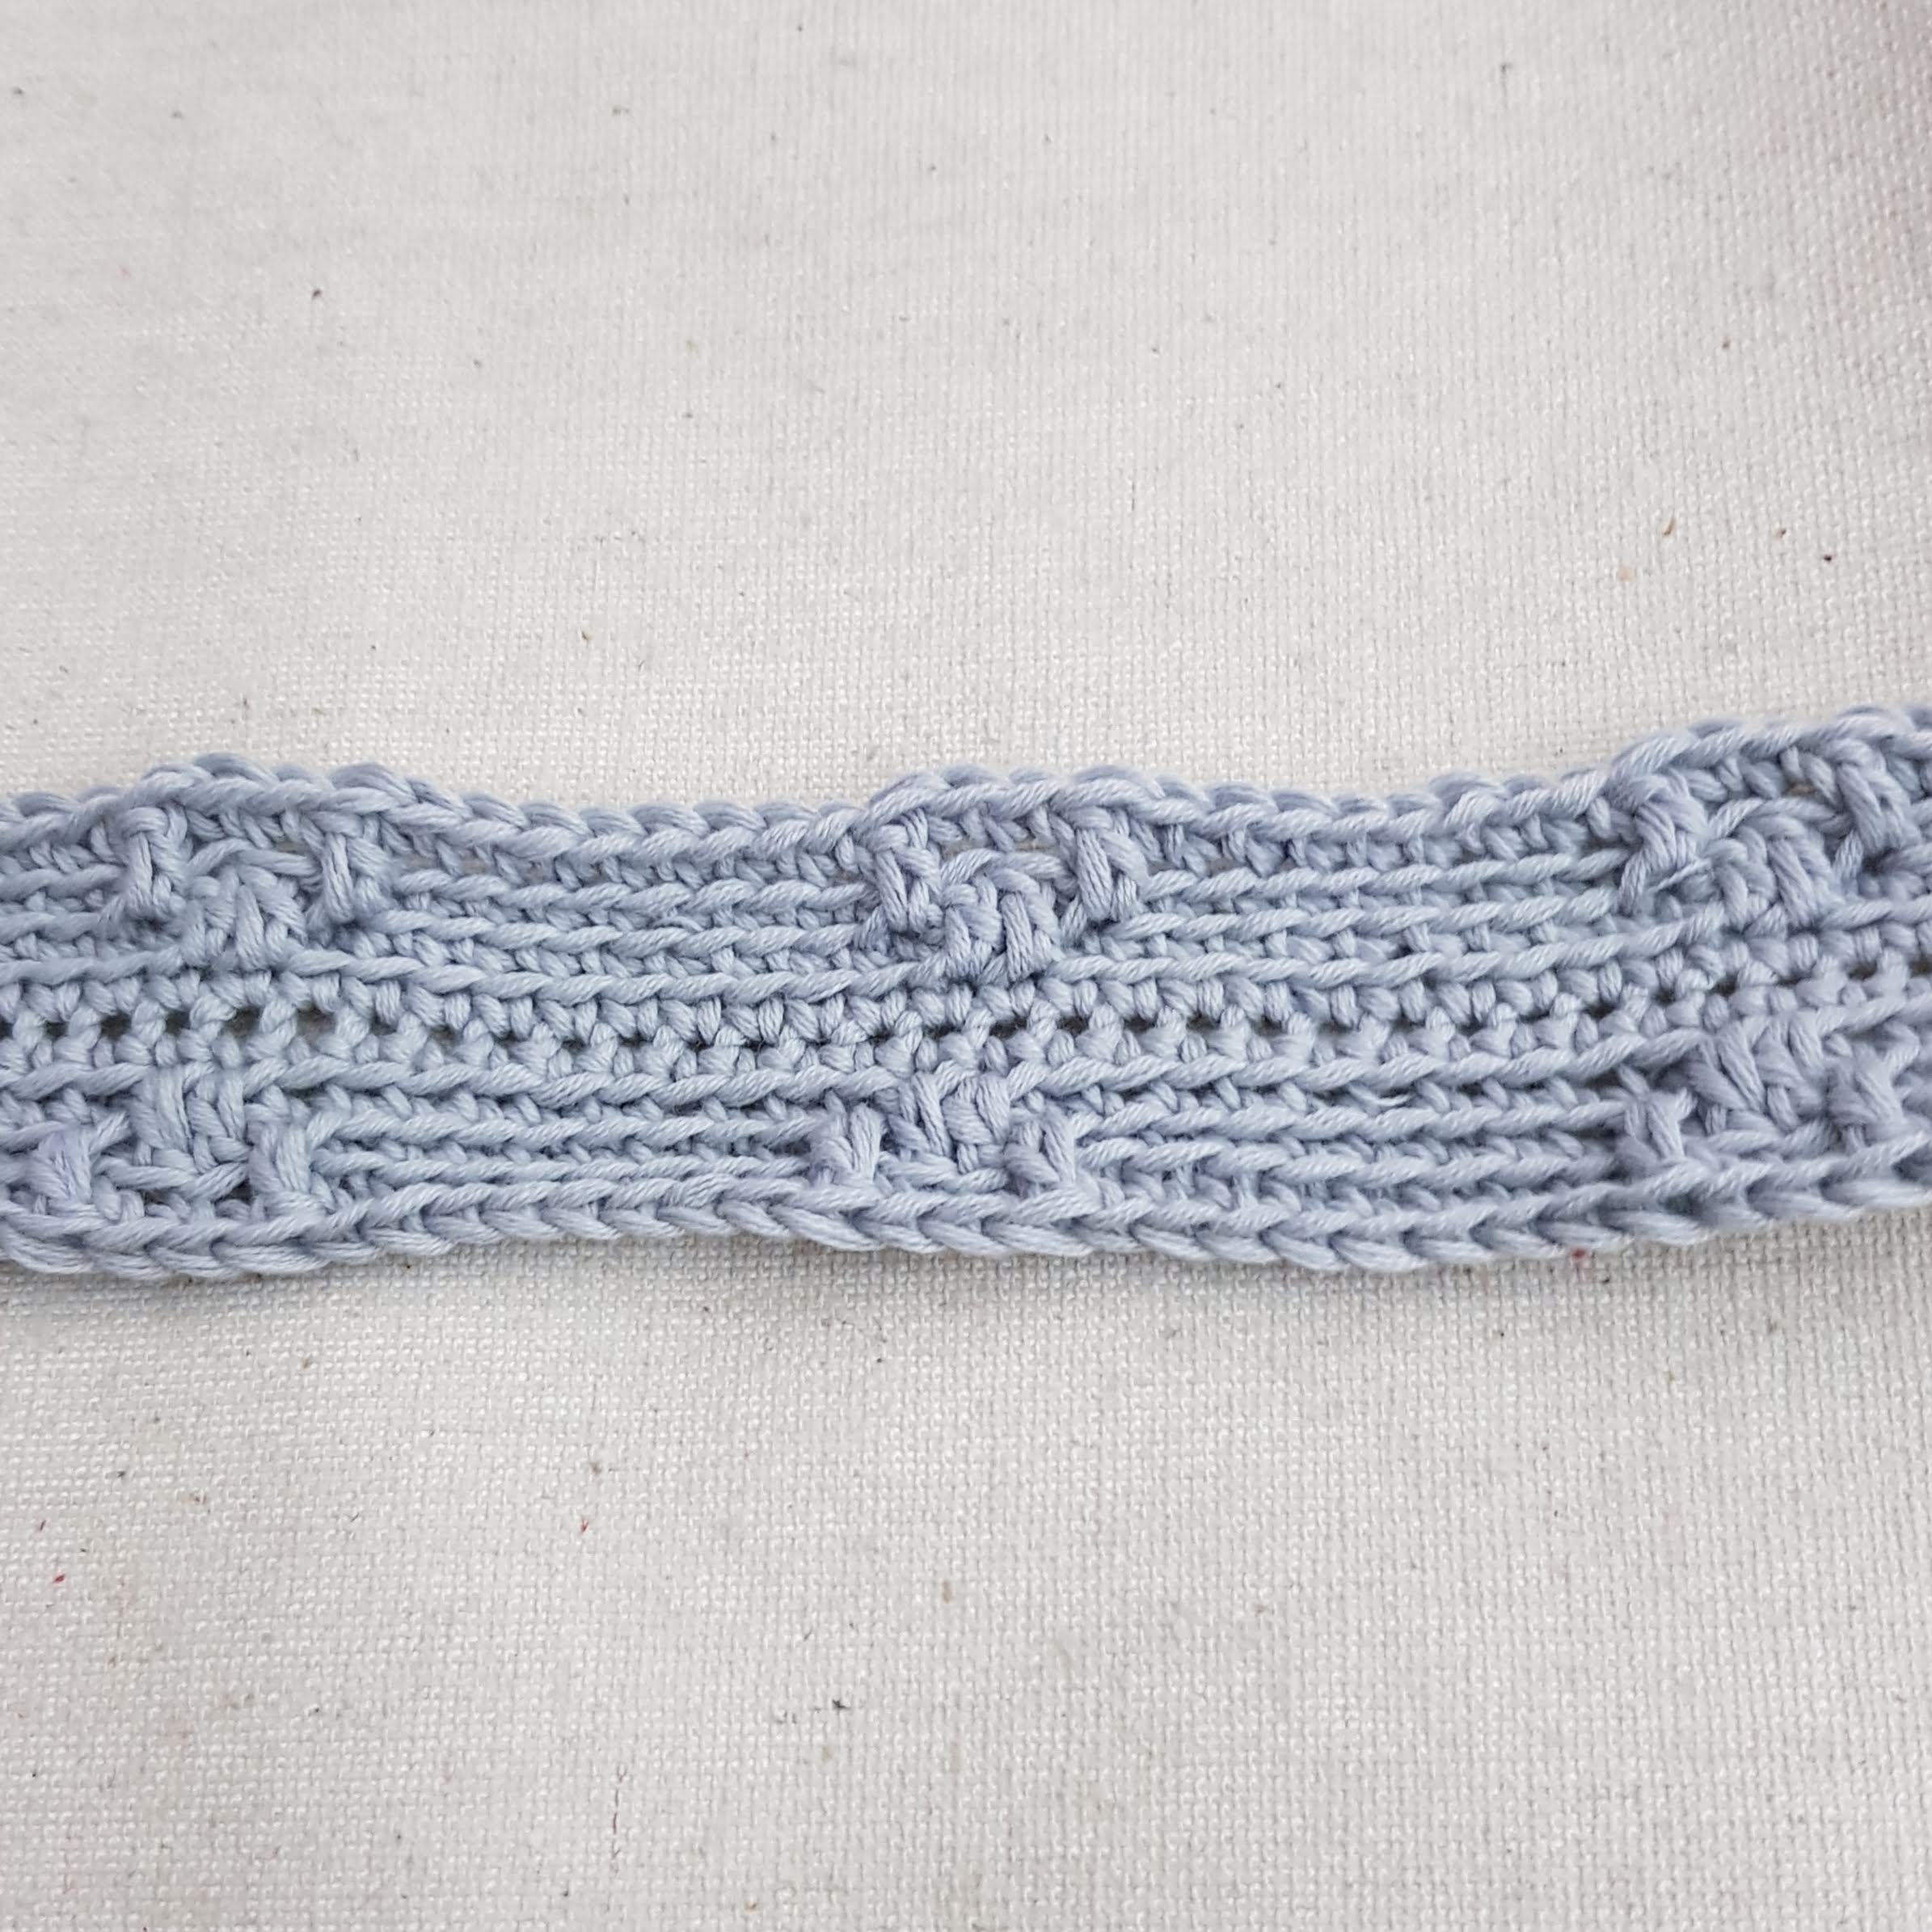
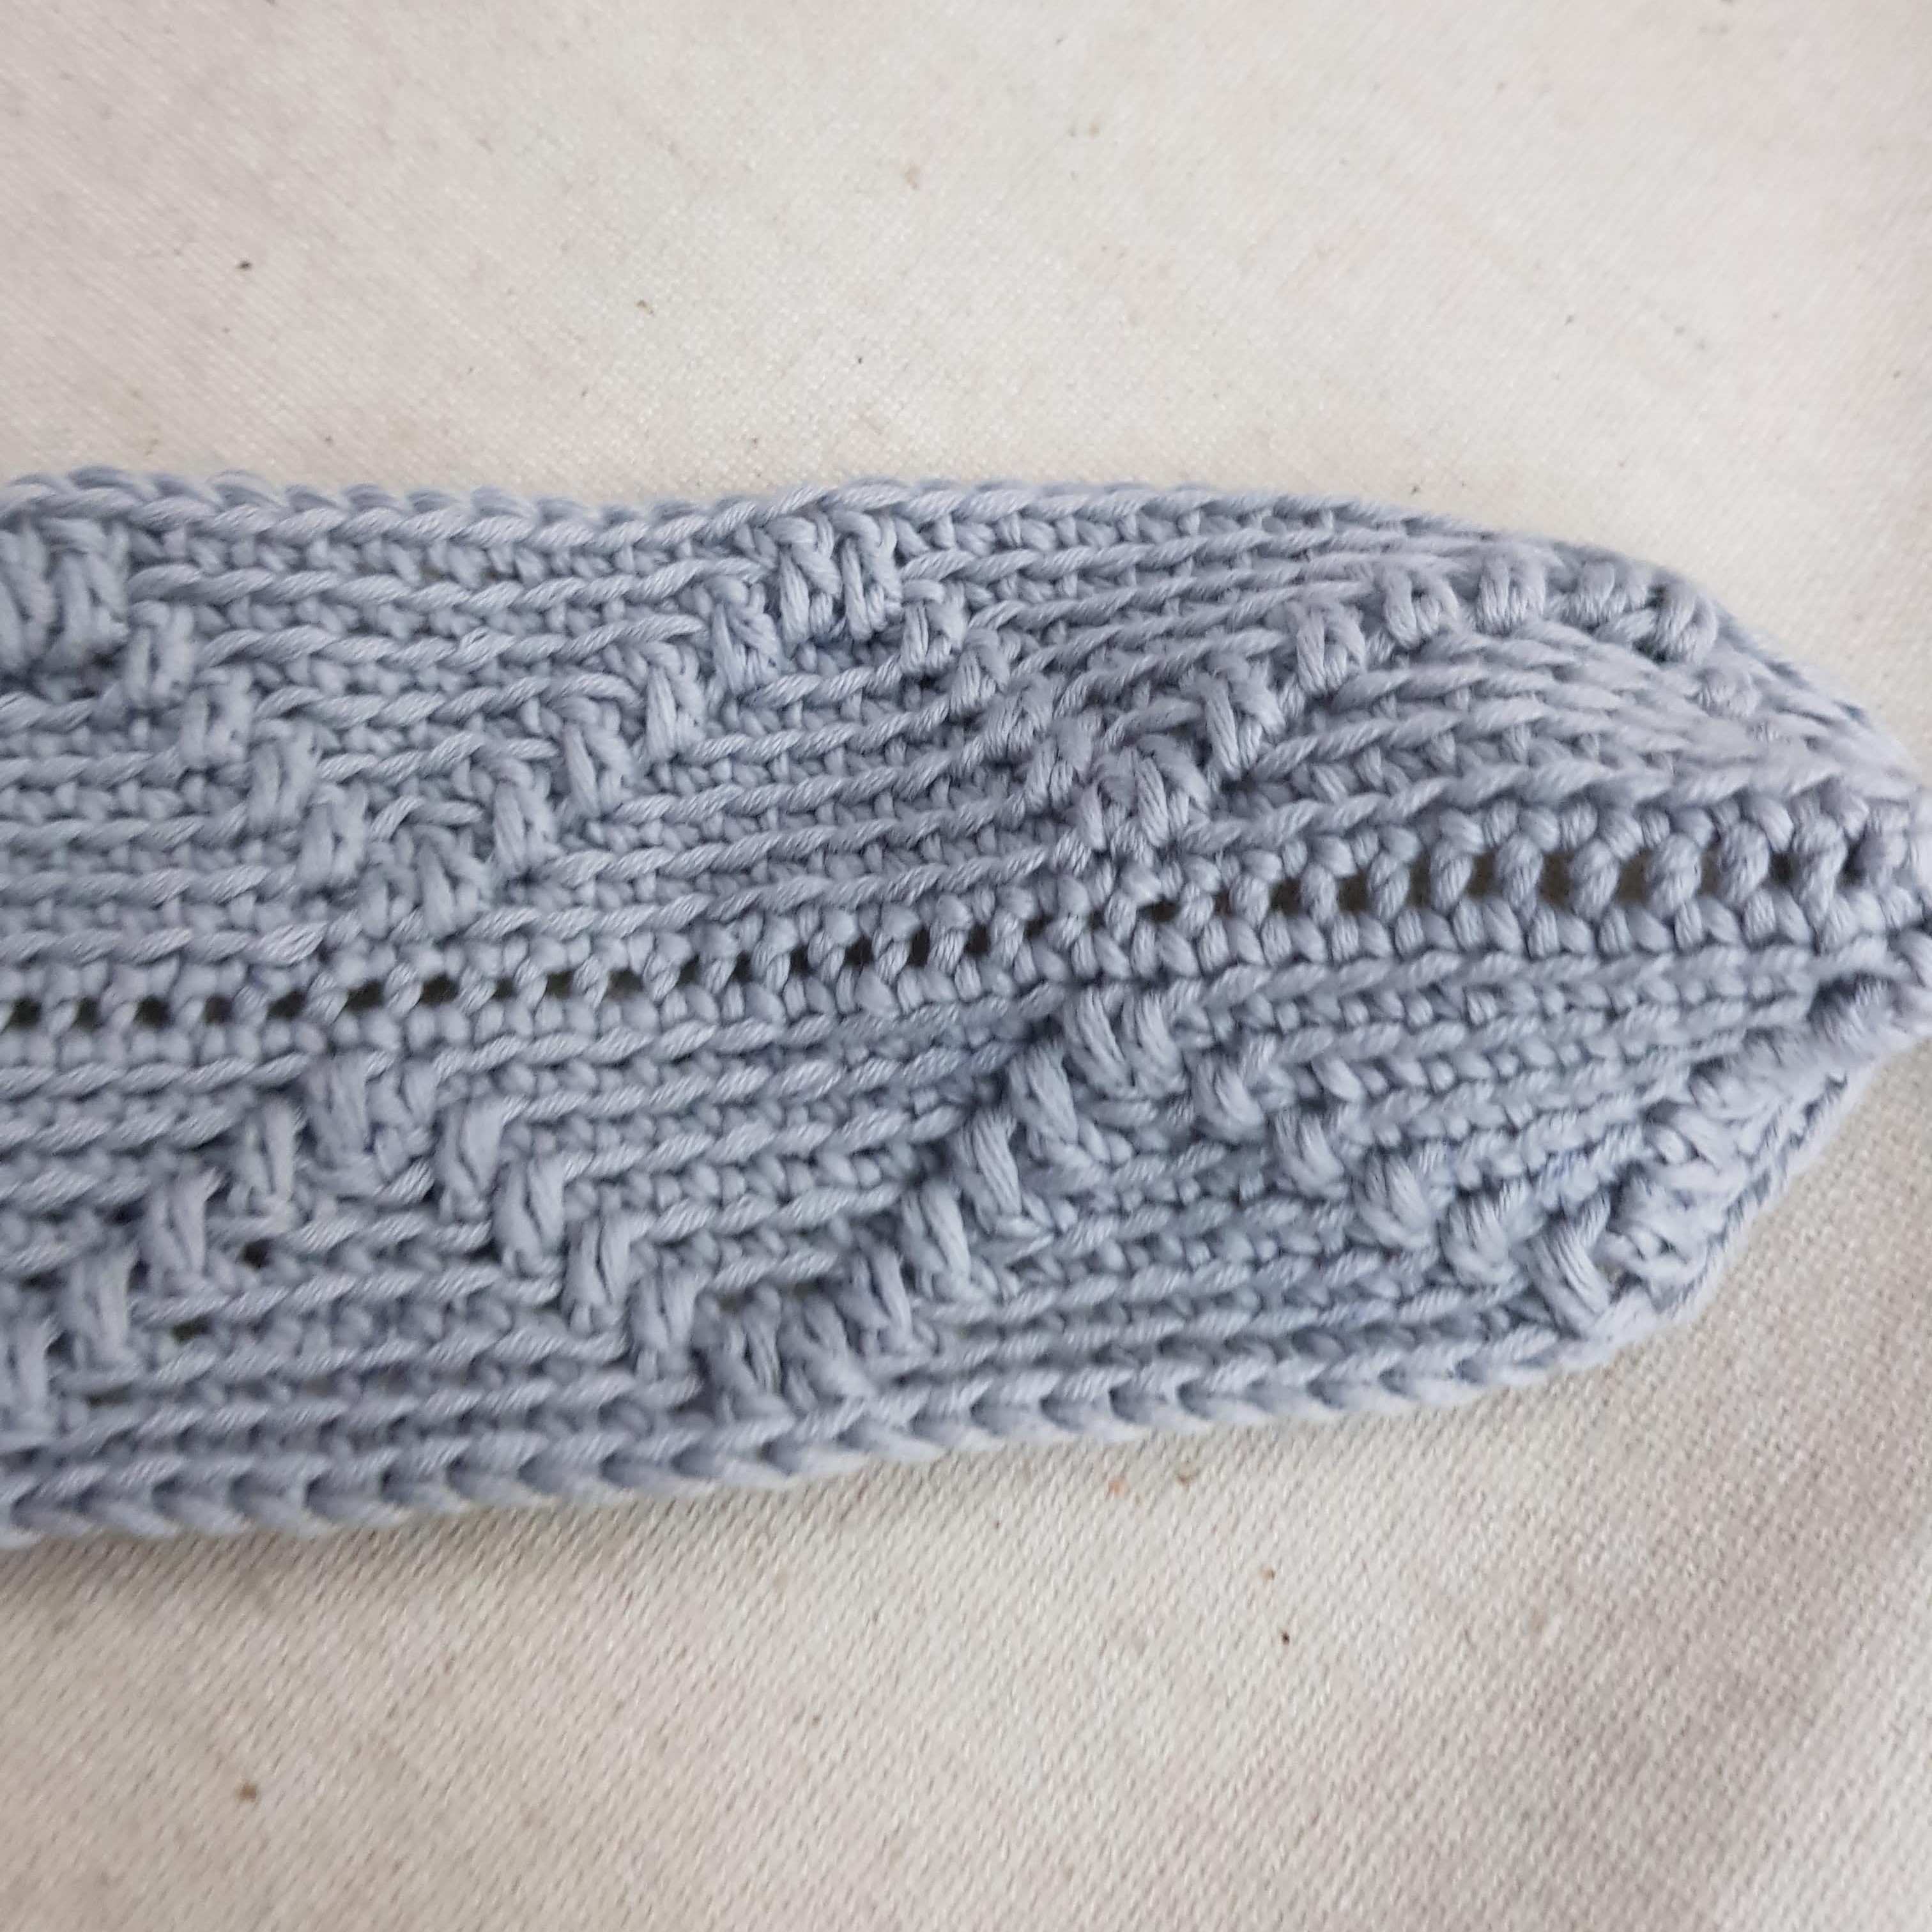
Step 10 – CH 1. Repeat (6 SC in back loop. 2 DC in front loop of next 2 SC from previous row. Skip 2 SC. 6 SC in back loop) 12 times. Join to first SC with a slip stitch.
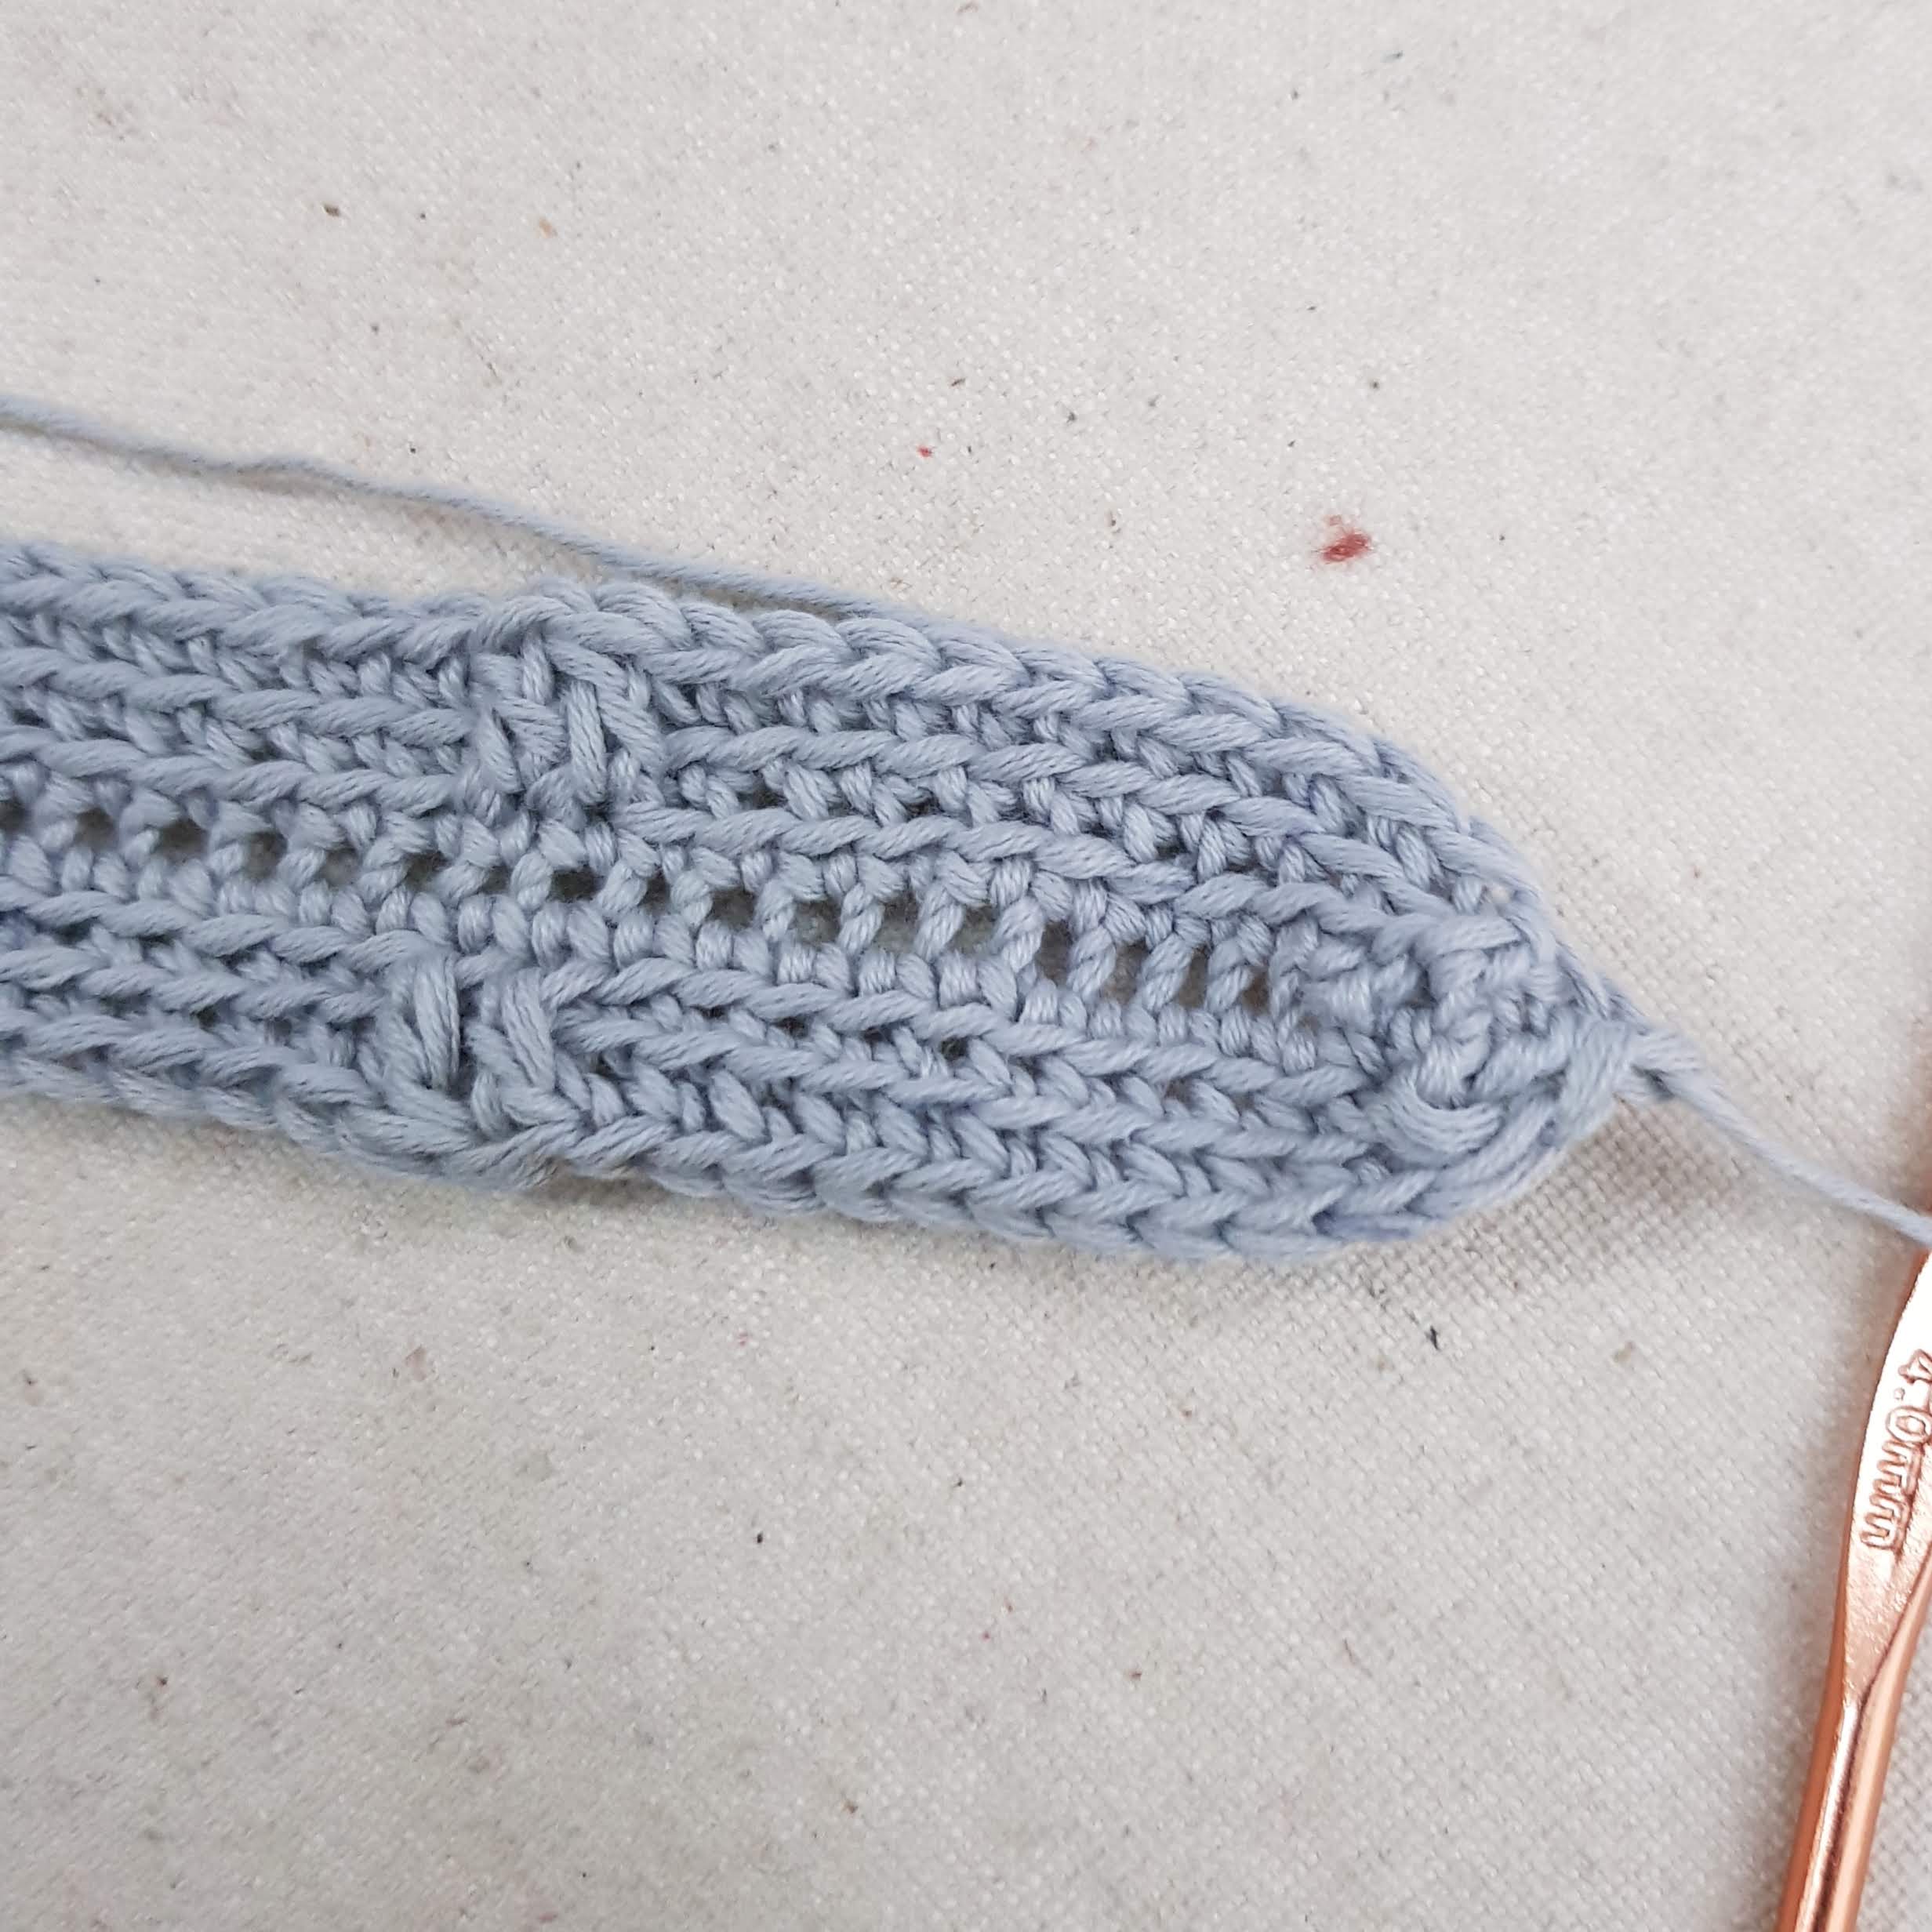
Step 11 – CH 1. Repeat (4 SC in back loop. DC in front loop of SC from previous row. Skip 1 SC. 2 SC in back loop of SC. DC in front loop of SC under the next SC (i.e. DC is in SC from previous row), skip 1 SC, 4 SC in back loop) 12 times. Join to first SC with a slip stitch.
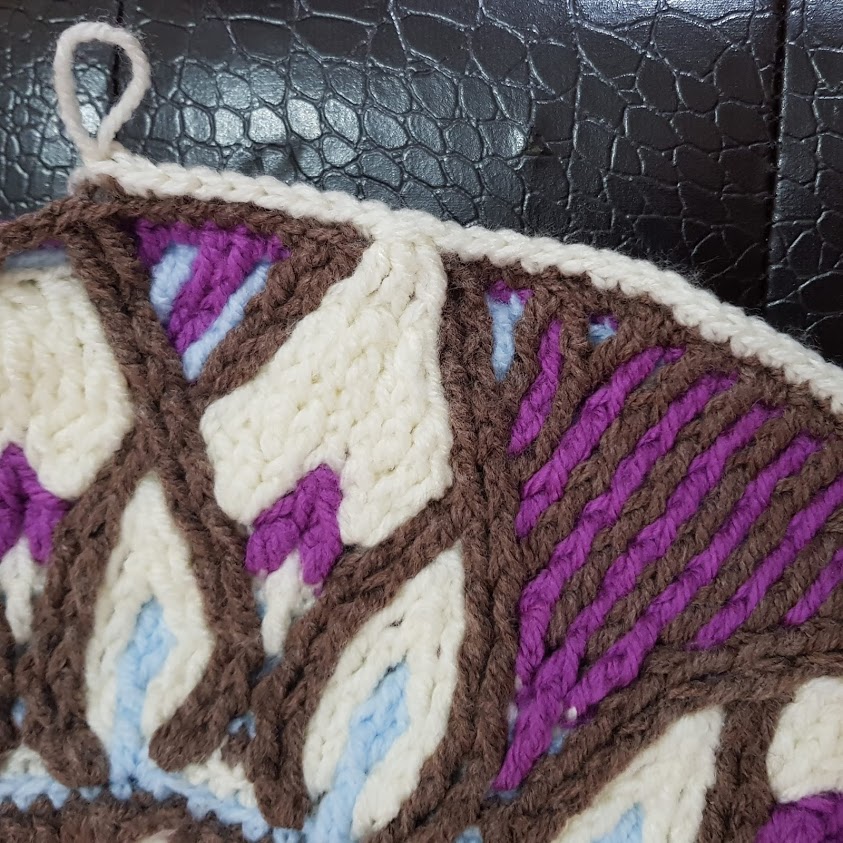
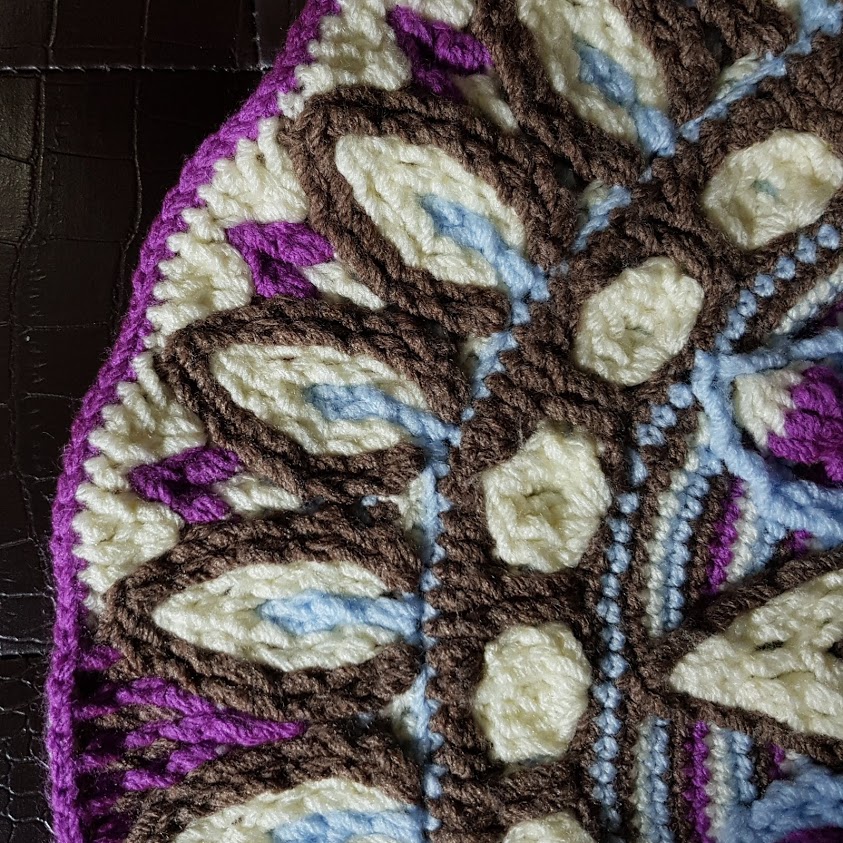
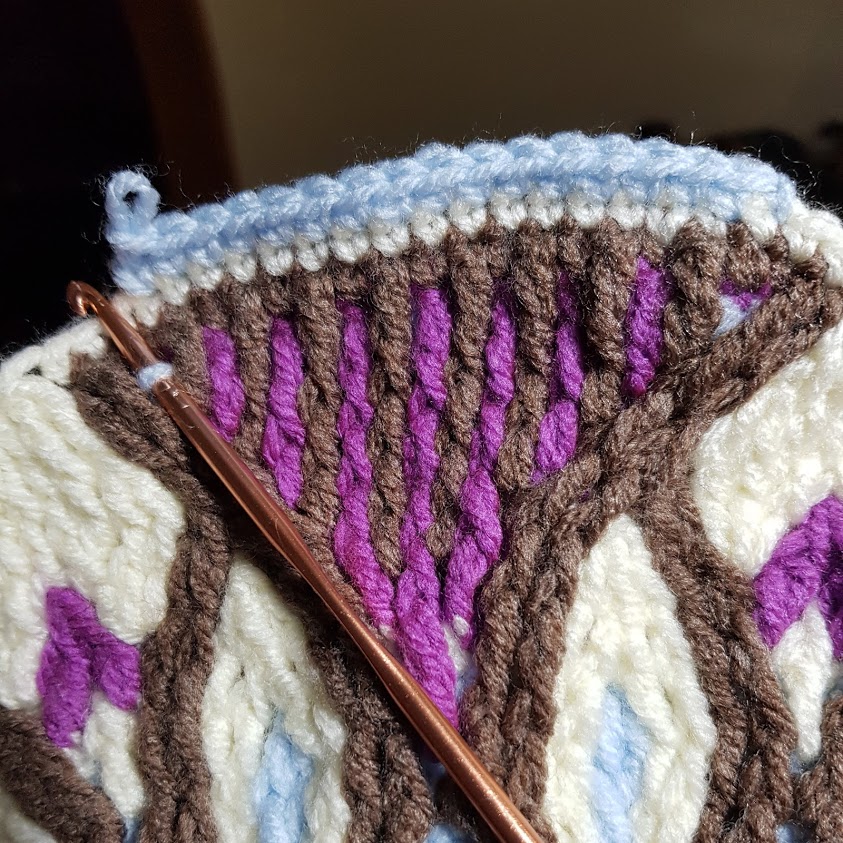
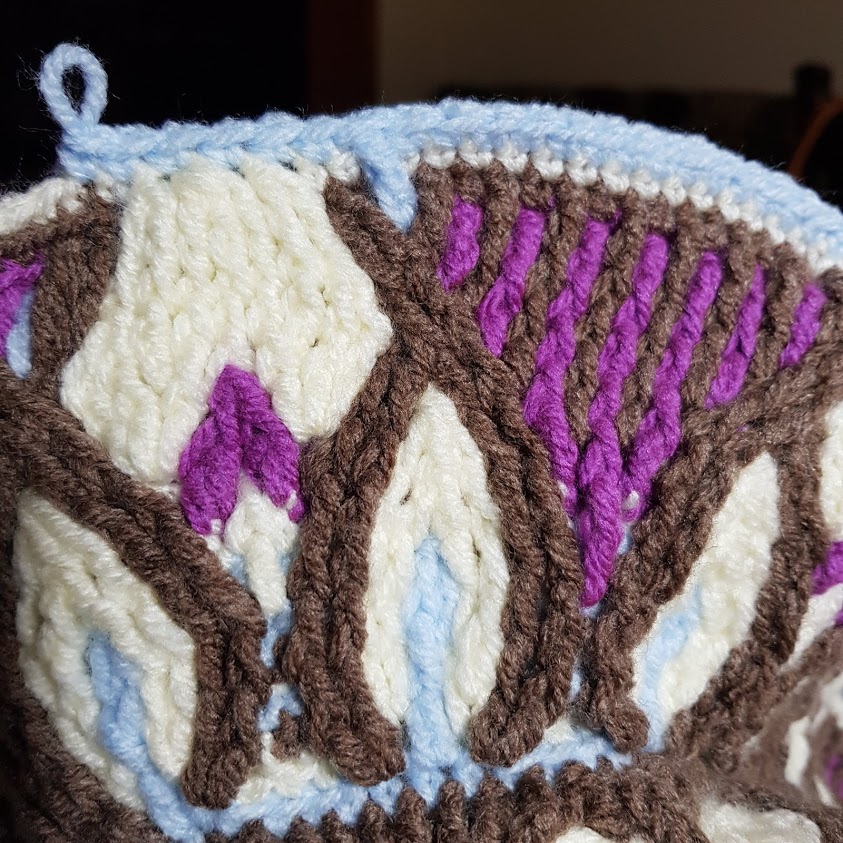
Step 12 – CH 1. Repeat (3 SC in back loop. DC in front loop of SC from previous row. Skip 1 SC. 4 SC in back loop of SC. DC in front loop of SC under the next SC (i.e. DC is in SC from previous row), skip 1 SC, 3 SC in back loop) 12 times. Join to first SC with a slip stitch. (N.b. photos from this point on show one side of the bag only)
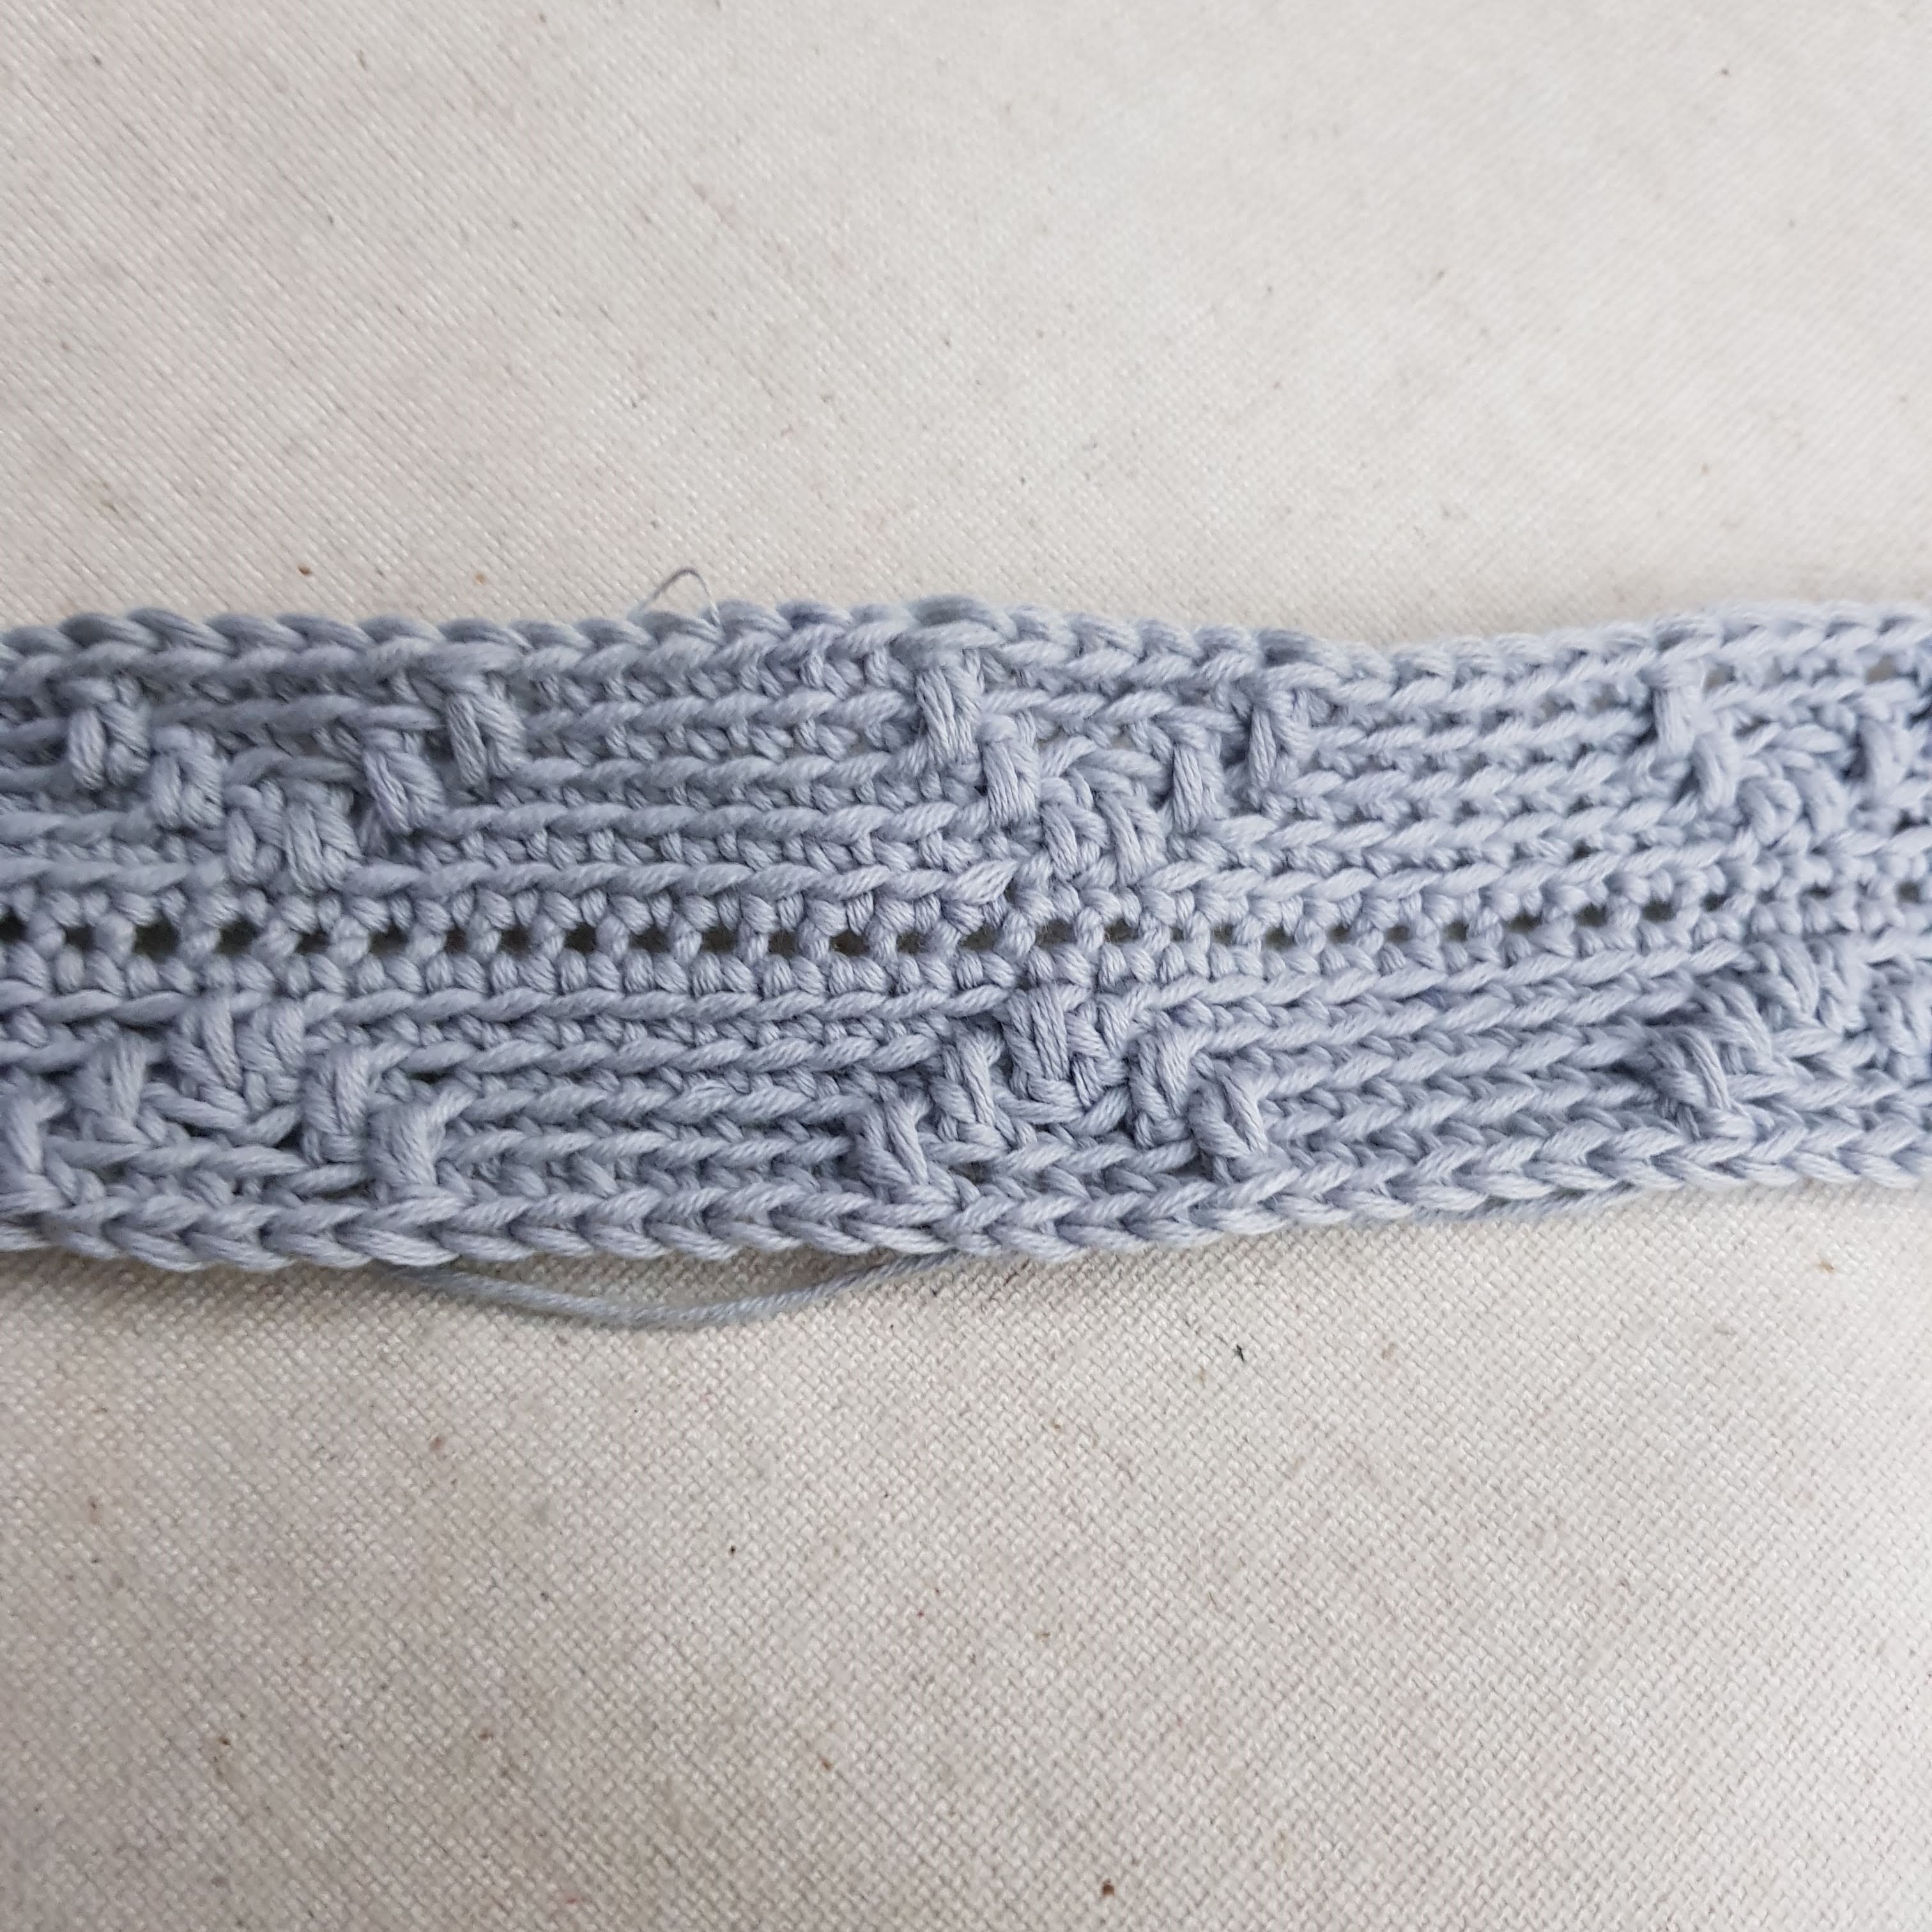
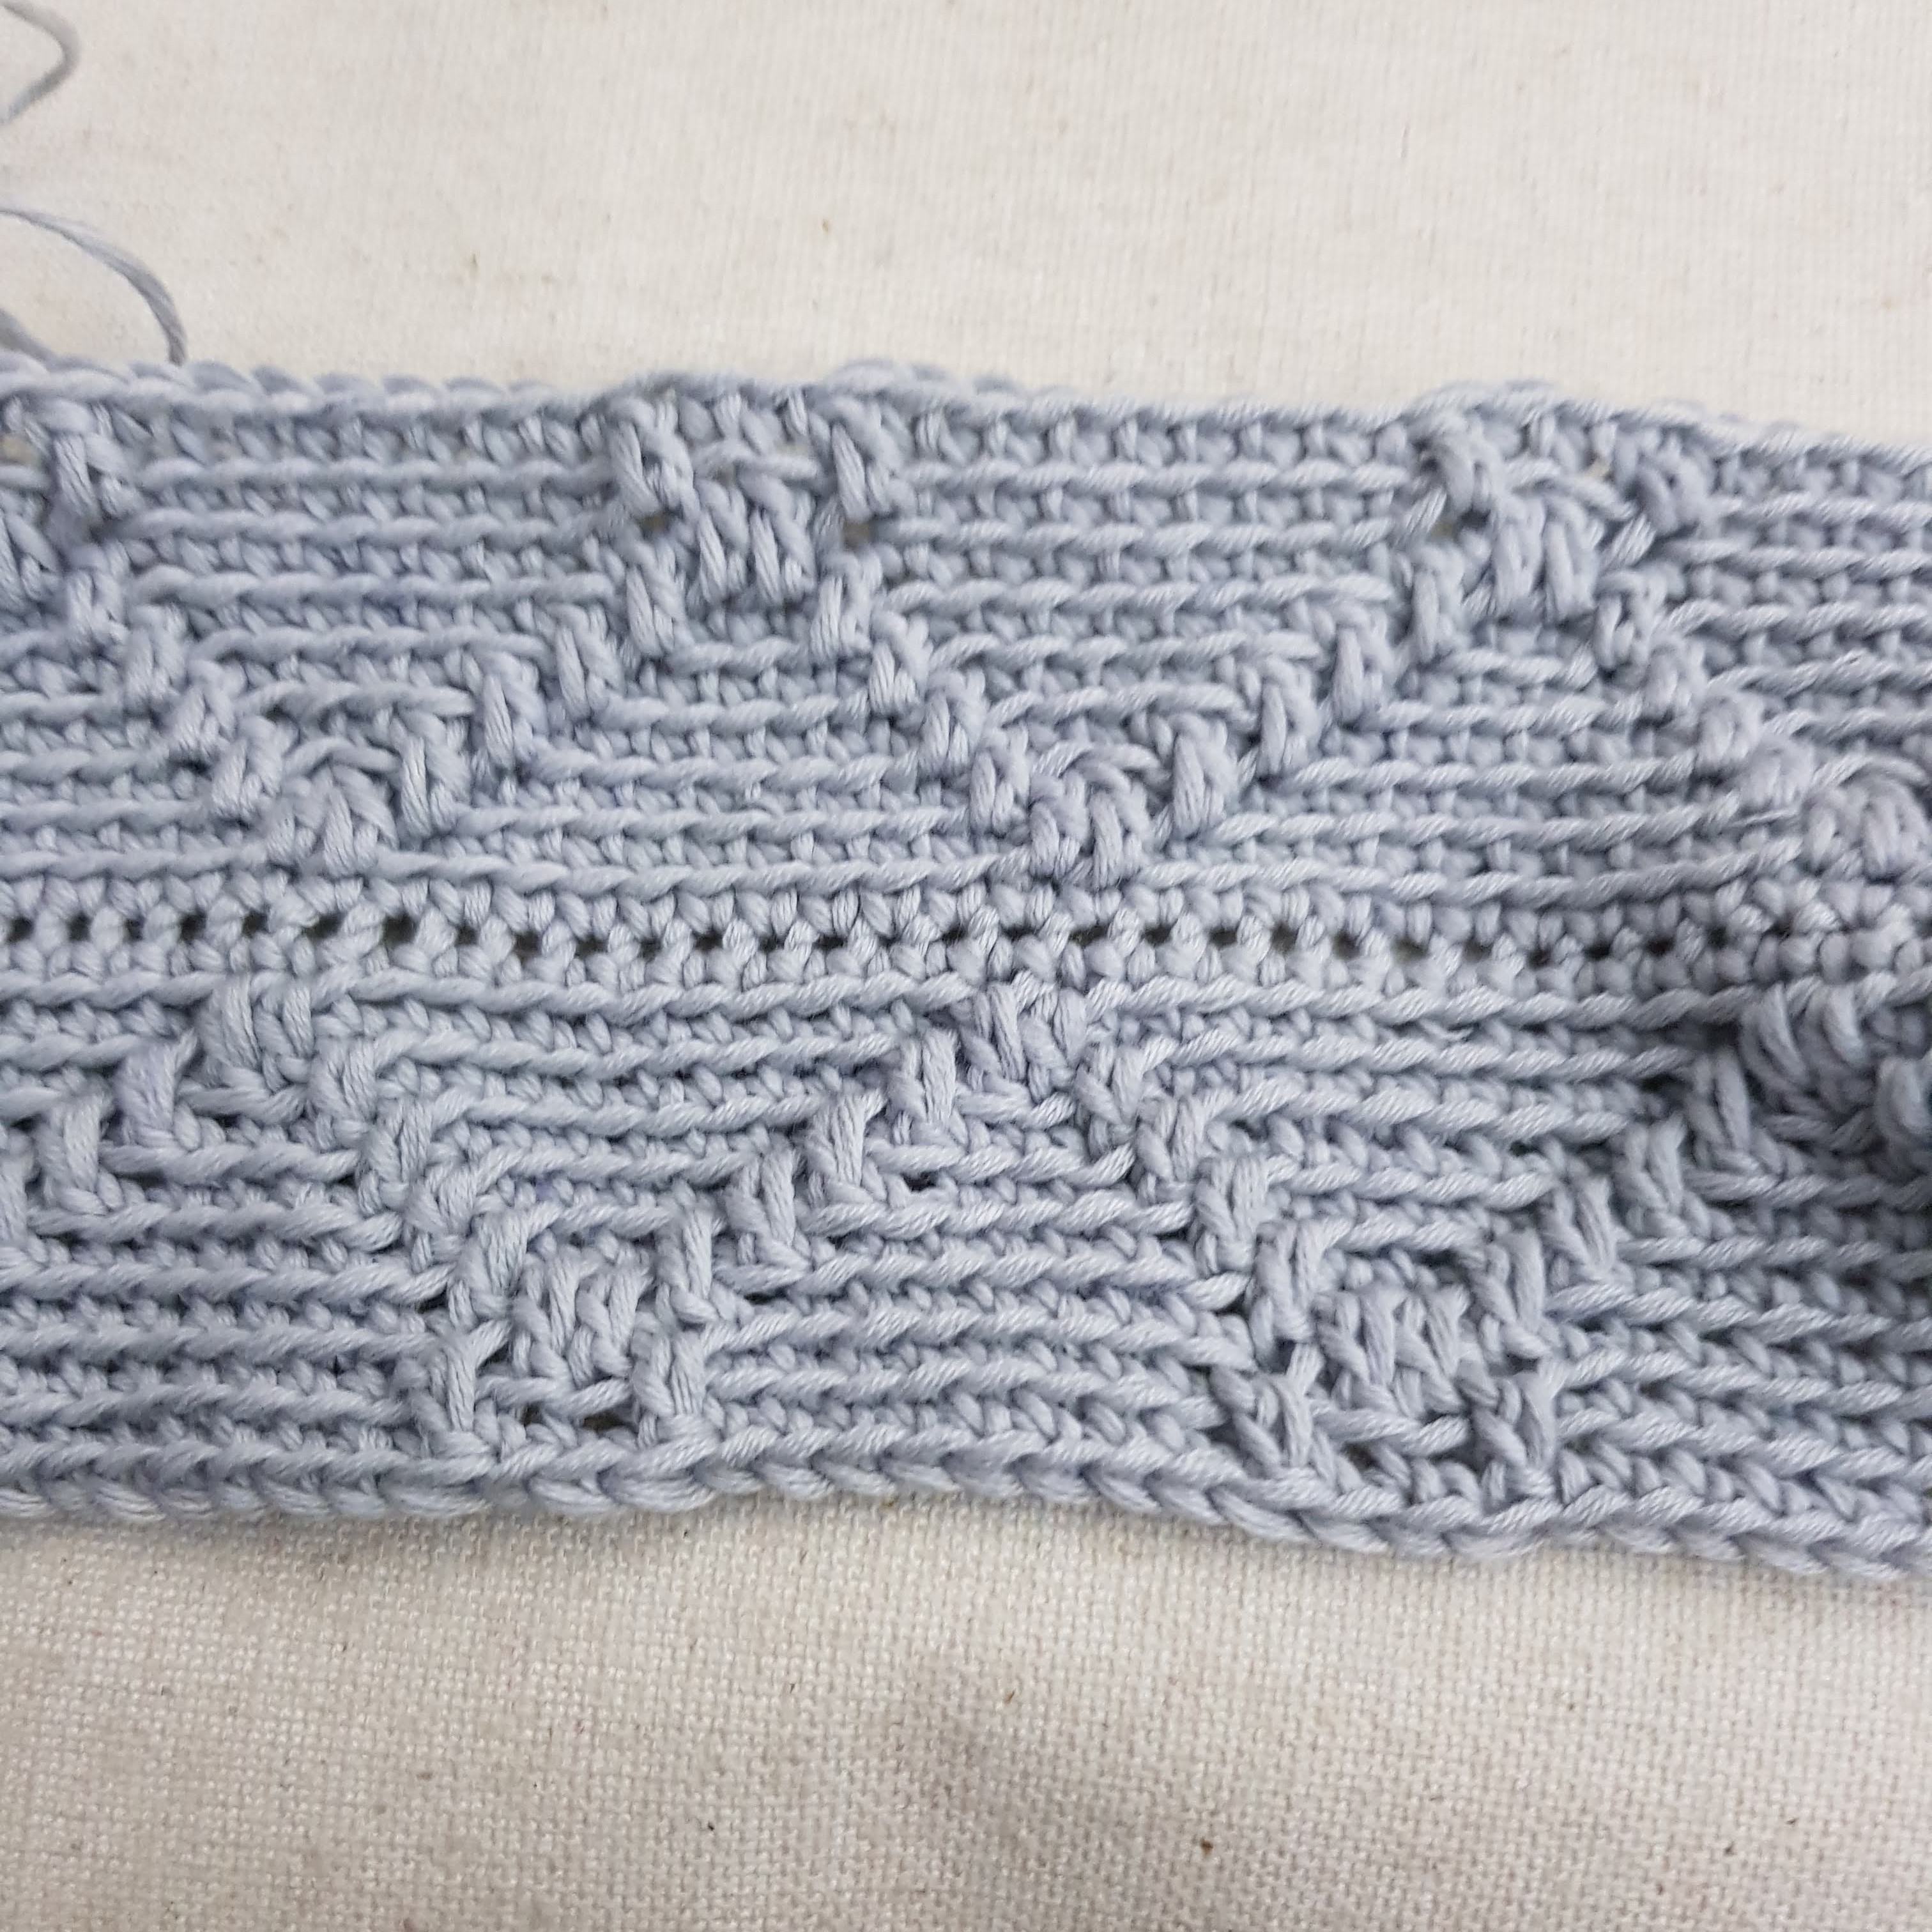
Step 13 – CH 1. Repeat (2 SC in back loop. DC in front loop of SC from previous row. Skip 1 SC. 6 SC in back loop of SC. DC in front loop of SC under the next SC (i.e. DC is in SC from previous row), skip 1 SC, 2 SC in back loop) 12 times. Join to first SC with a slip stitch.
Step 14 – CH 1. Repeat (SC in back loop. DC in front loop of SC from previous row. Skip 1 SC. 8 SC in back loop of SC. DC in front loop of SC under the next SC (i.e. DC is in SC from previous row), skip 1 SC, SC in back loop) 12 times. Join to first SC with a slip stitch.
Step 15 – CH 1. Repeat (DC in front loop of SC from previous row. Skip 1 SC. 10 SC in back loop of SC. DC in front loop of SC under the next SC (i.e. DC is in SC from previous row)) 12 times. Join to first SC with a slip stitch.
Step 16 – Repeat from Step 6 to Step 15 6 more times.
Step 17 – CH 1. 144 SC in the back loop of SC . Join to first SC with a slip stitch.
Step 18 – CH 1. 144 SC in the front loop of same SCs in whose back loops you used in step 17. Join to first SC with a slip stitch.
Step 19 – CH 1. 144 SCs through SCs made in step 17 and 18 – i.e. the SCs you make now are through both SCs from previous 2 steps. Join to first SCs with slip stitch.
Now the body has been completed, but don’t cast off yet, as you will make the handle.
Step 20 – 2 slip stitches in 2 SC from previous step.
Step 21 – CH 151. Slip stitch into SC on top of bag main part on the opposite side
Step 22 – 150 SC into chains from step 21. Slip Stitch into top of bag.
Step 23 – Turn and make another 150 SC across into same Chain from step 21 – so you will have two SCs in each chain fom step 21. Slip stitch into SC on main bag to secure.
Step 24 – CH 1. Slip stitch into SC on main bag. 150 SC through back loop of SC from step 23 and SC from step 22. Slip stitch into SC on main bag to secure.
Step 25 – CH 1. Slip stitch into SC on main bag. 150 SC through back loops of SCs from step 23 and 24. Slip stitch into SC on main bag to secure.
Step 26 – Repeat Step 25 12 times.
Step 26 – CH 1. Slip stitch into SC on main bag. 150 slip stitches into the SCs from last 2 steps . Slip stitch into SC on main bag to secure. Cast off and weave in the ends.
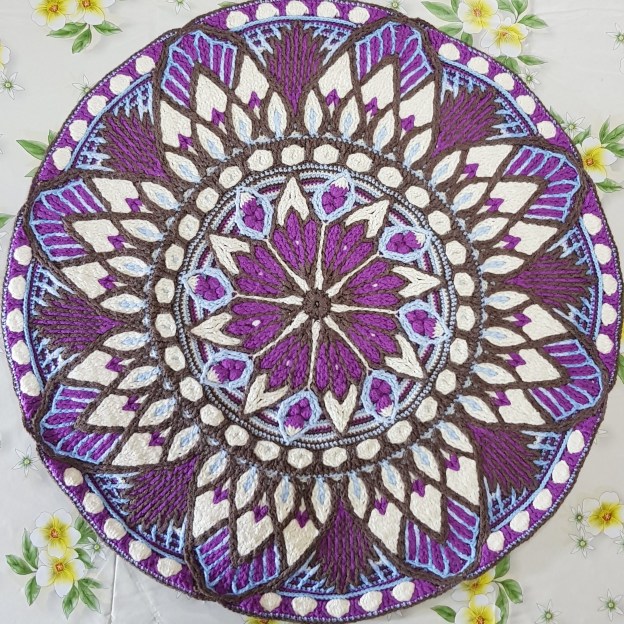
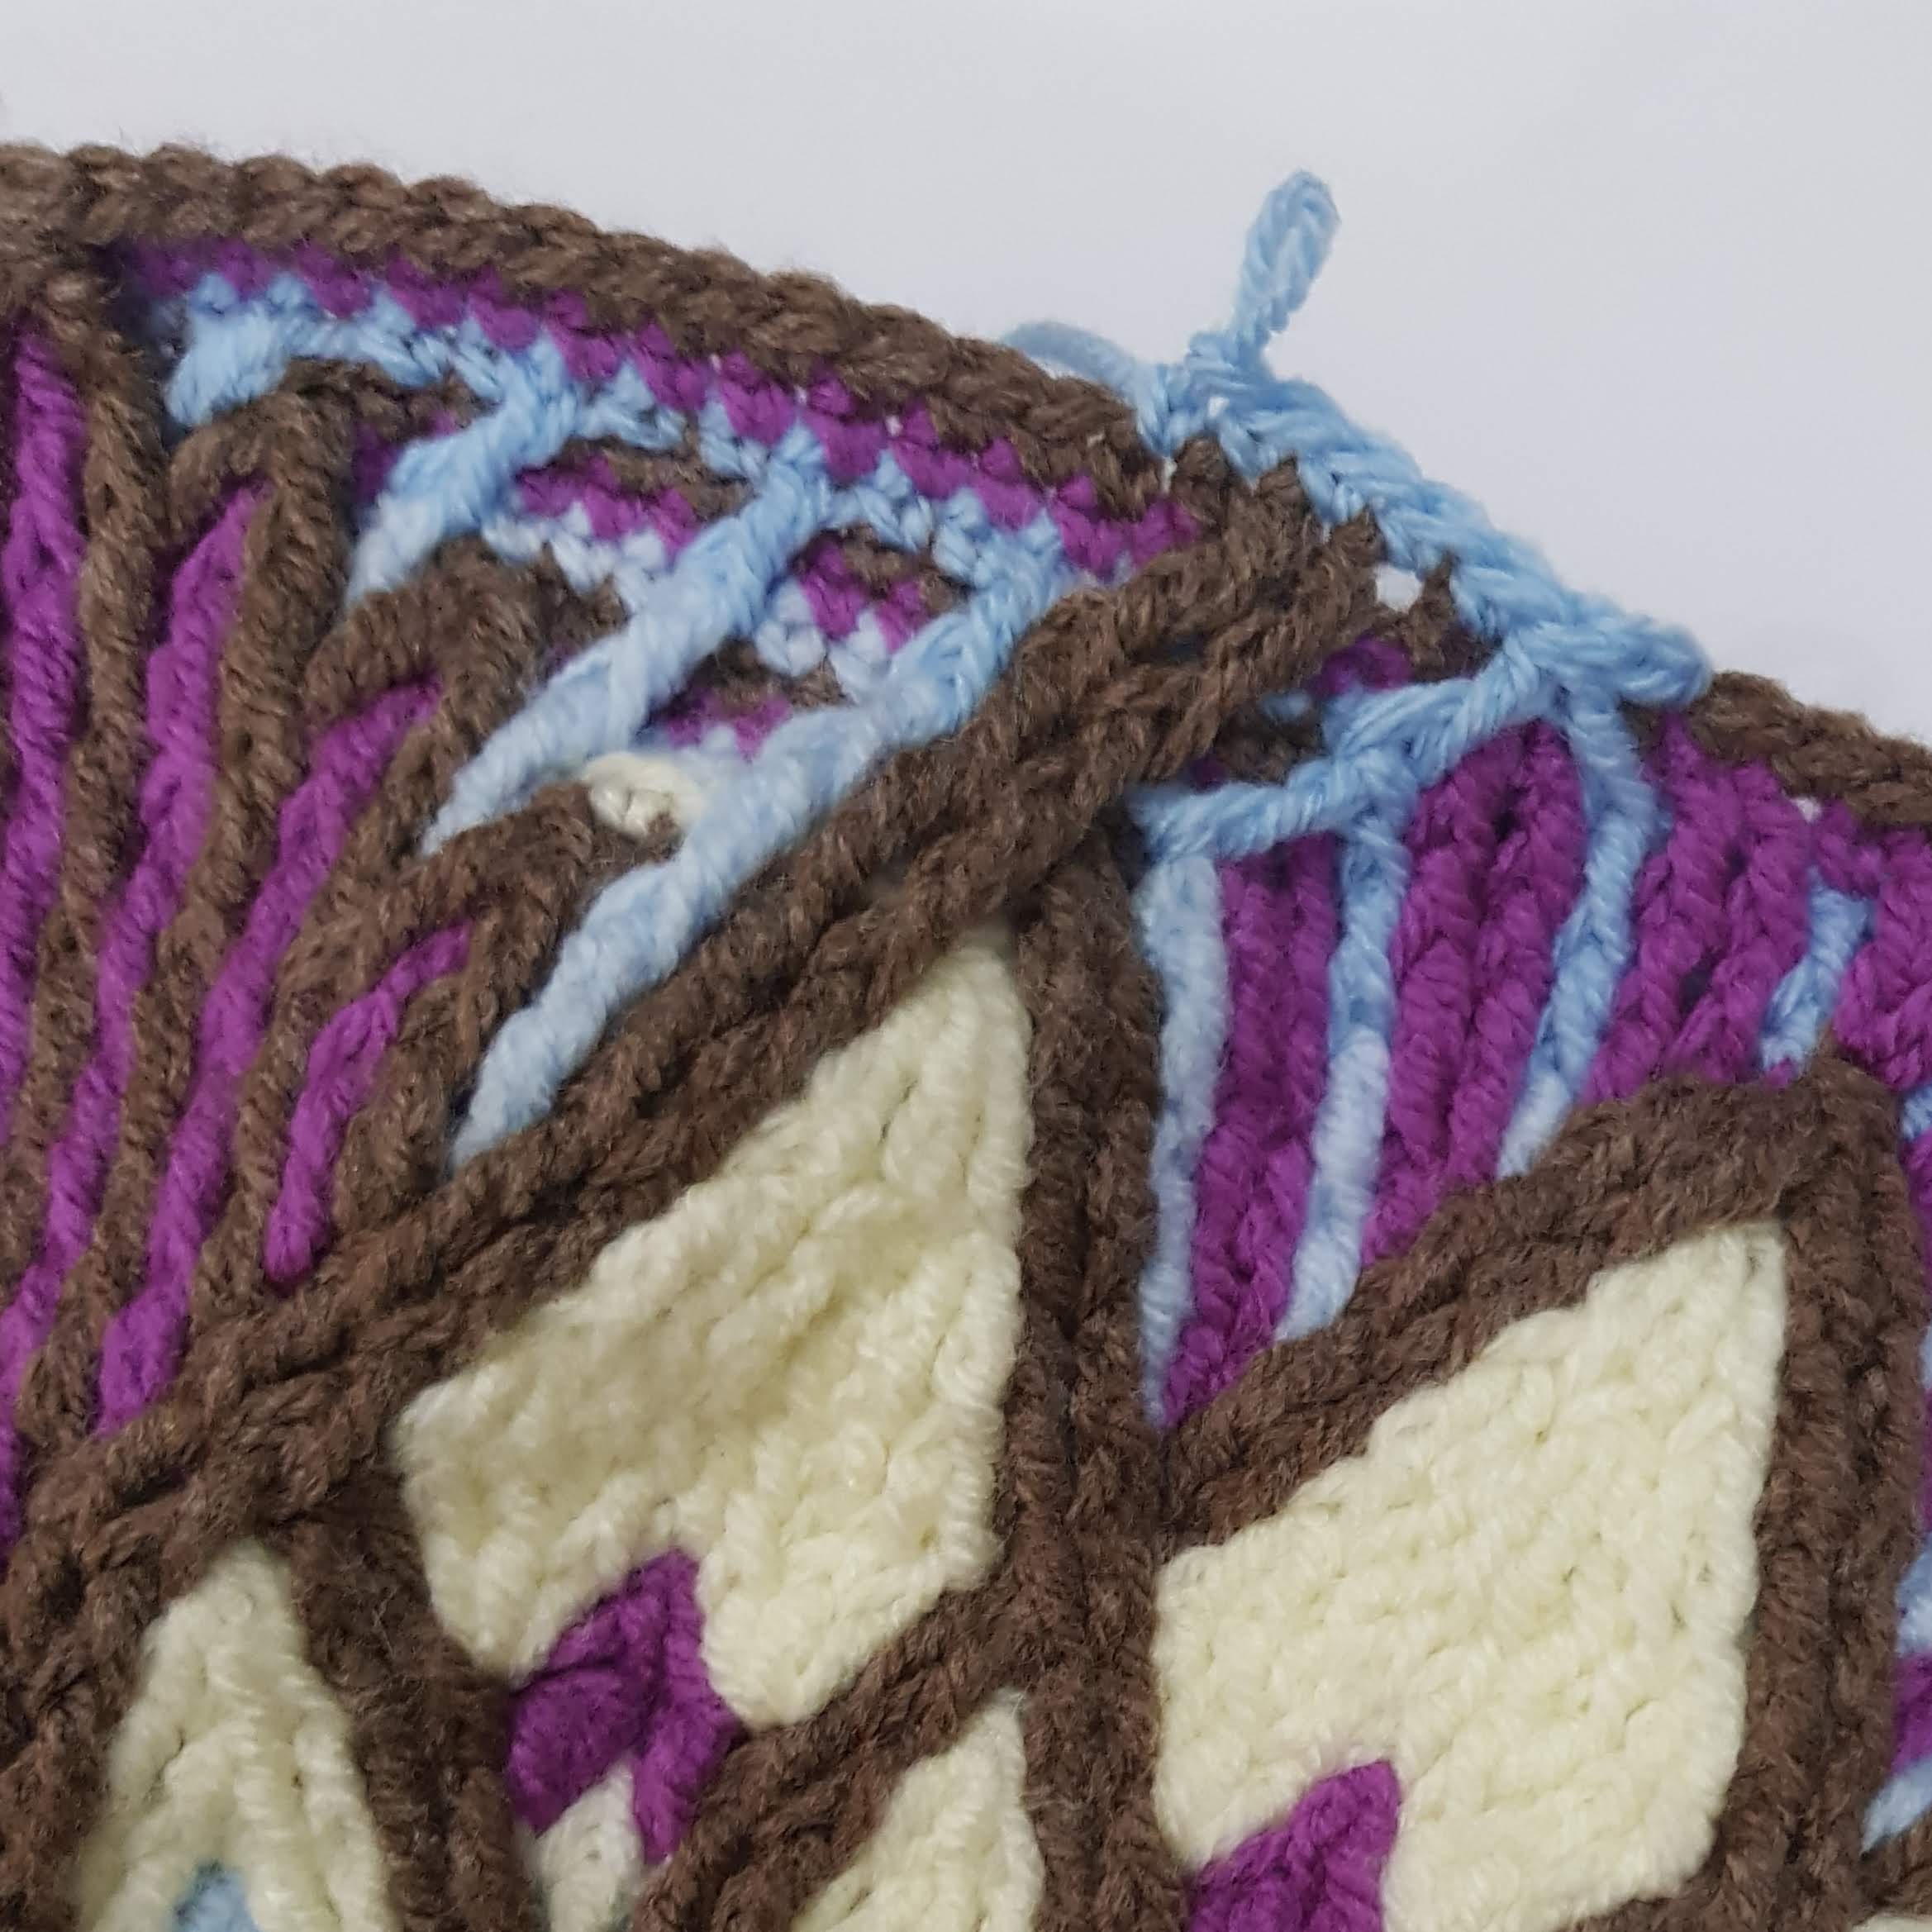
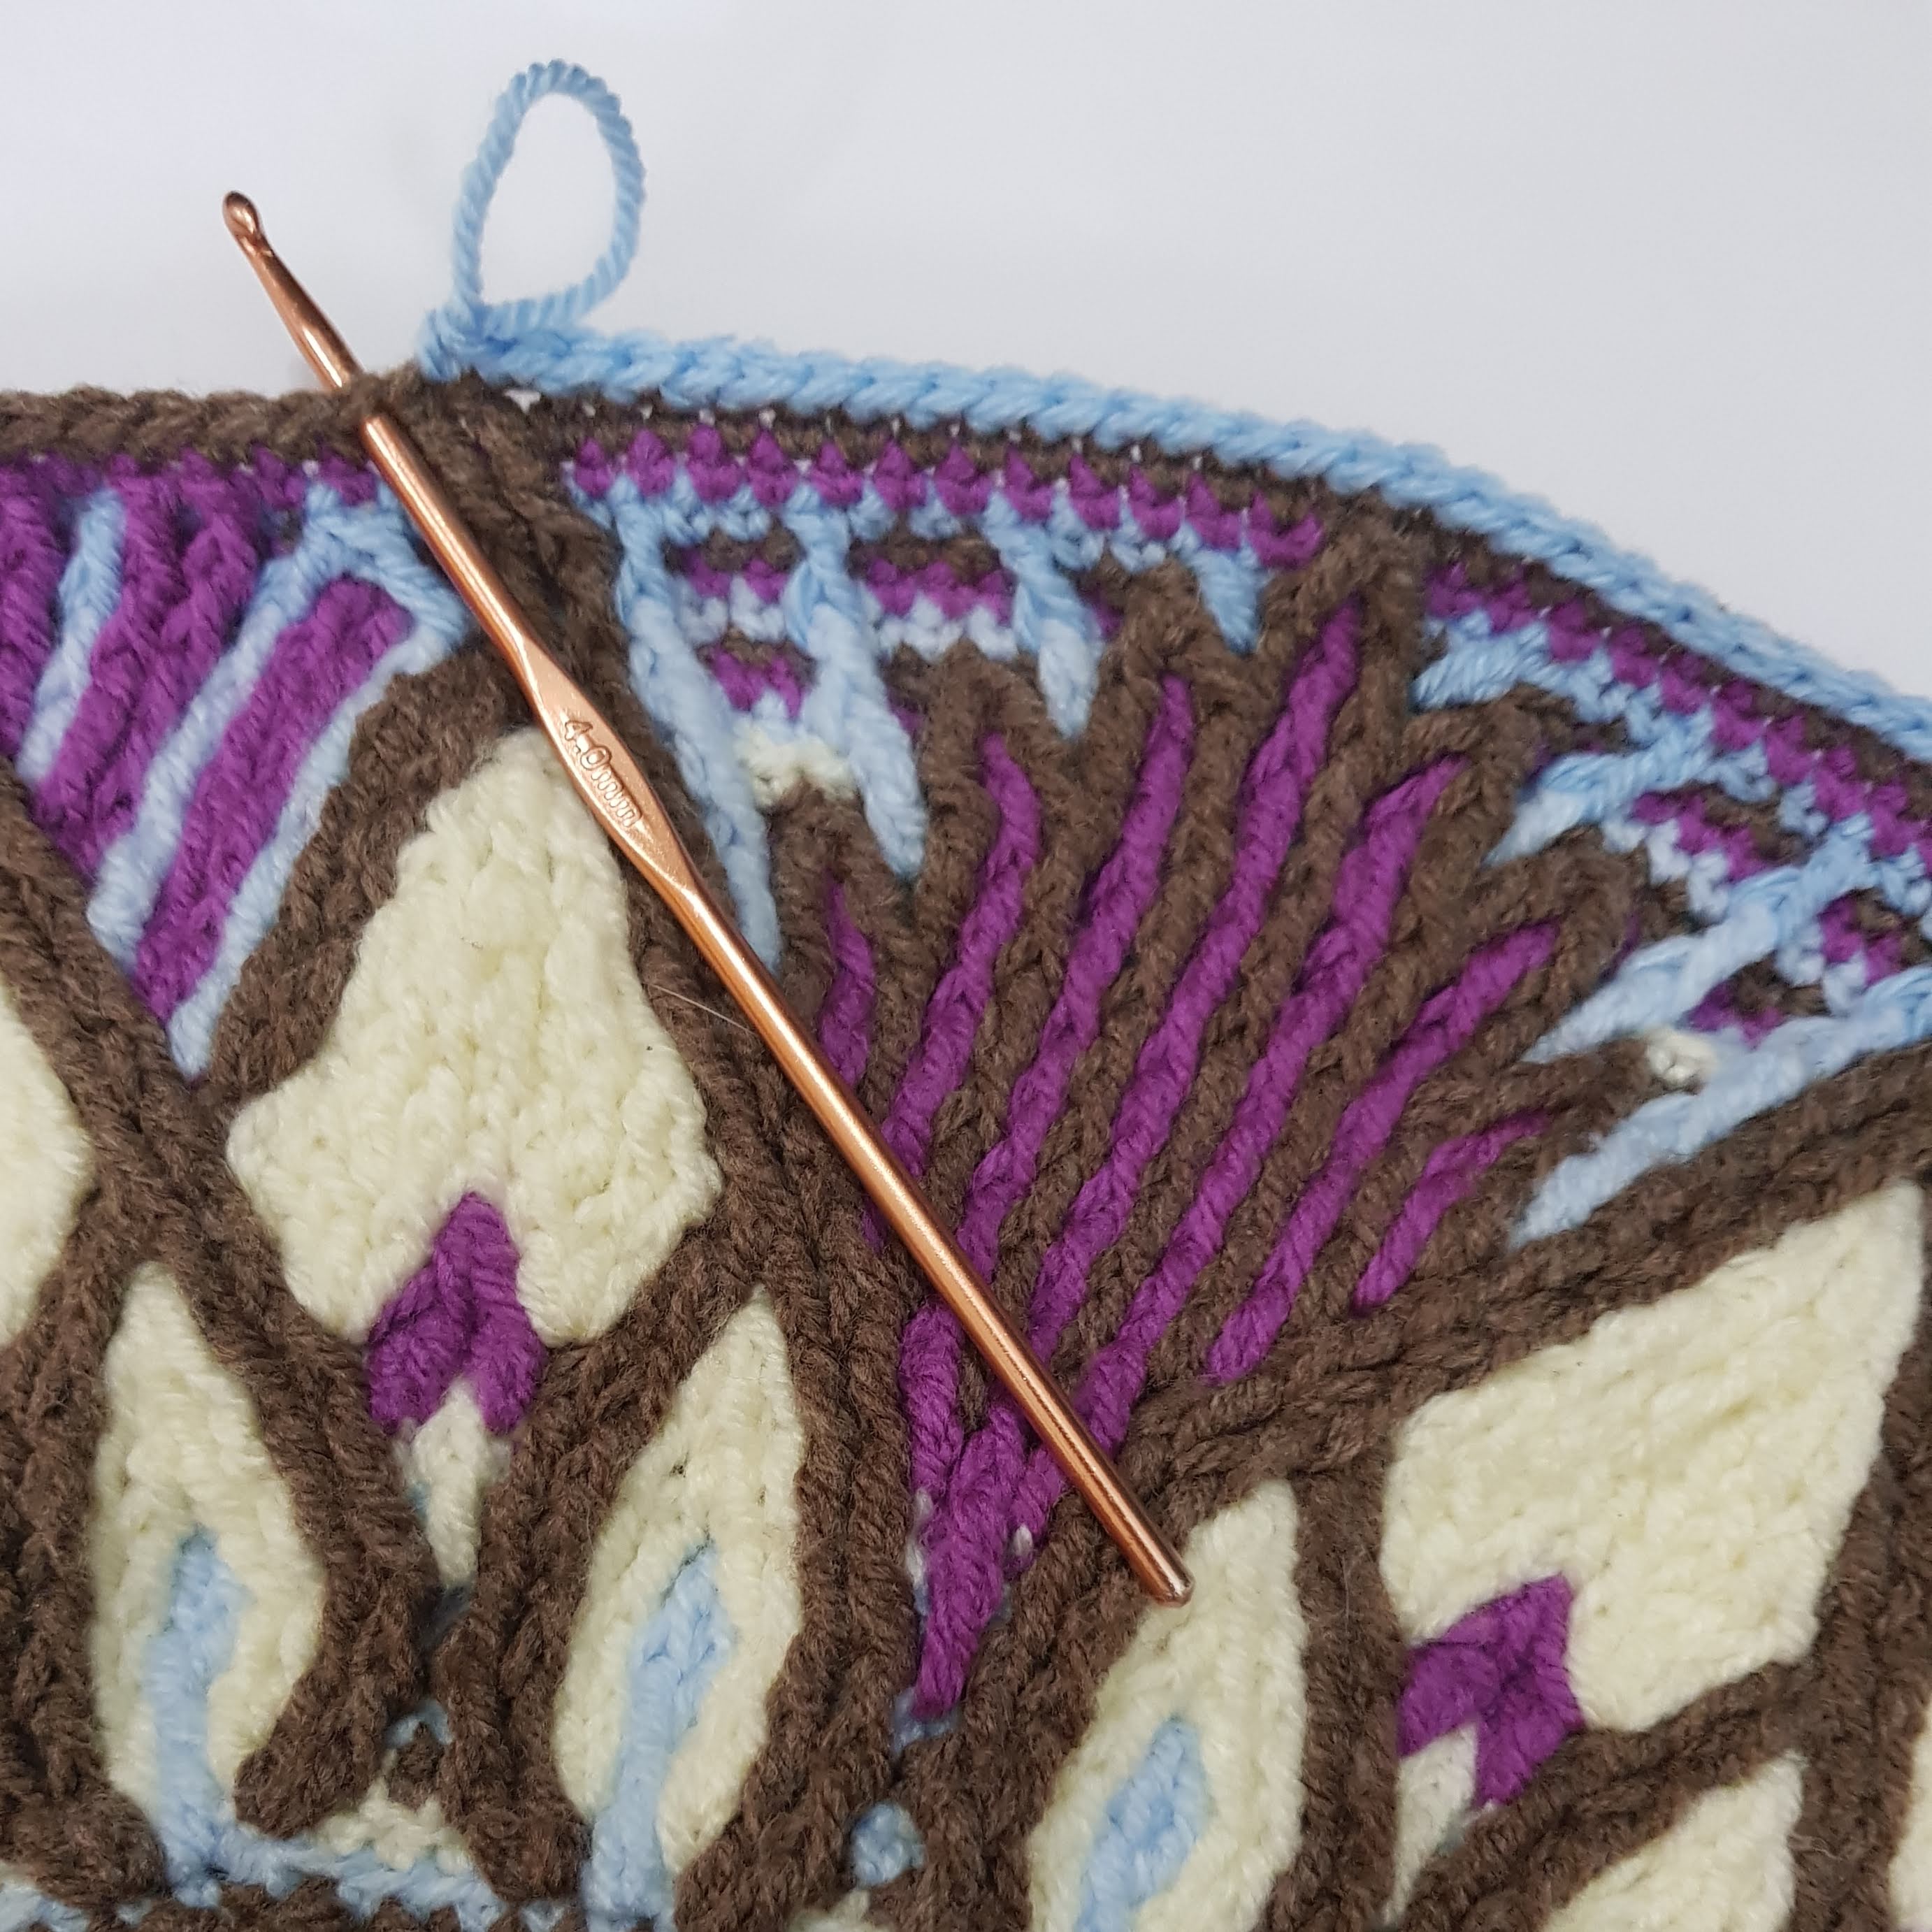
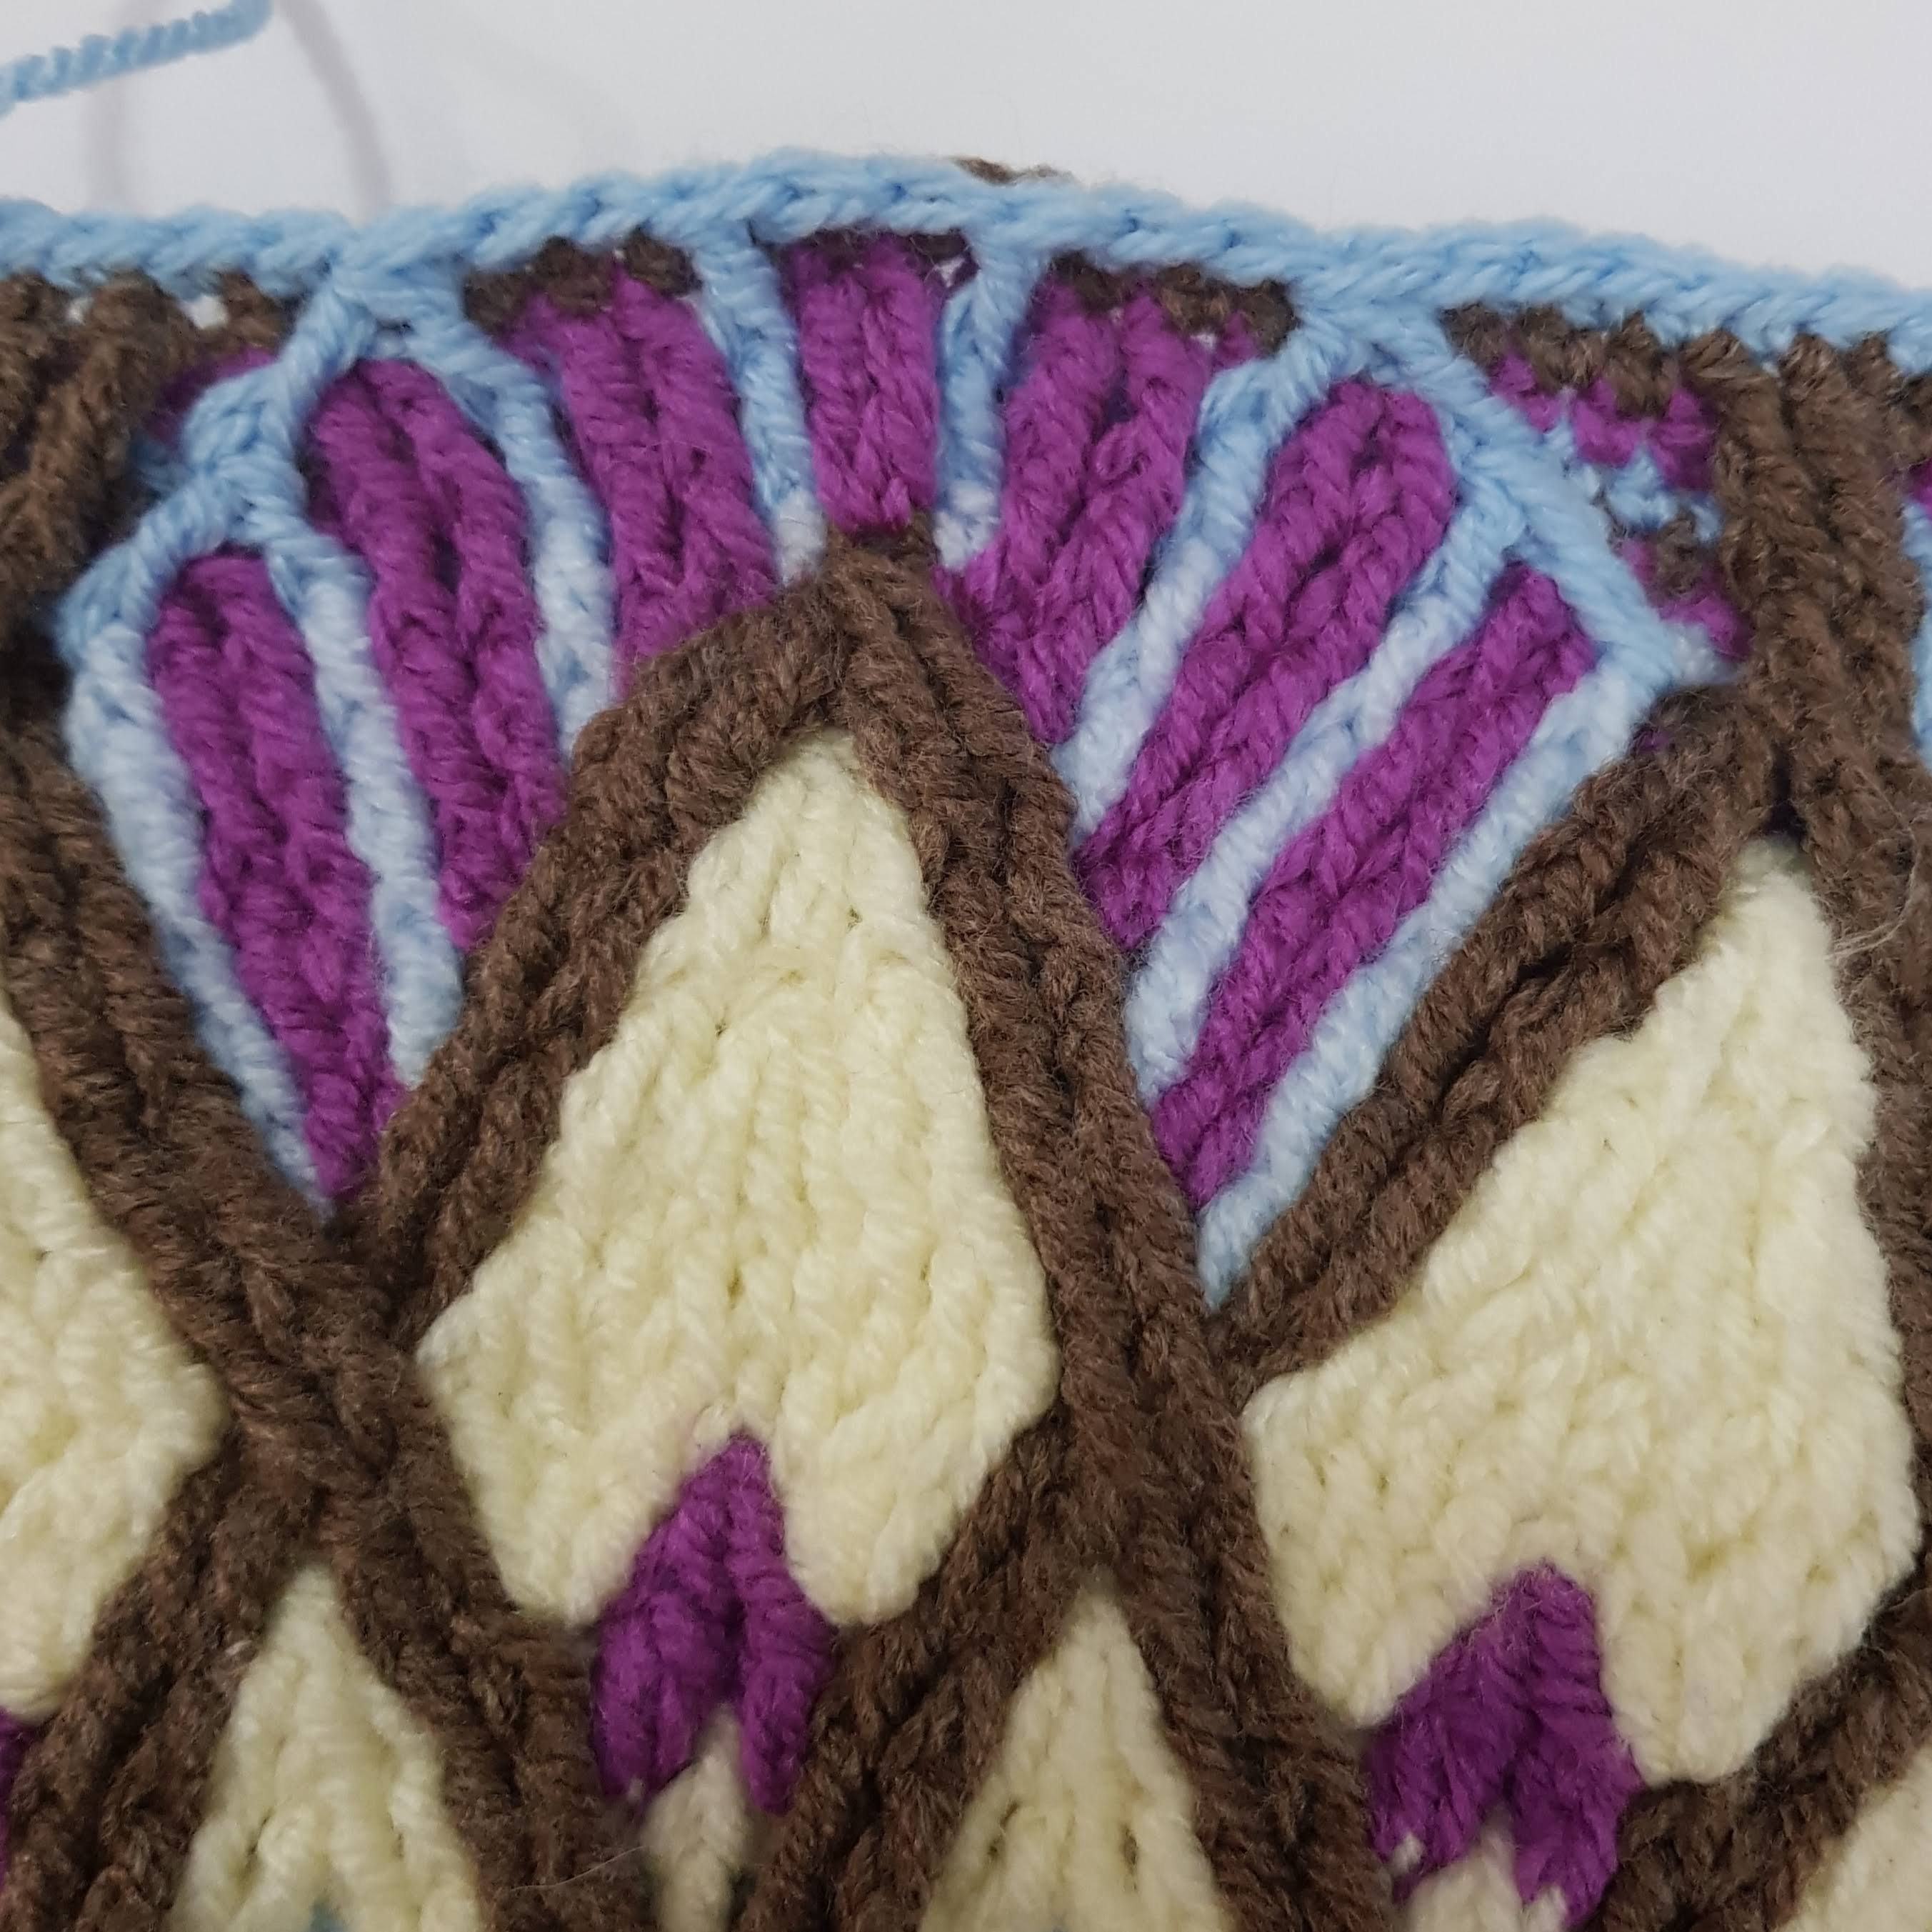
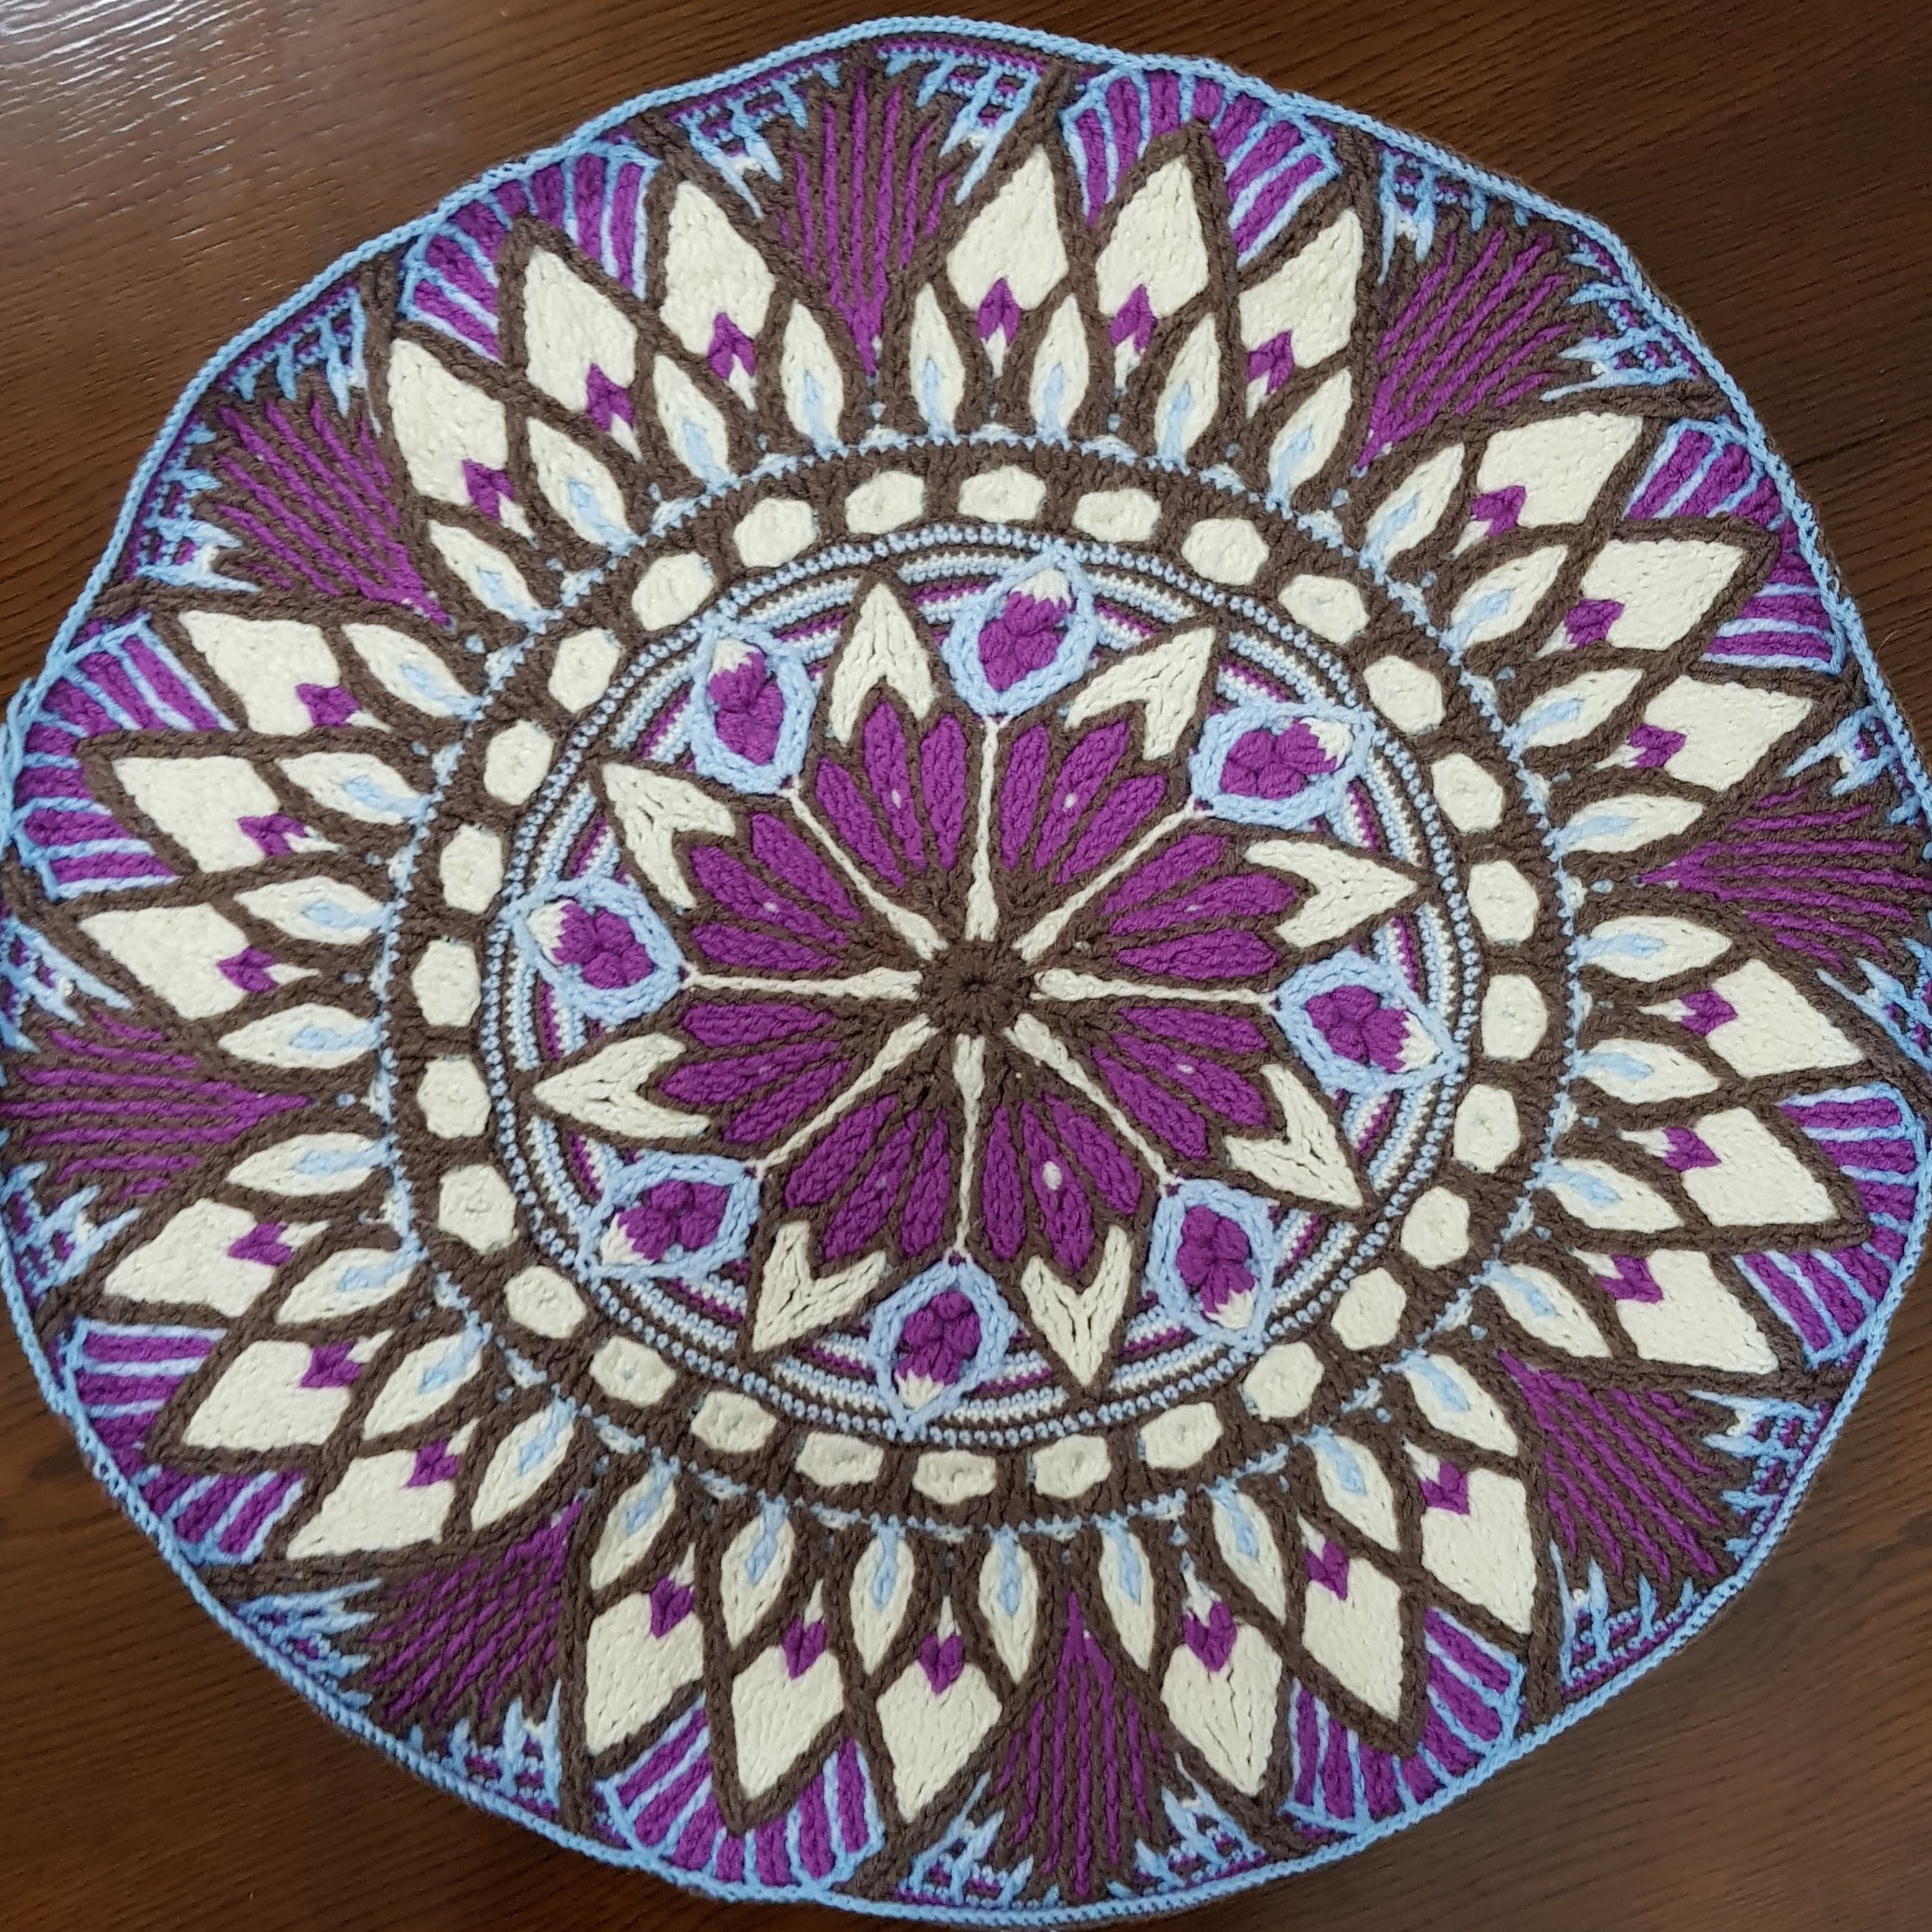
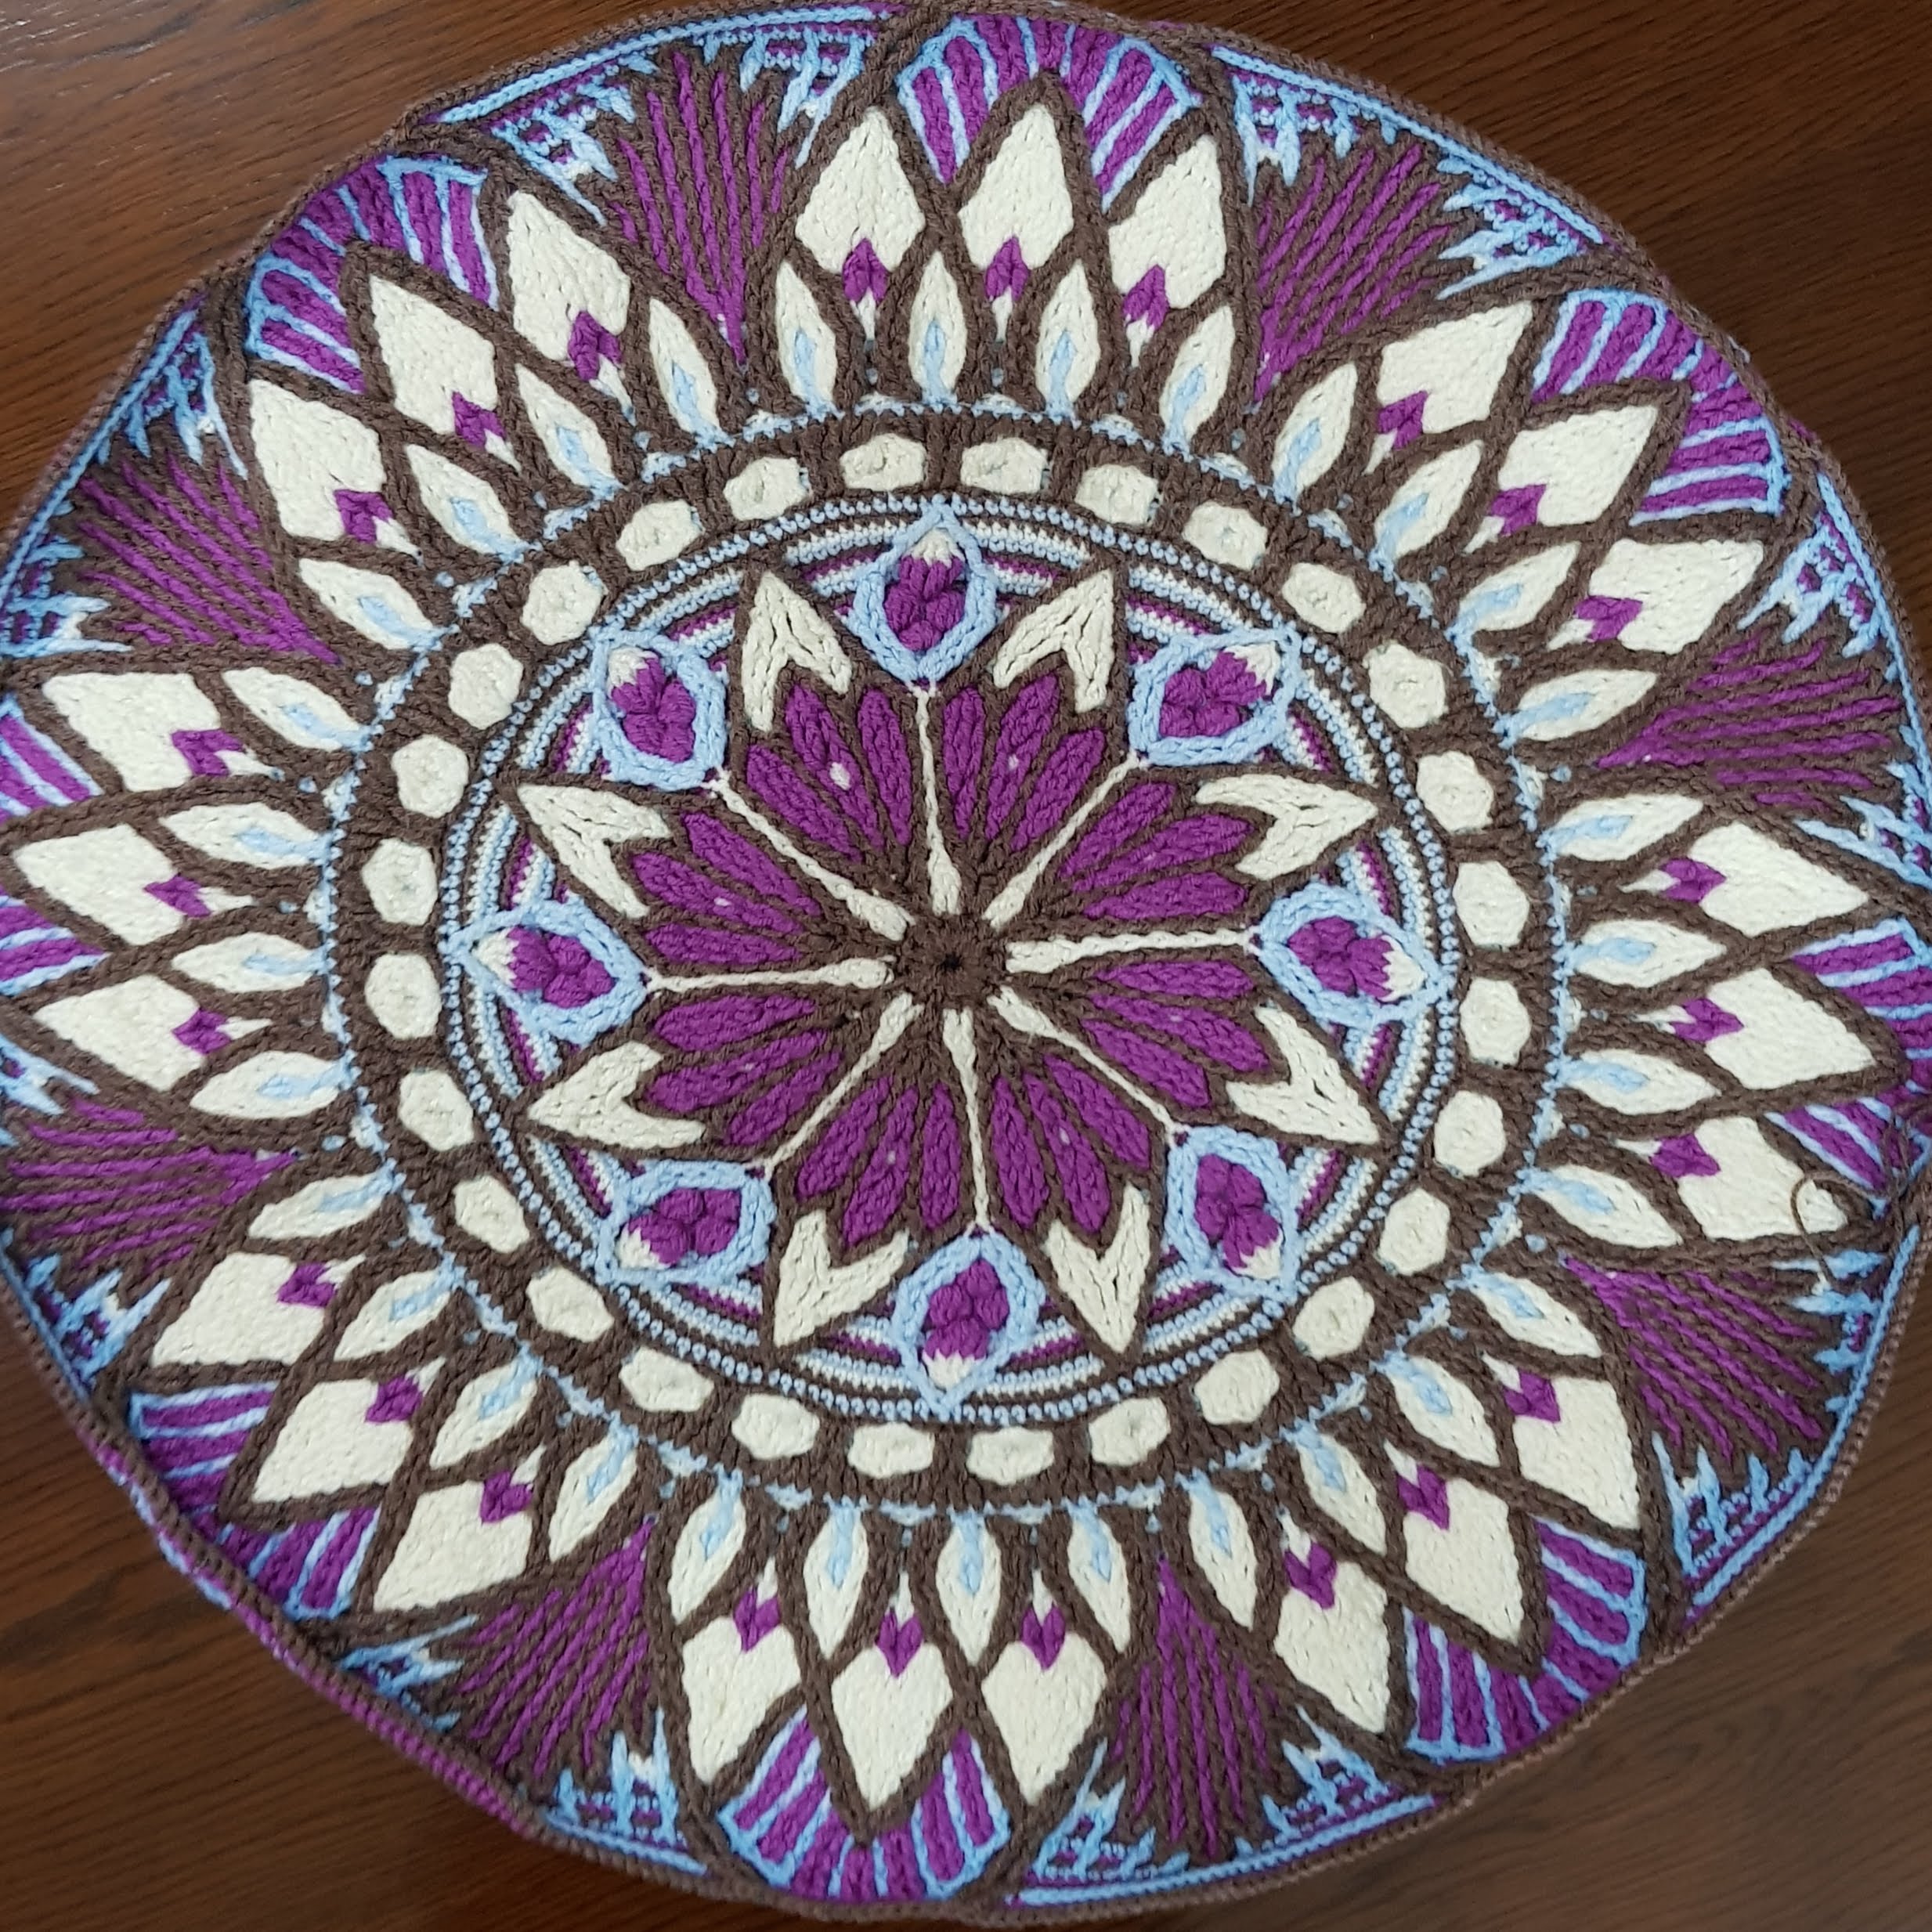
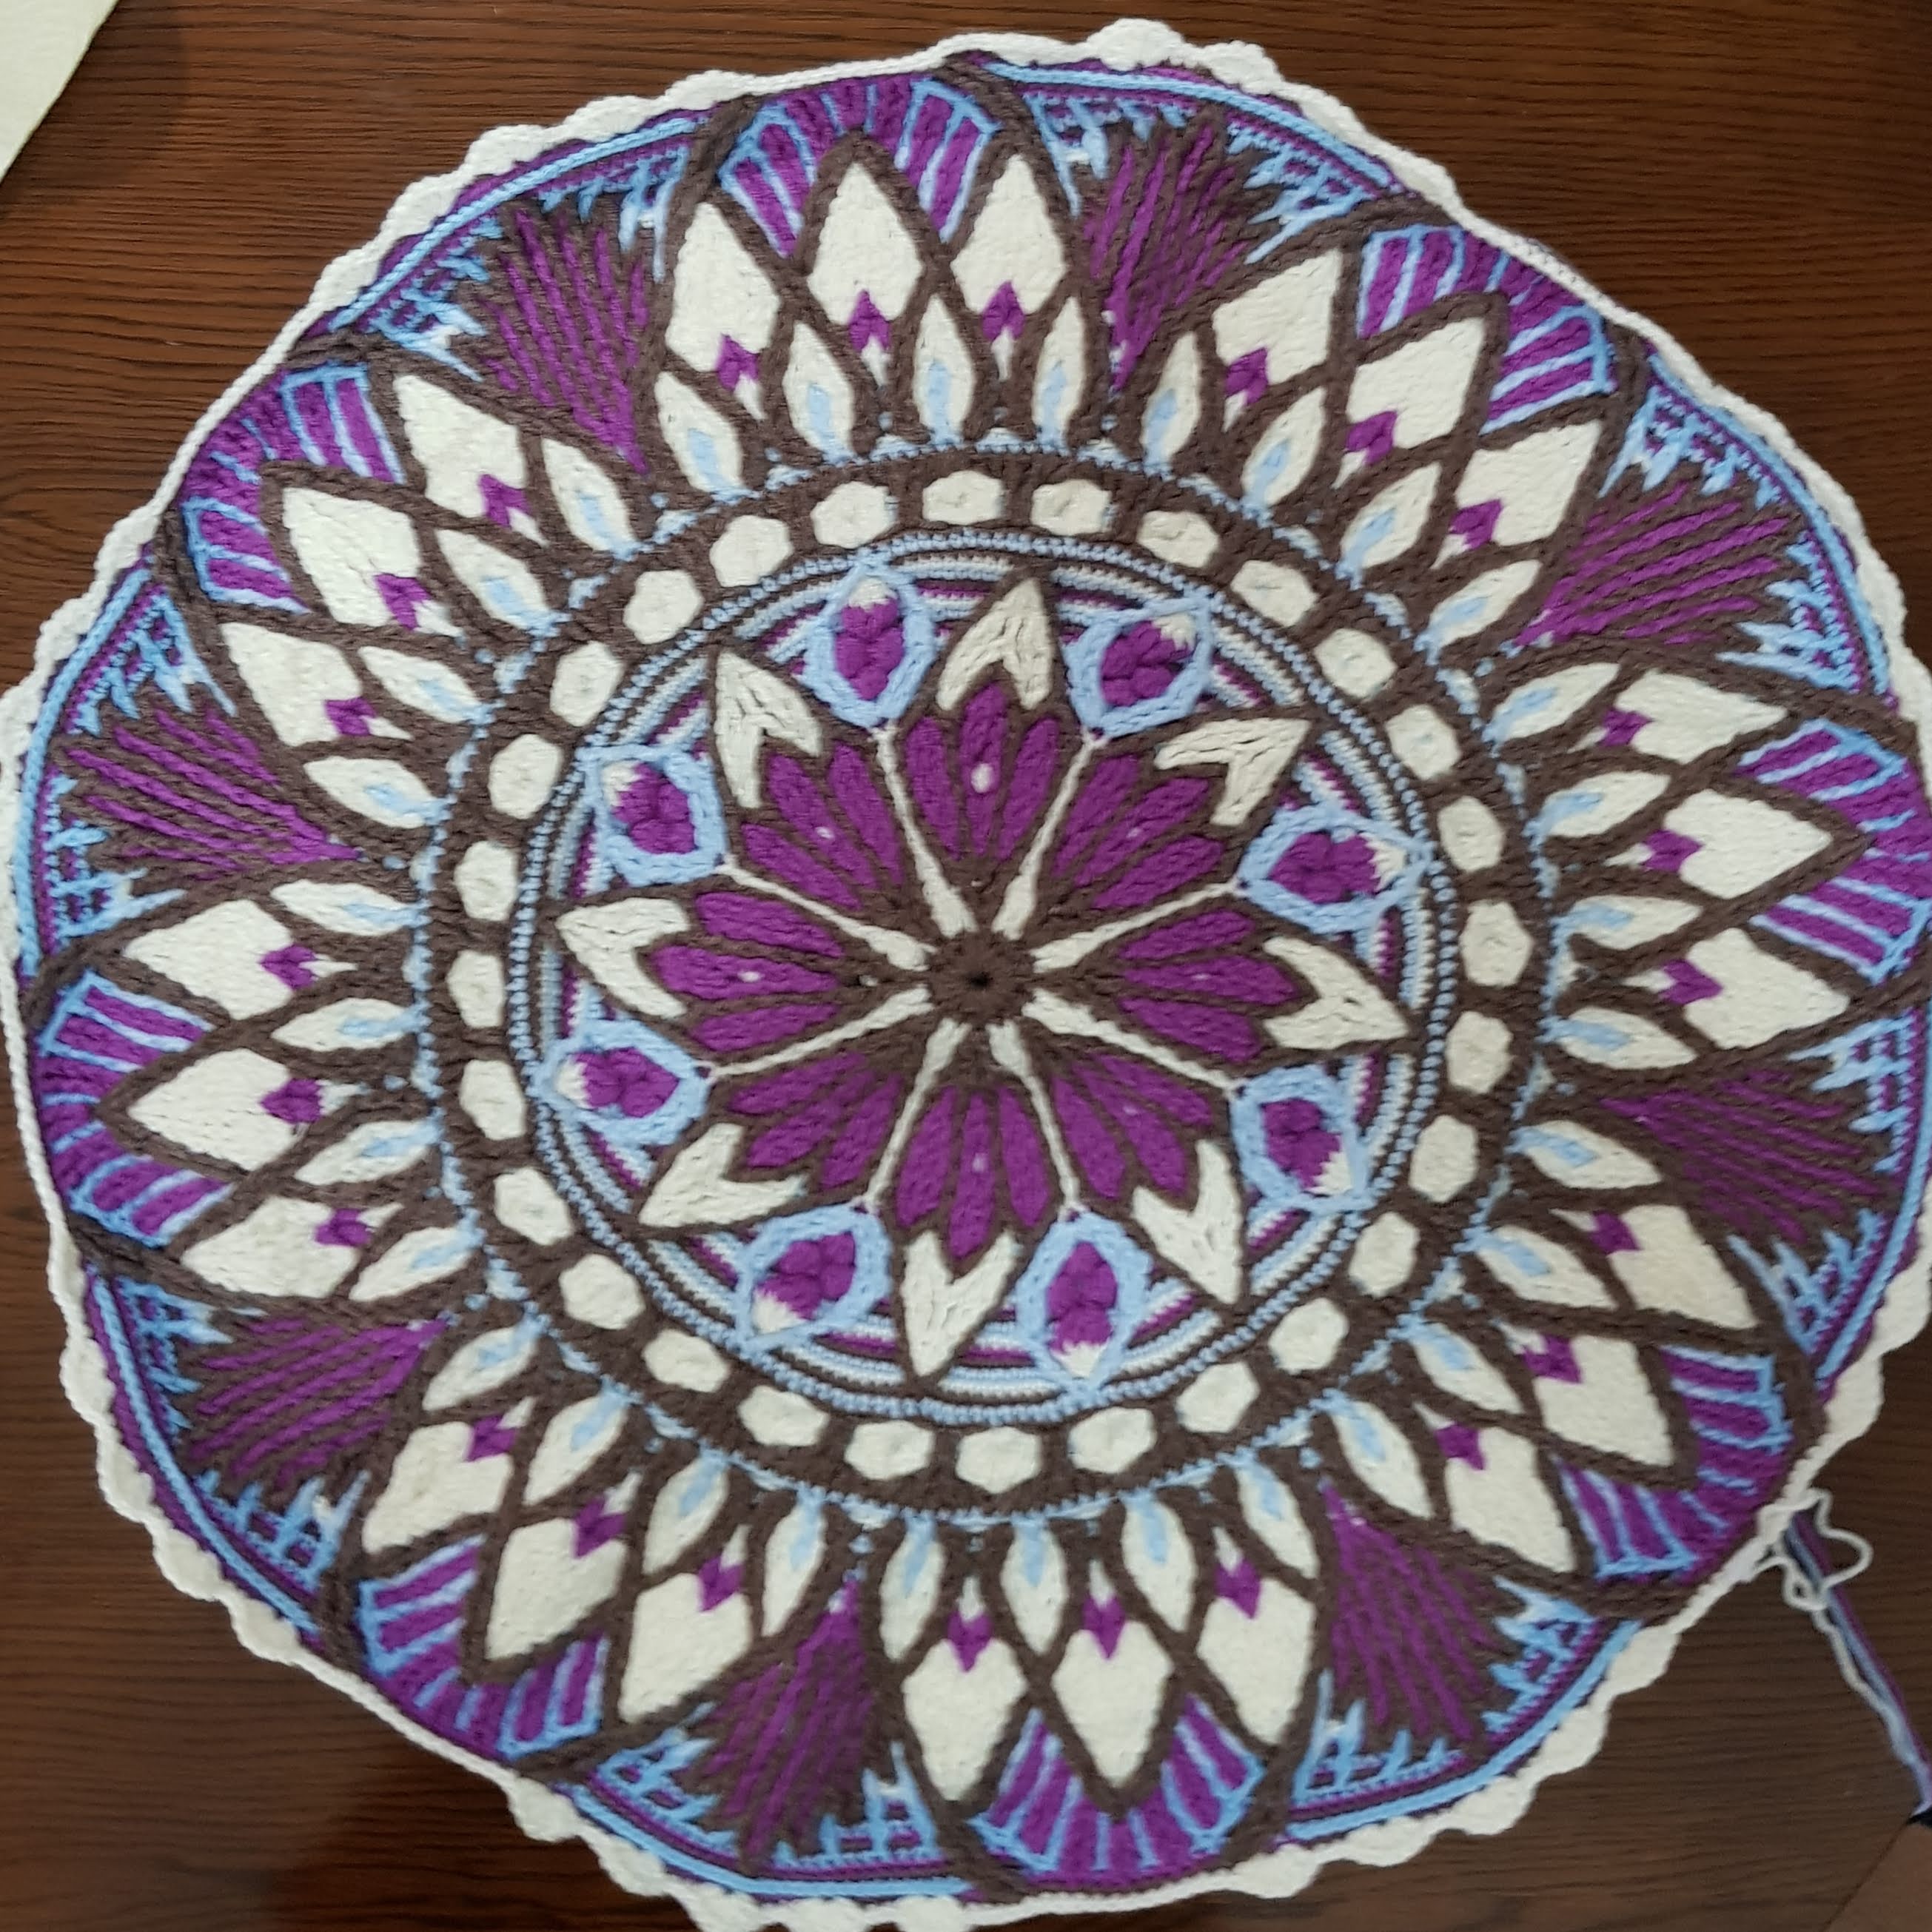
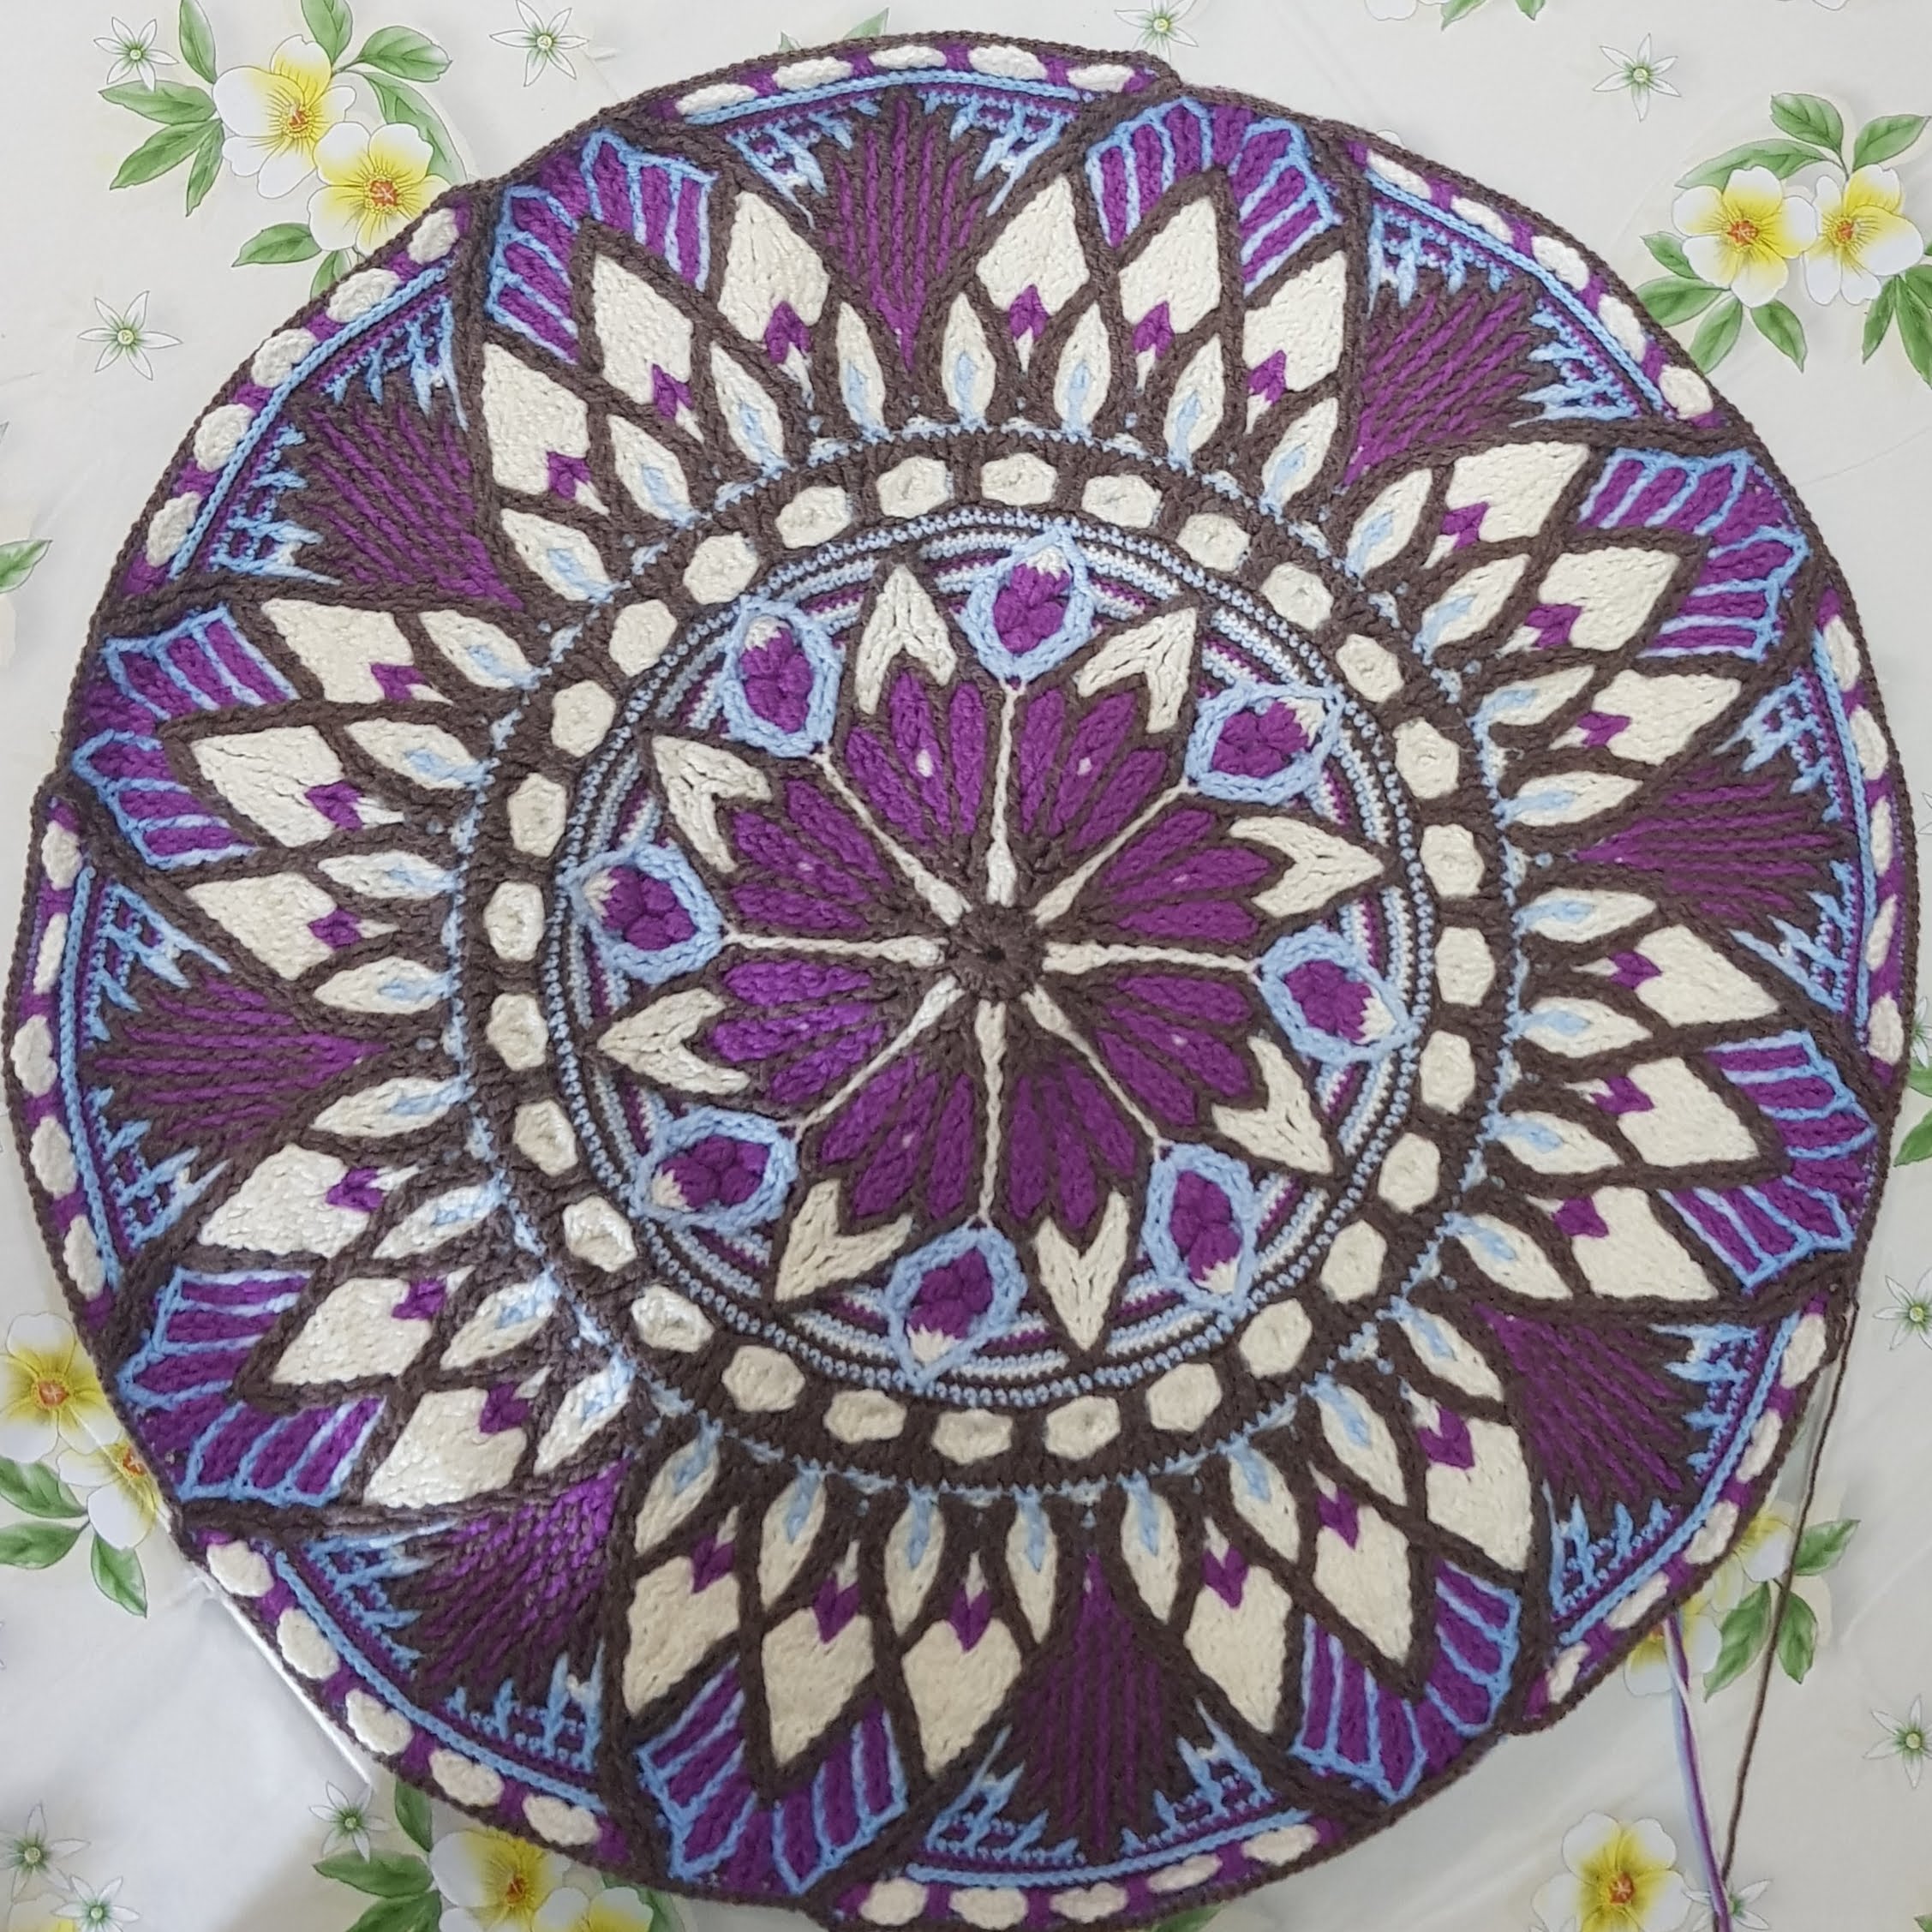
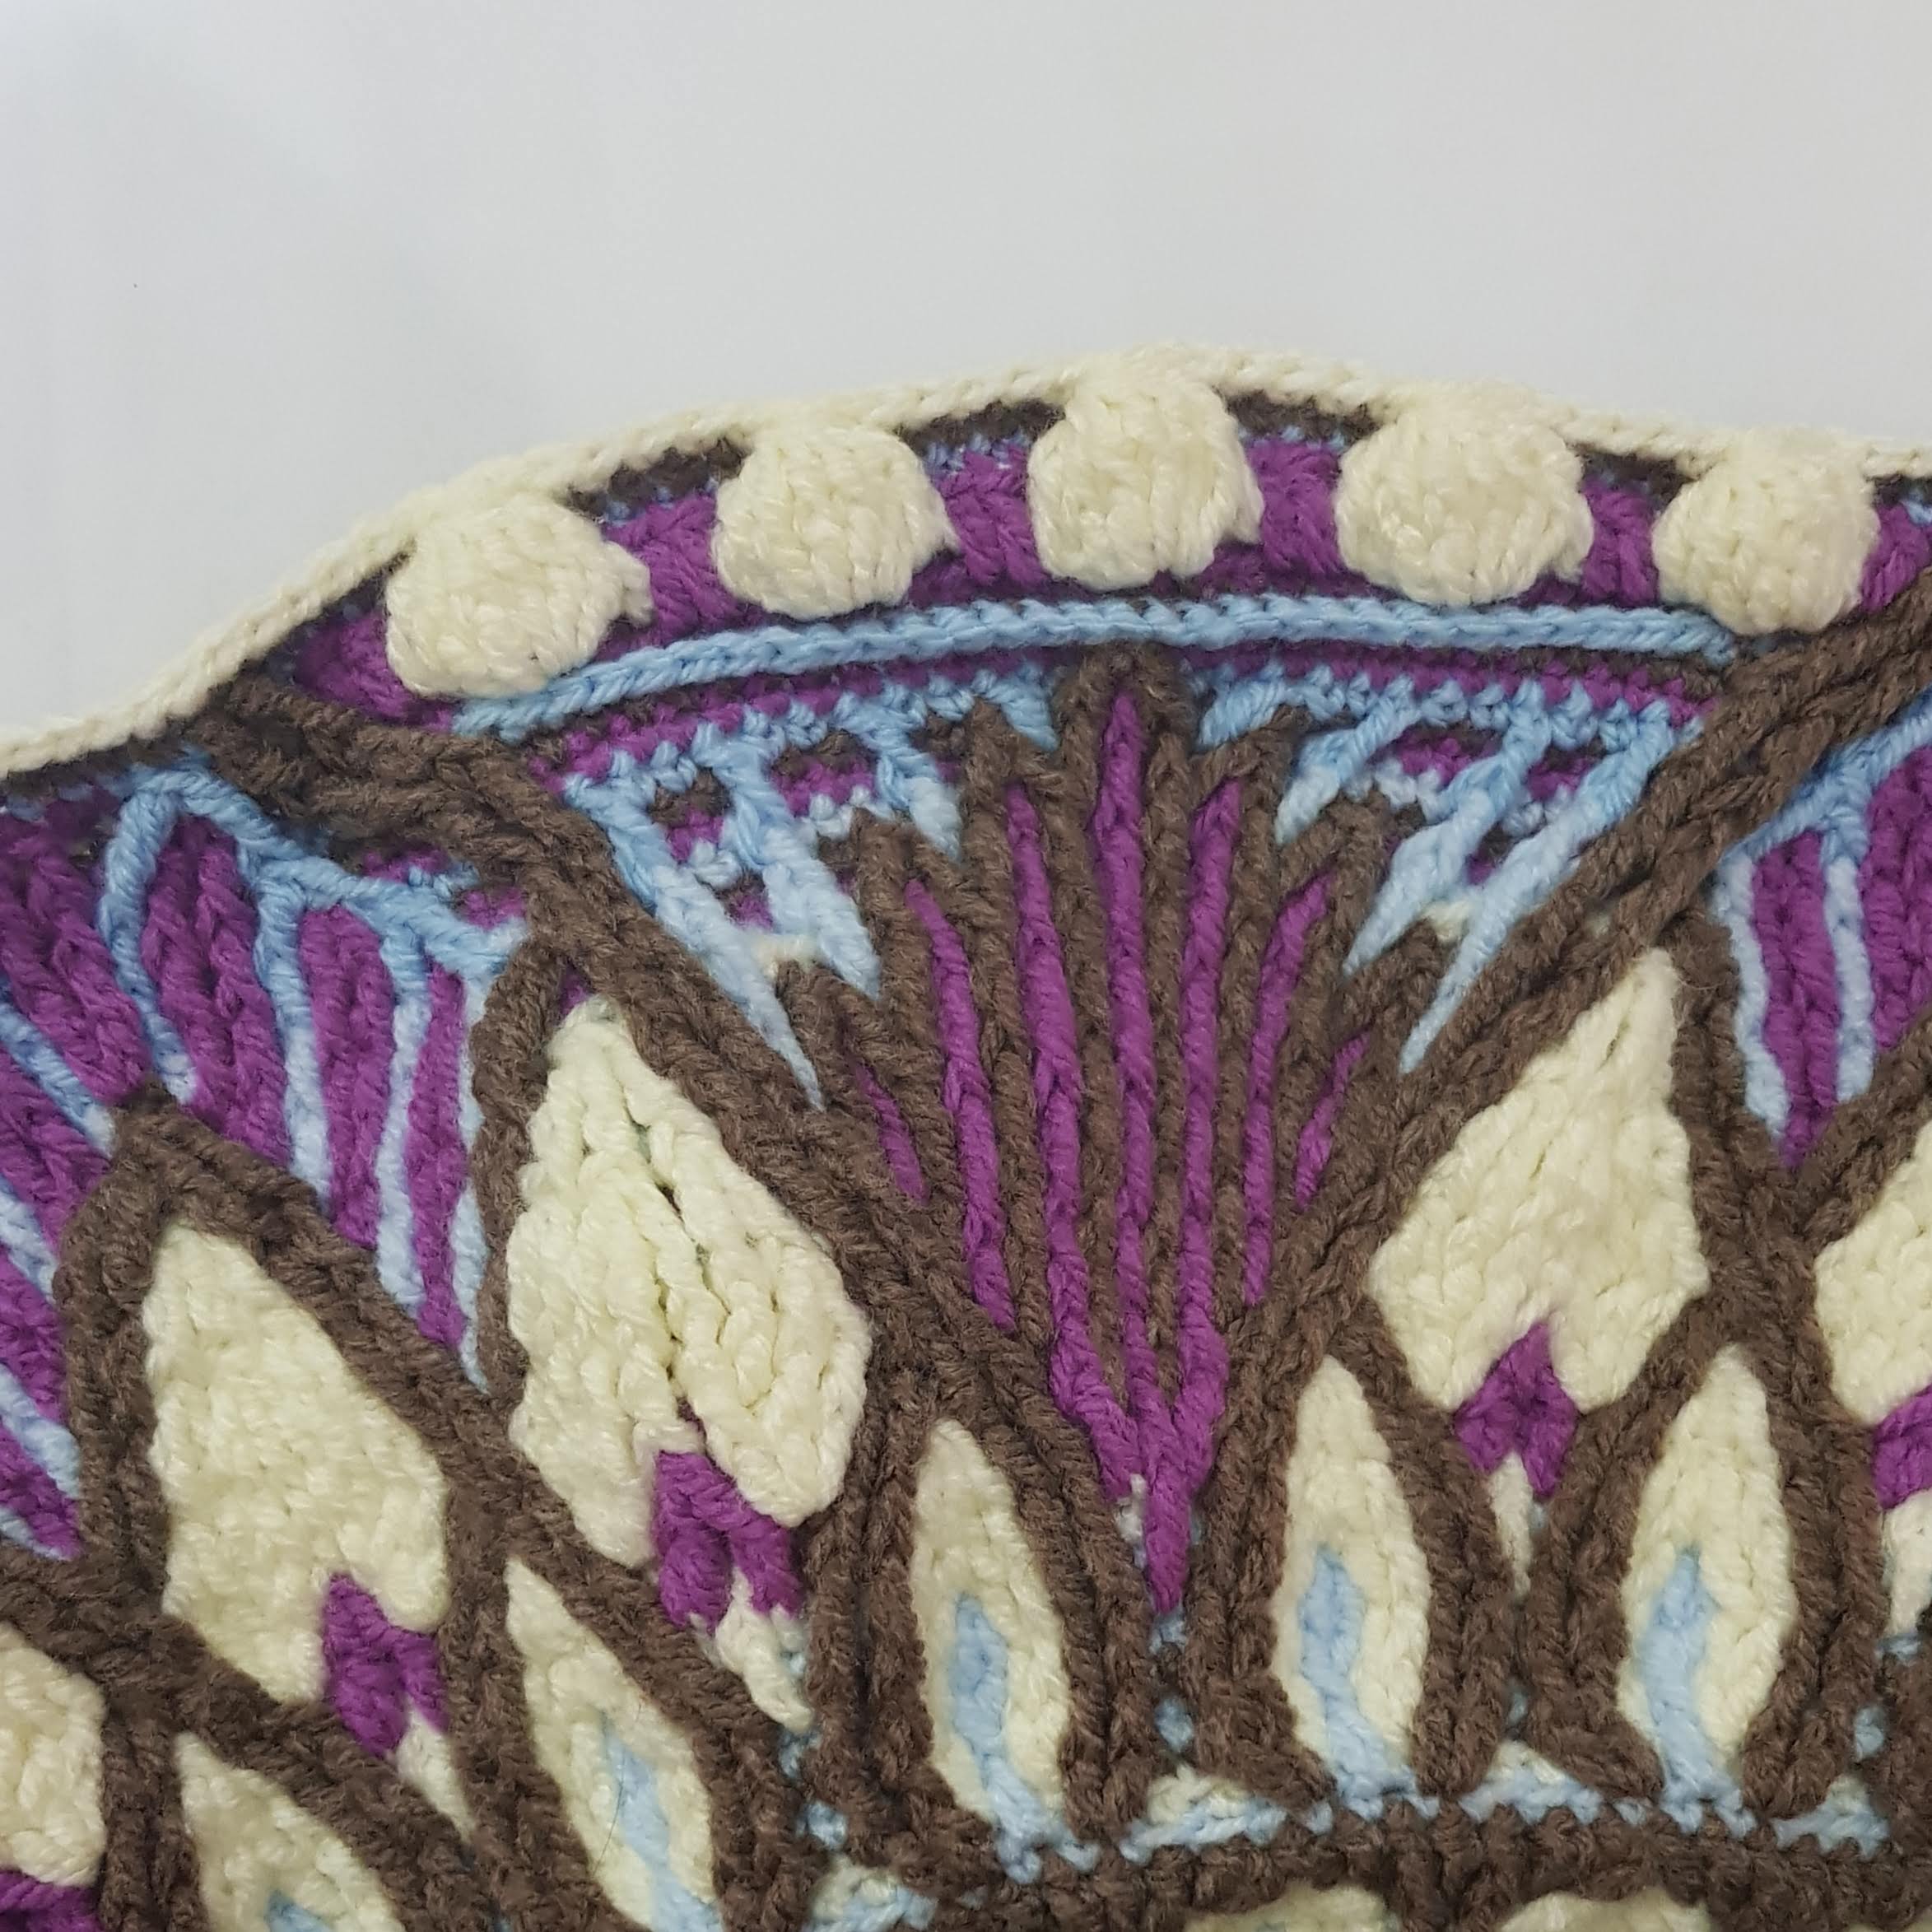
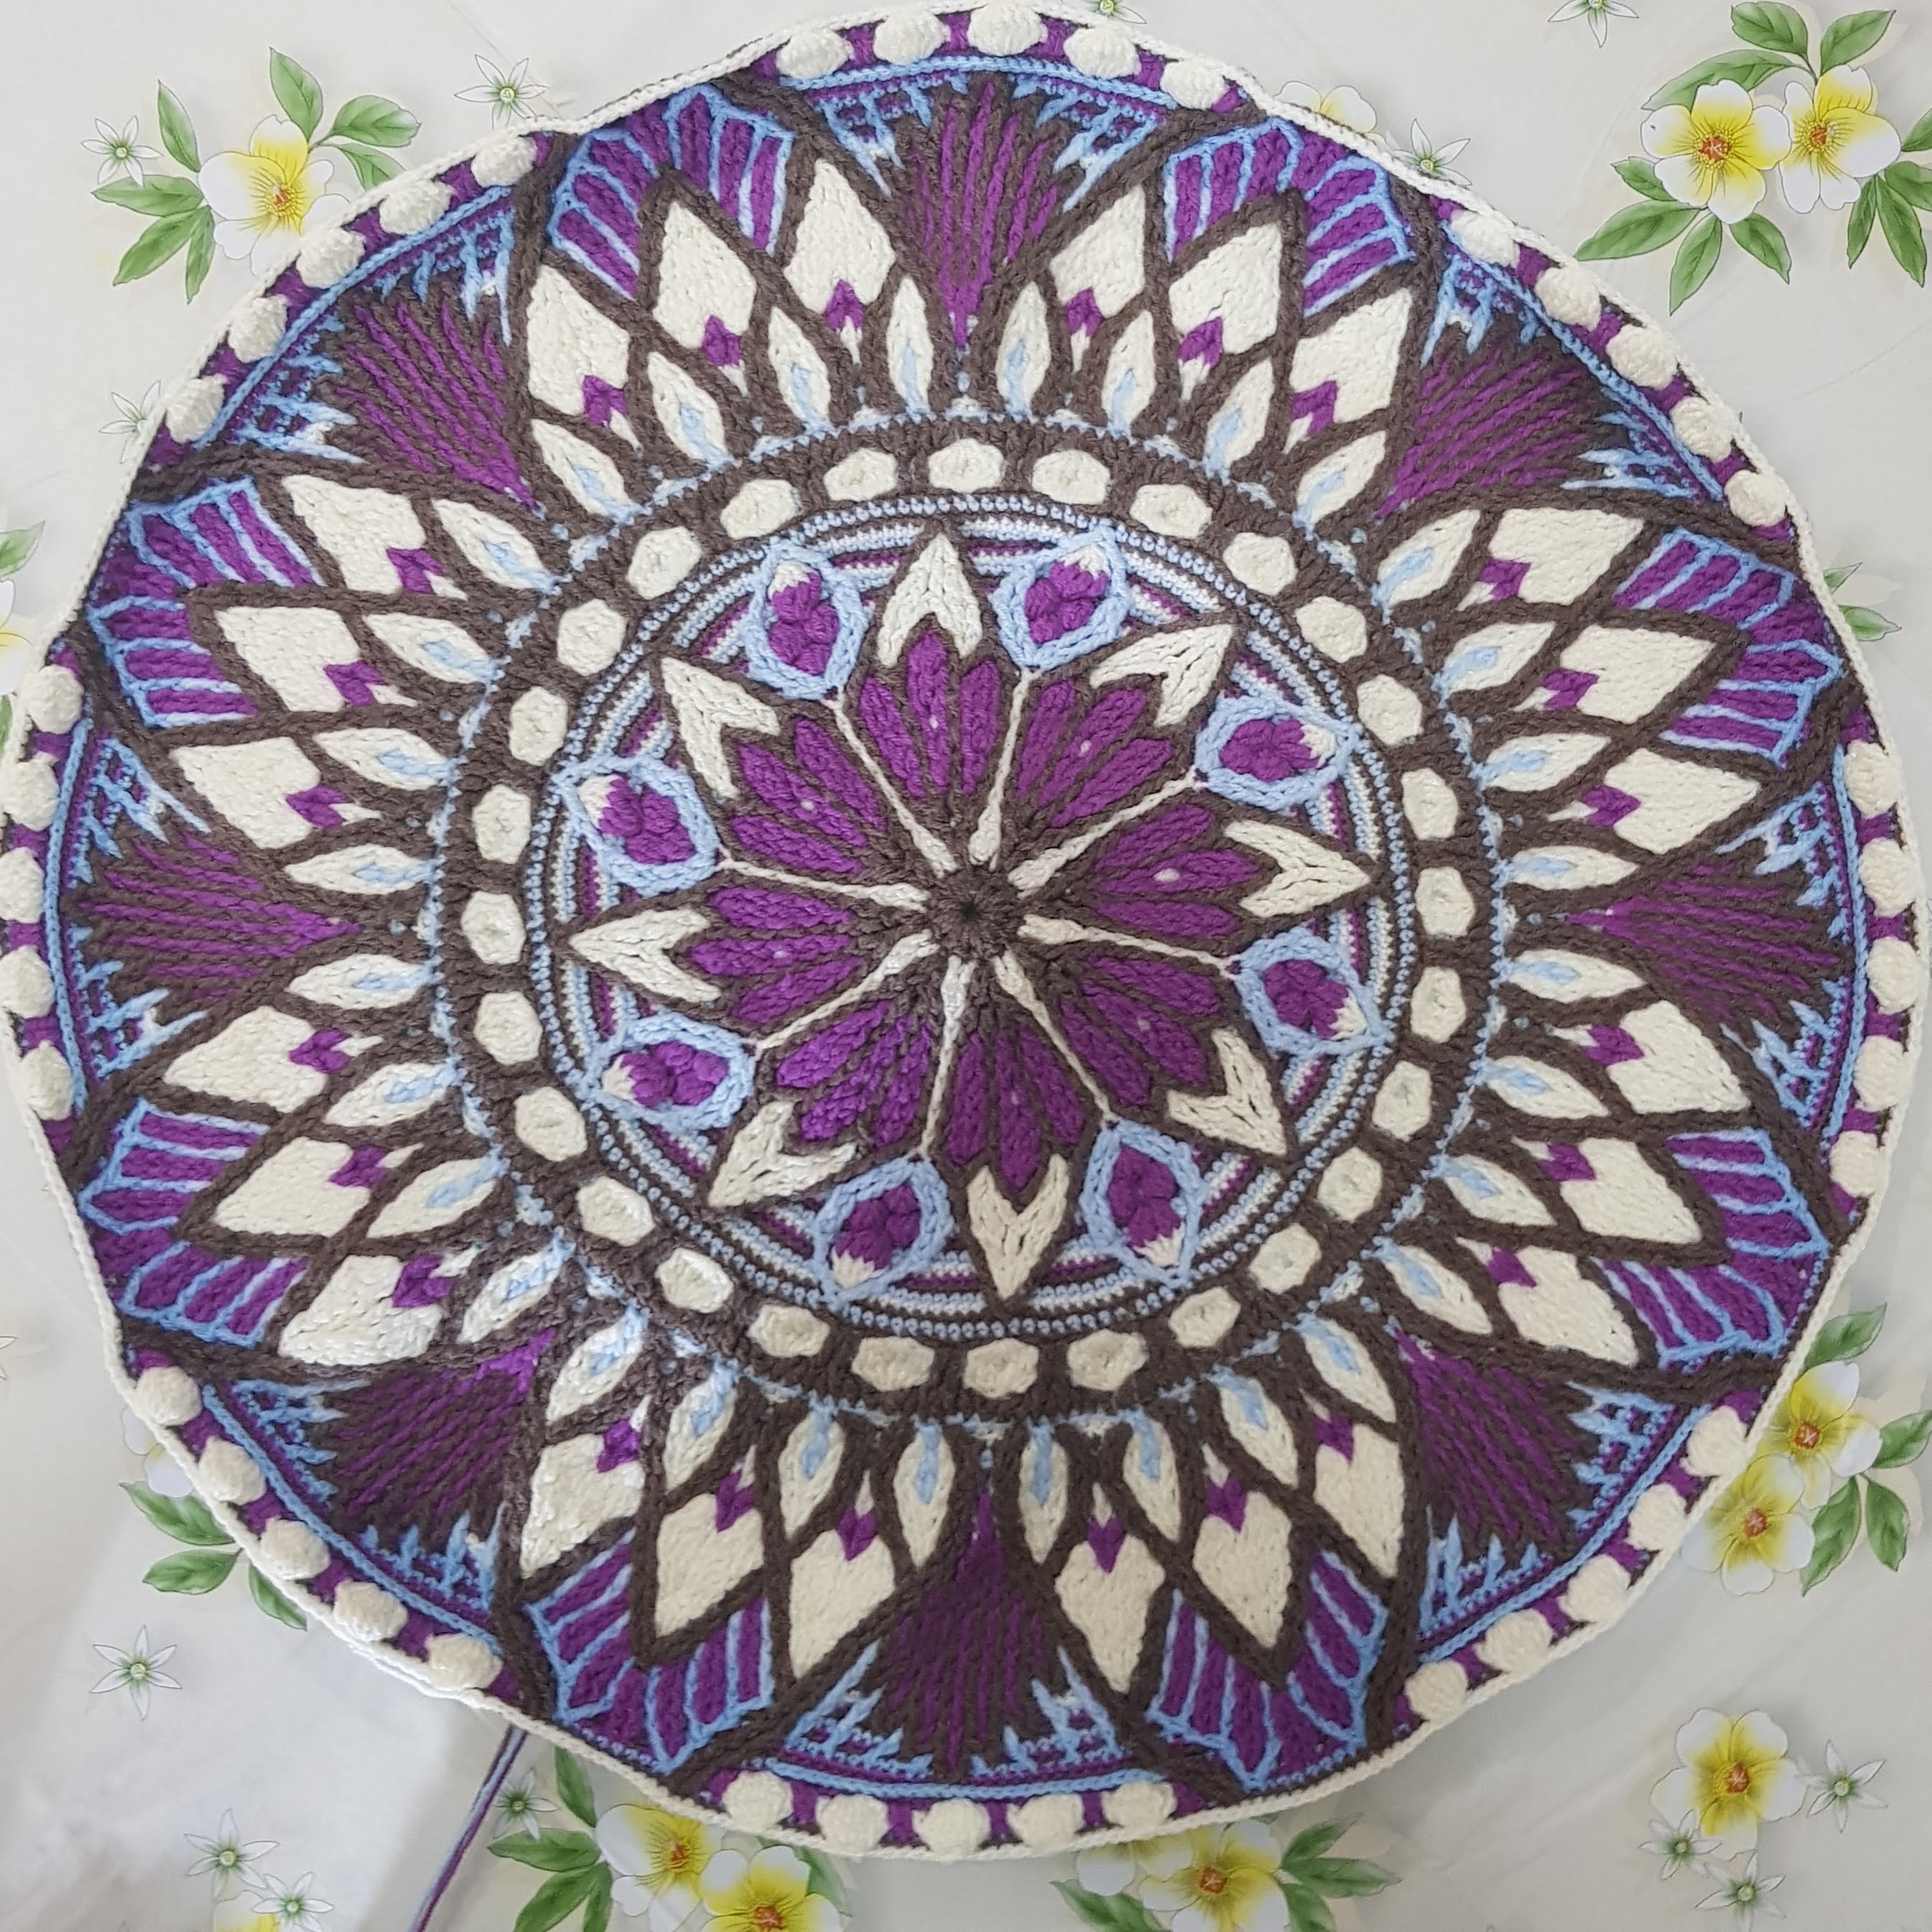
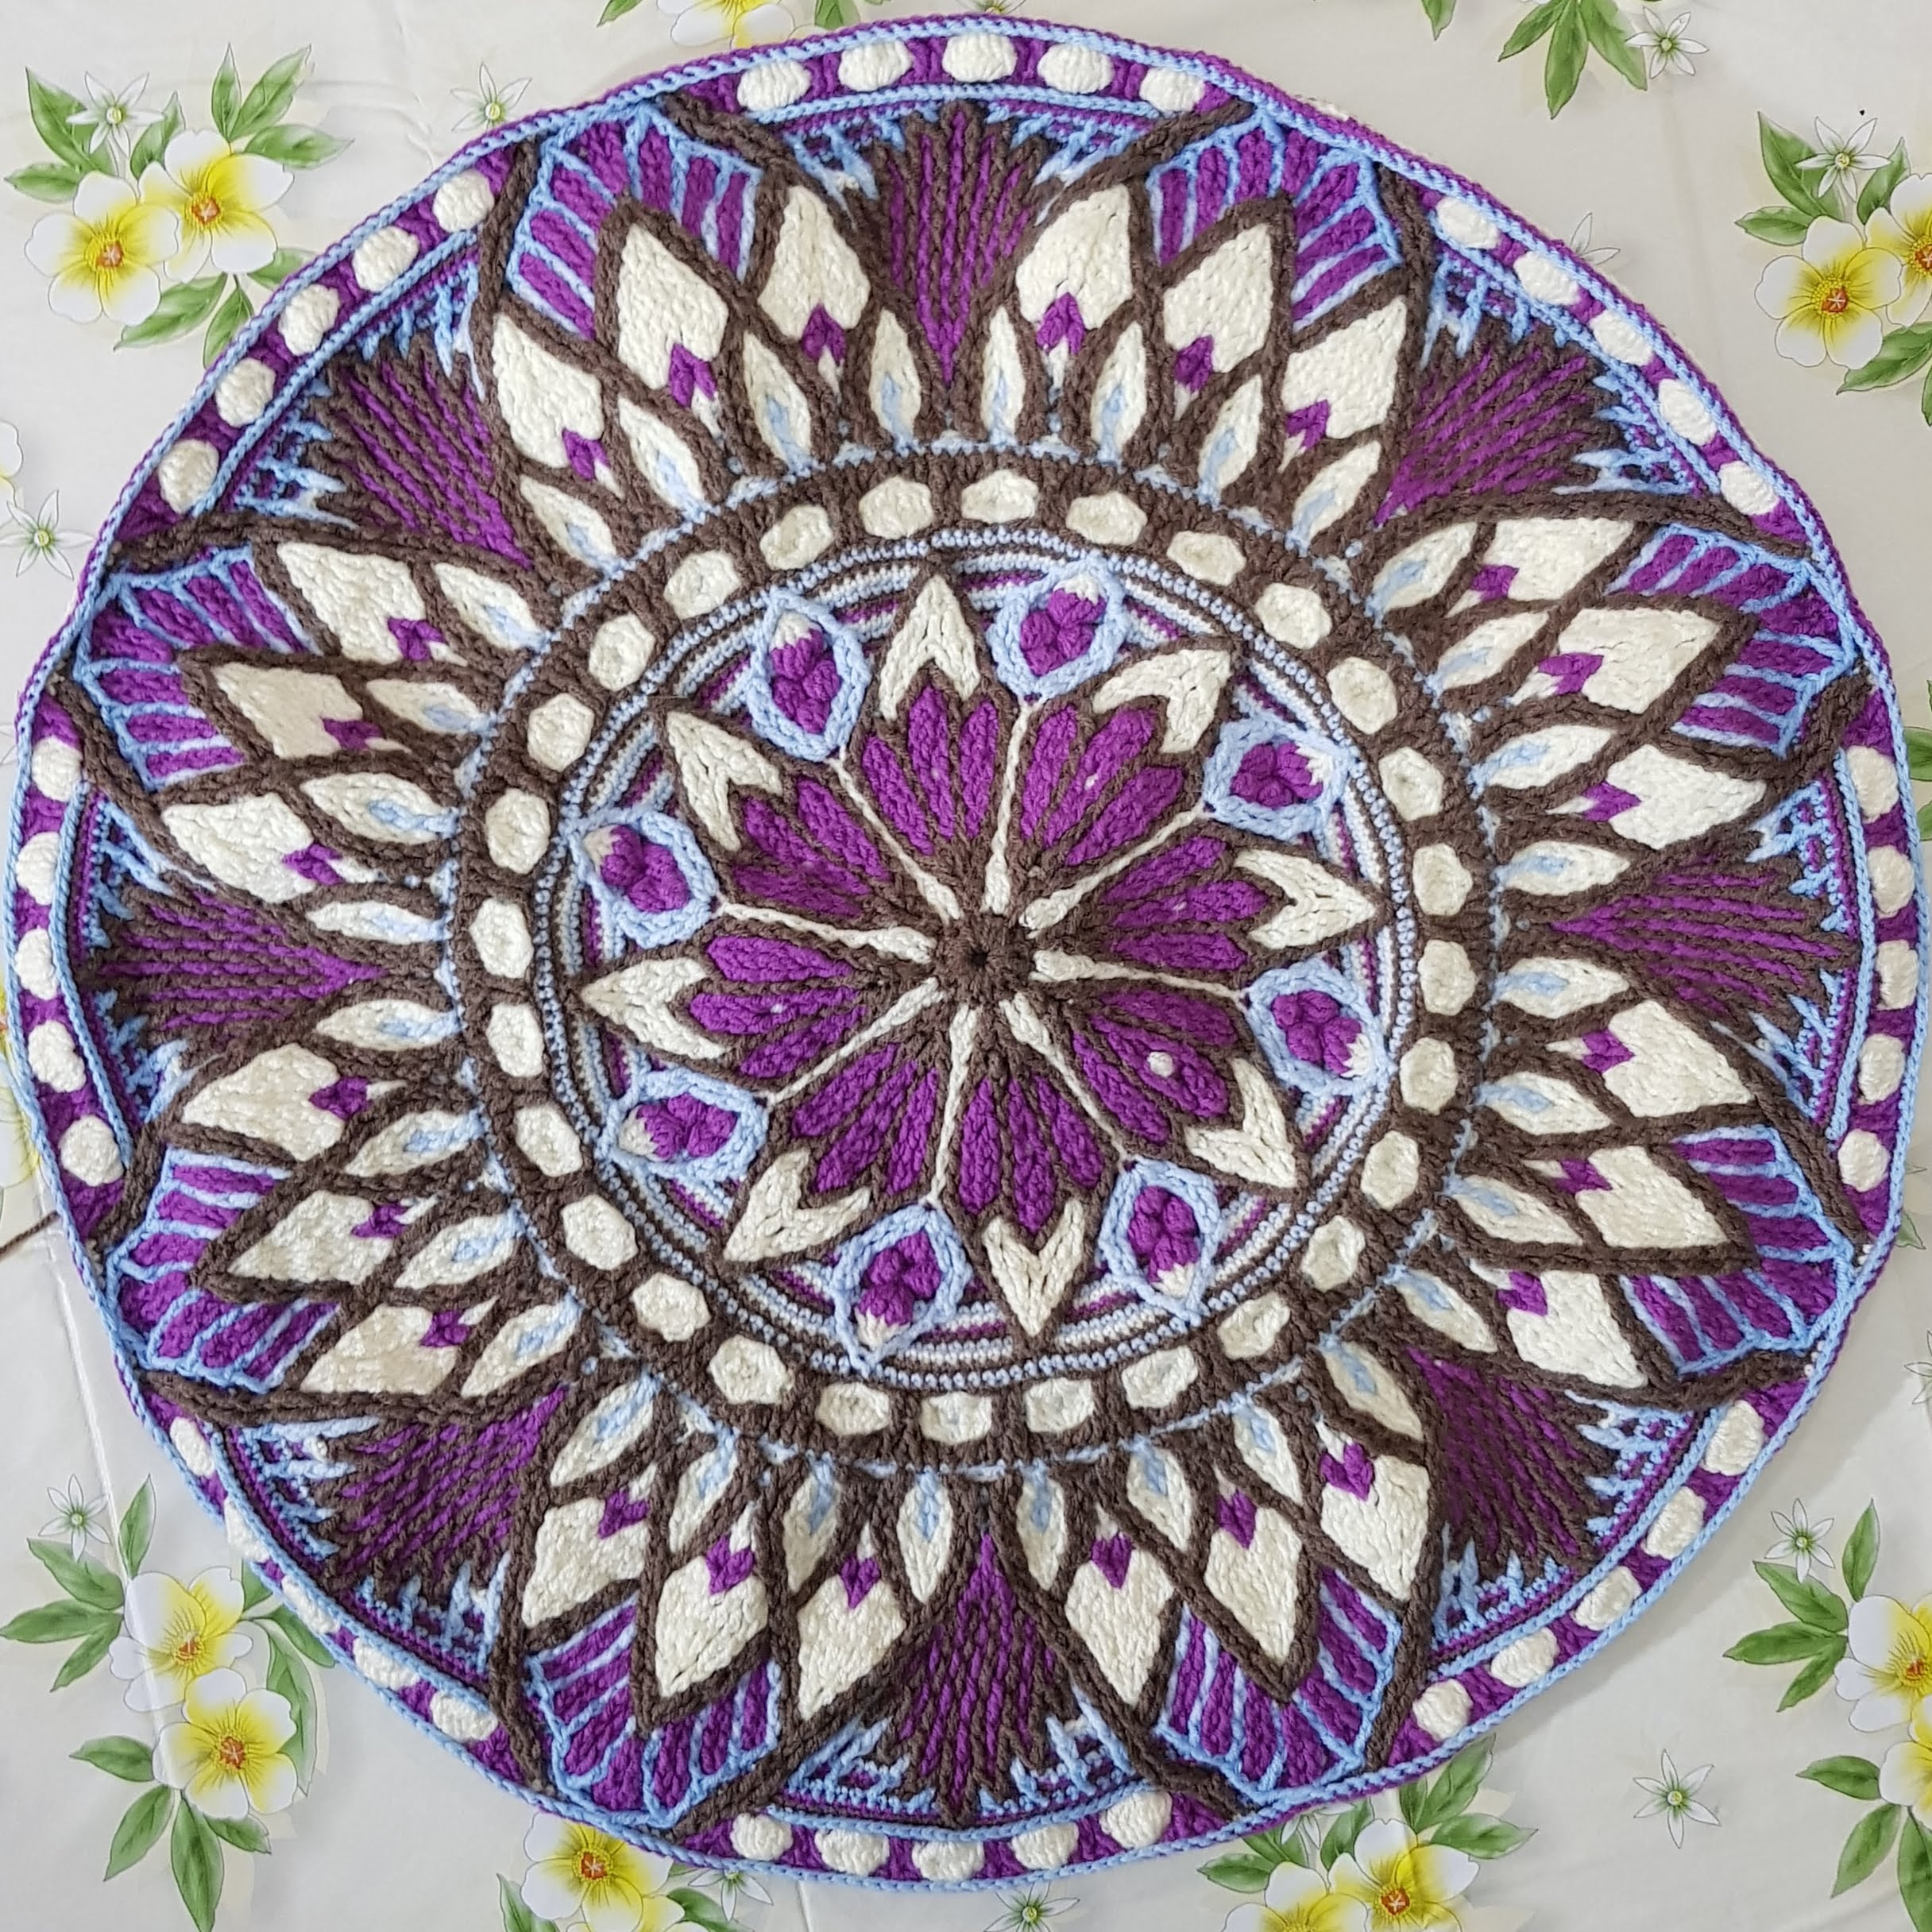
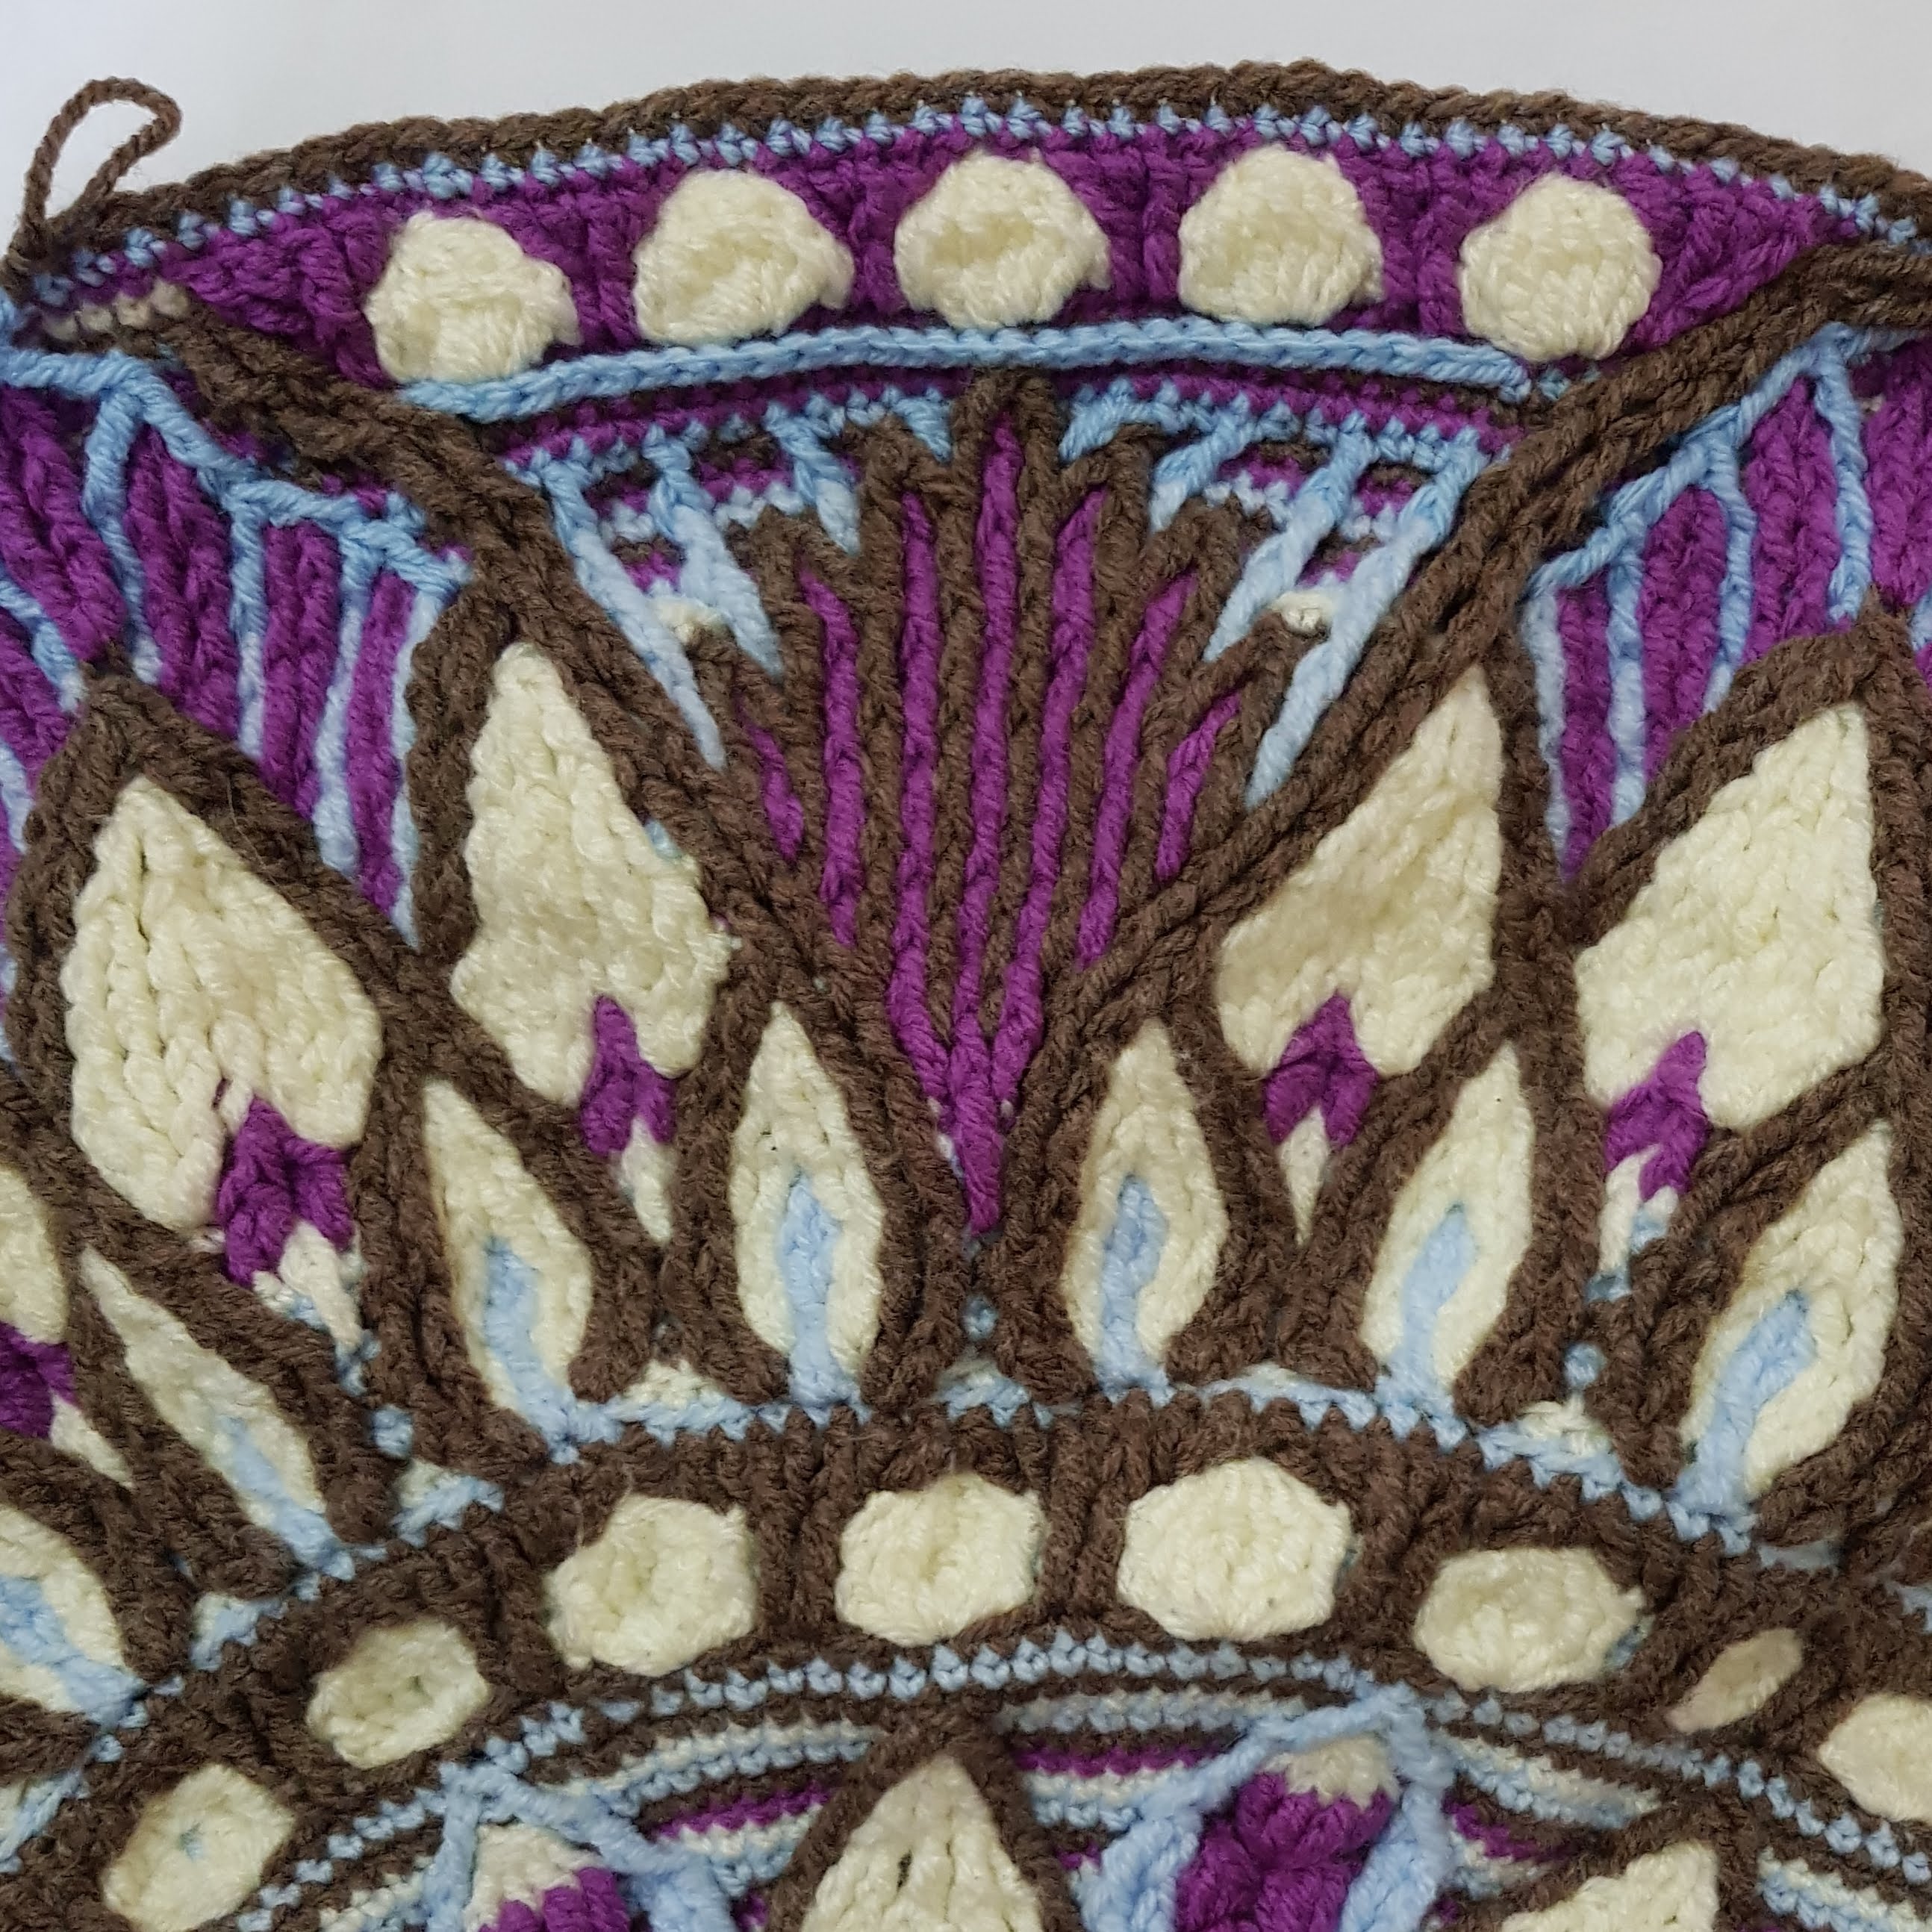
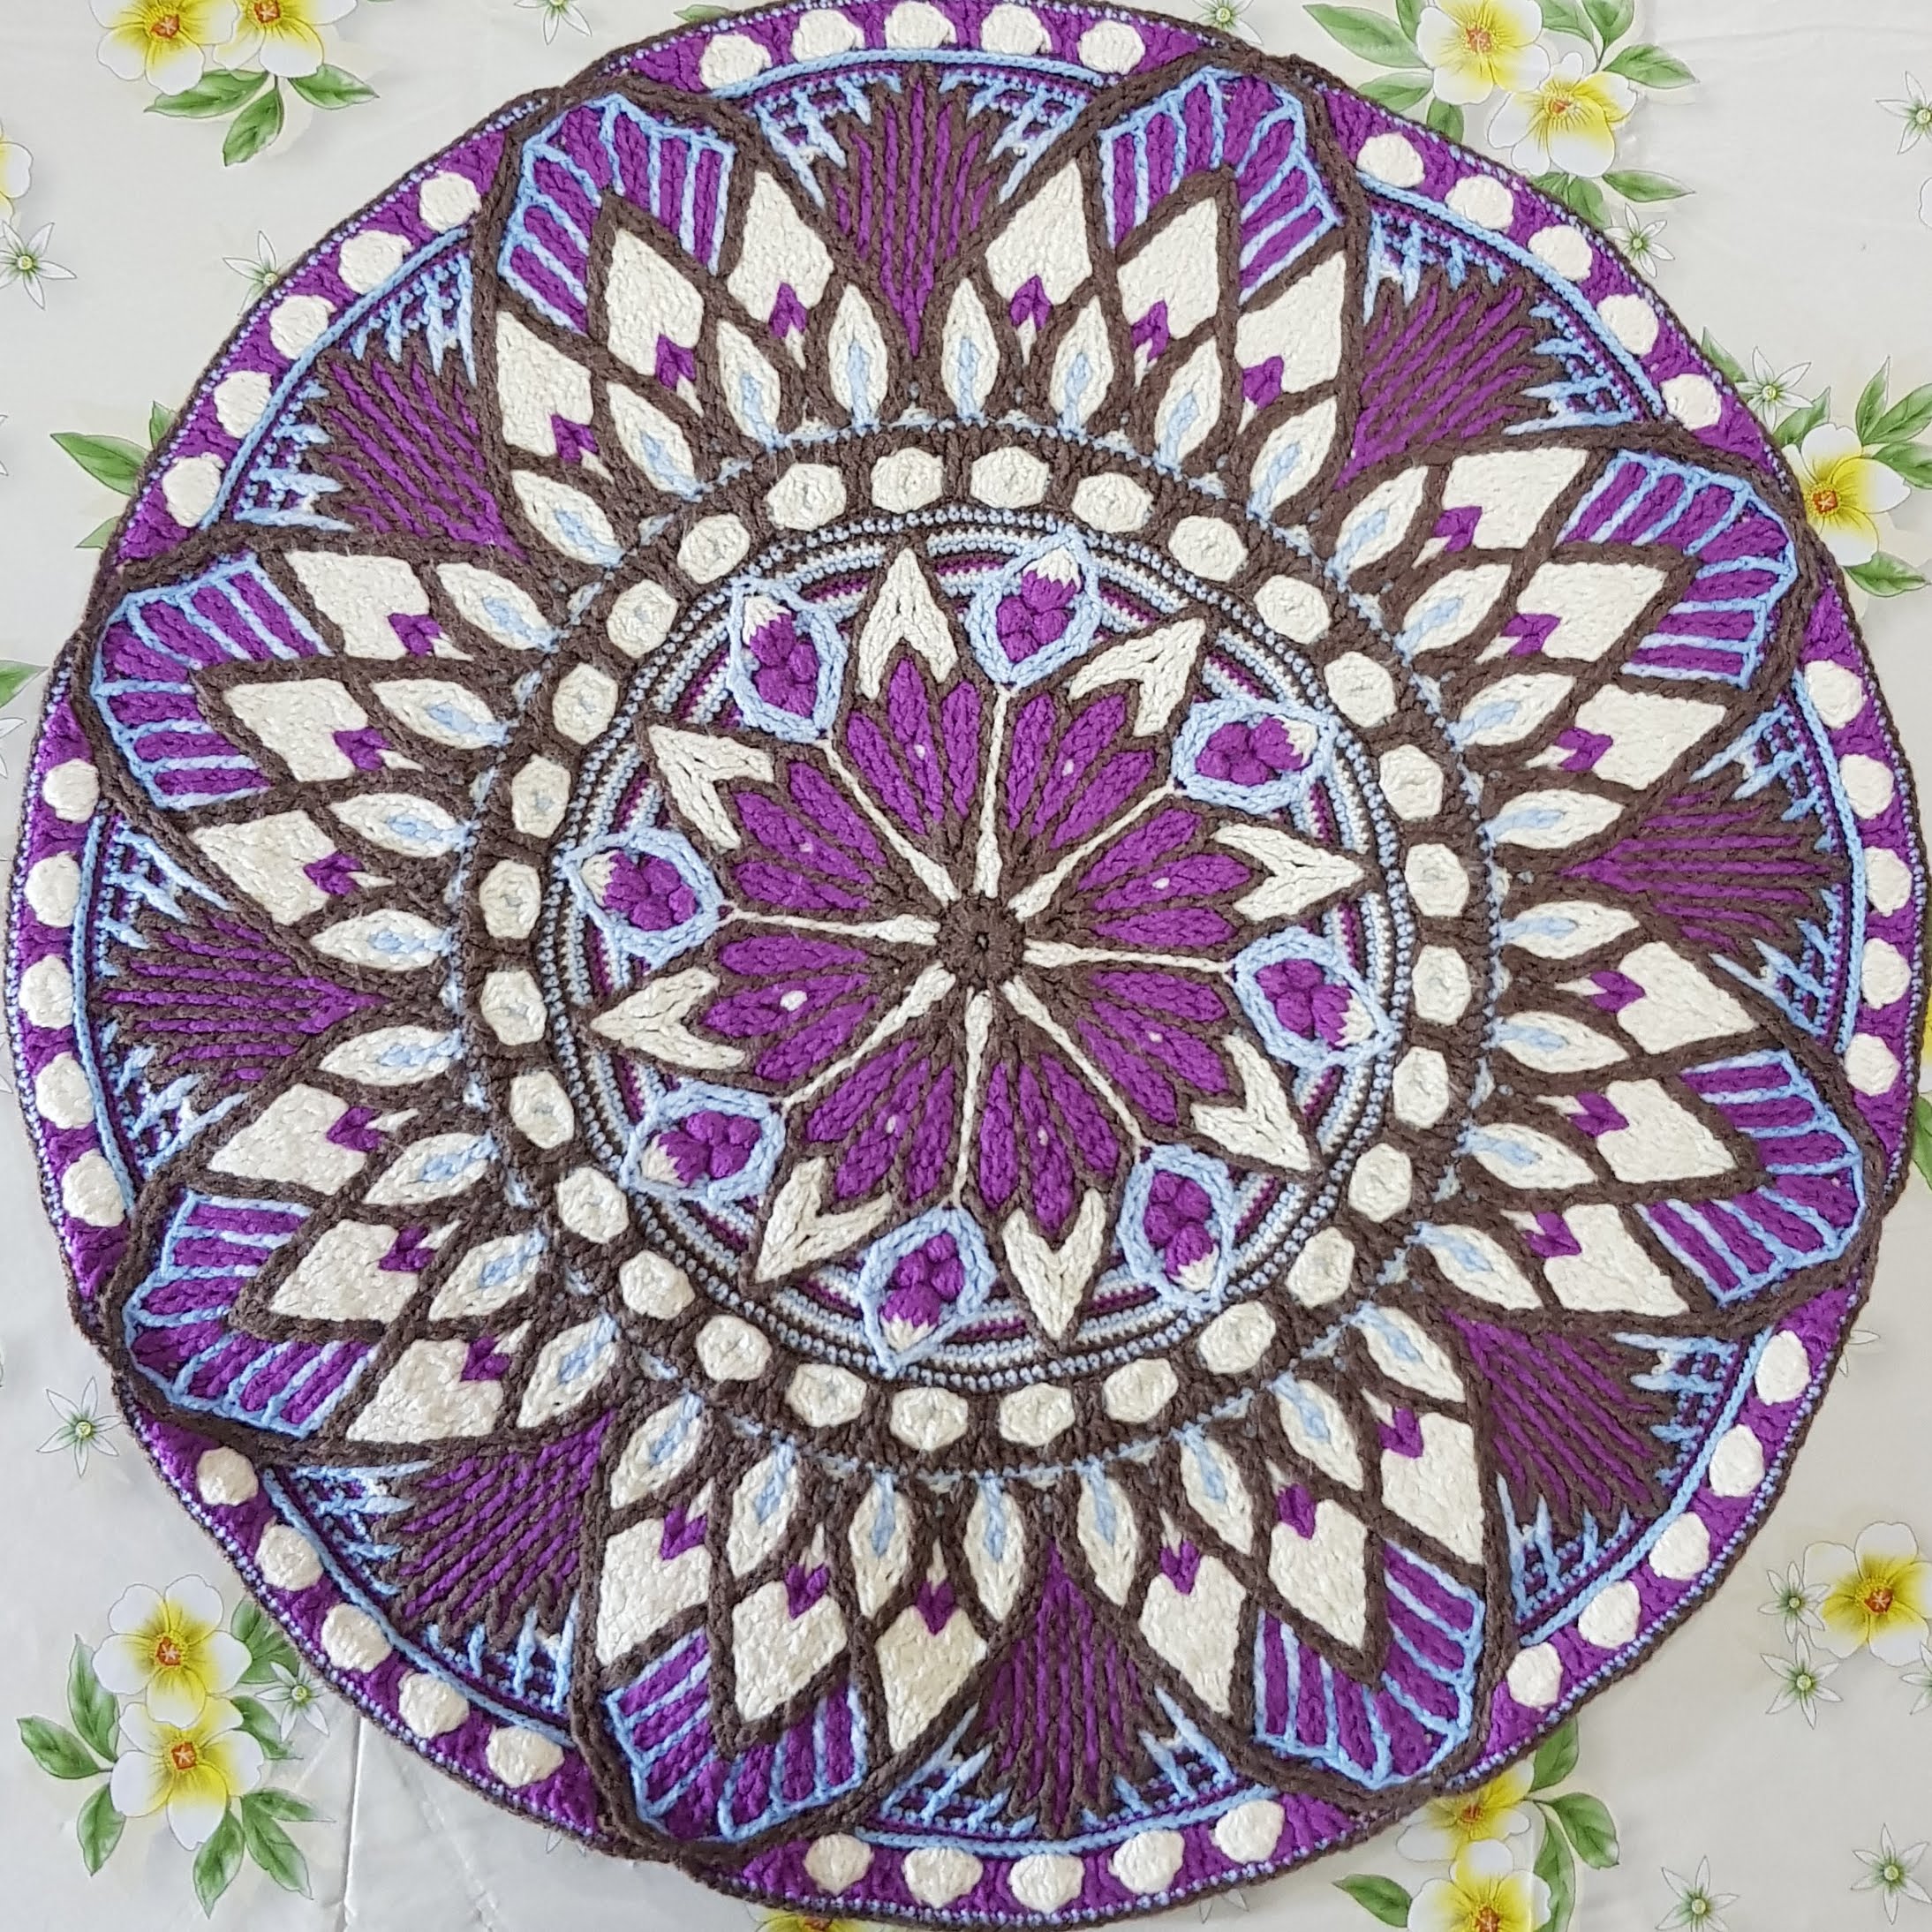
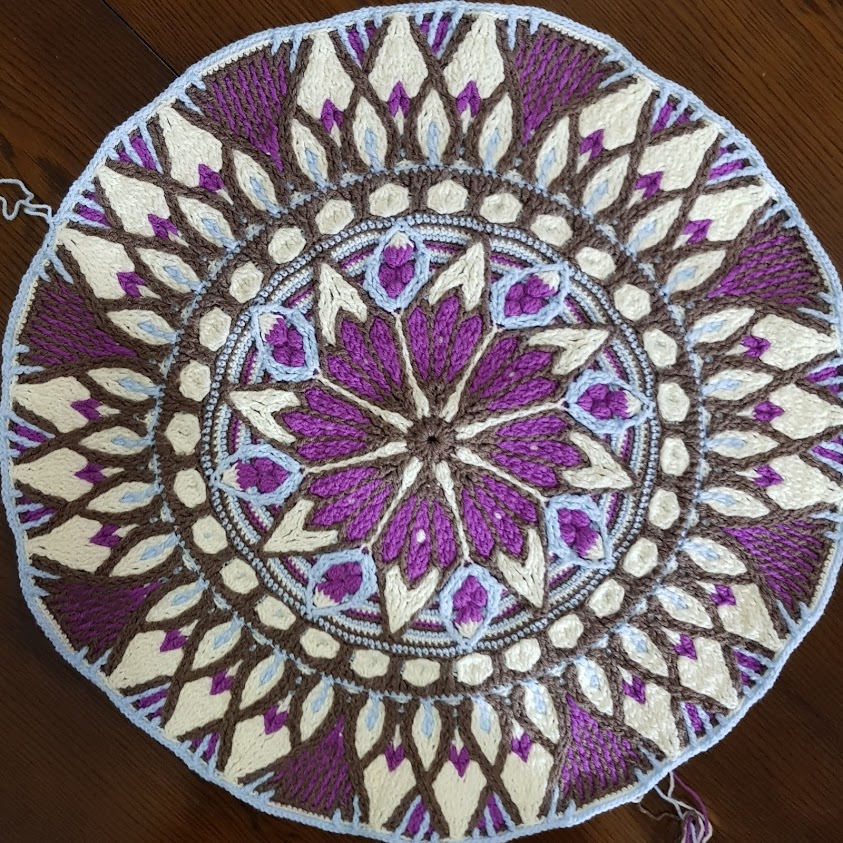
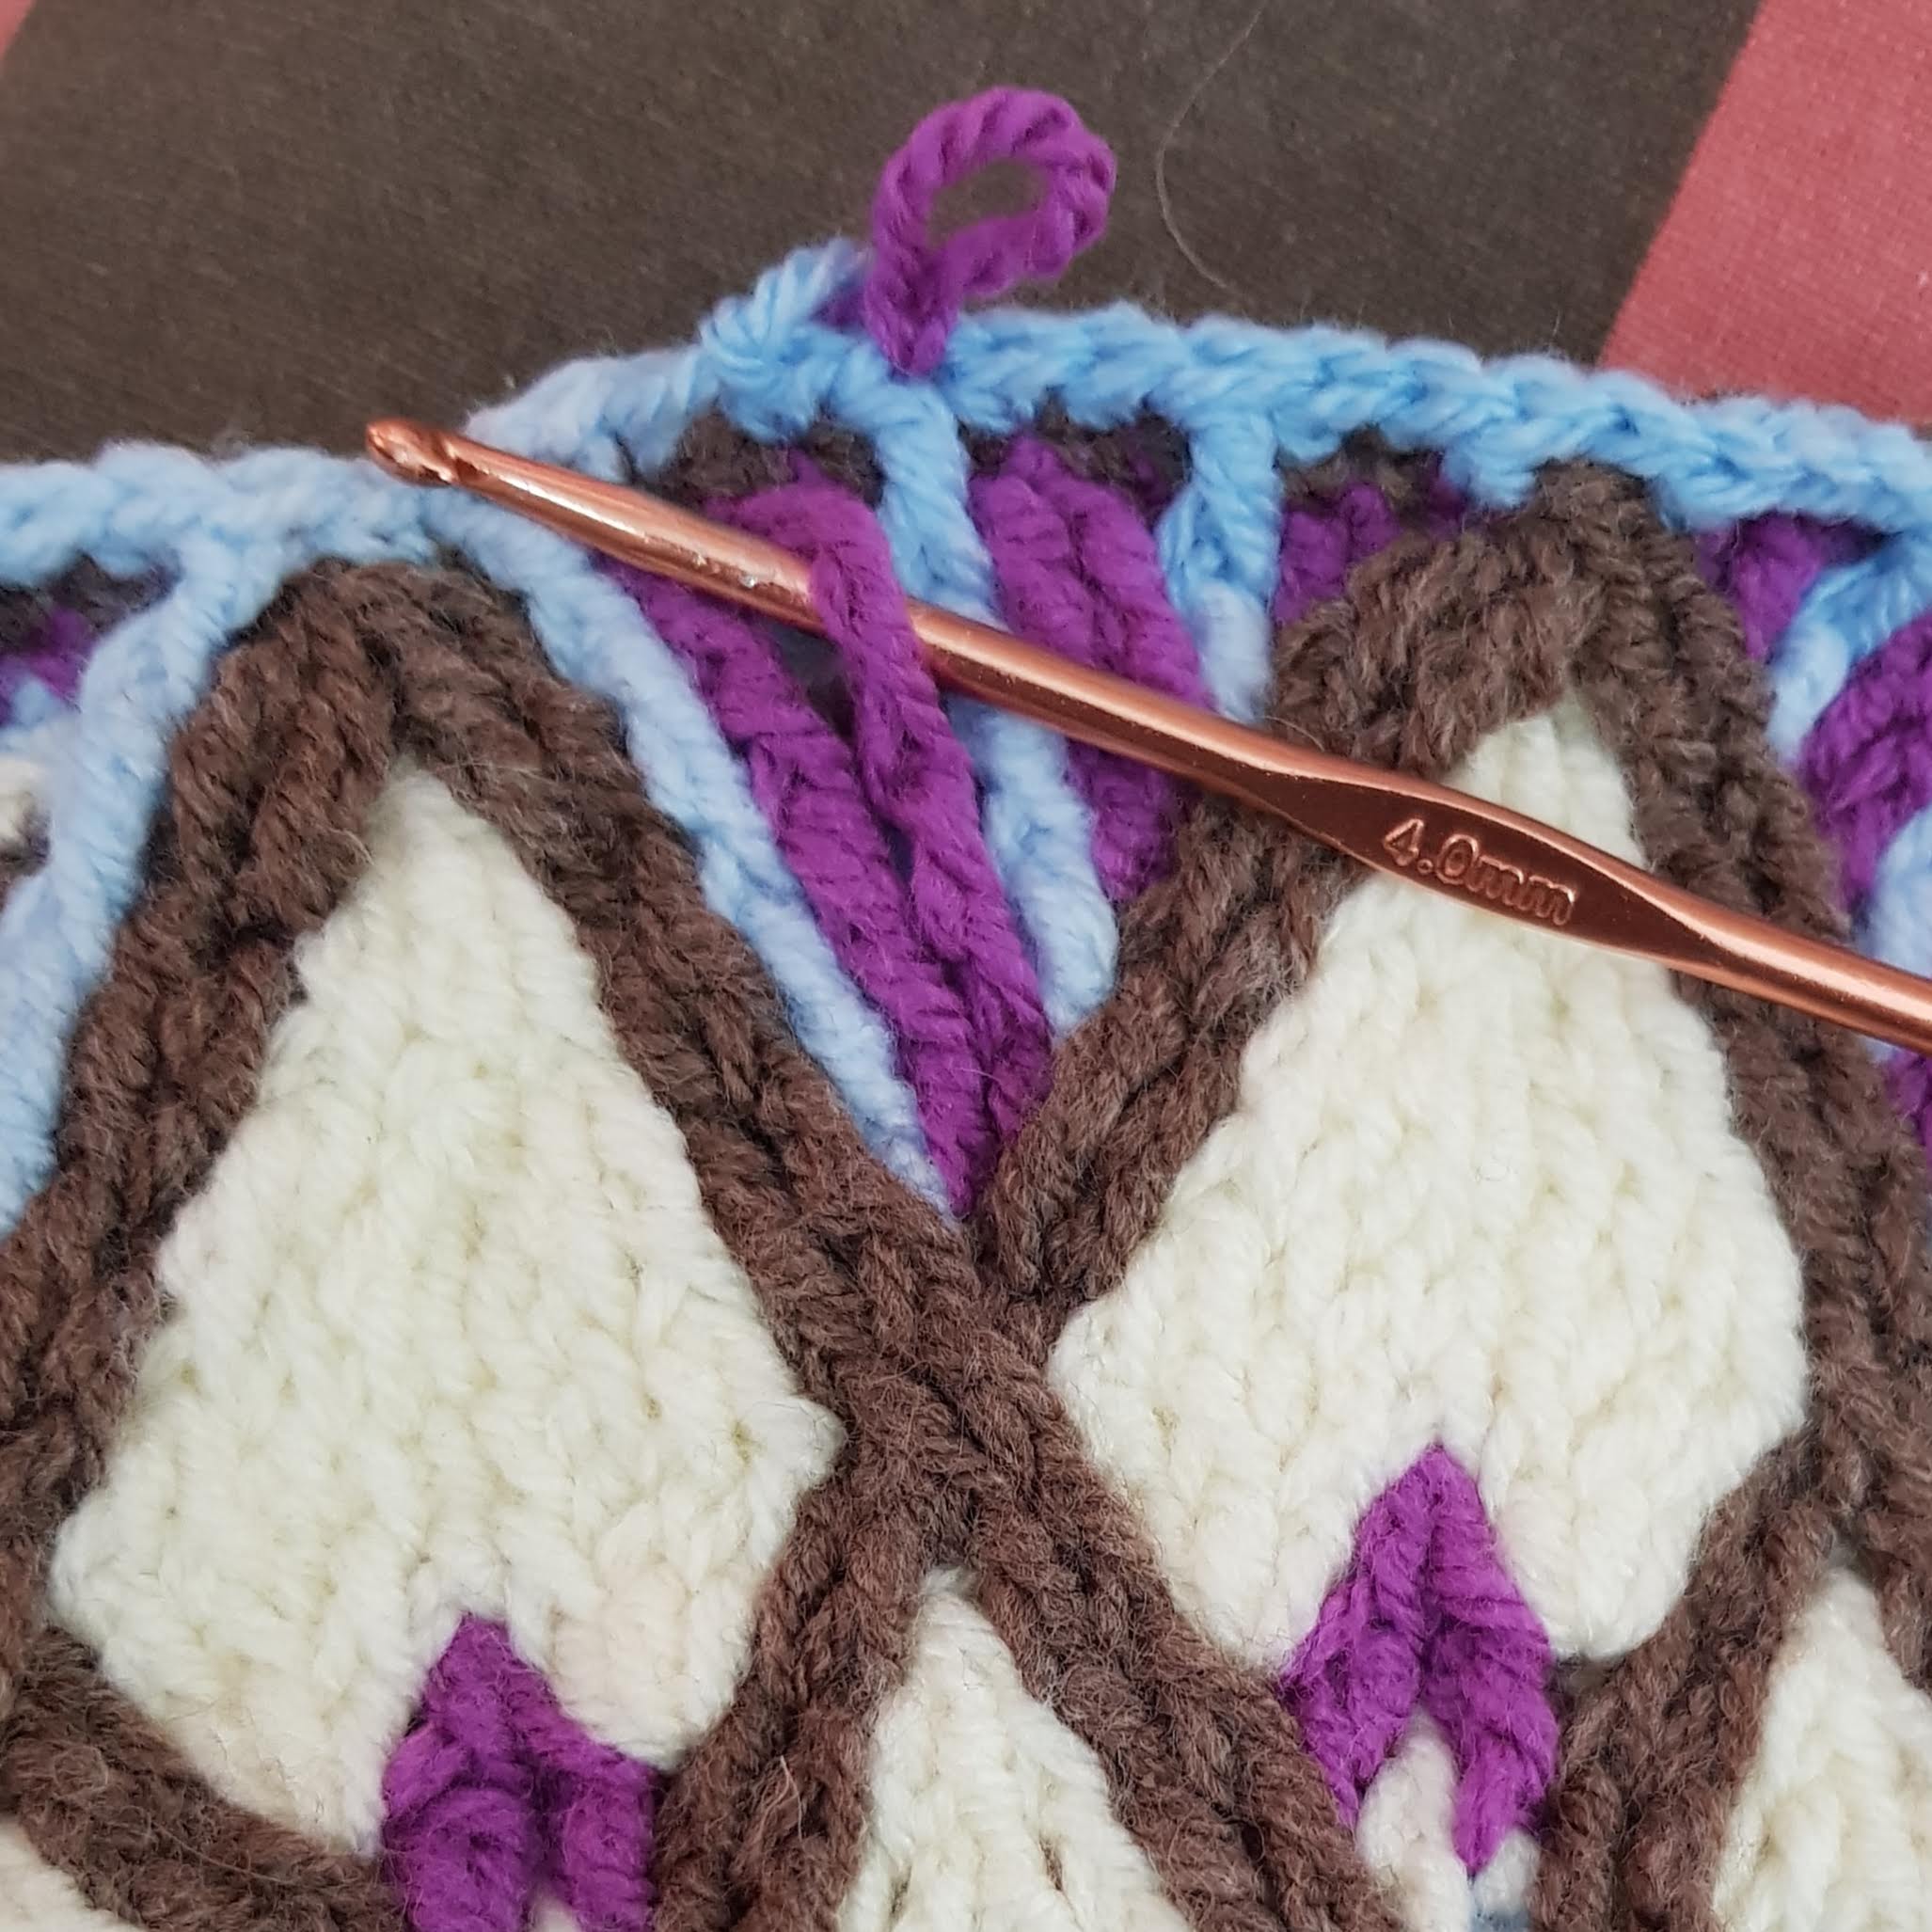
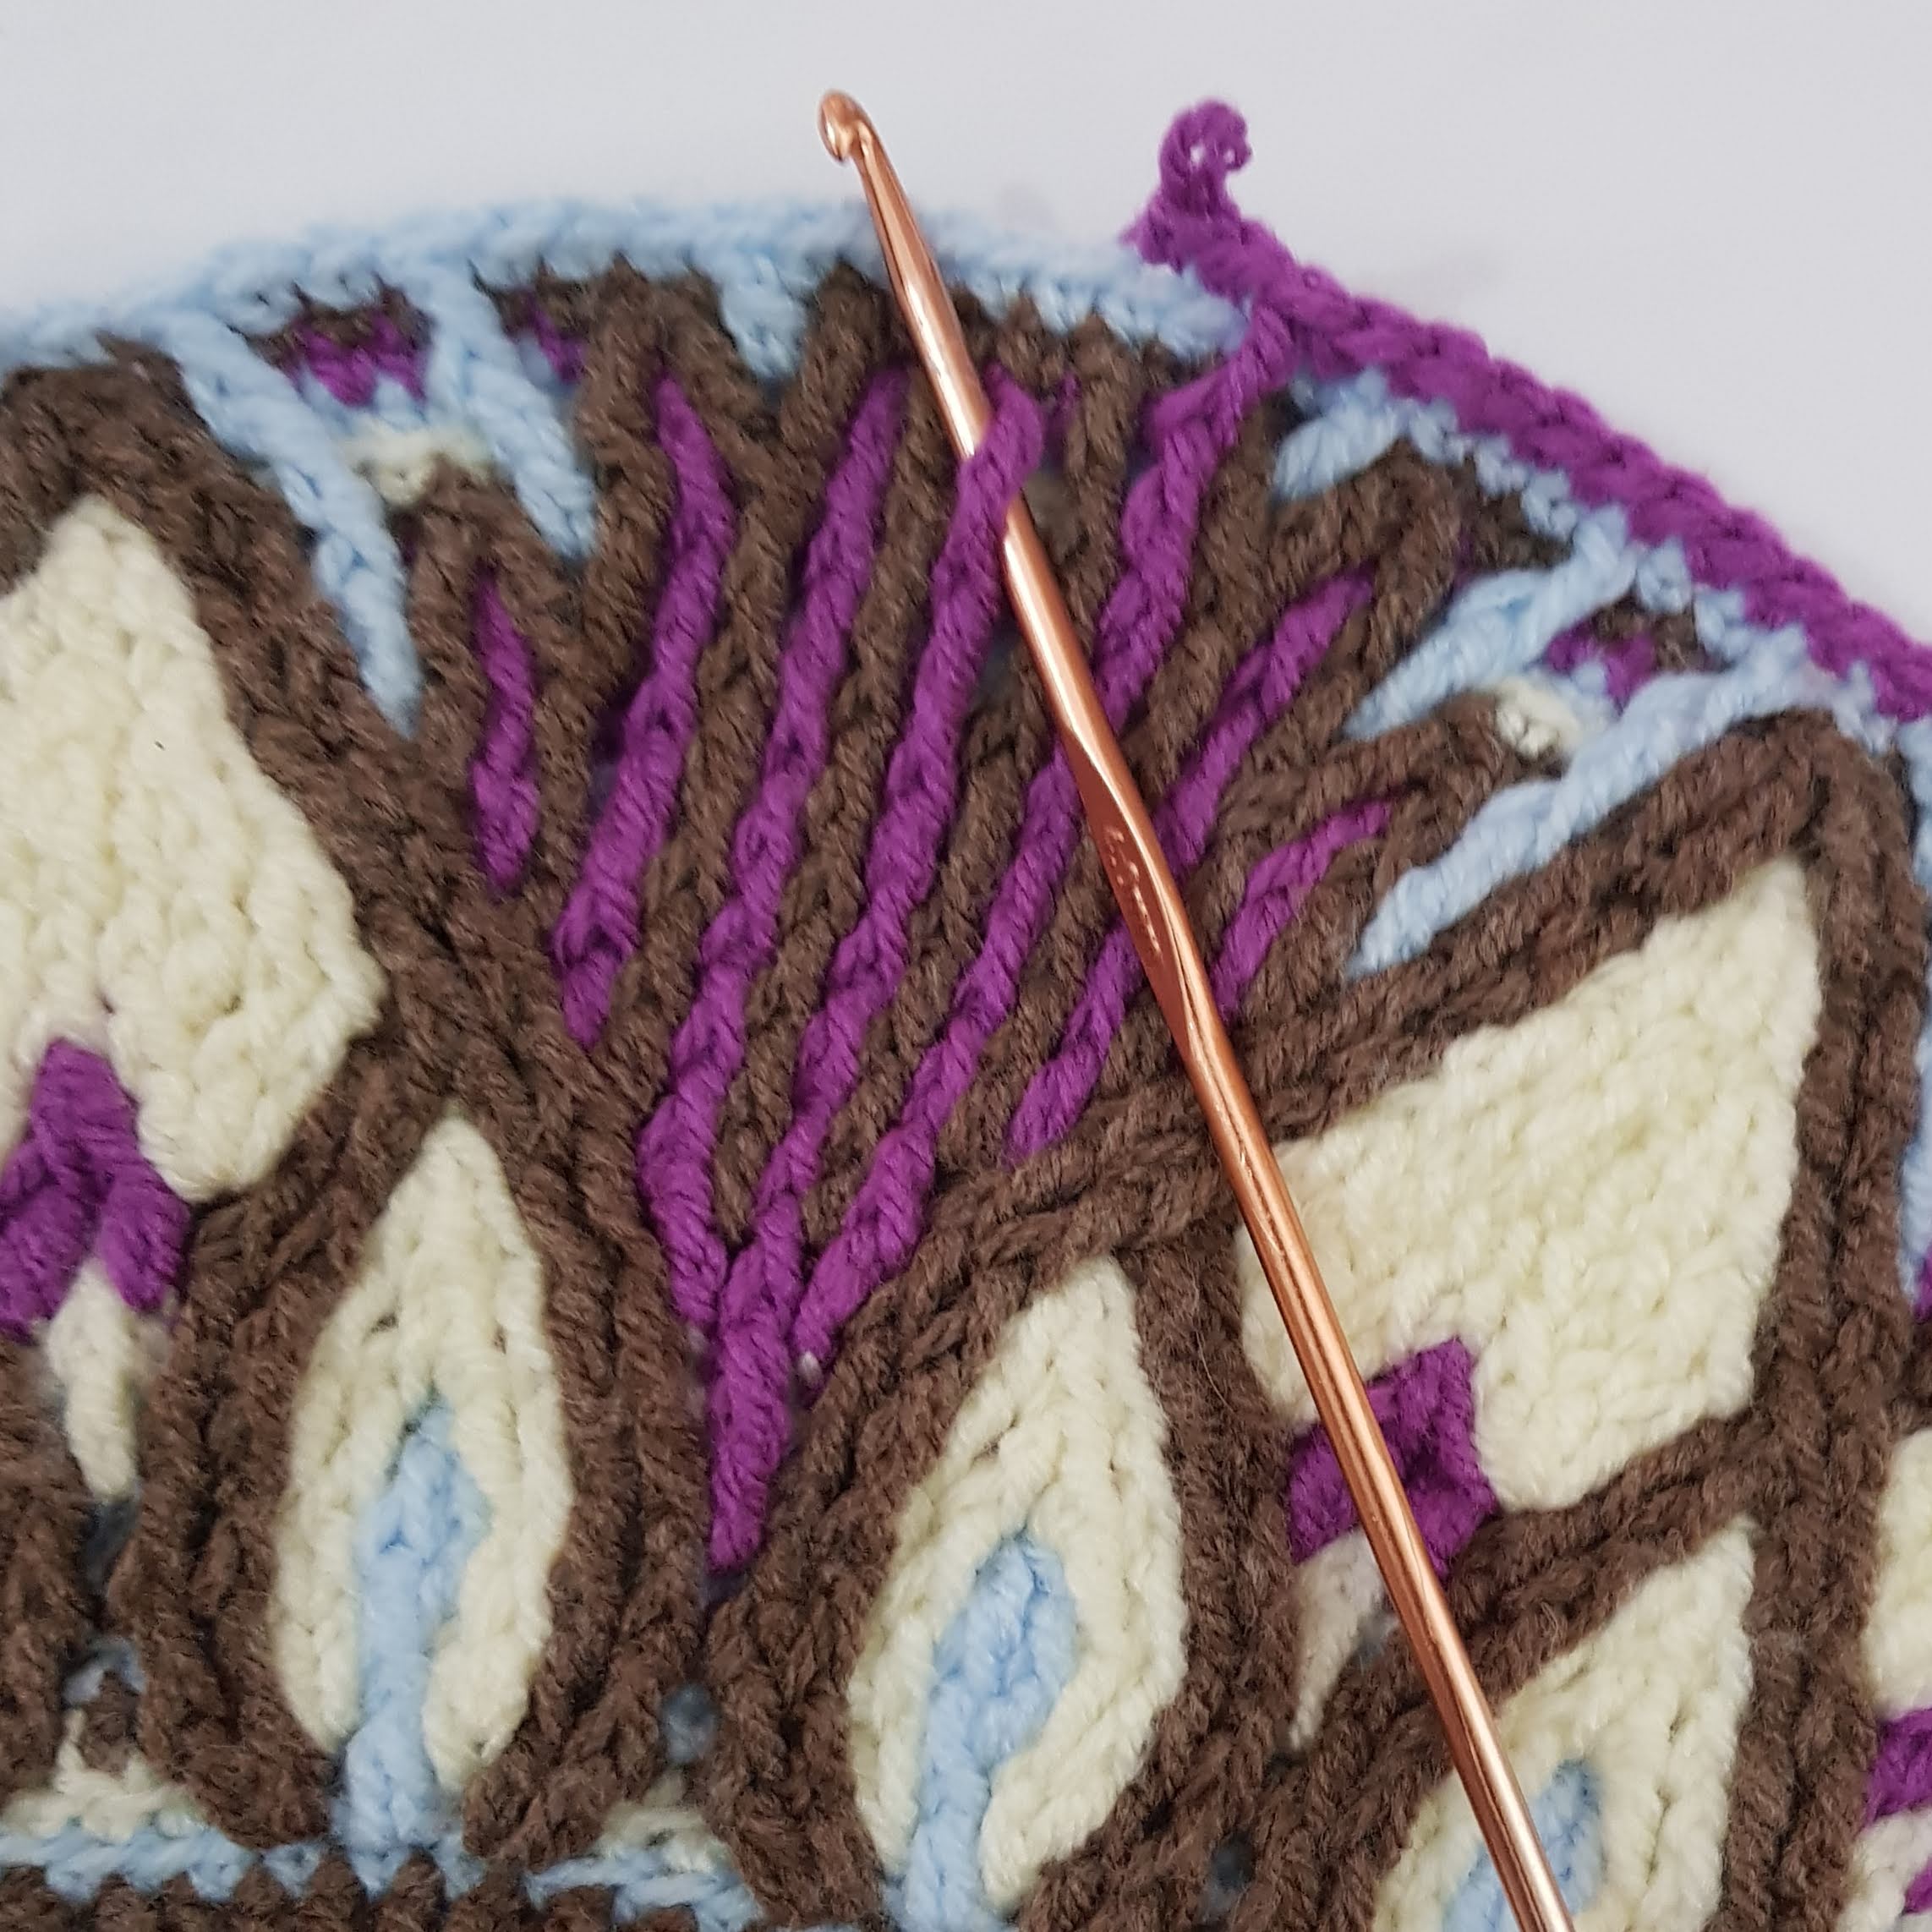
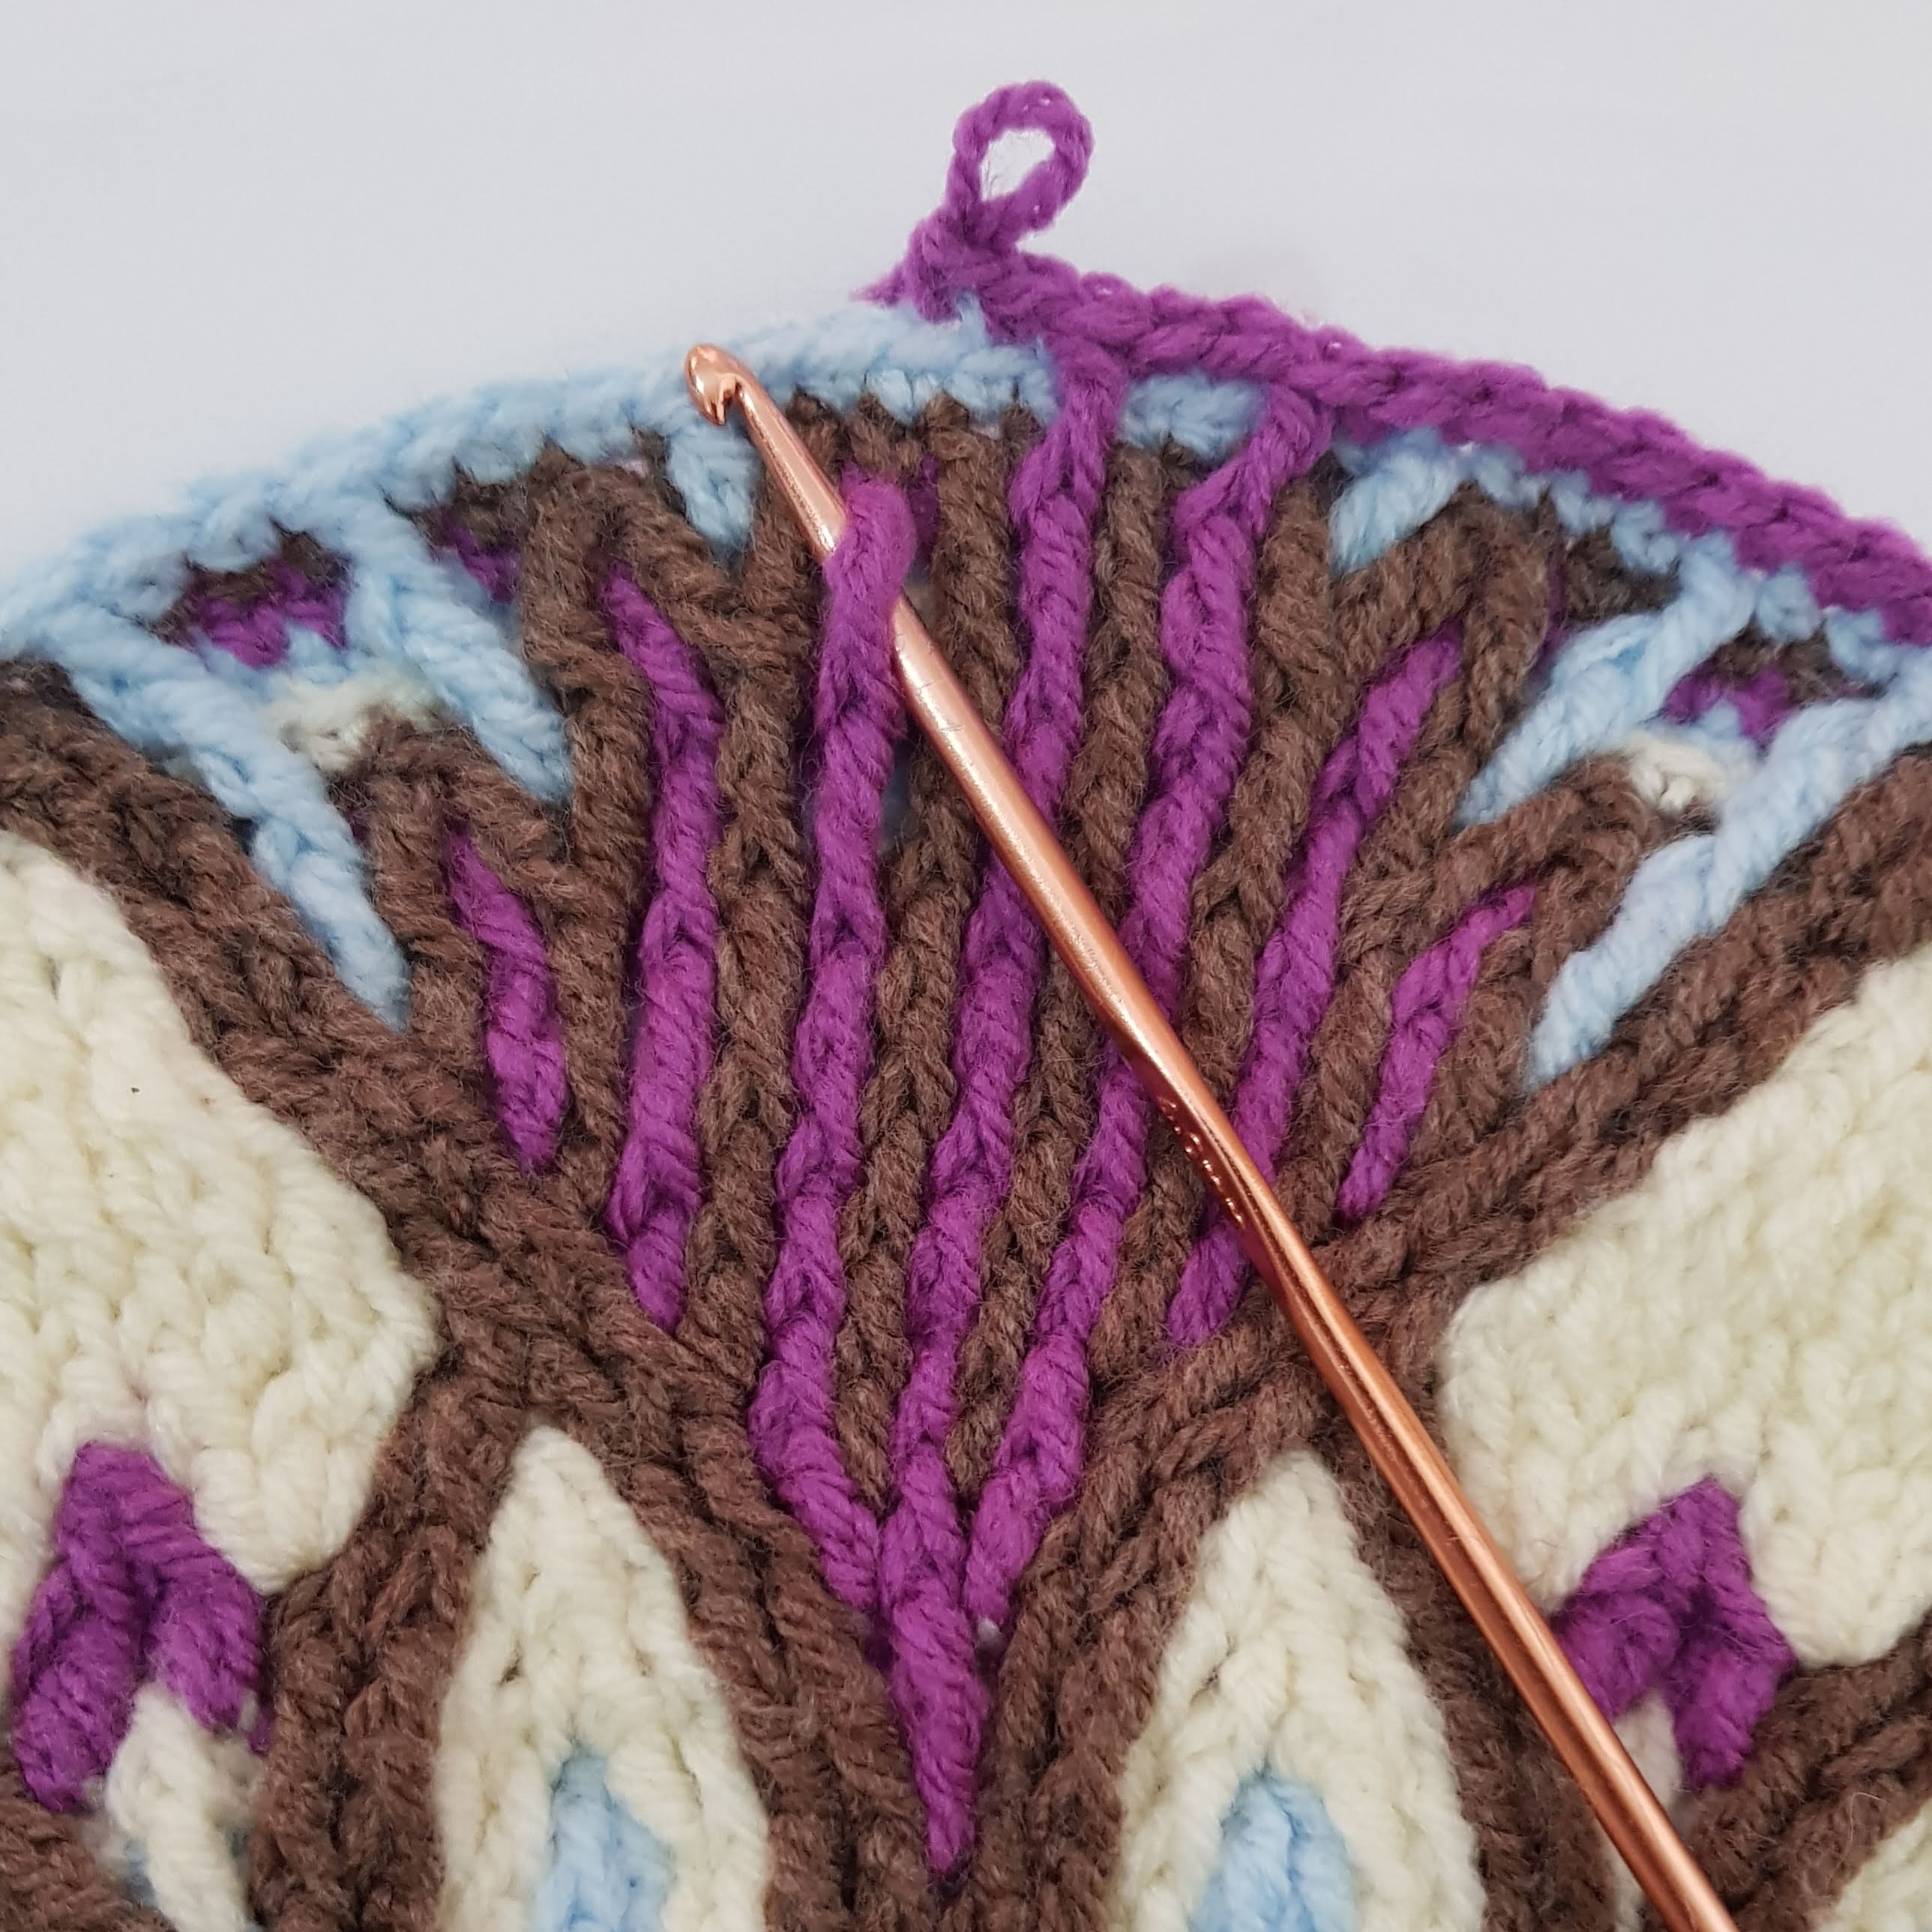
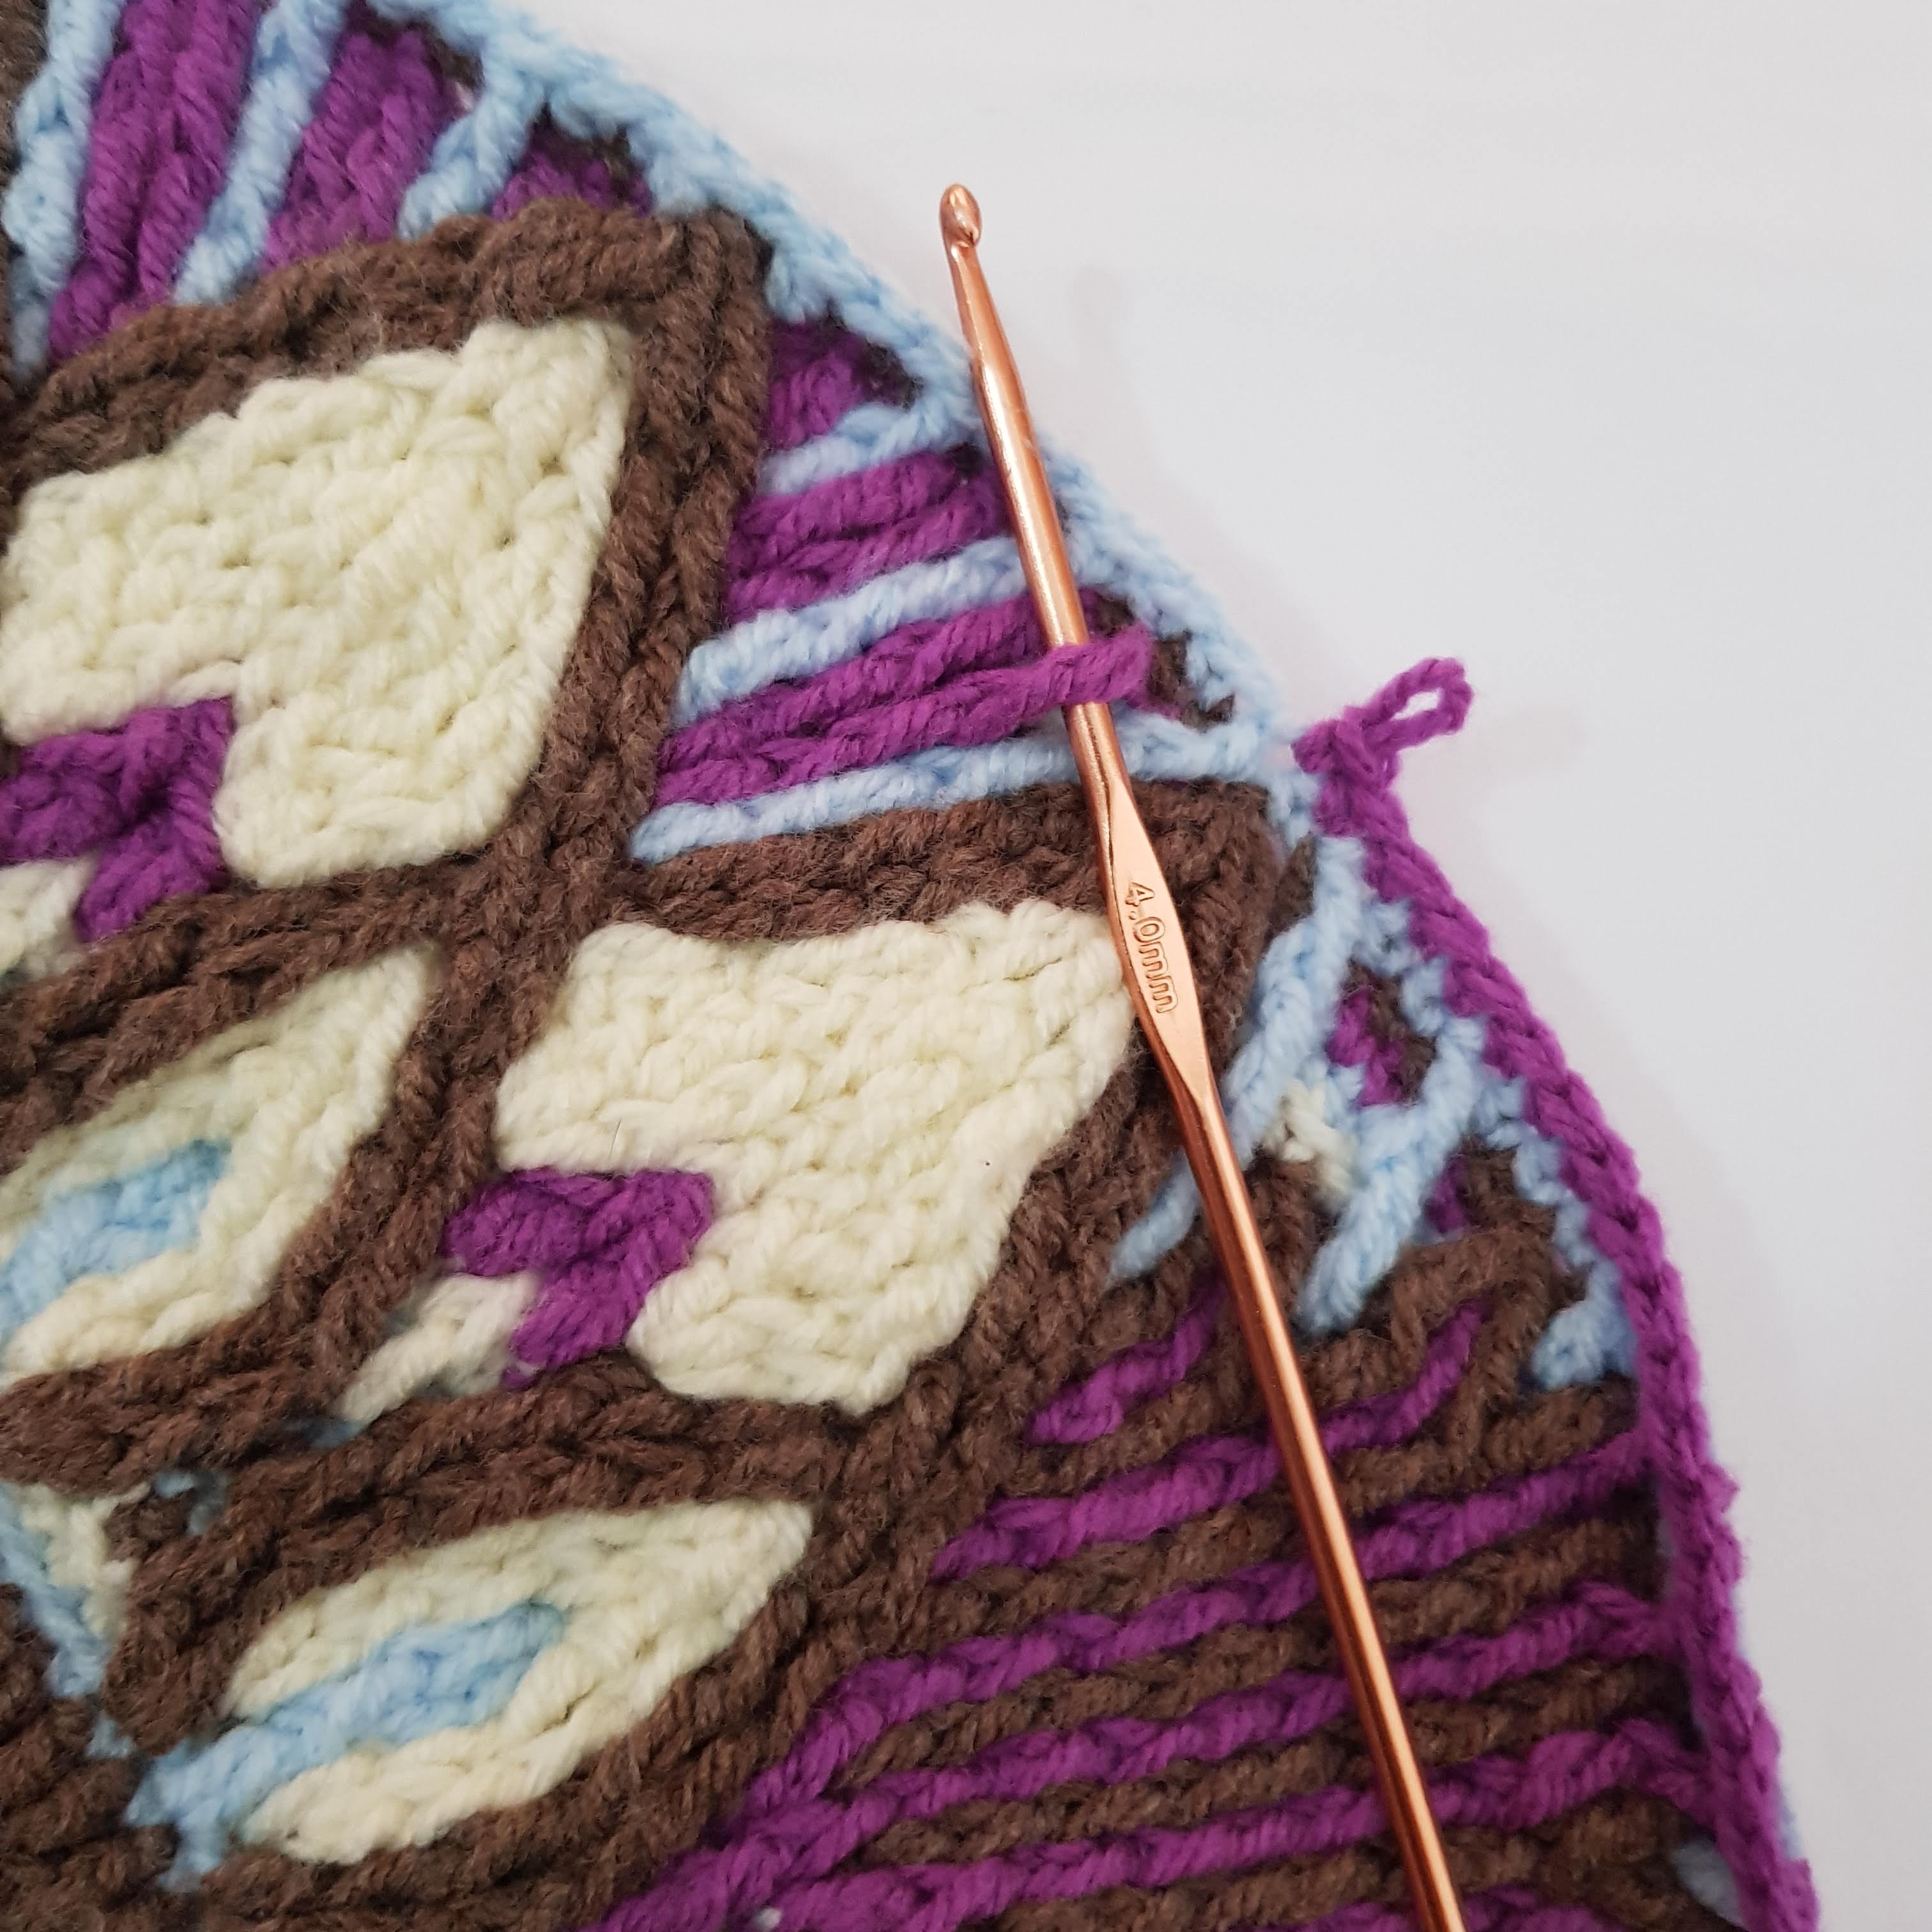
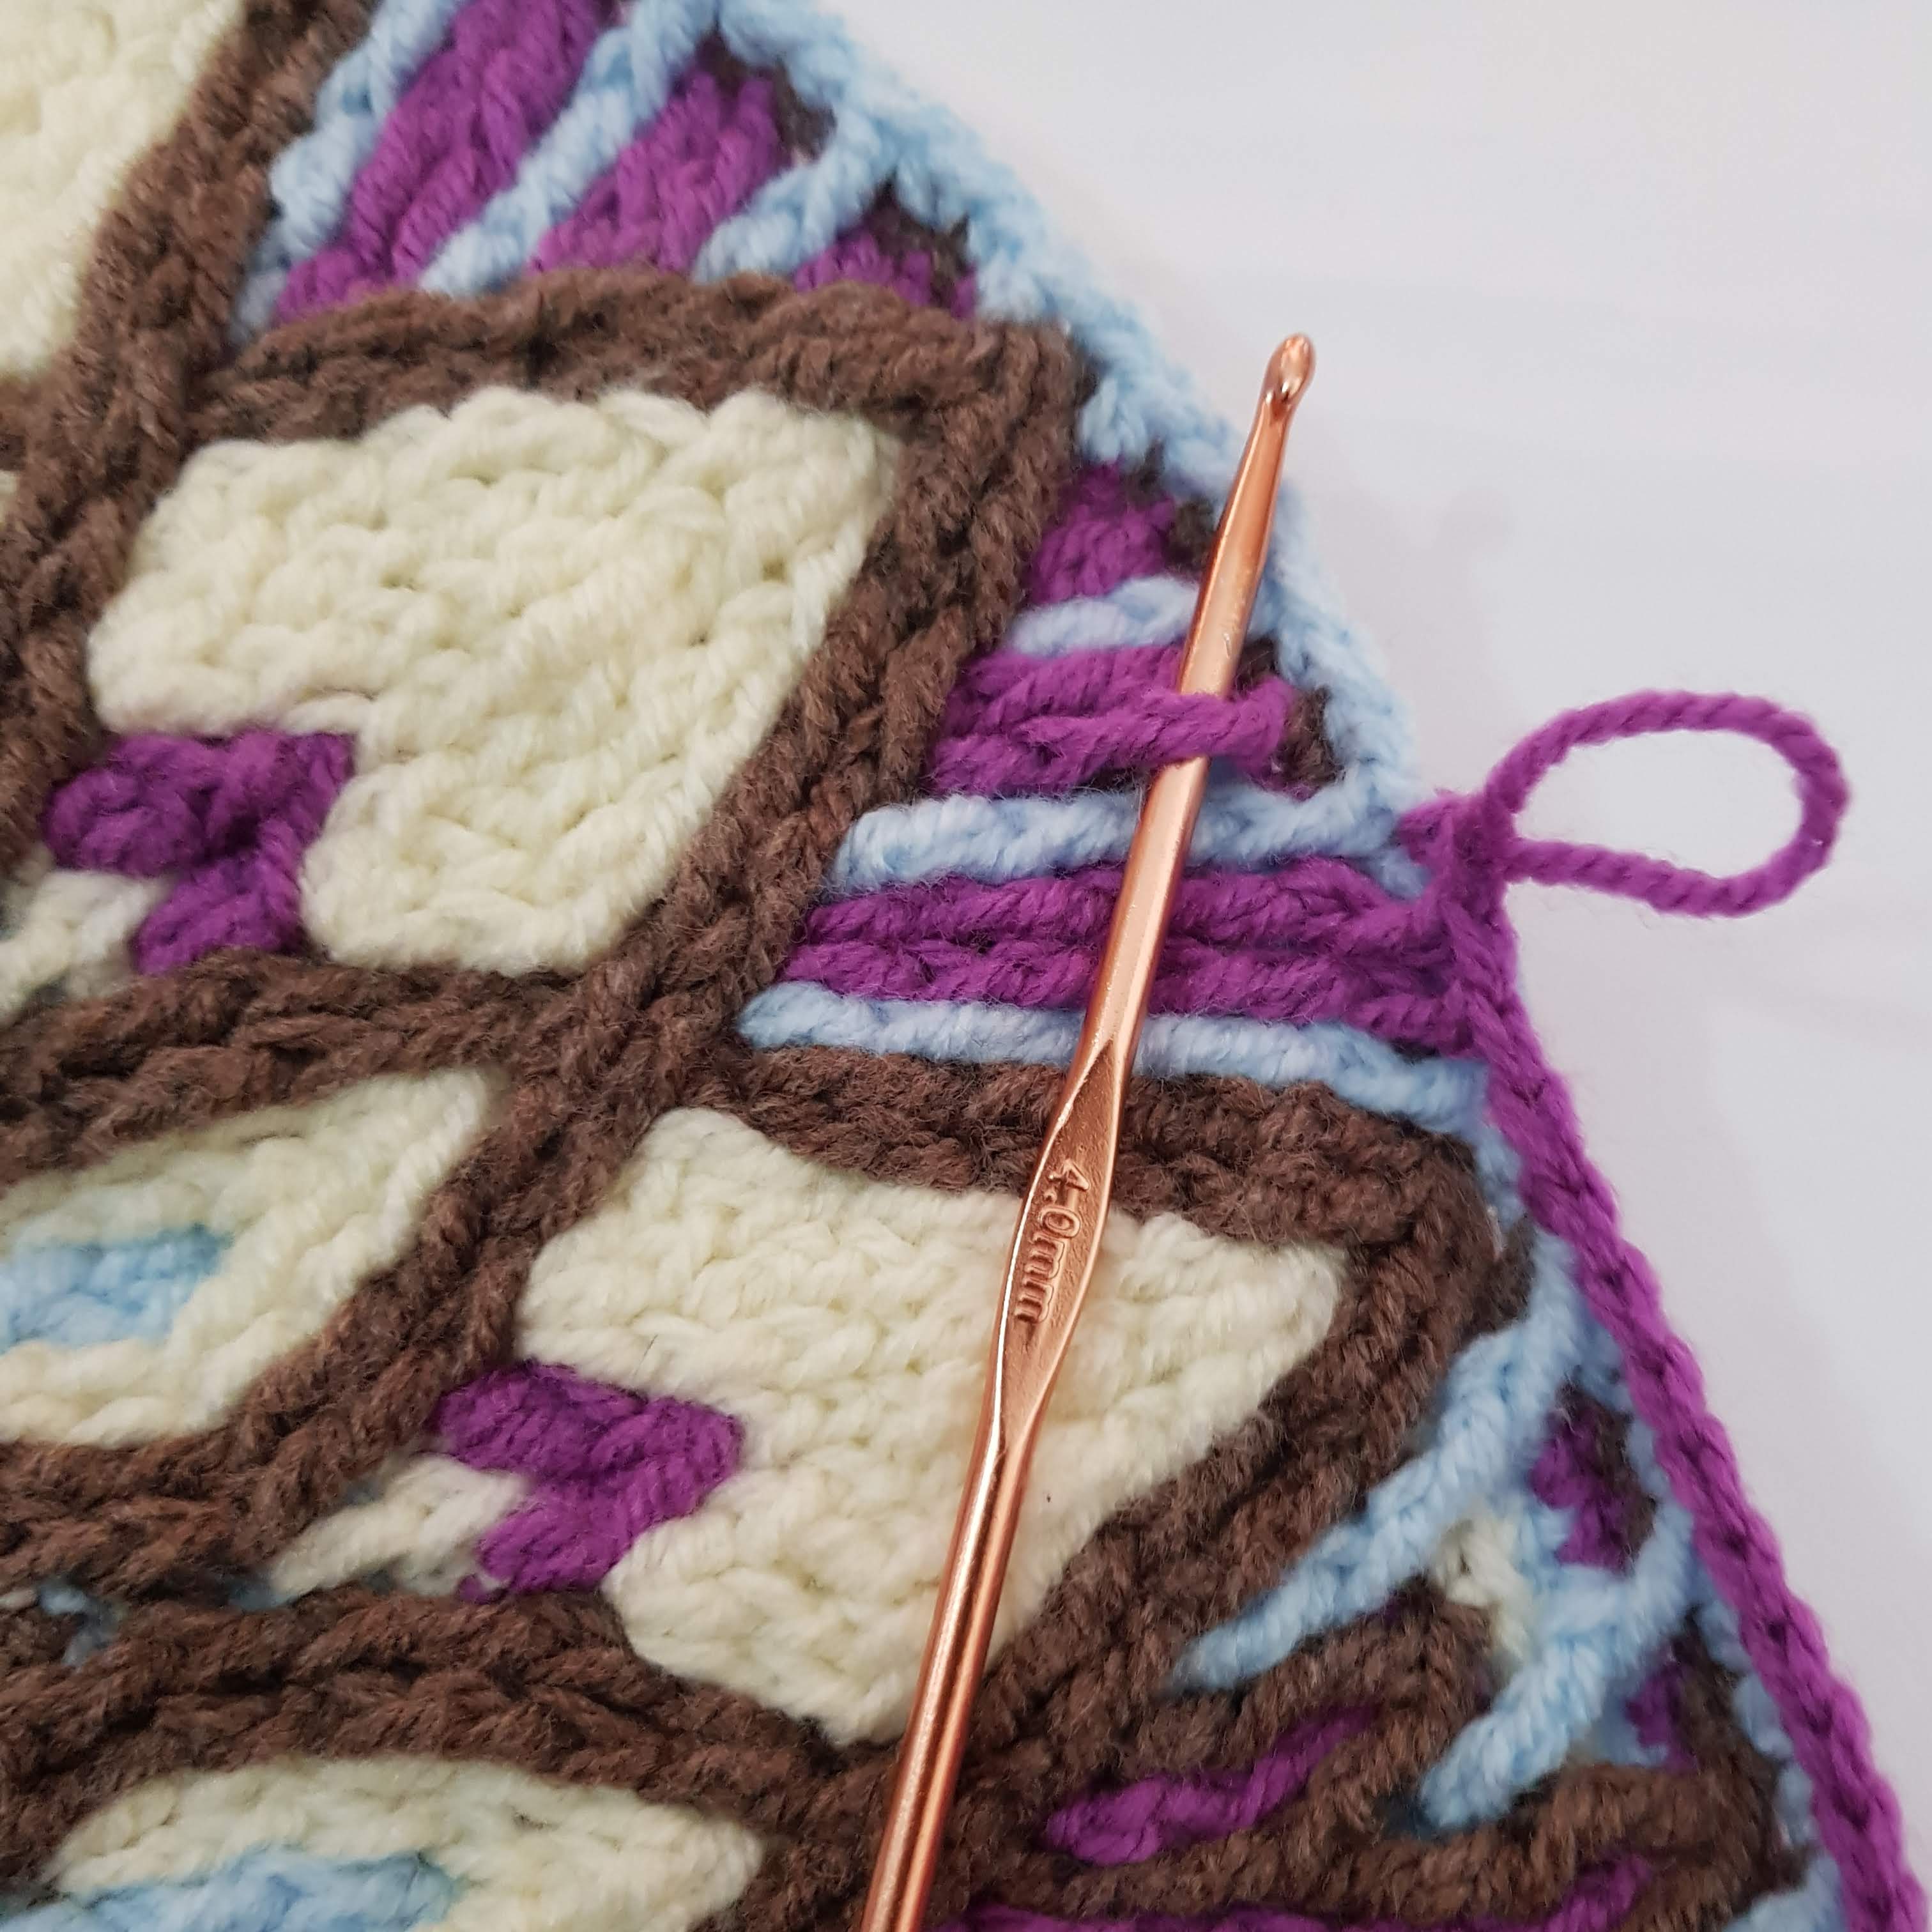
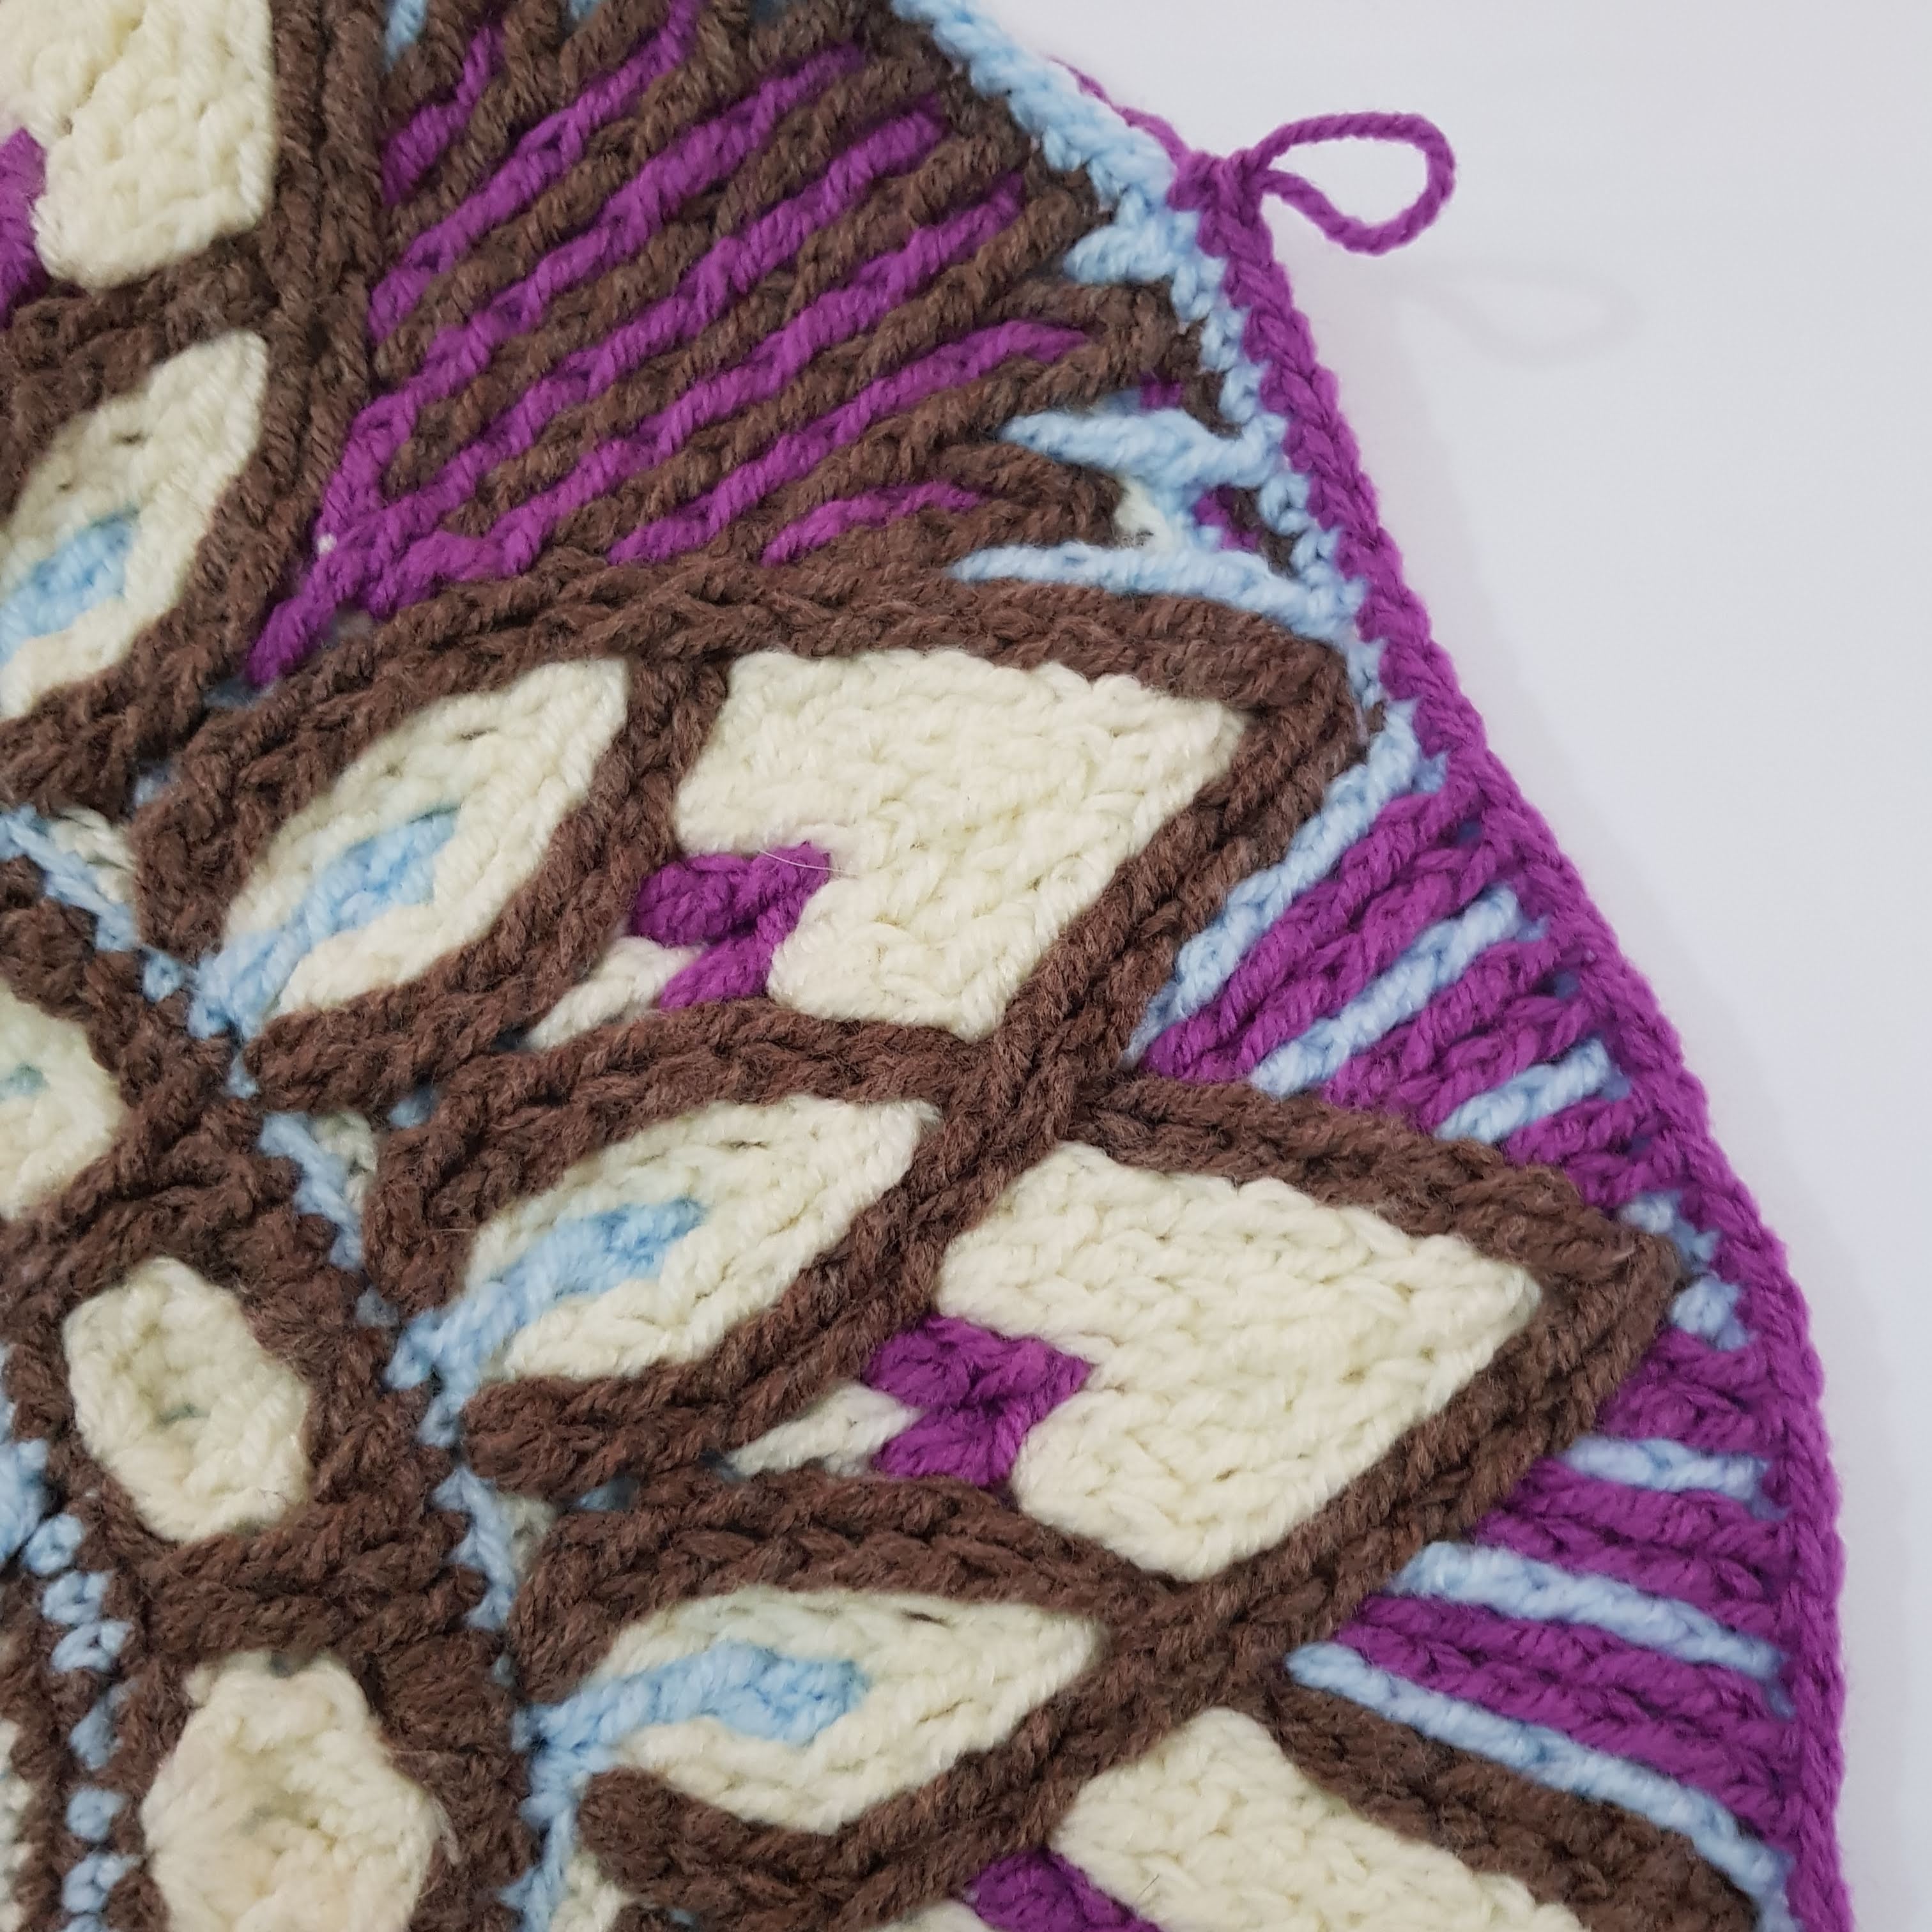
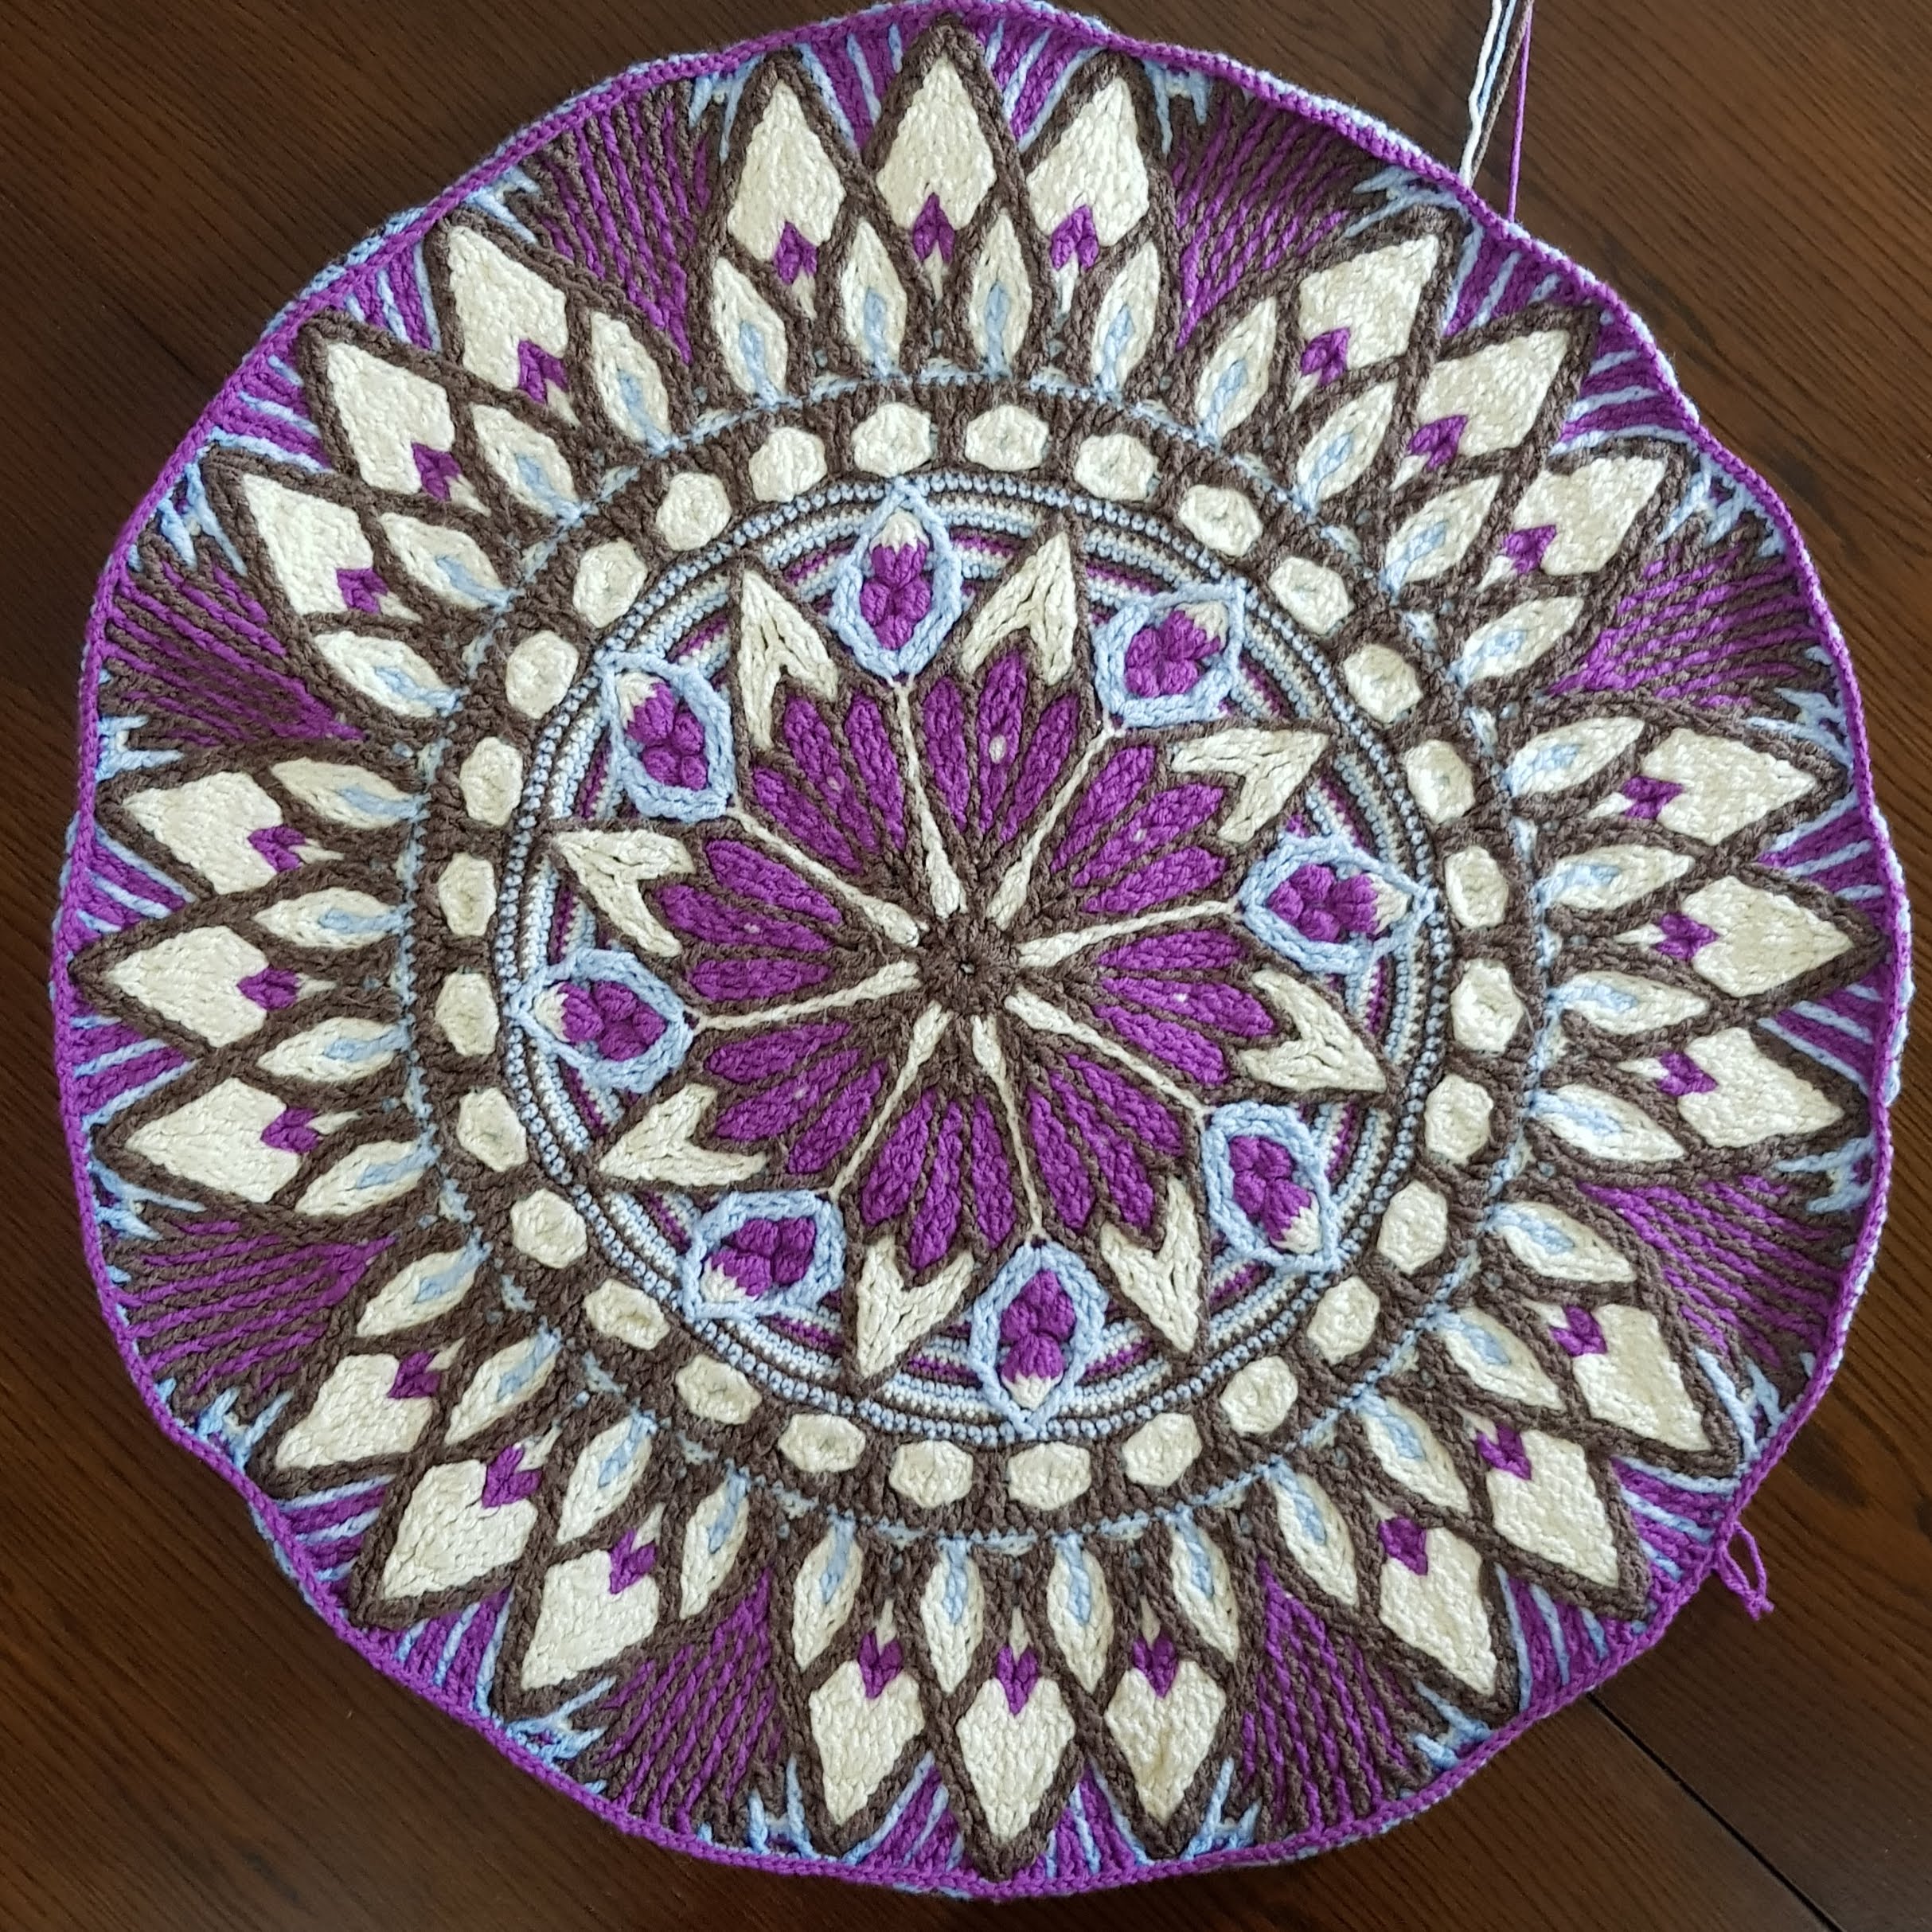
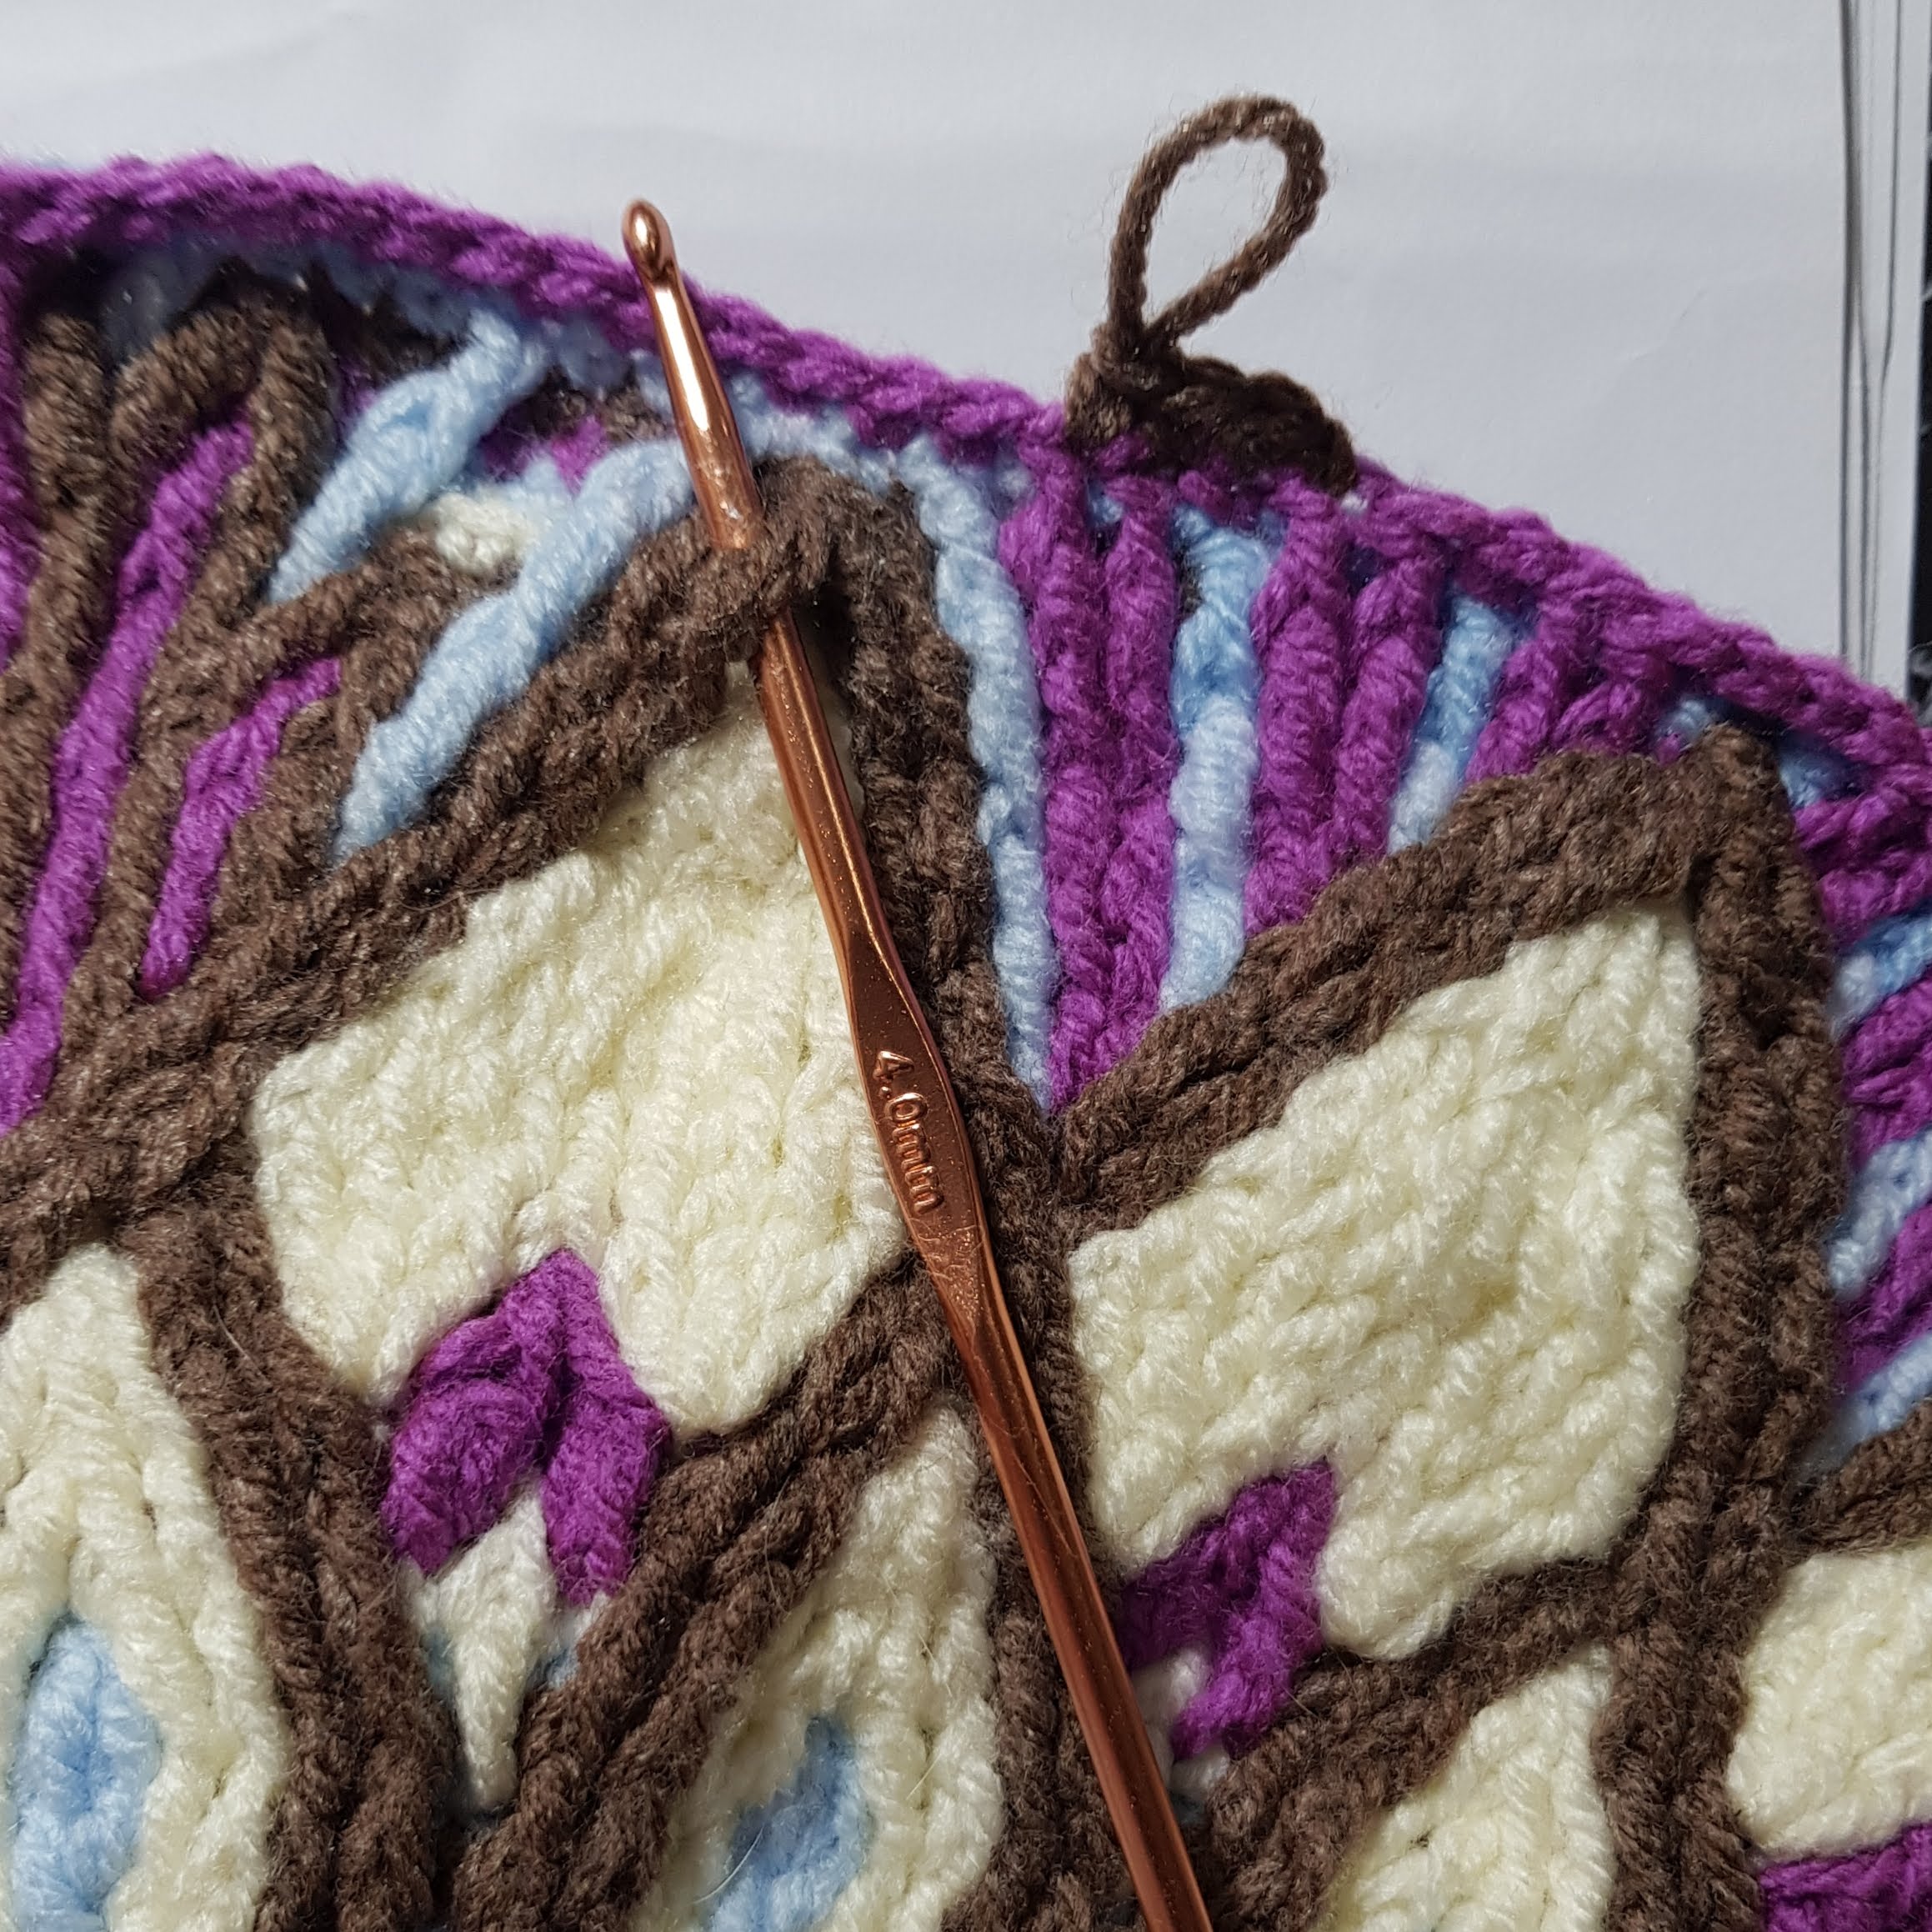
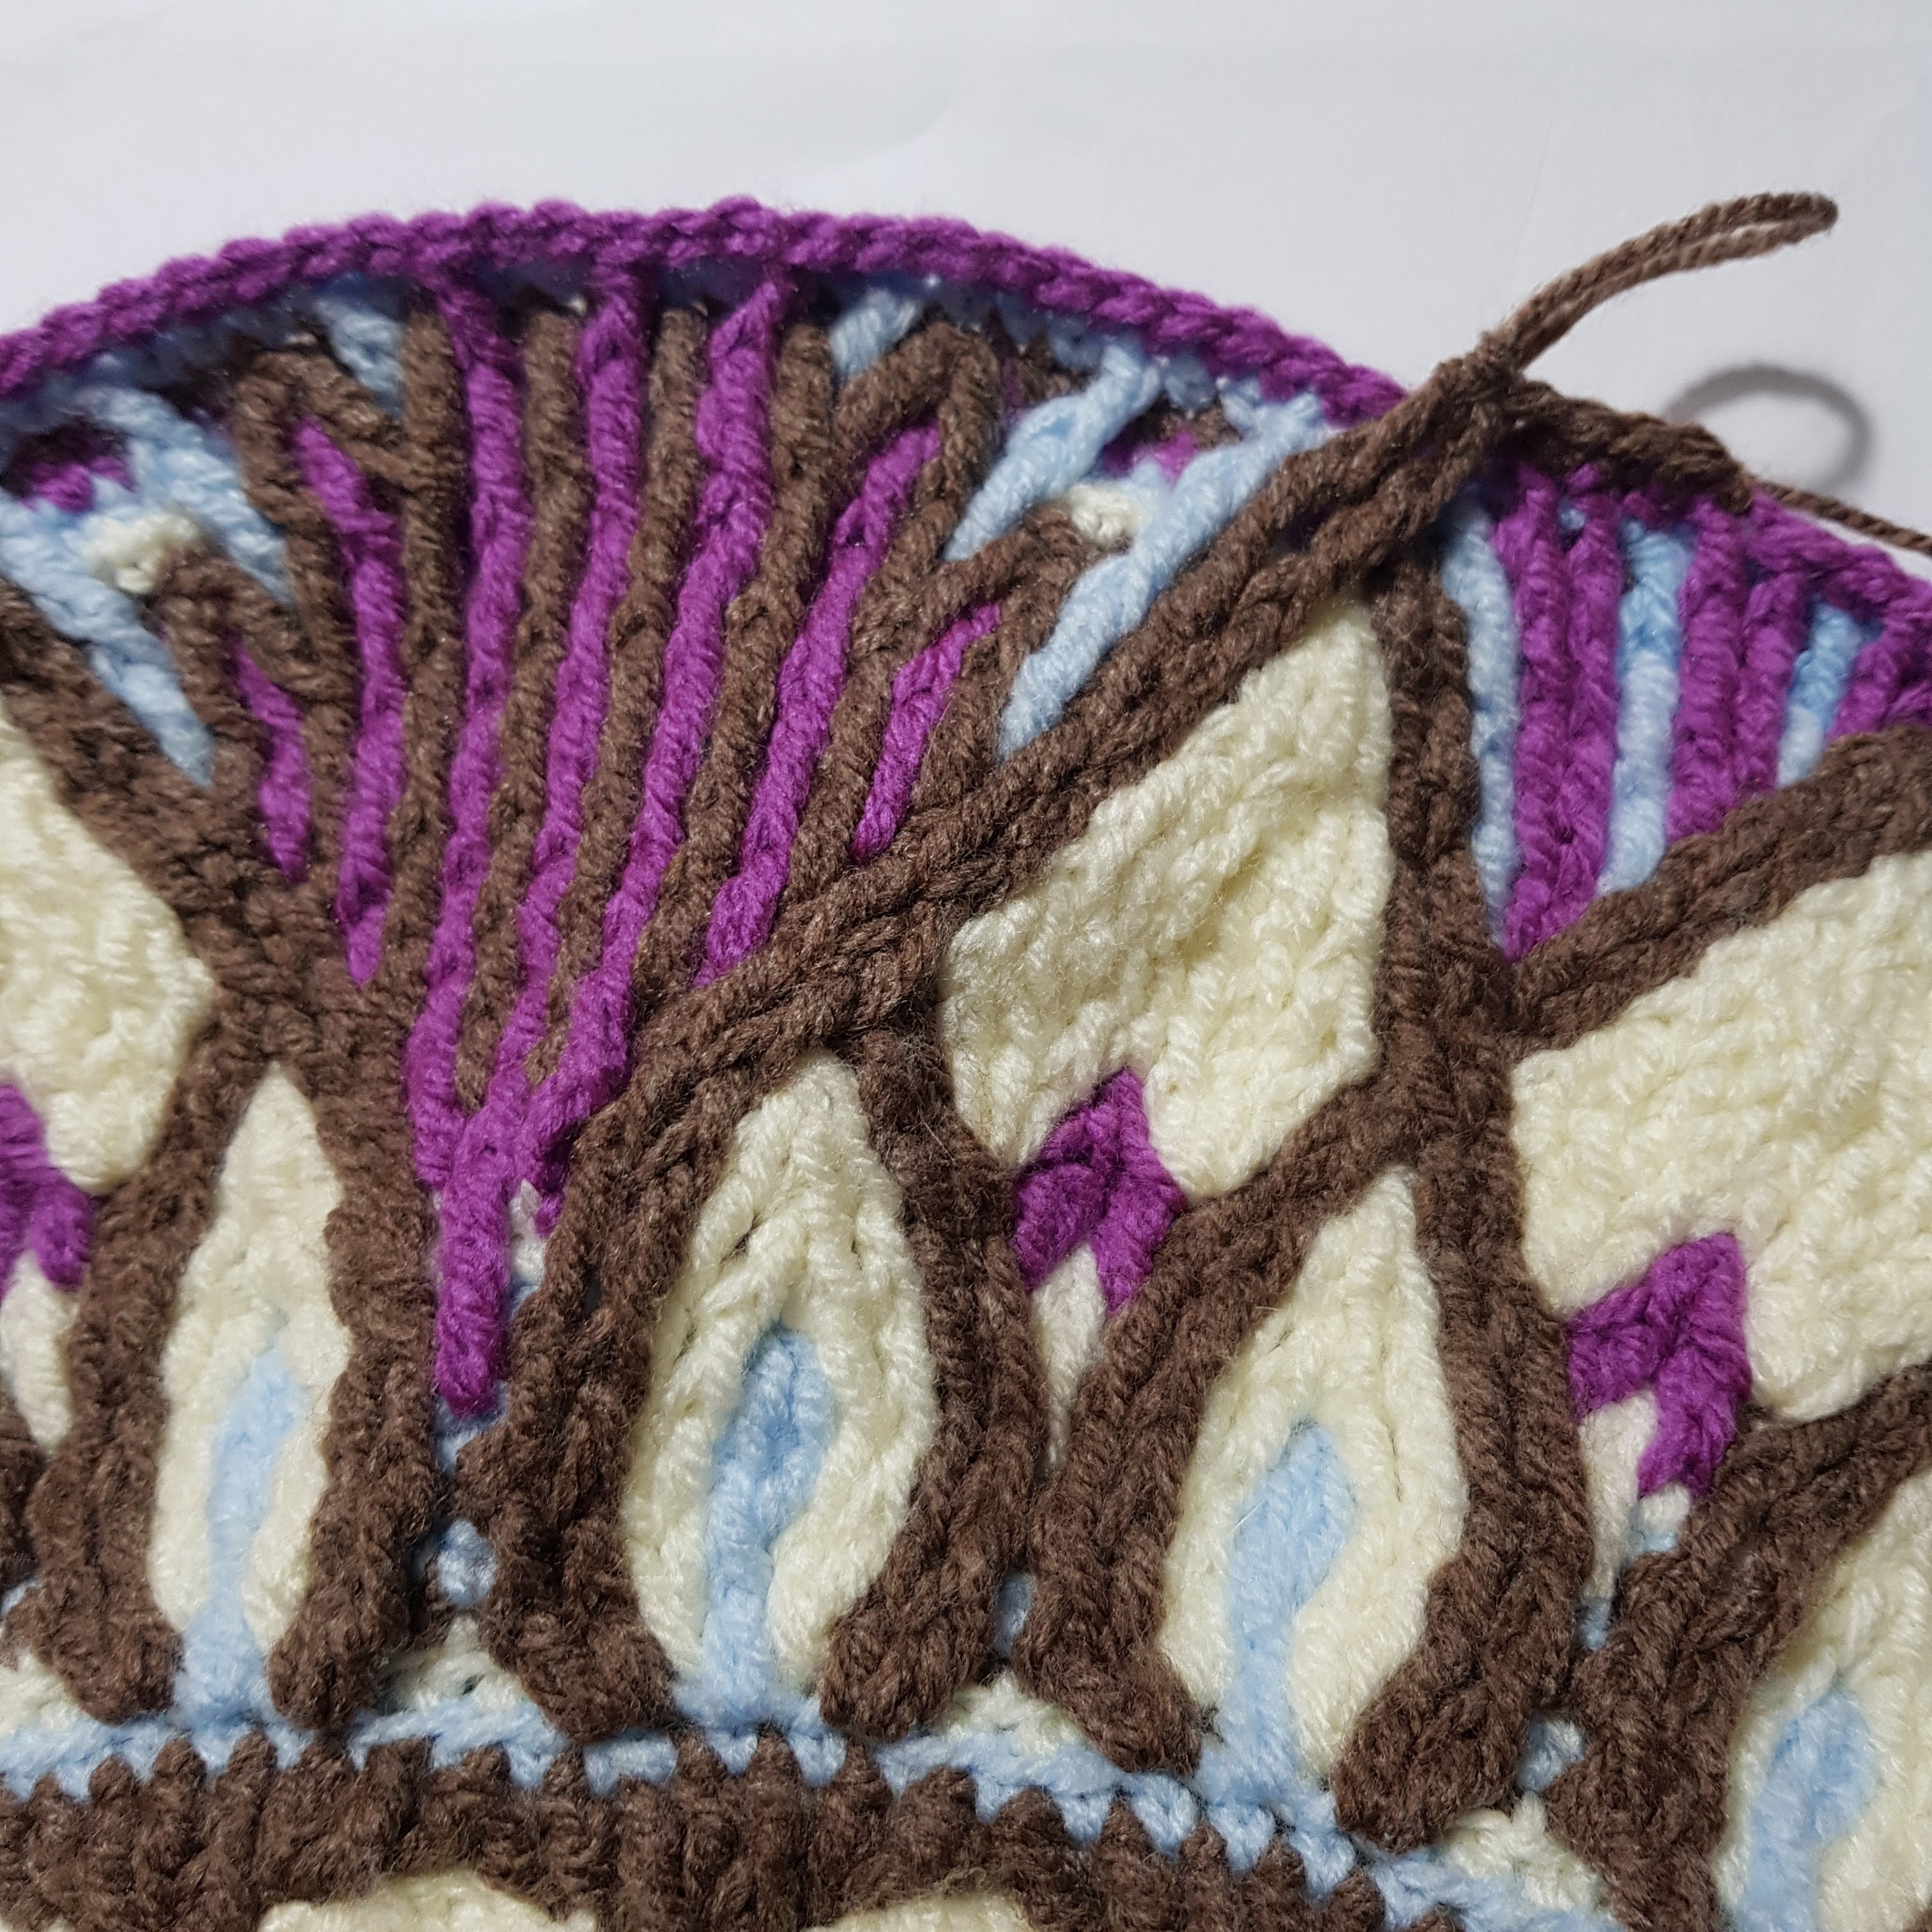
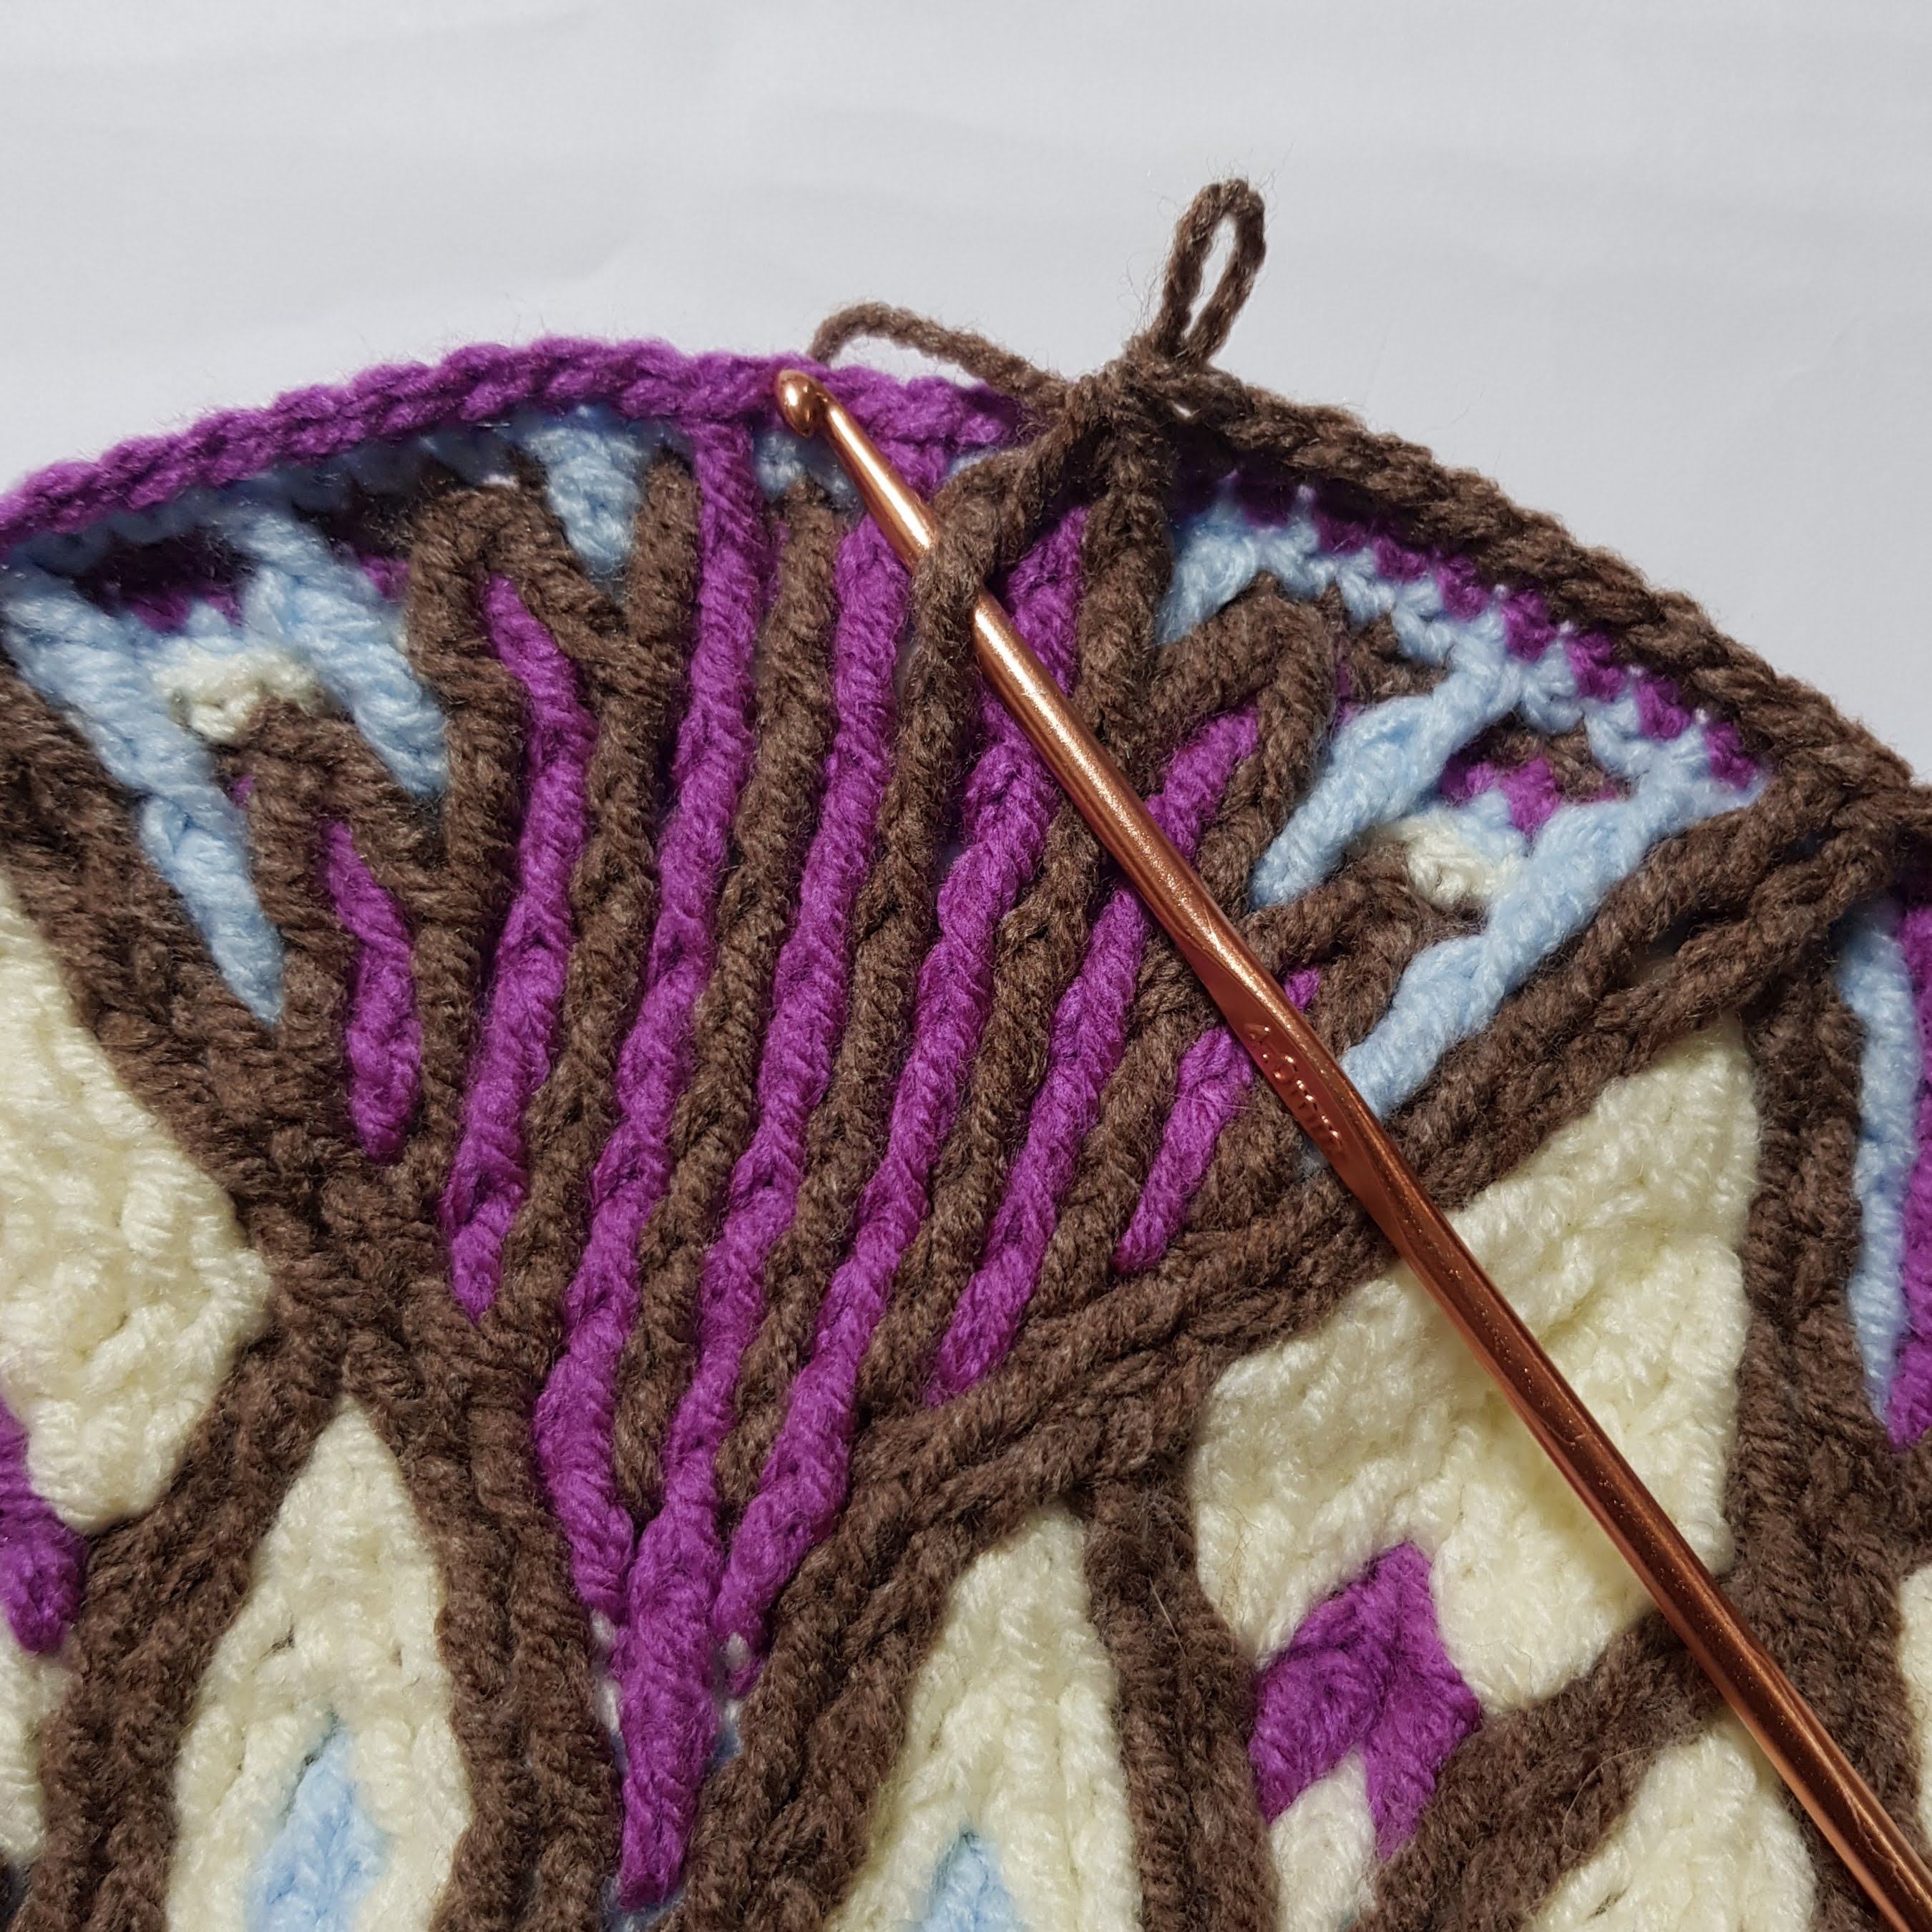
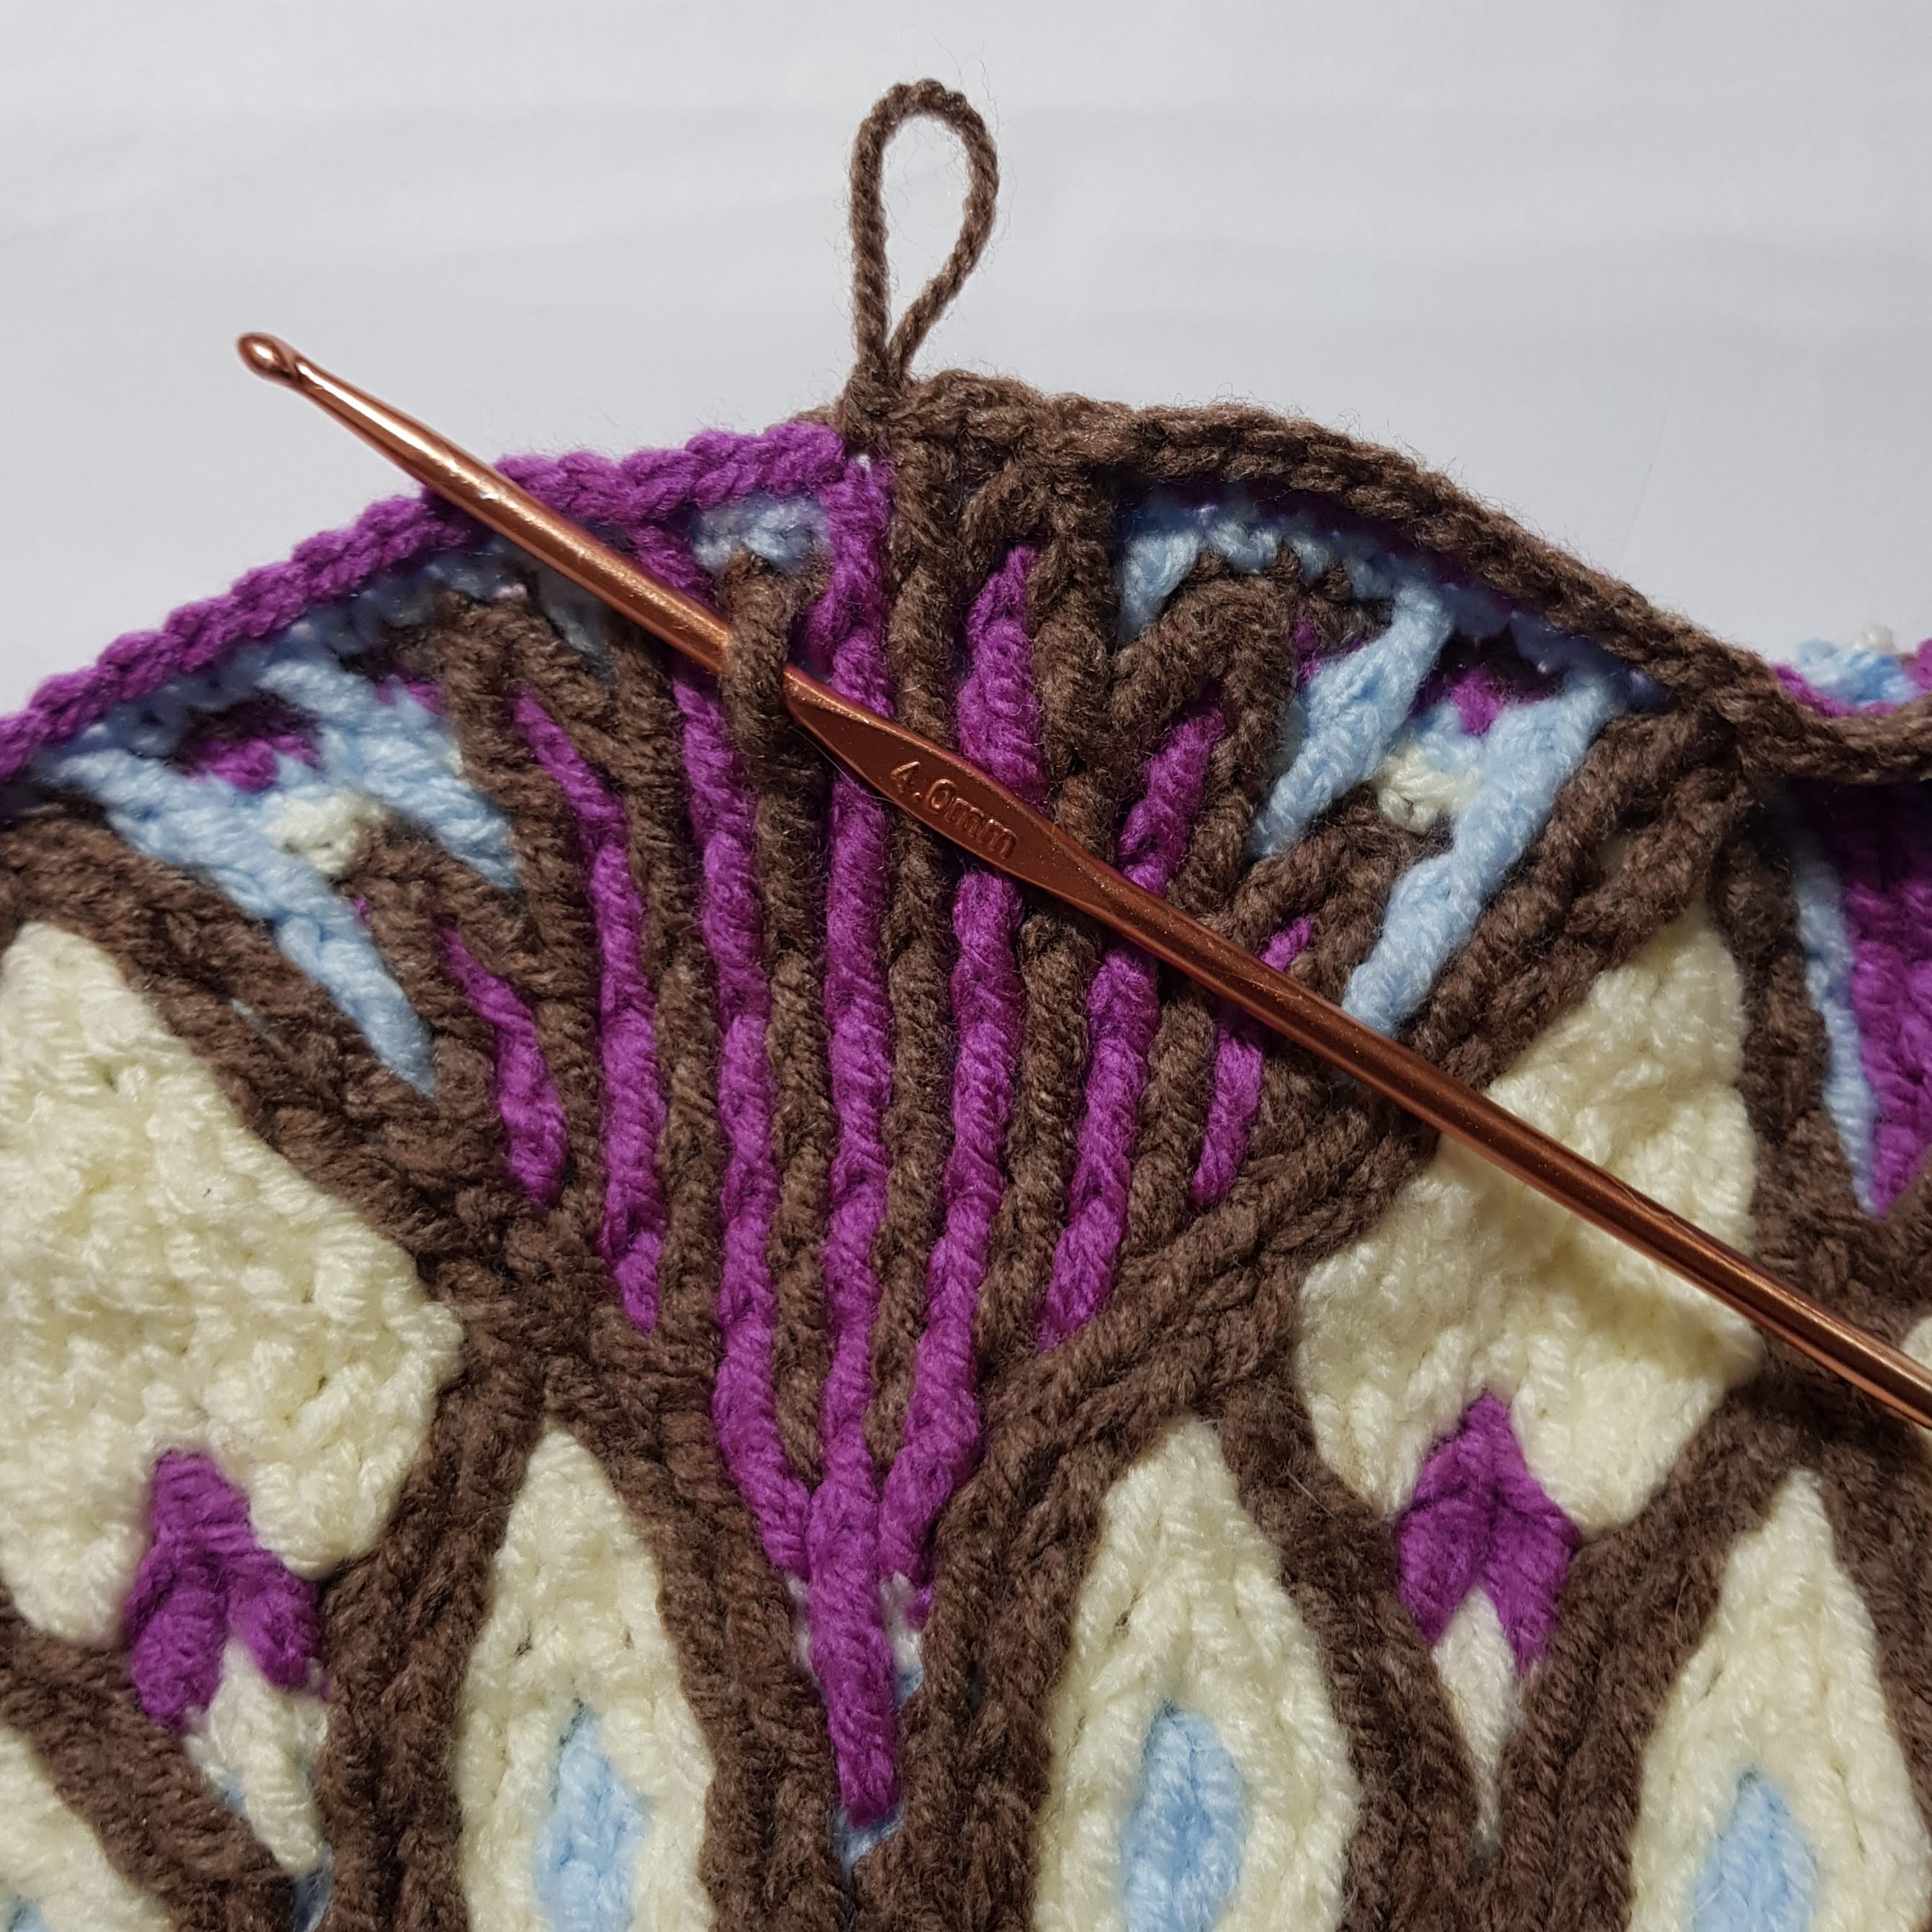
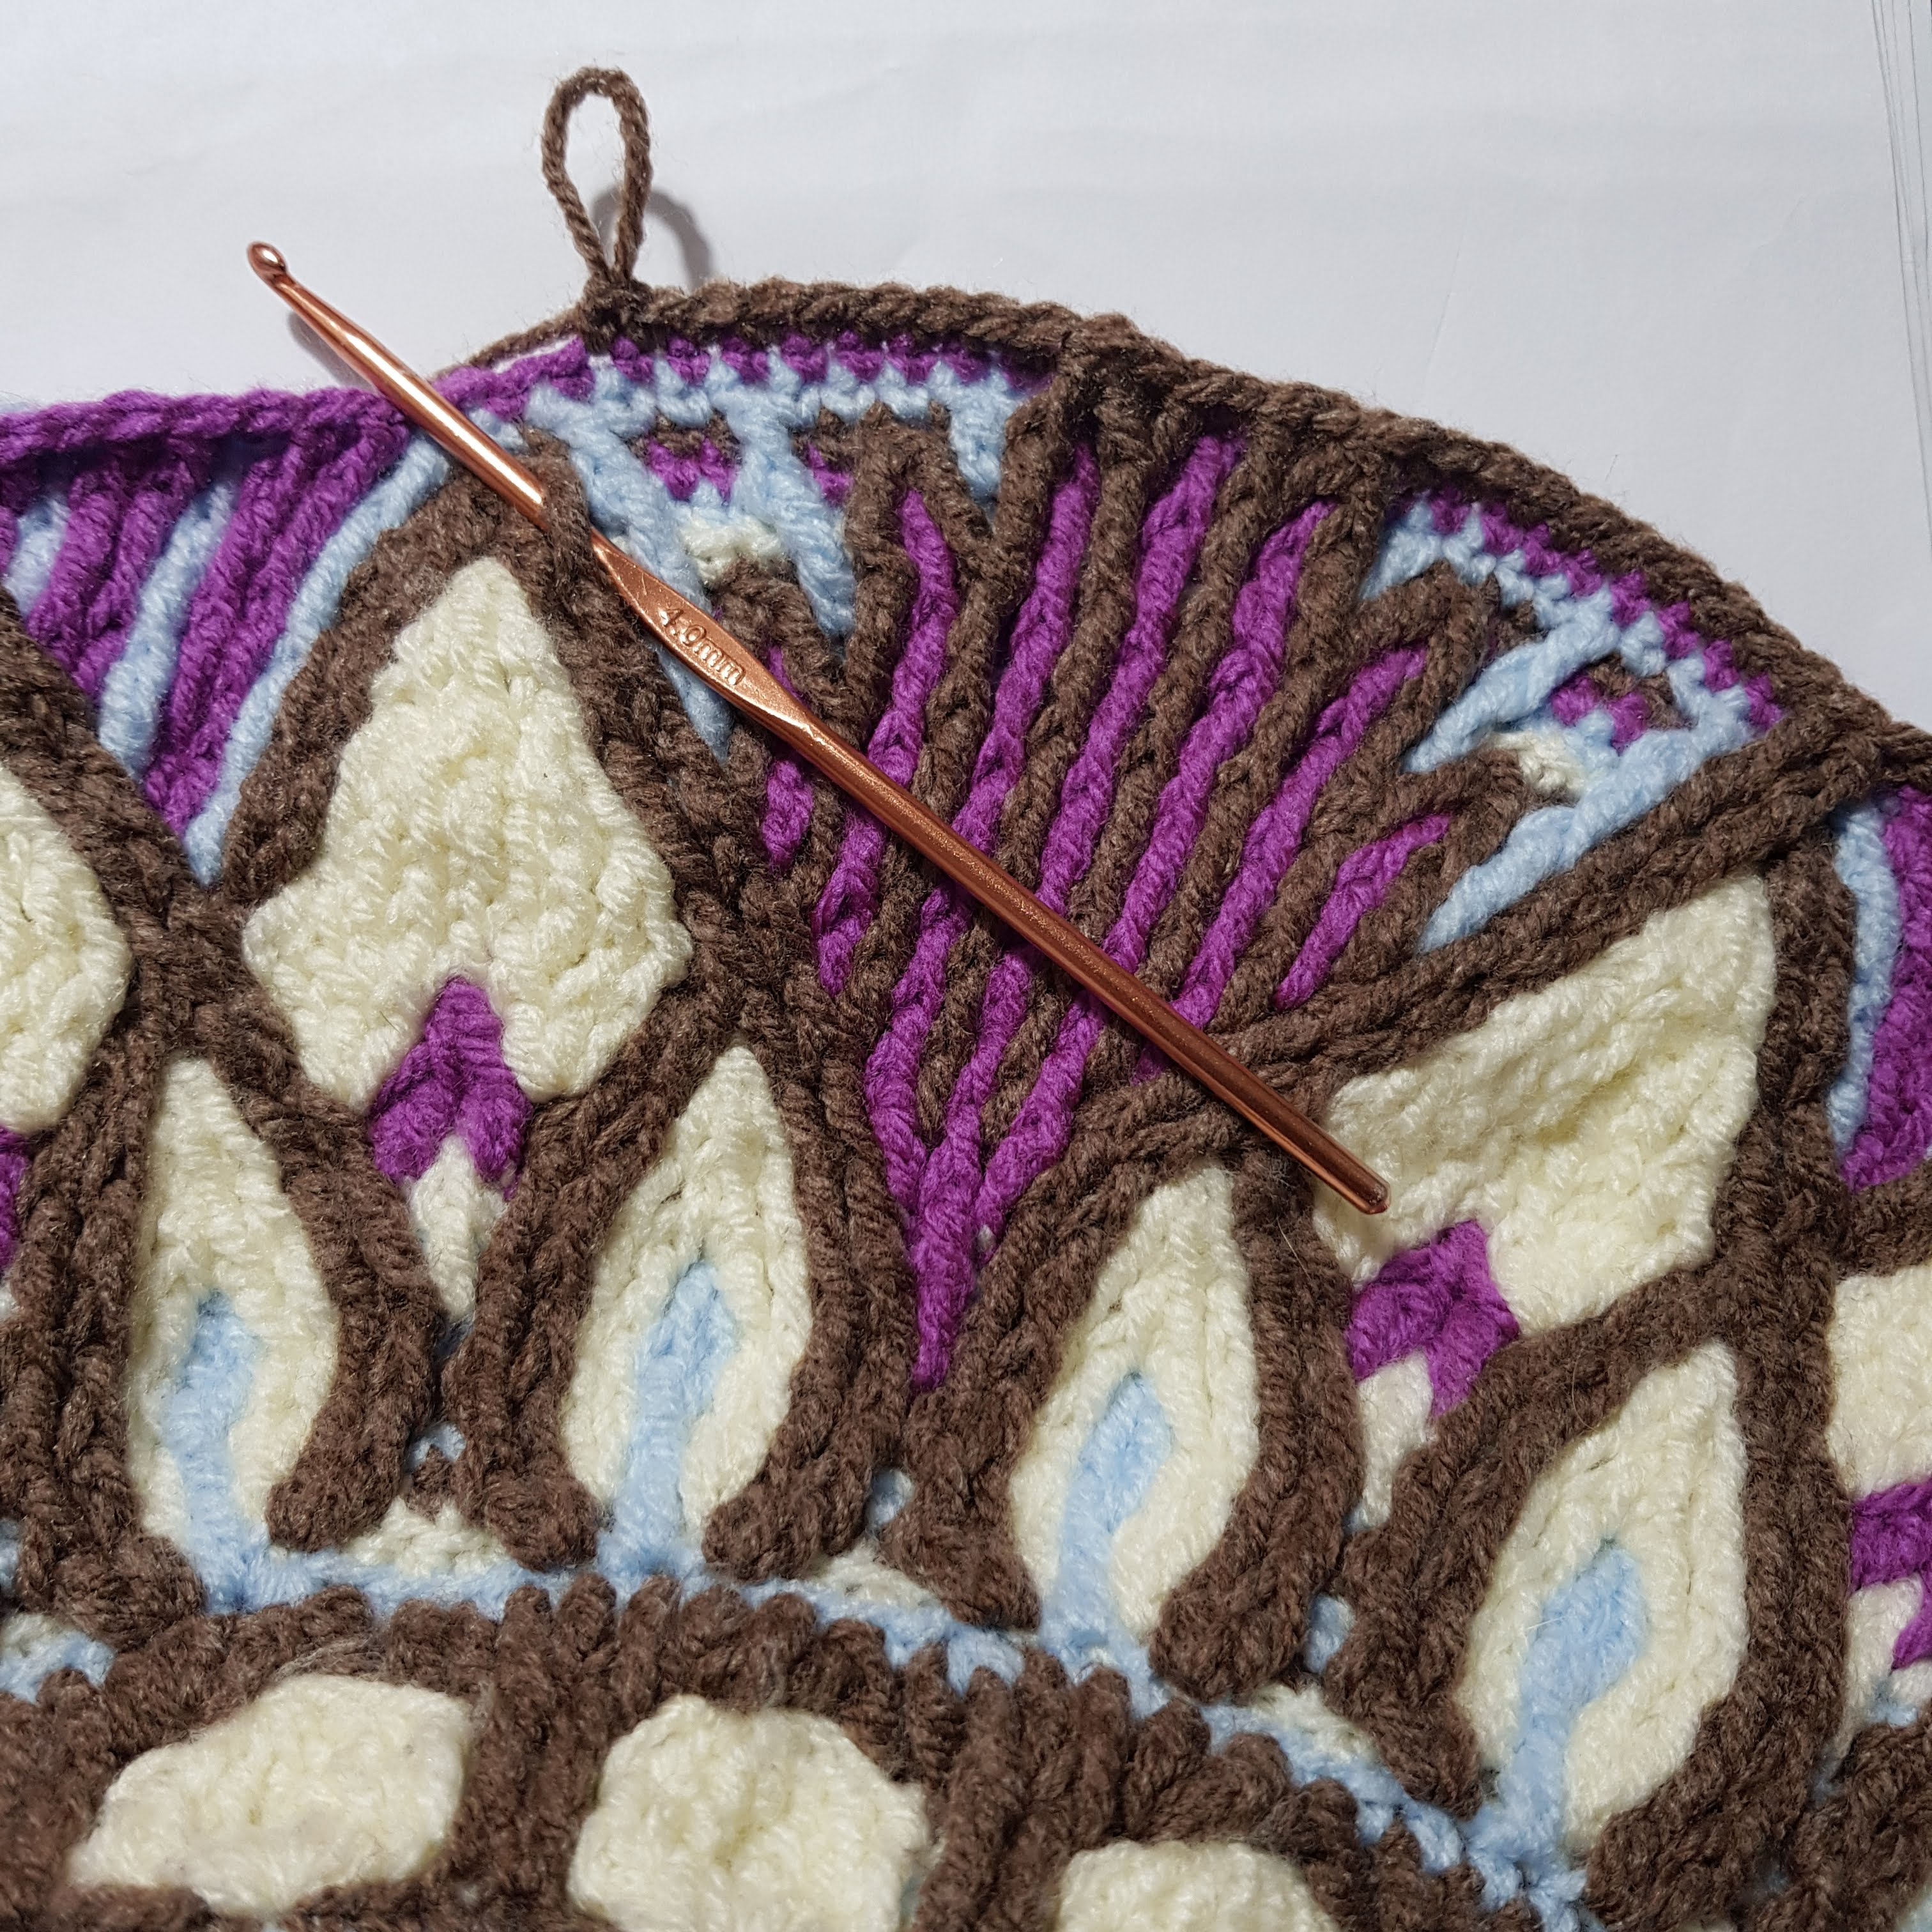
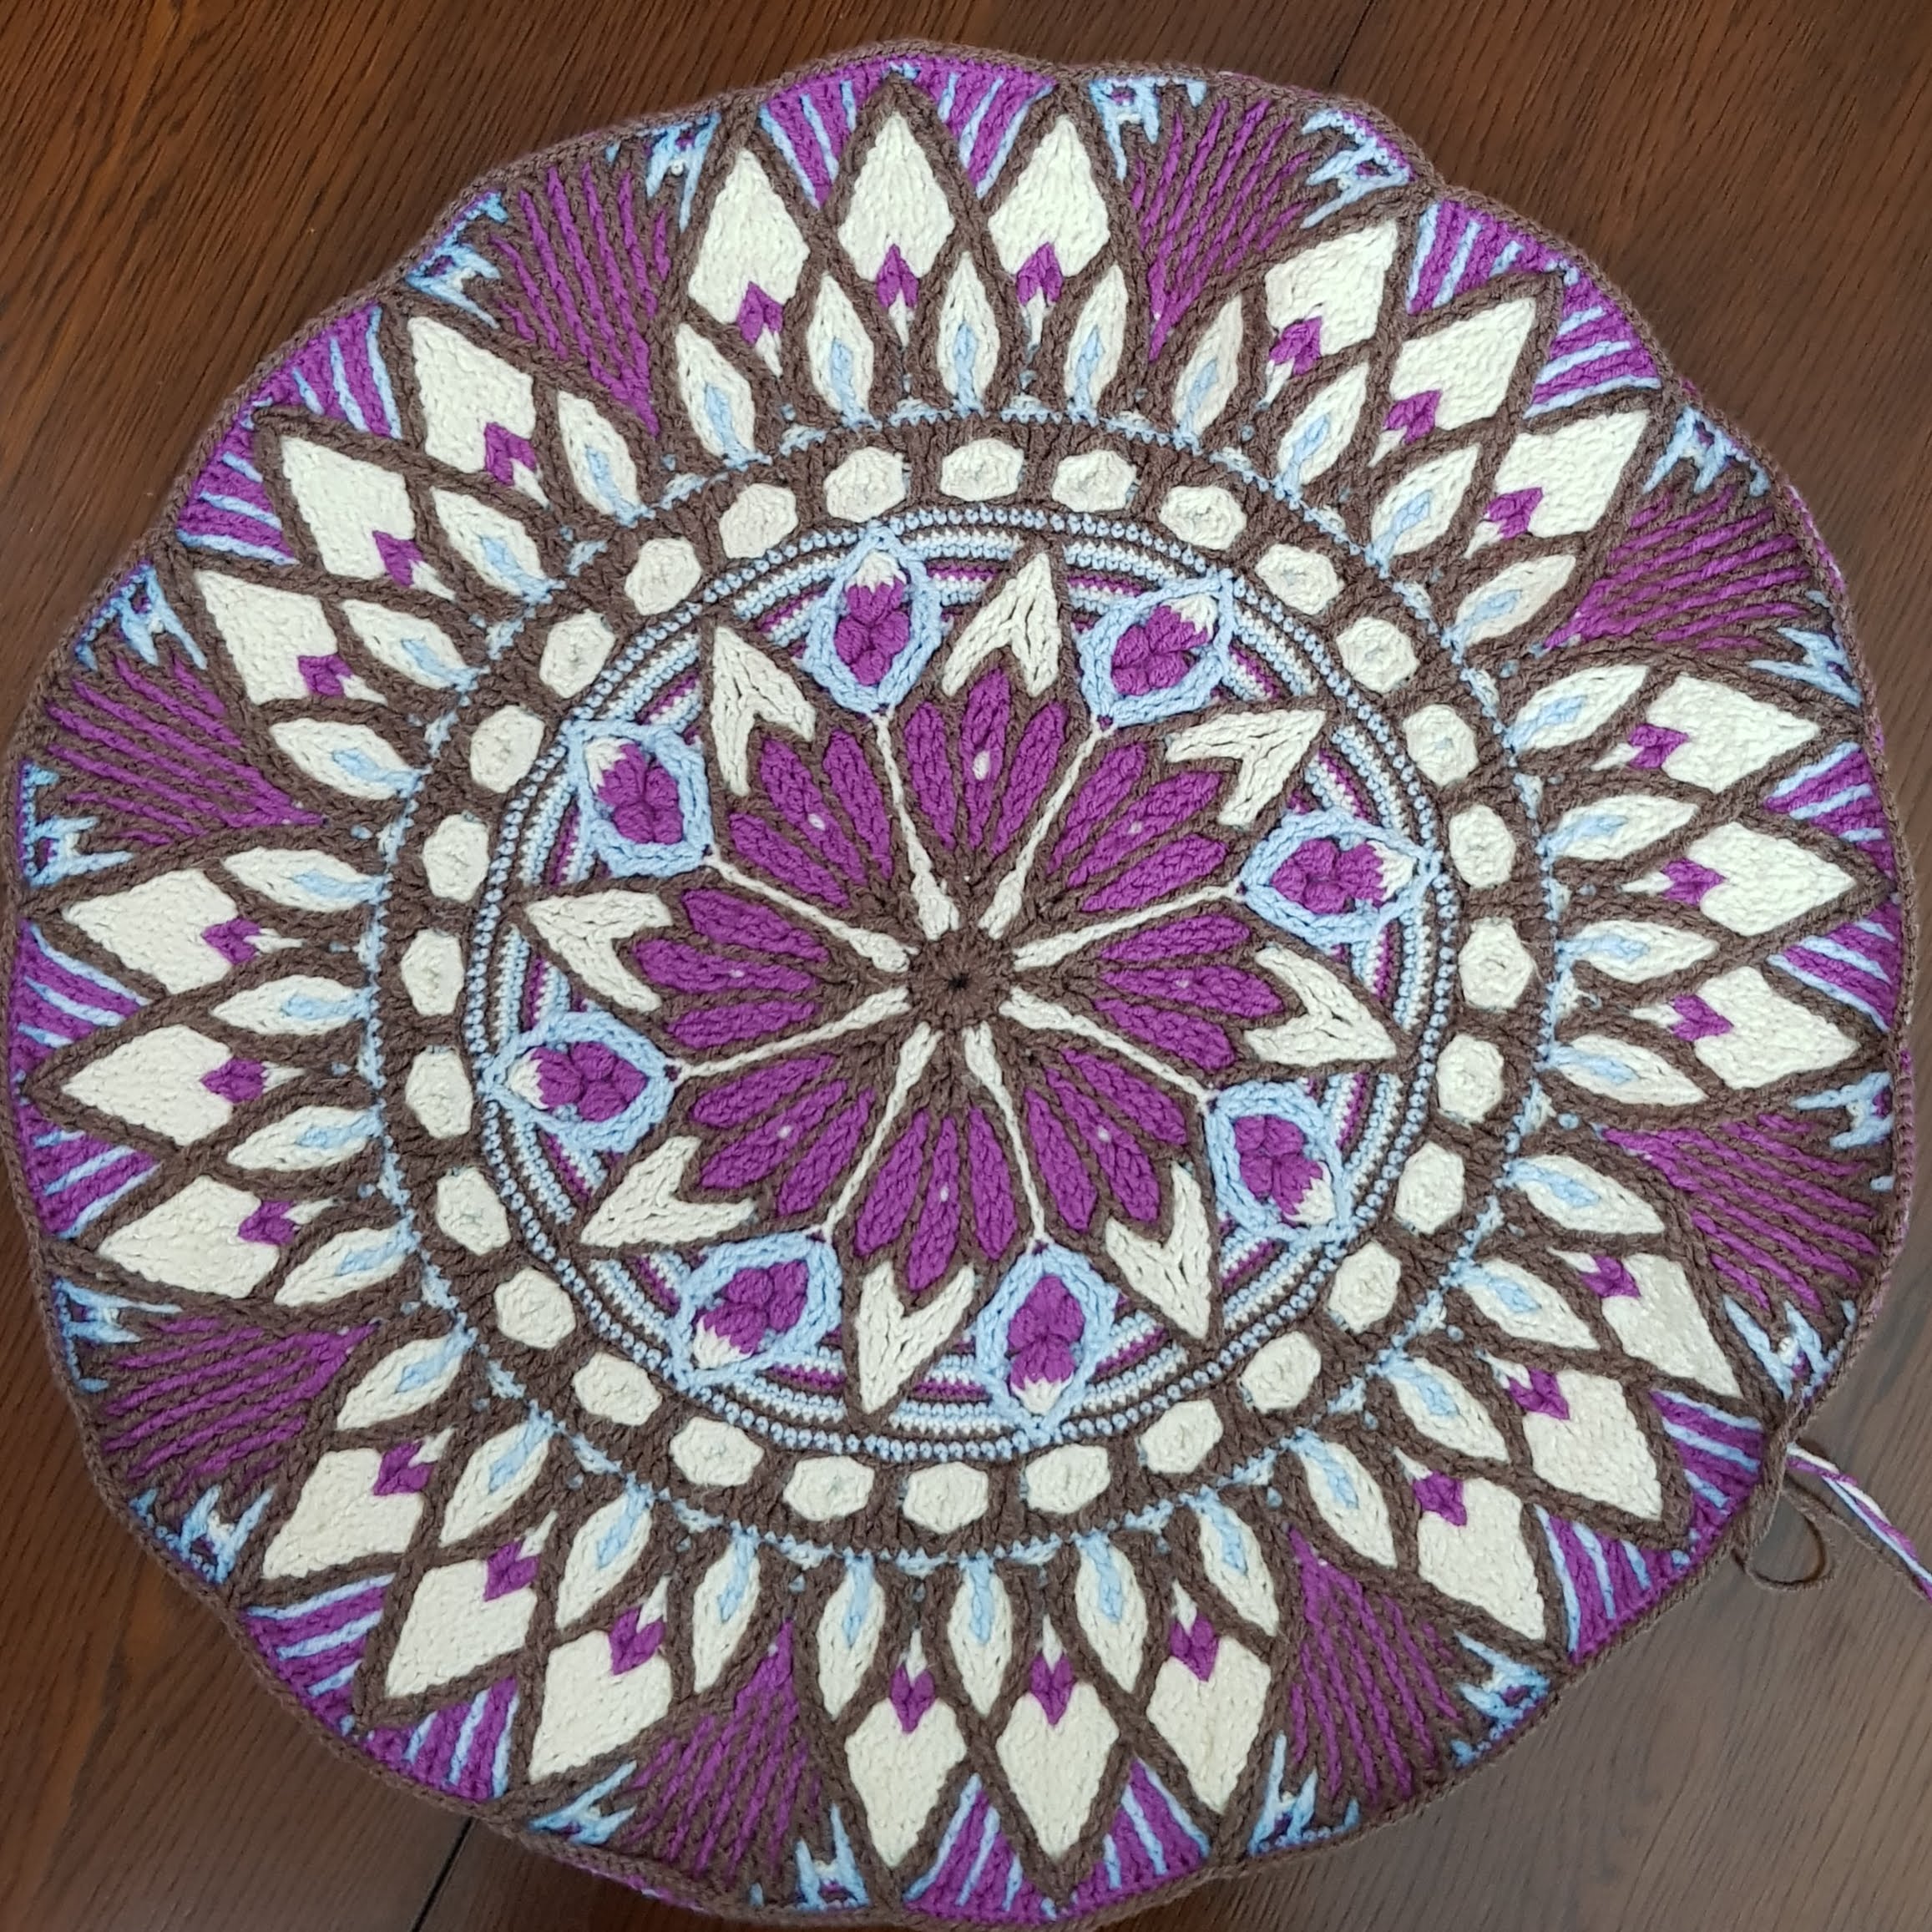
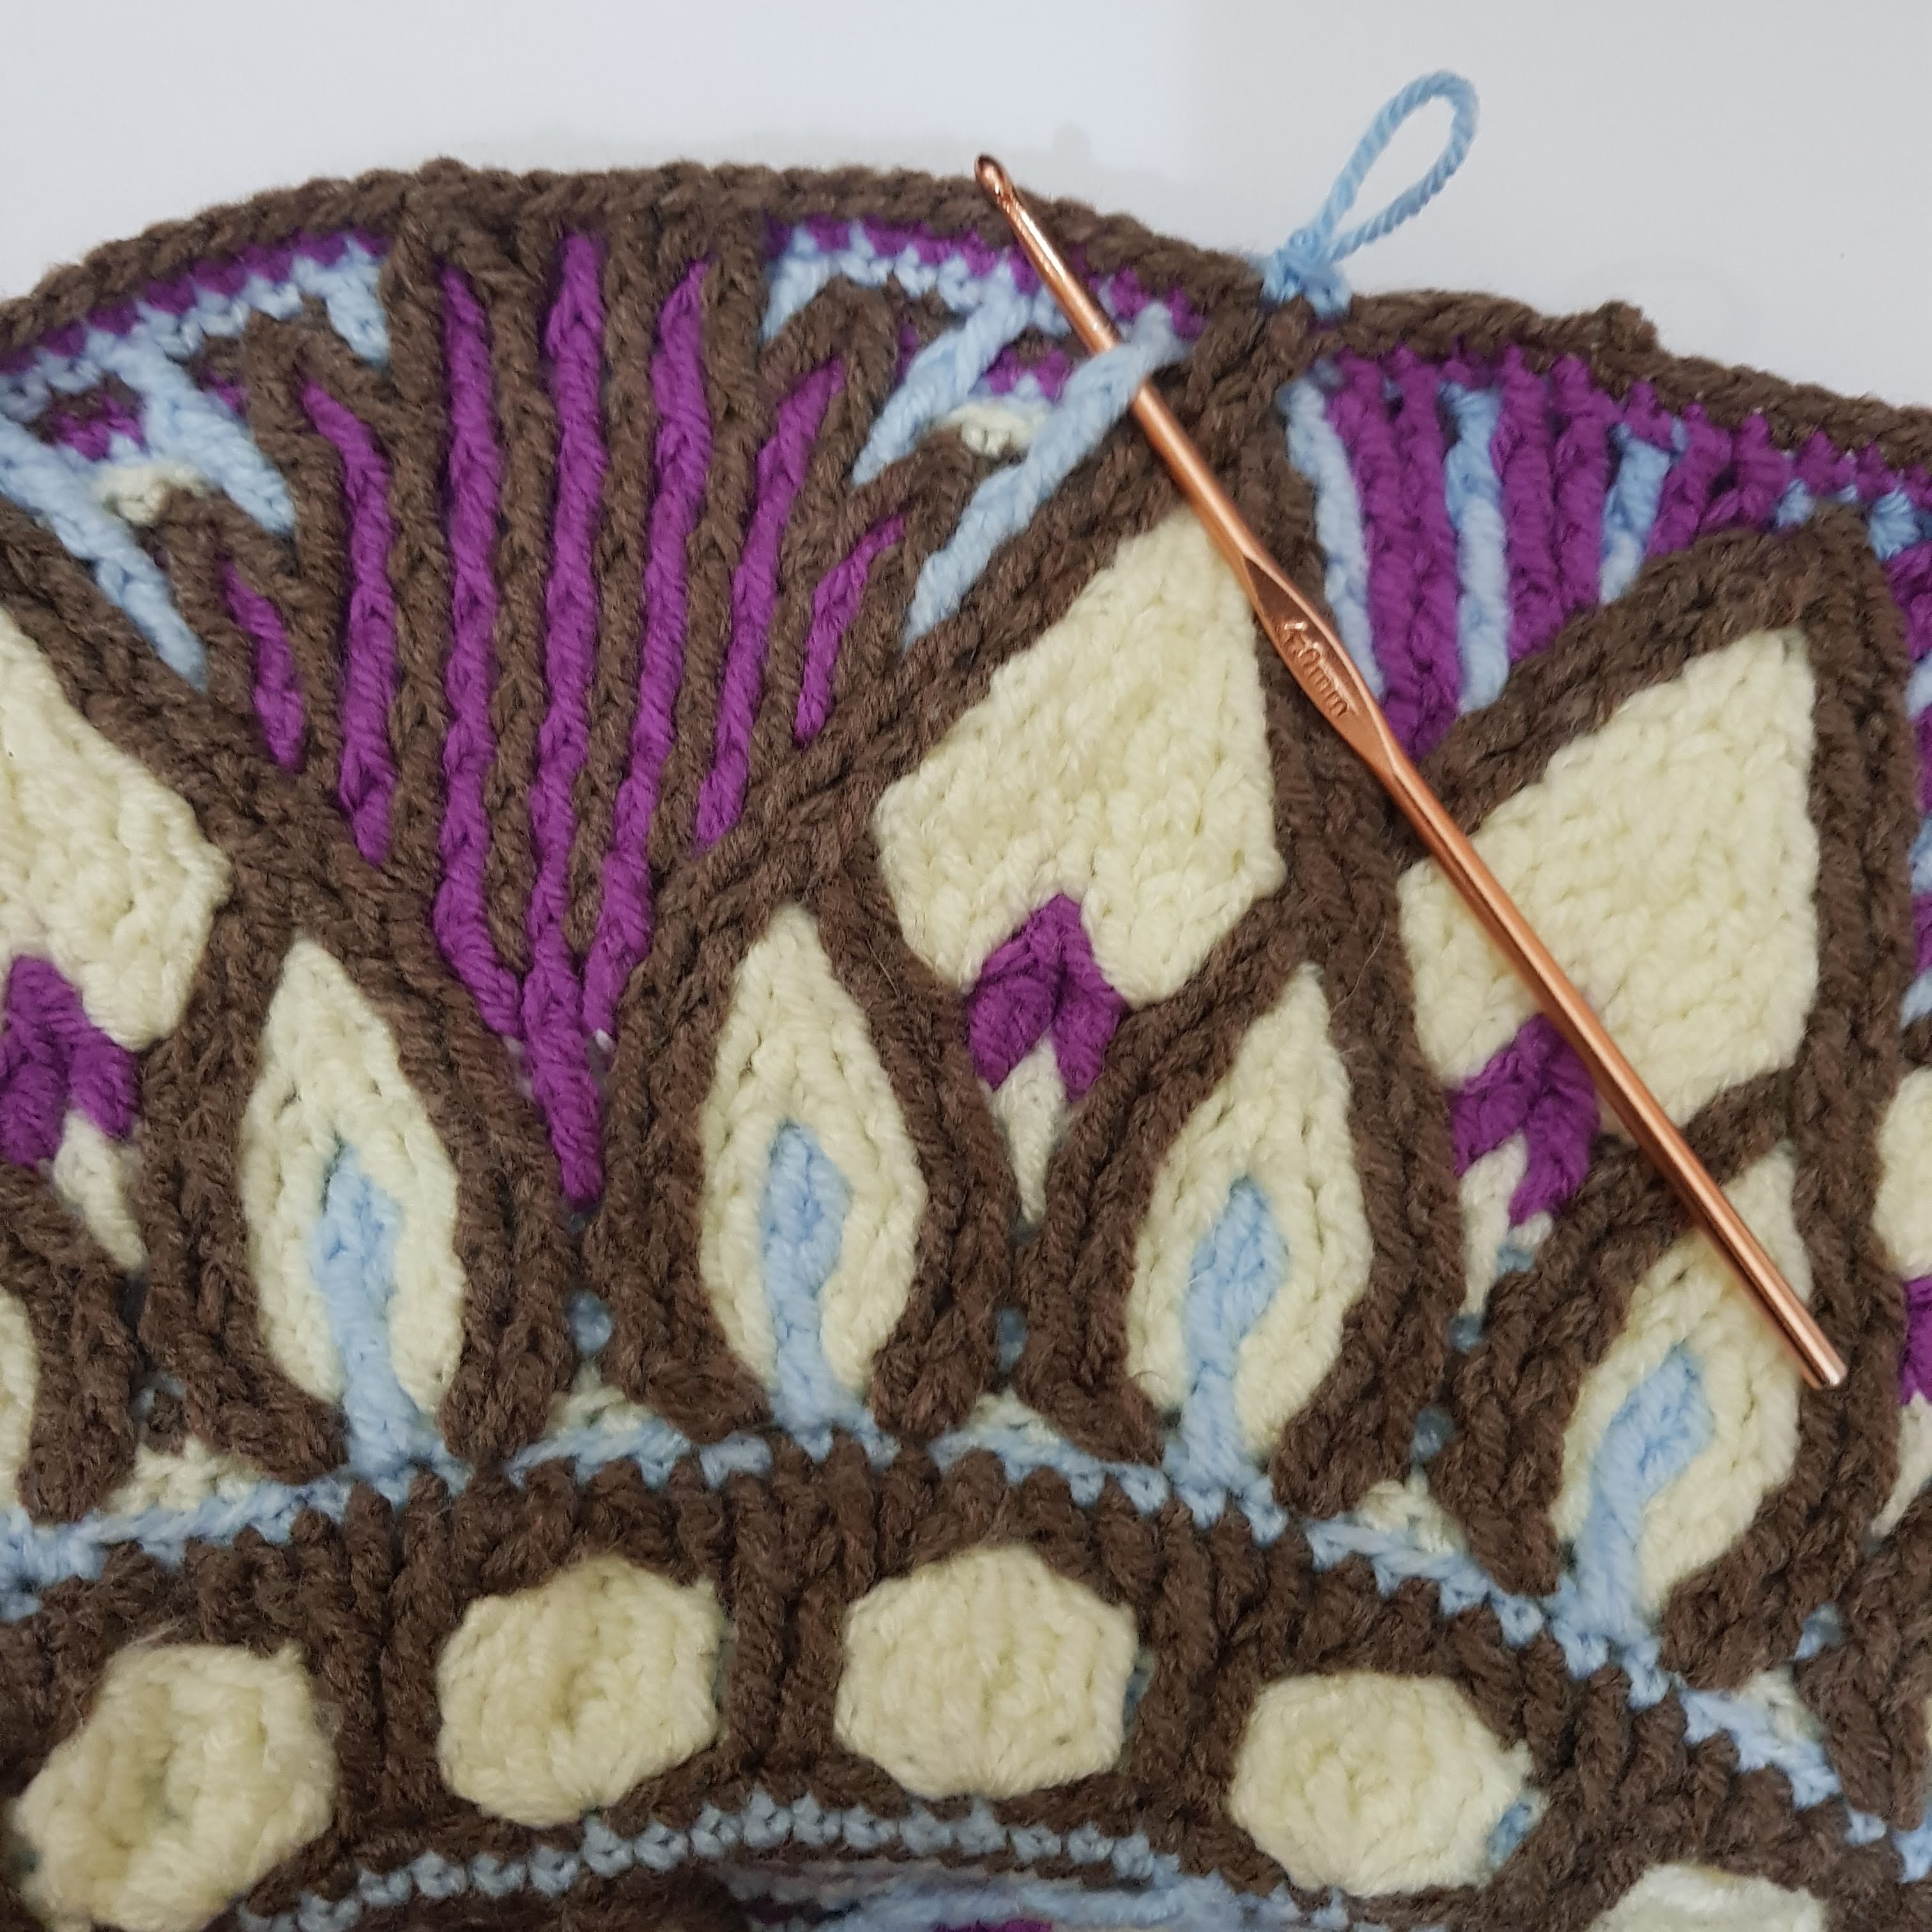
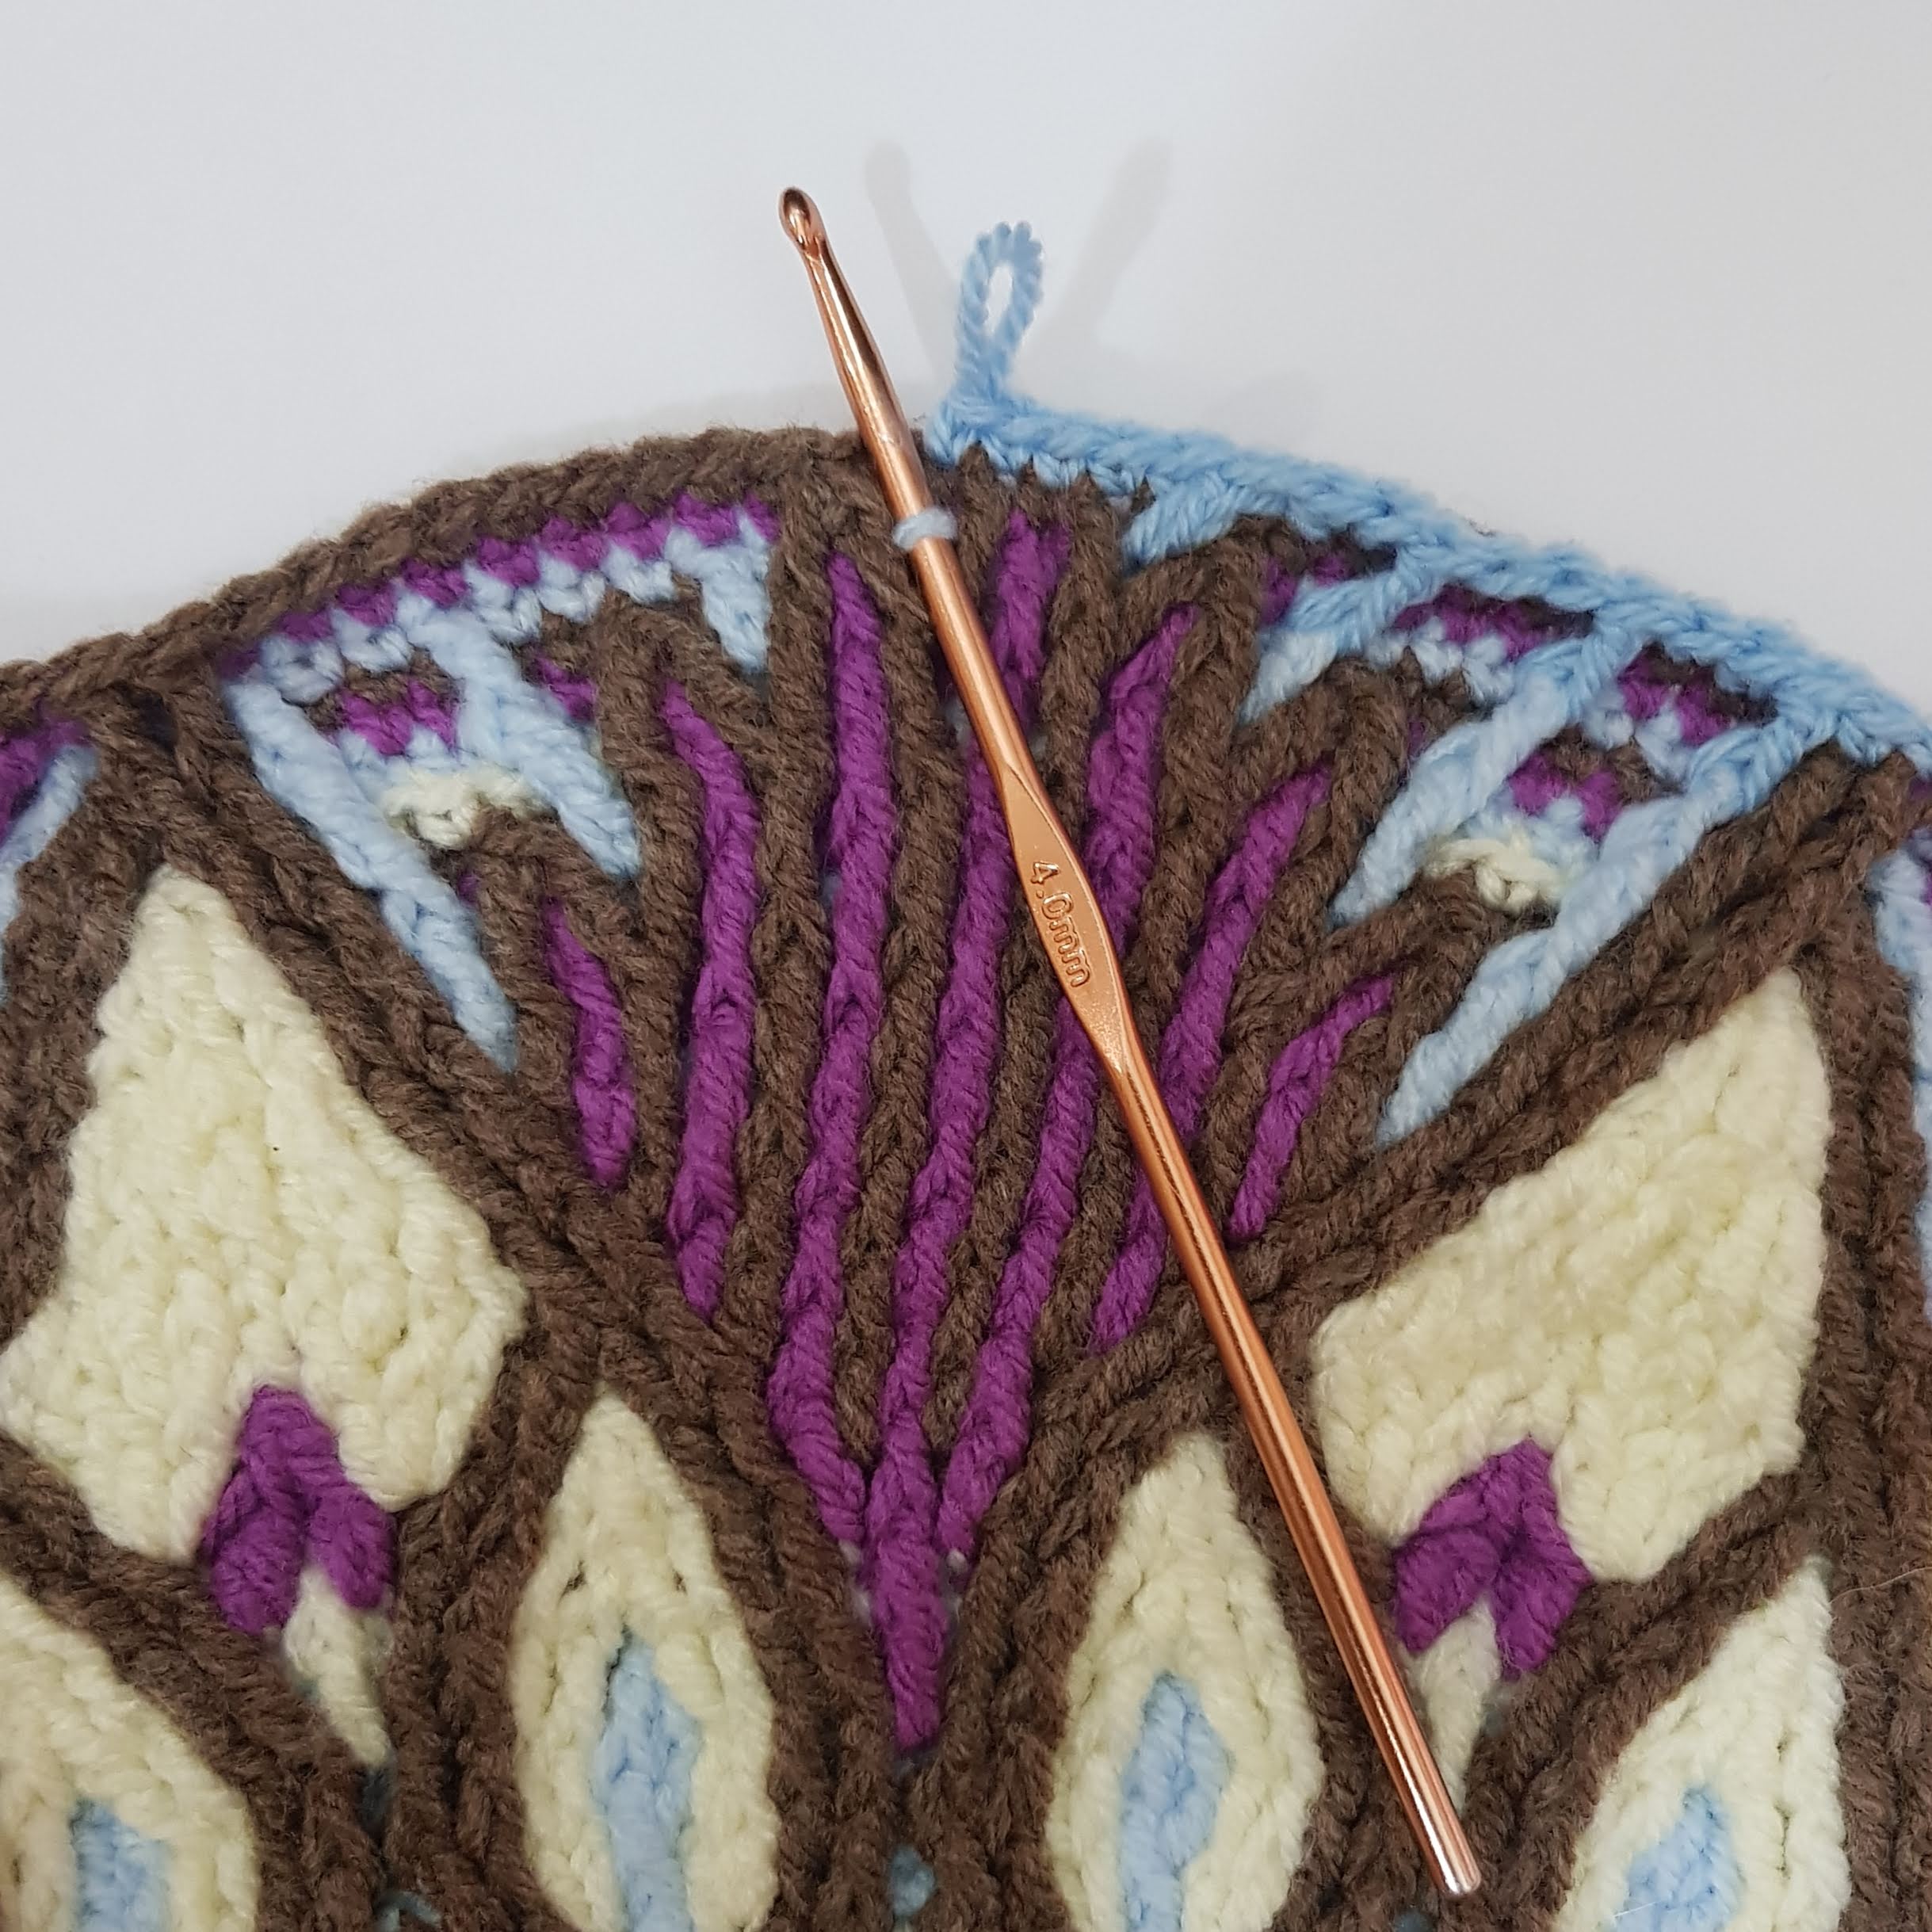
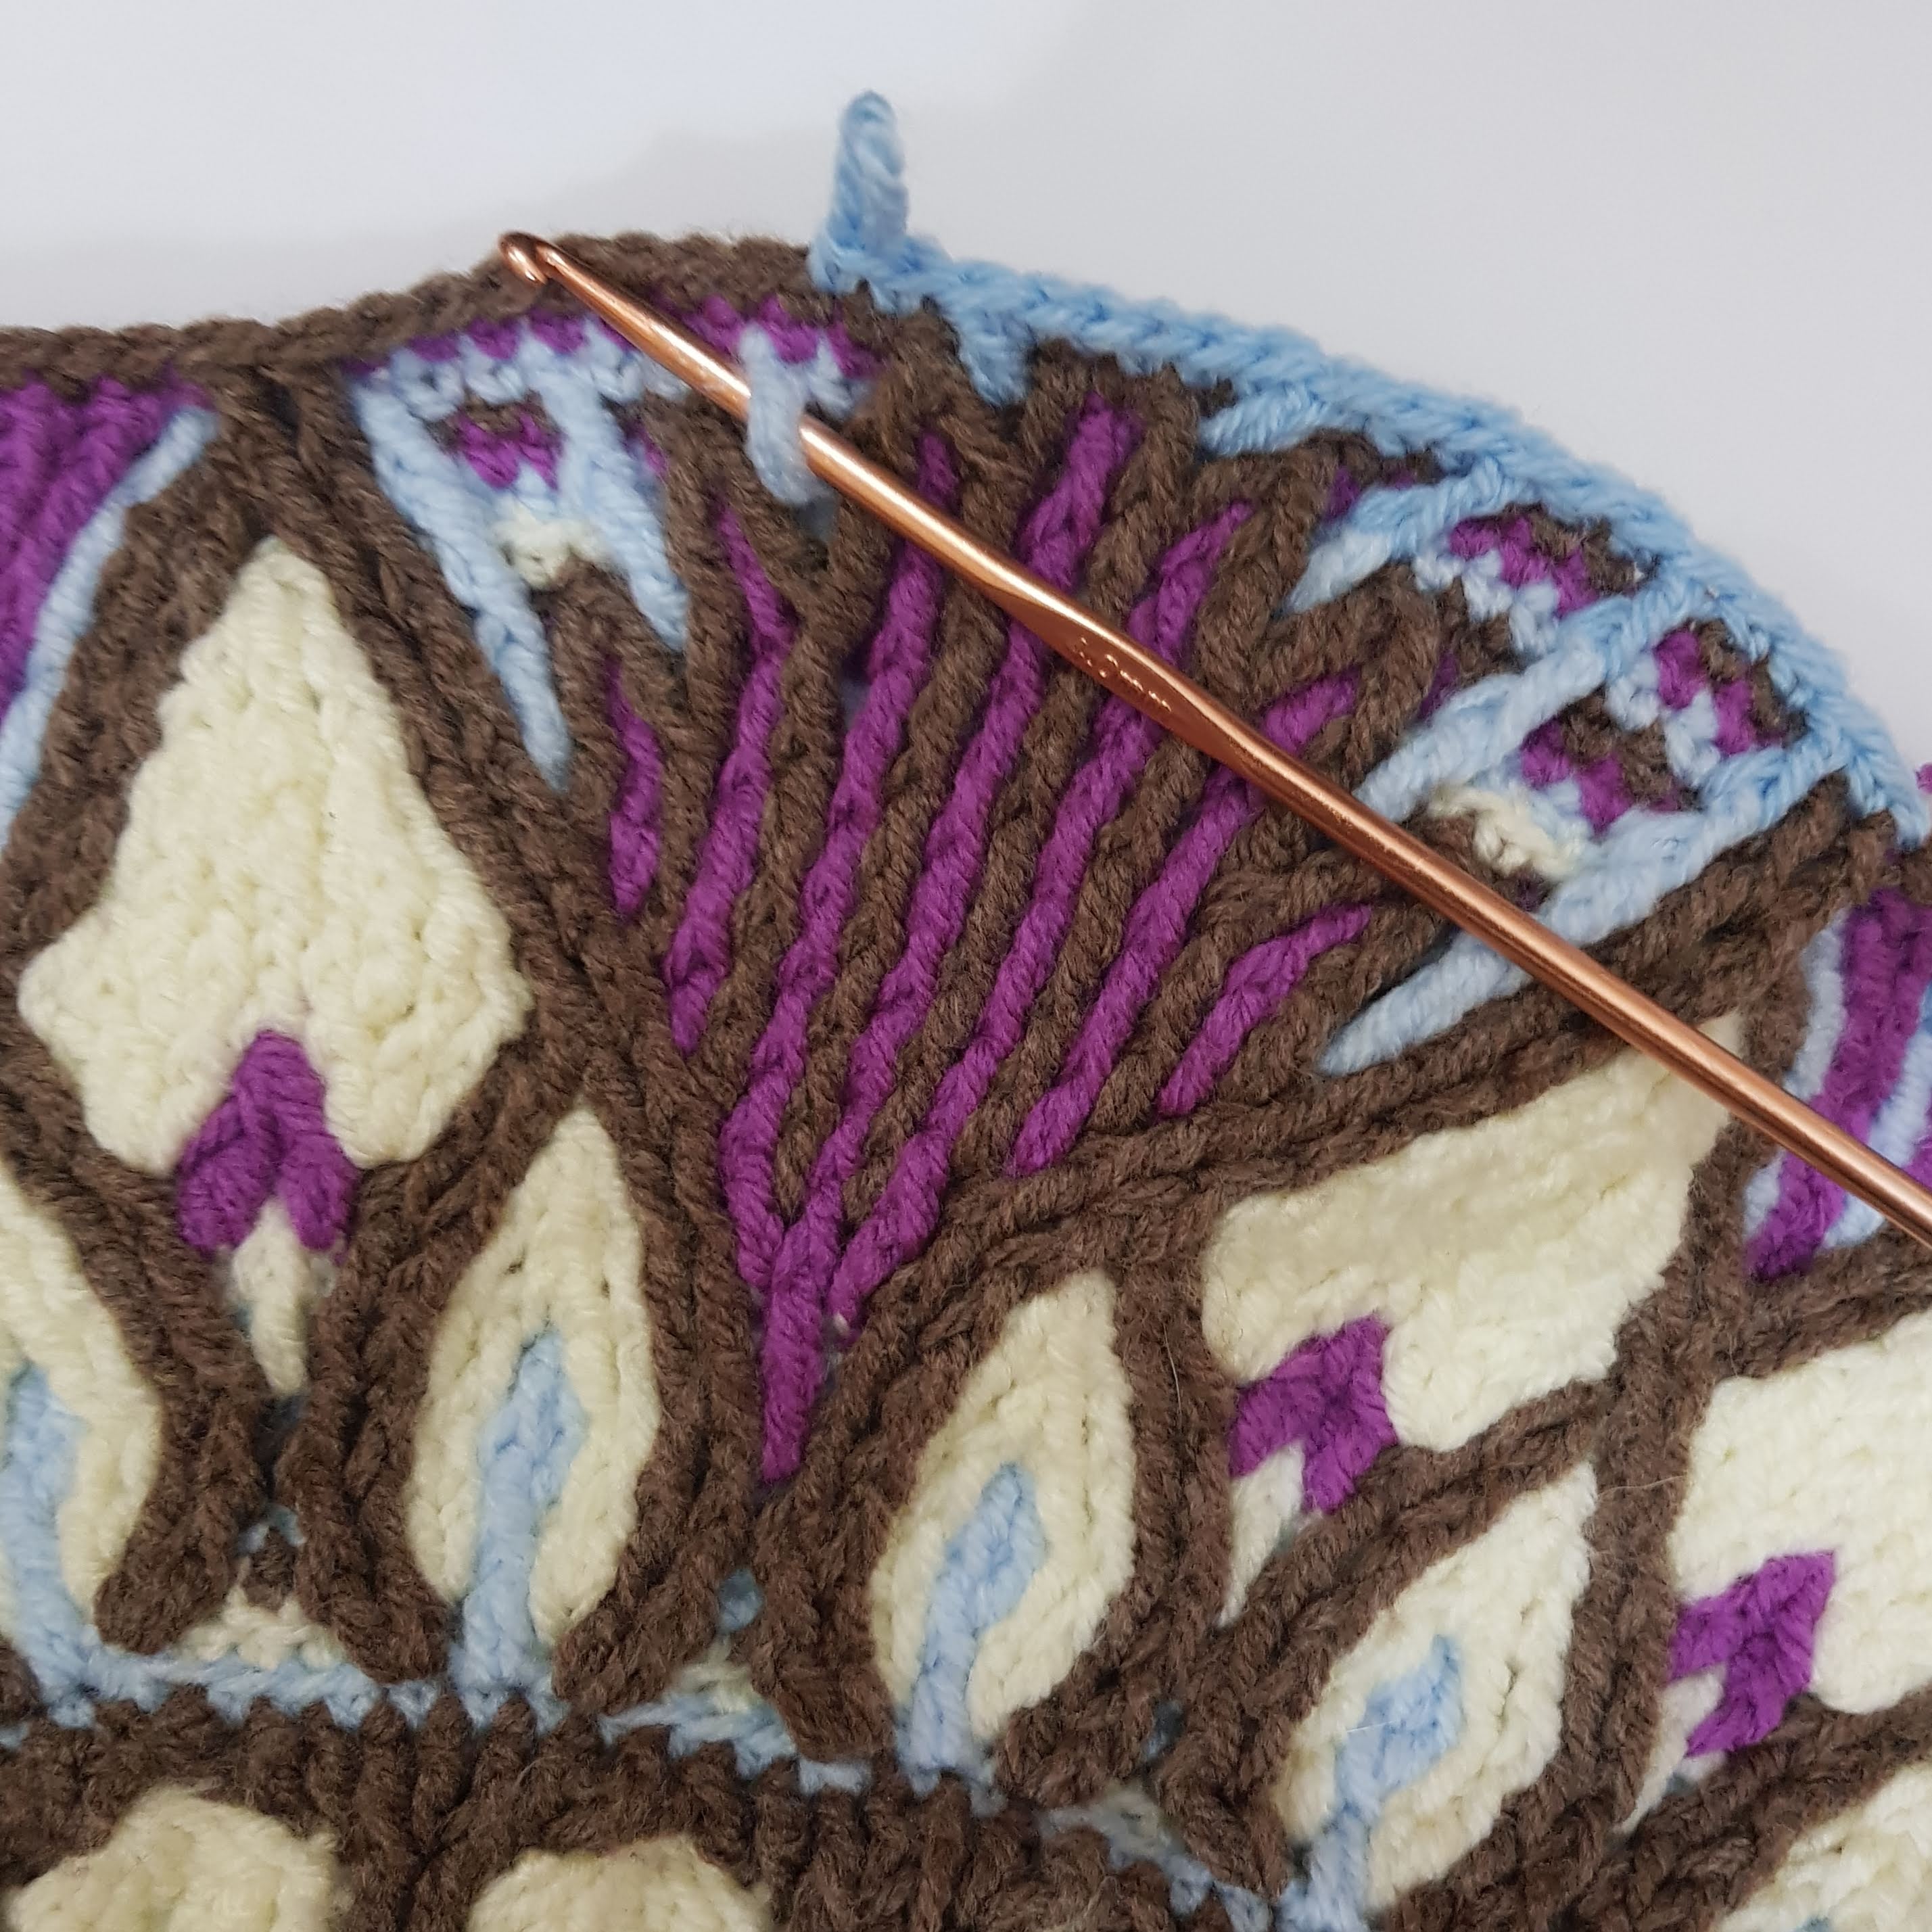
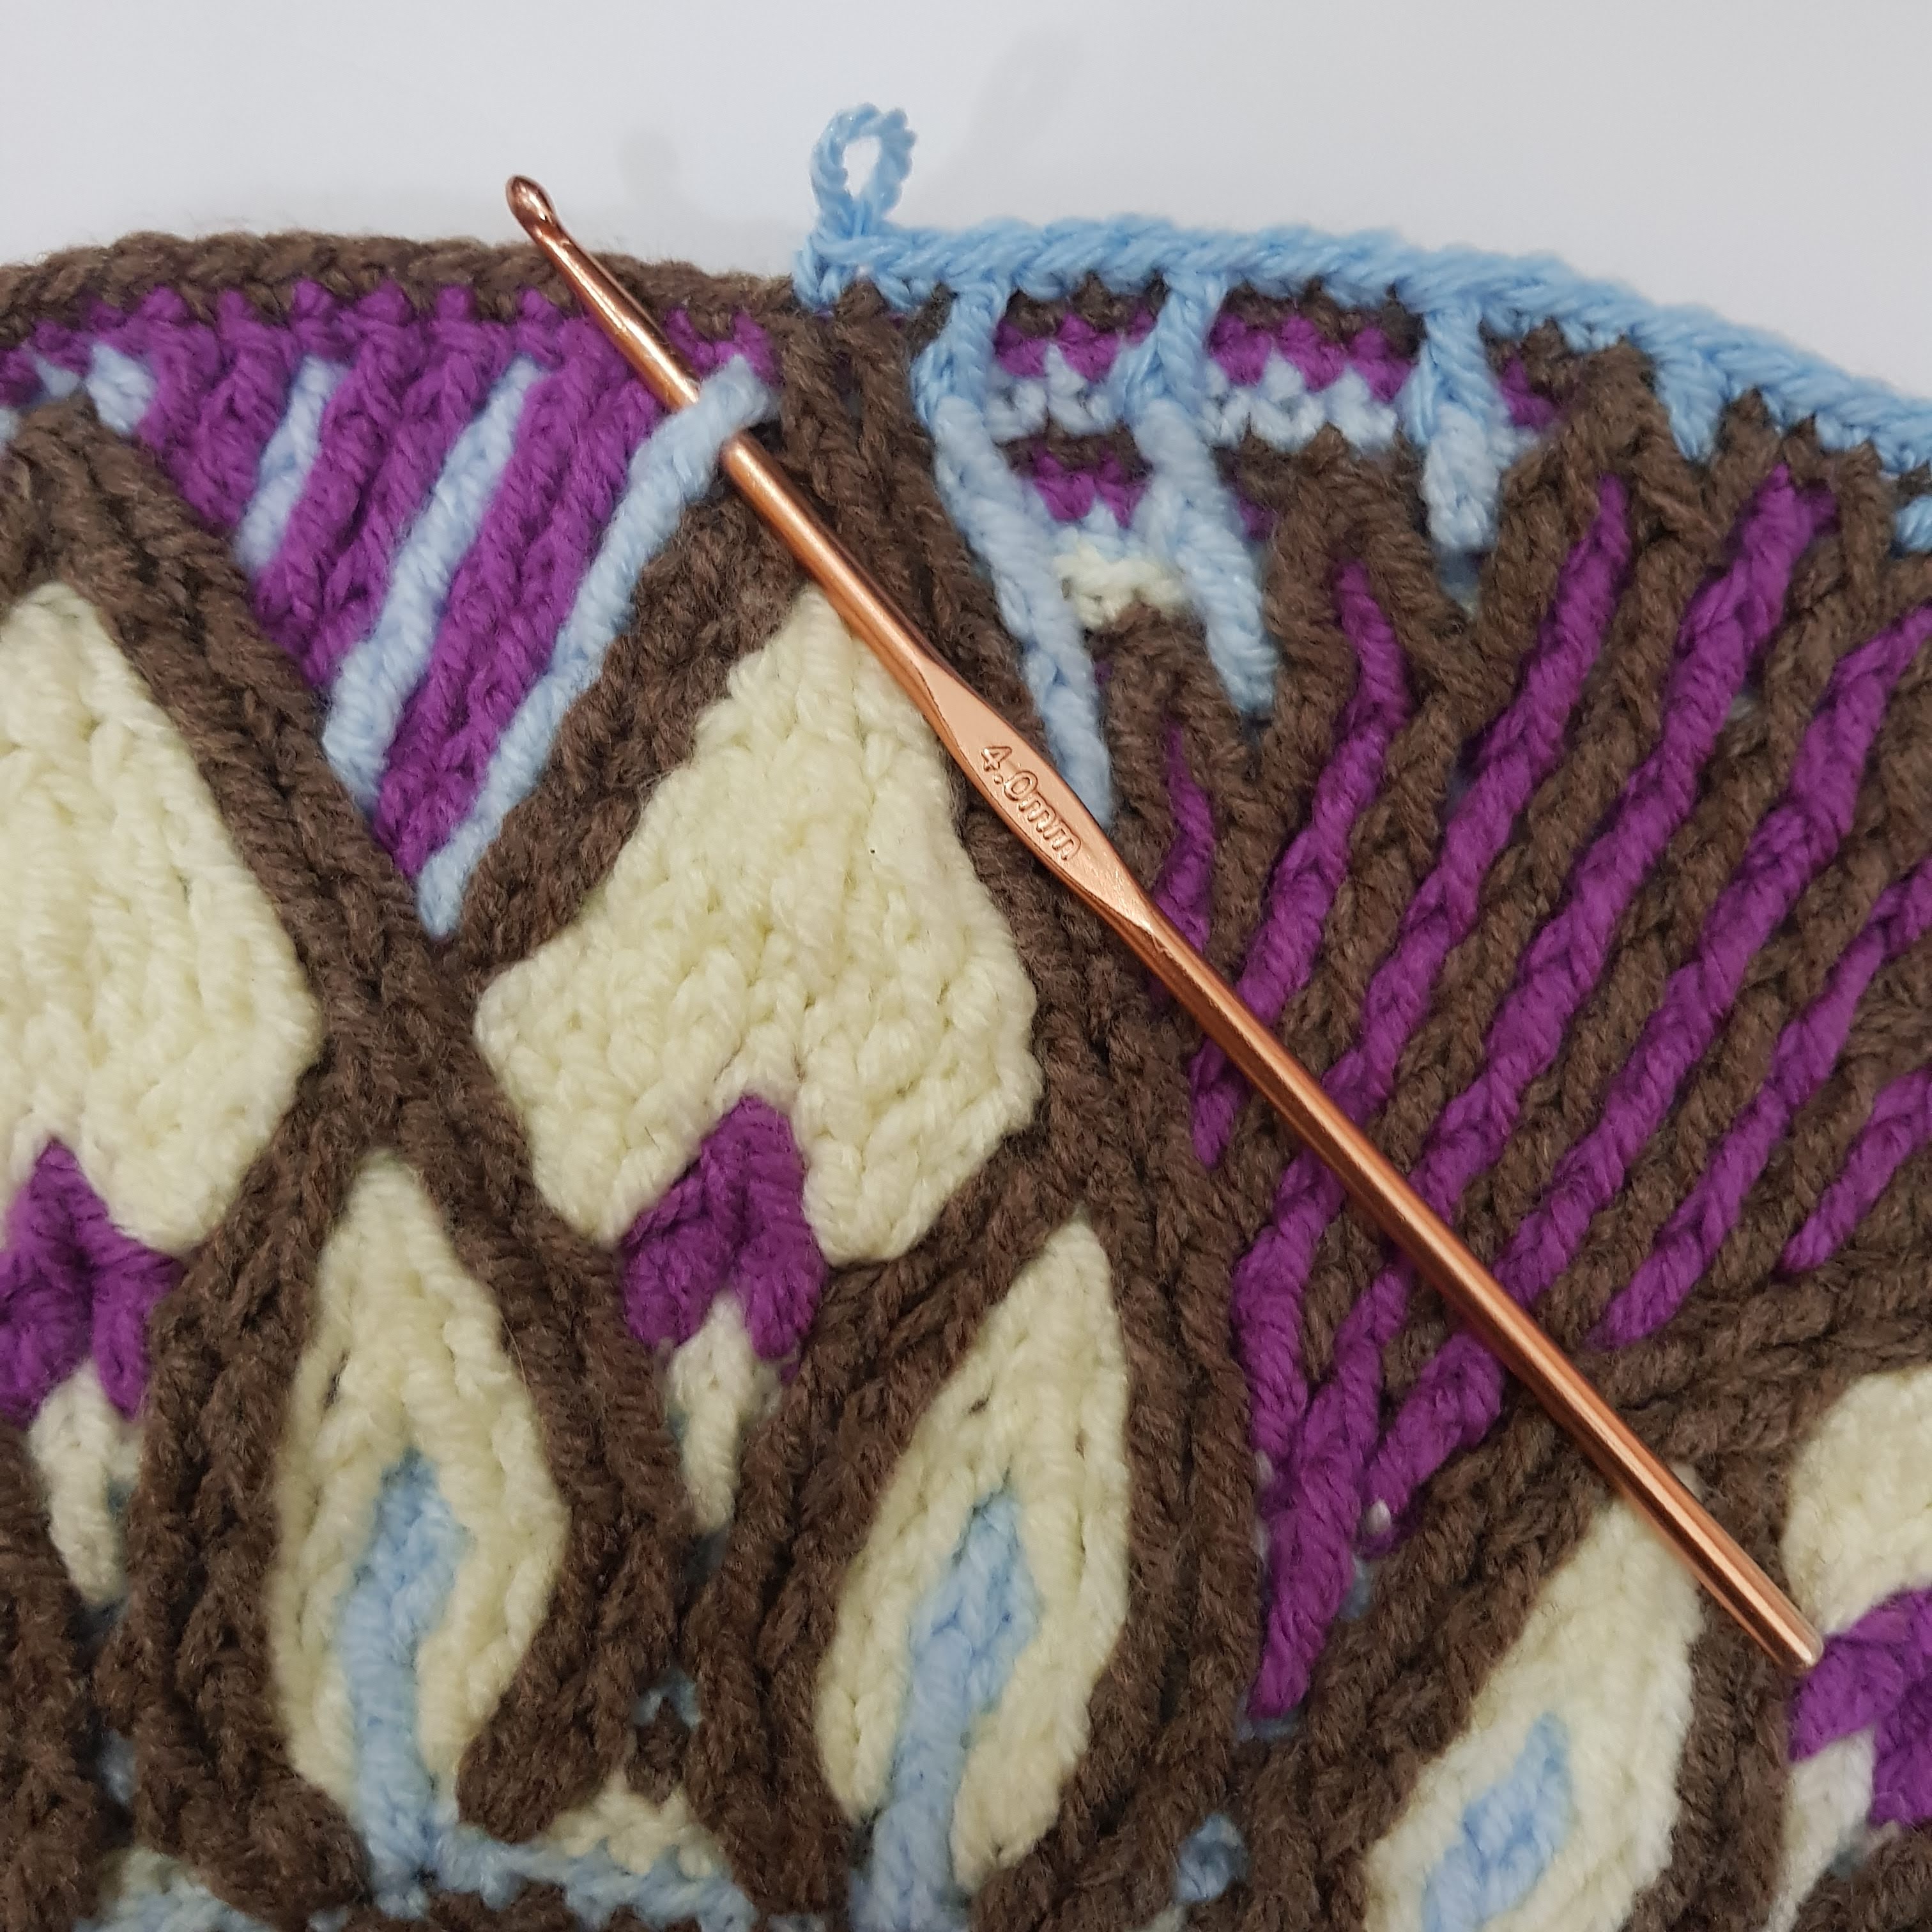
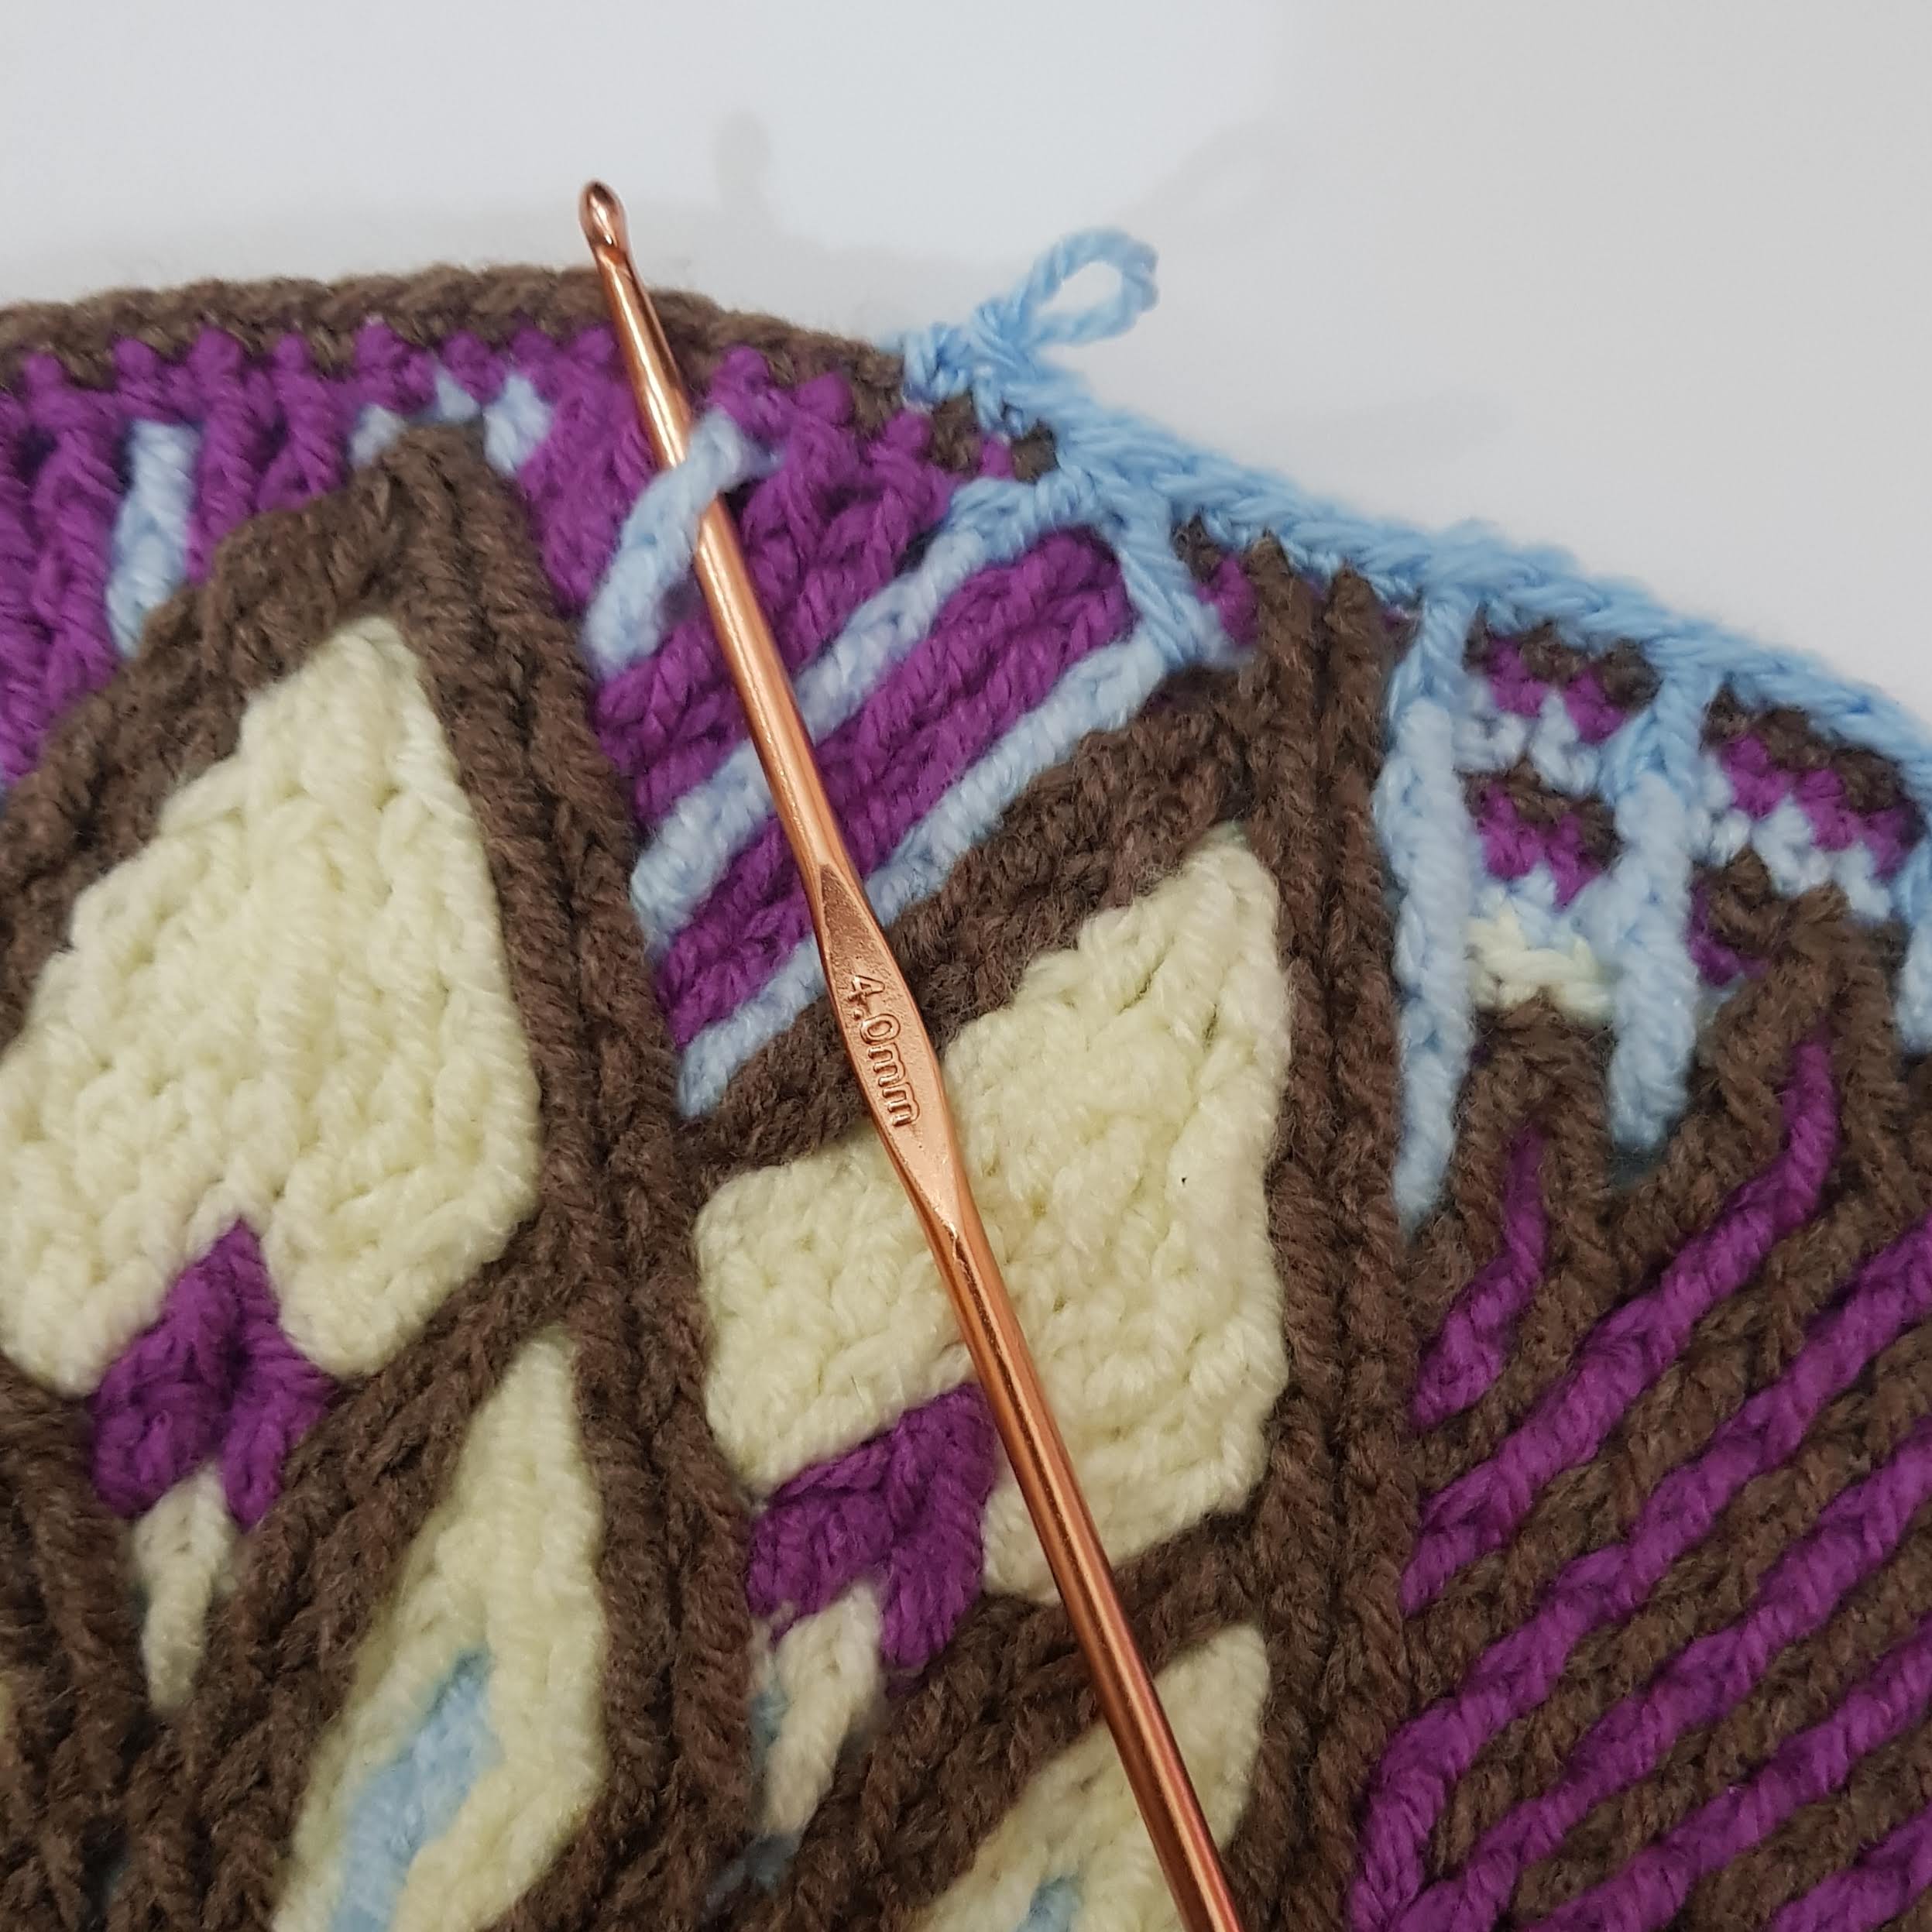
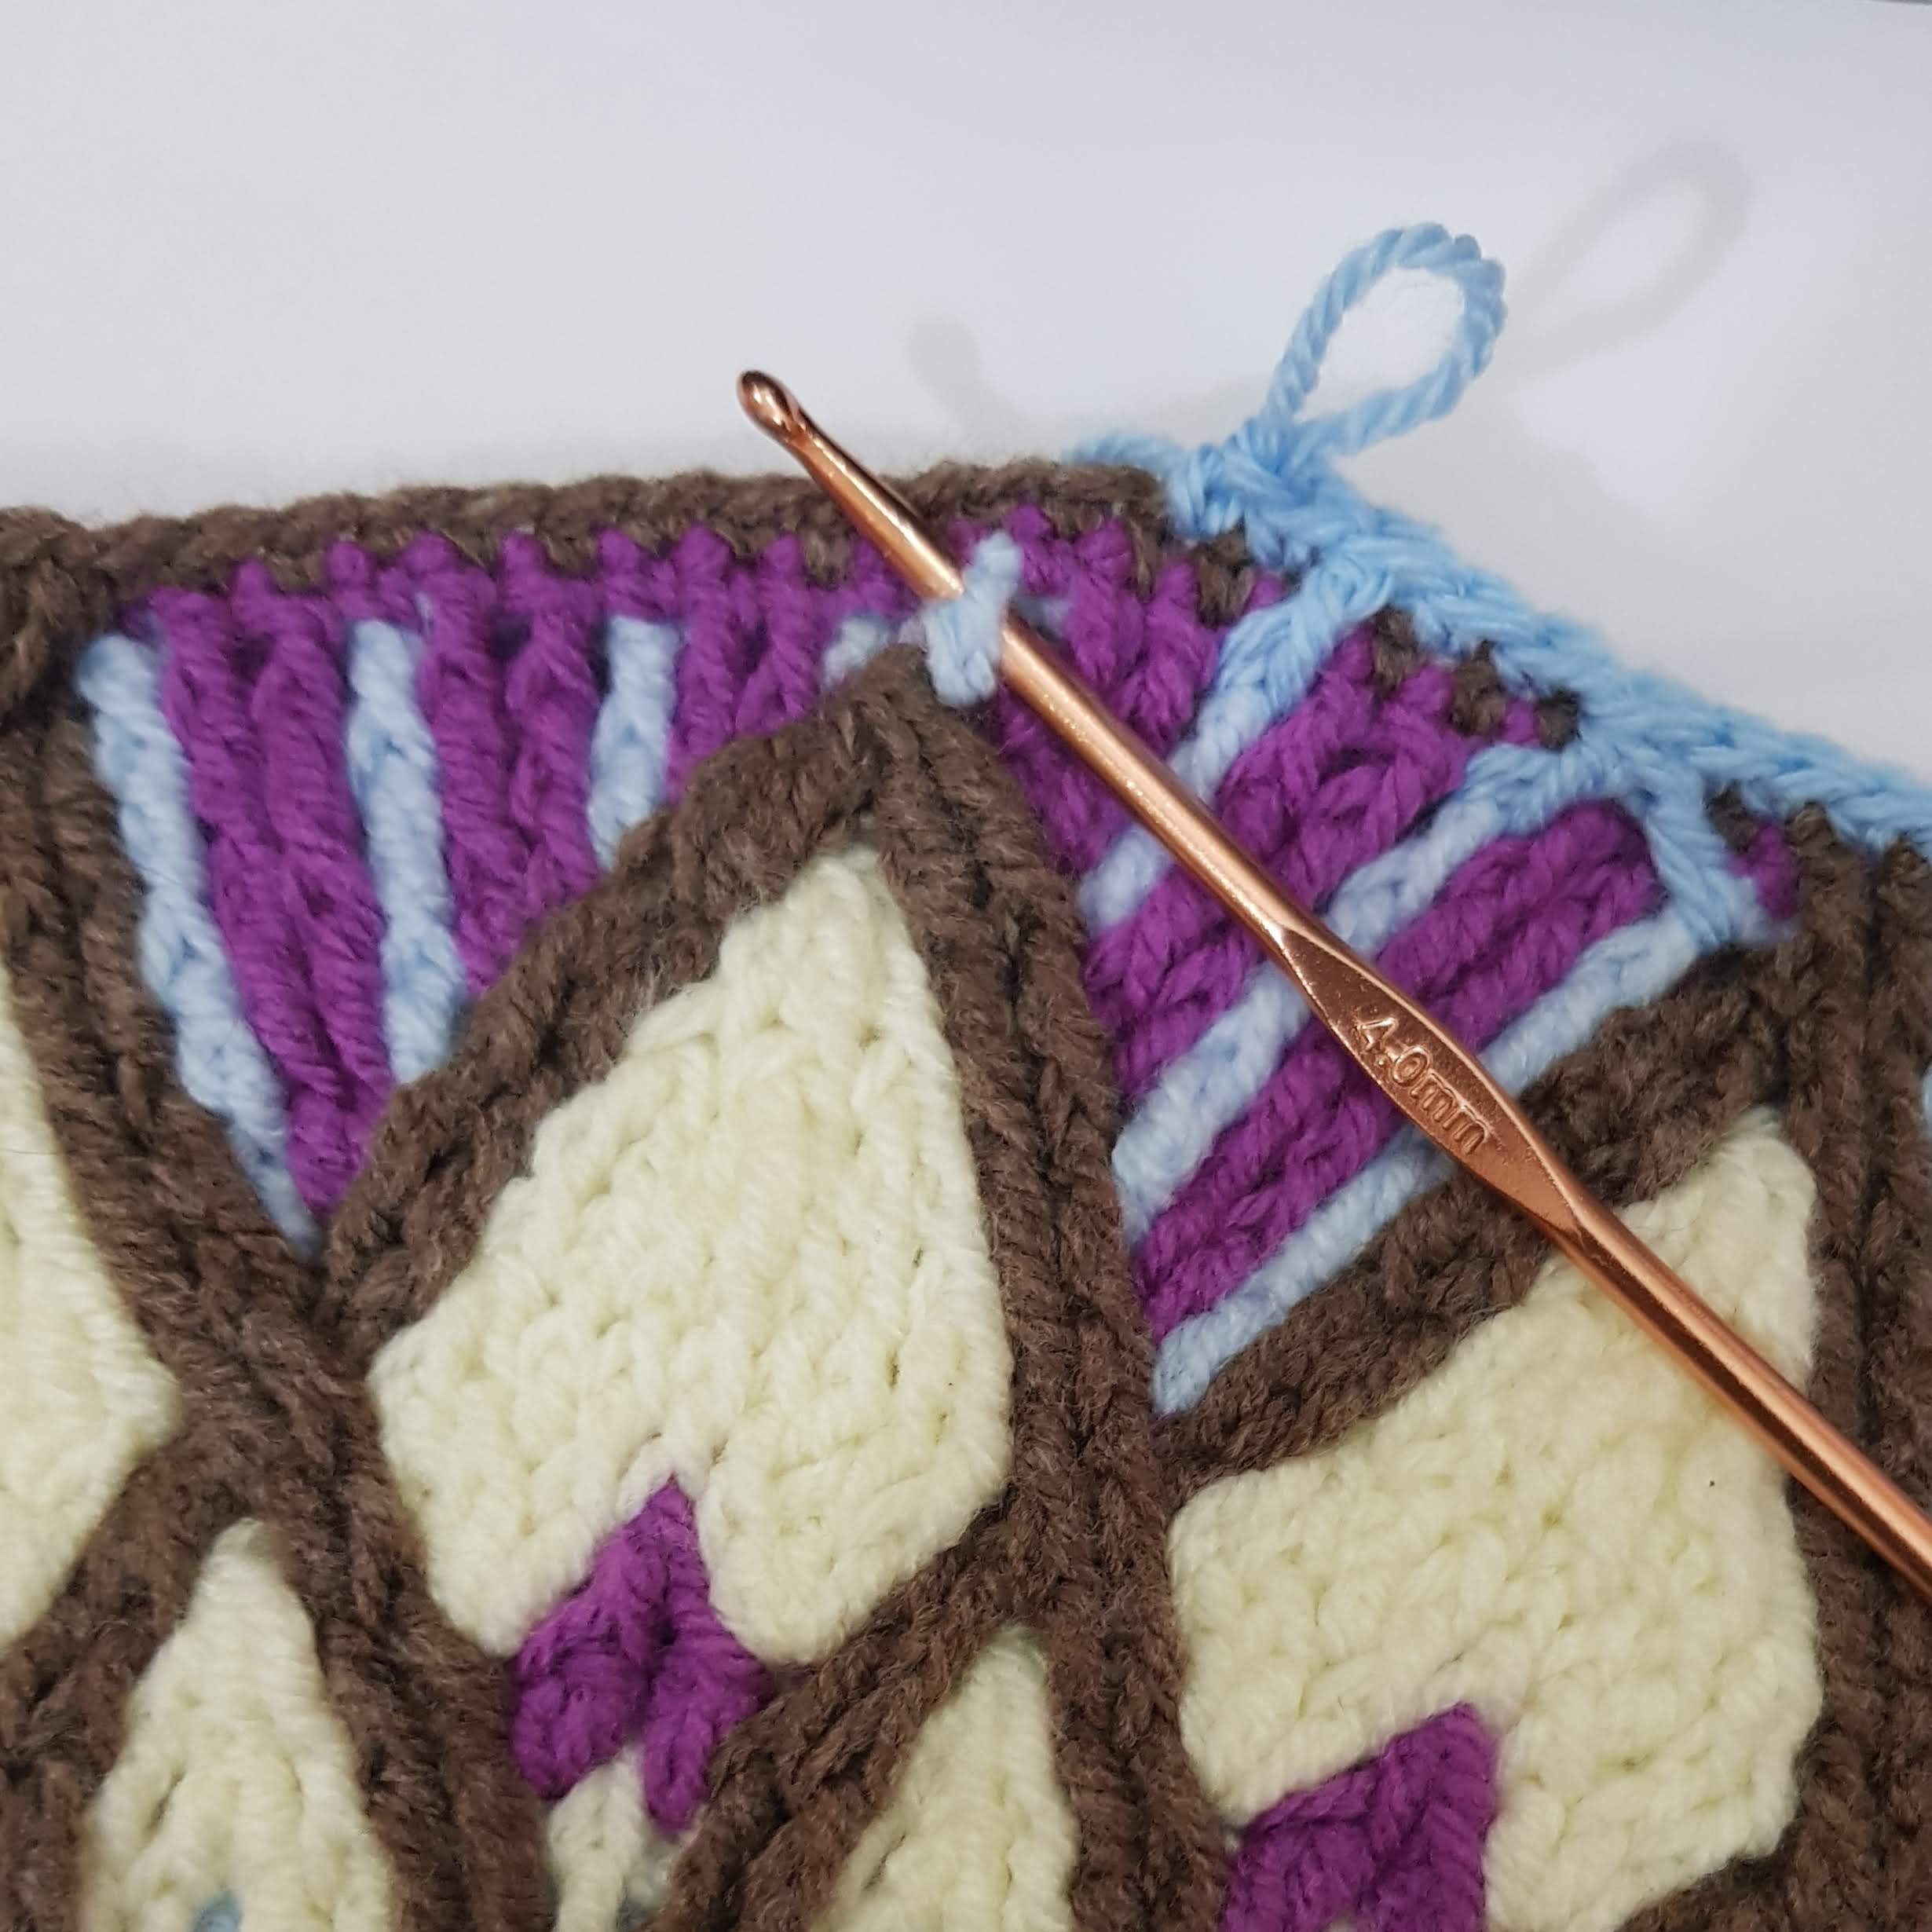
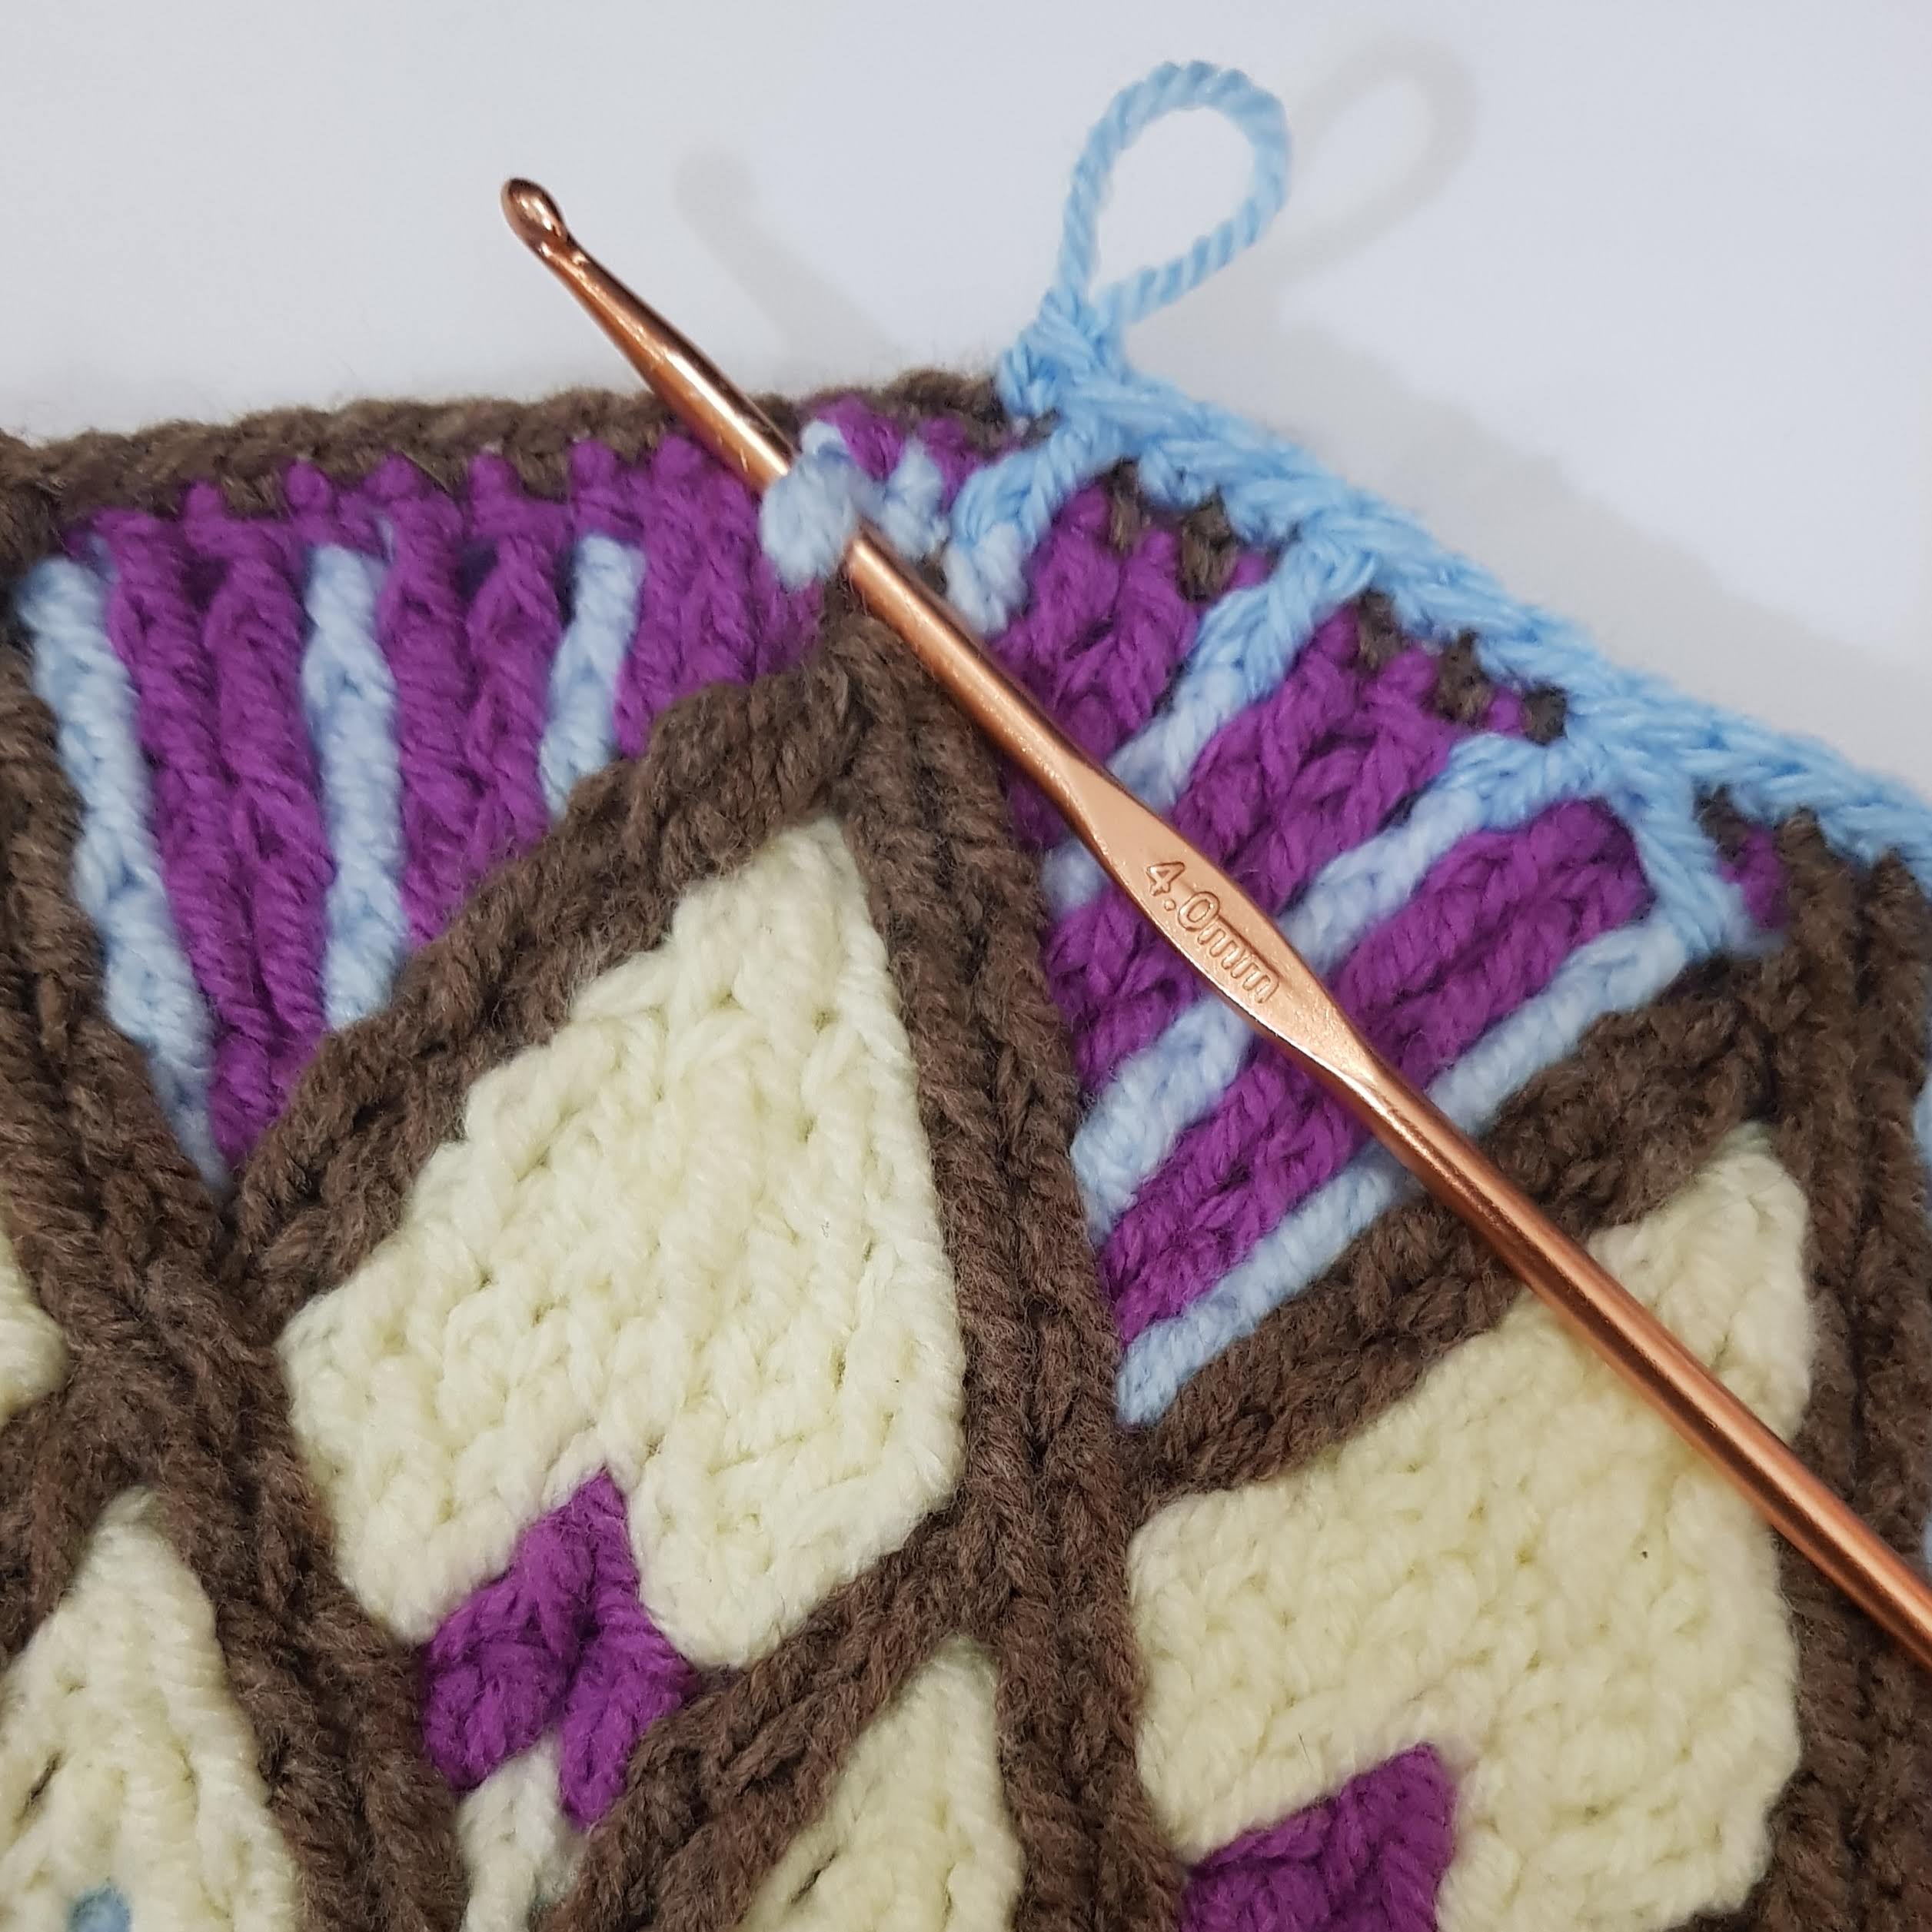
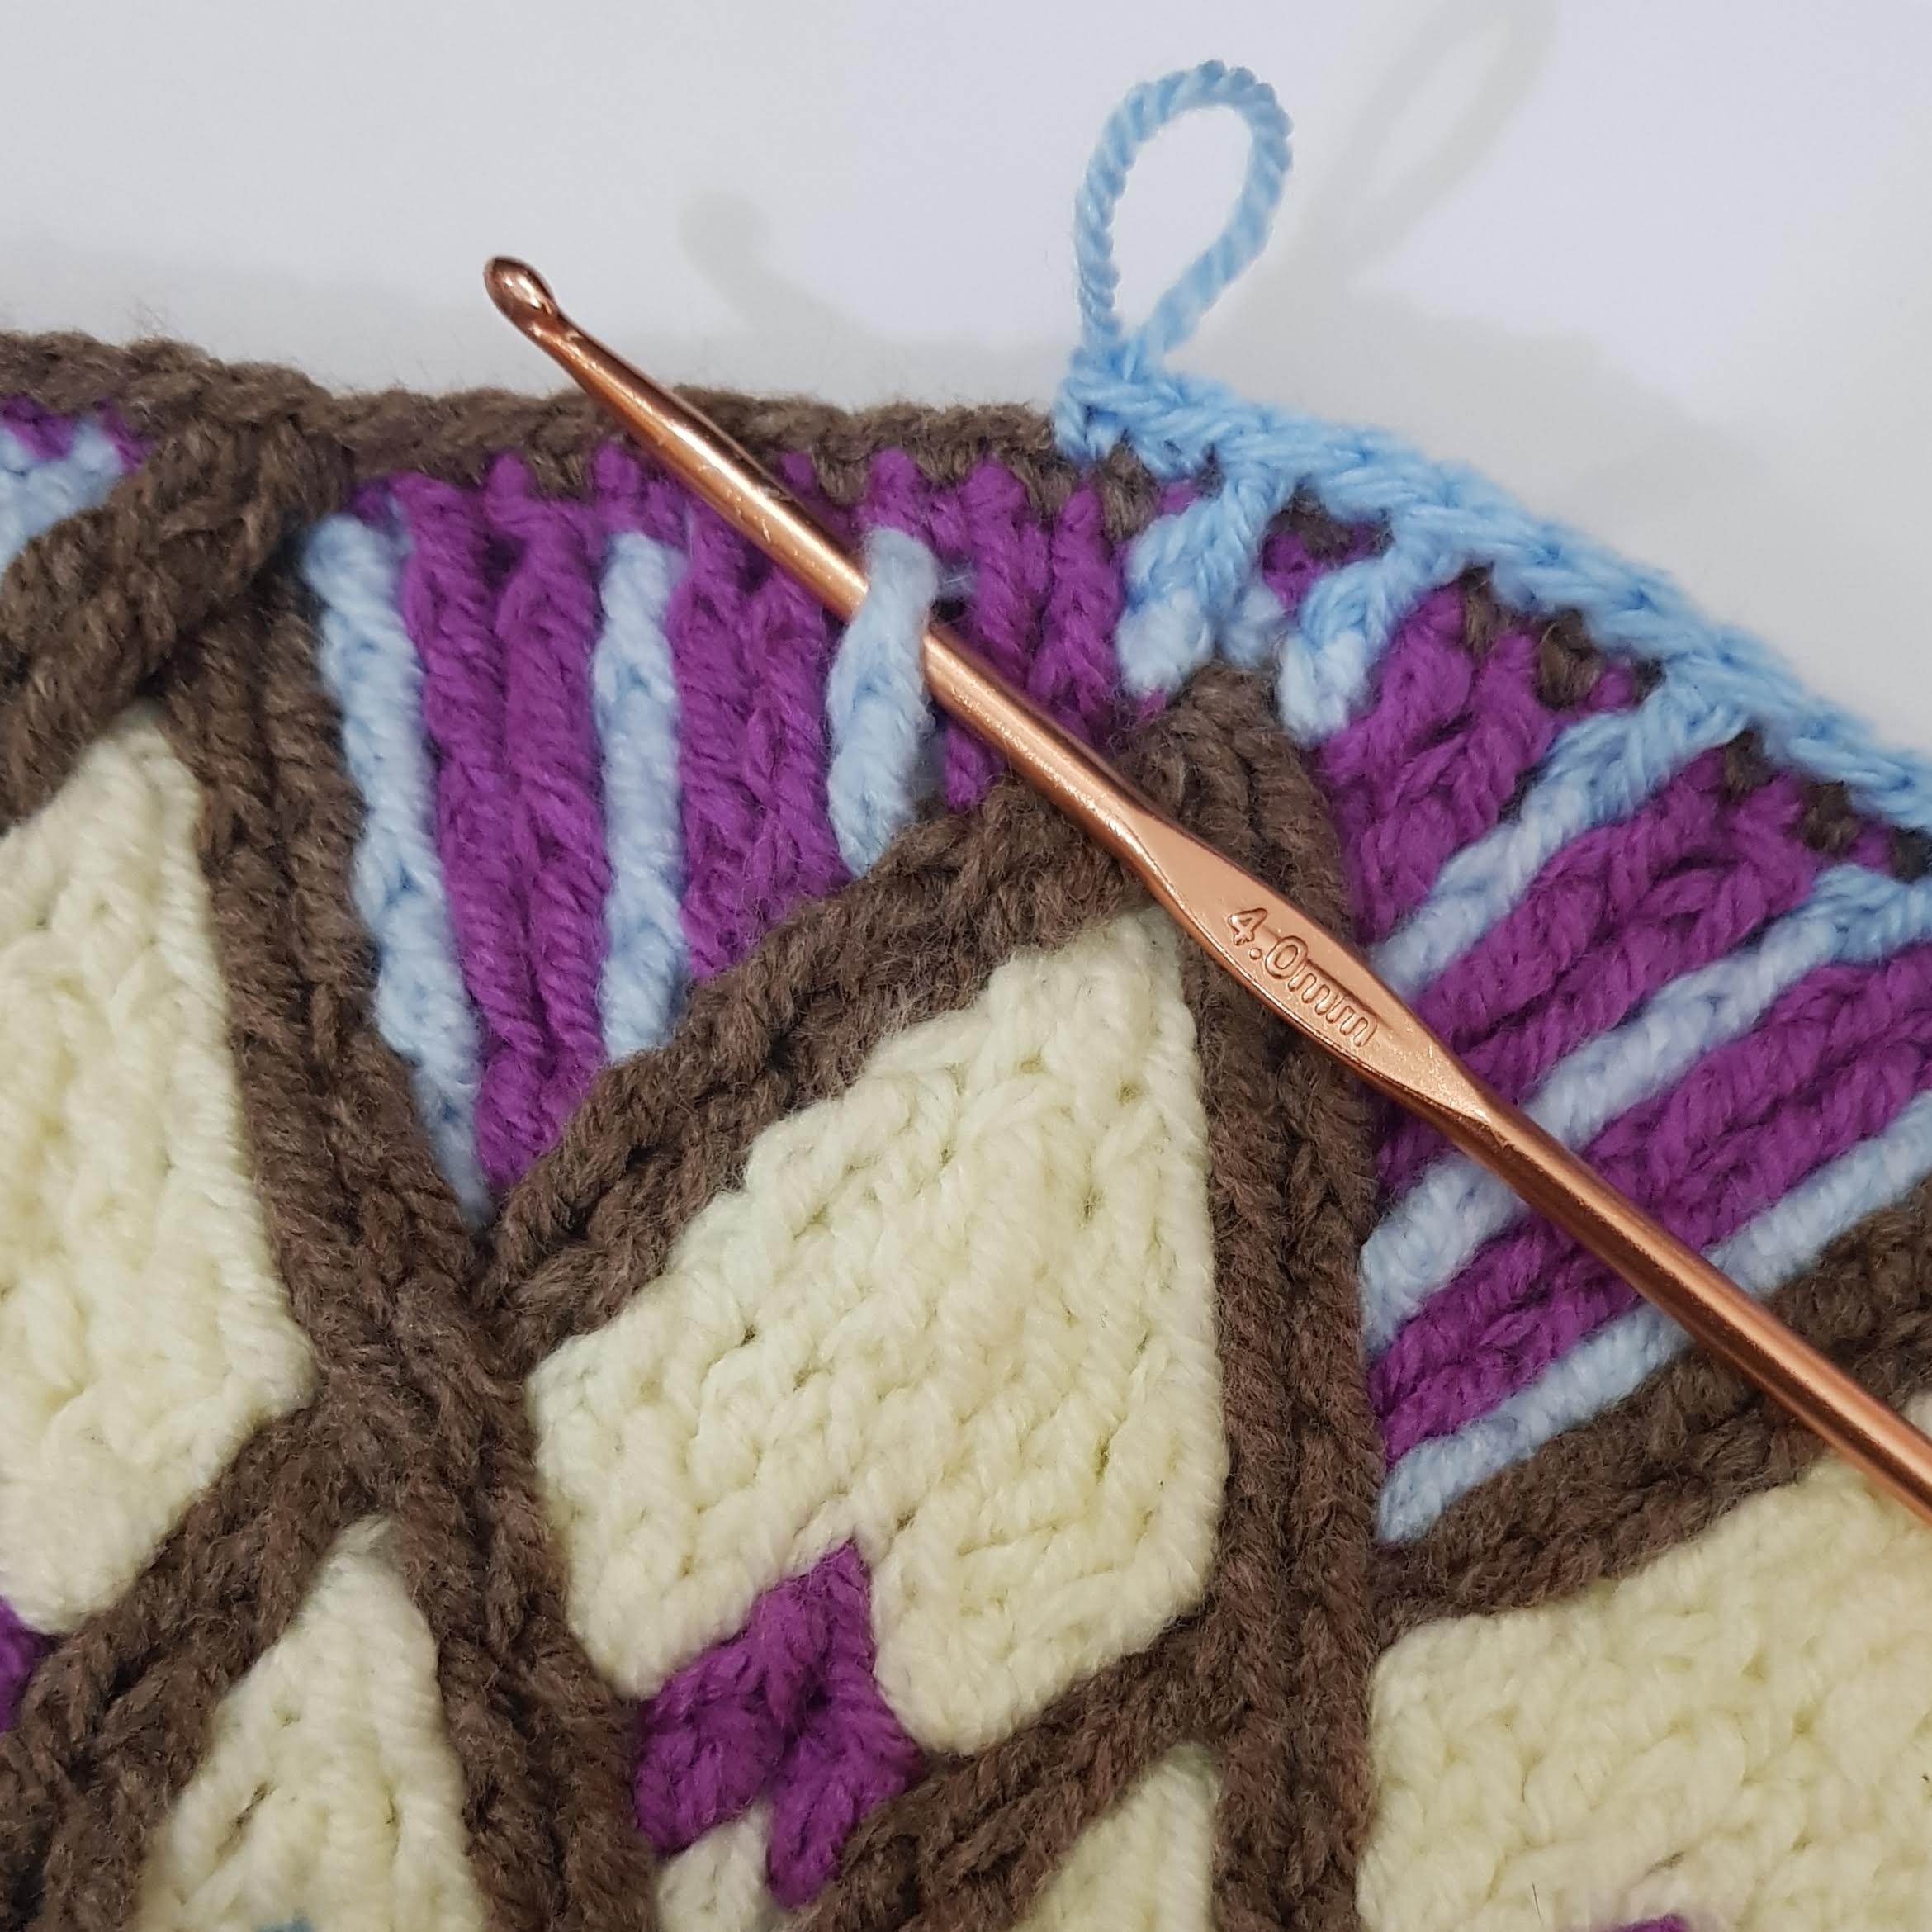
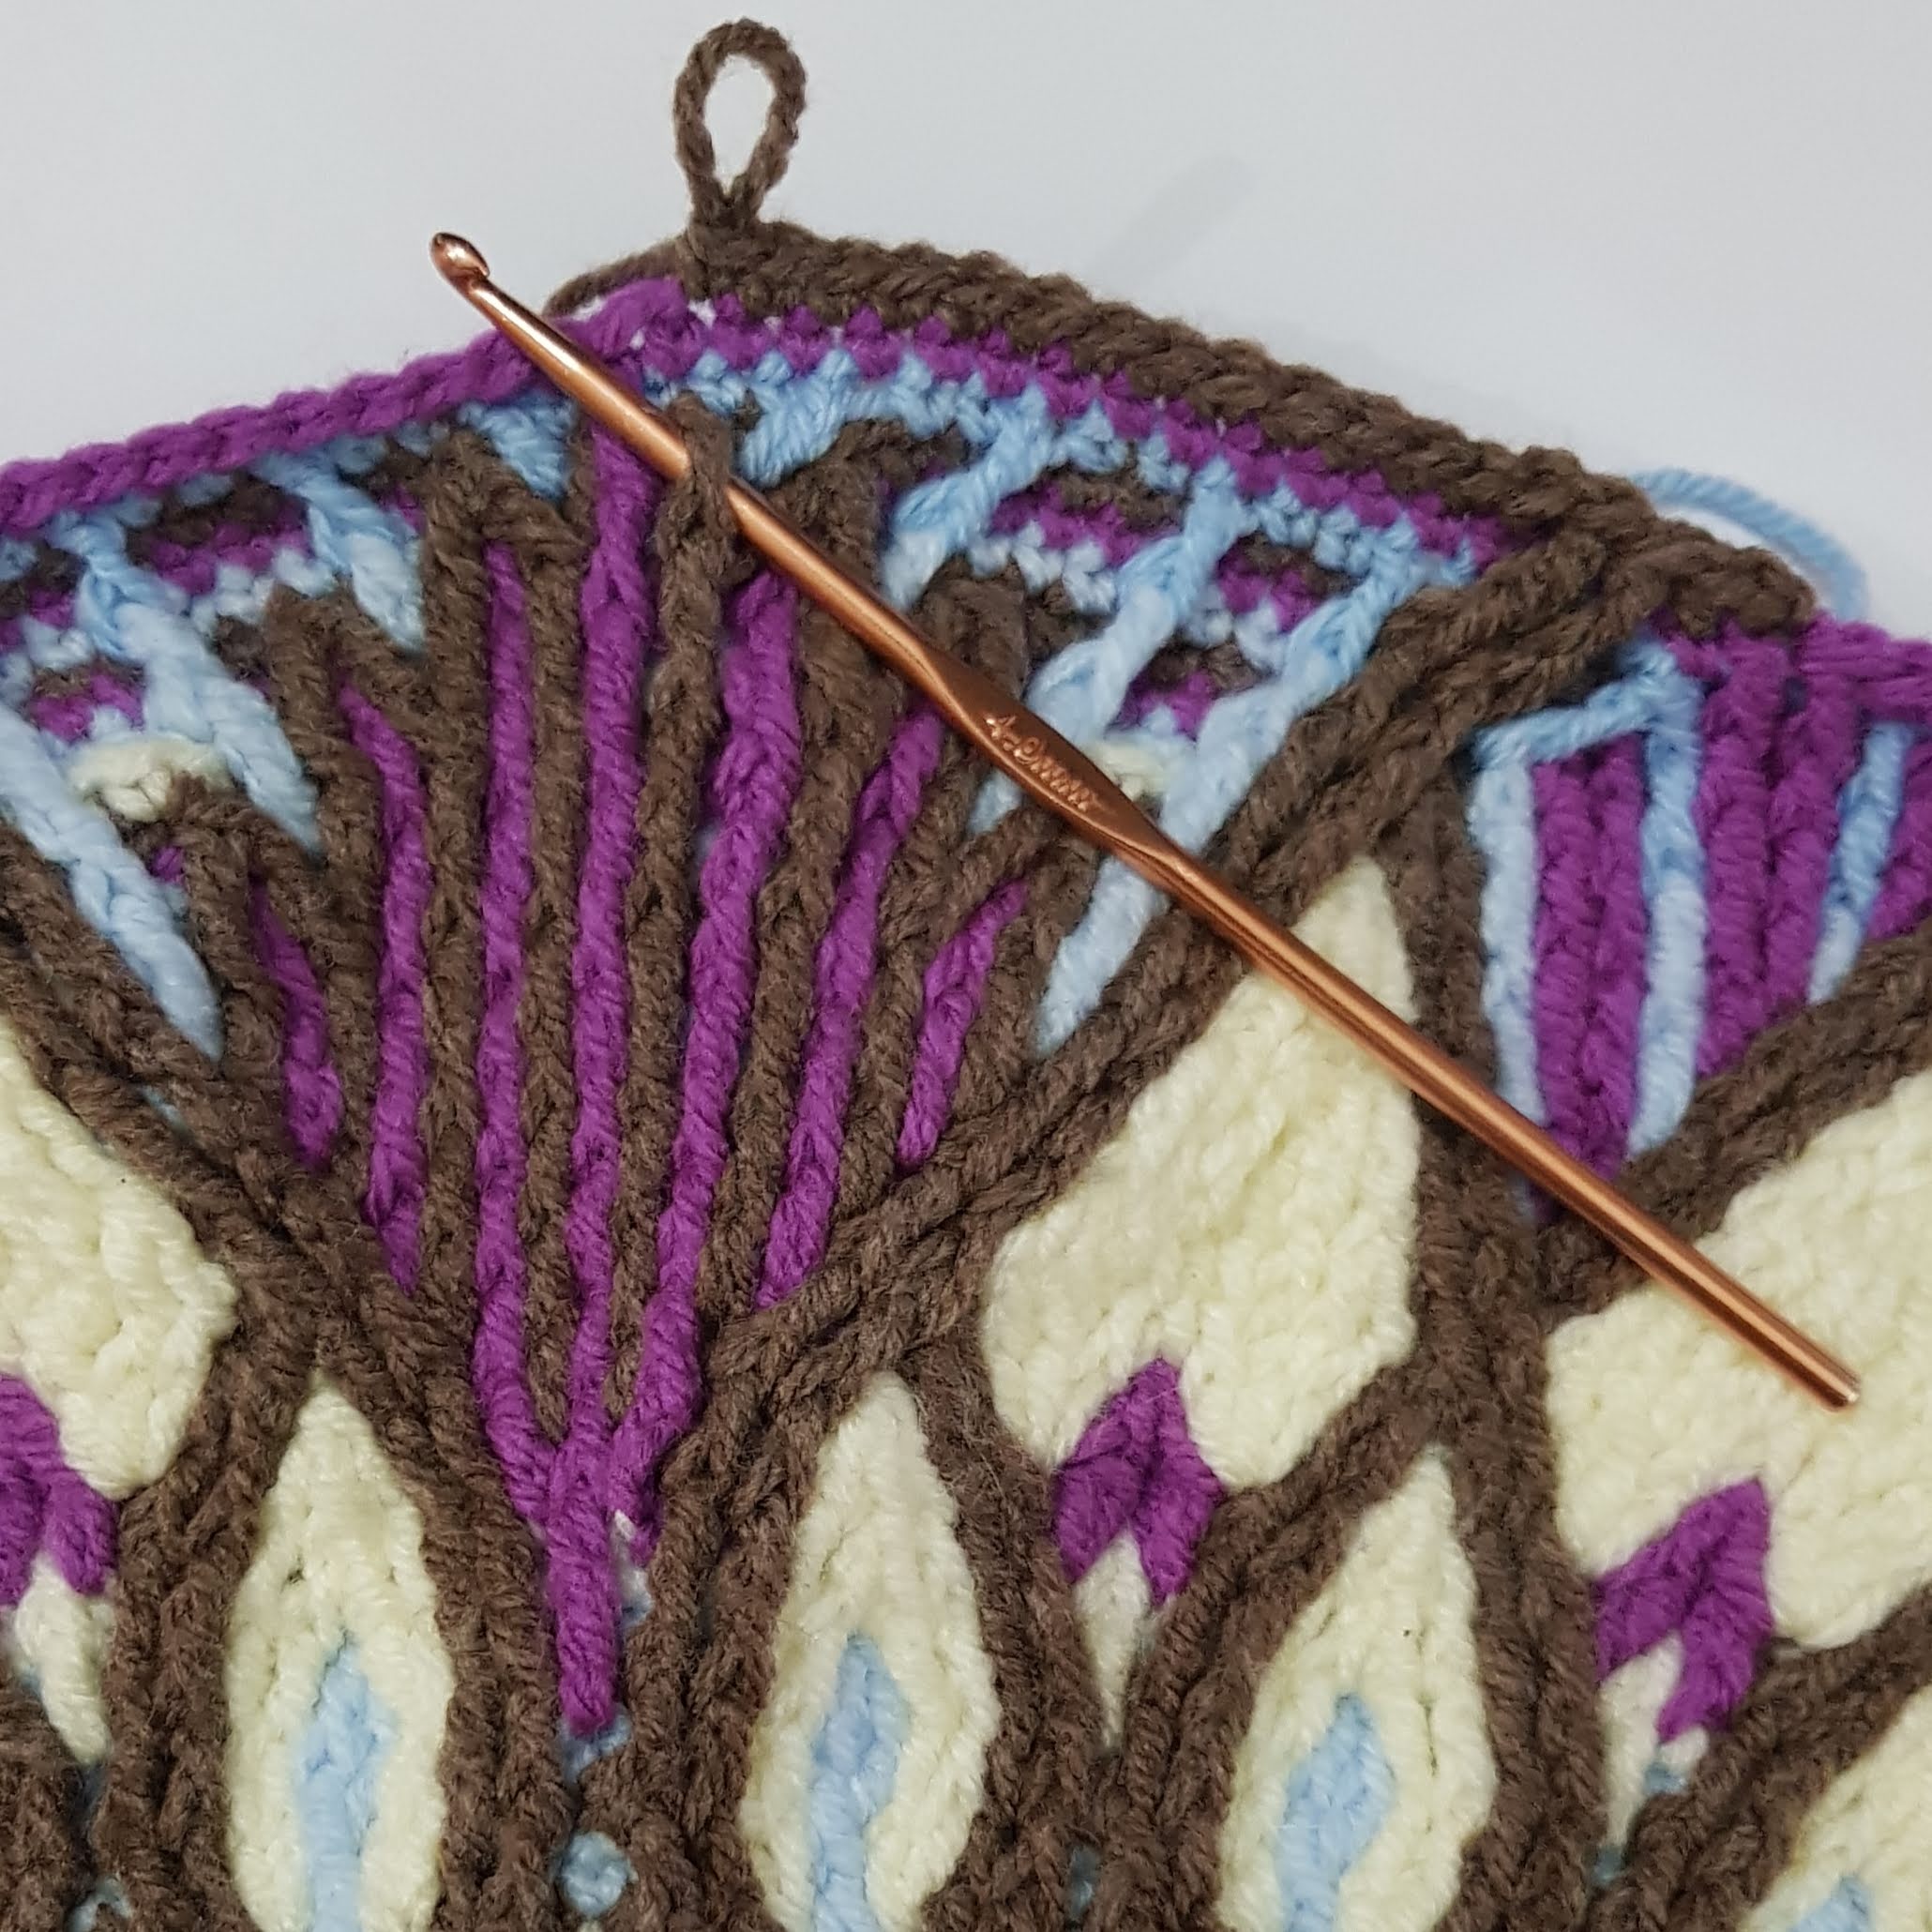
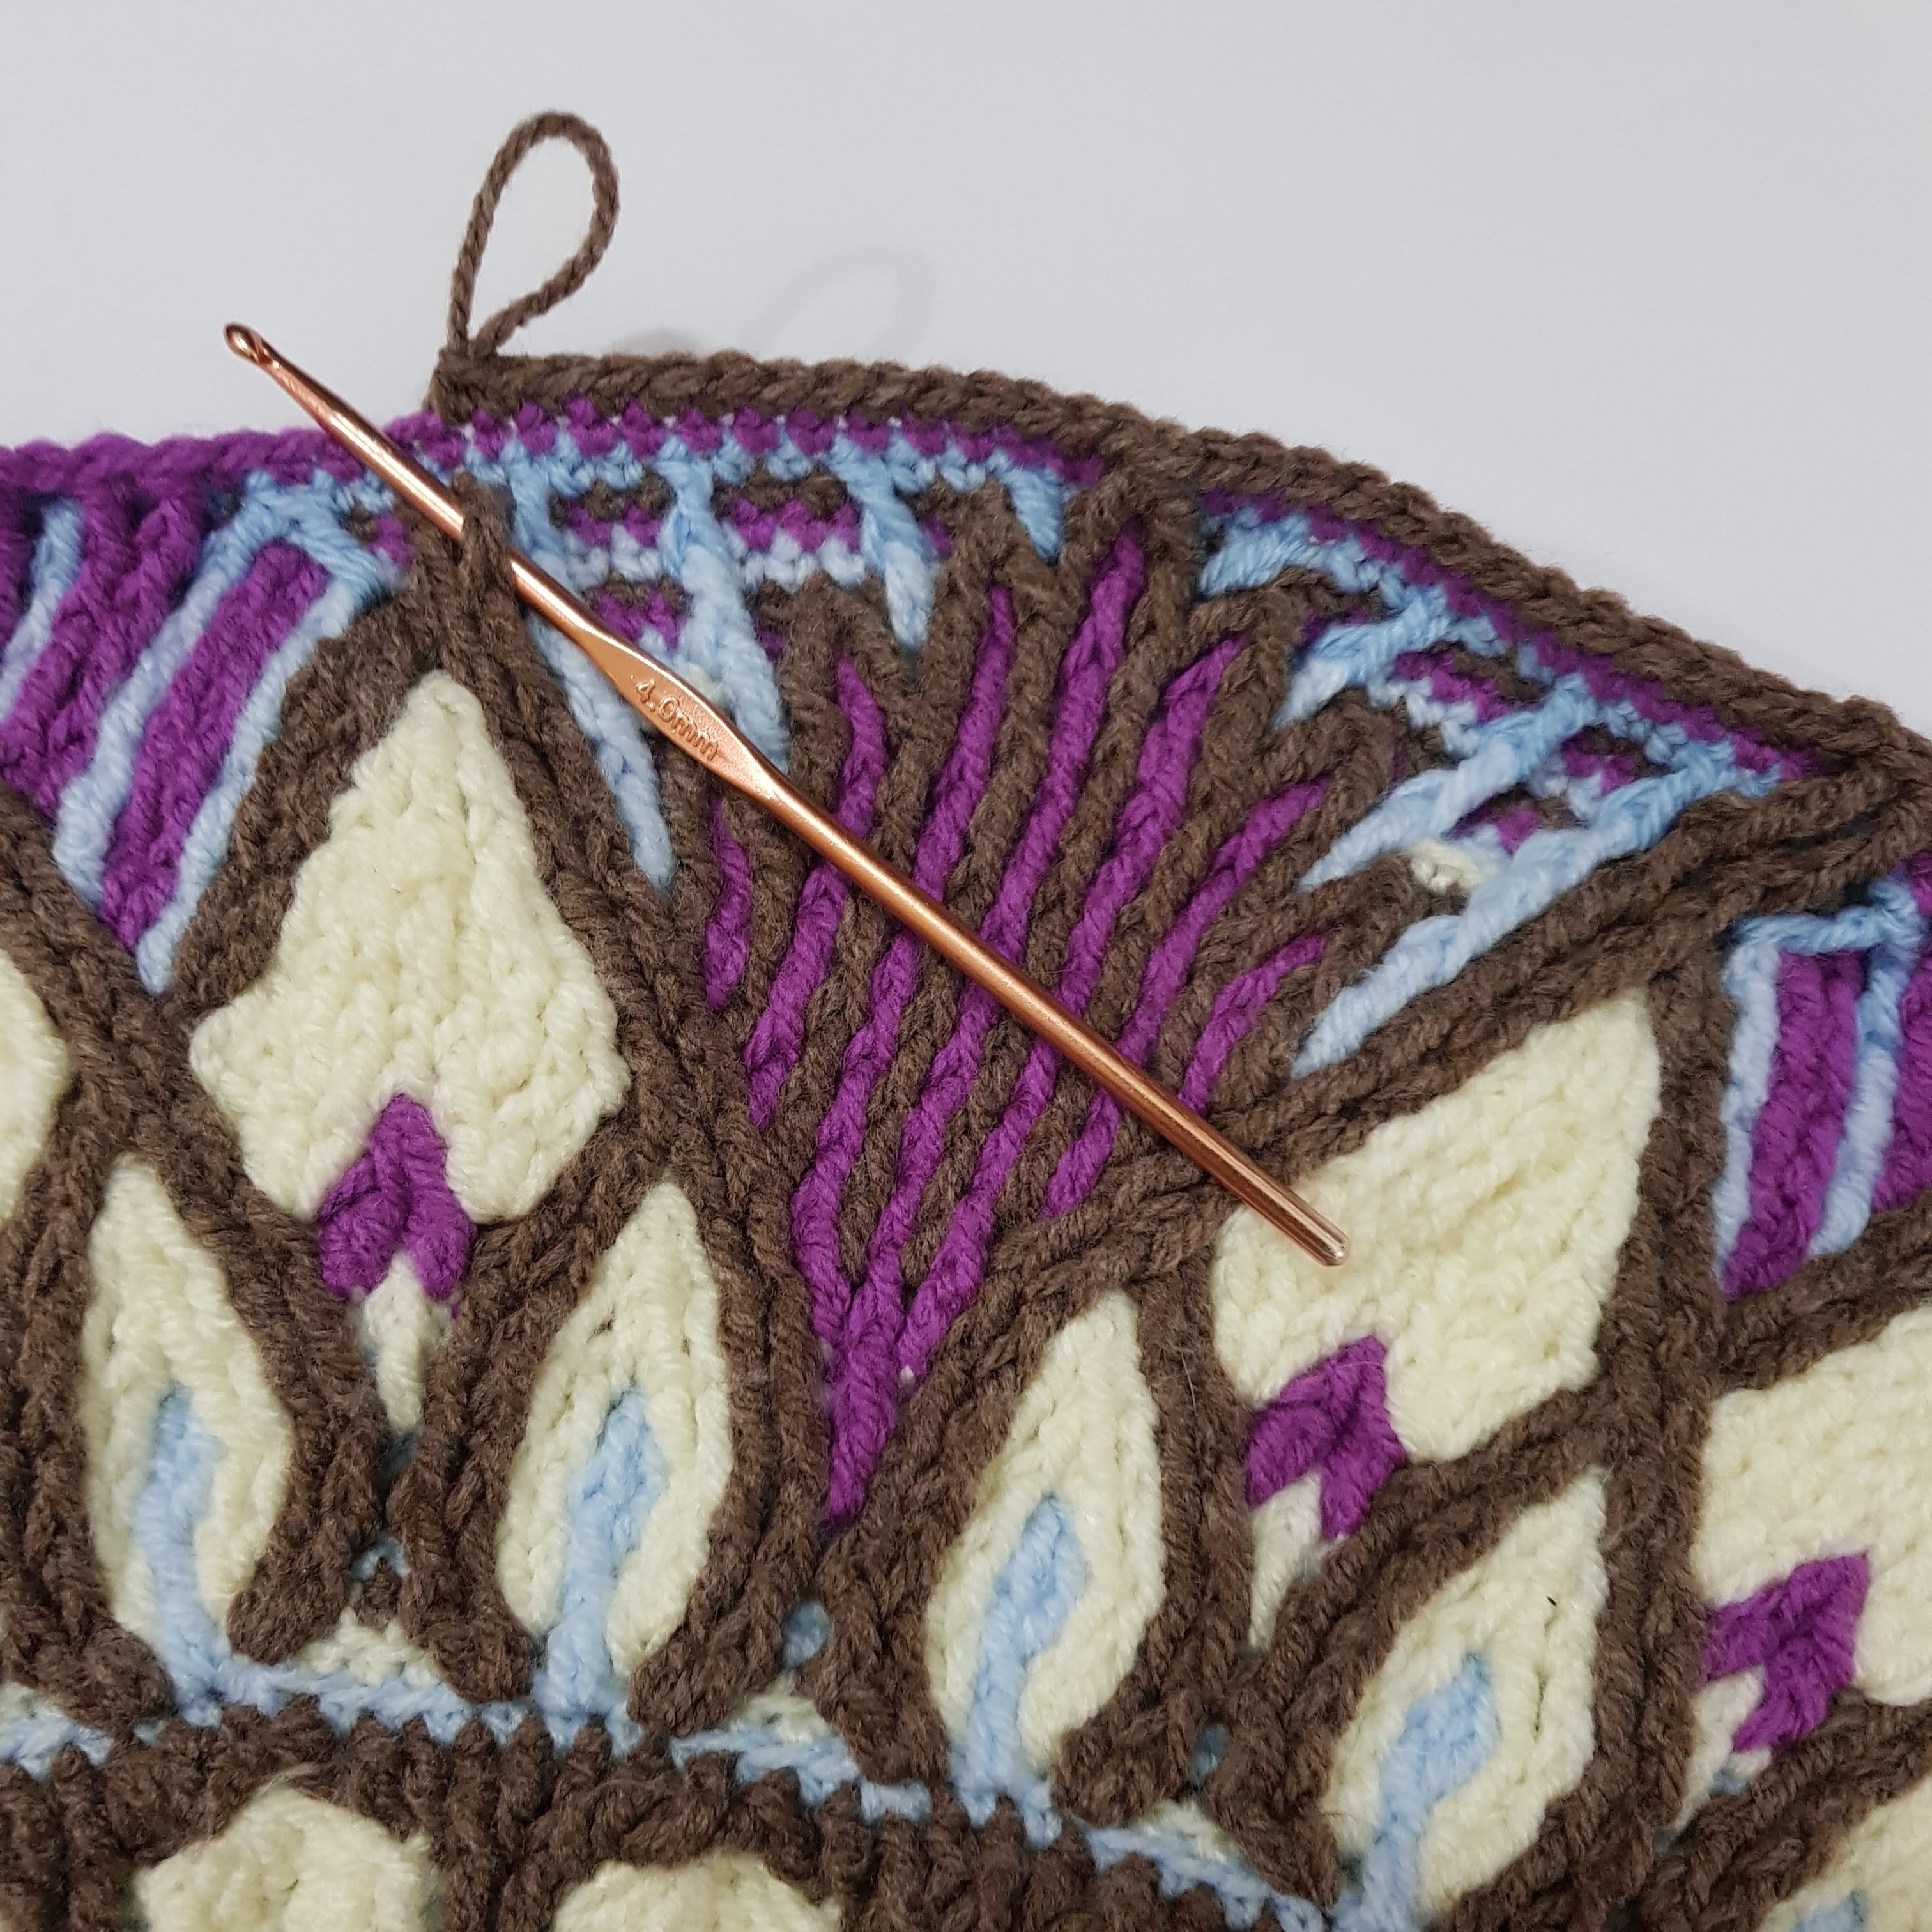
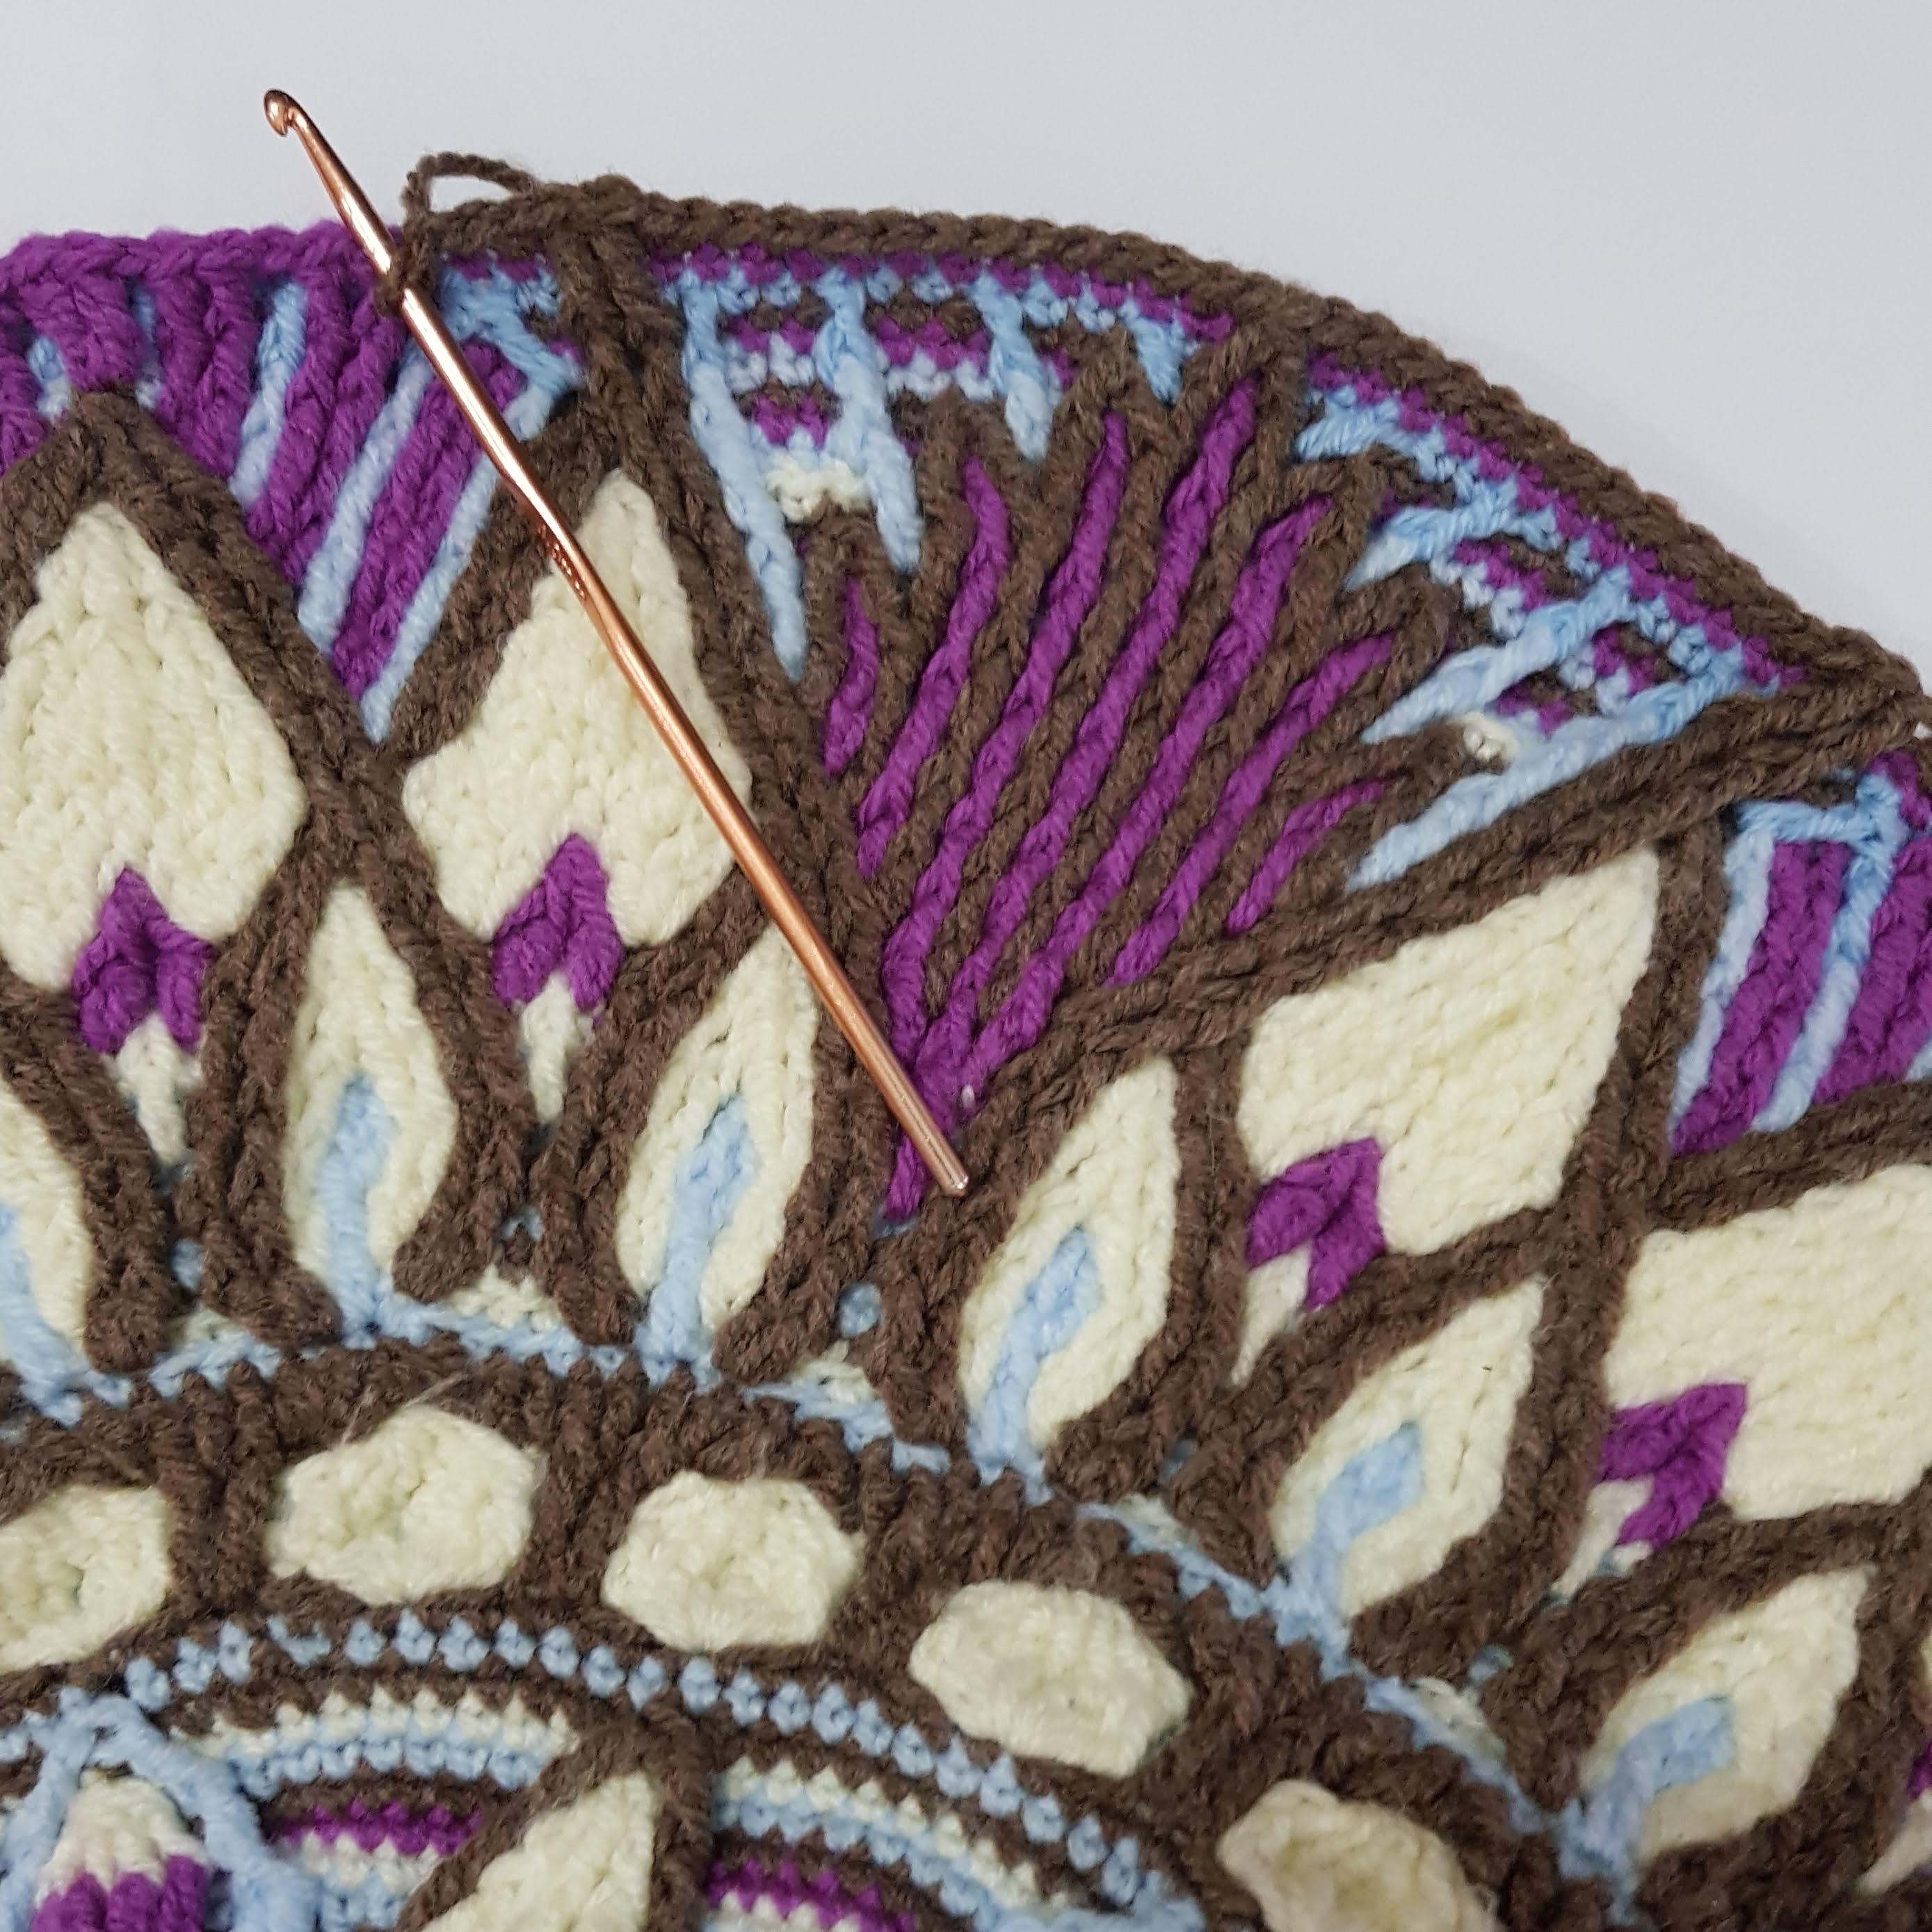
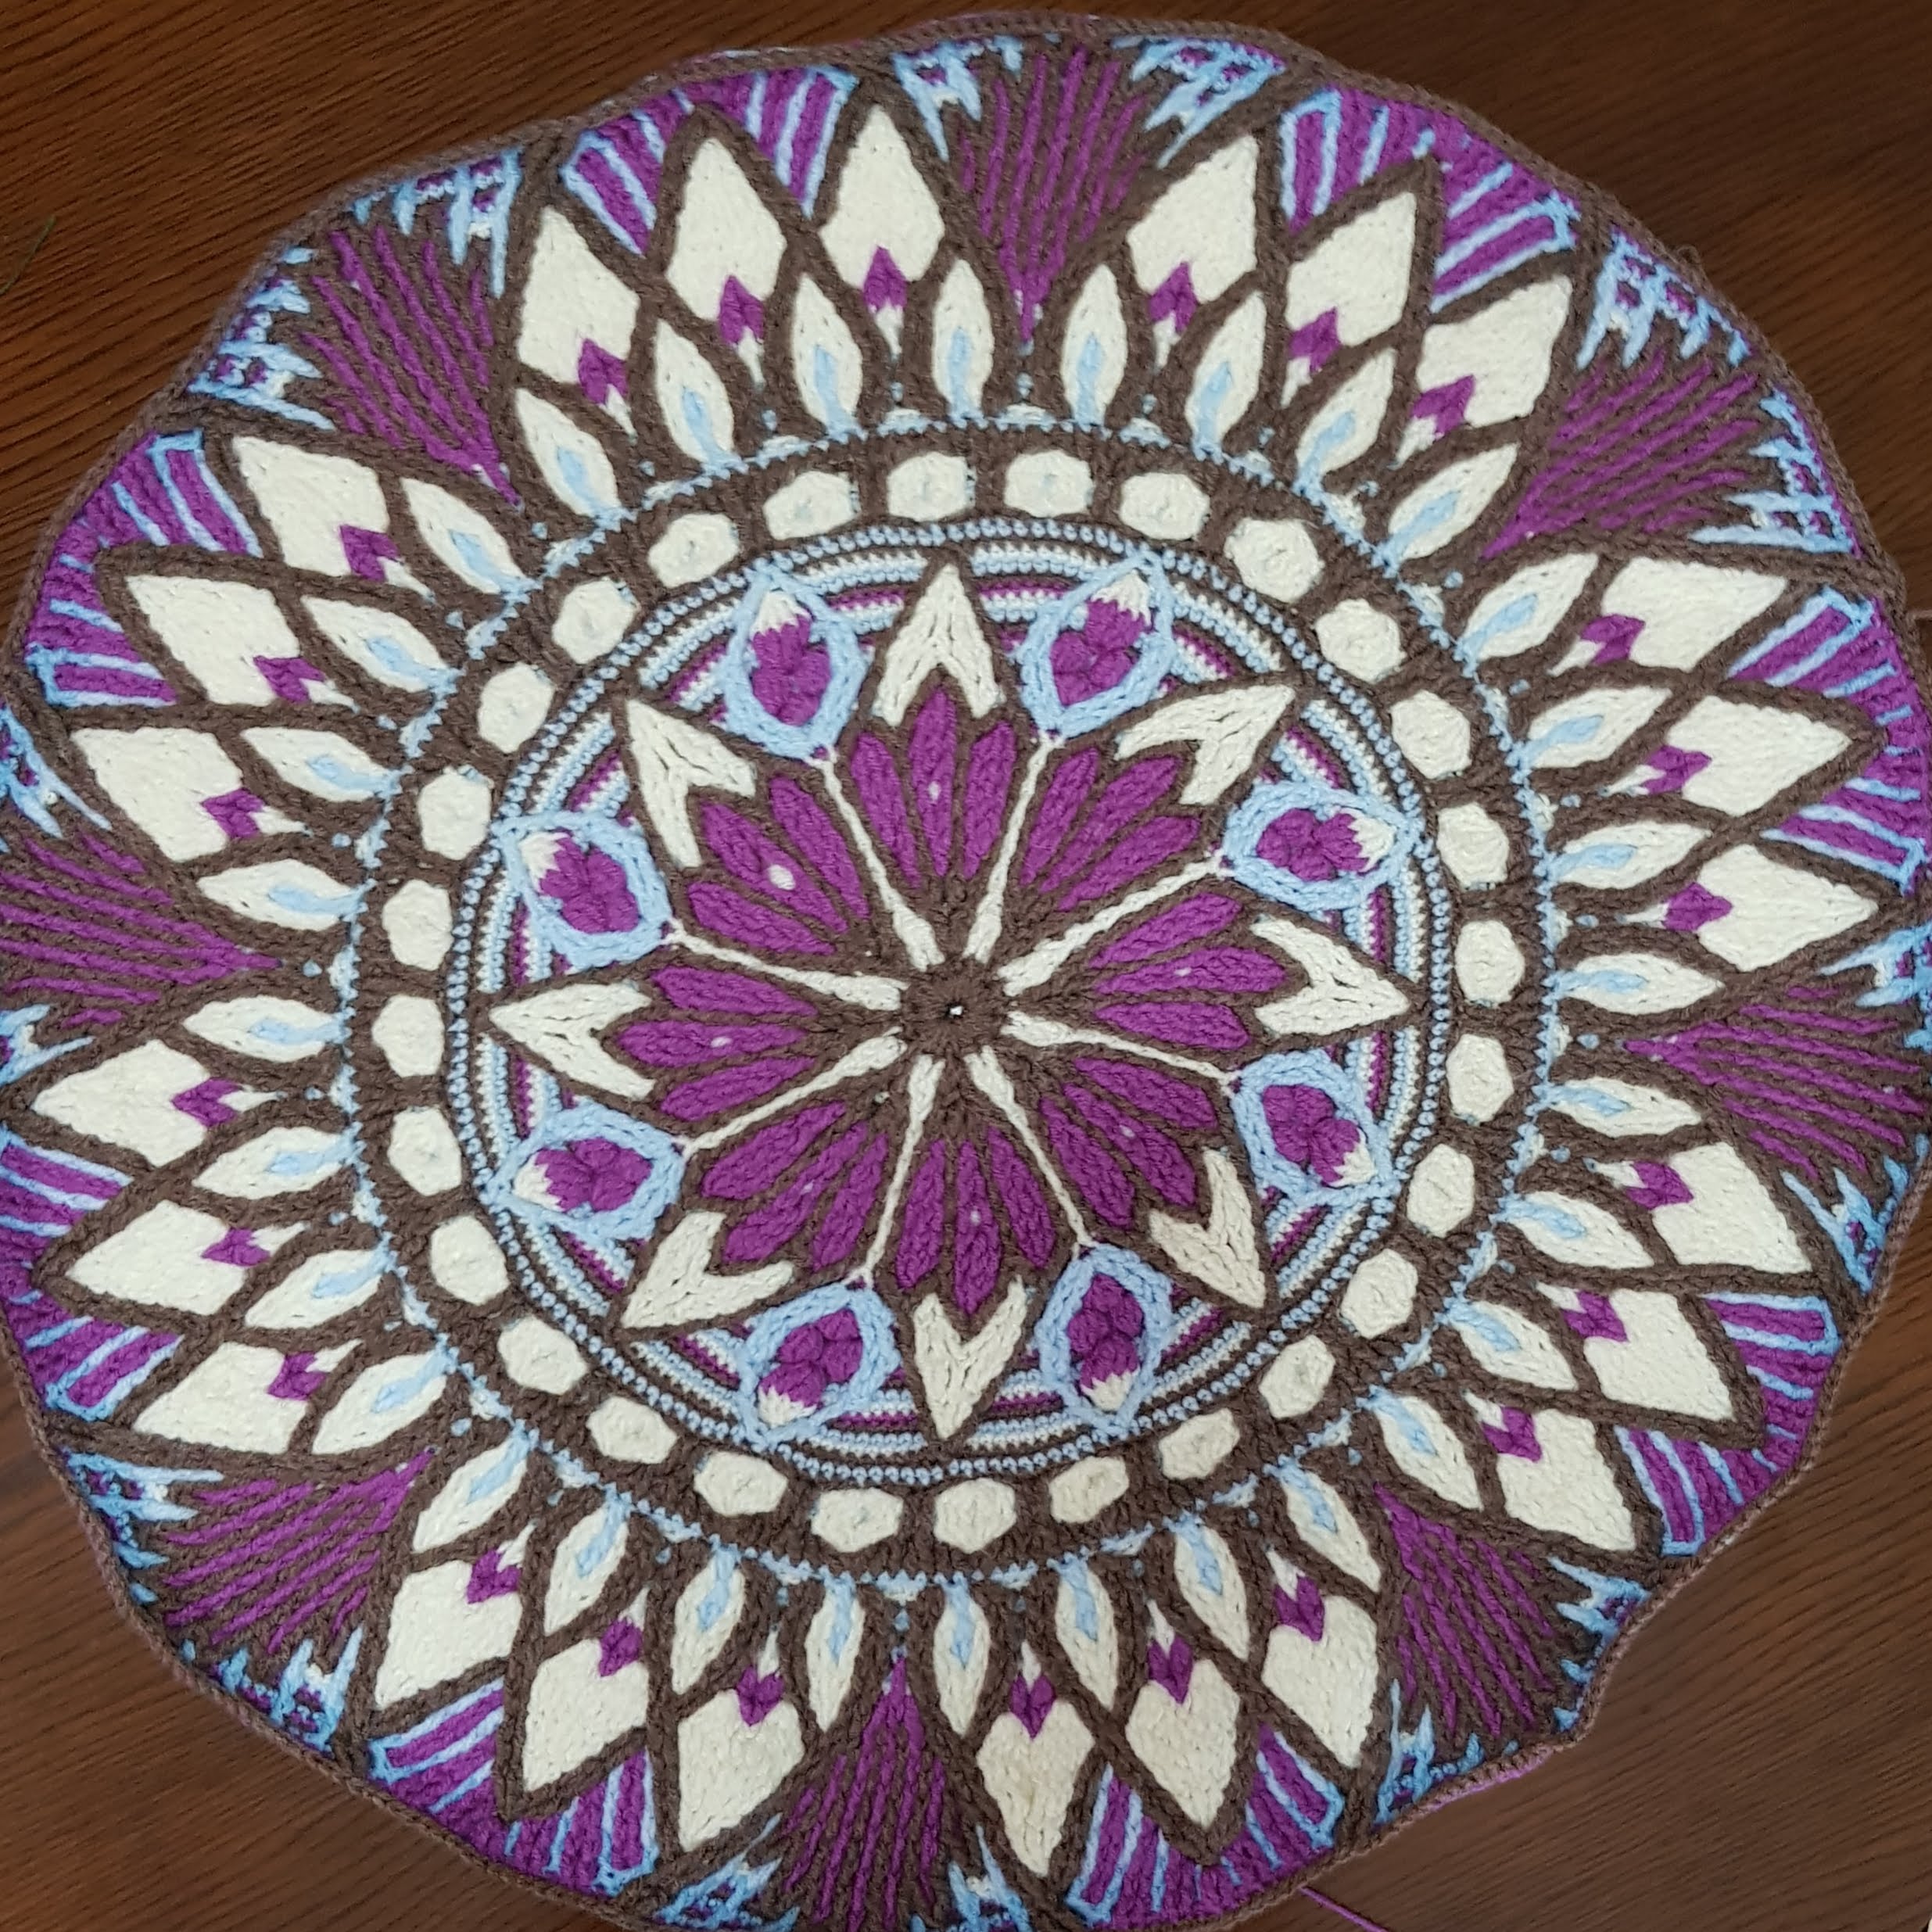
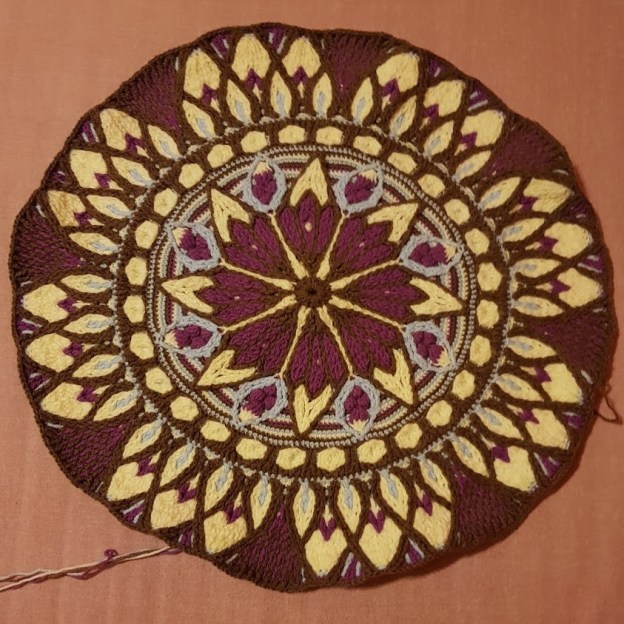
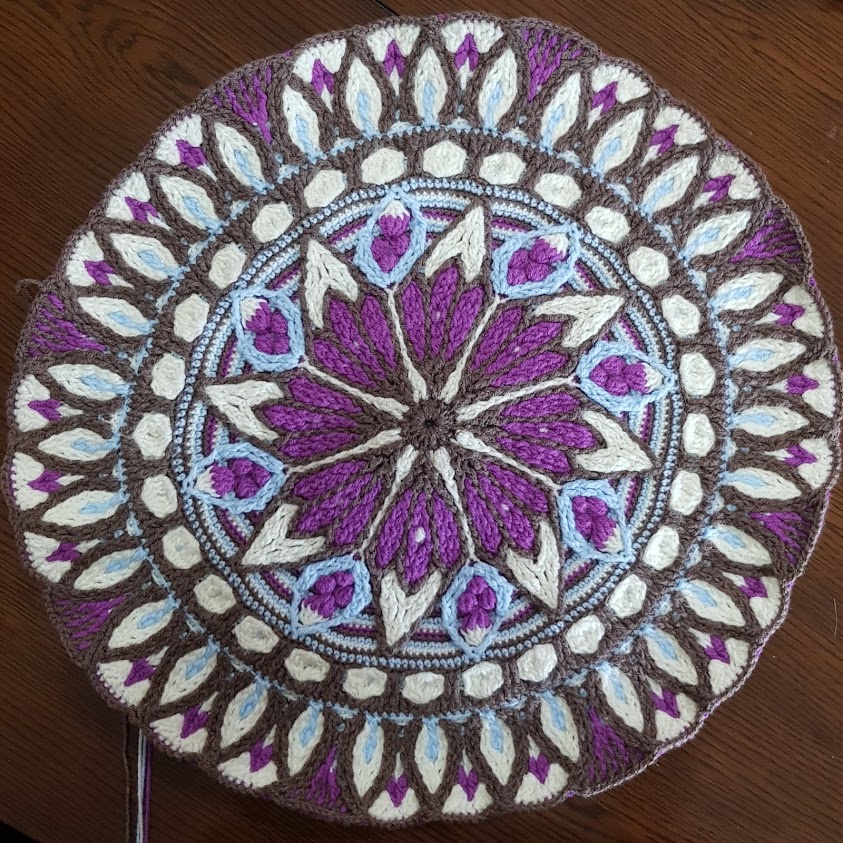
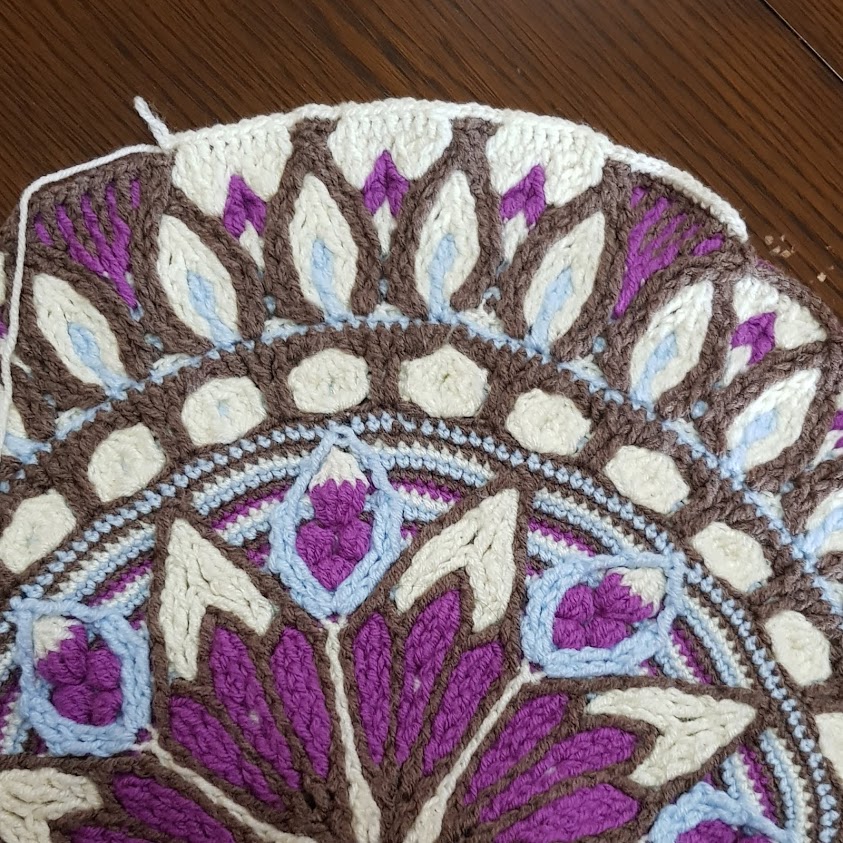
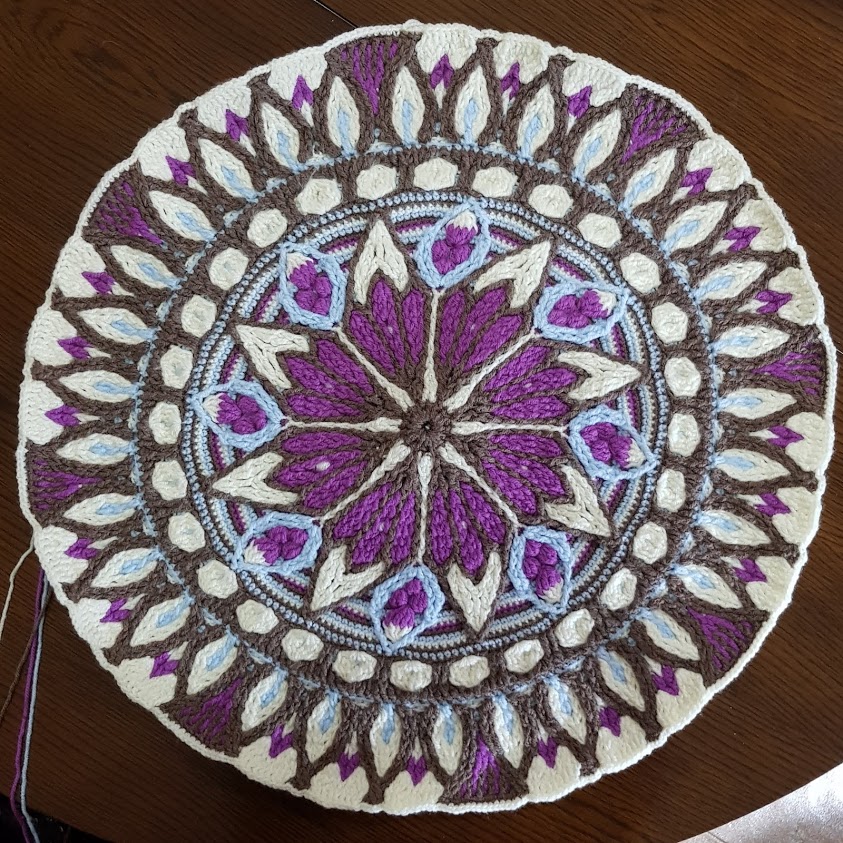
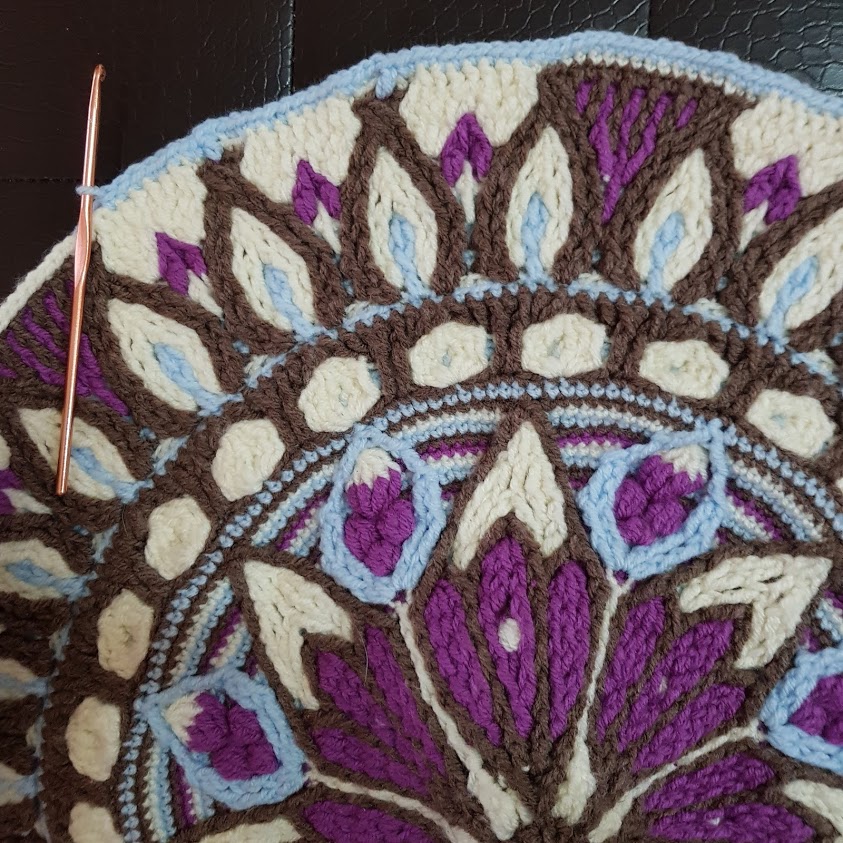
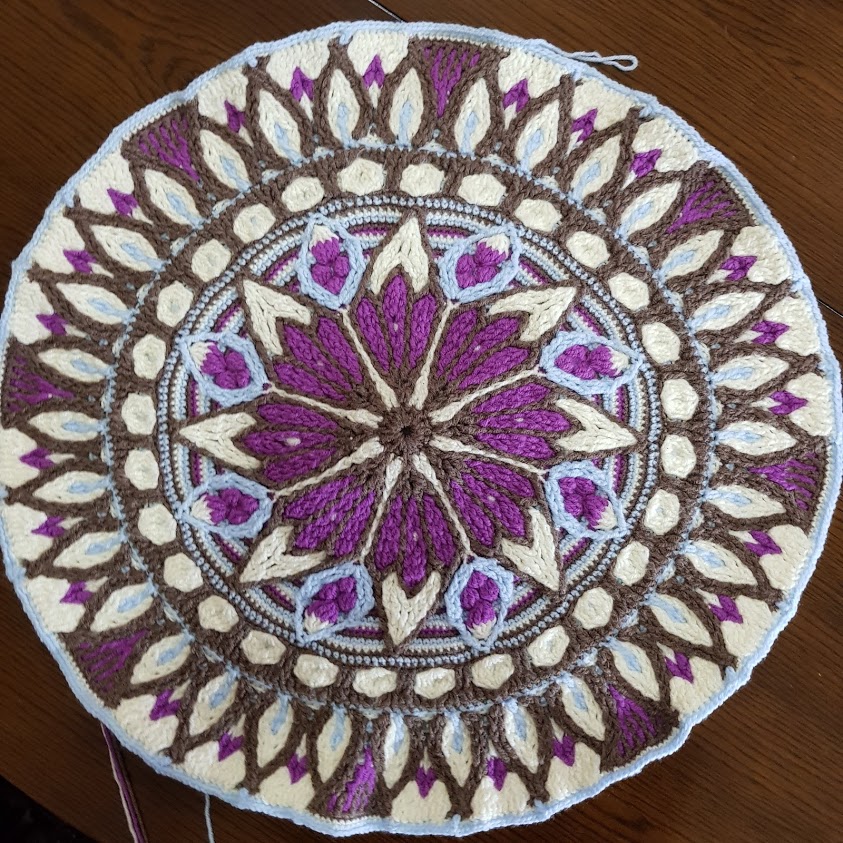
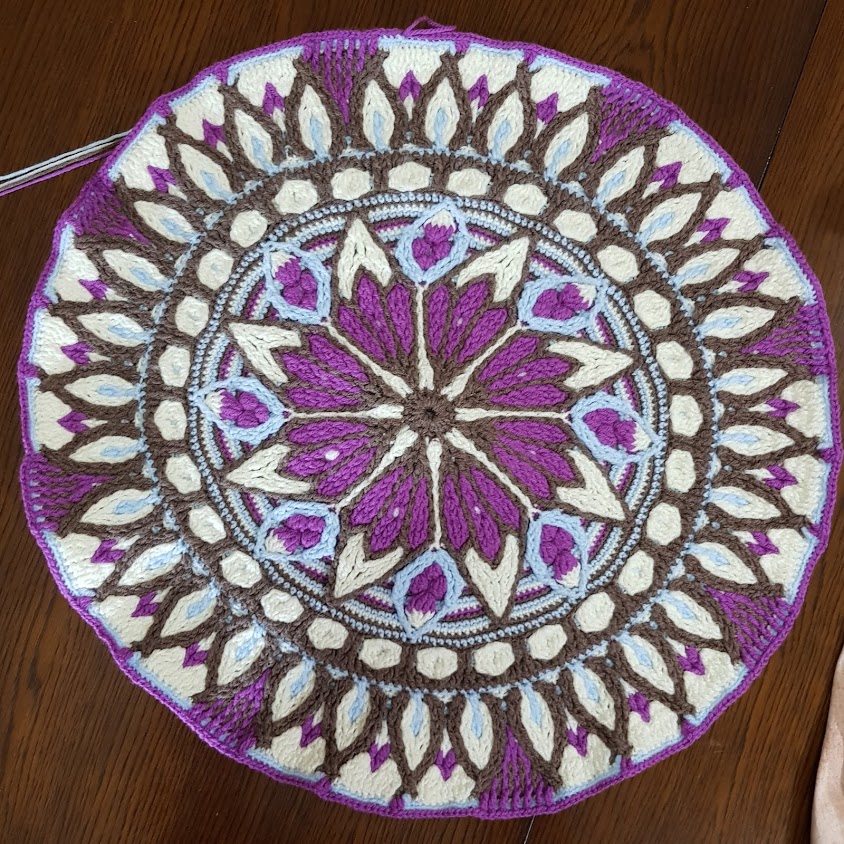
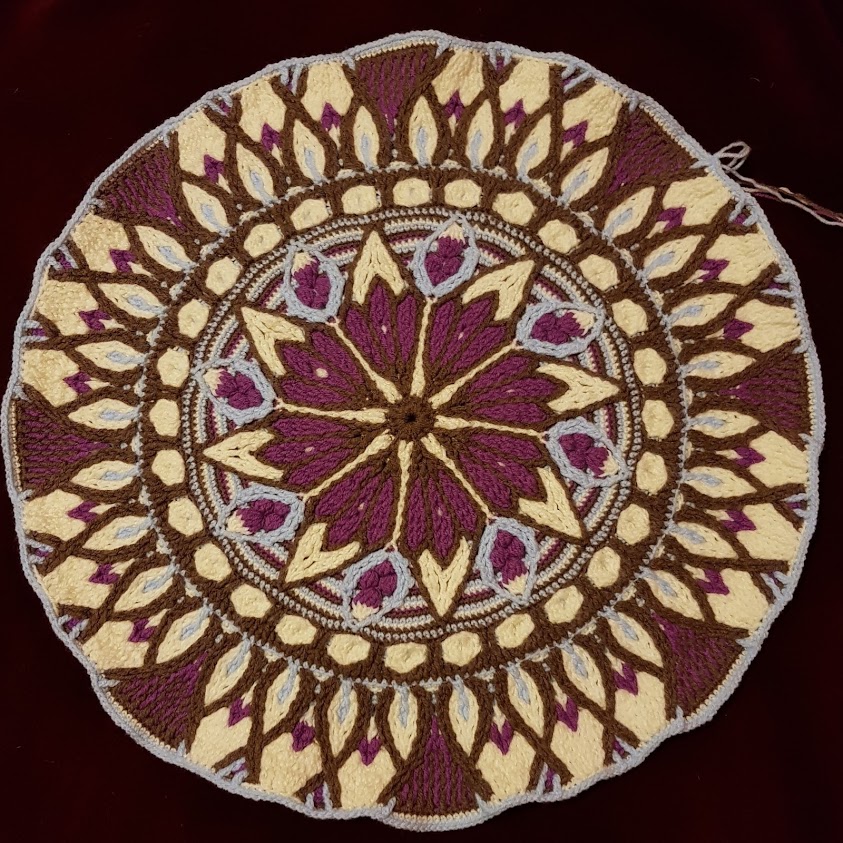
There is nothing new under the sun – this phrase is from the Book of Ecclesiastes – and one I choose to interpret this as – there is a lot of inspiration to be found in history.
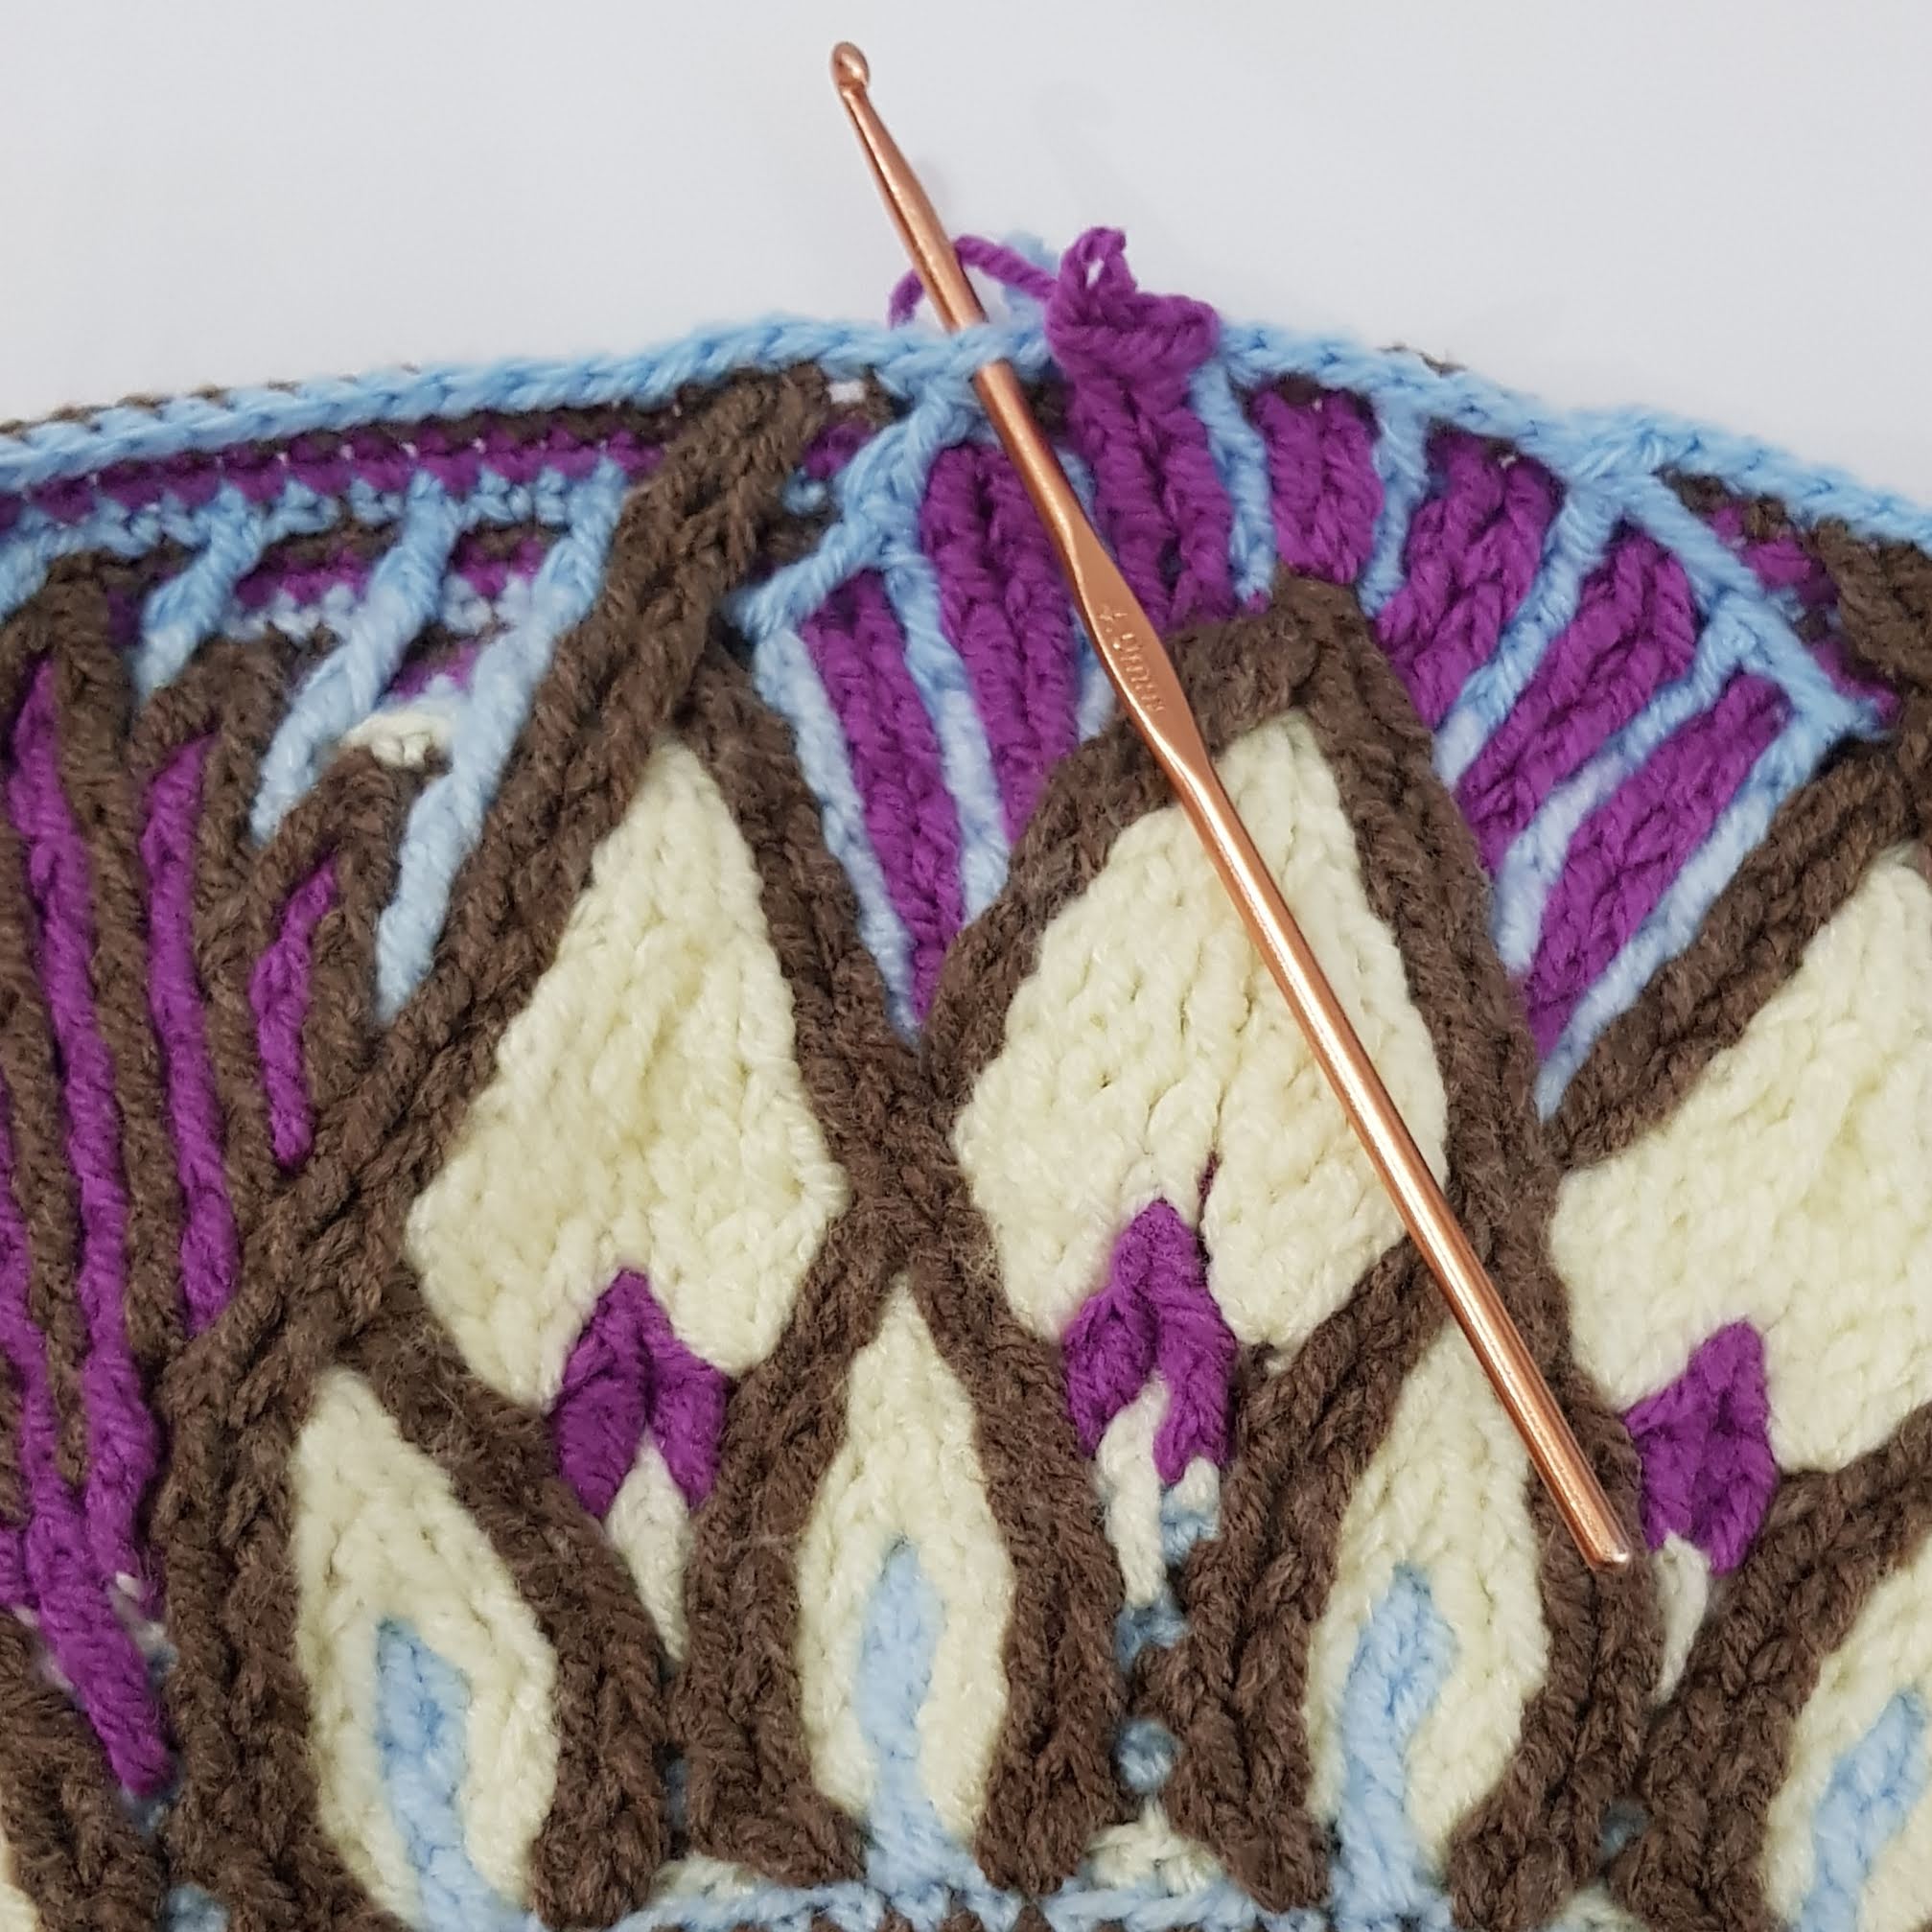
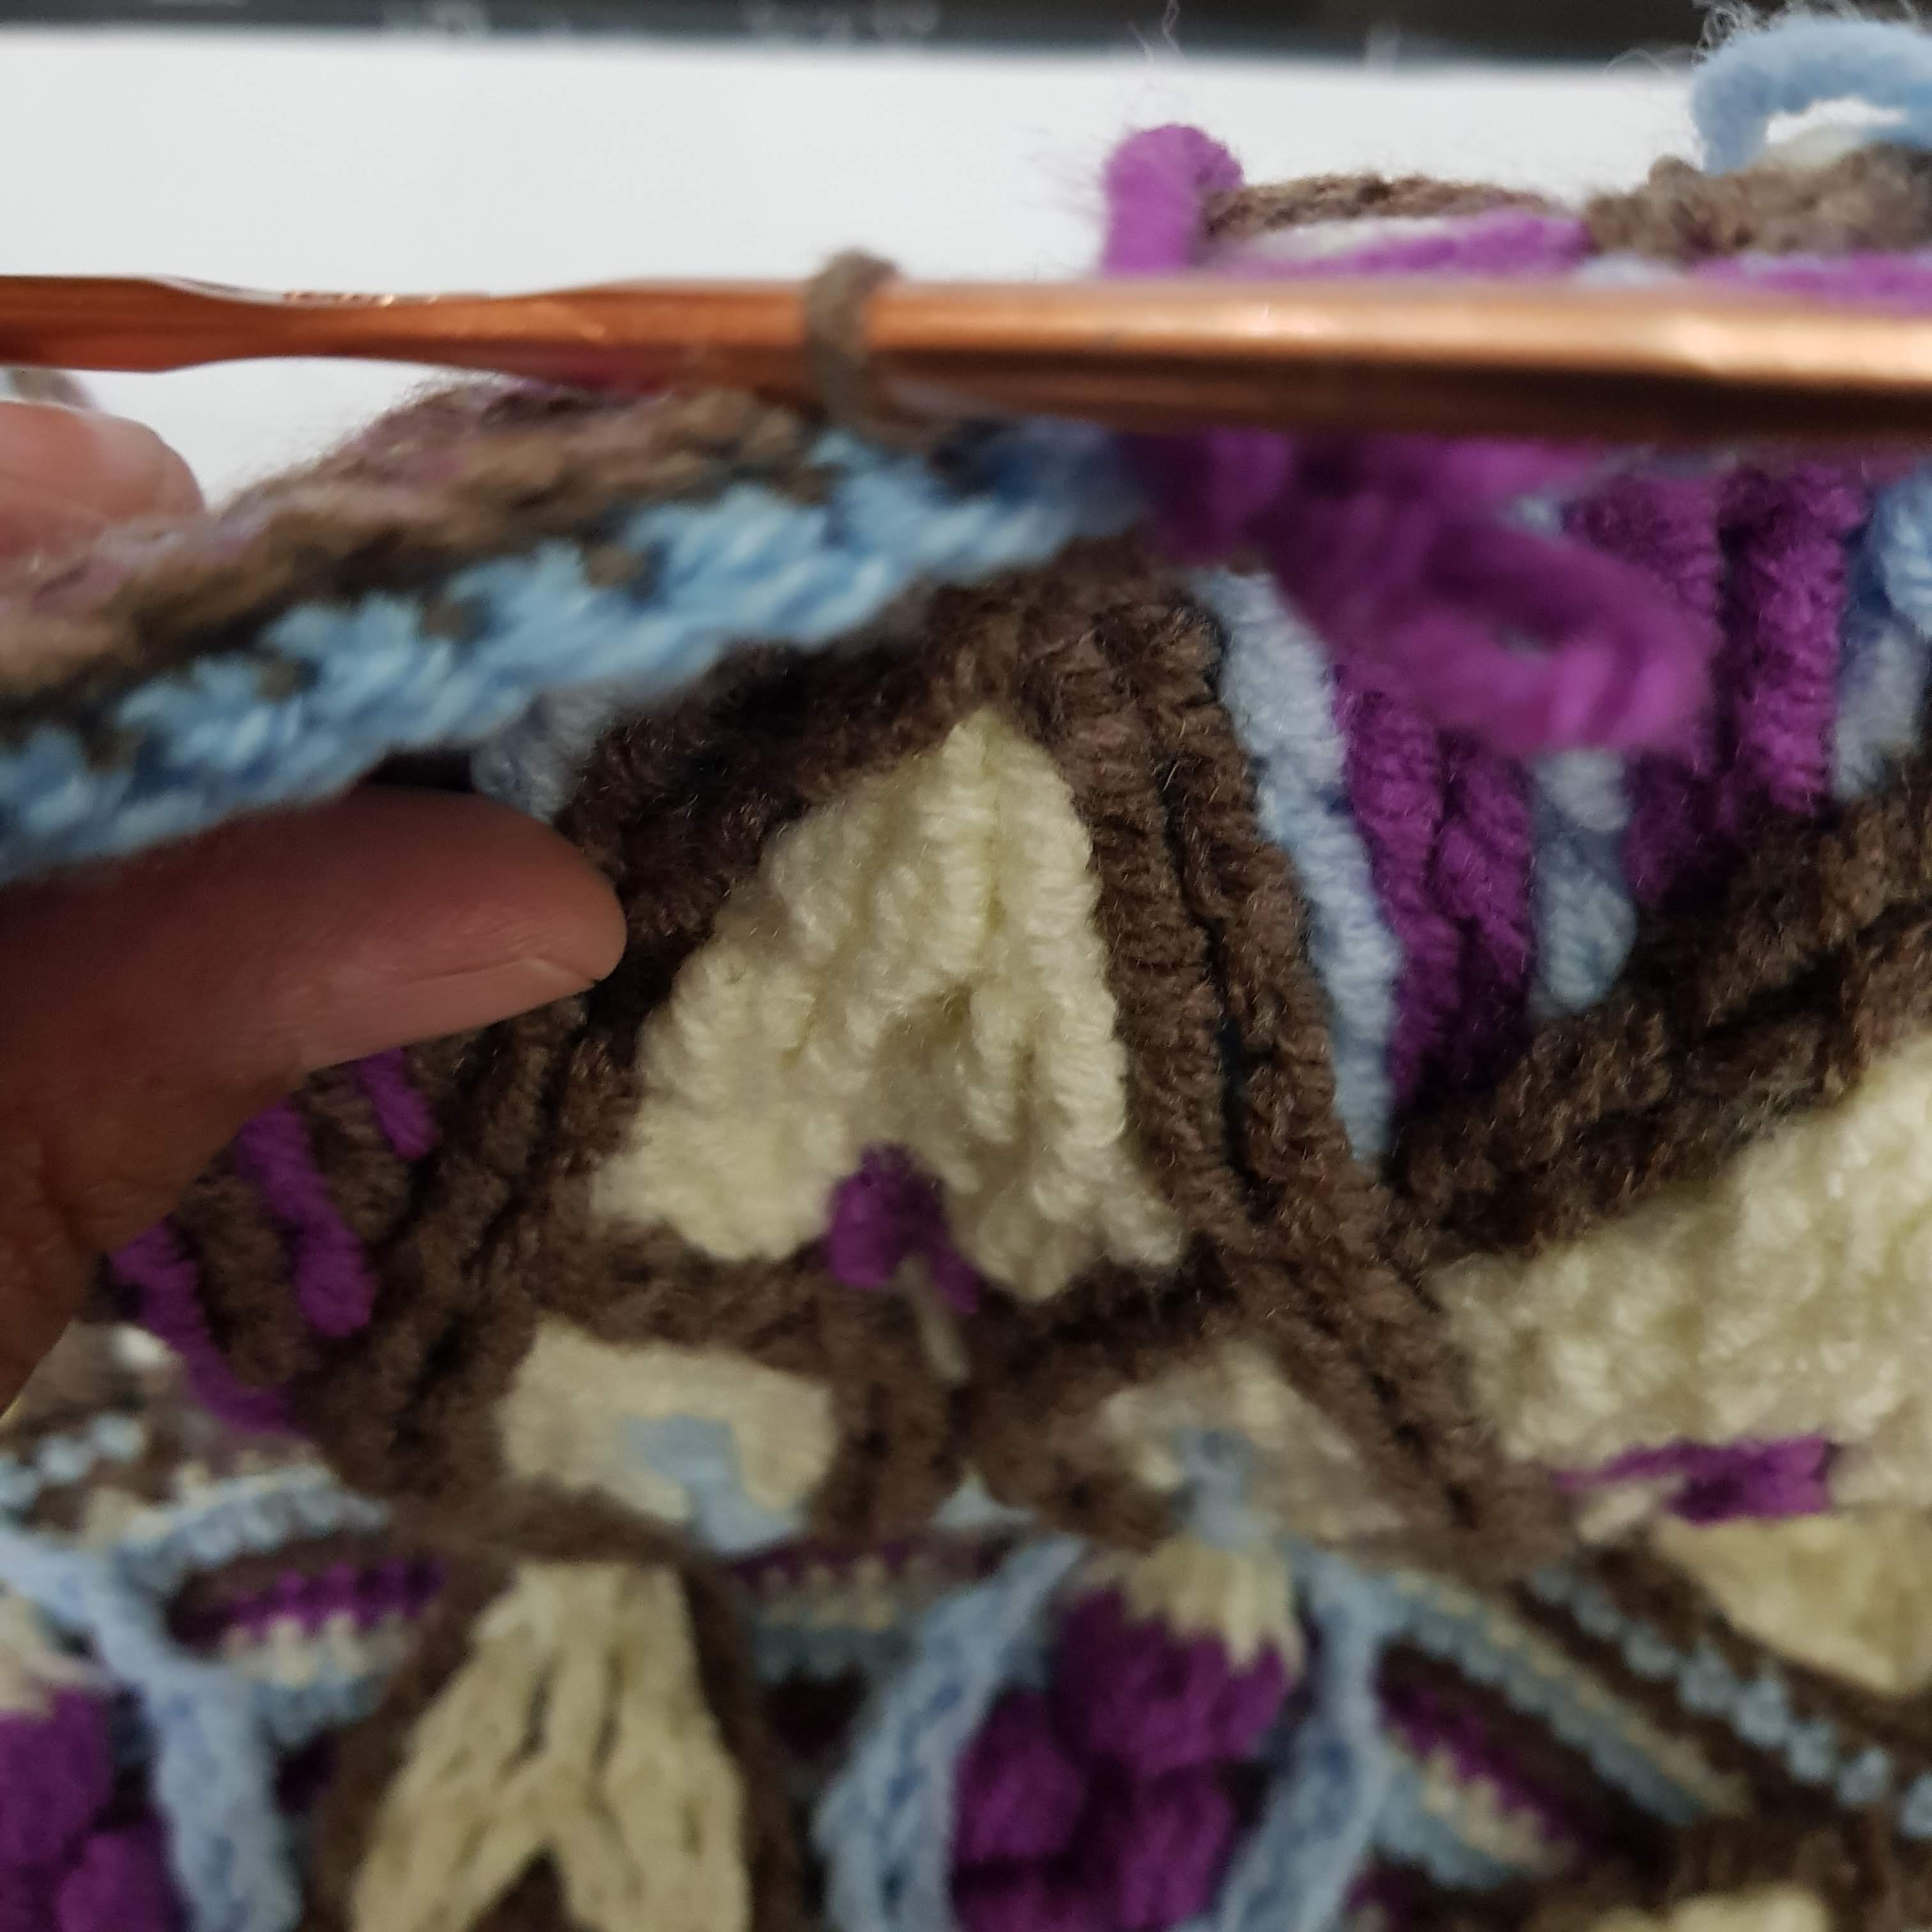
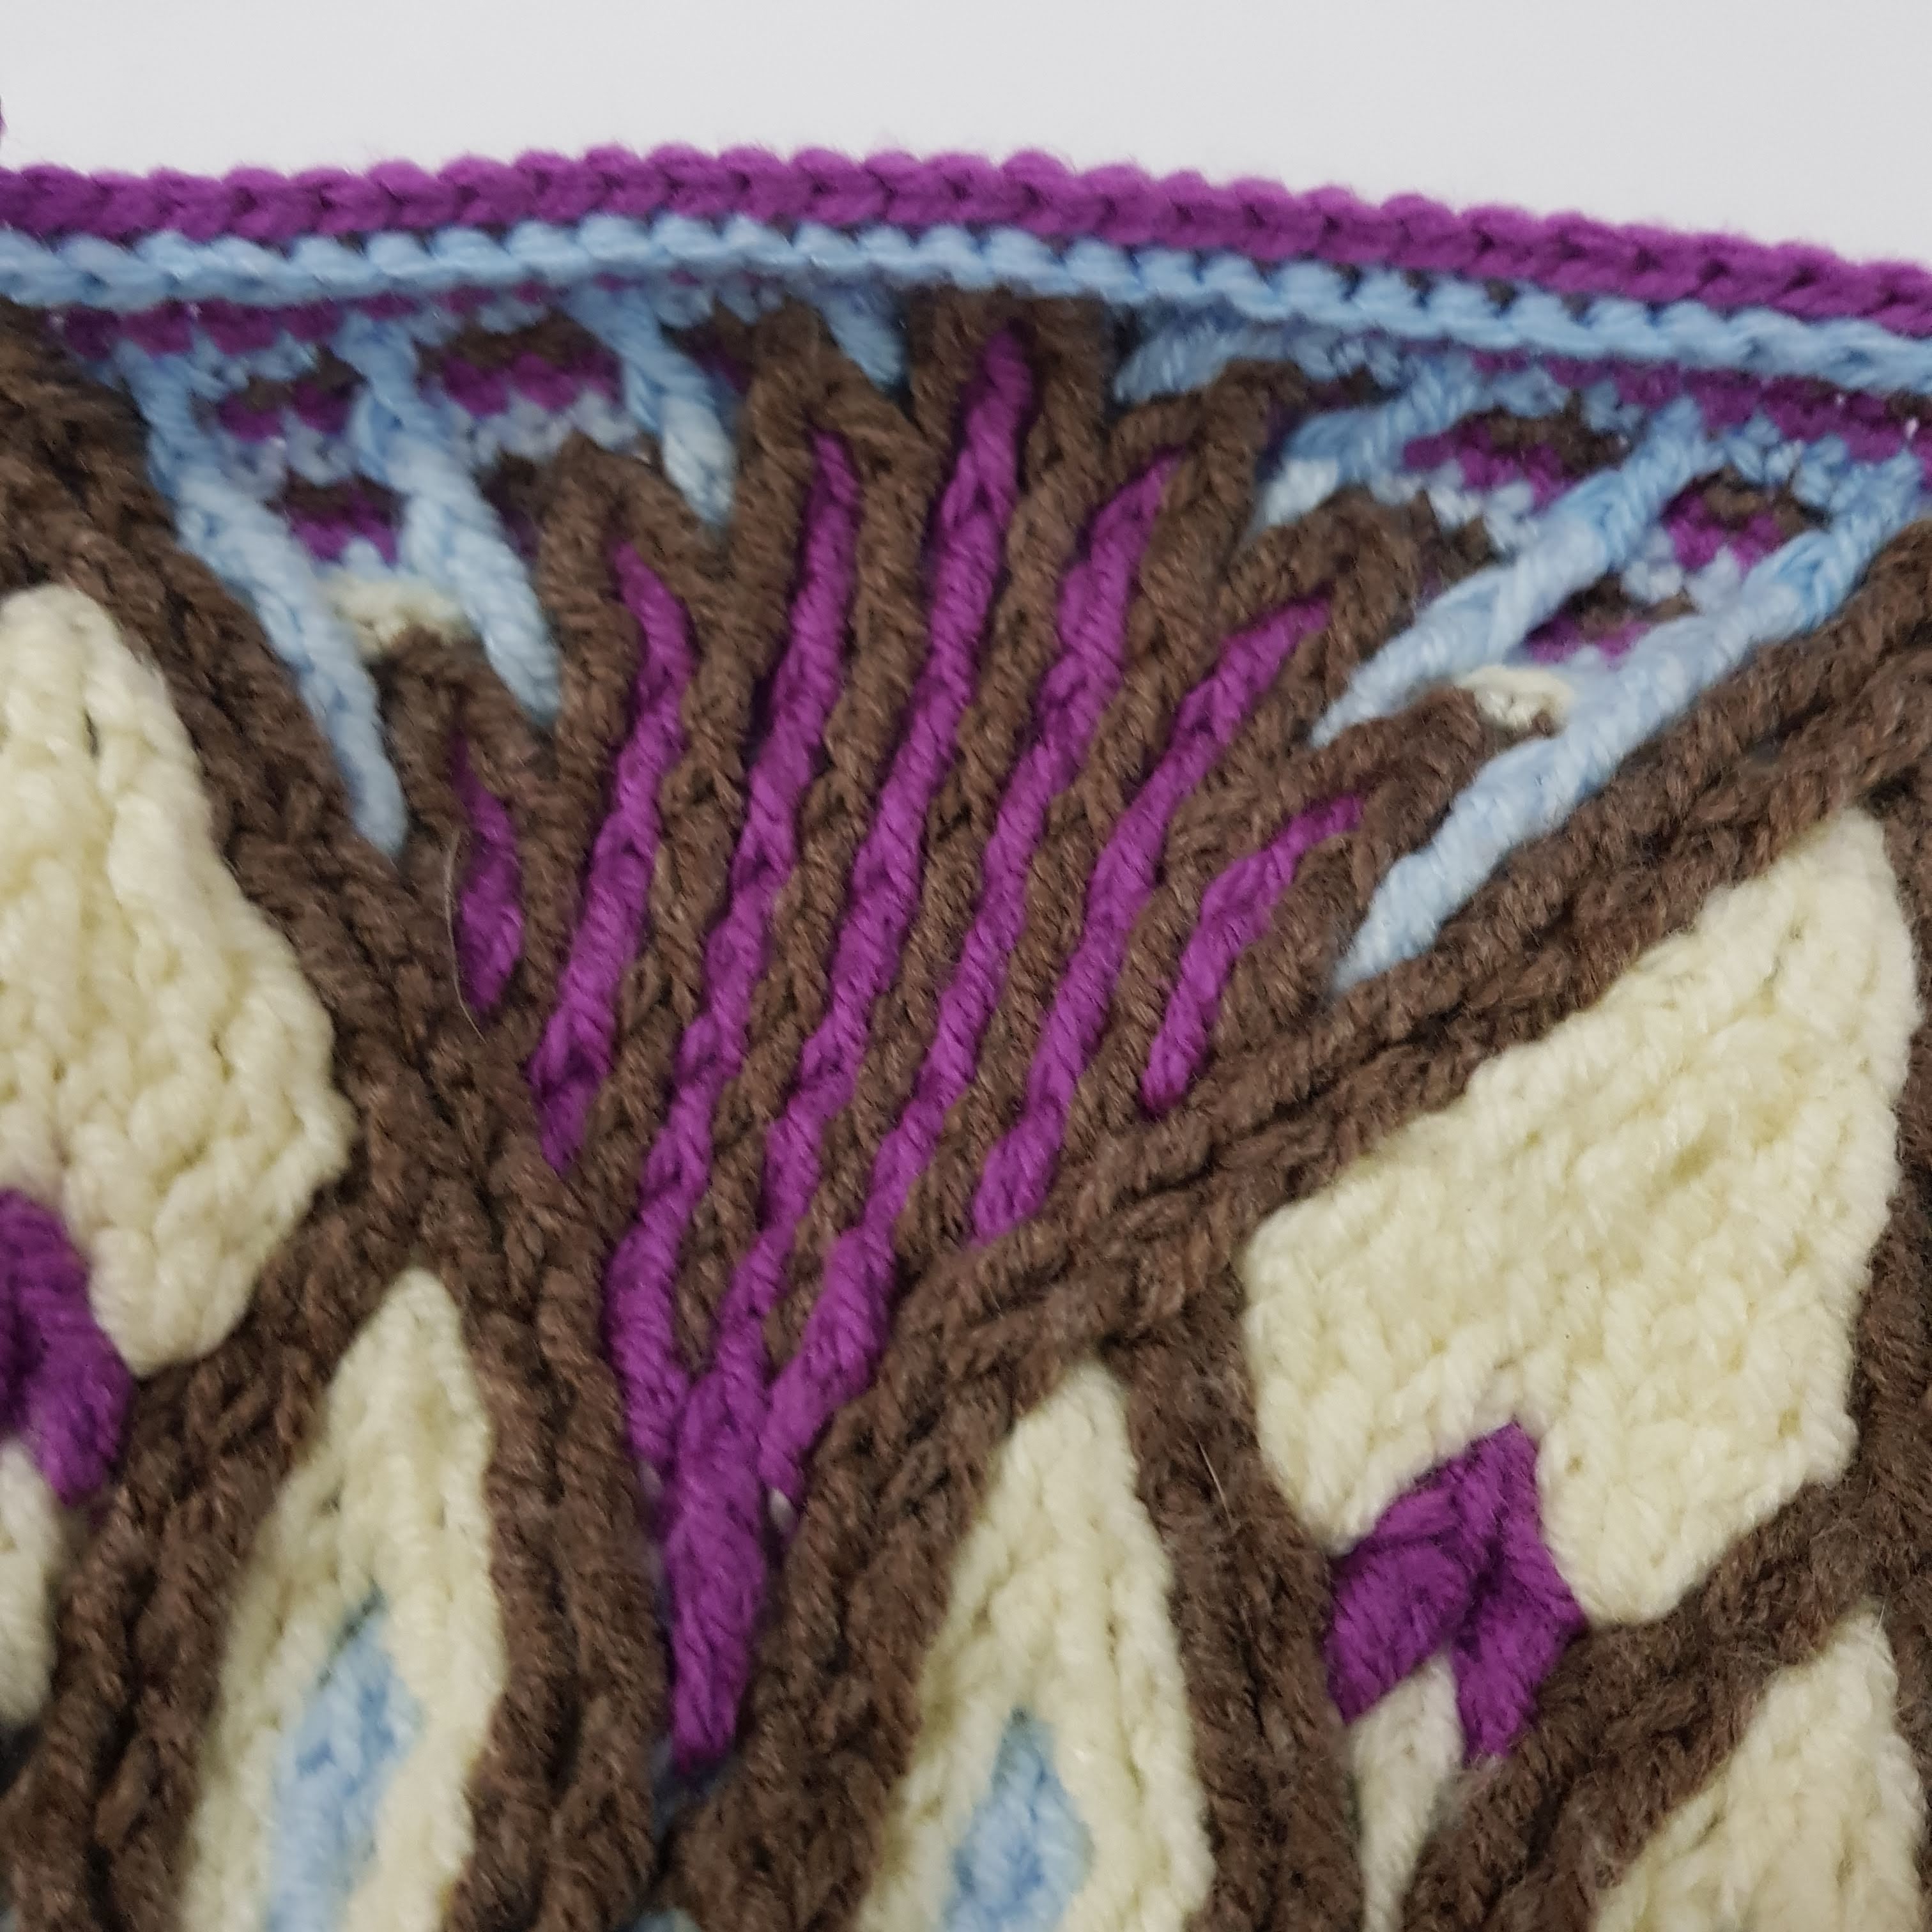
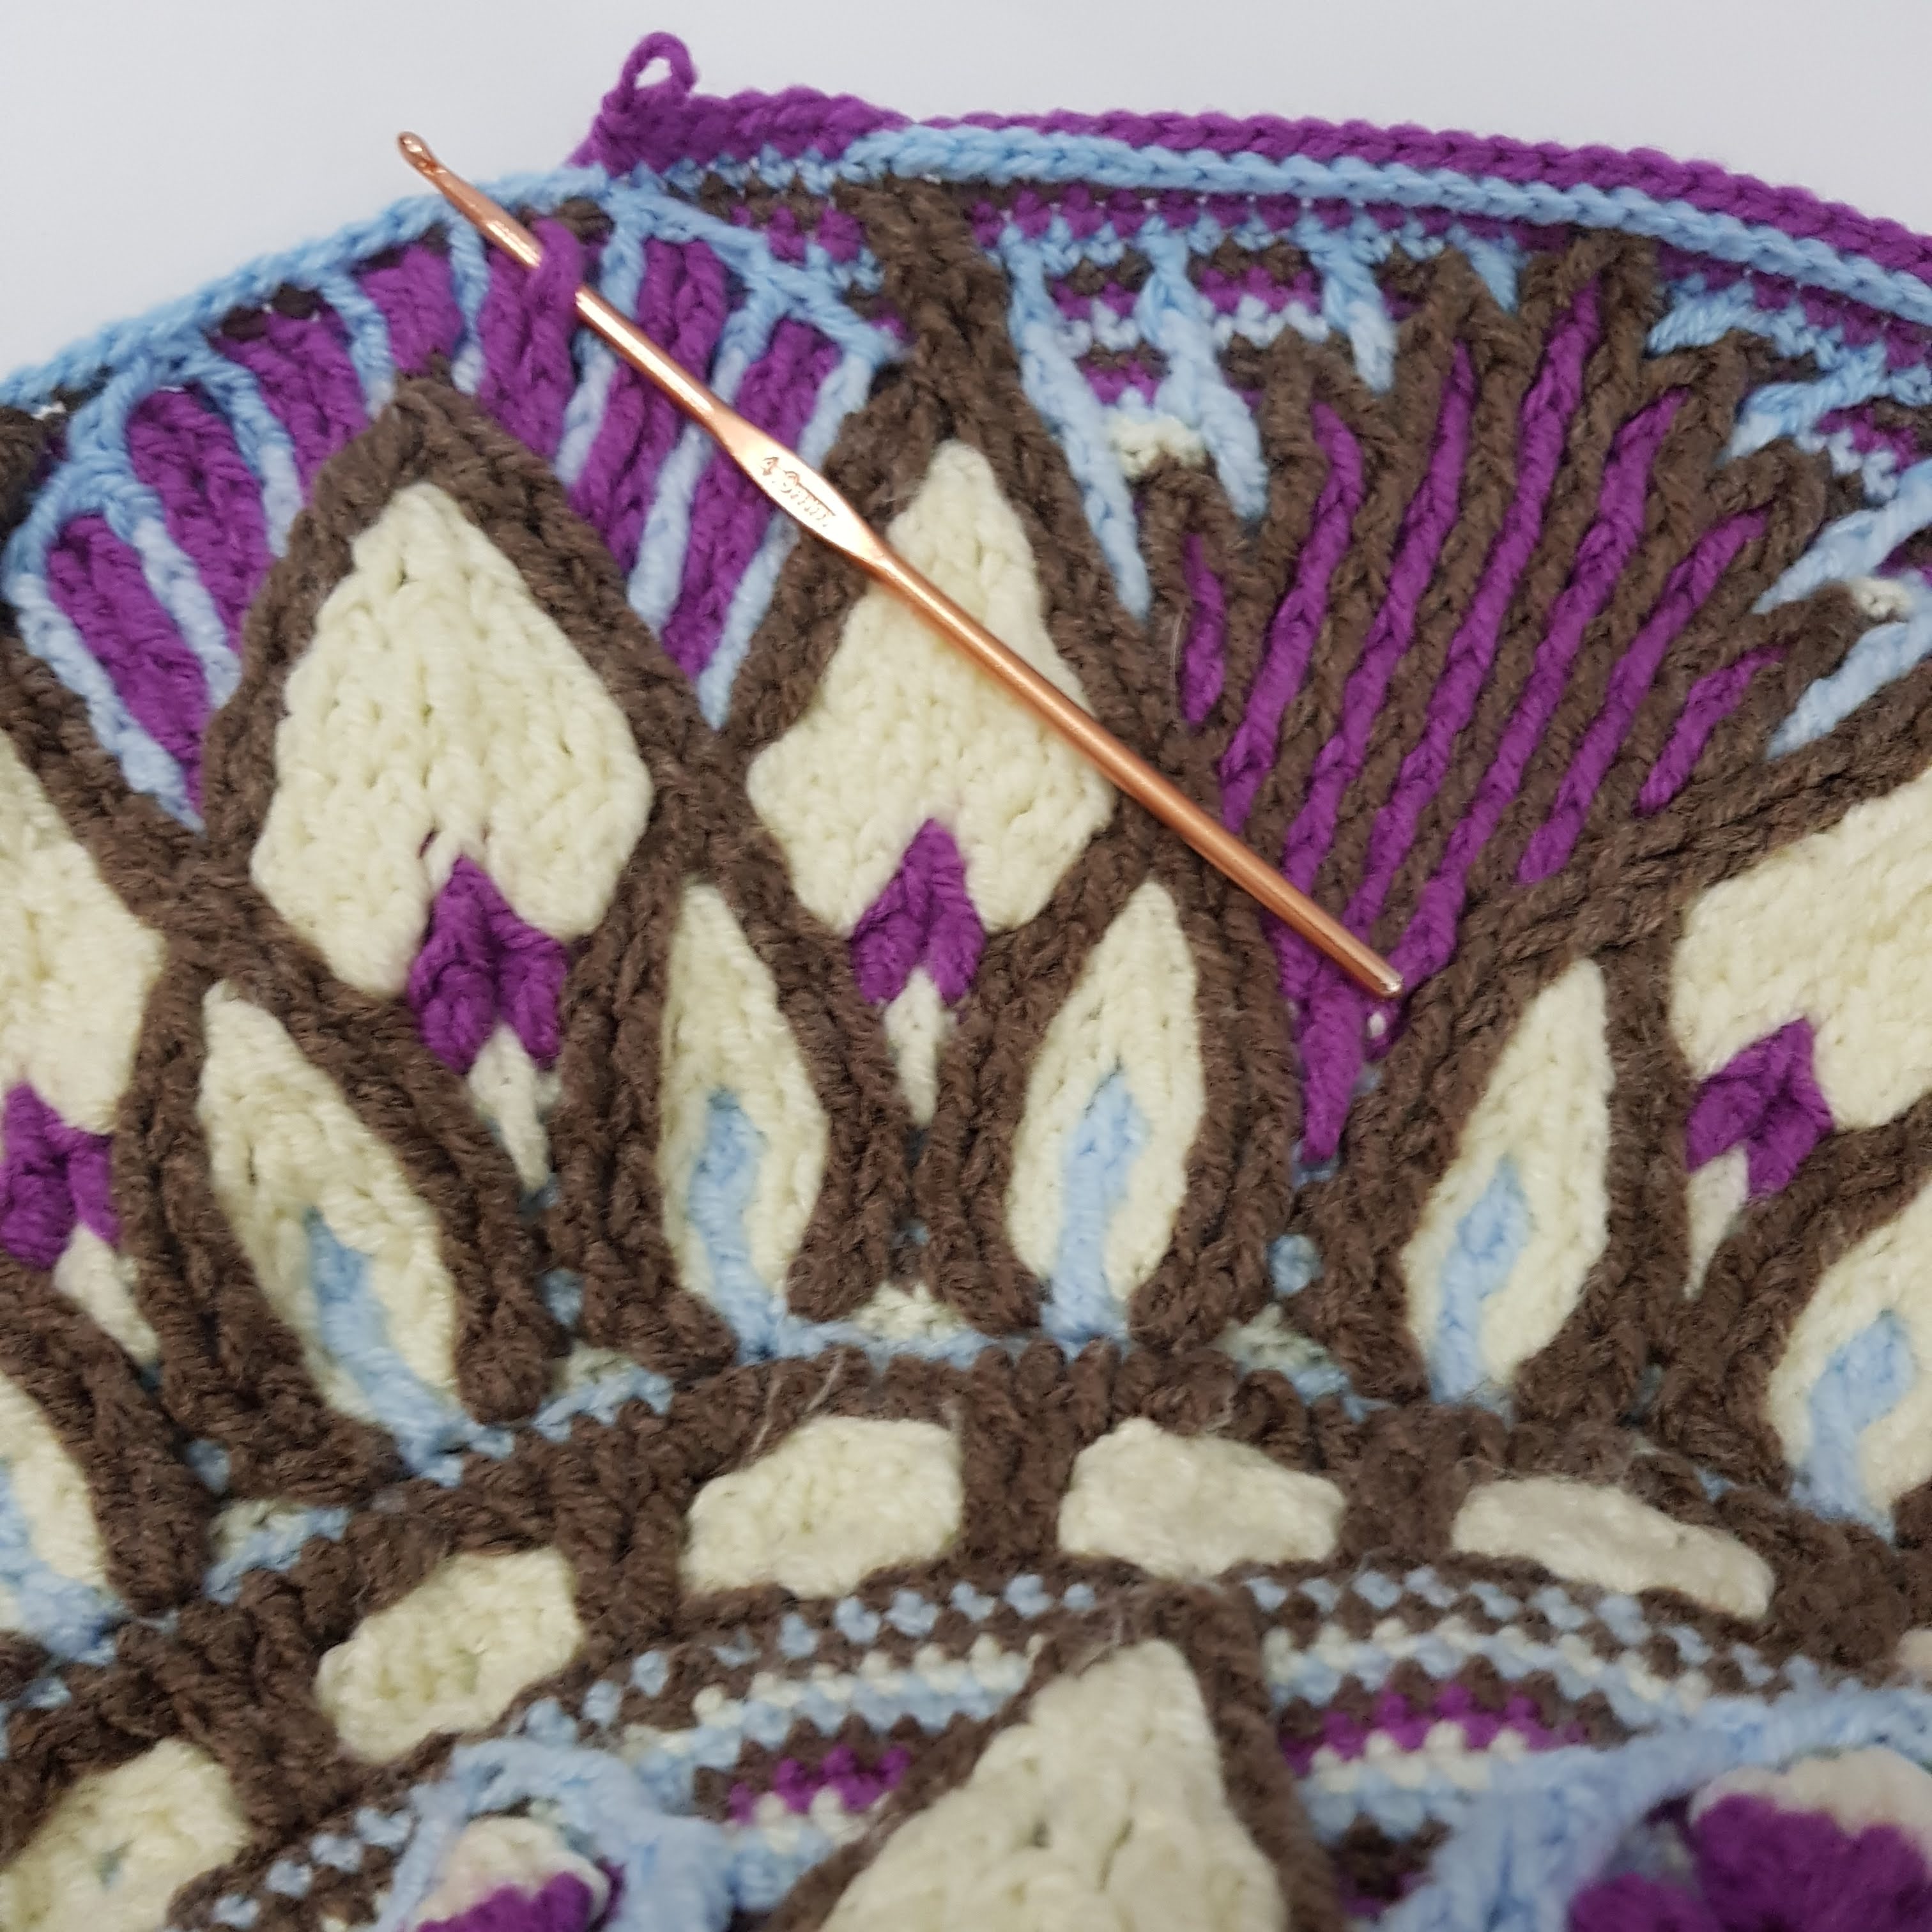
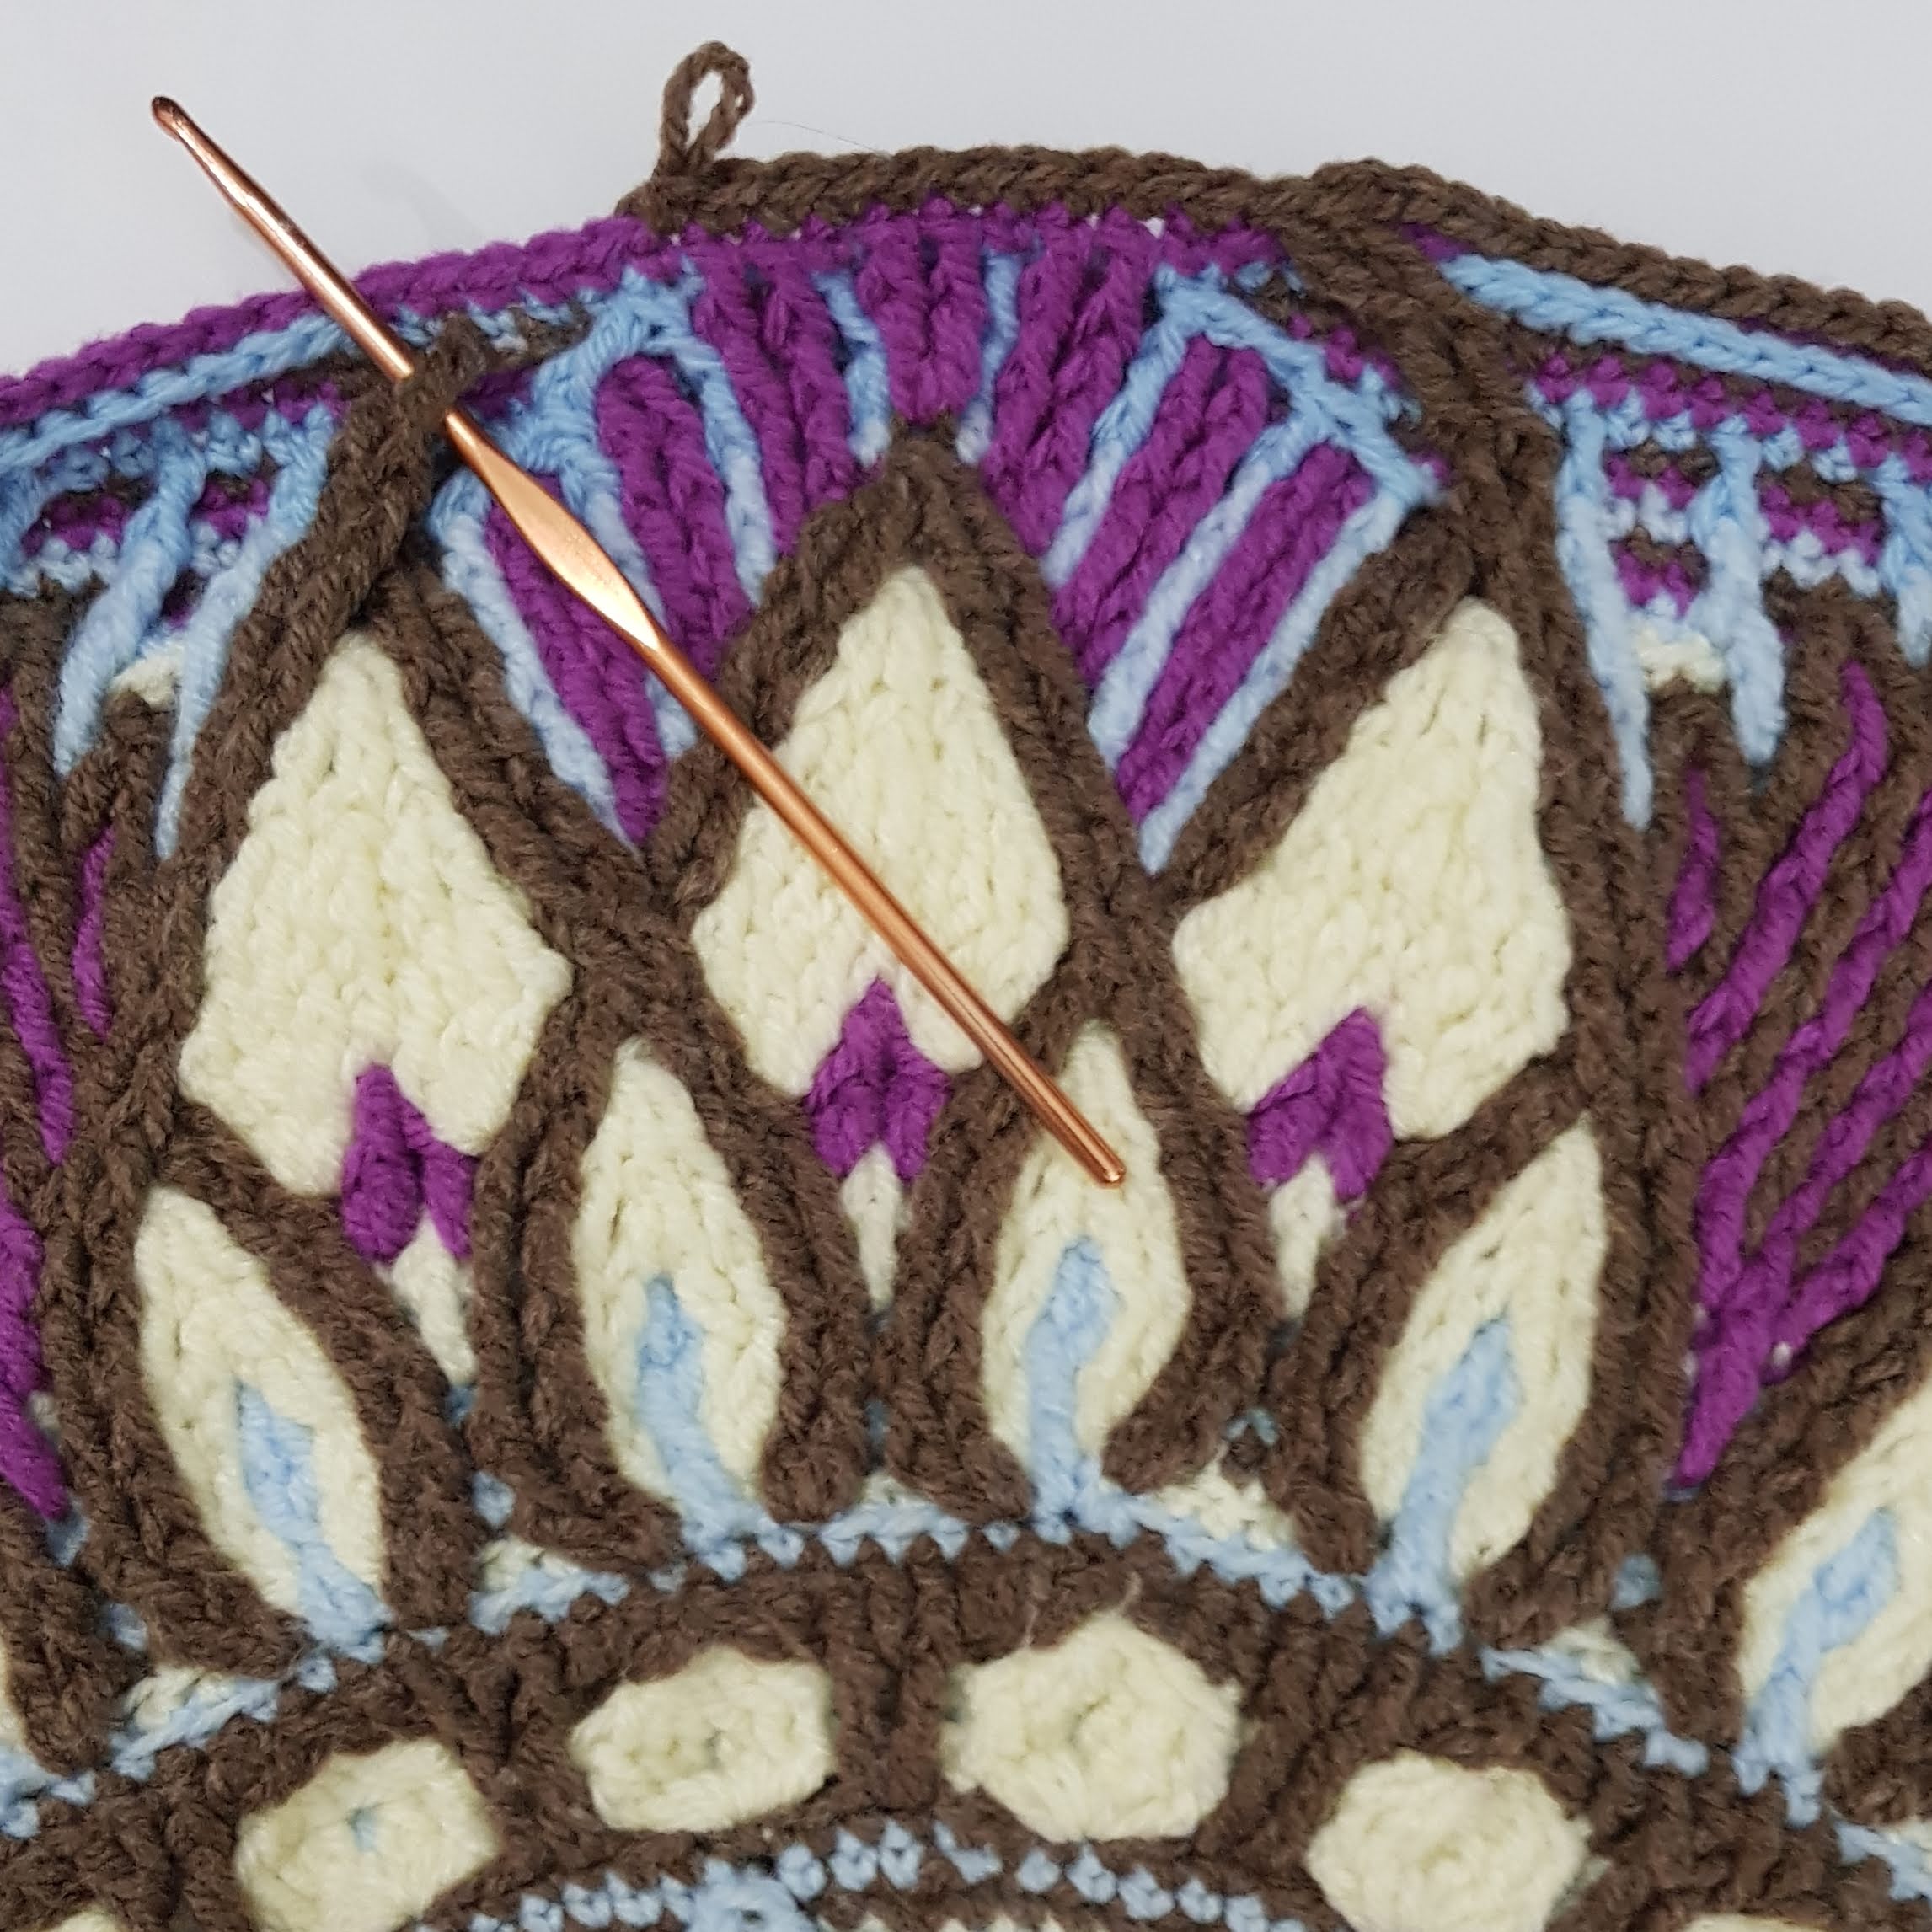
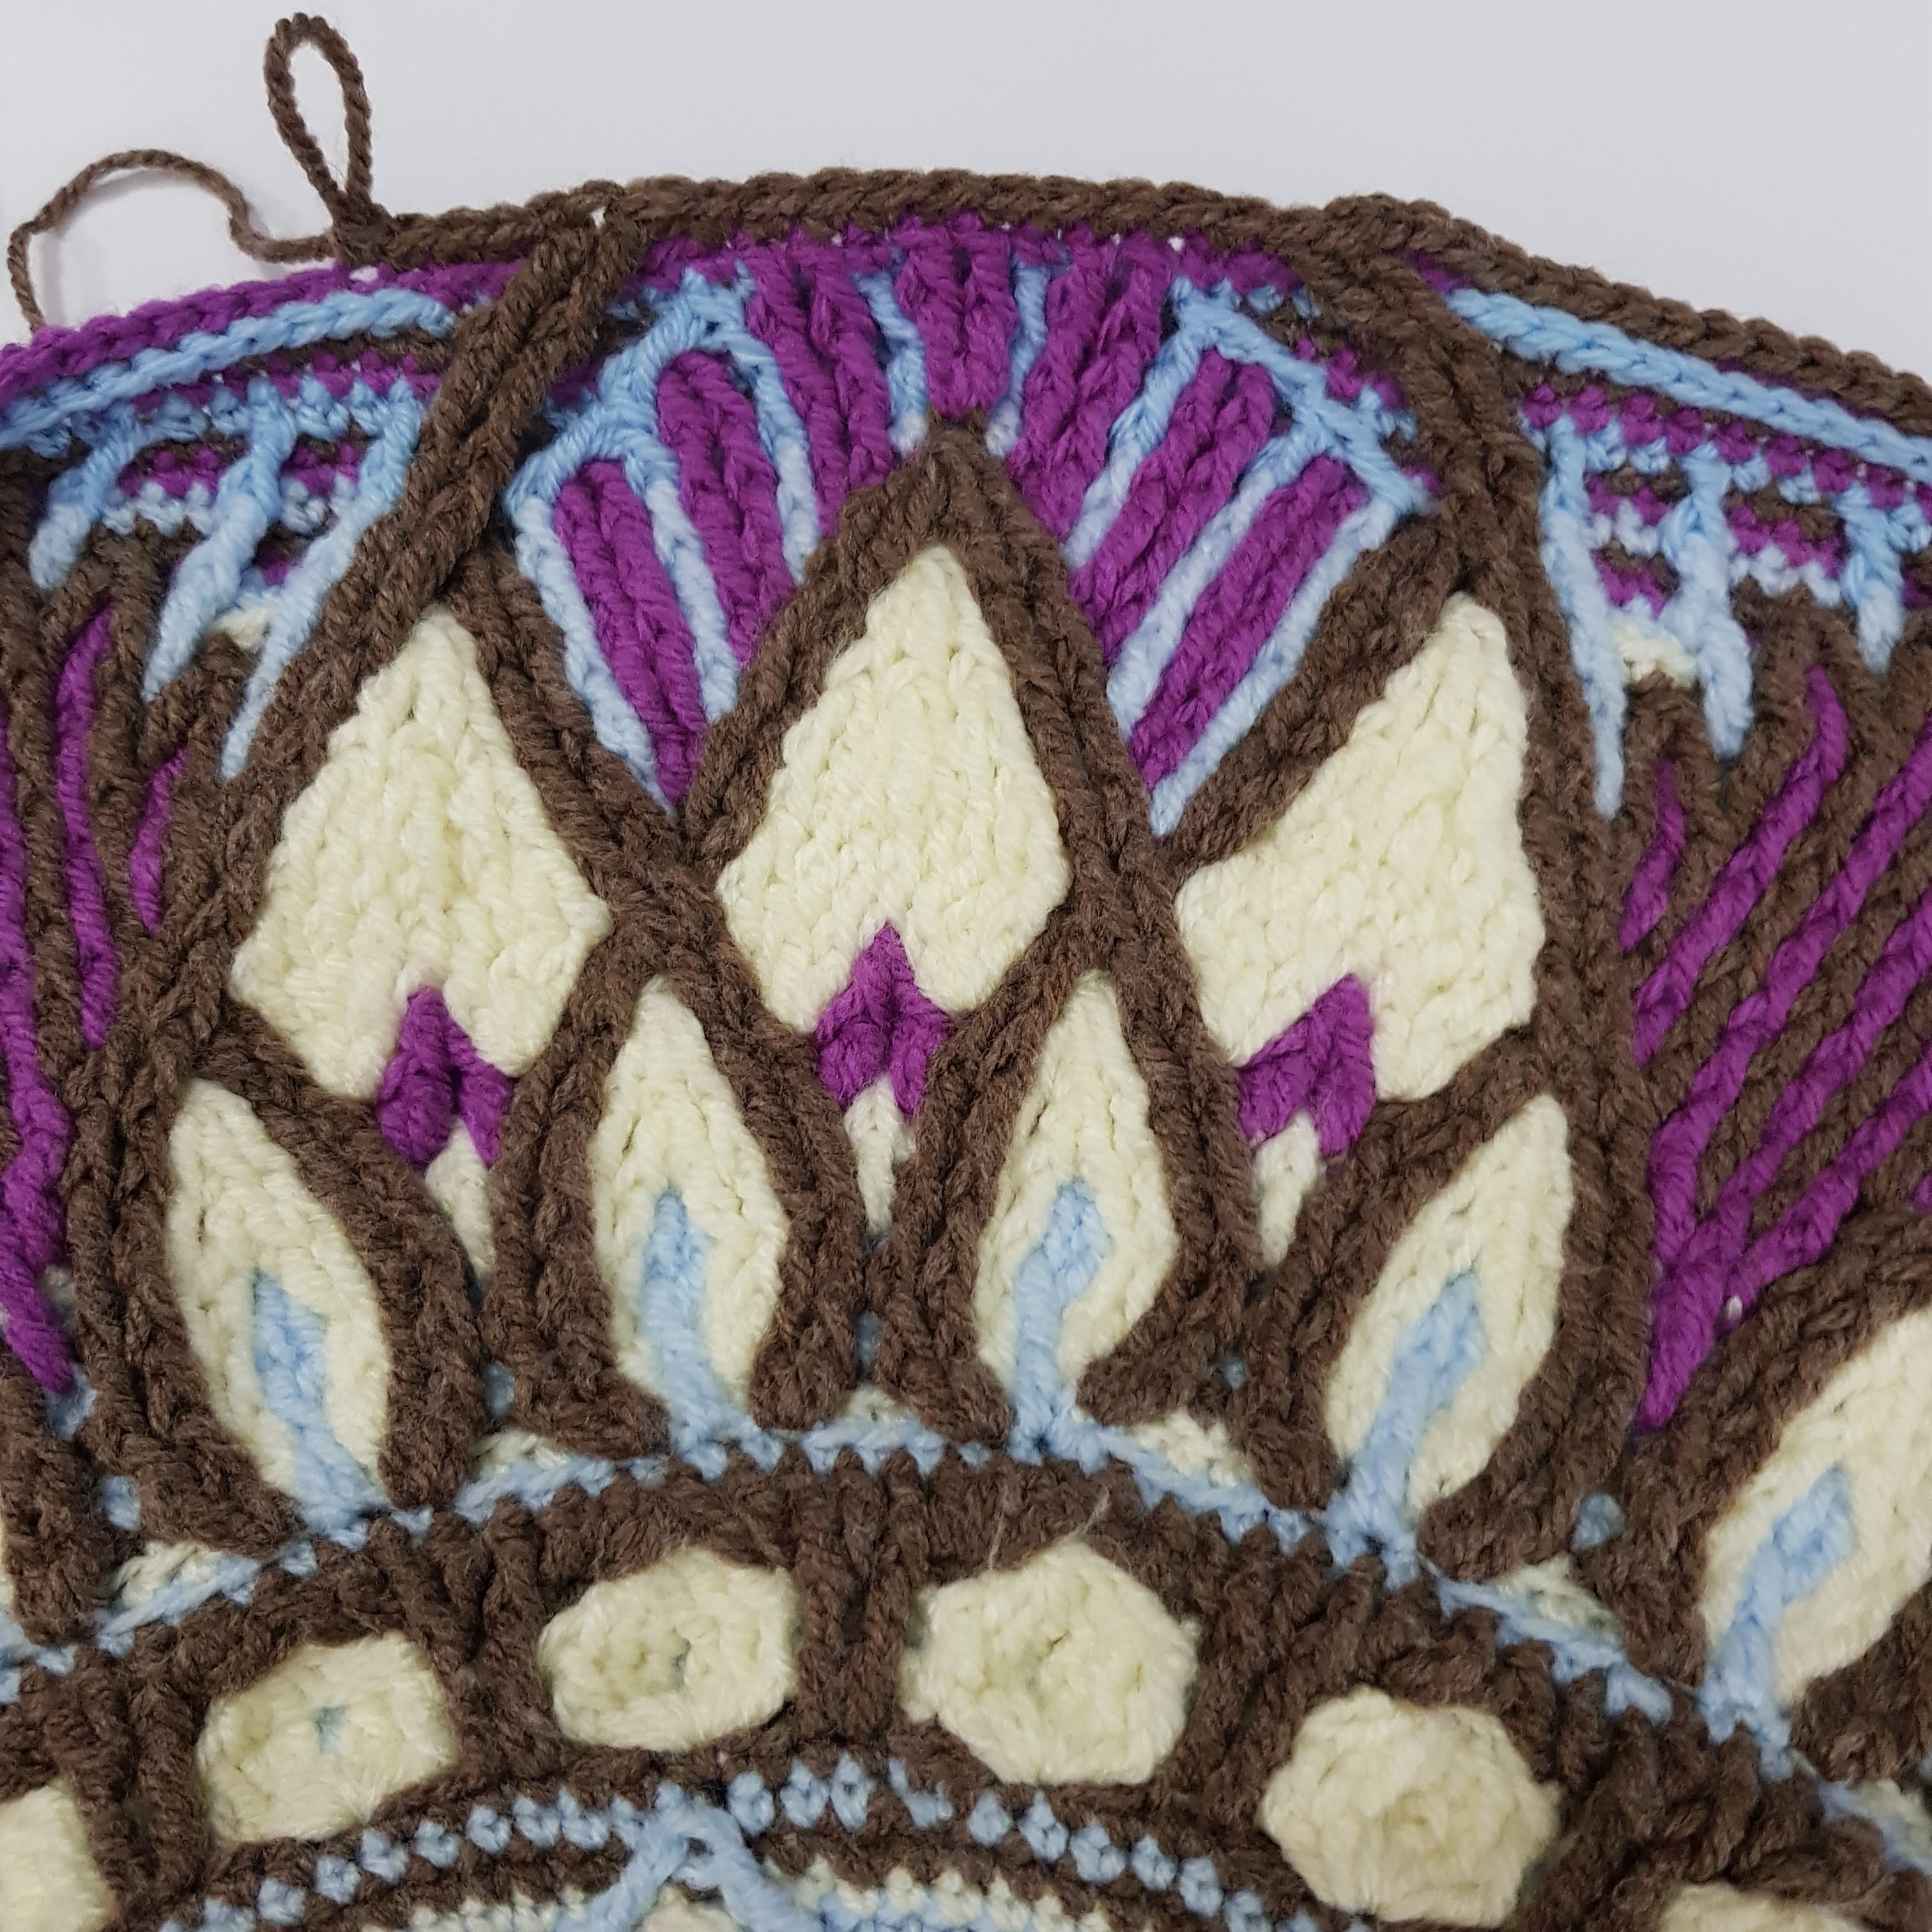
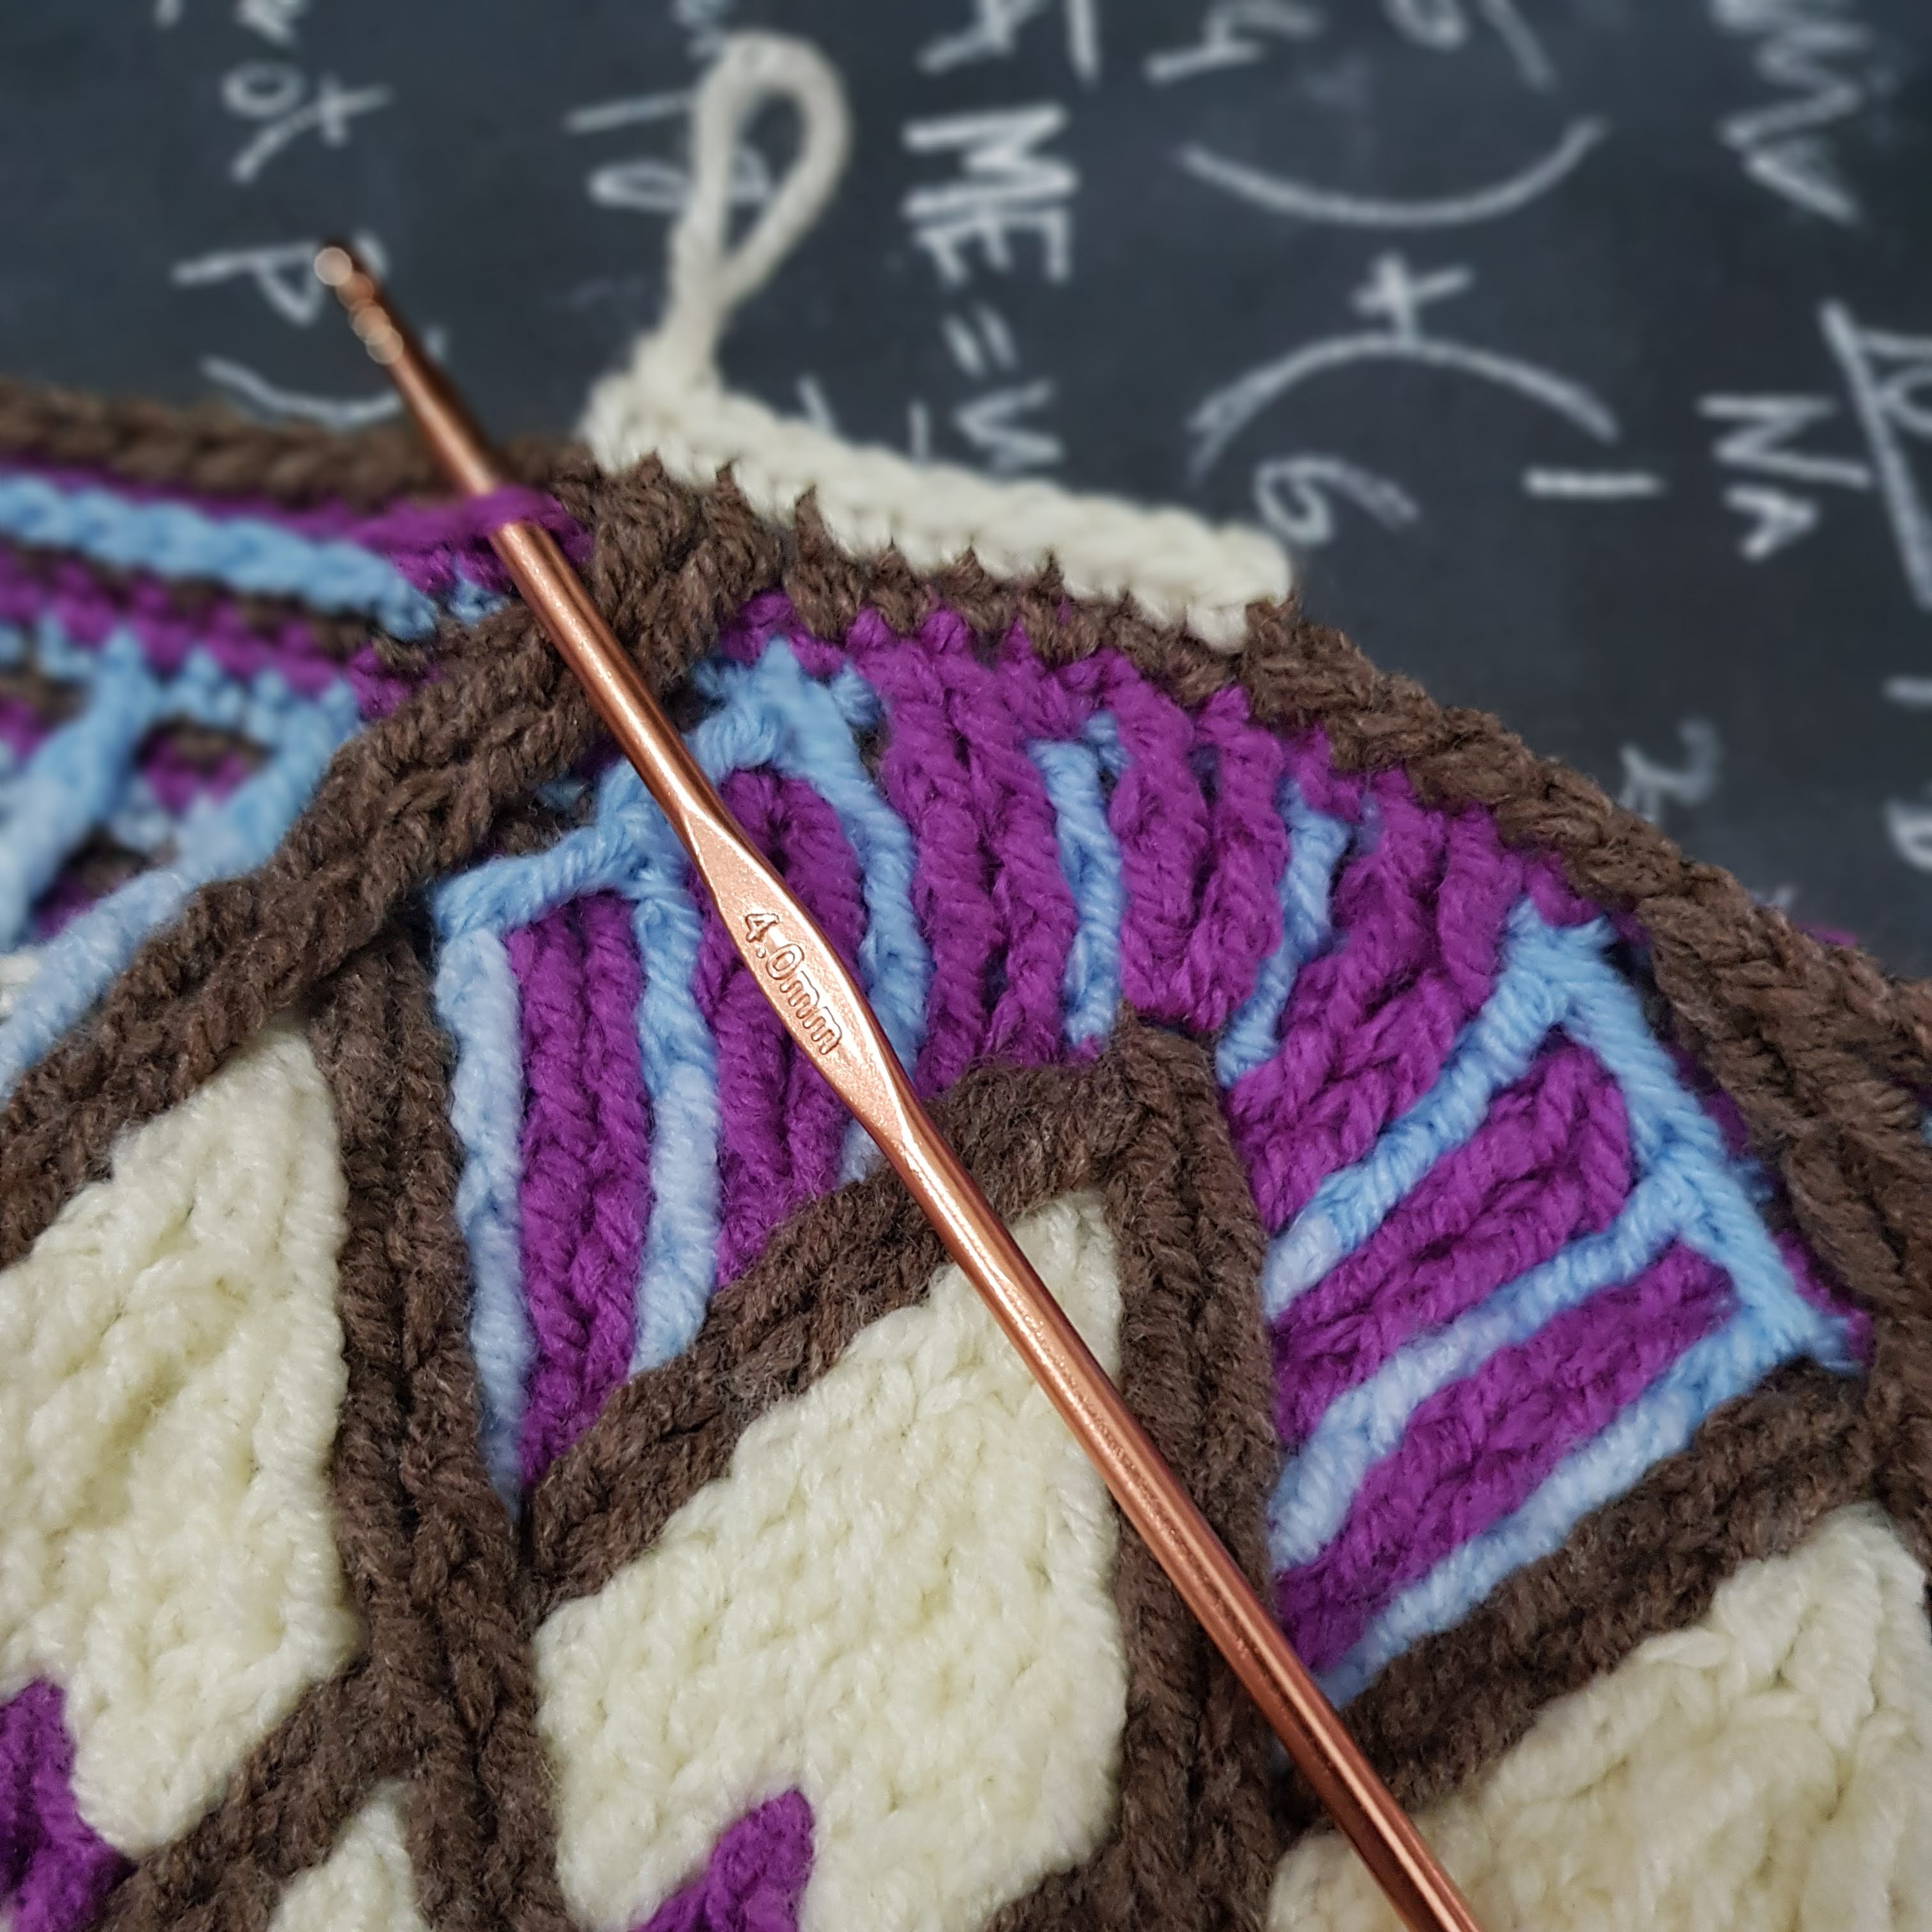
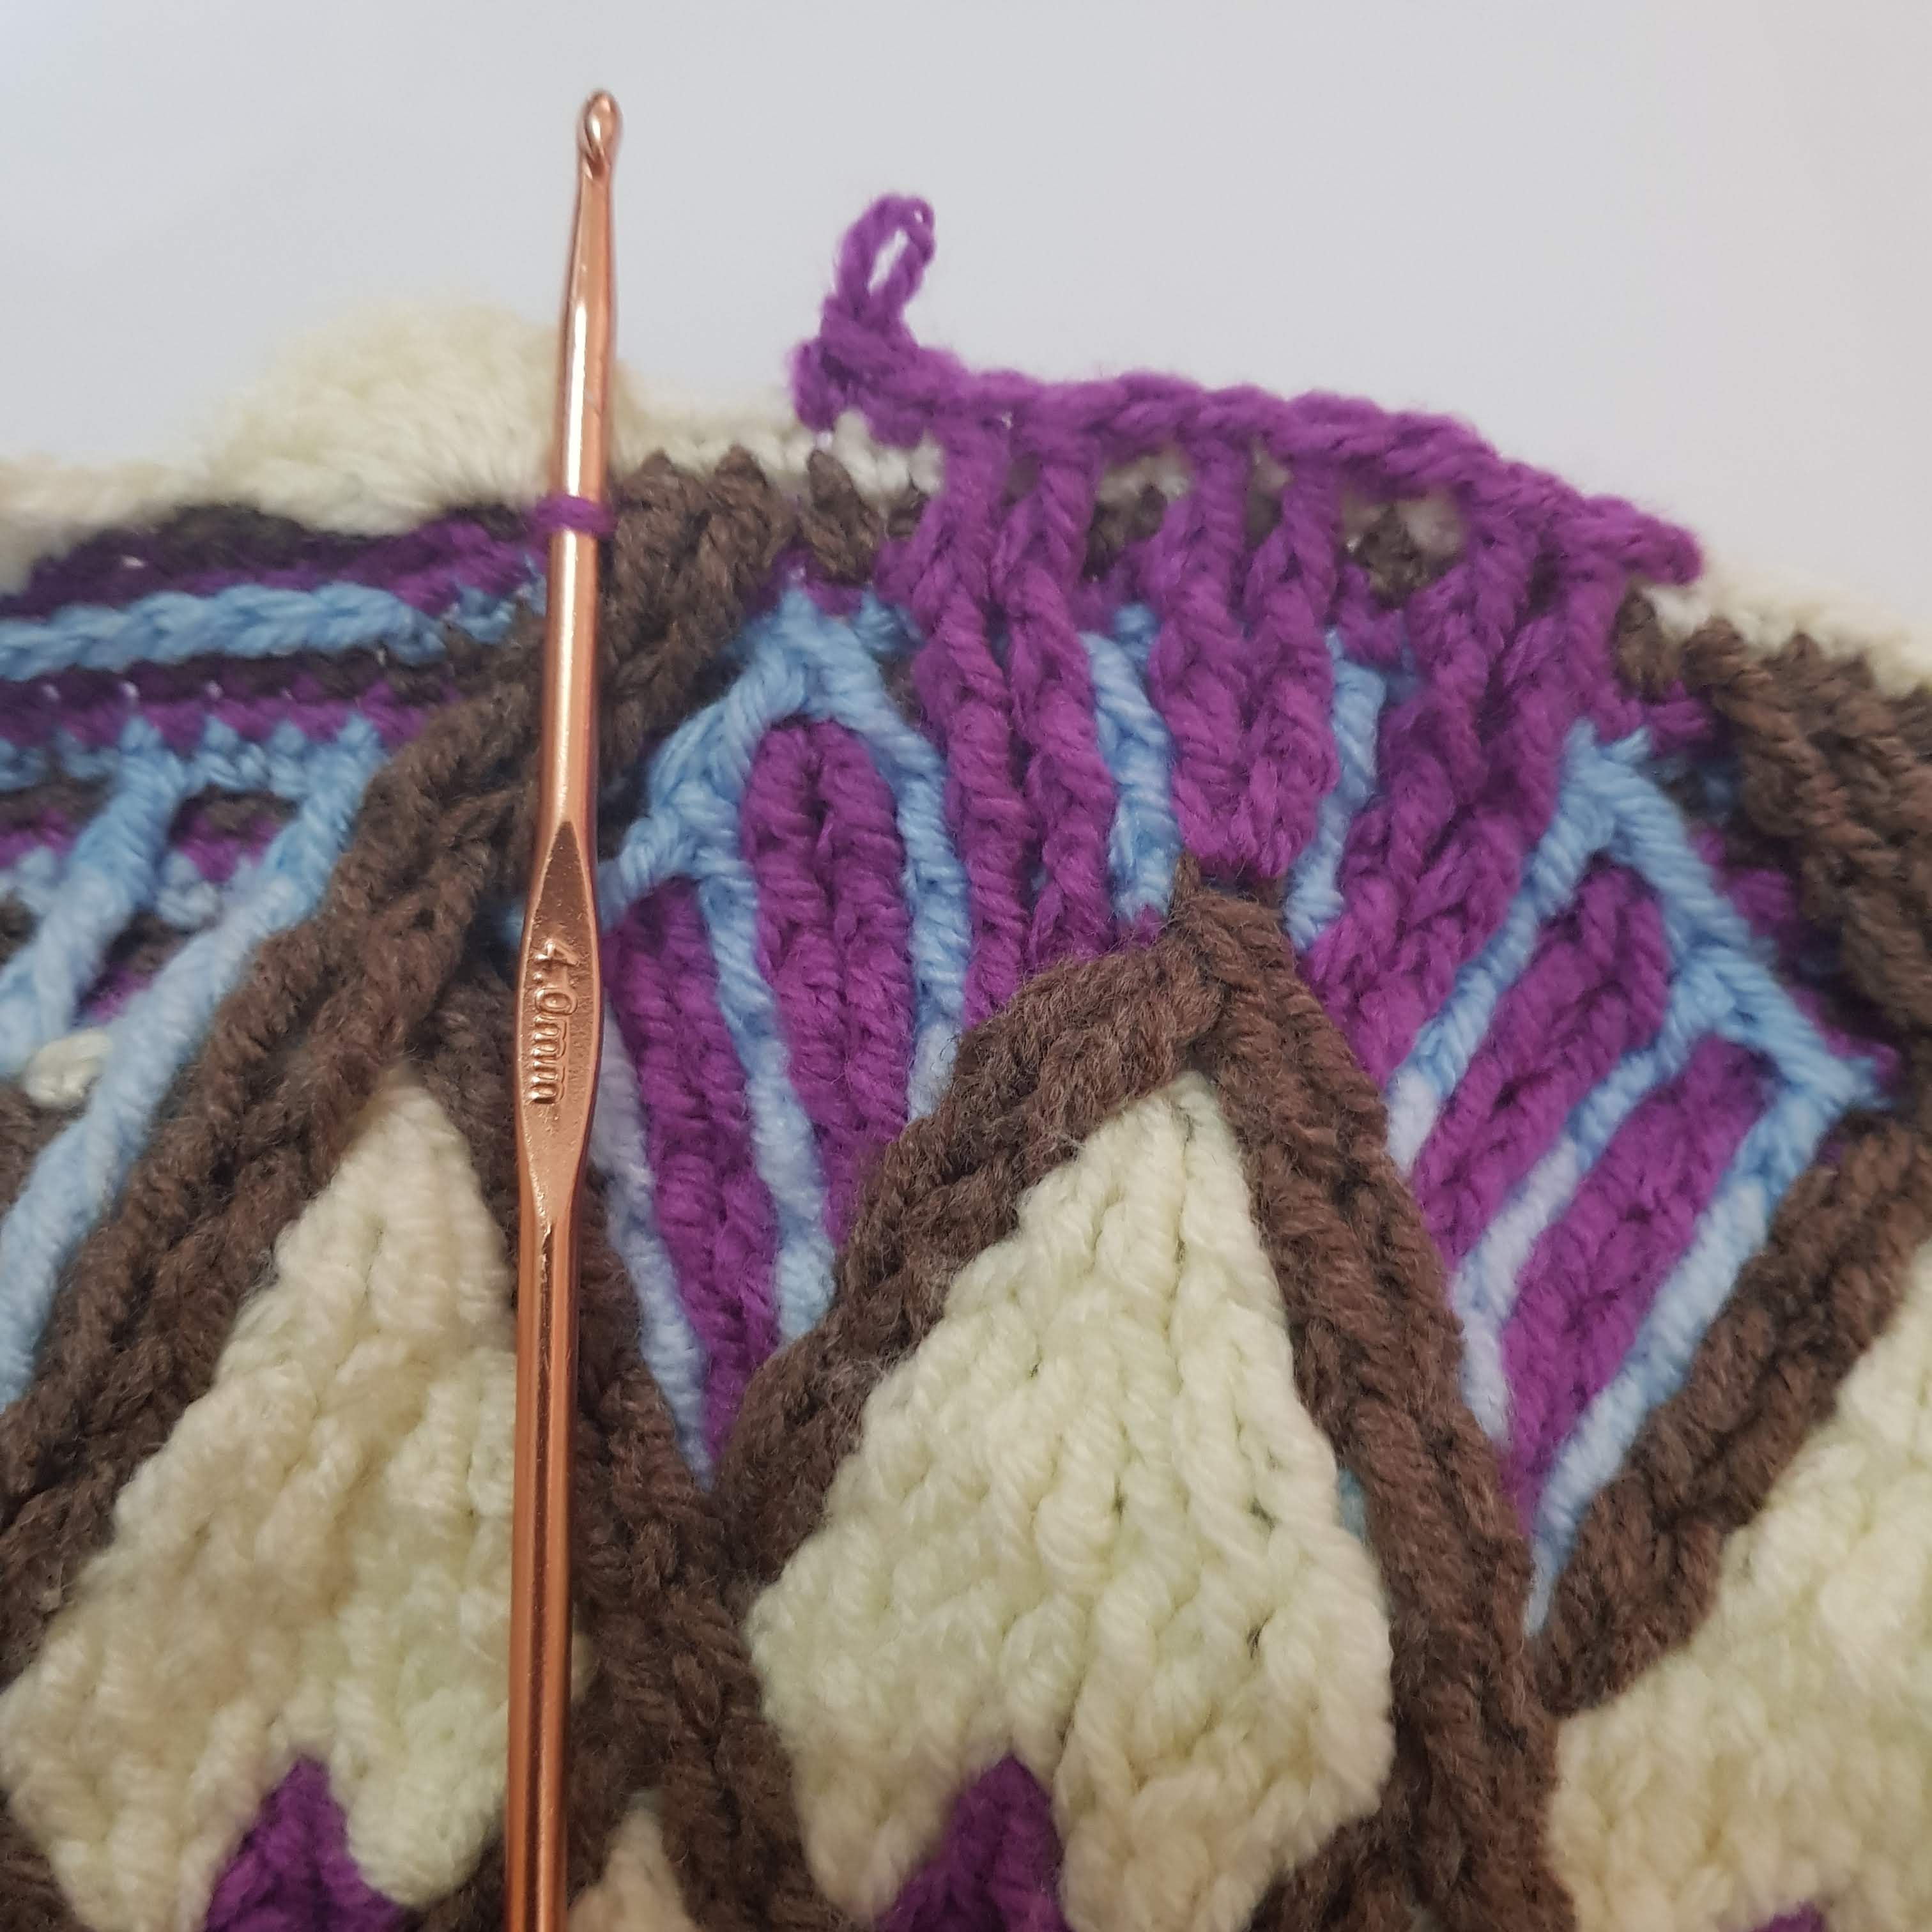
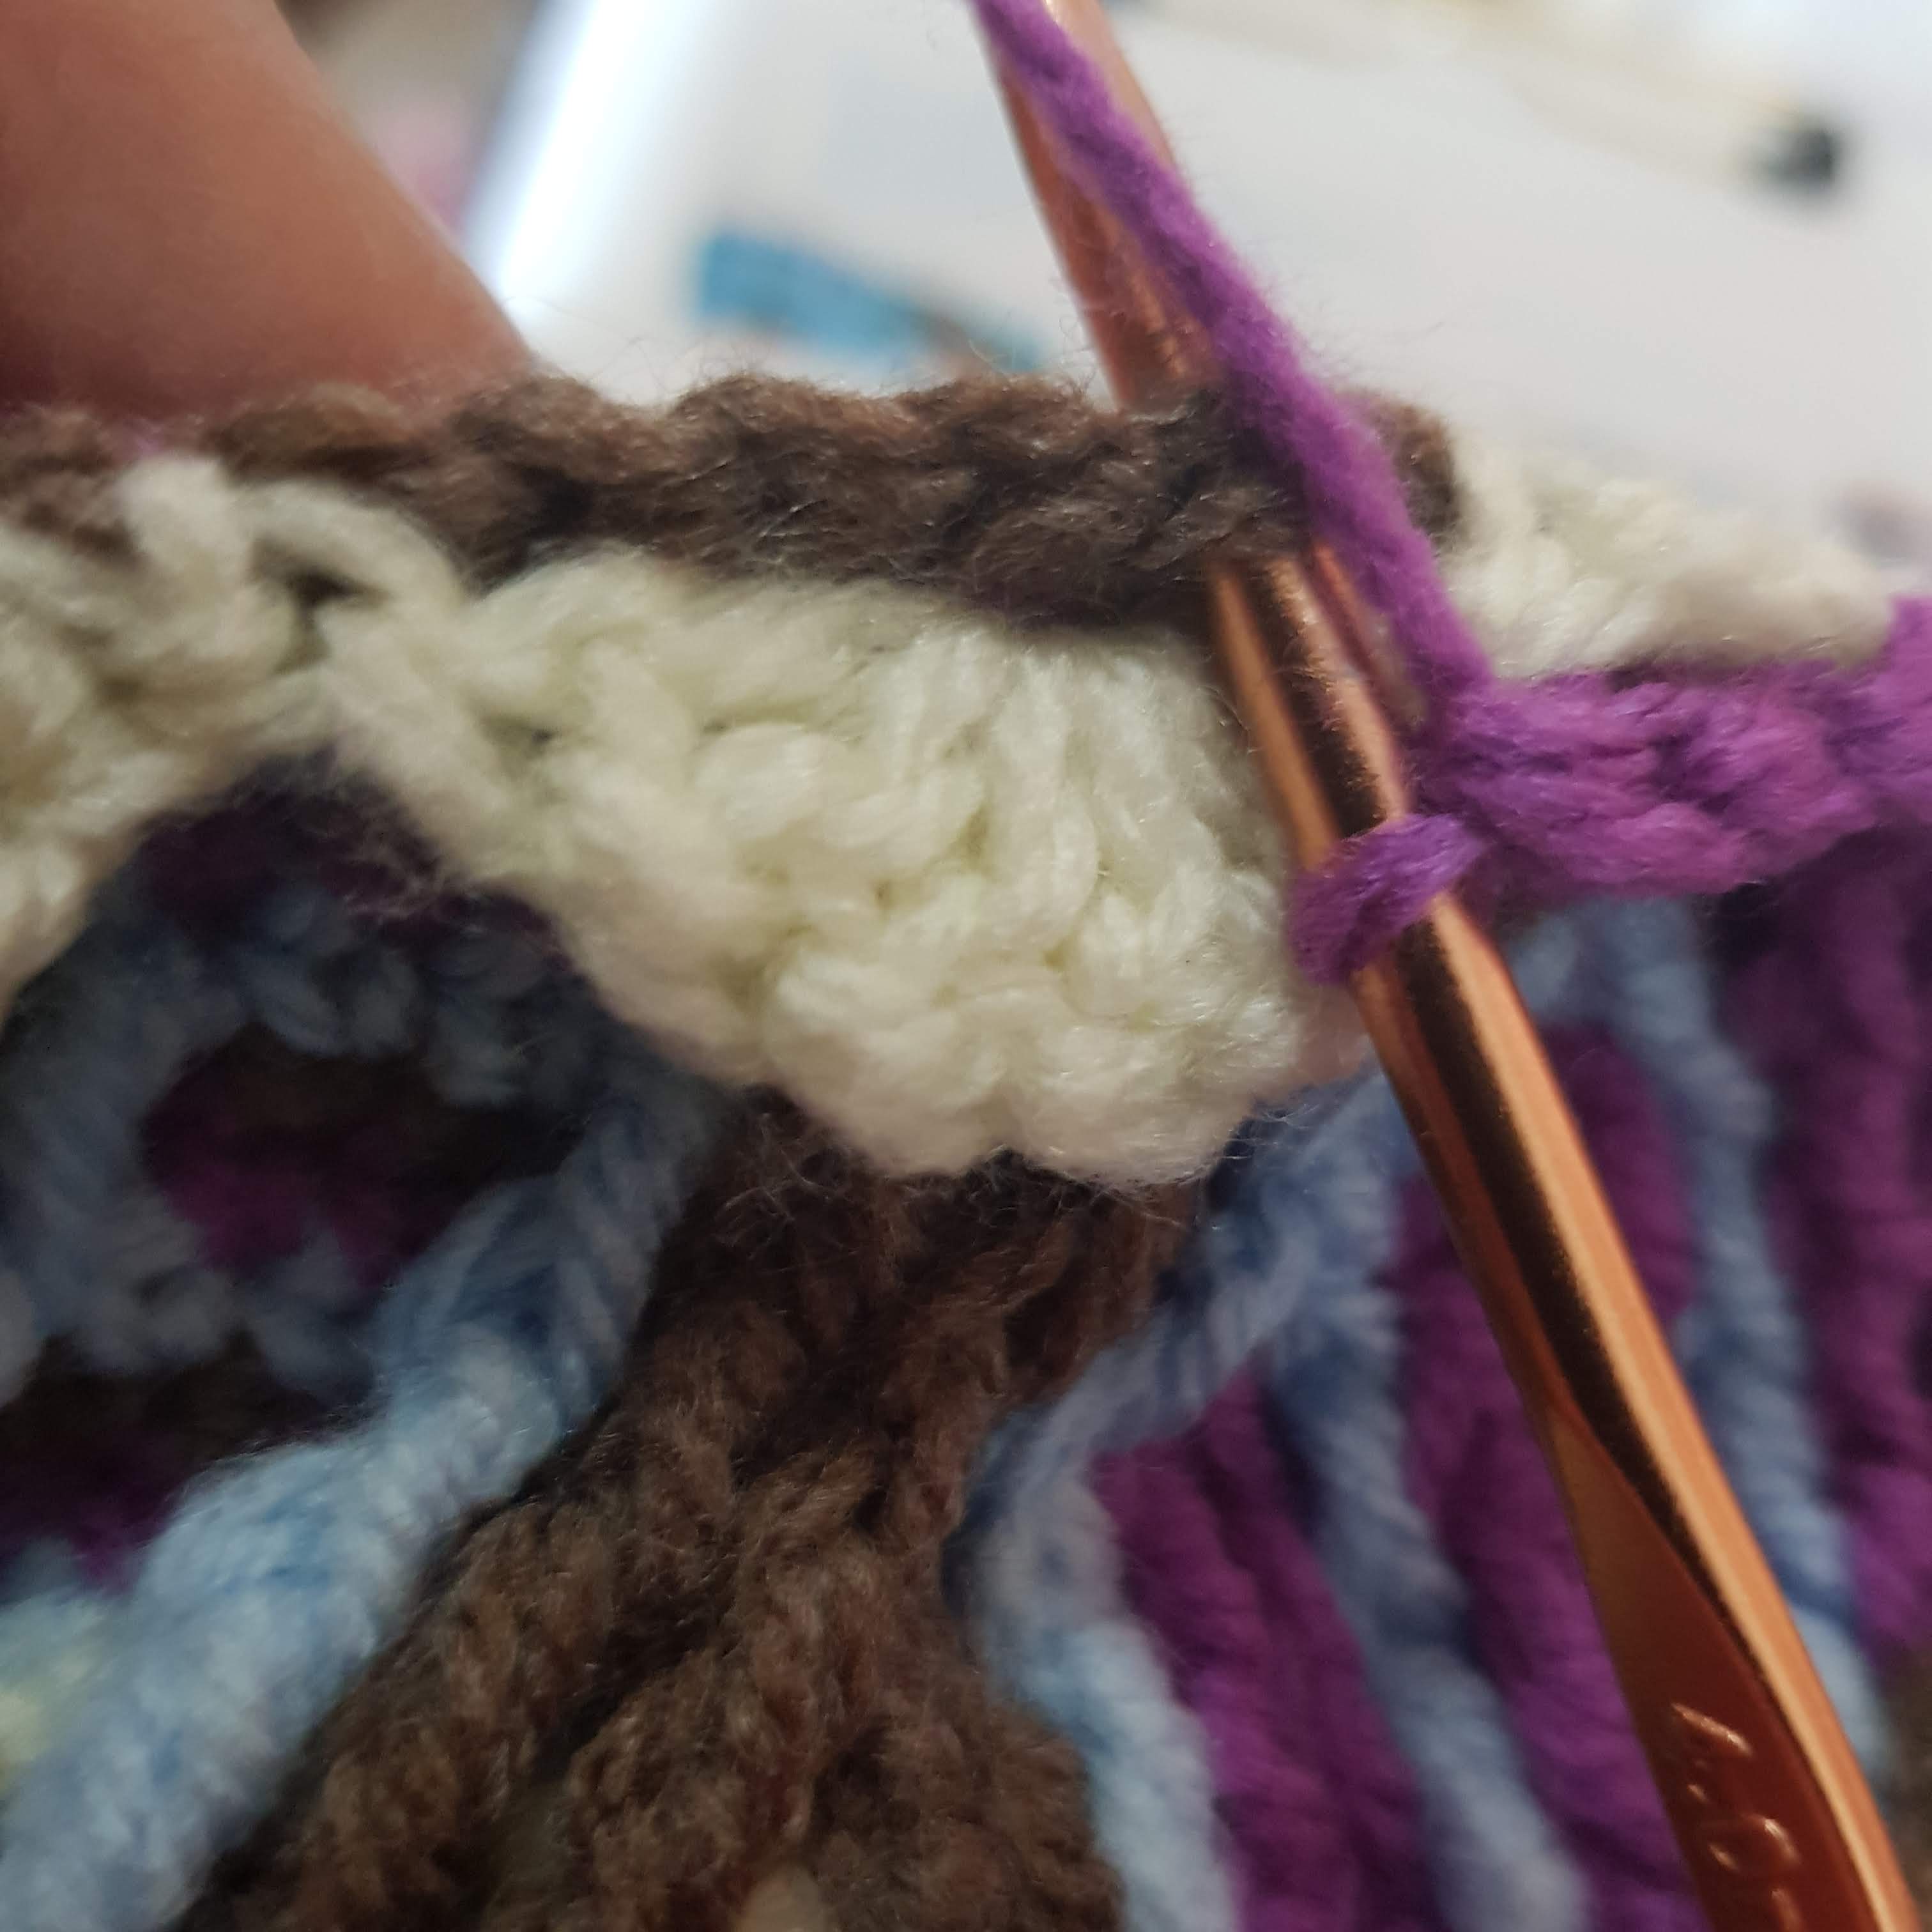
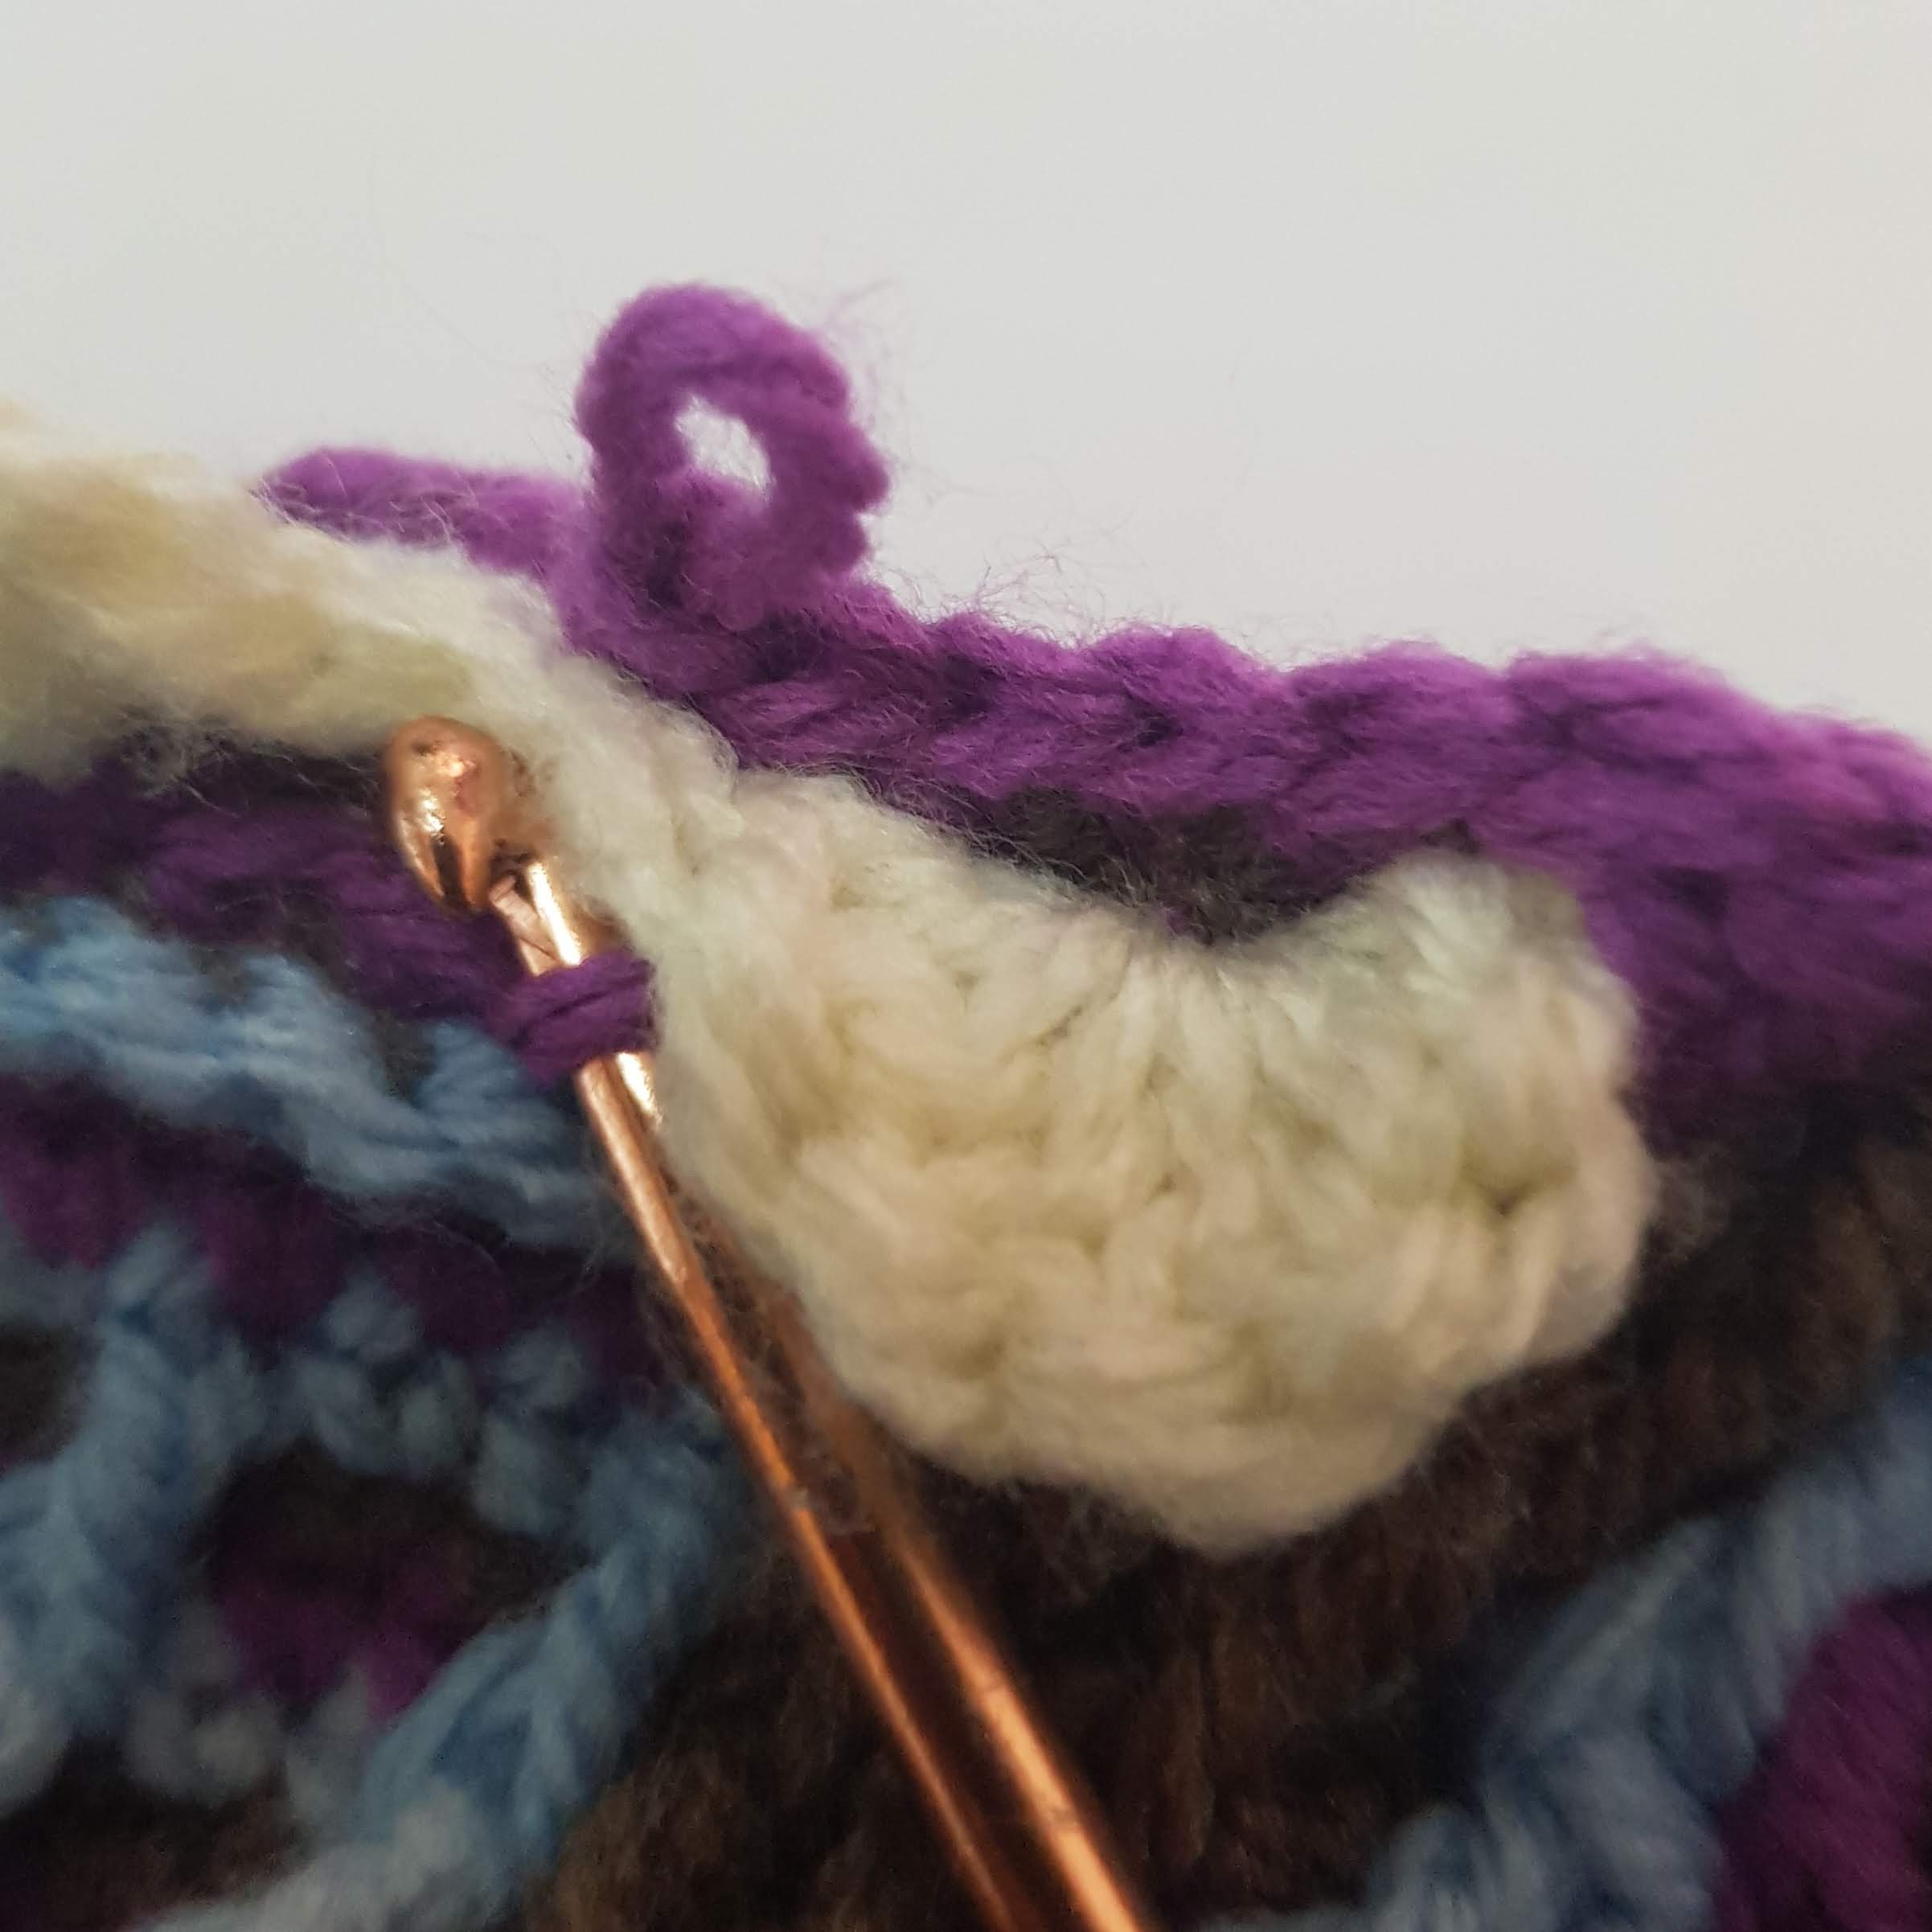
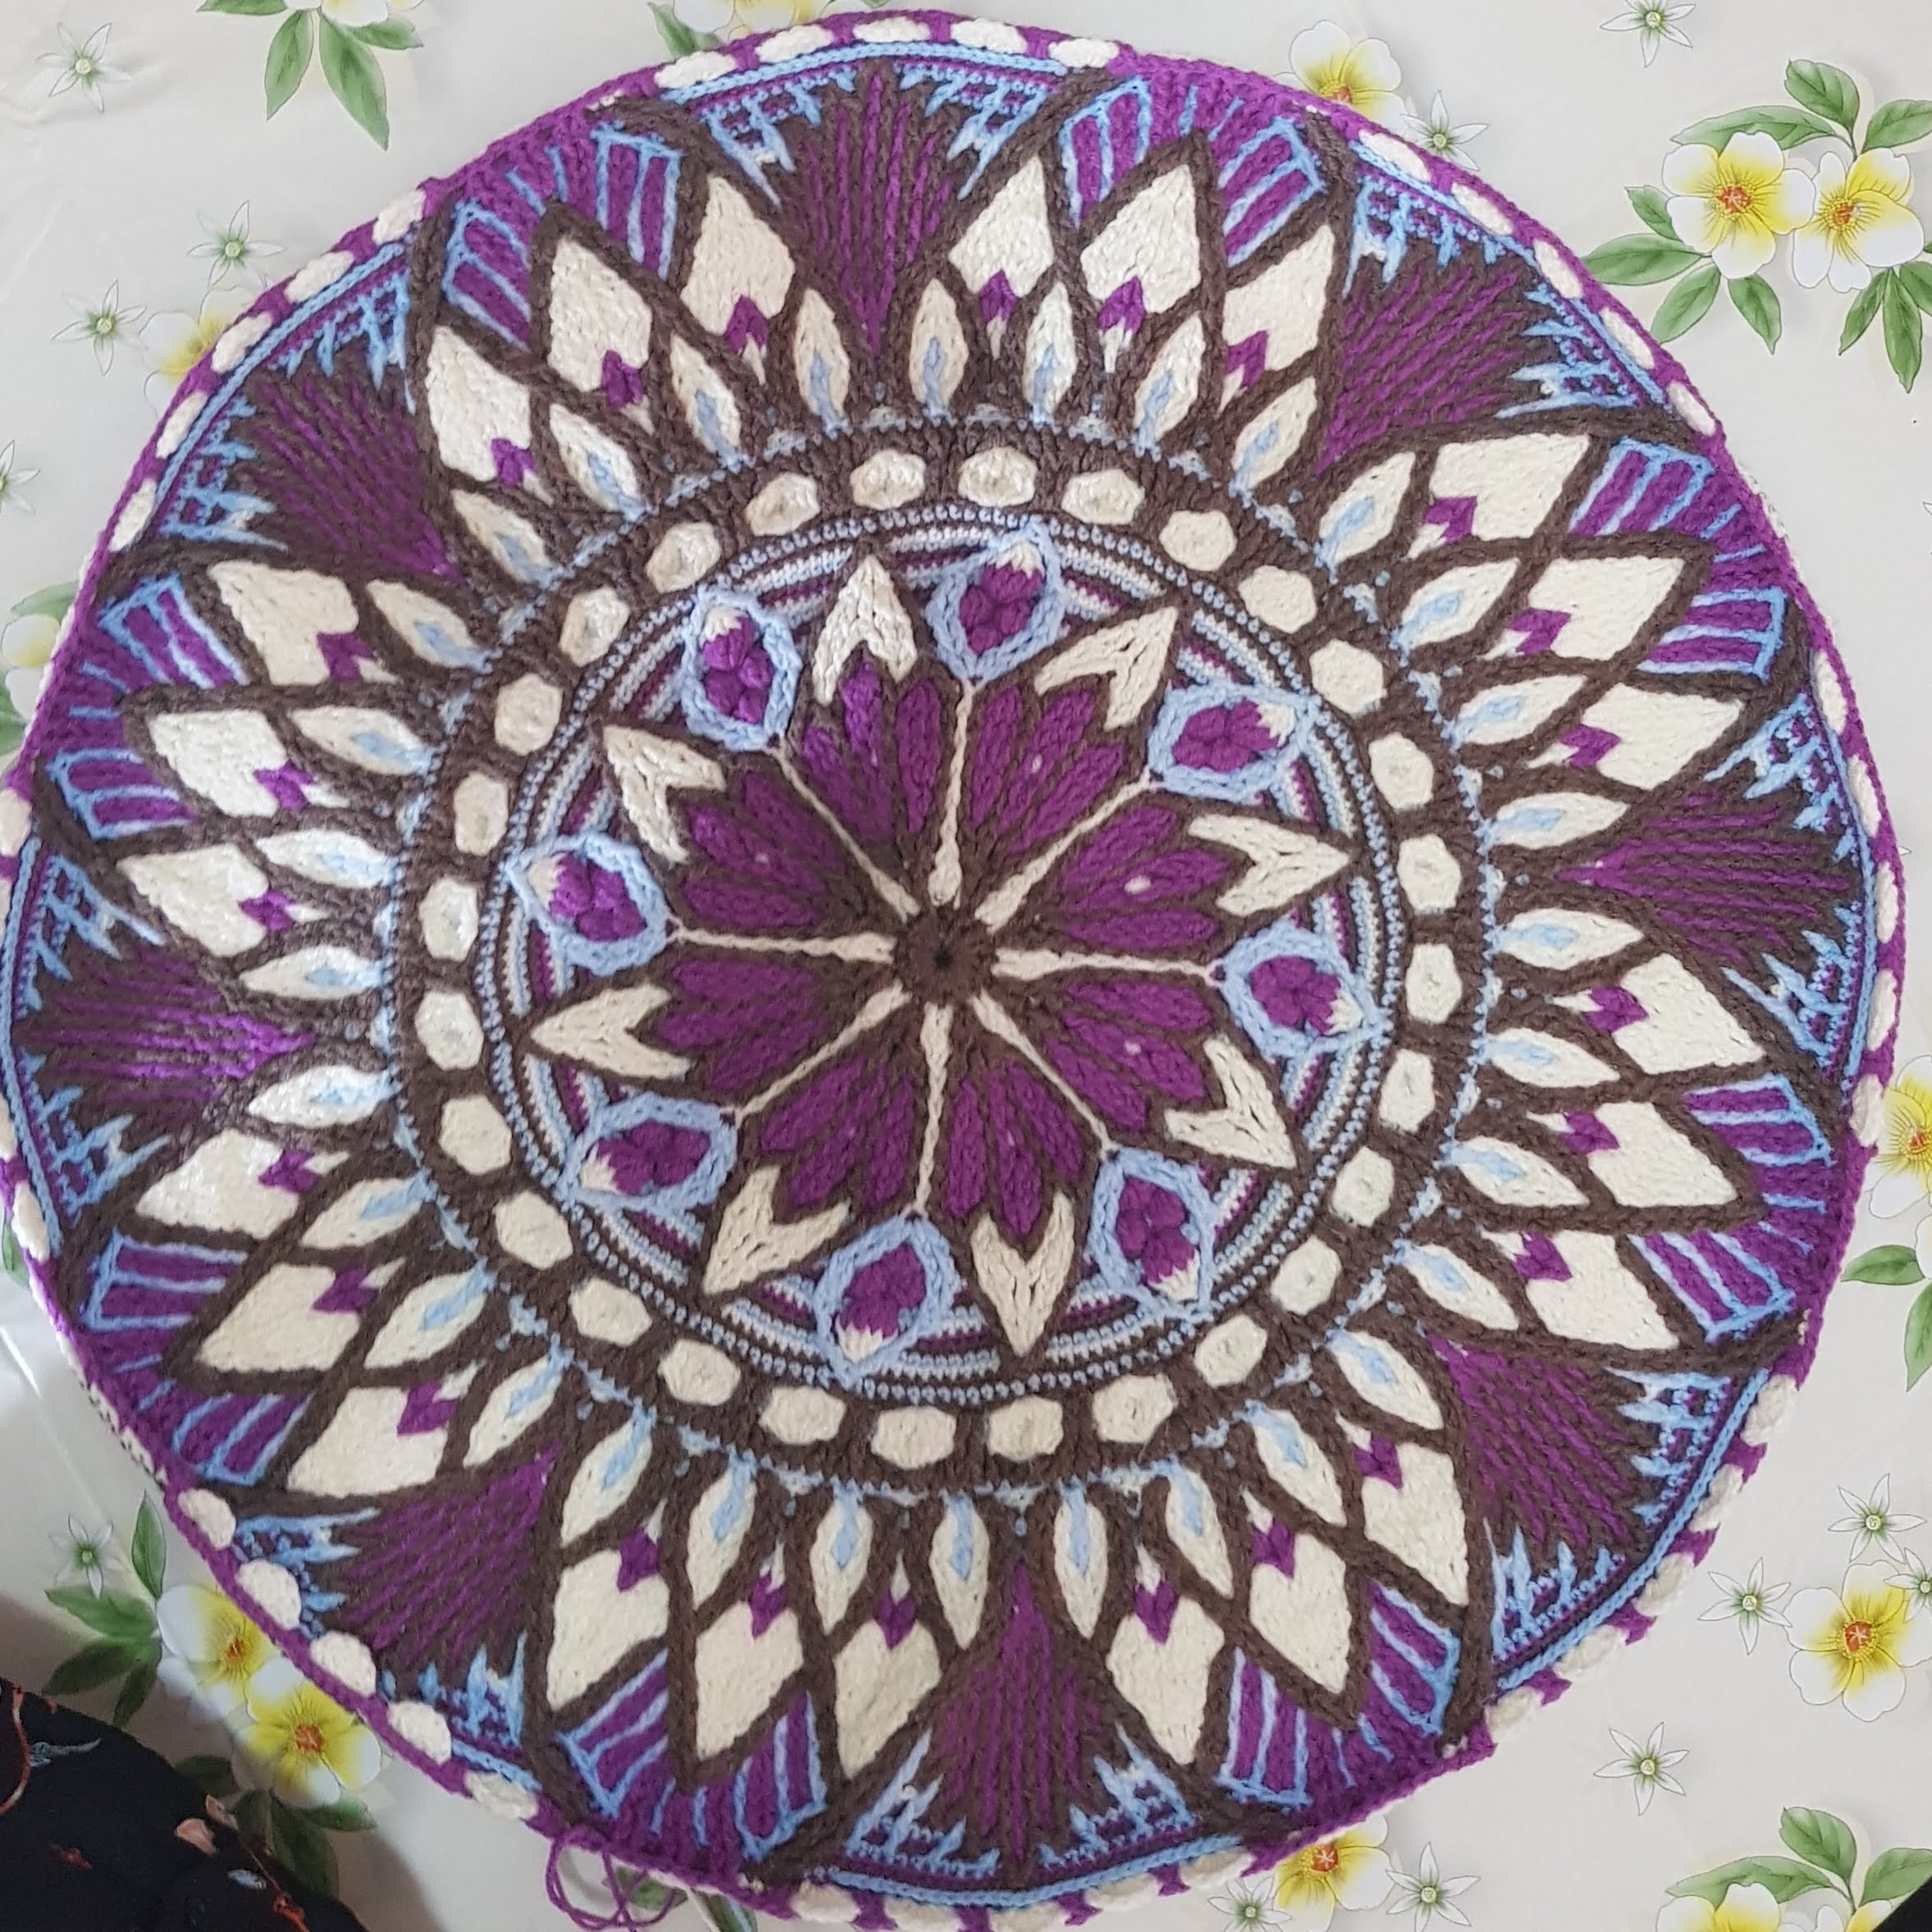
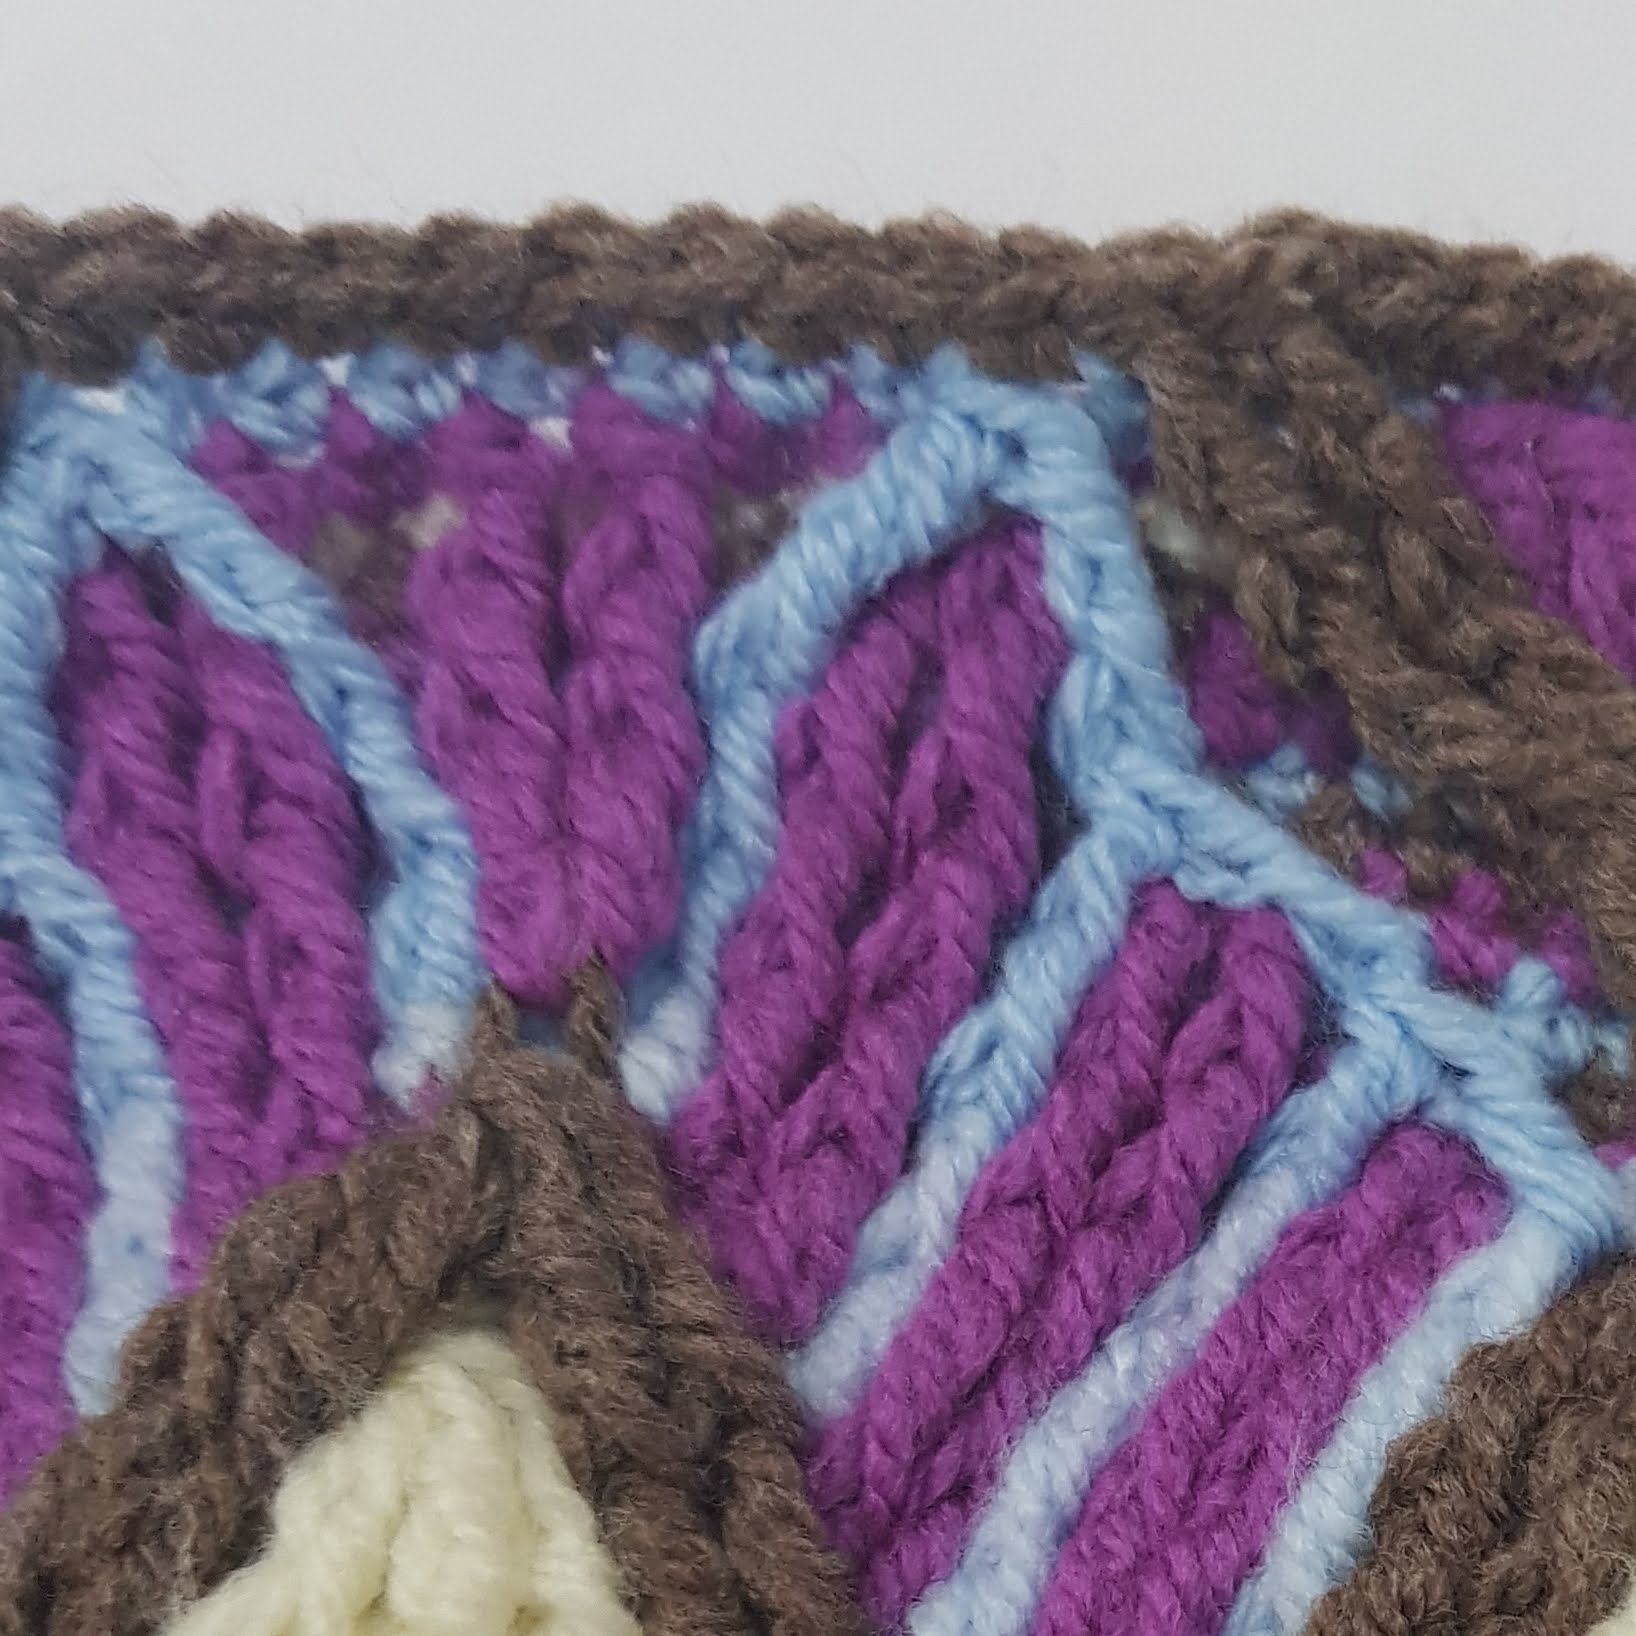
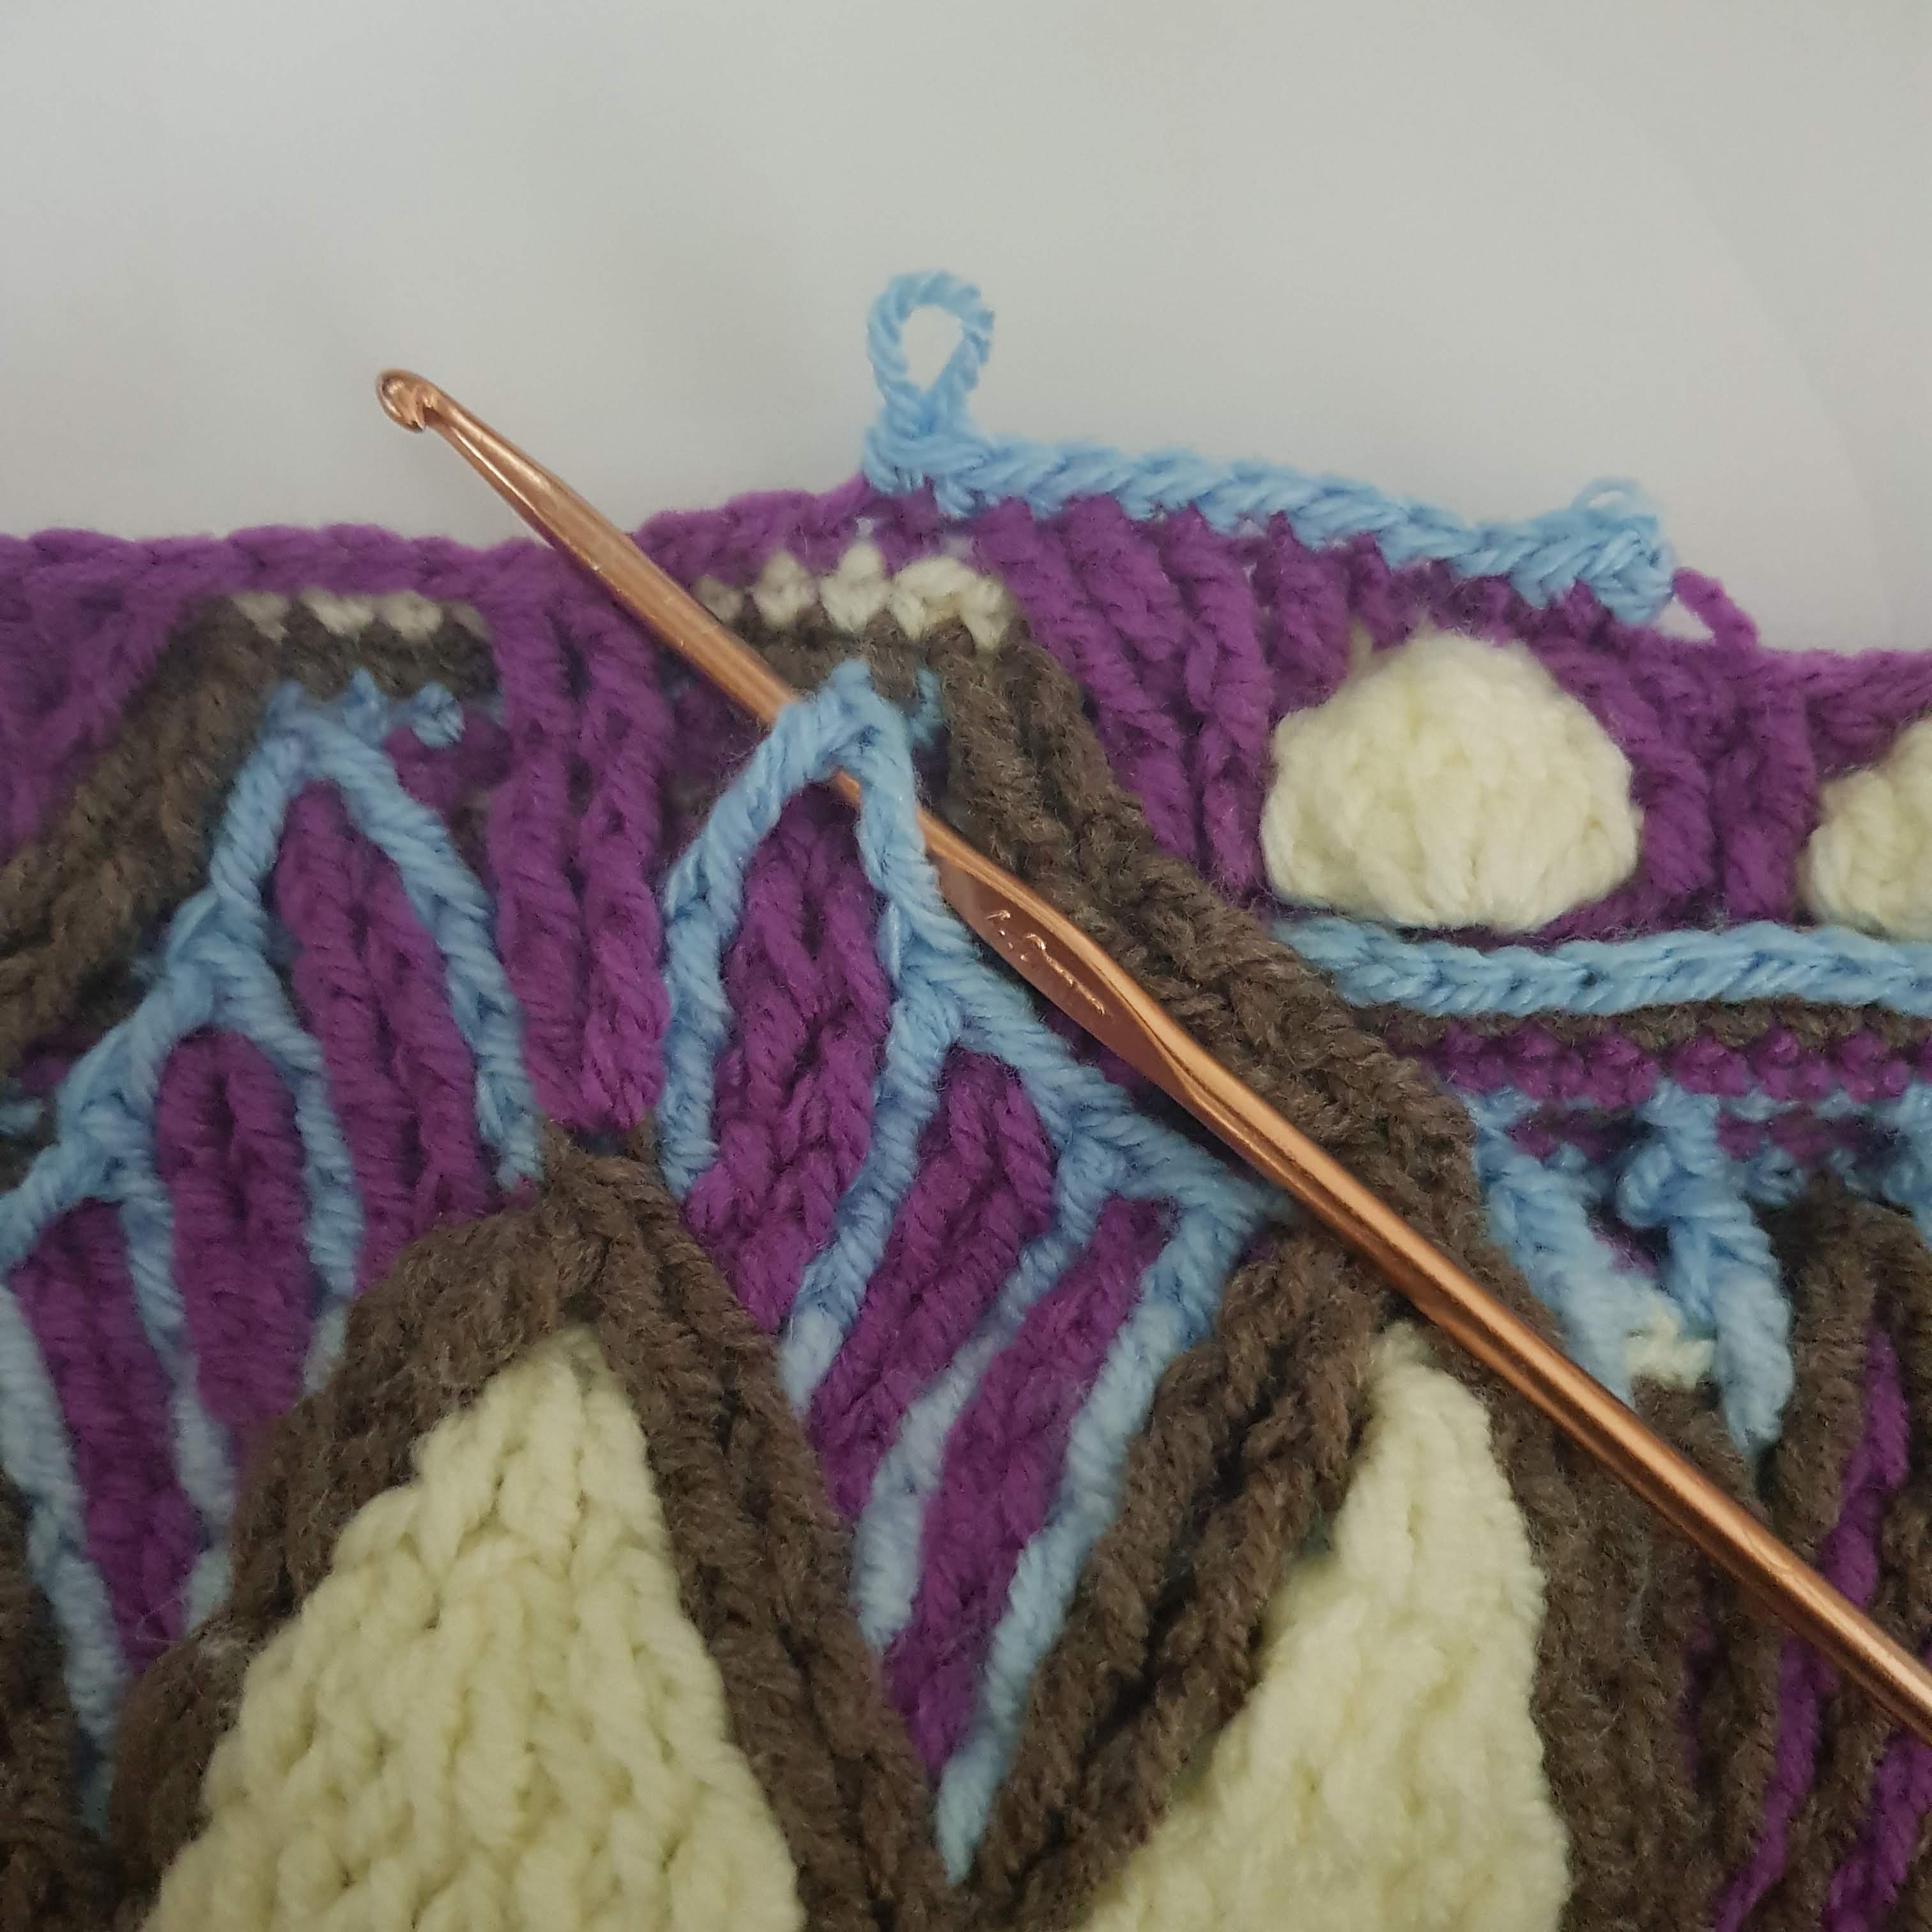
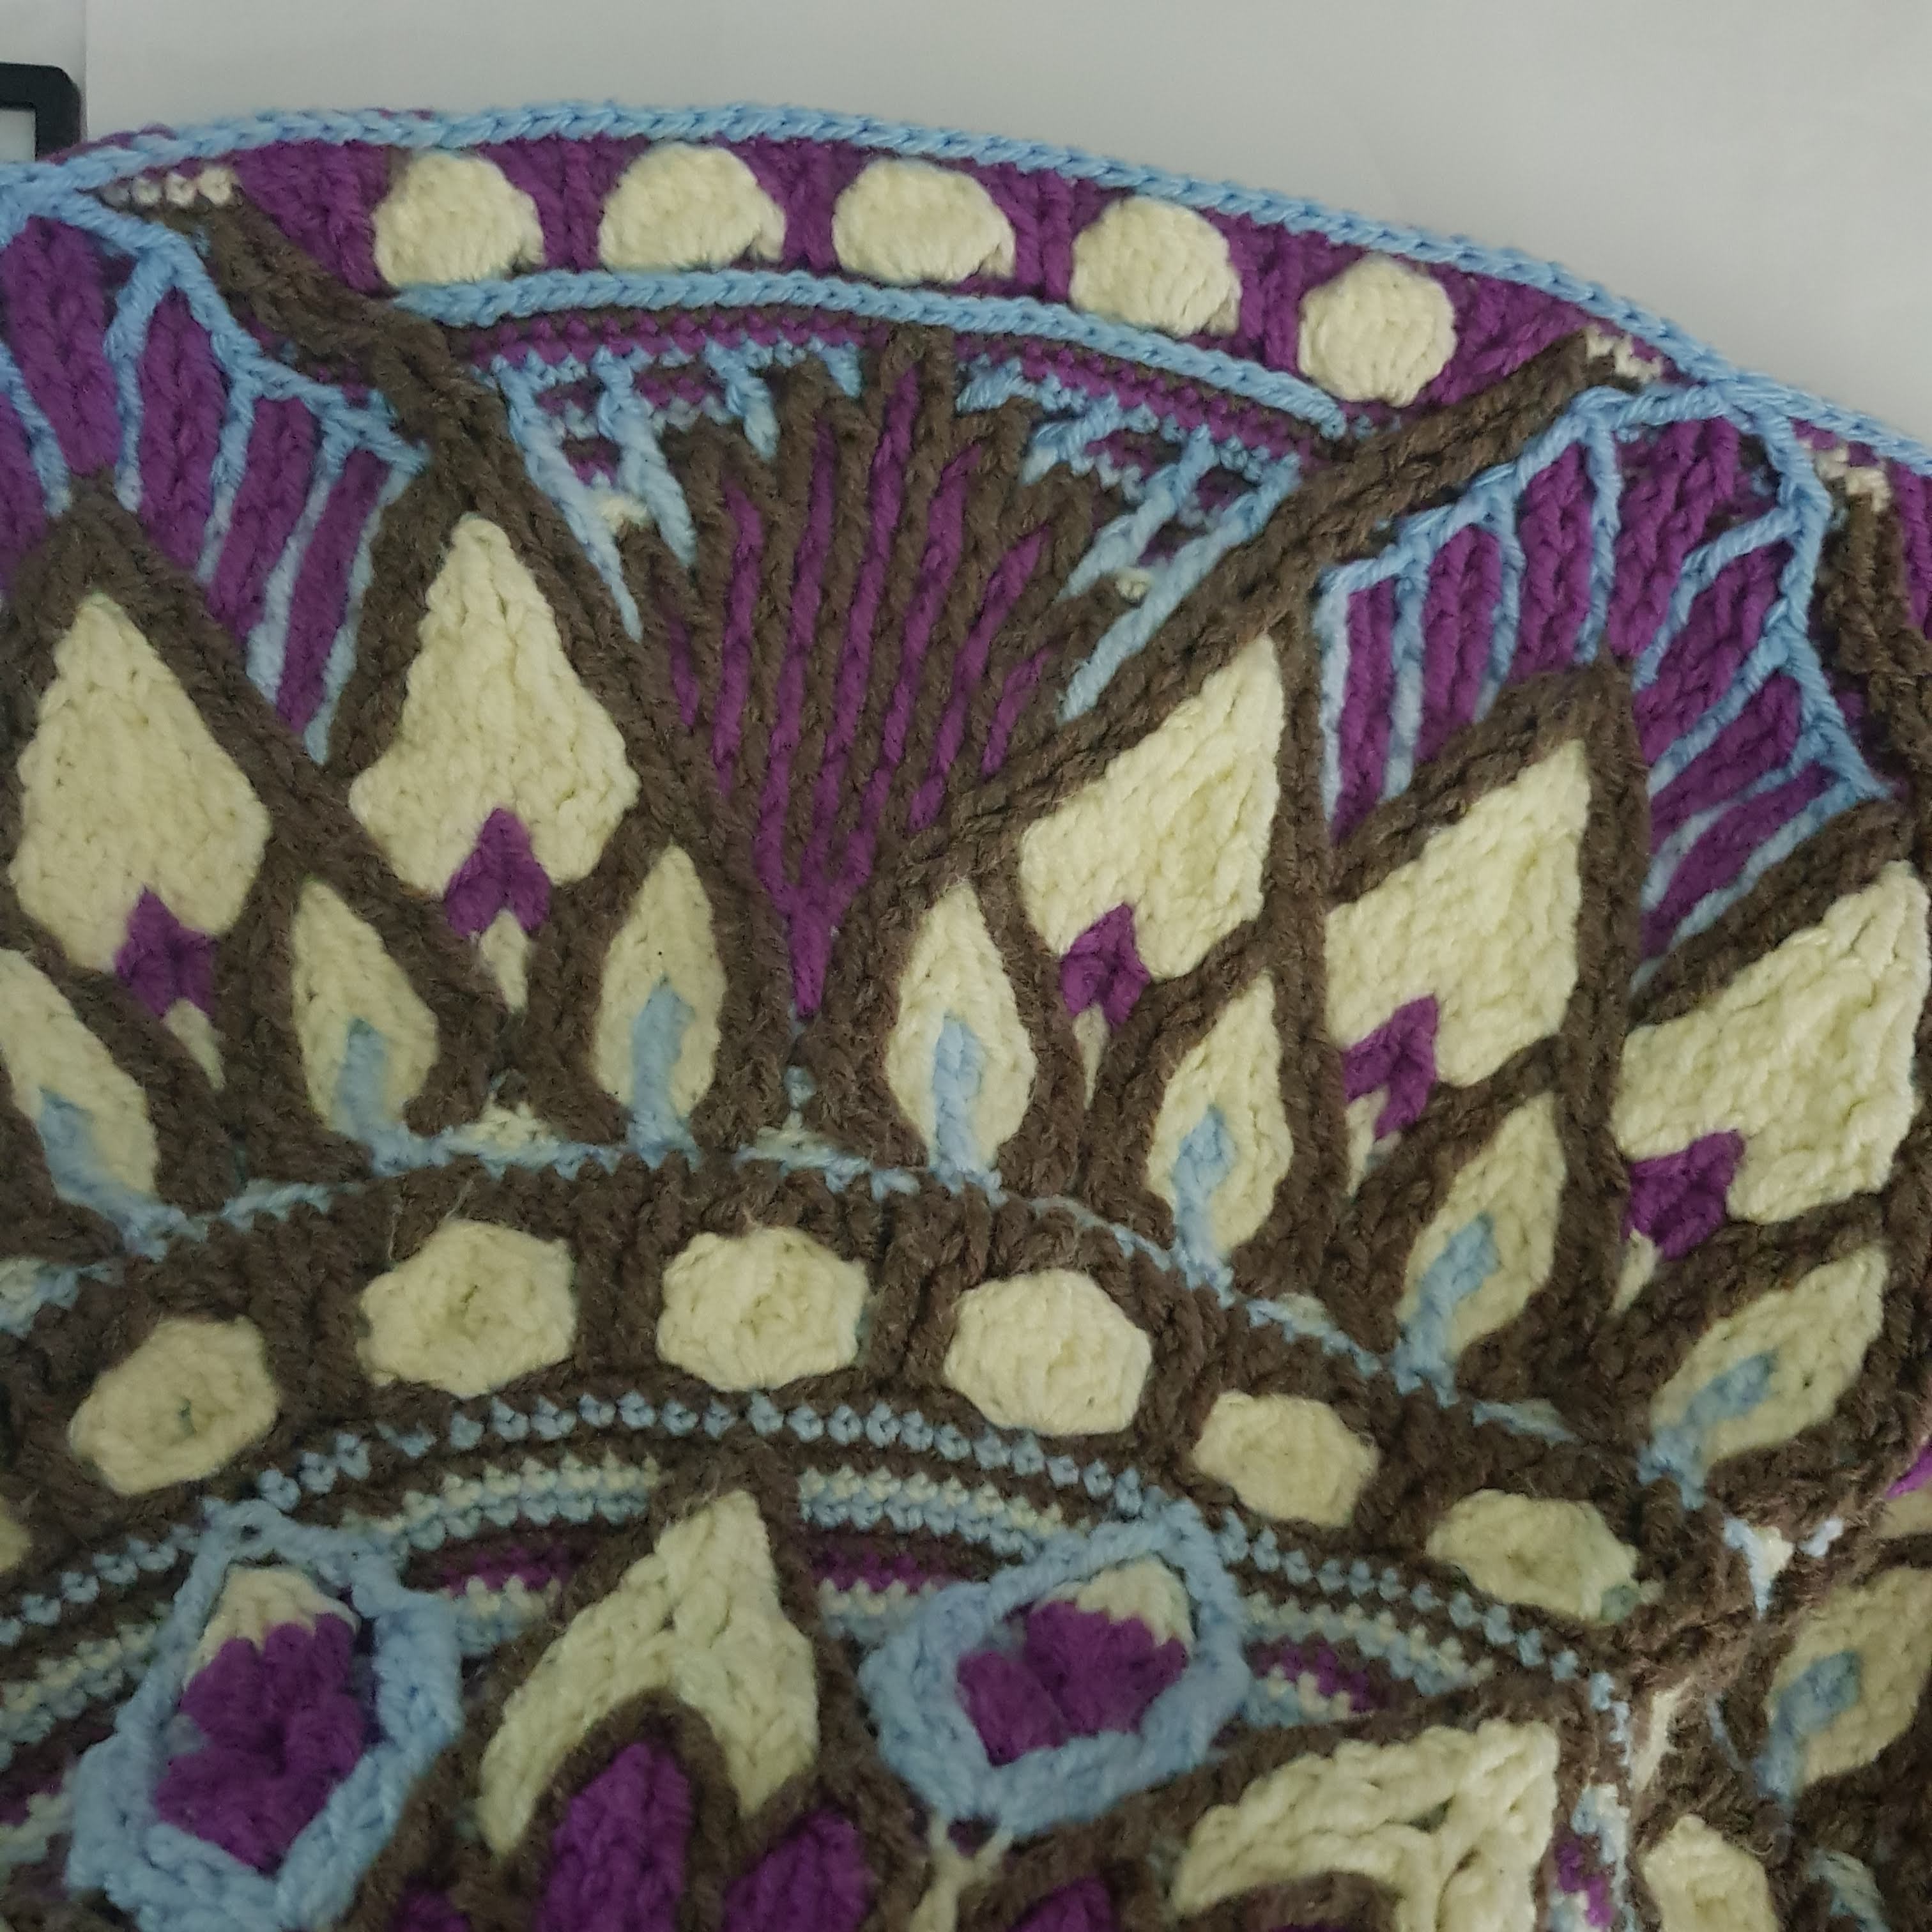
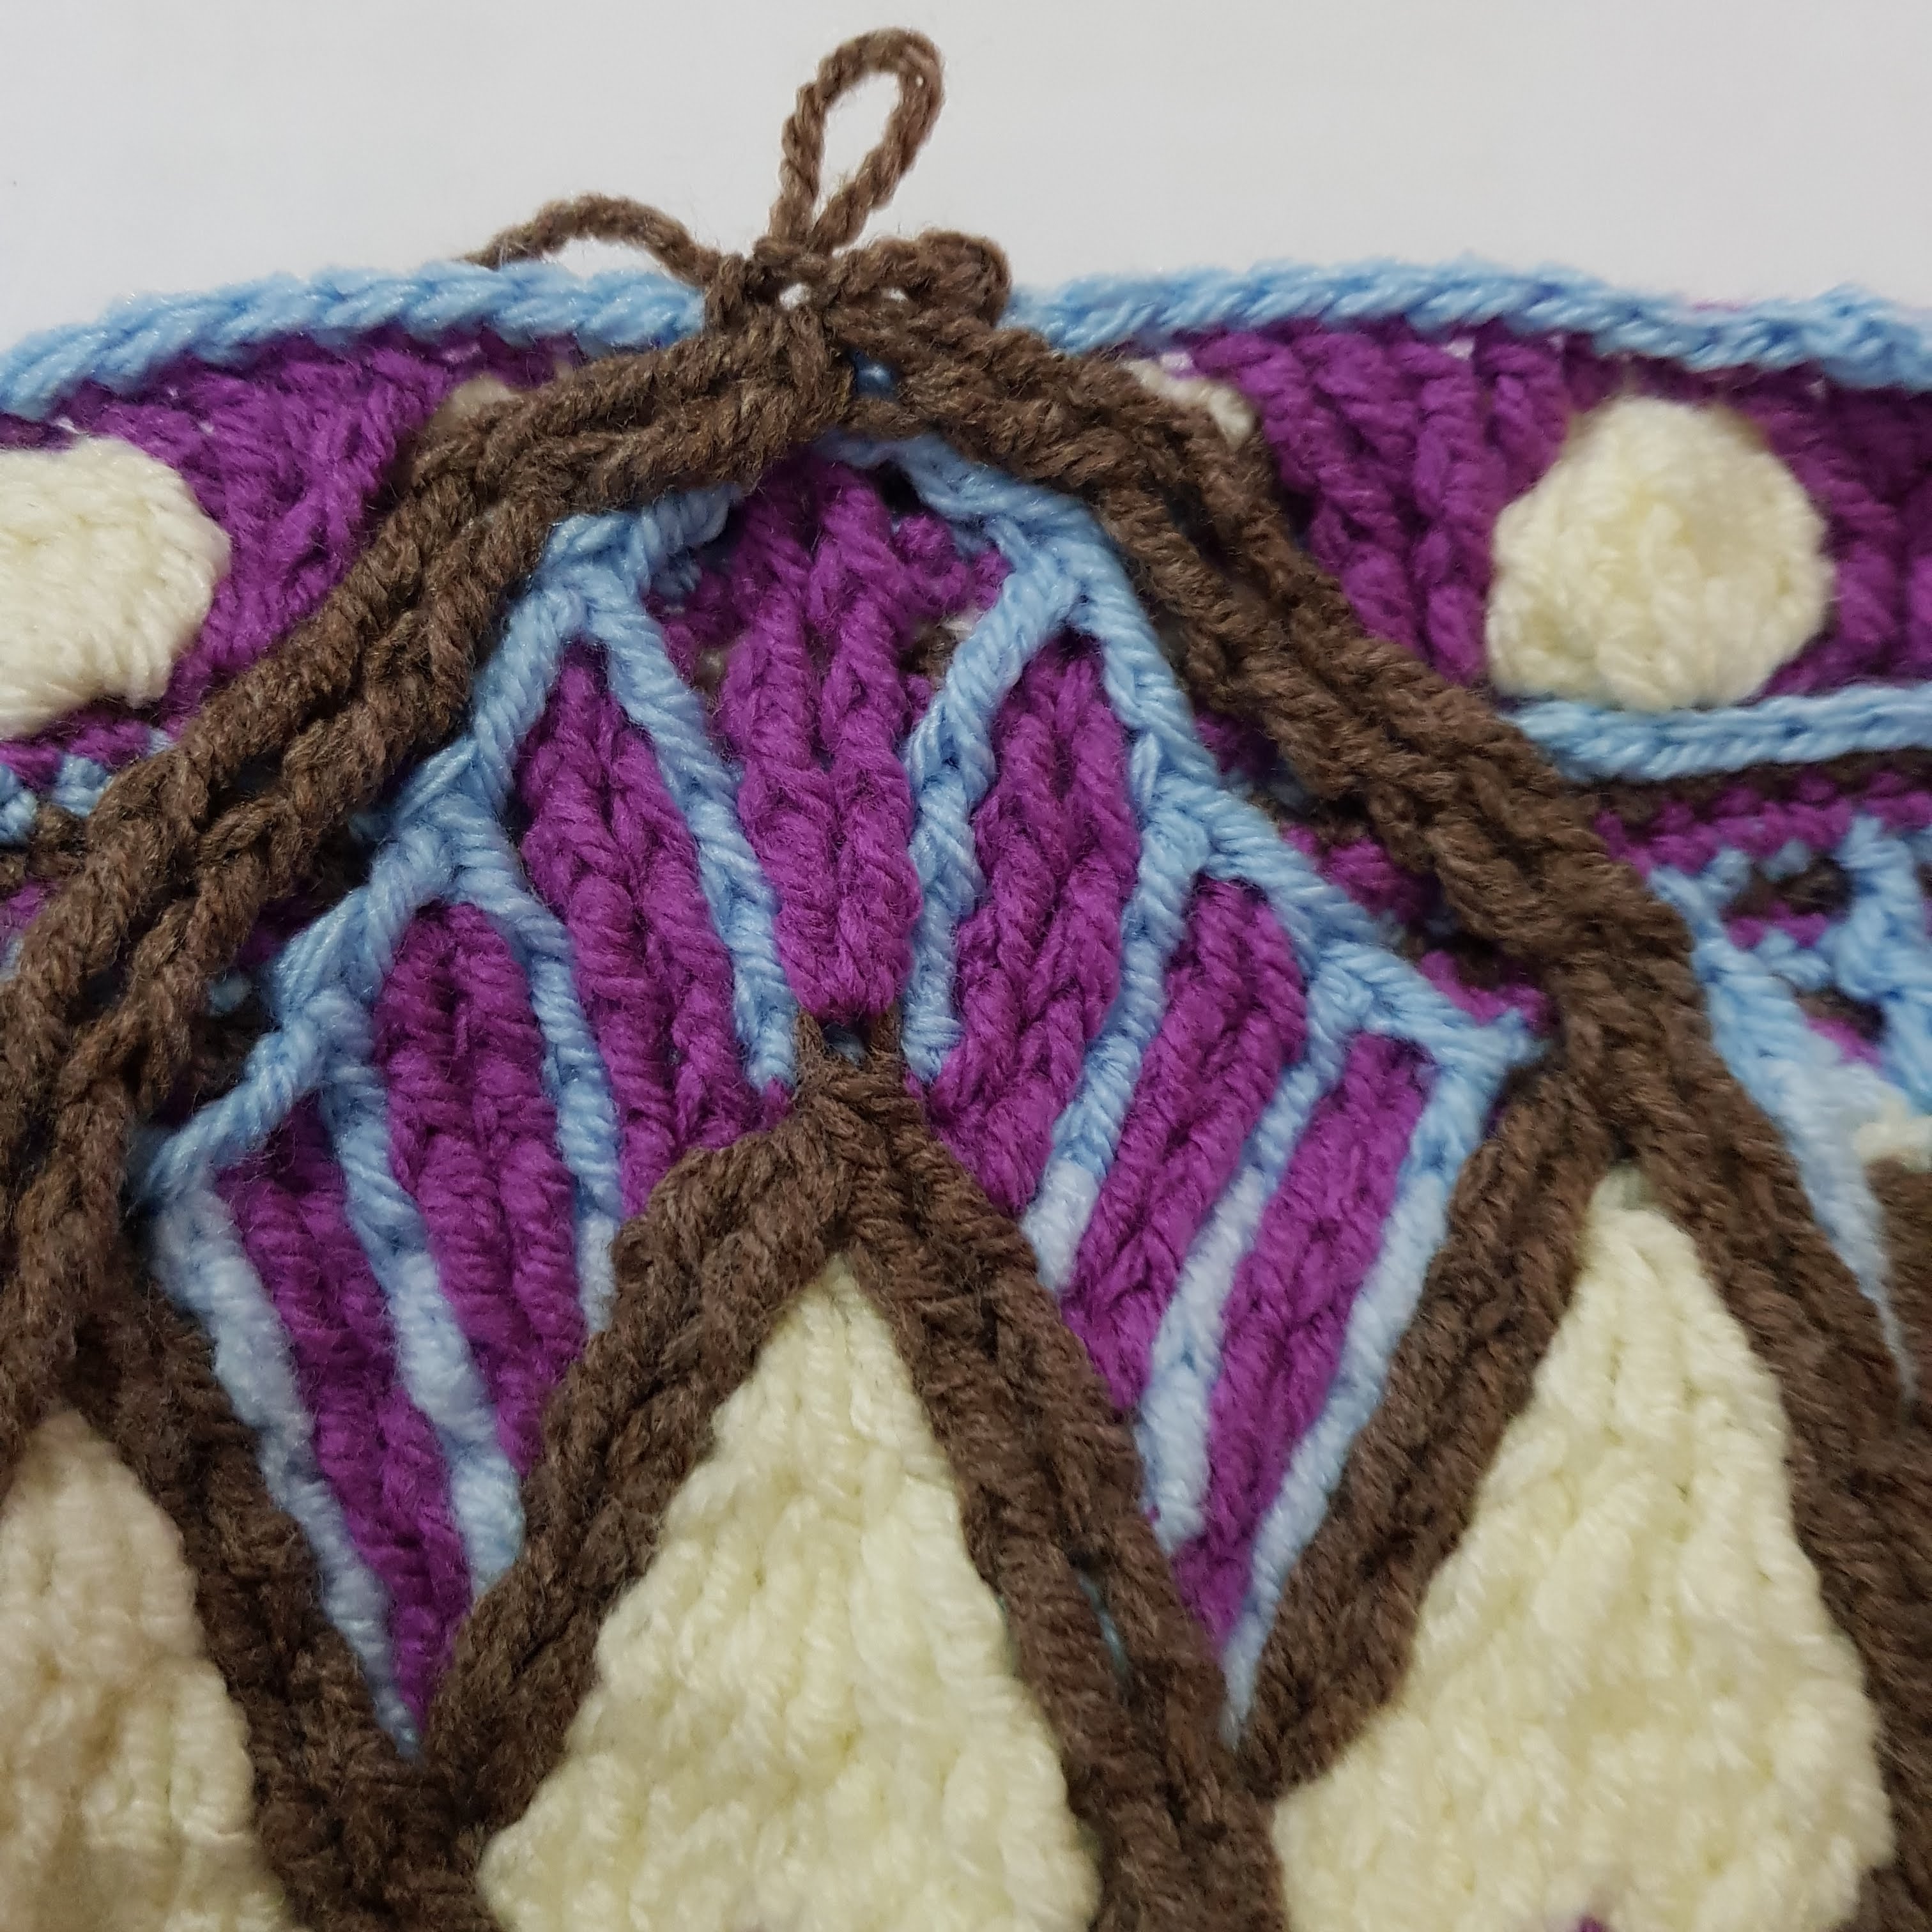
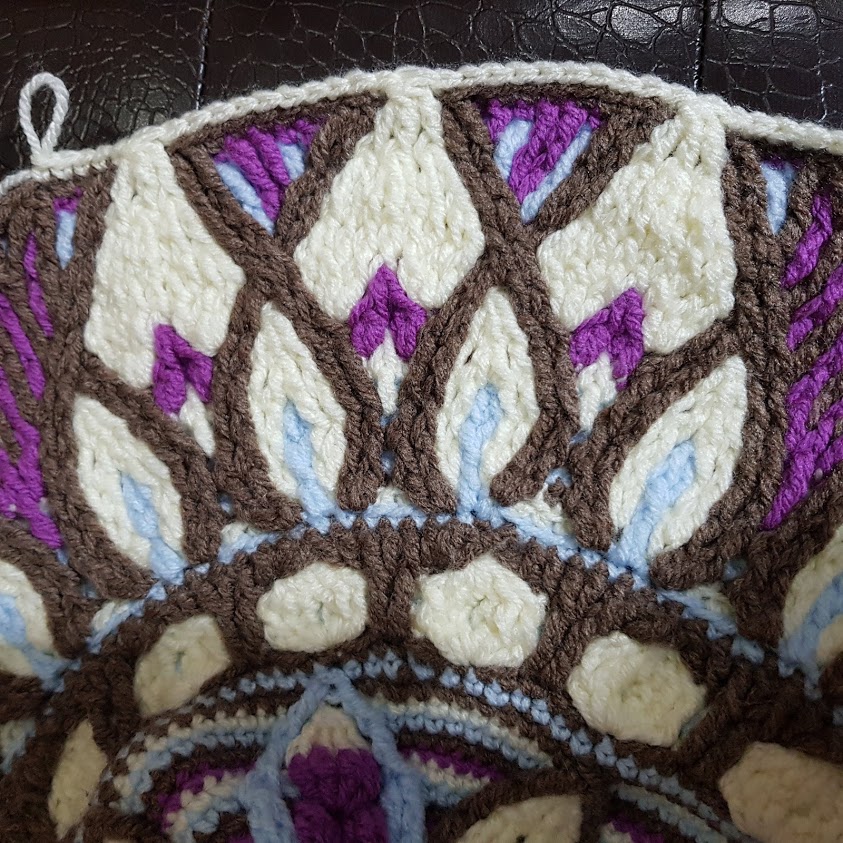
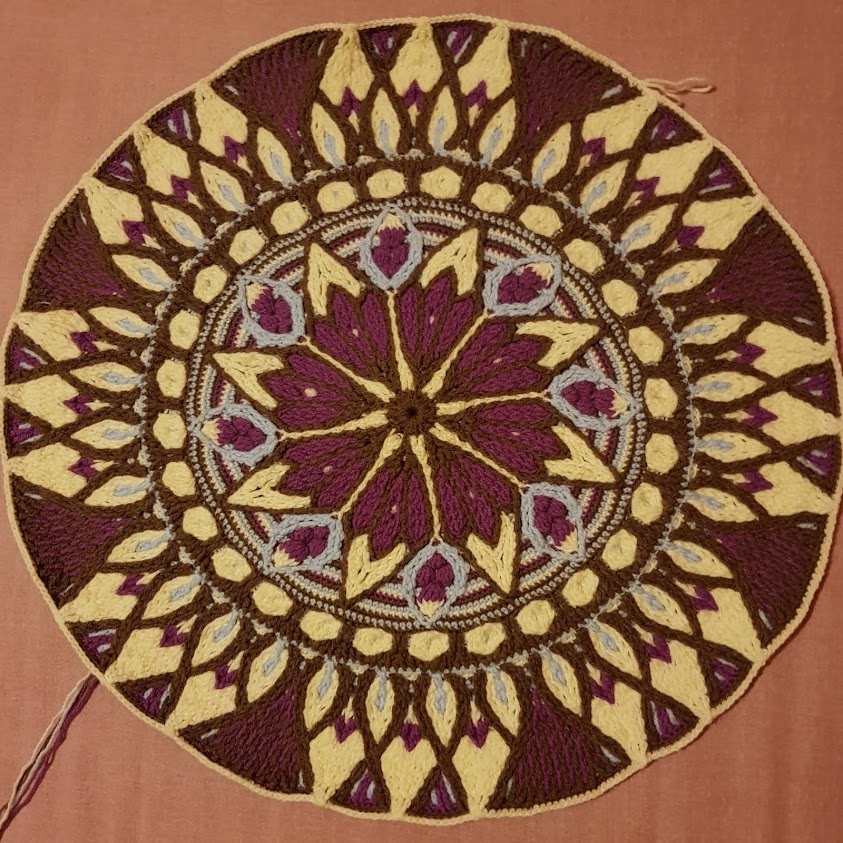
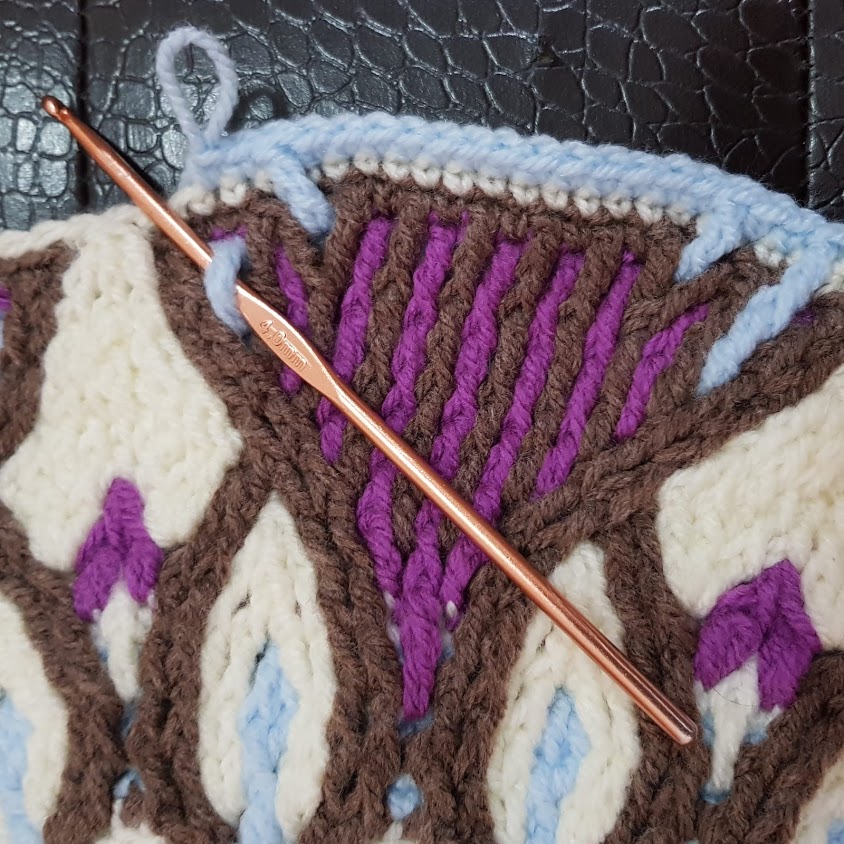
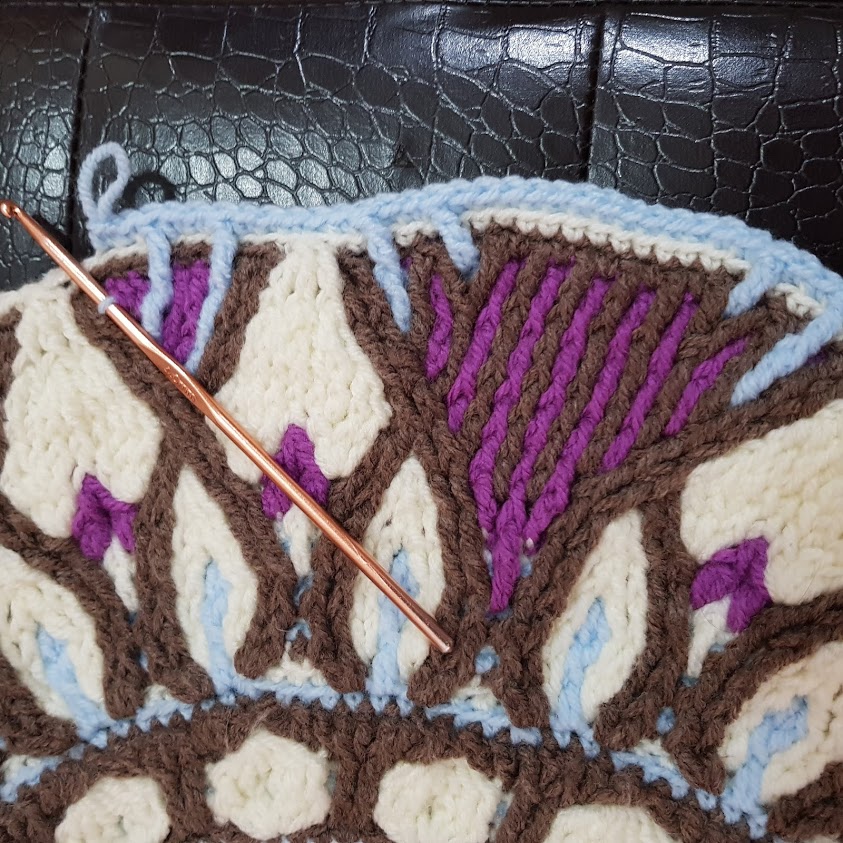
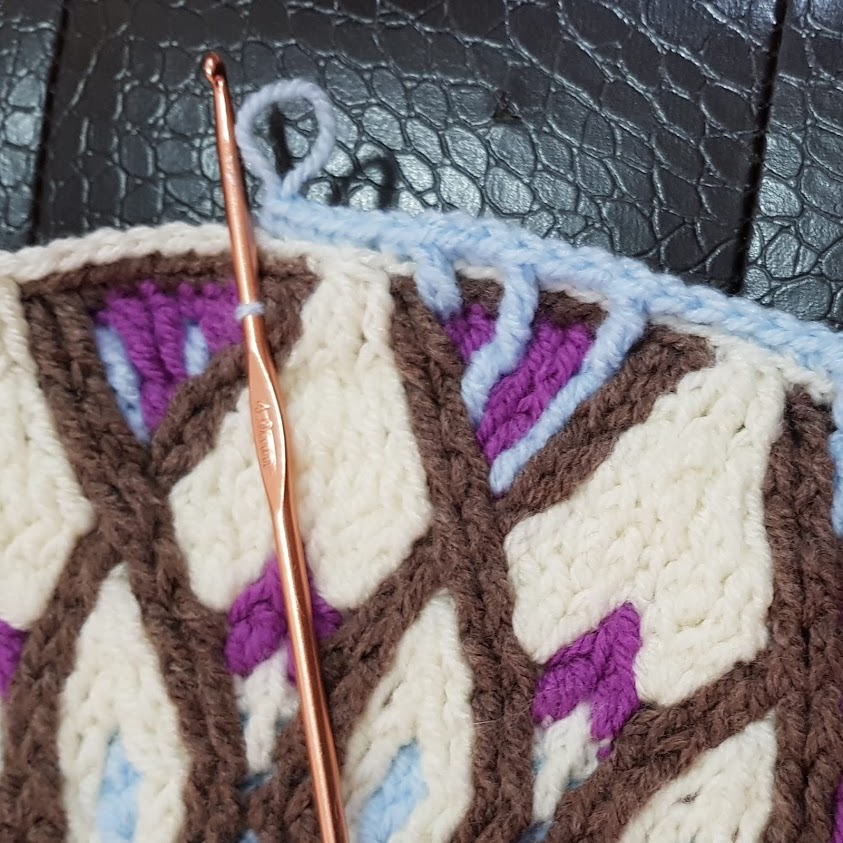
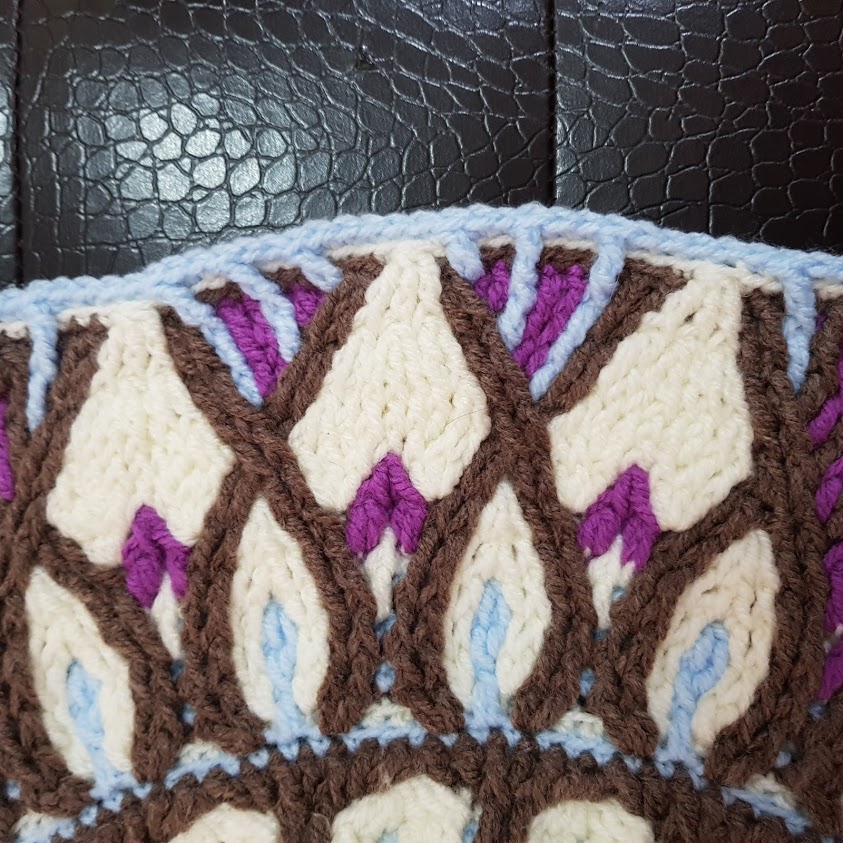
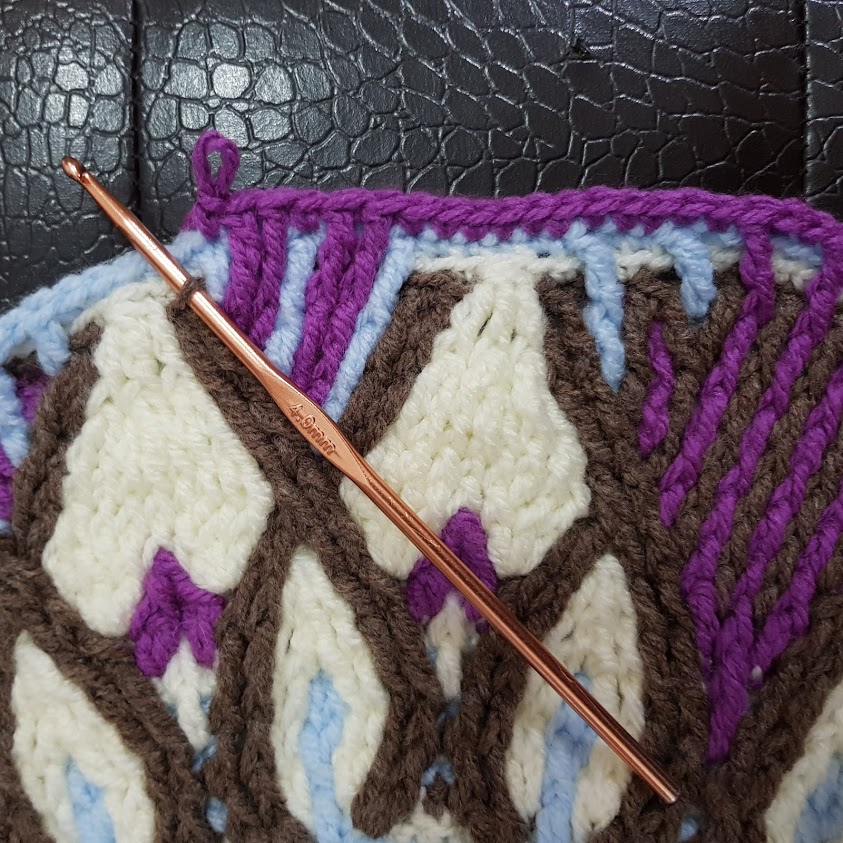
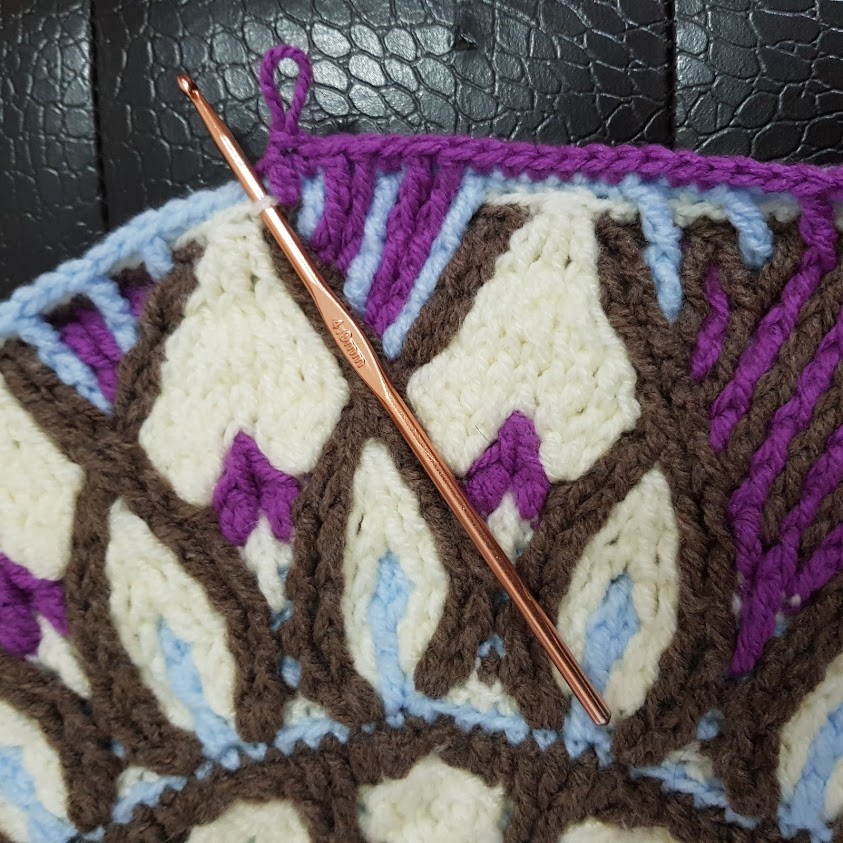
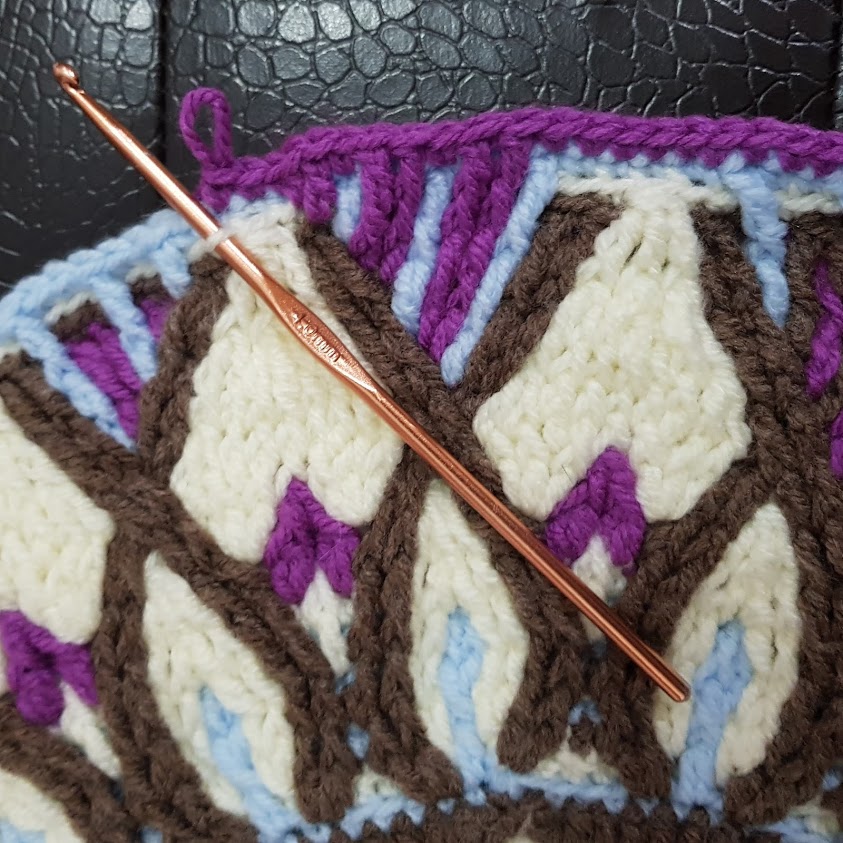
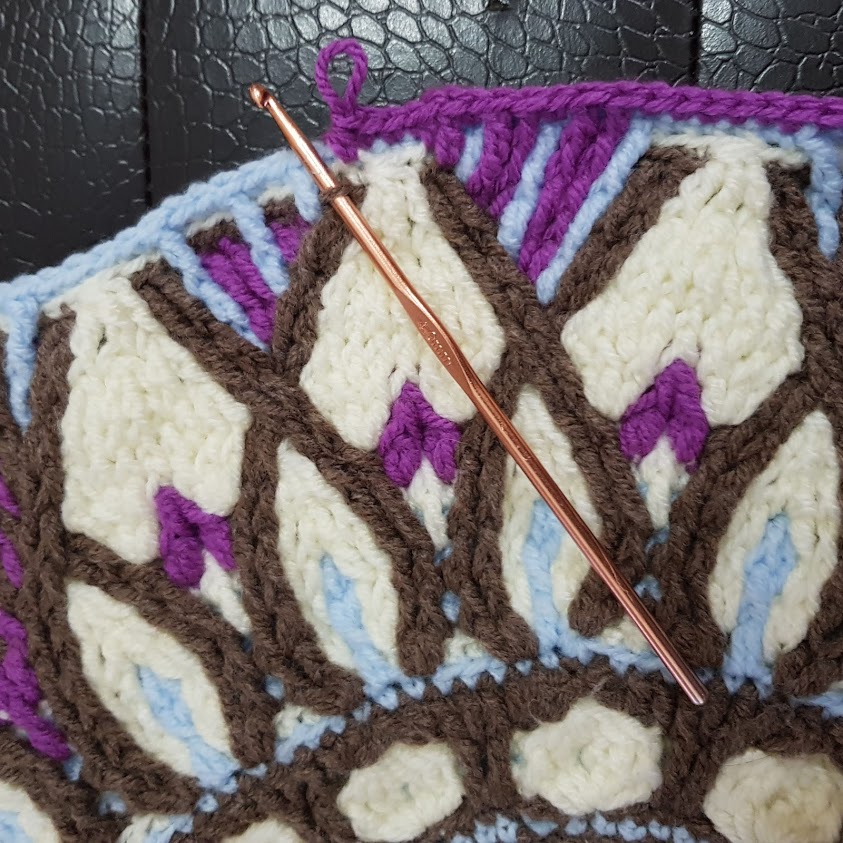
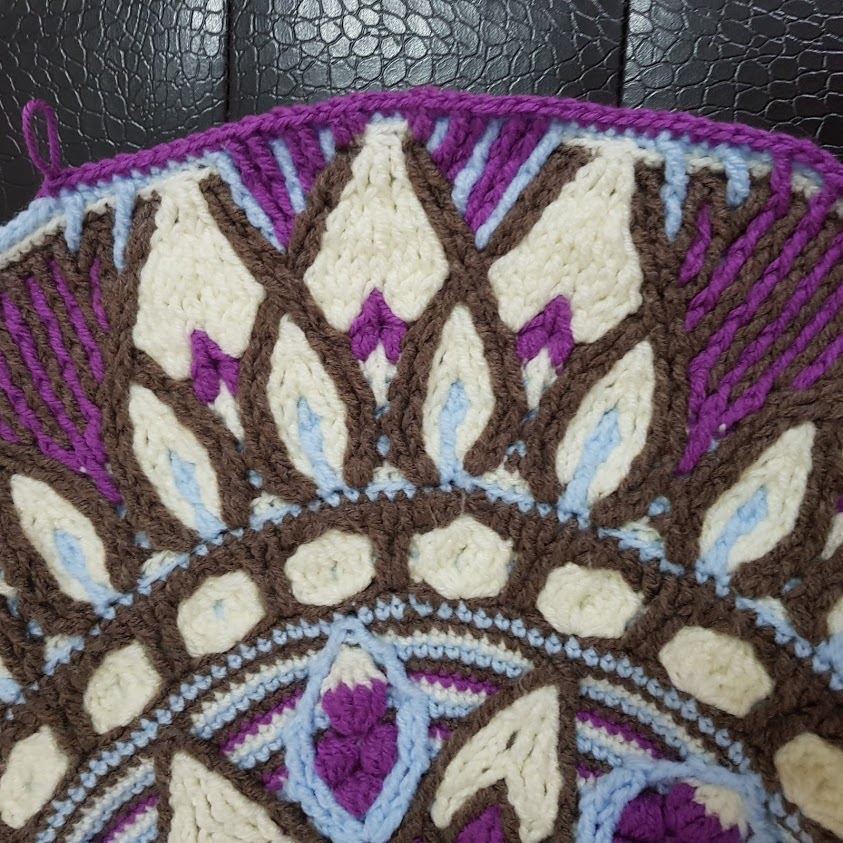
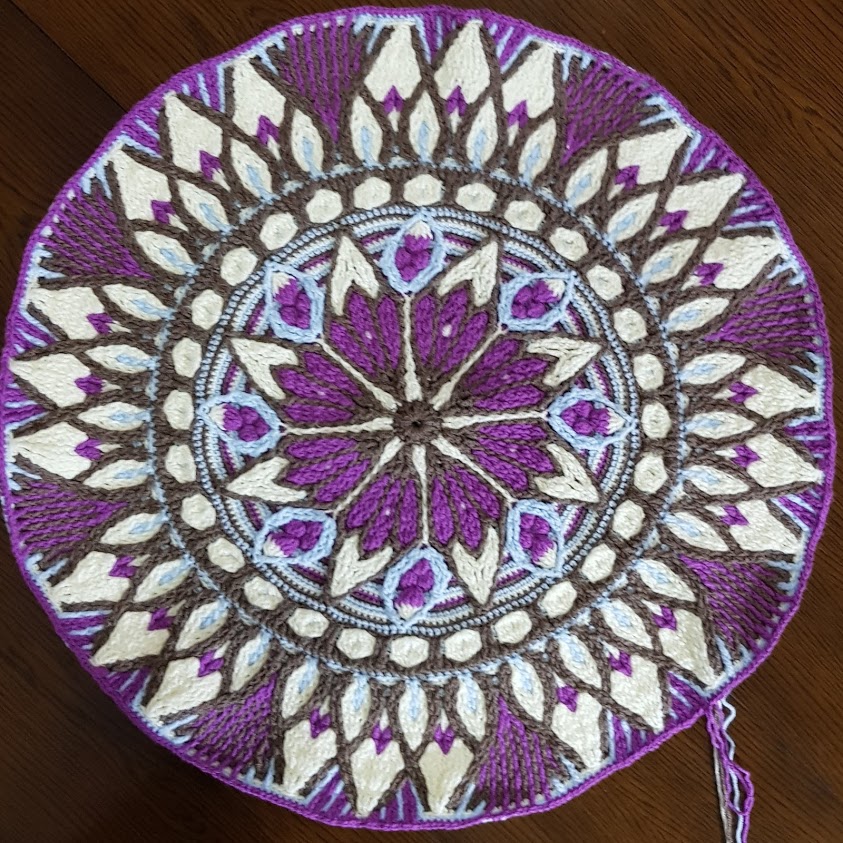
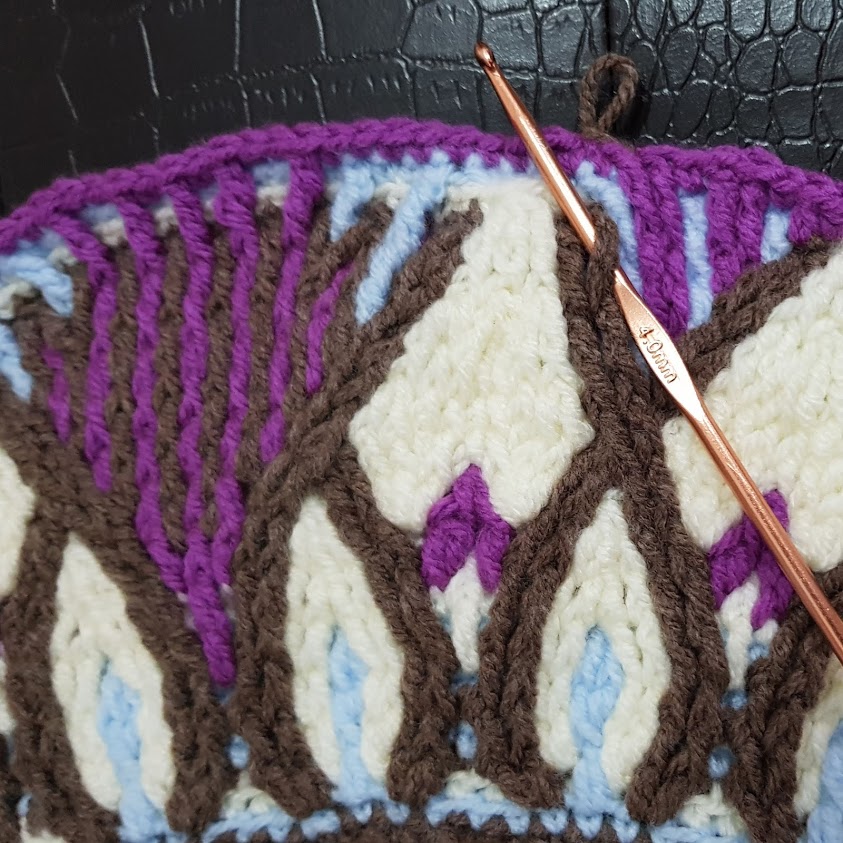
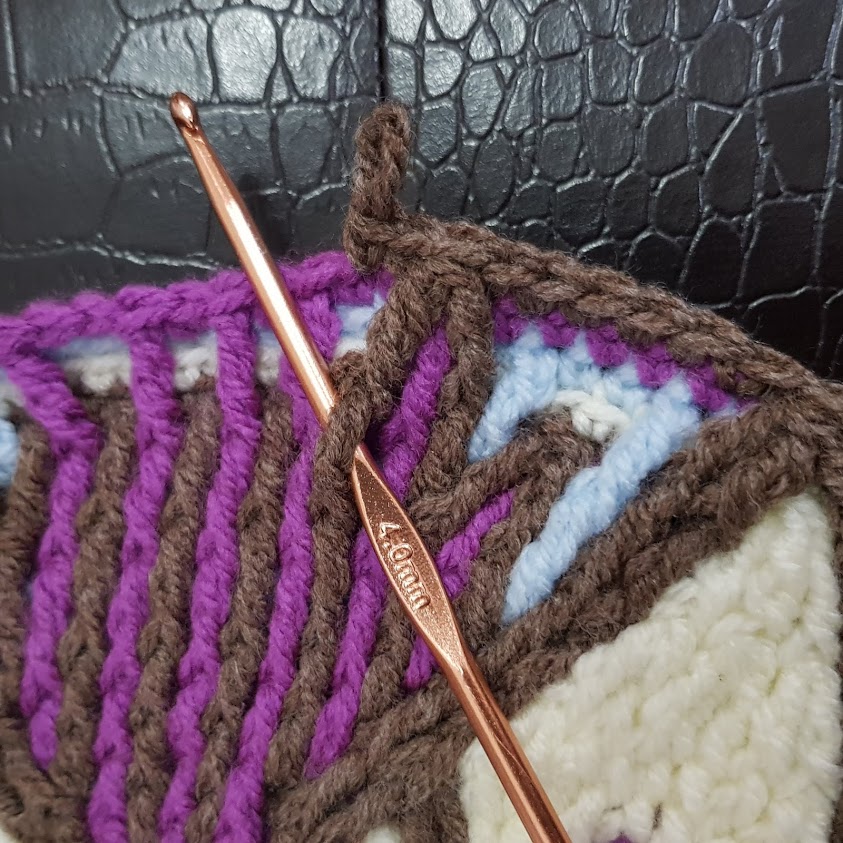
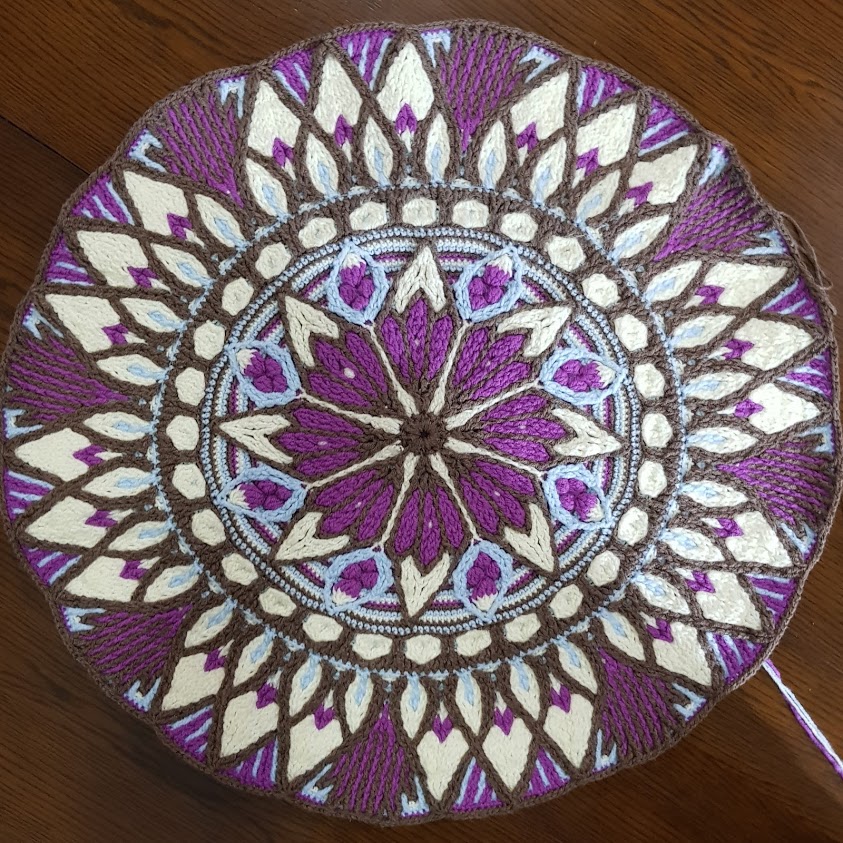
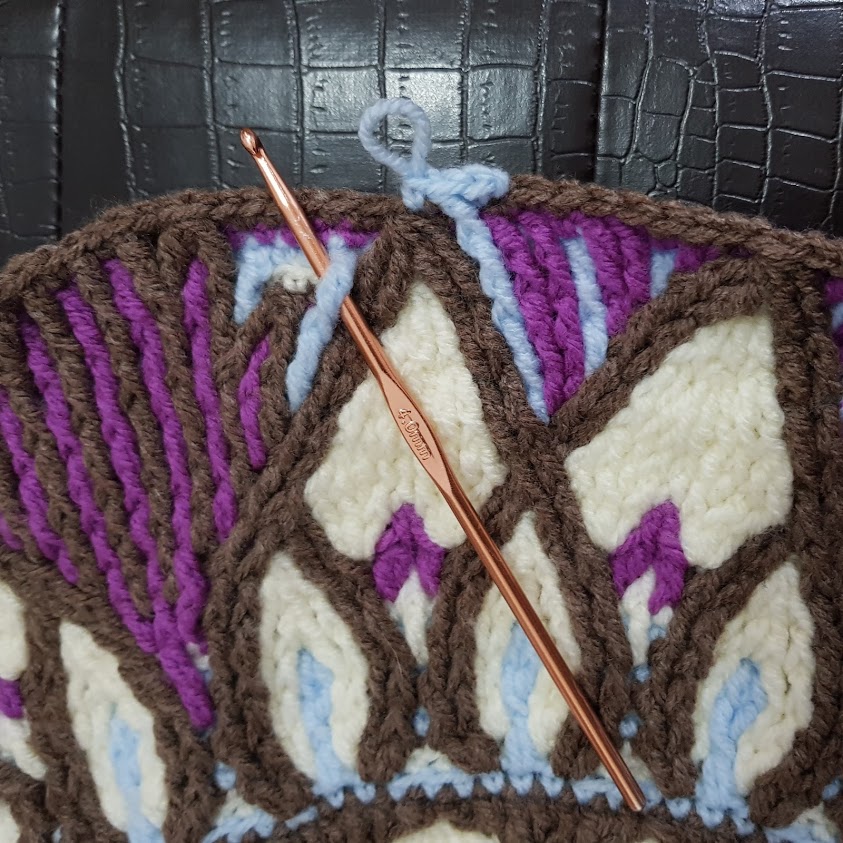
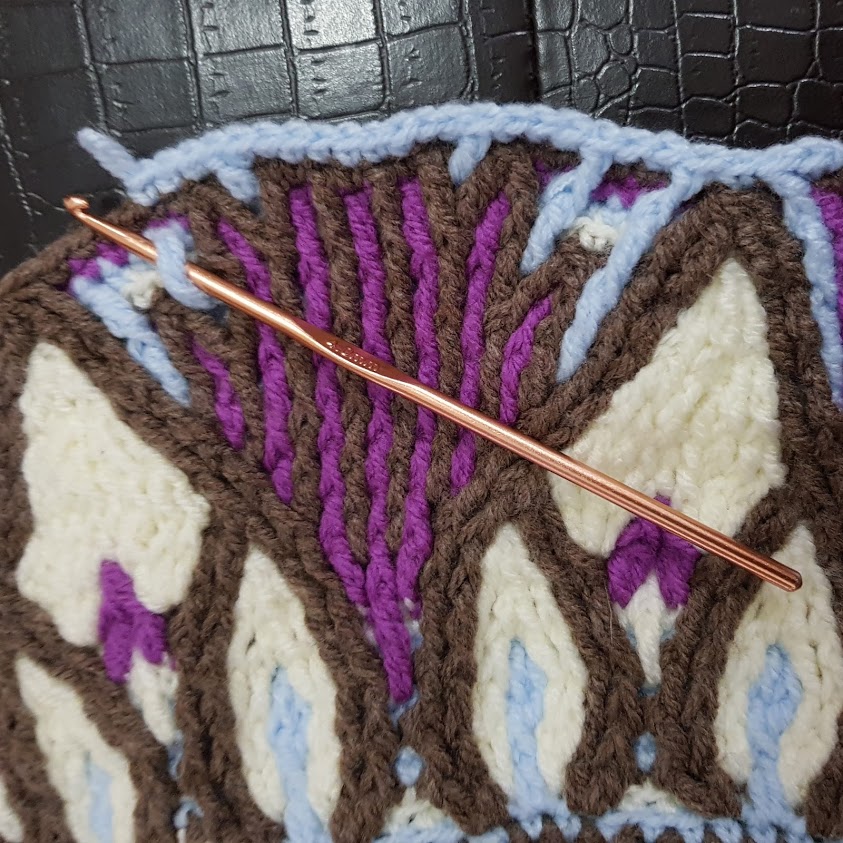
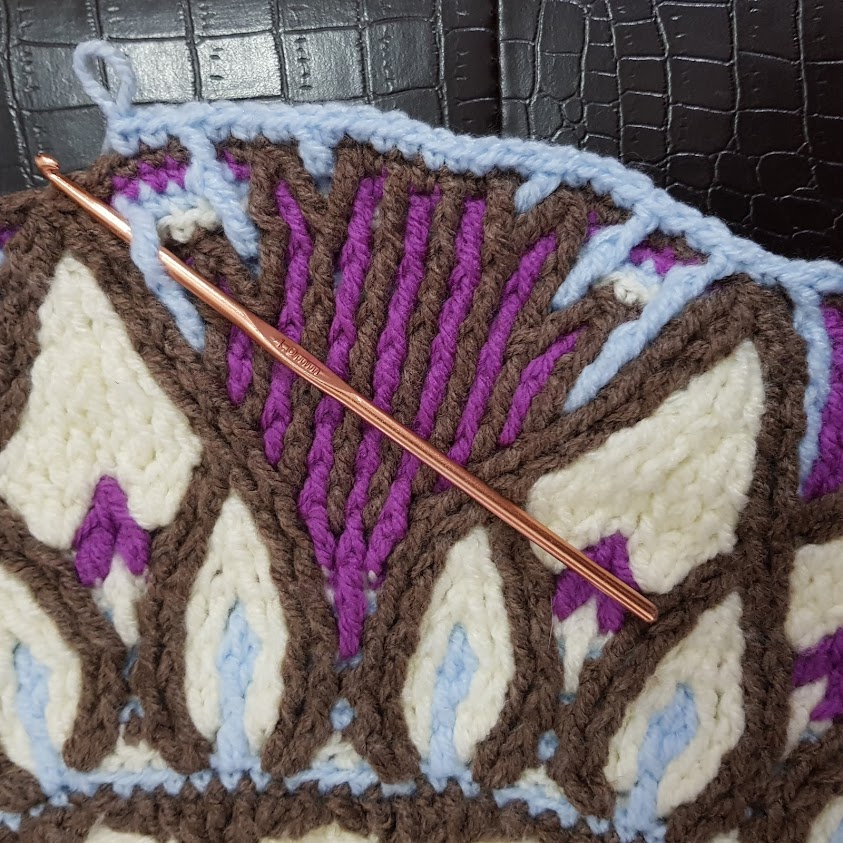
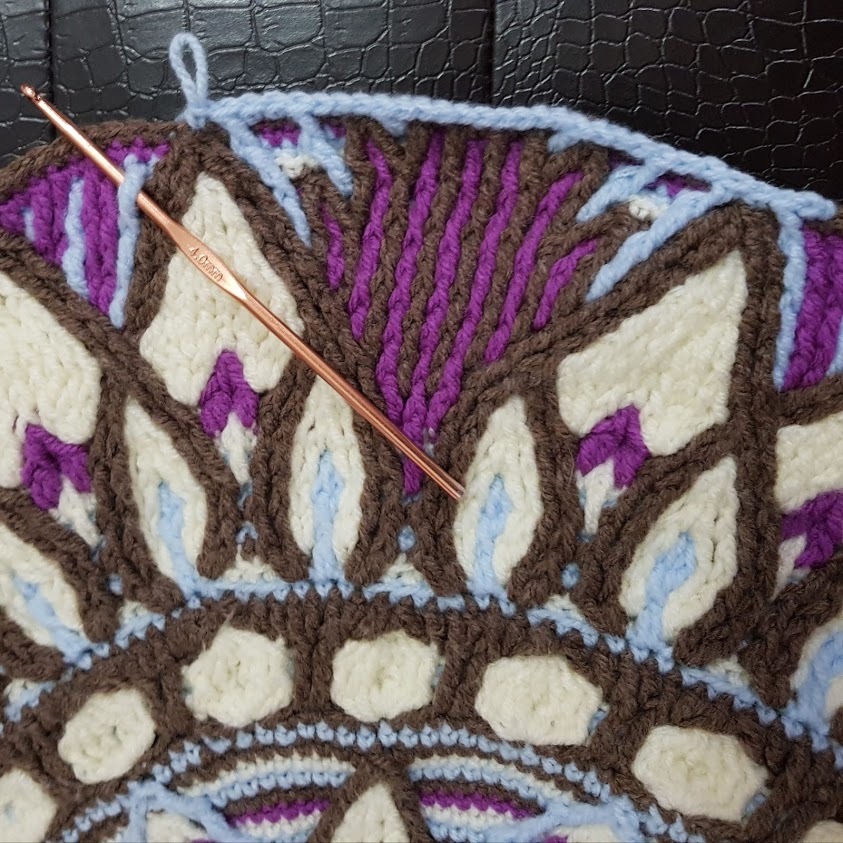
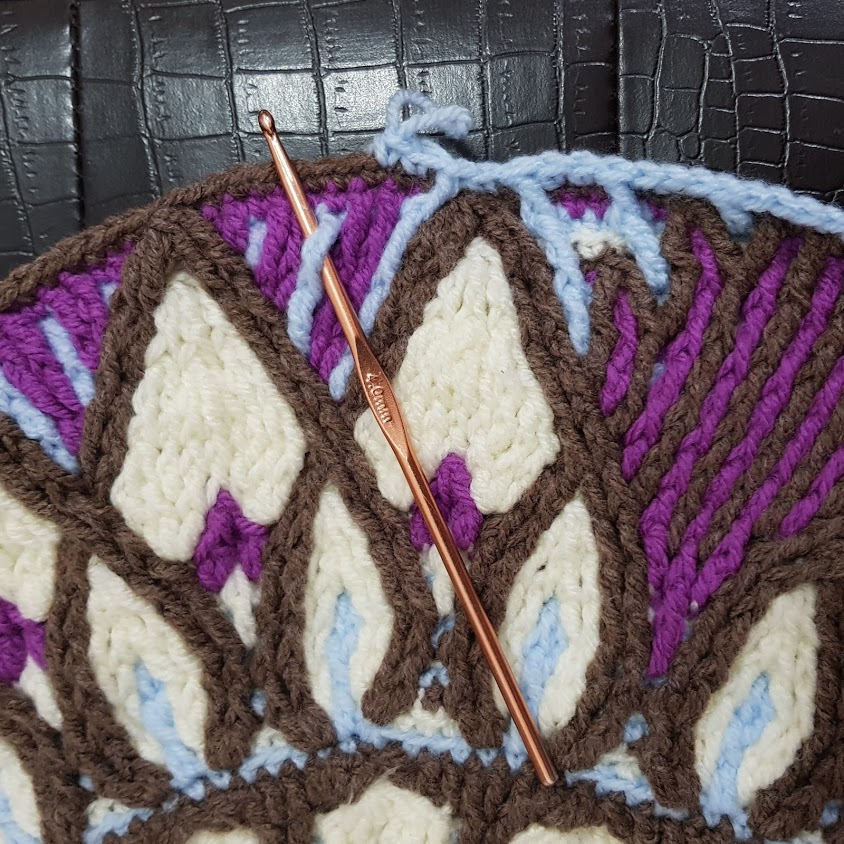
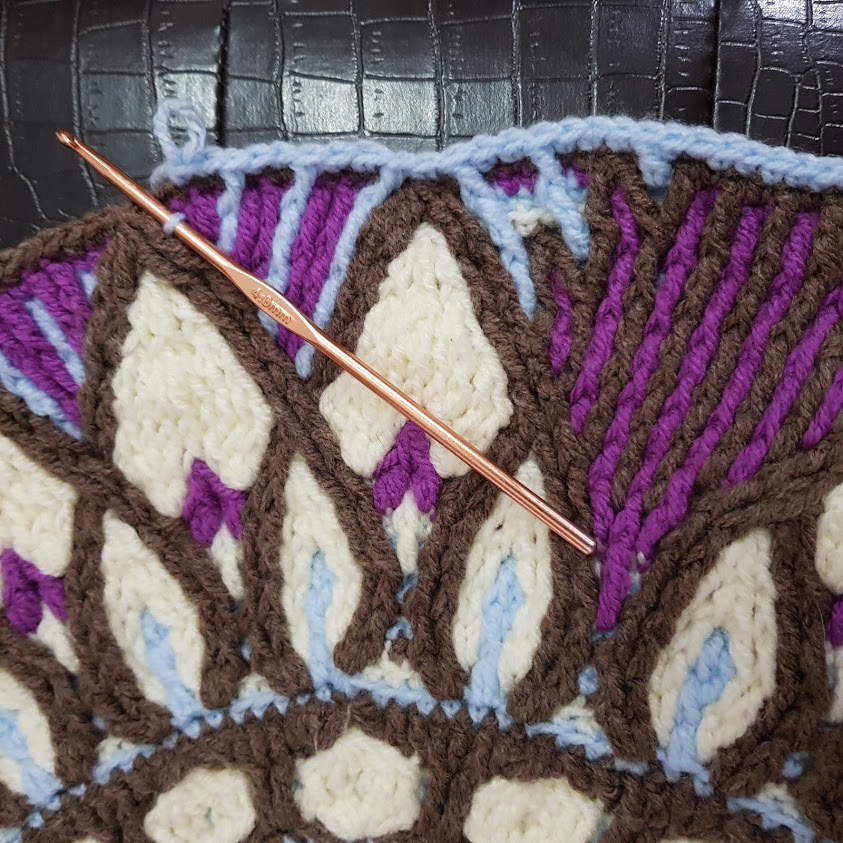
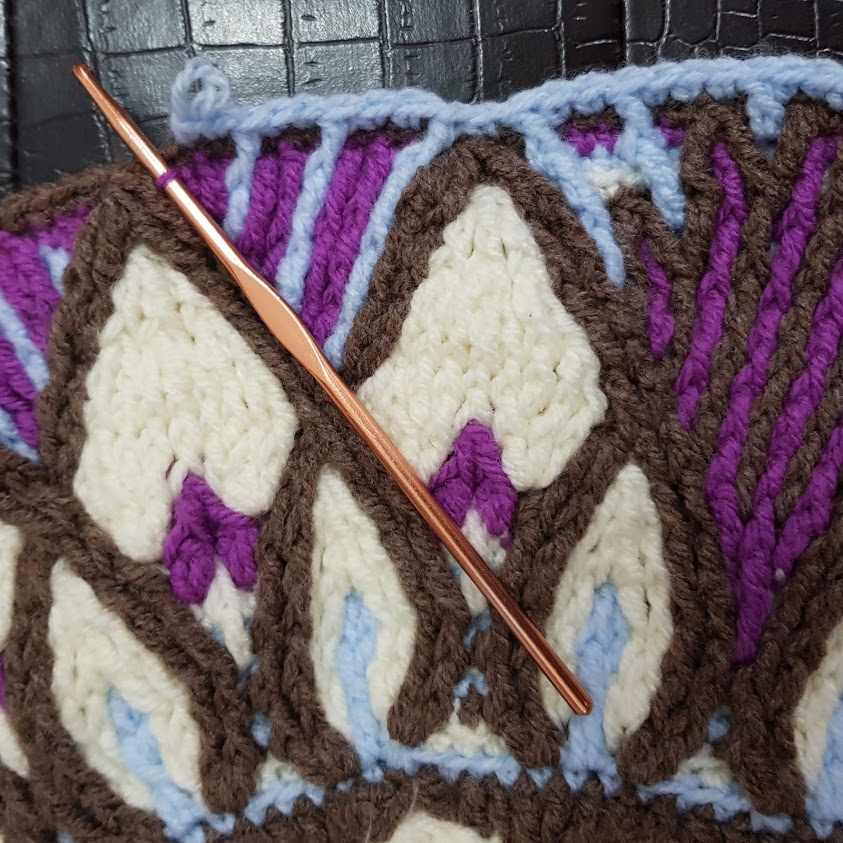
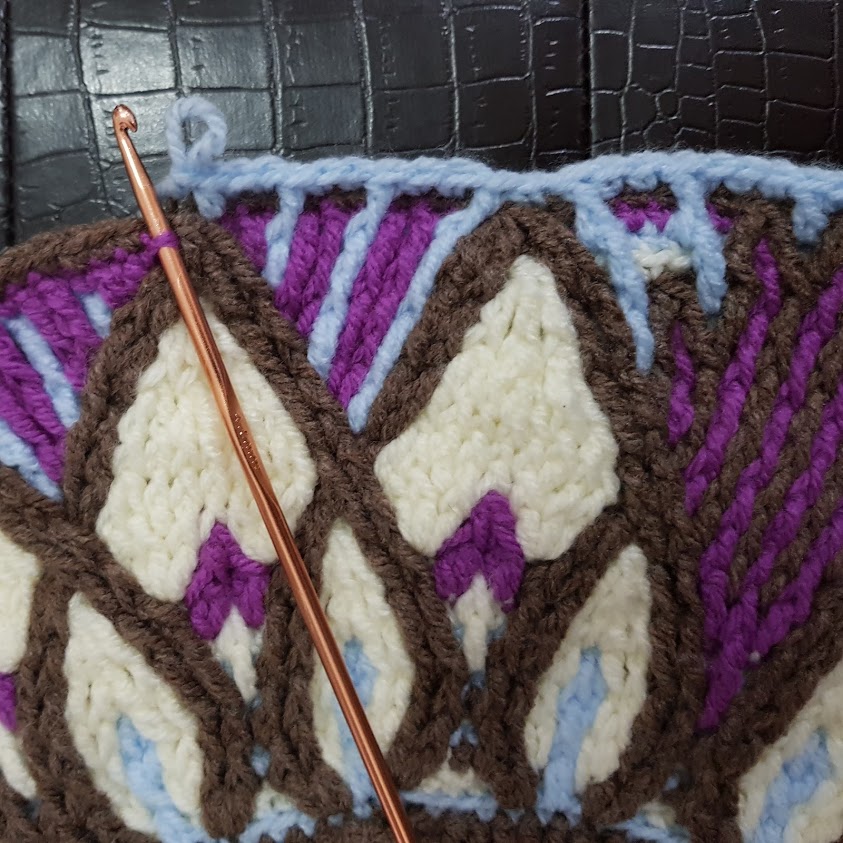
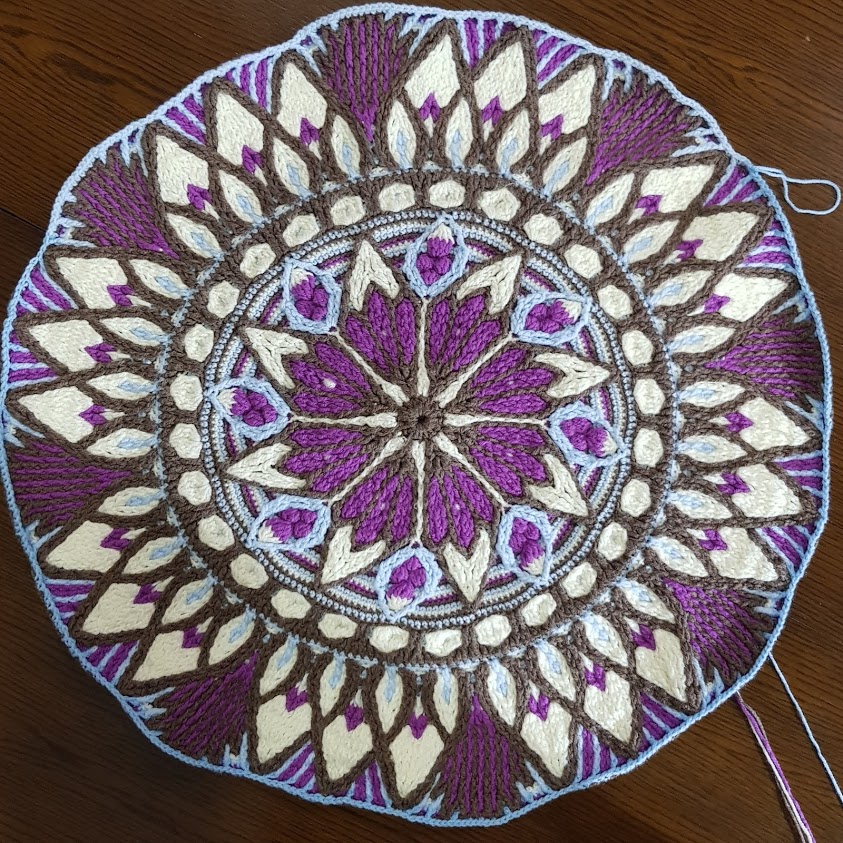
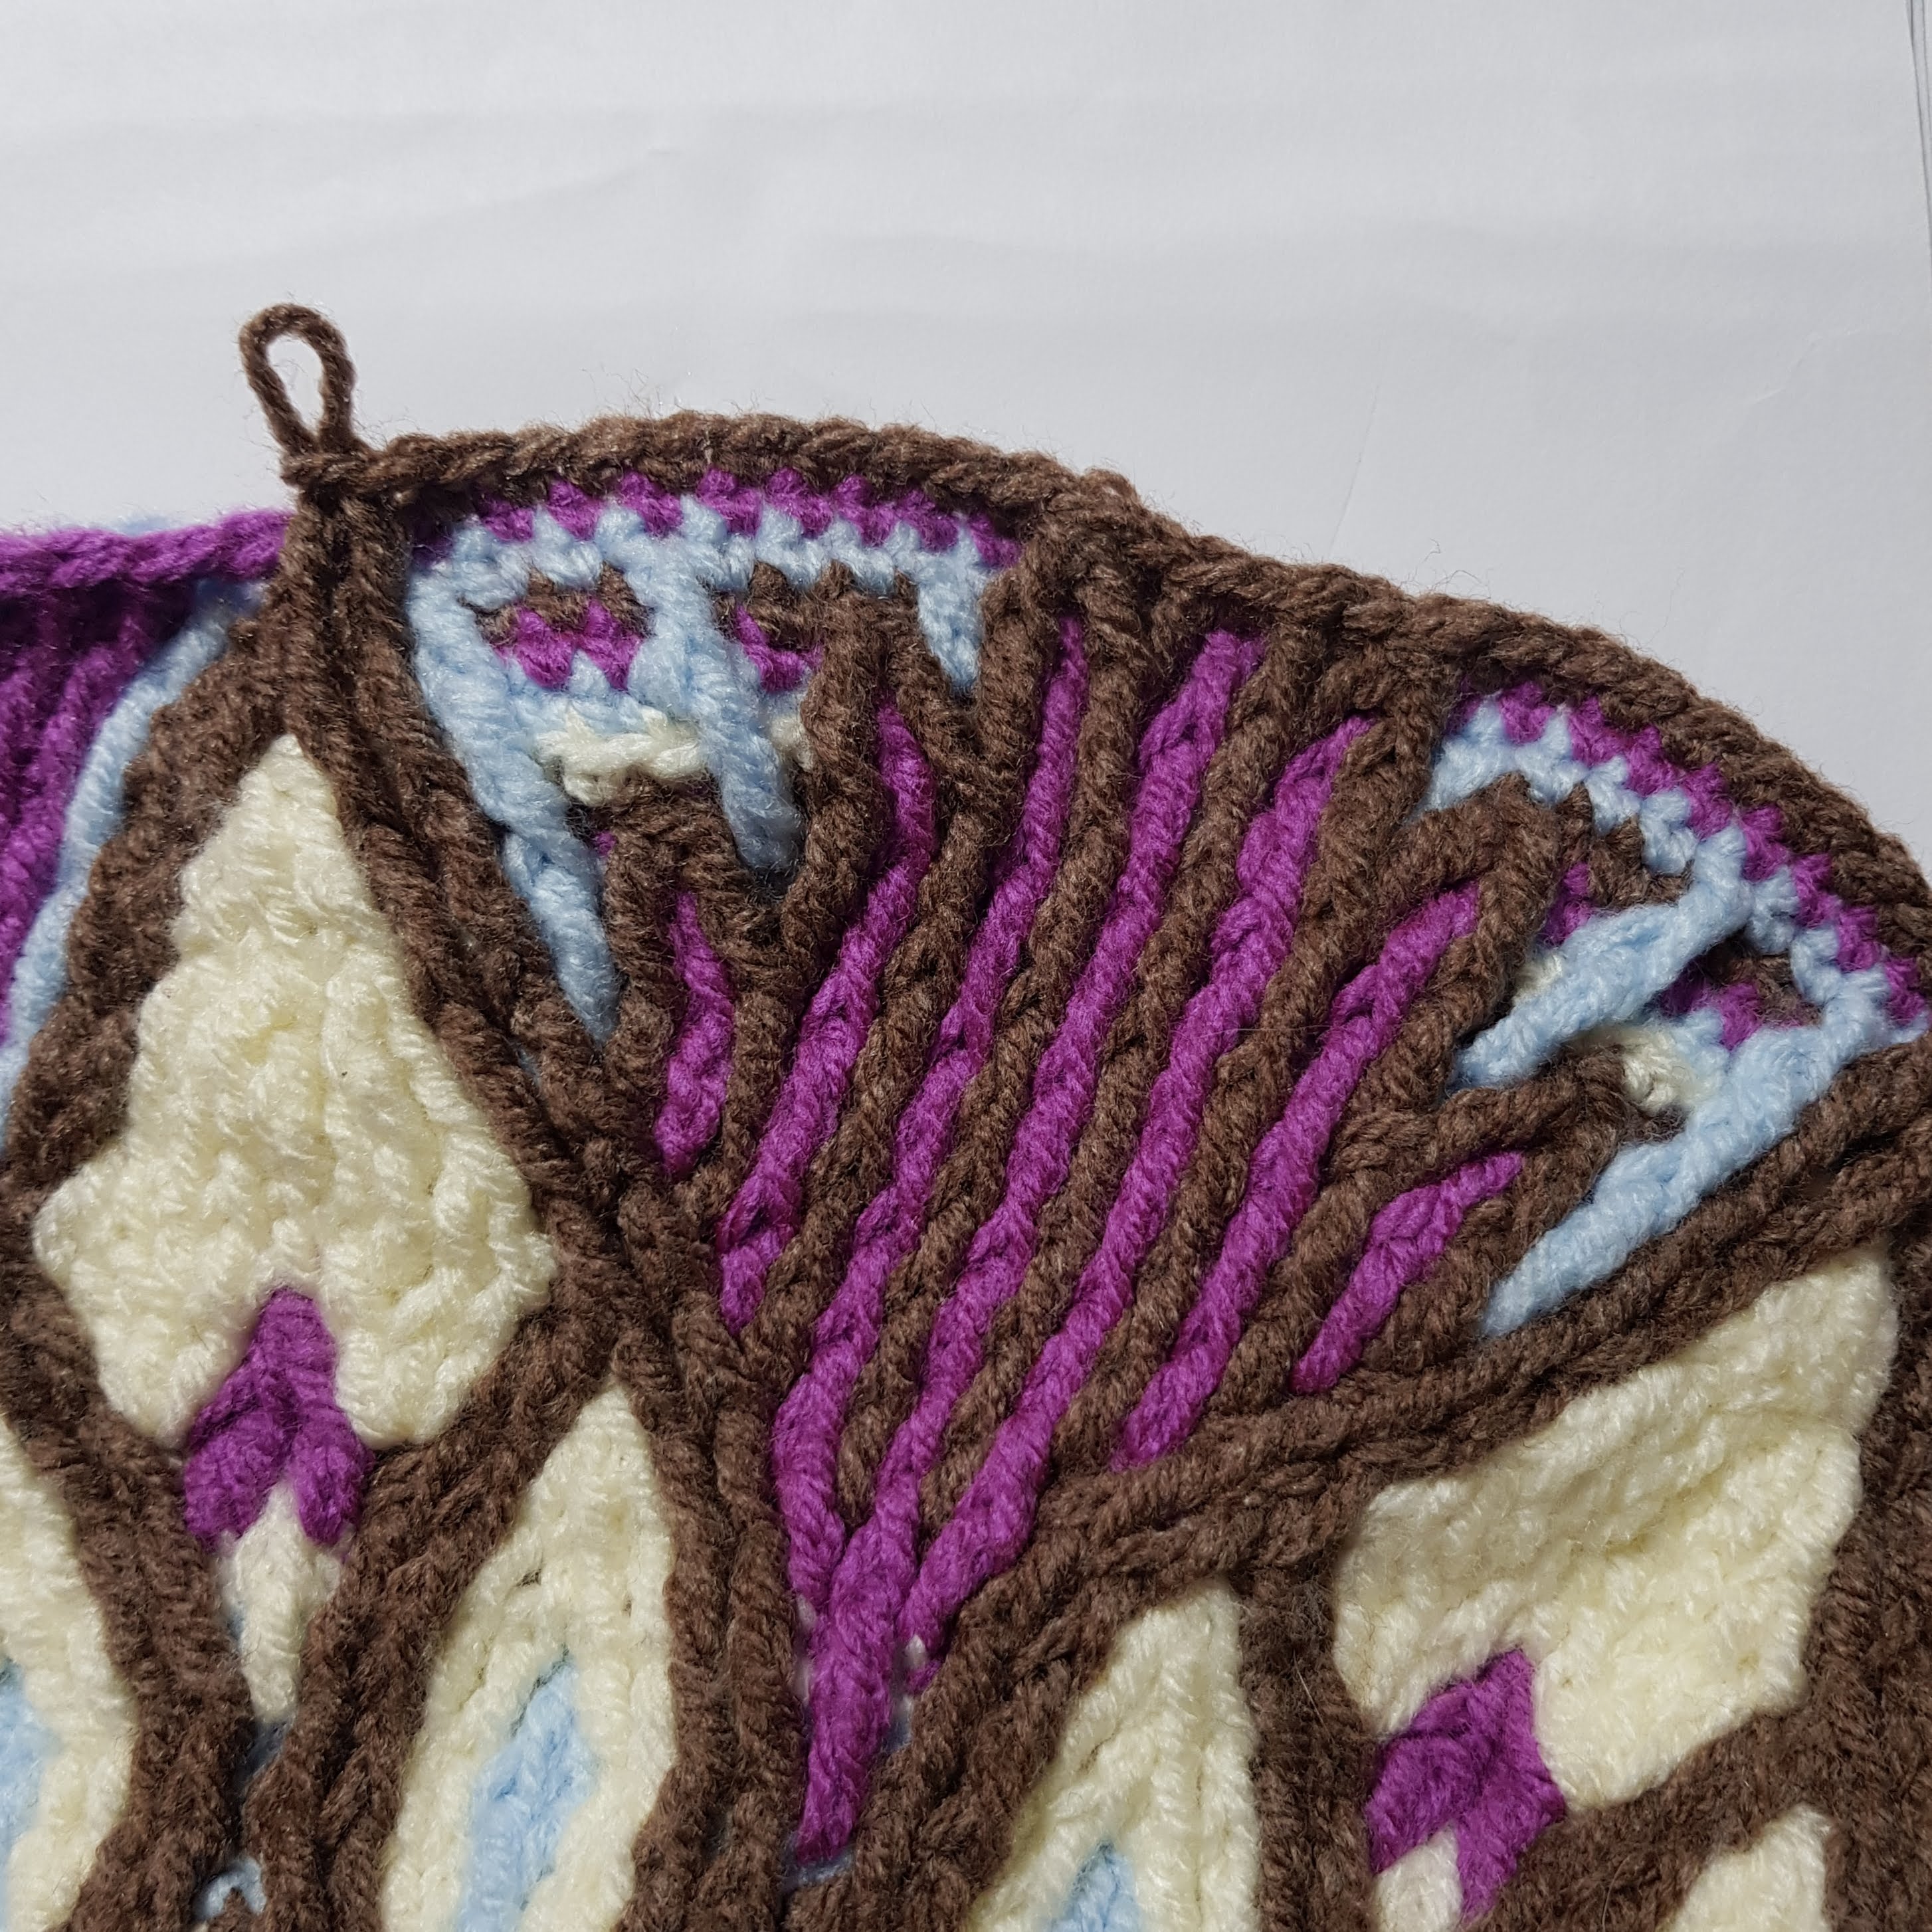
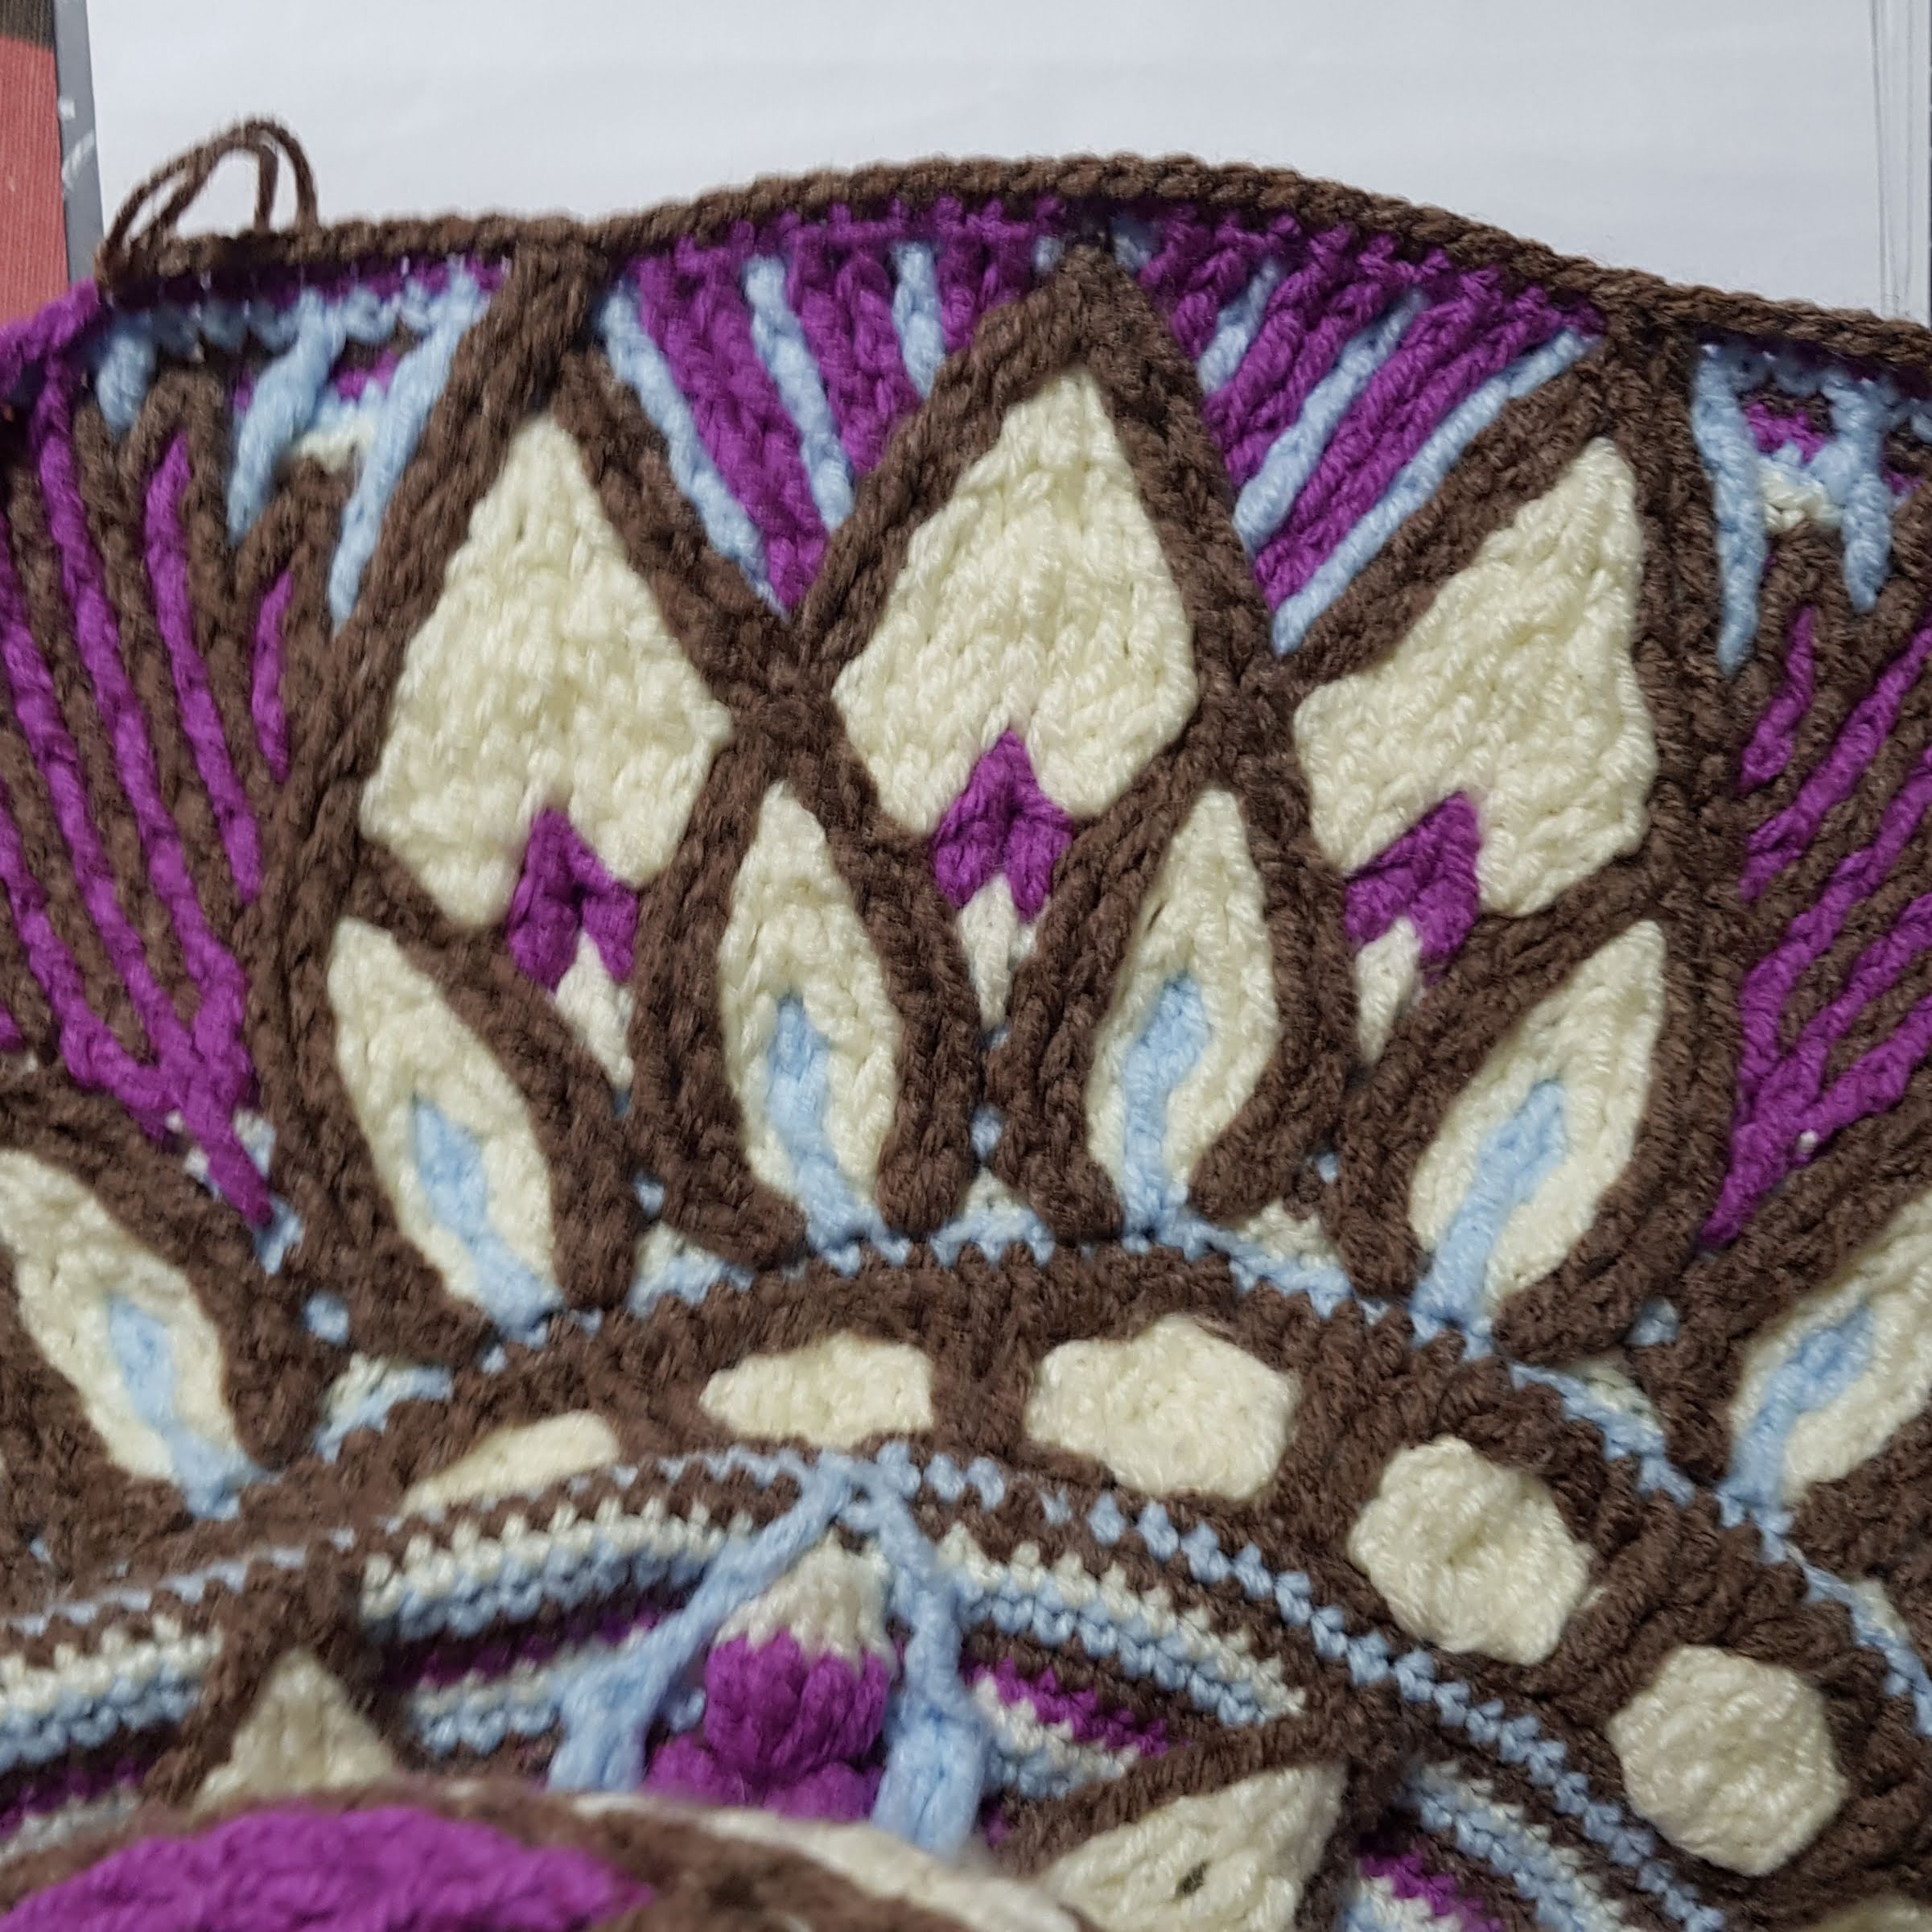
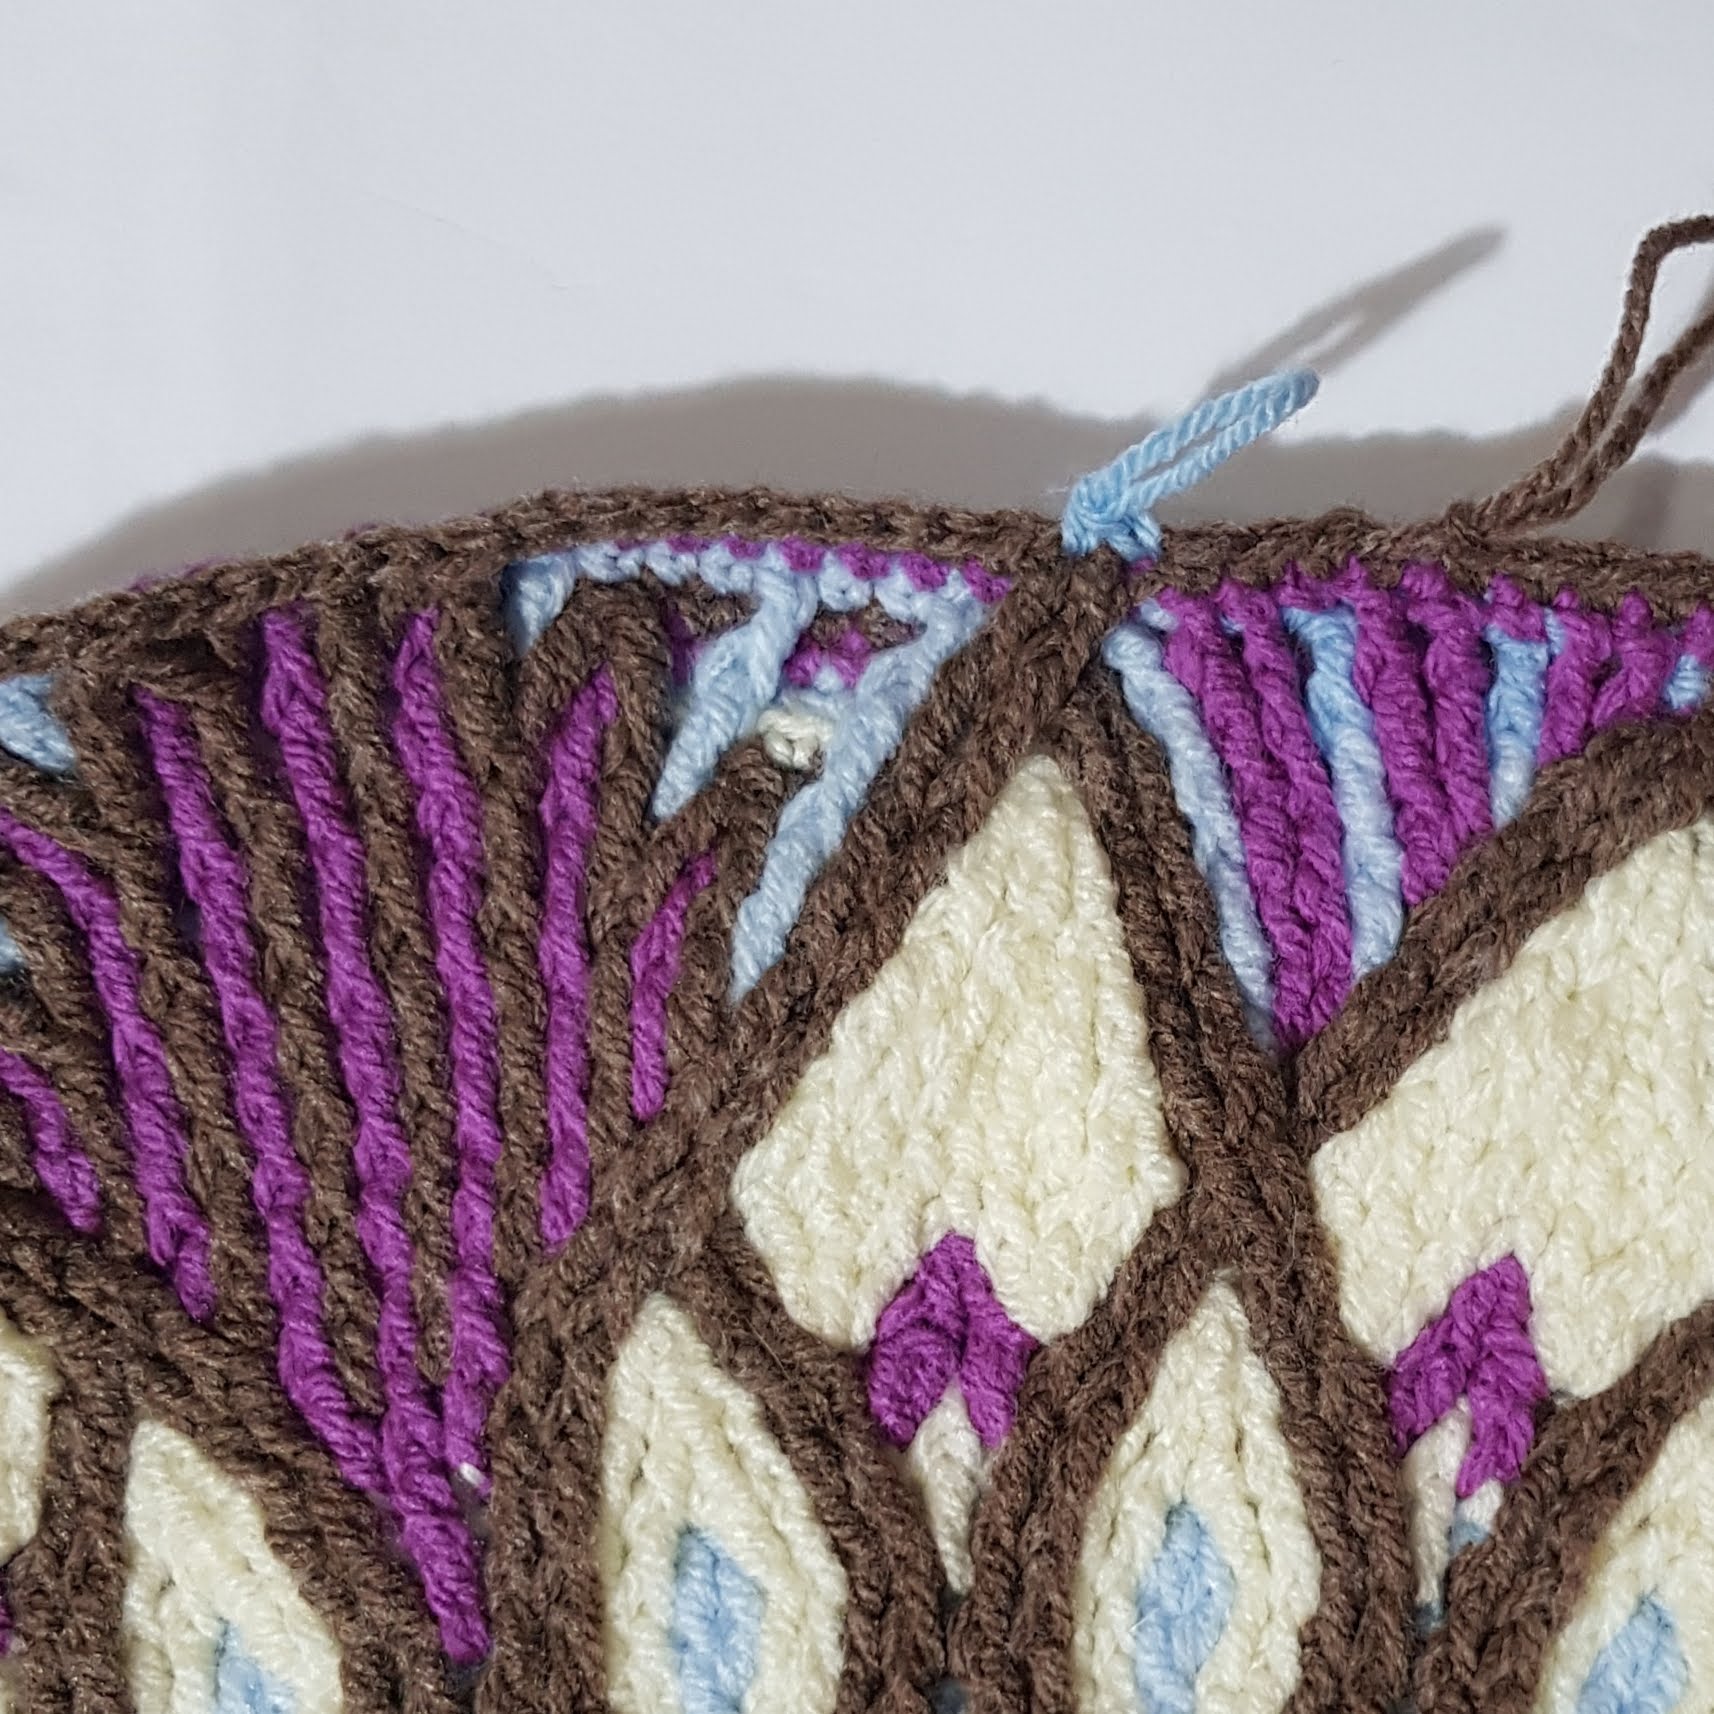
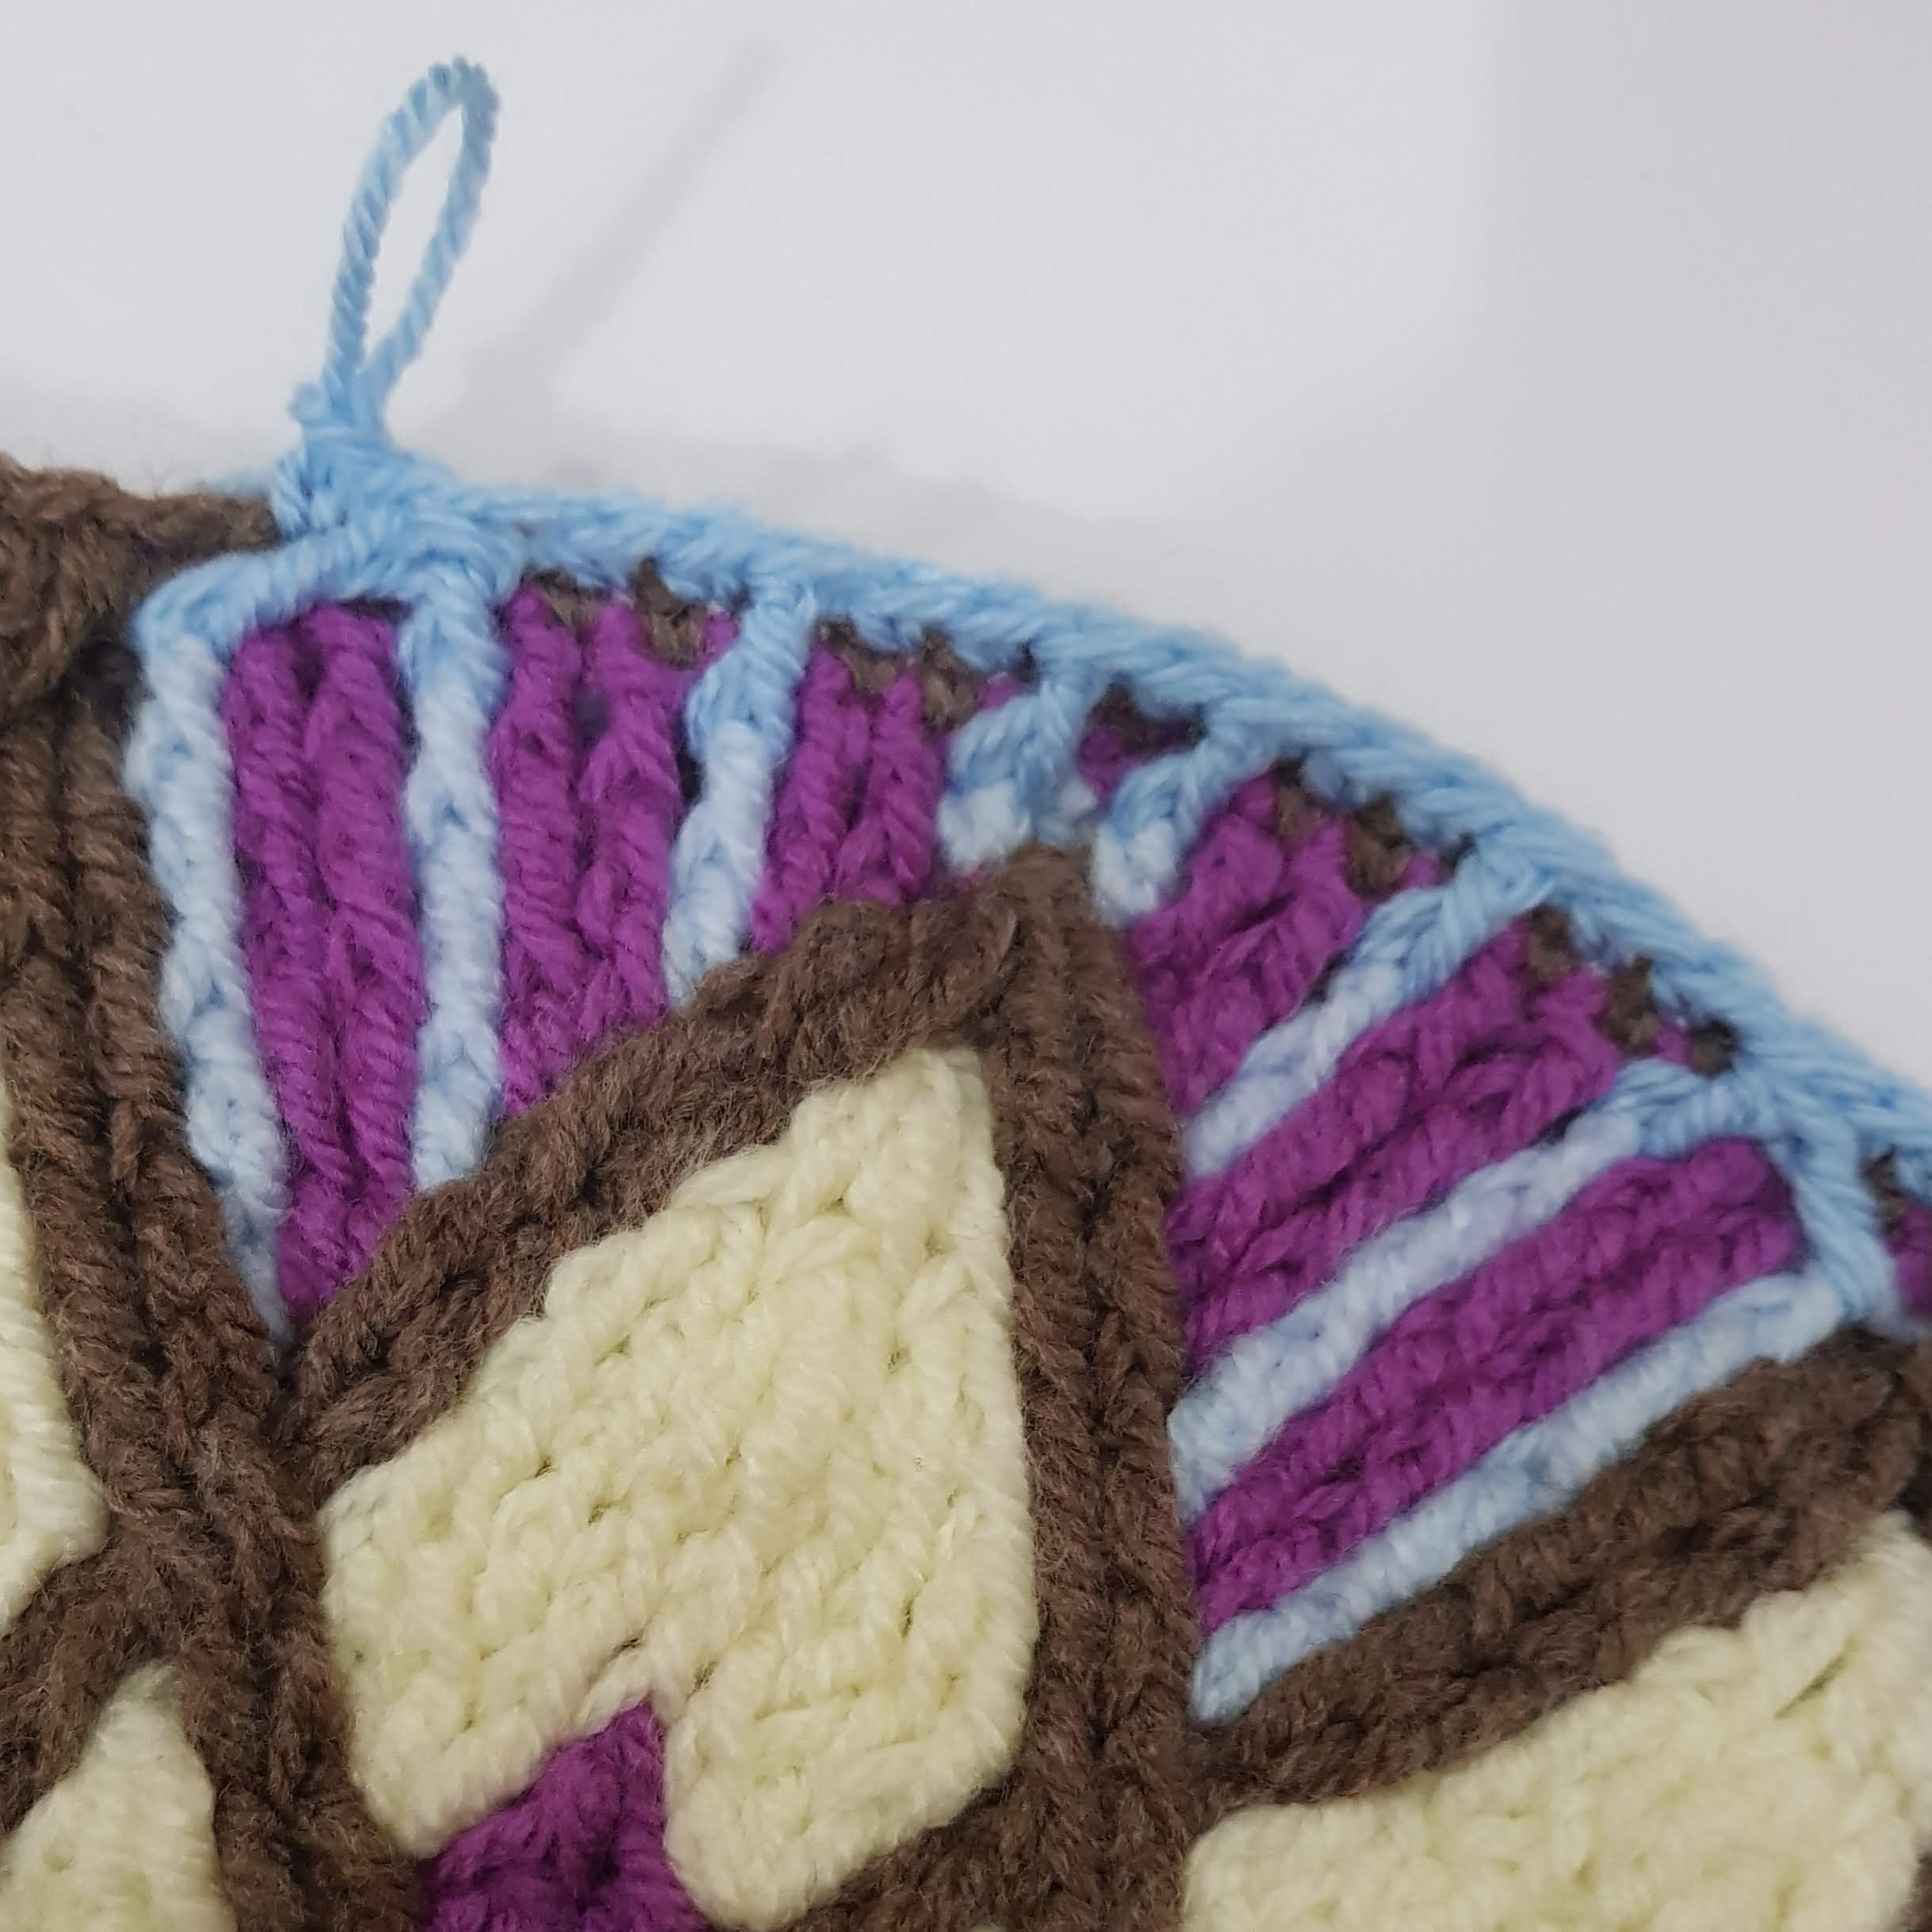
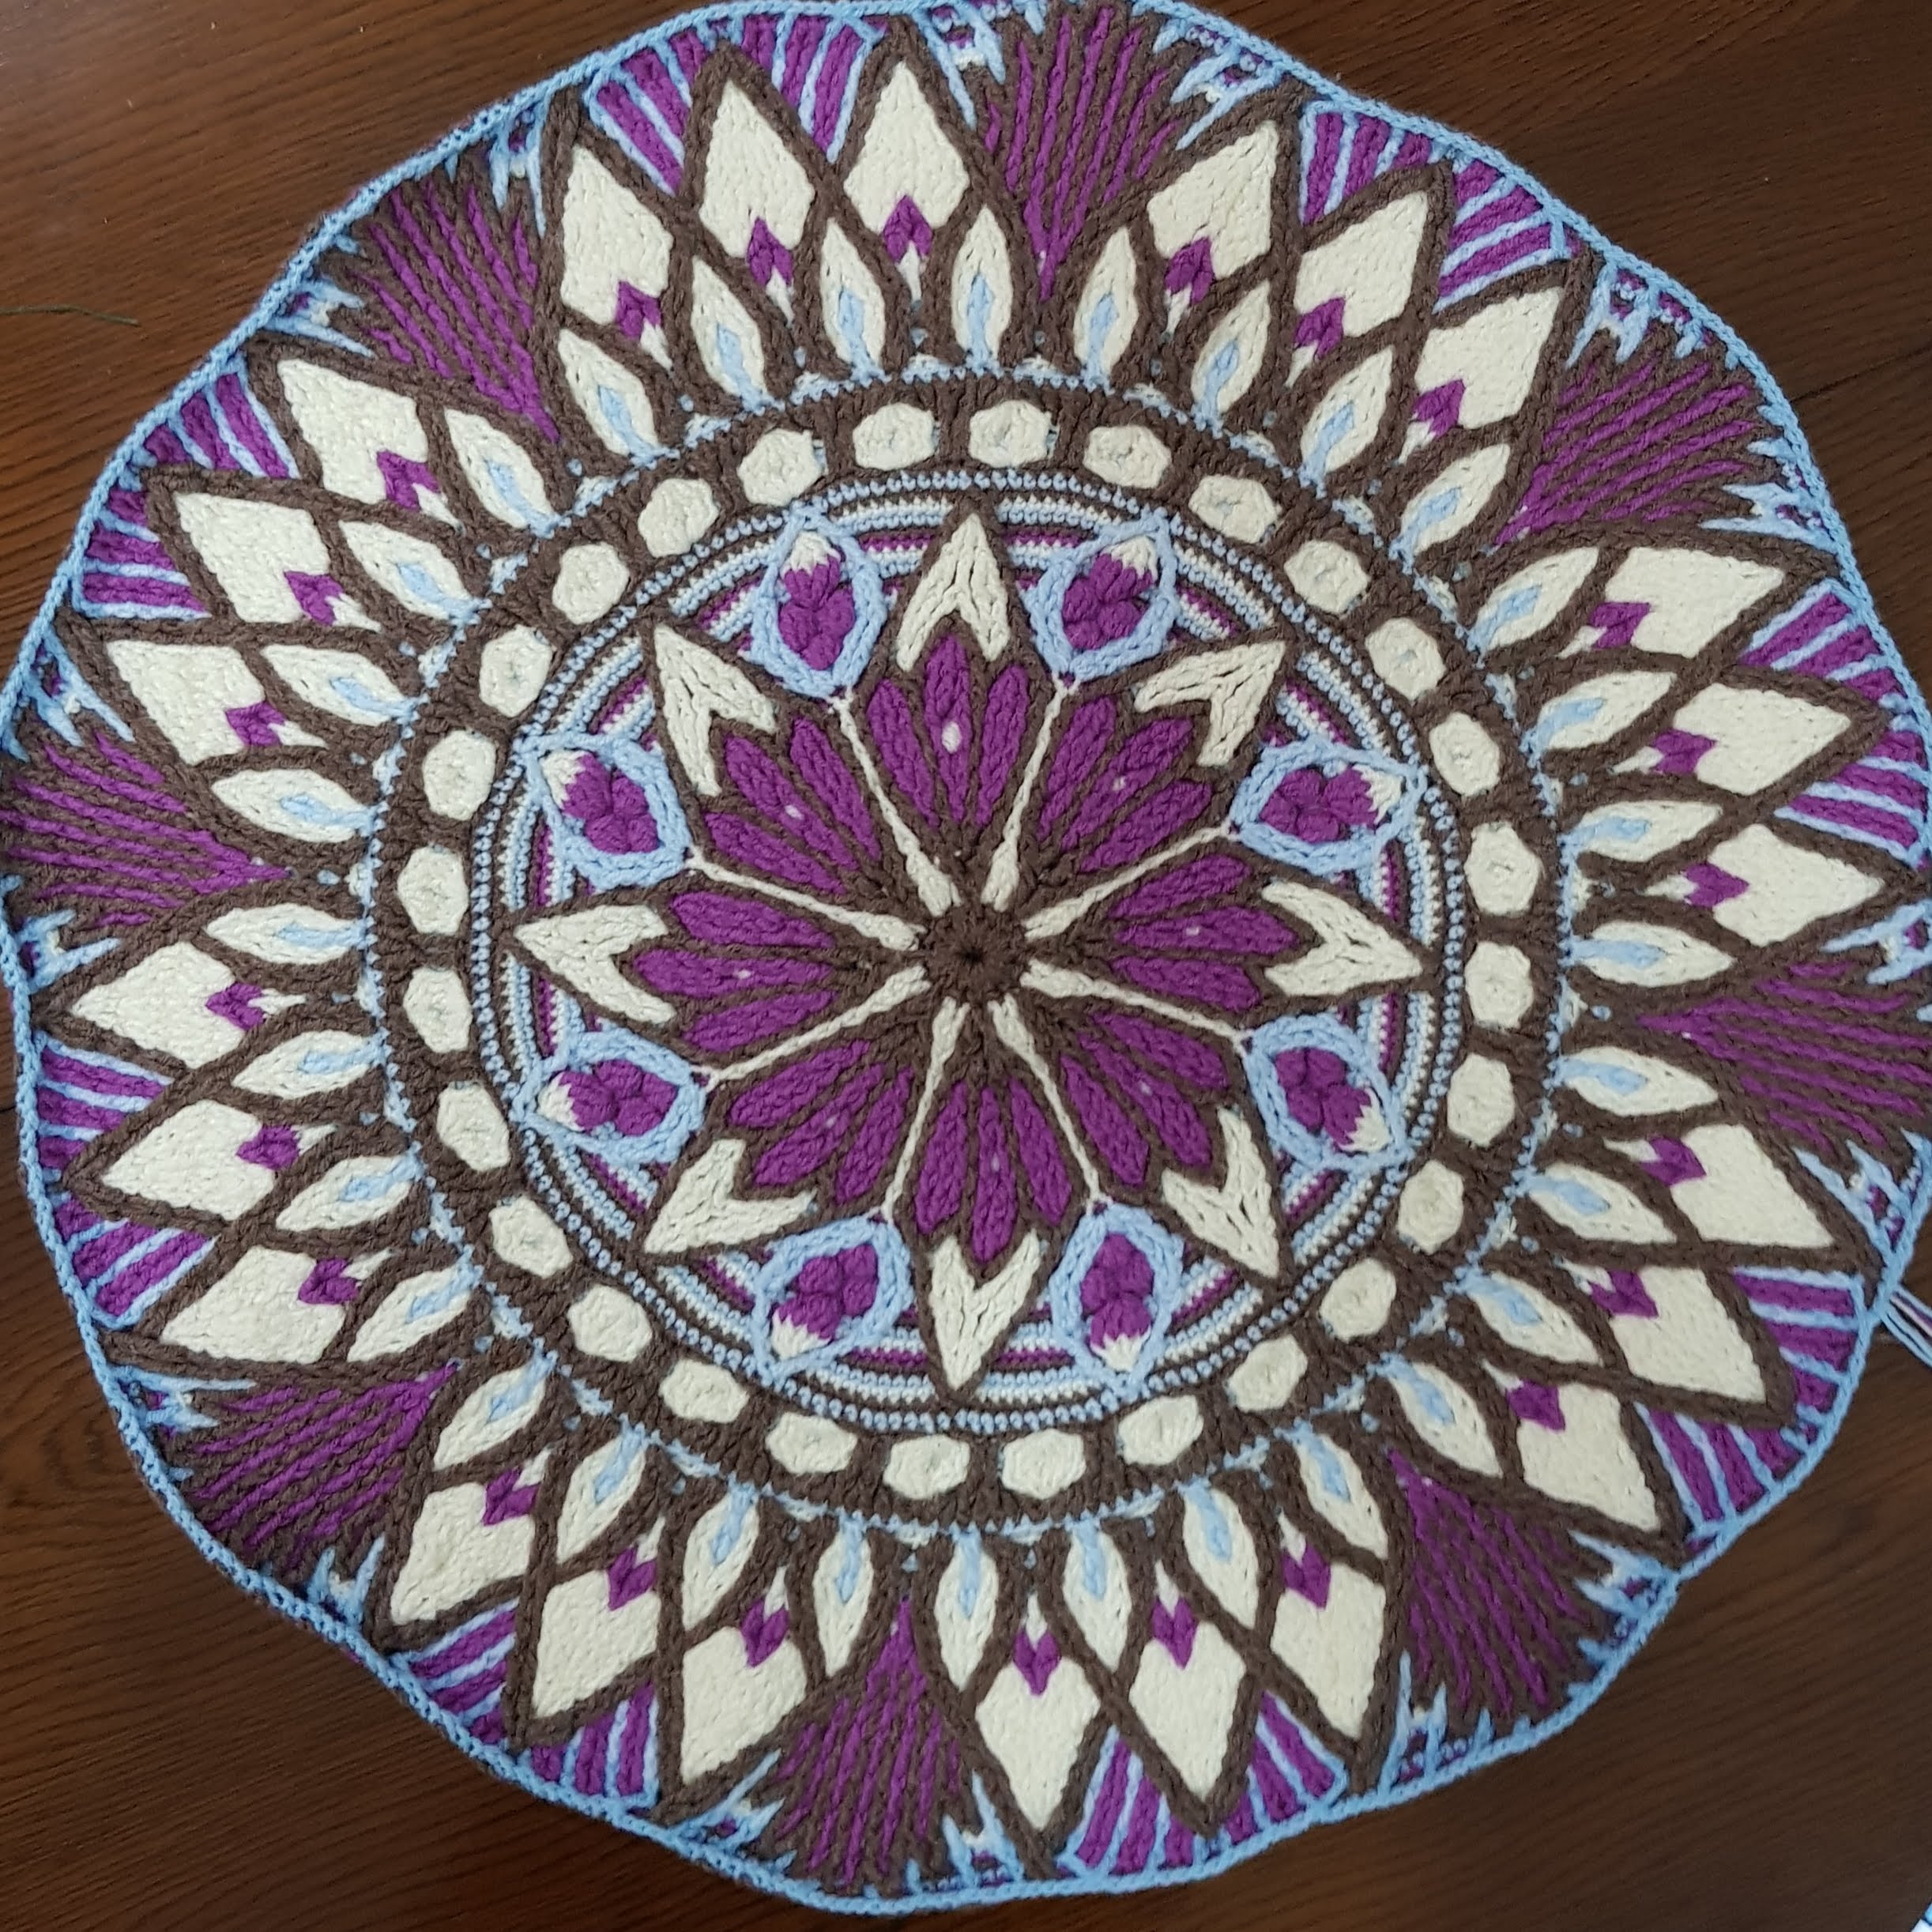
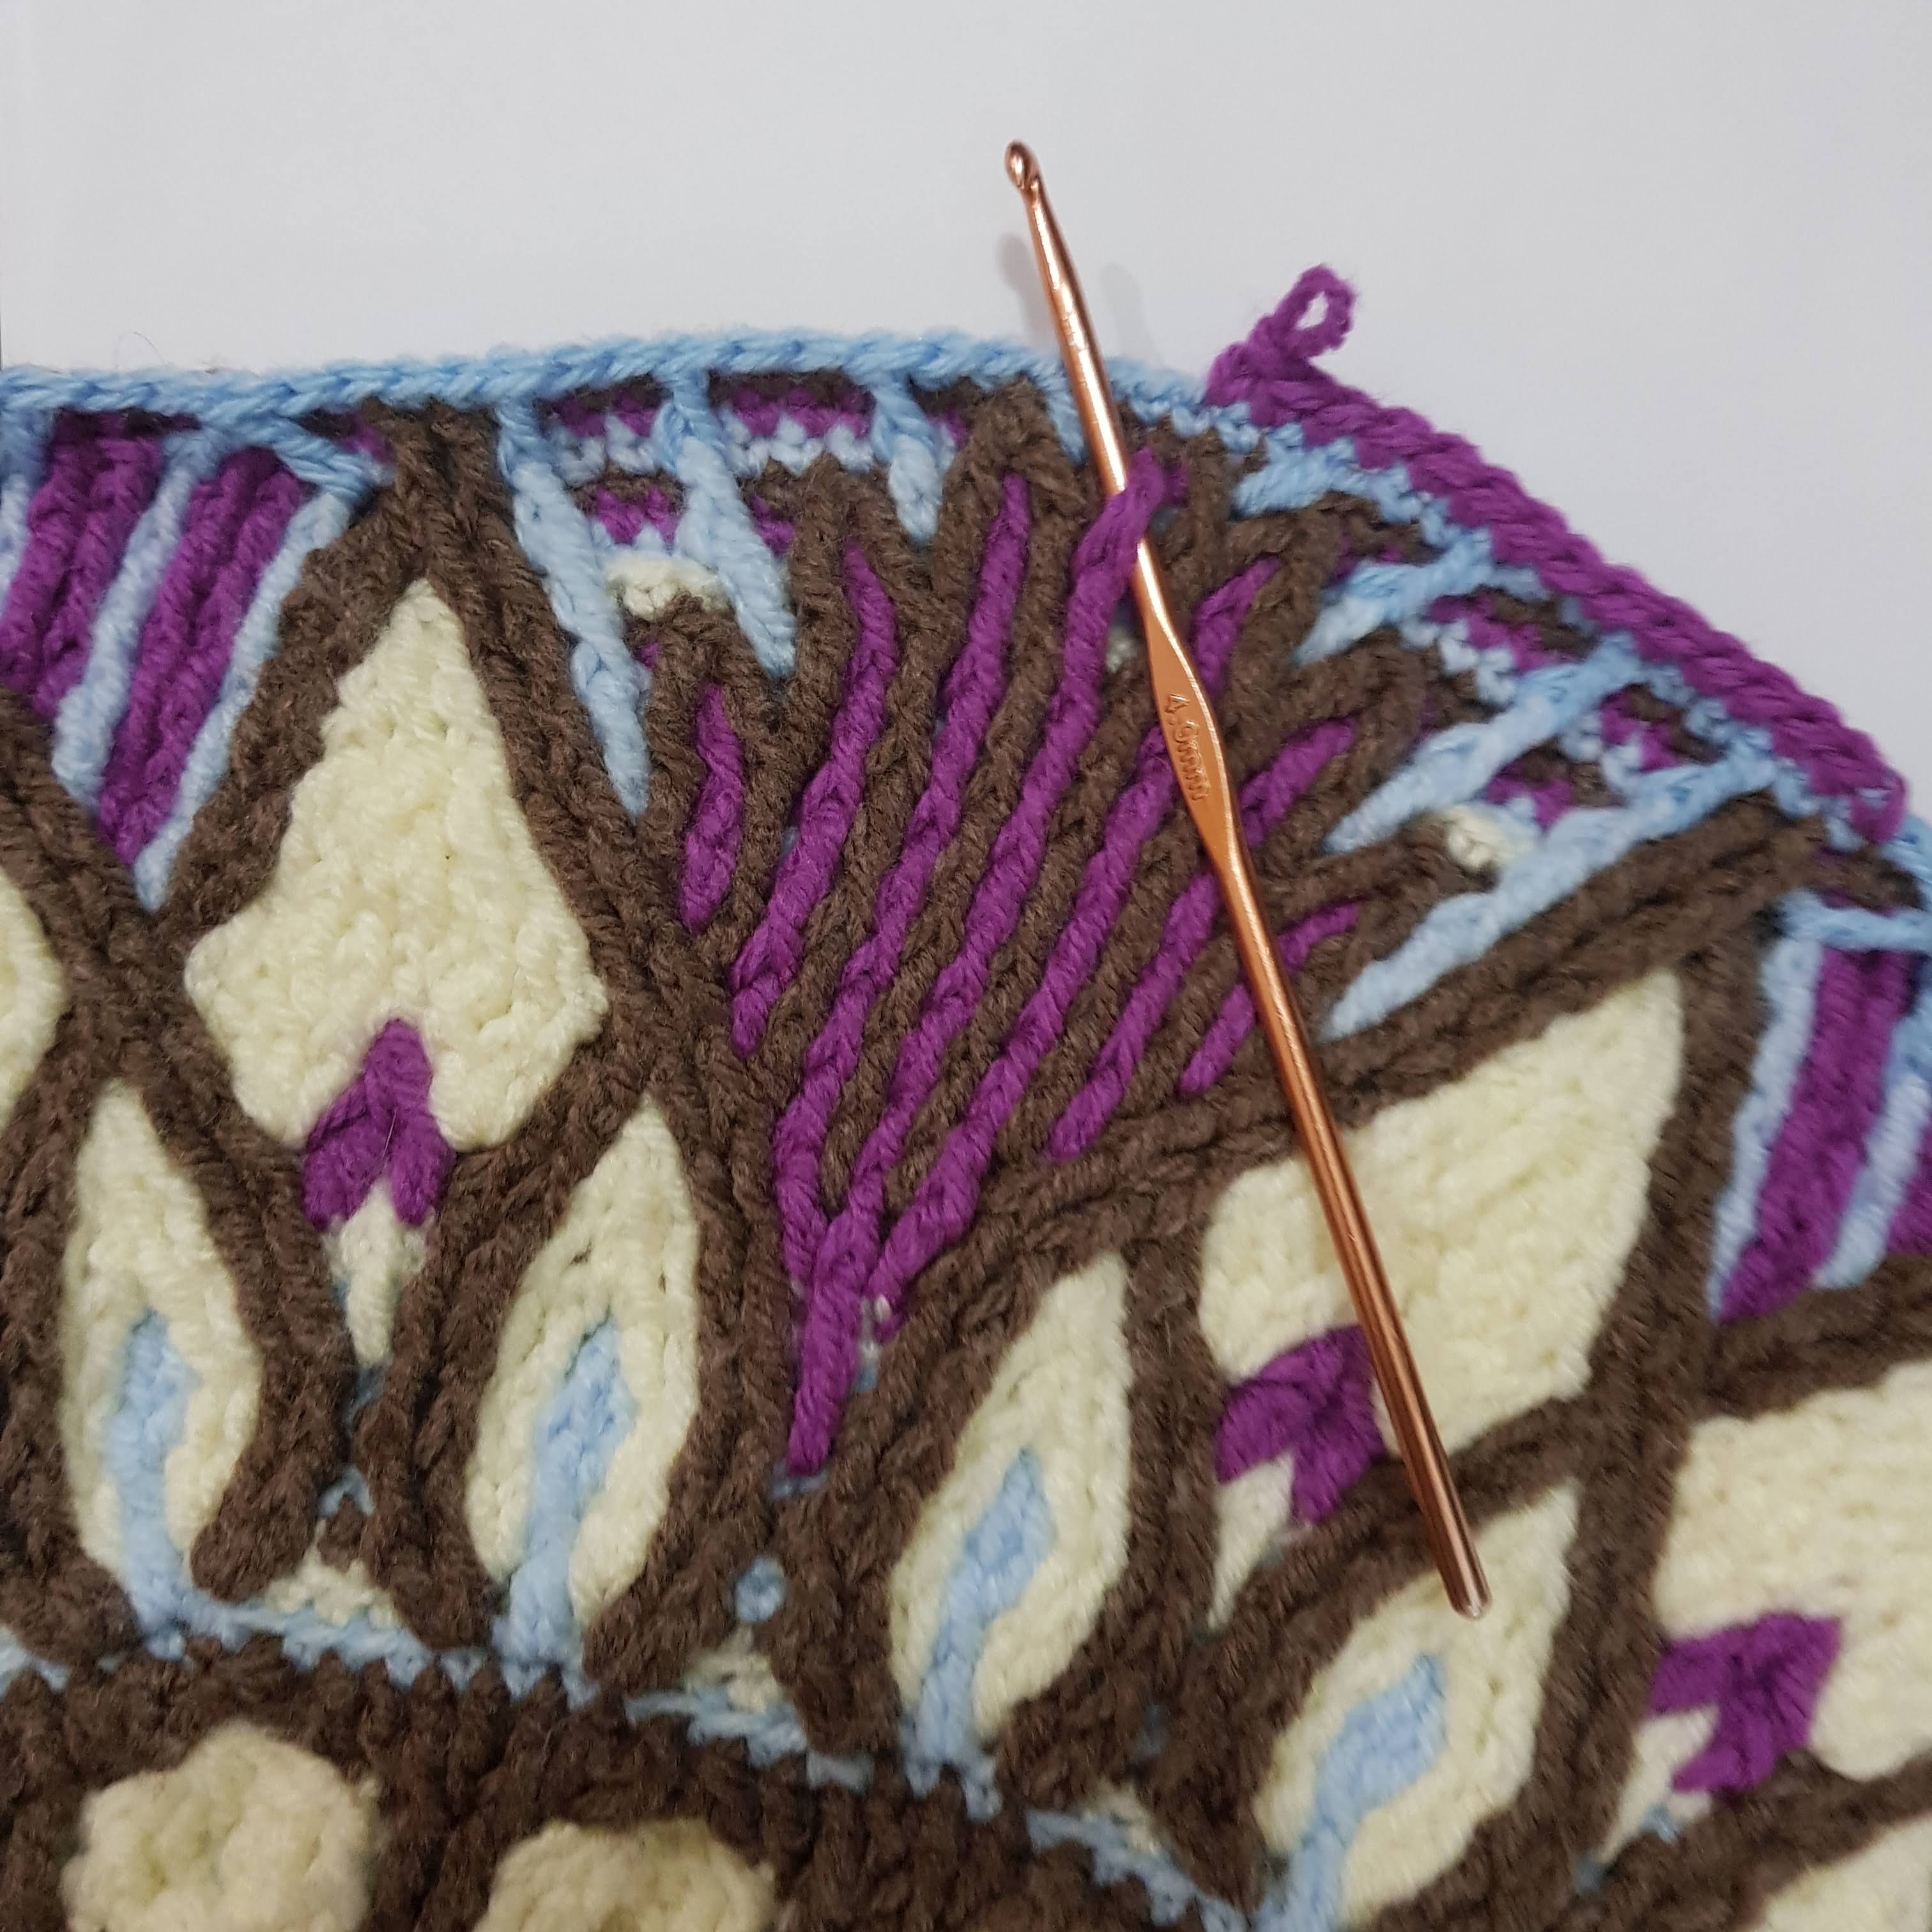
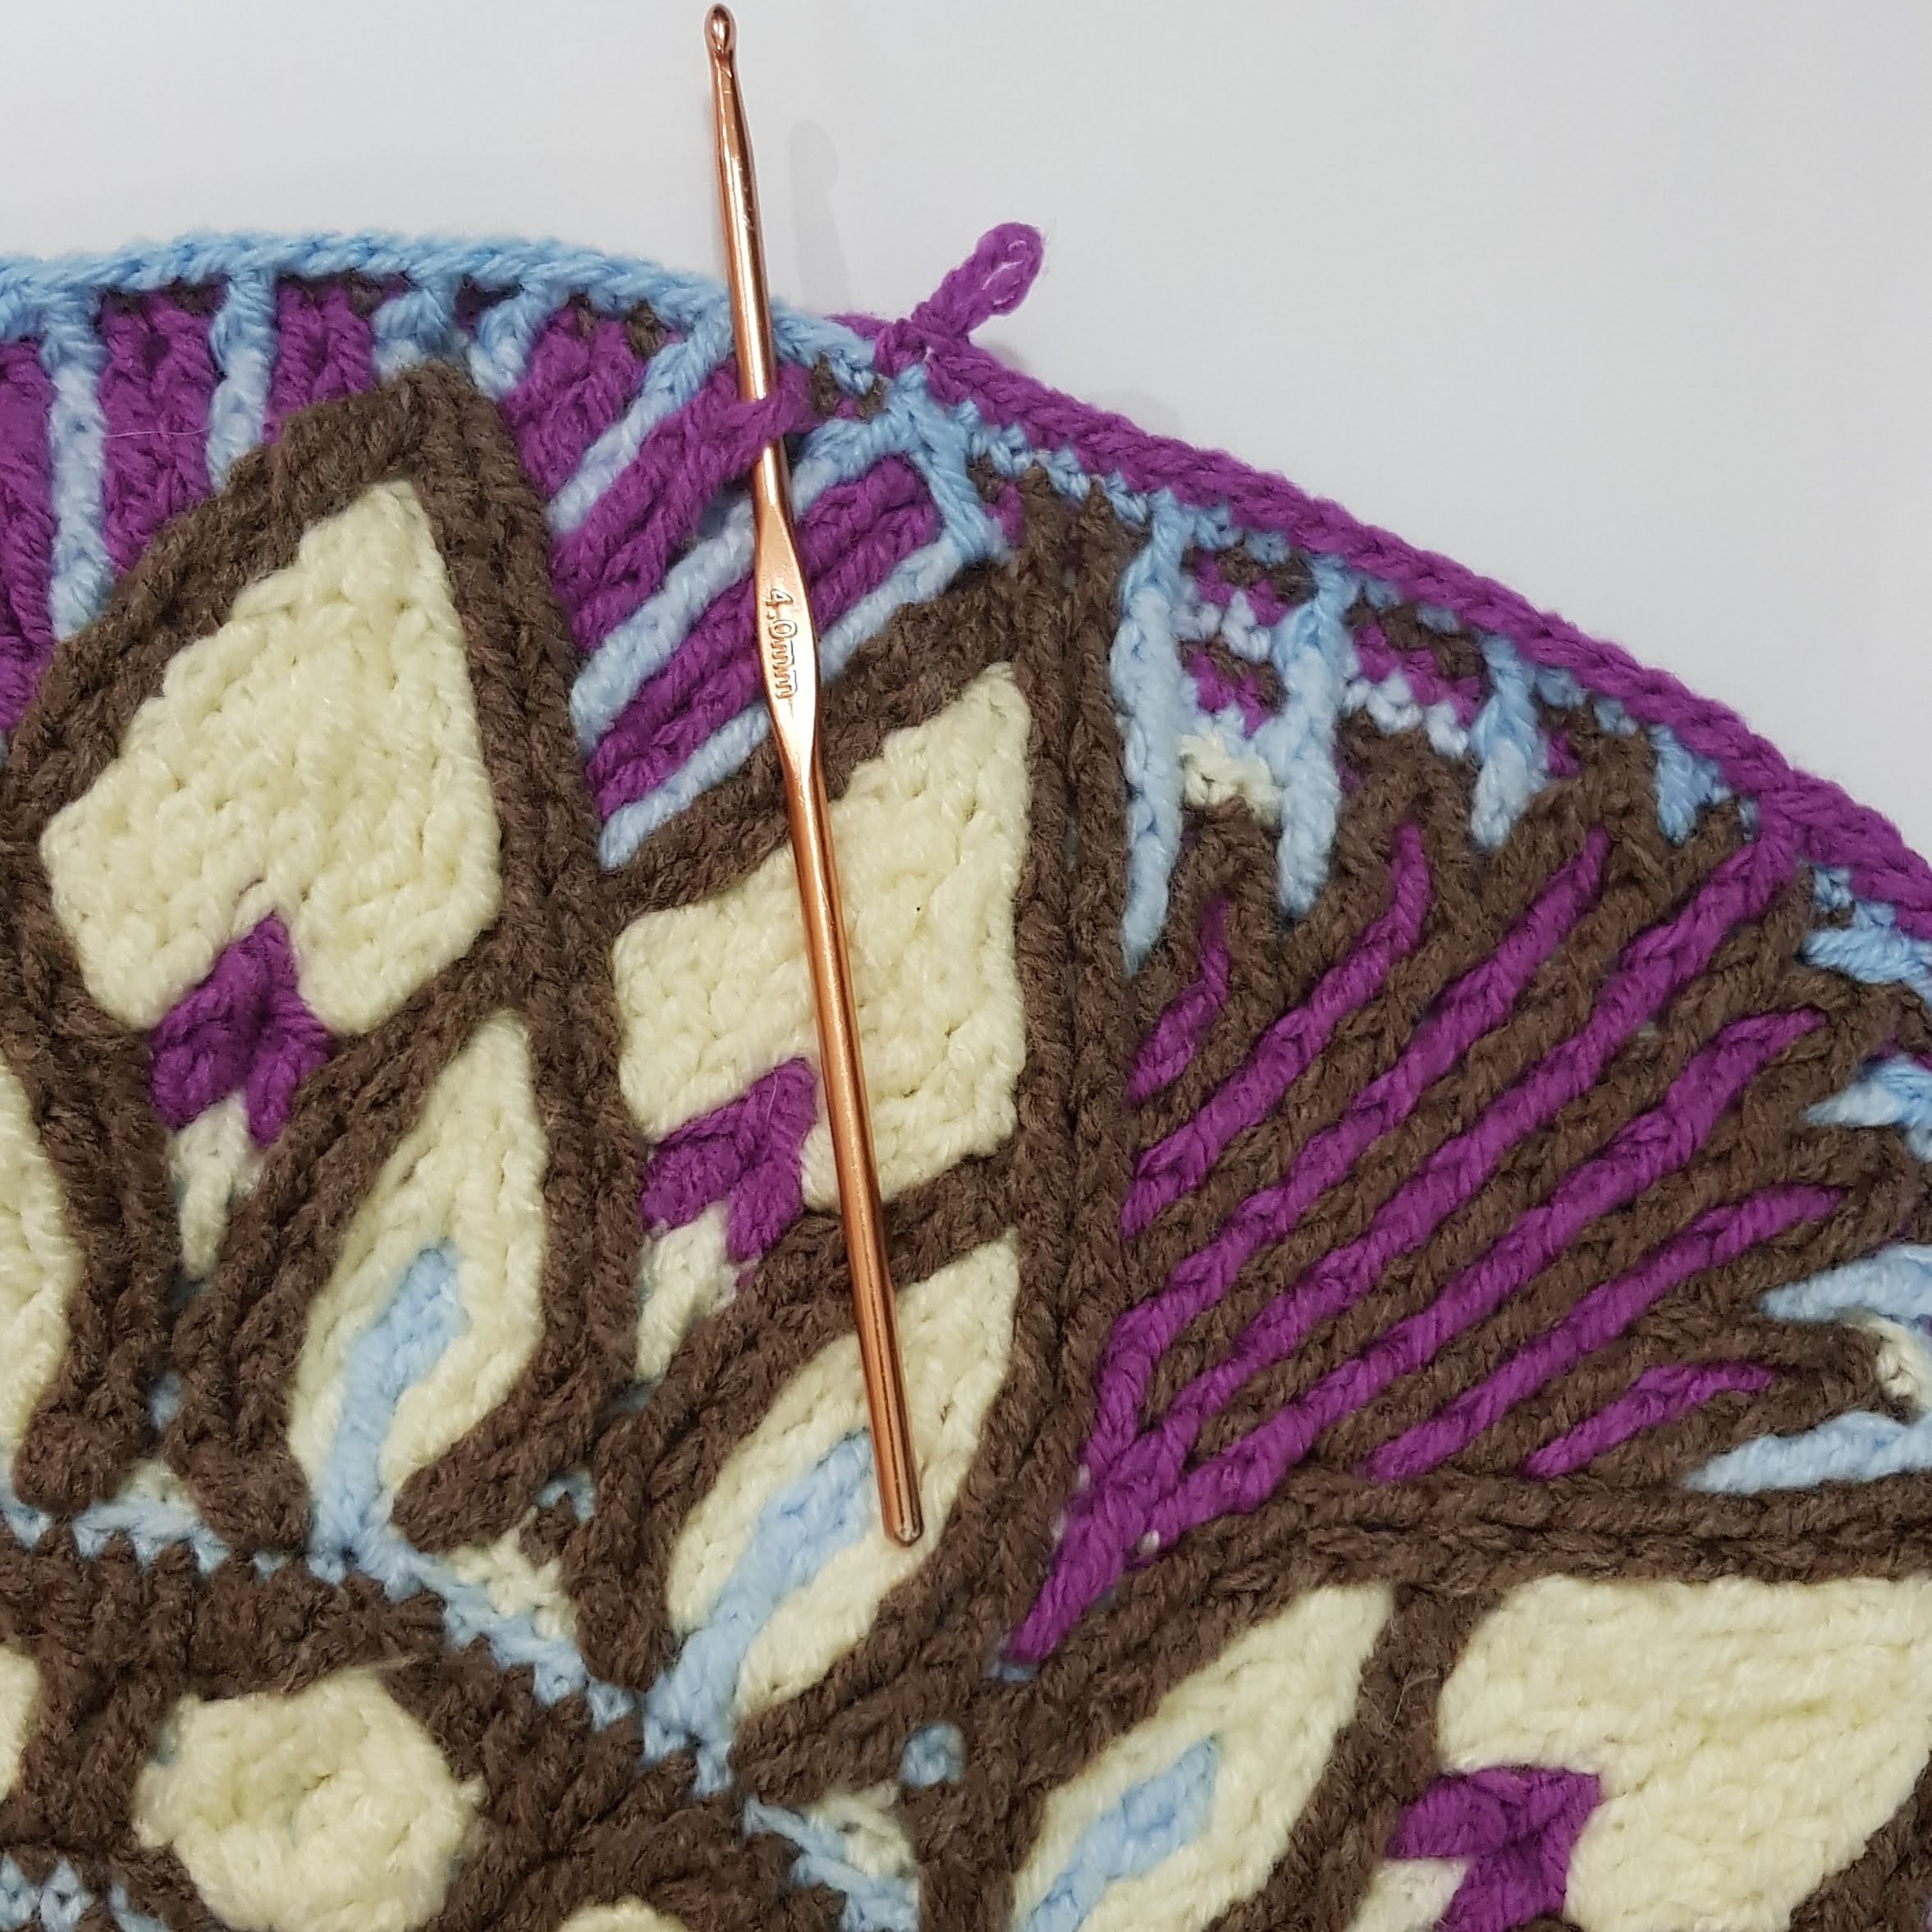
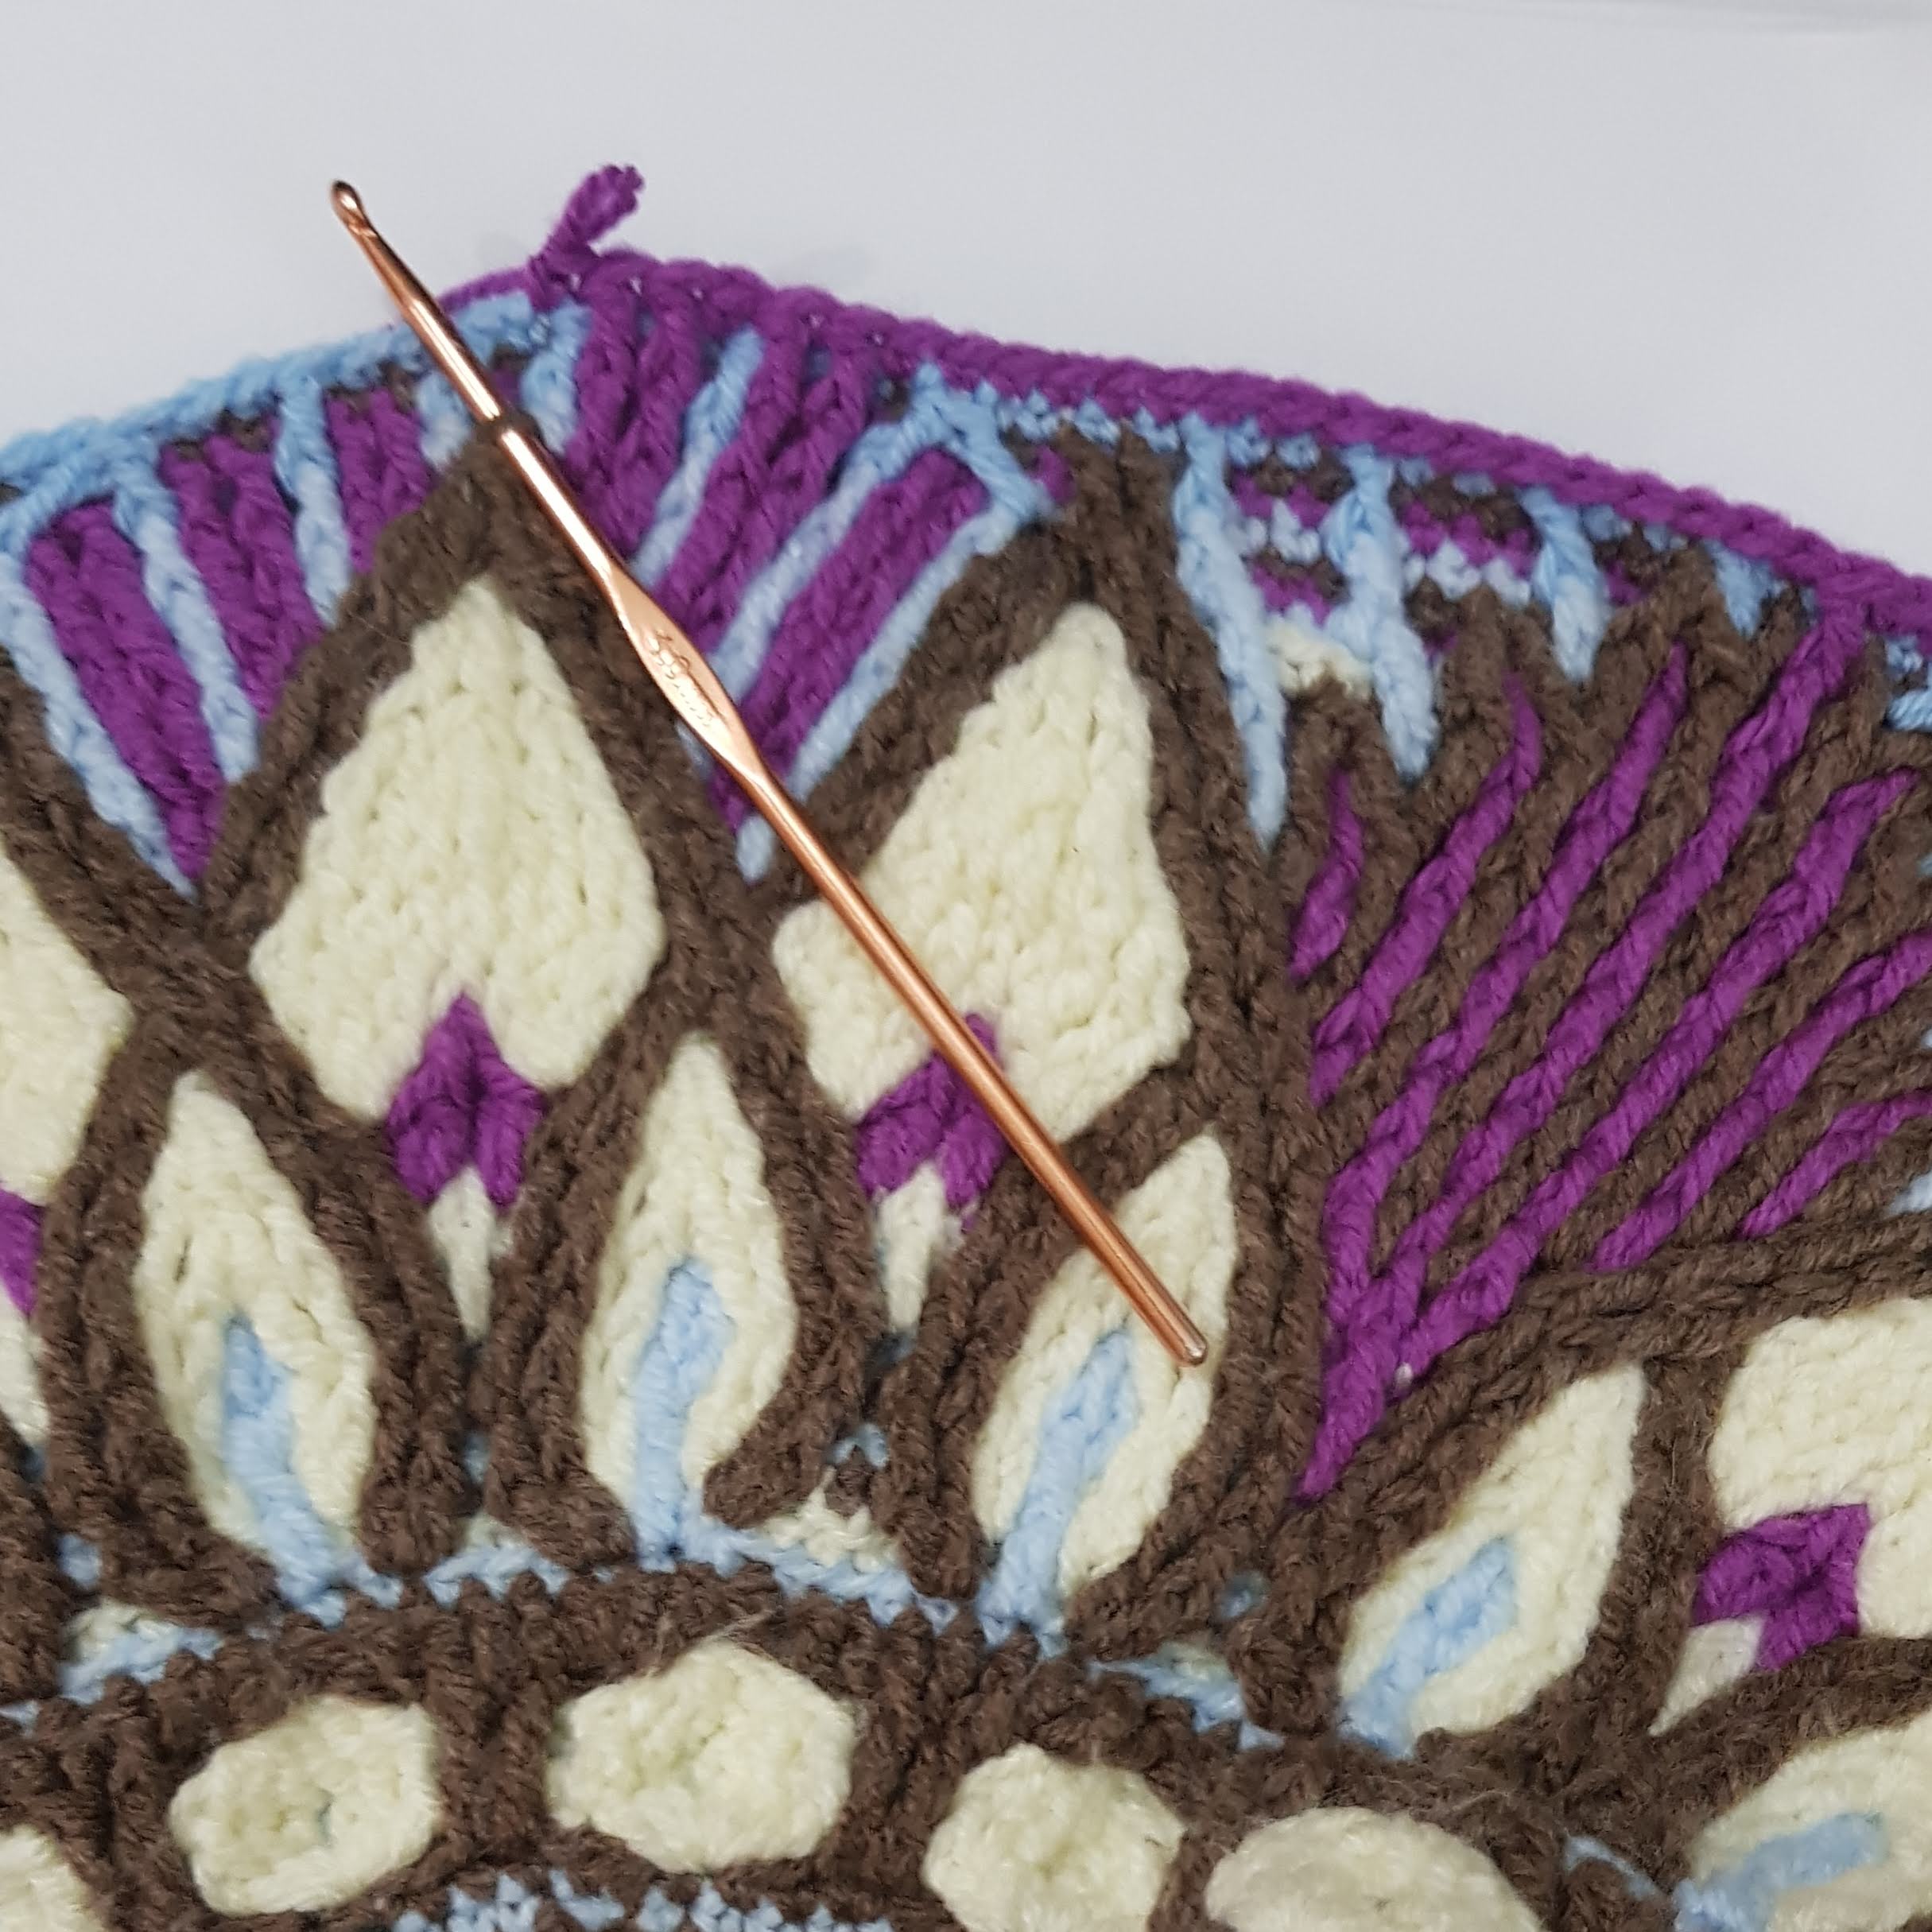
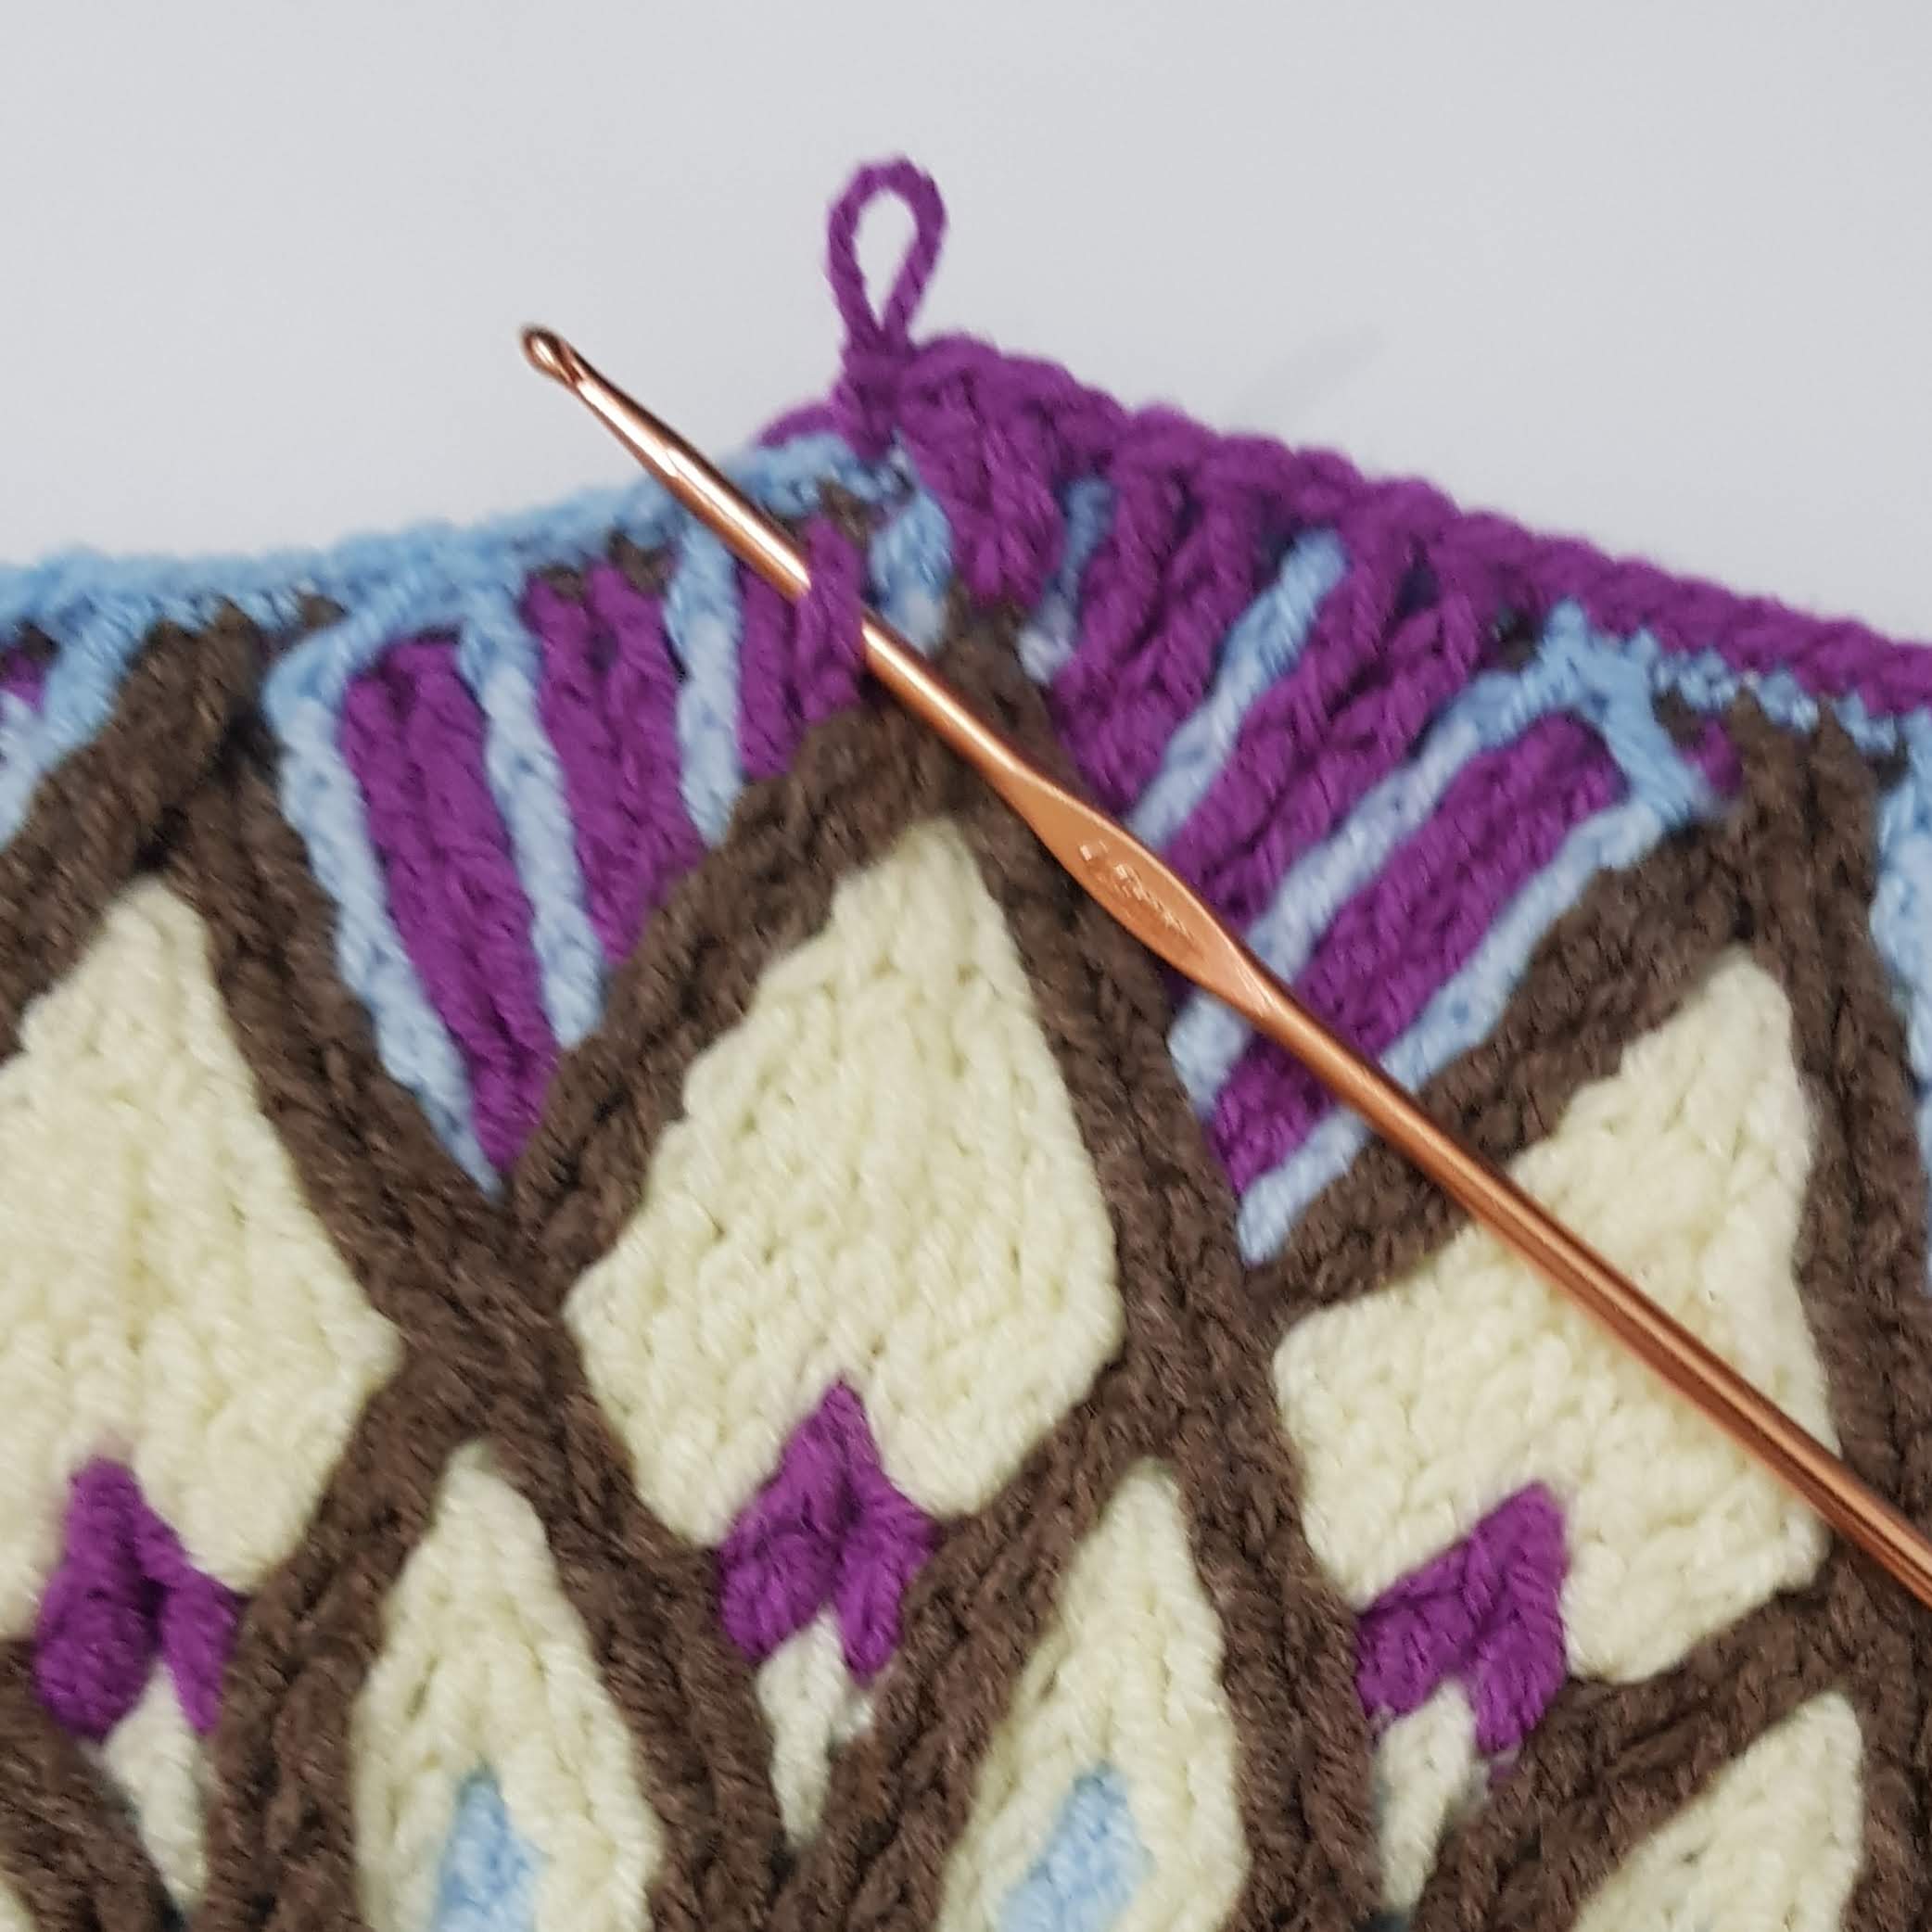
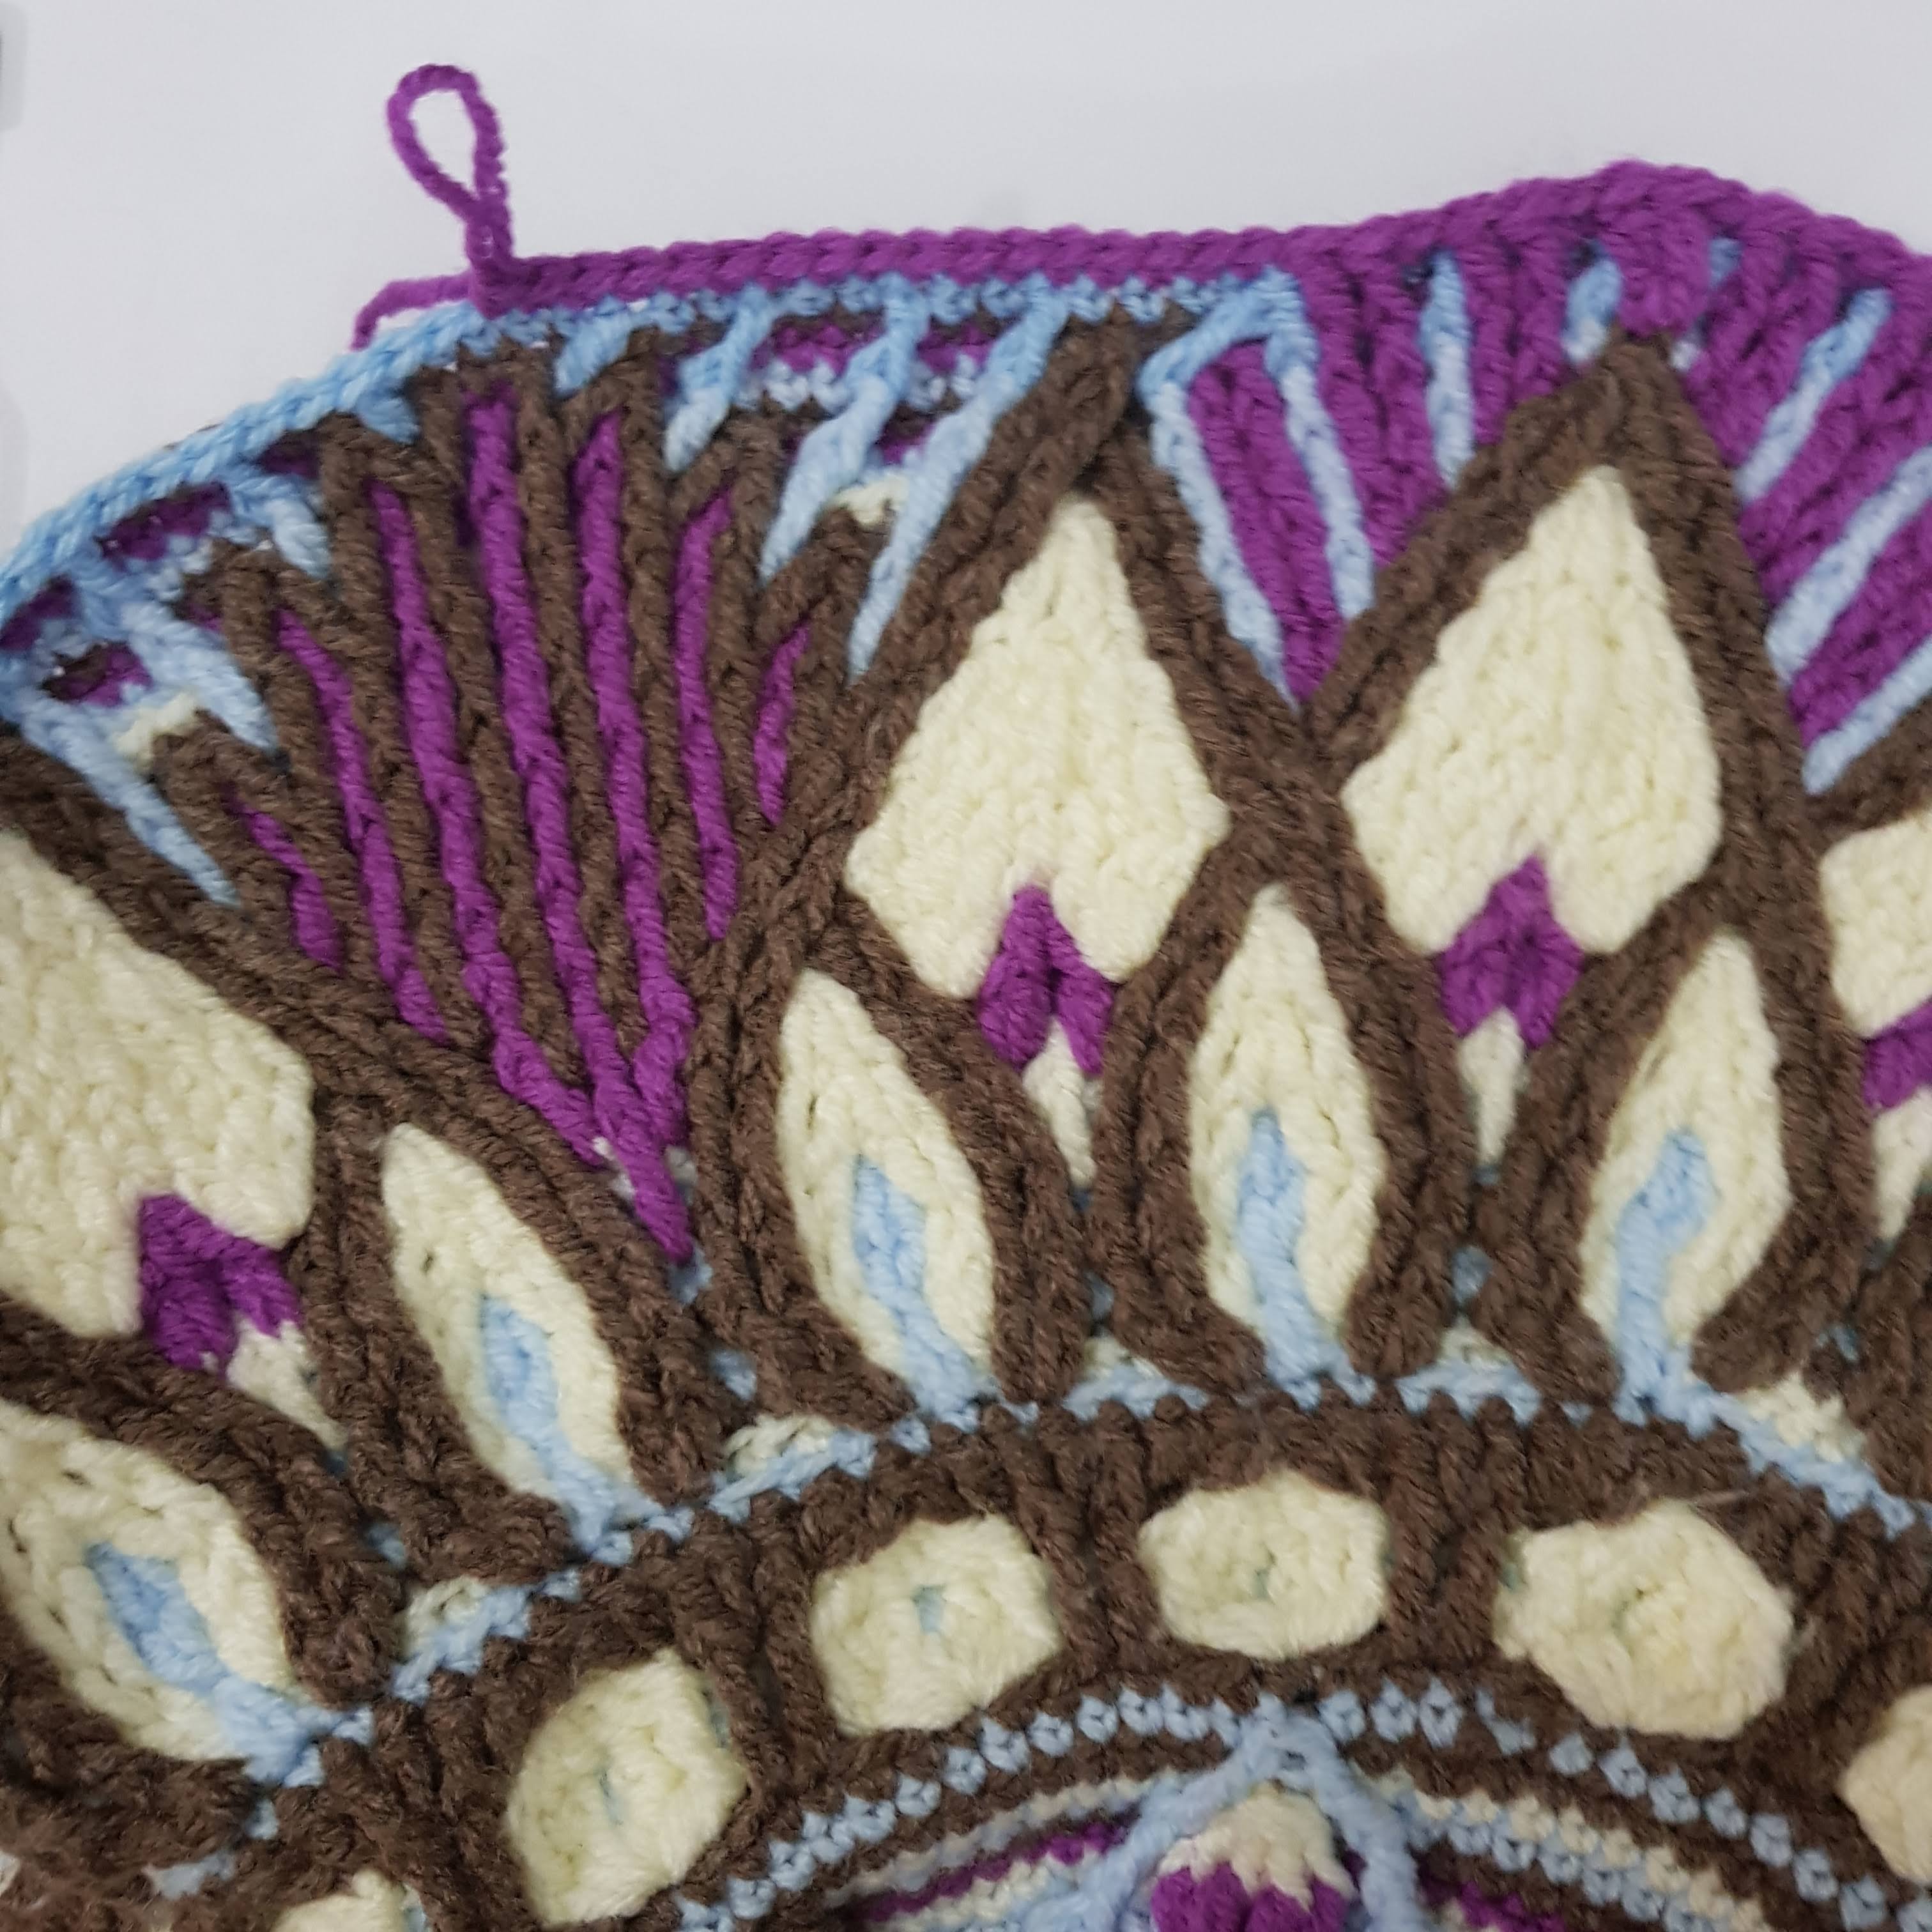
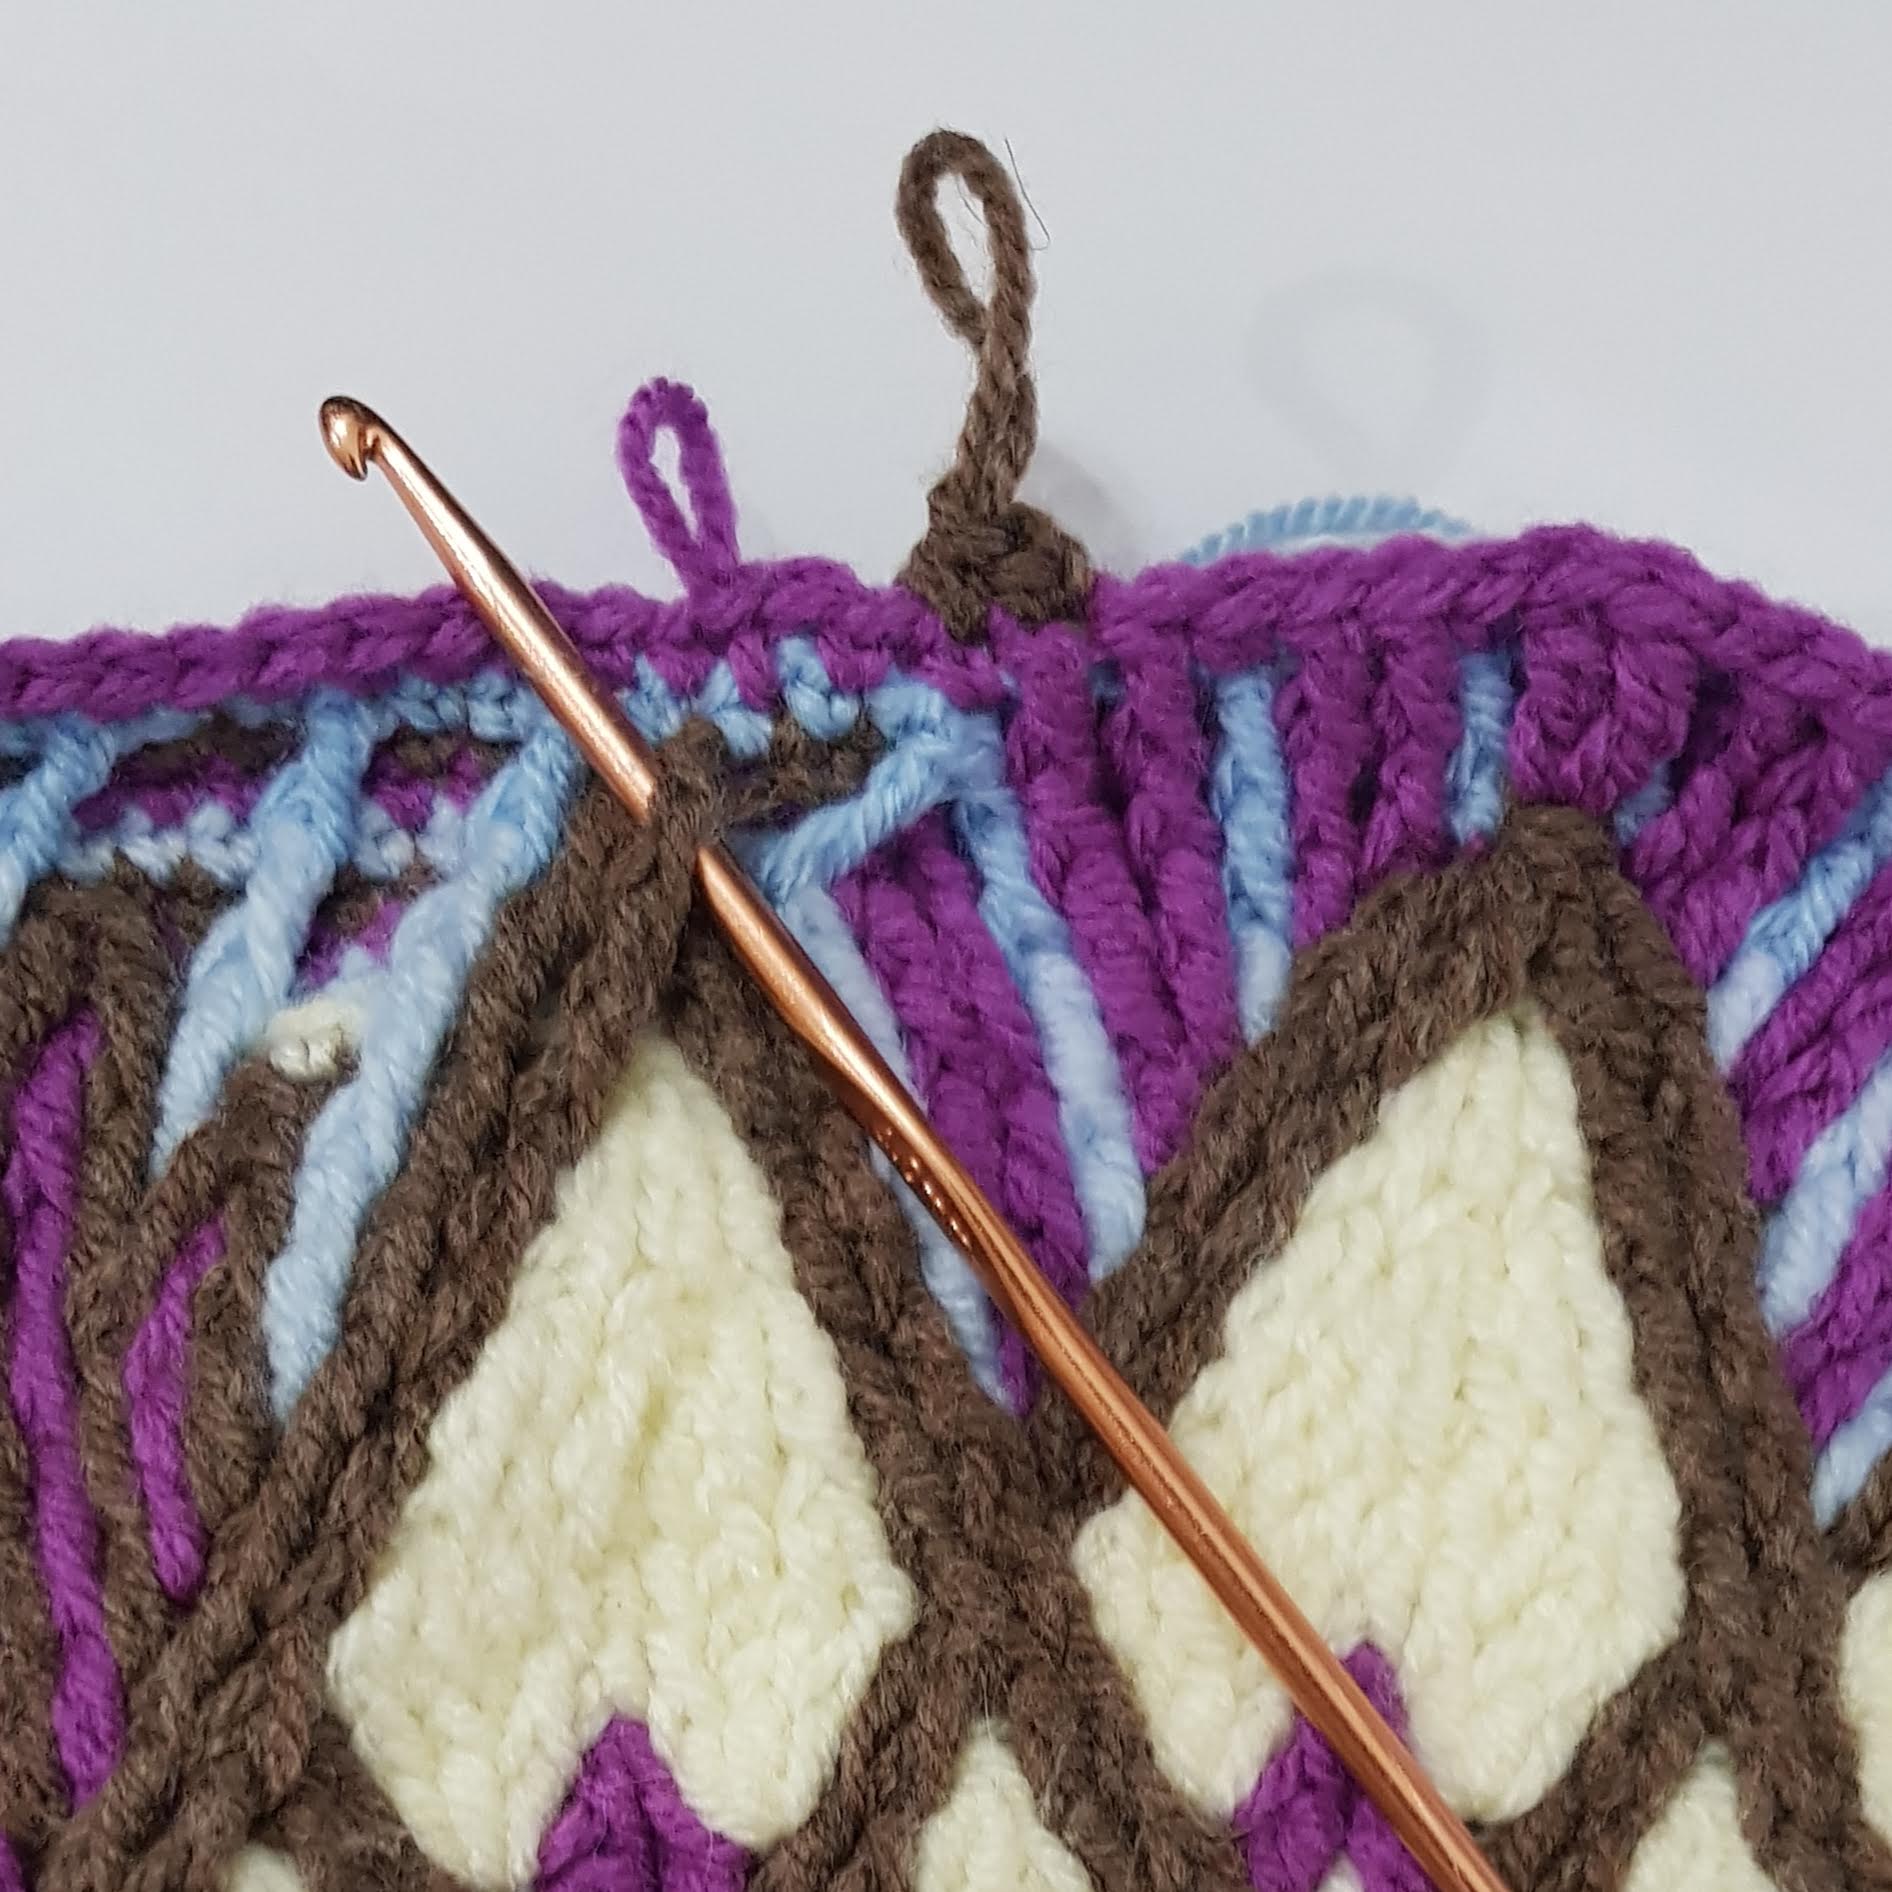
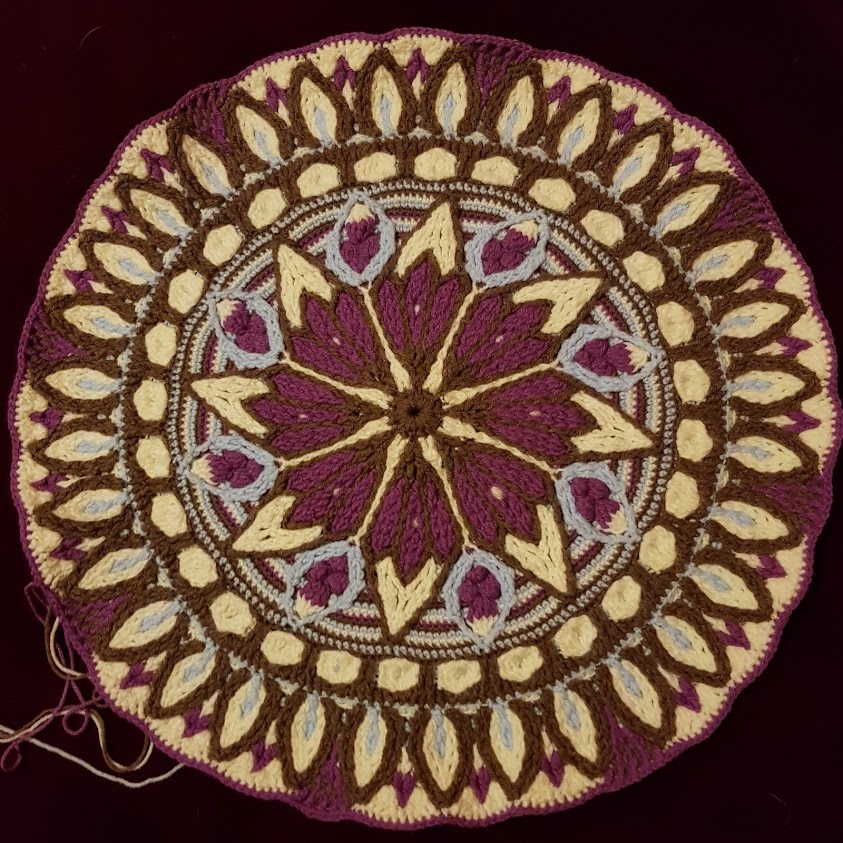
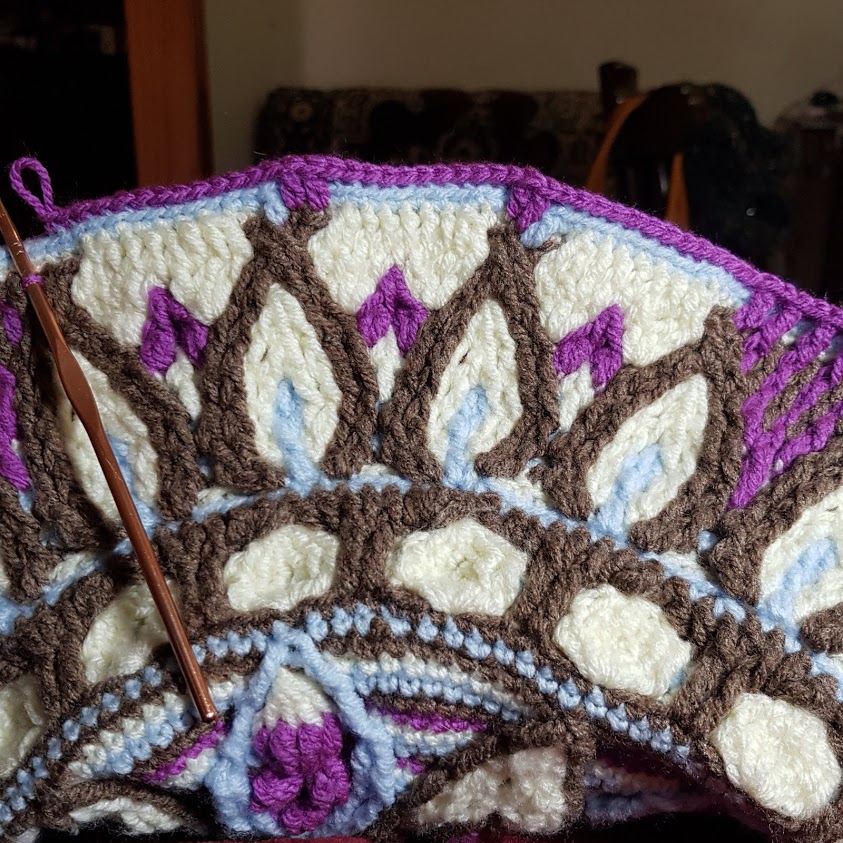
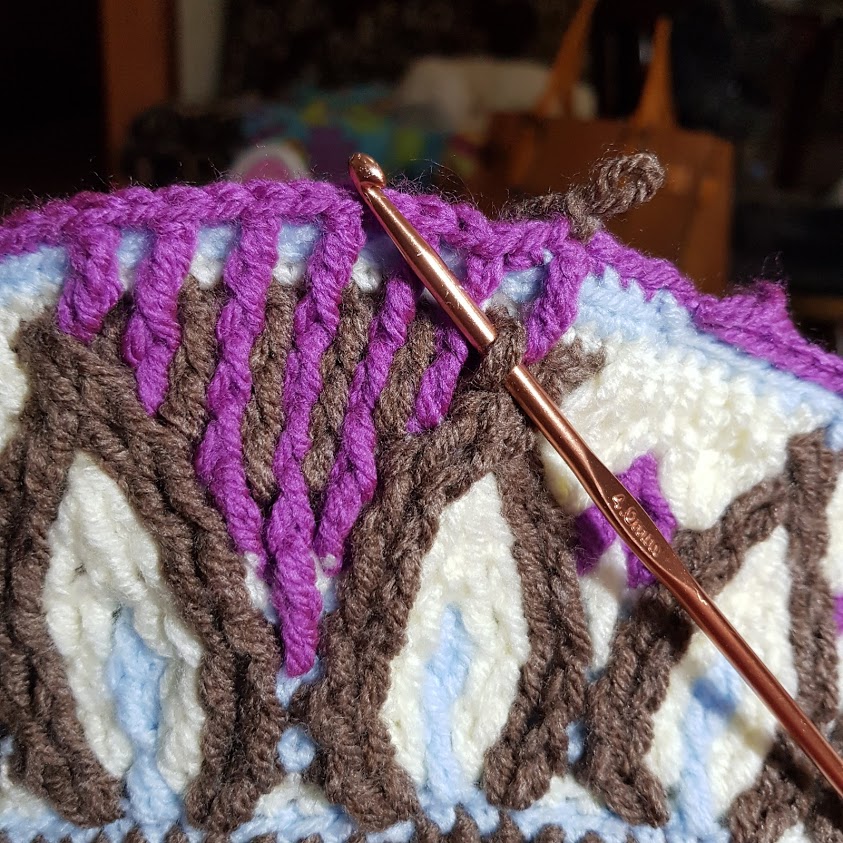
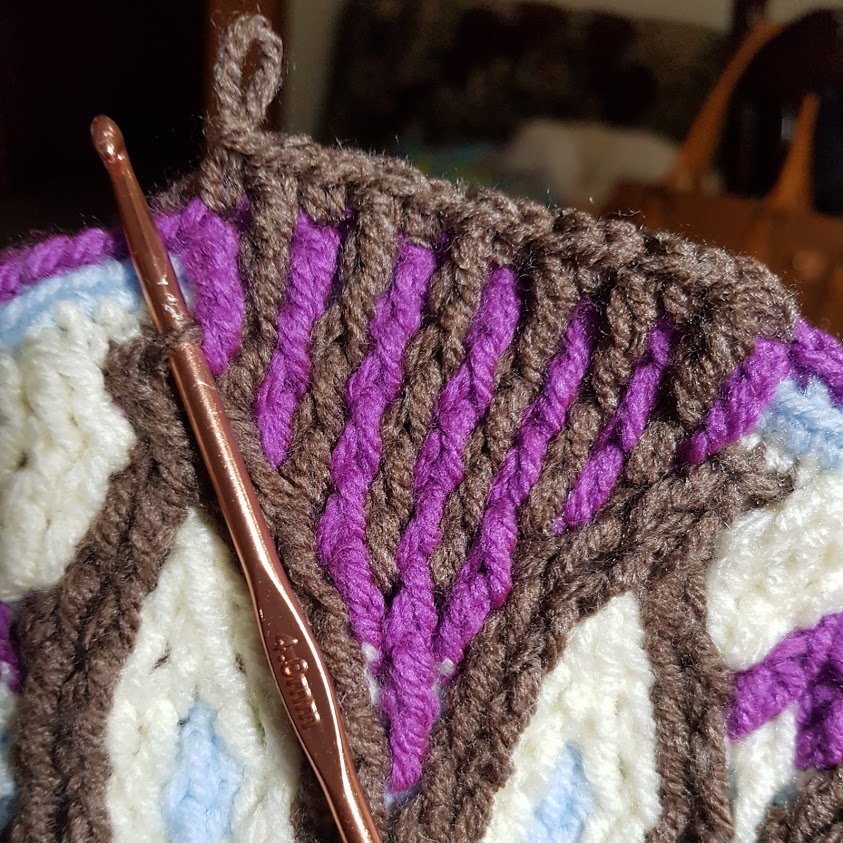
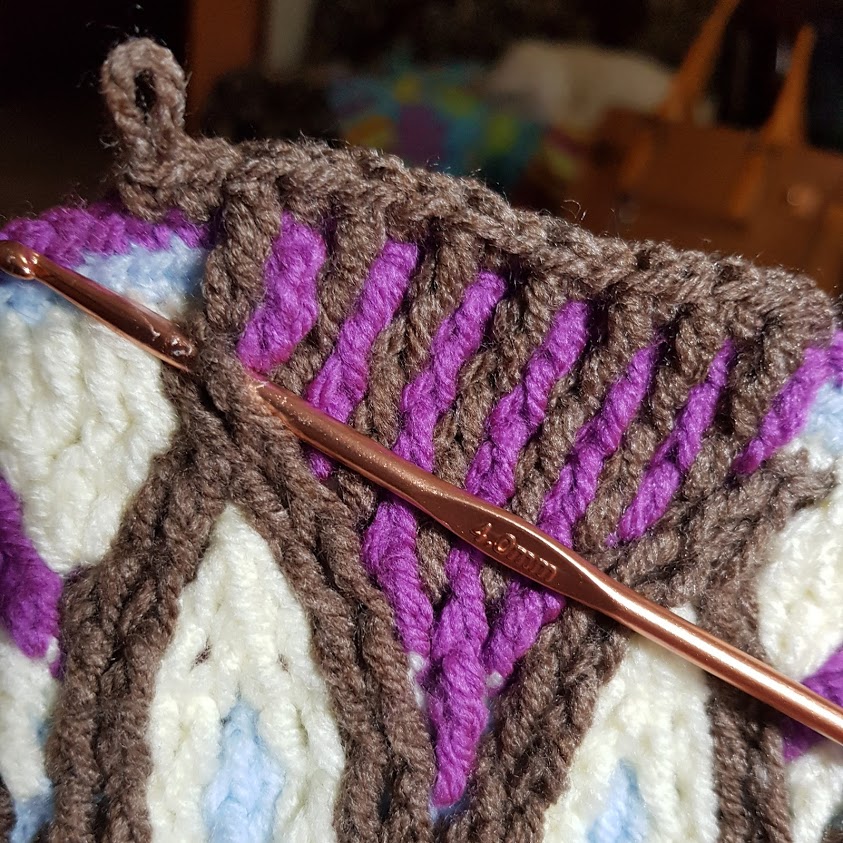
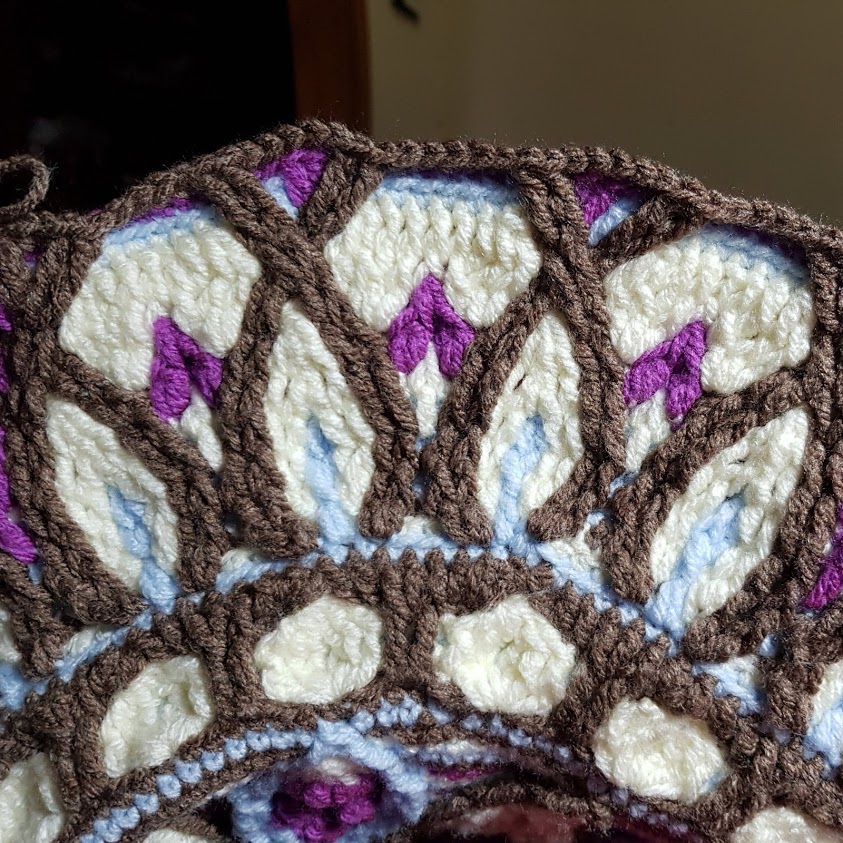
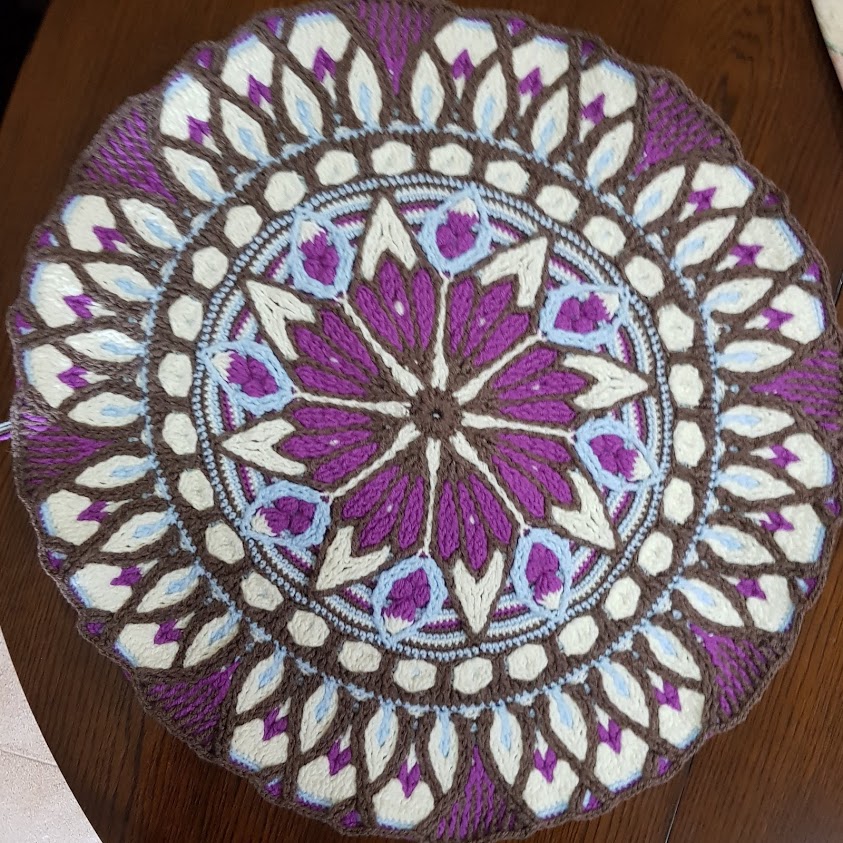
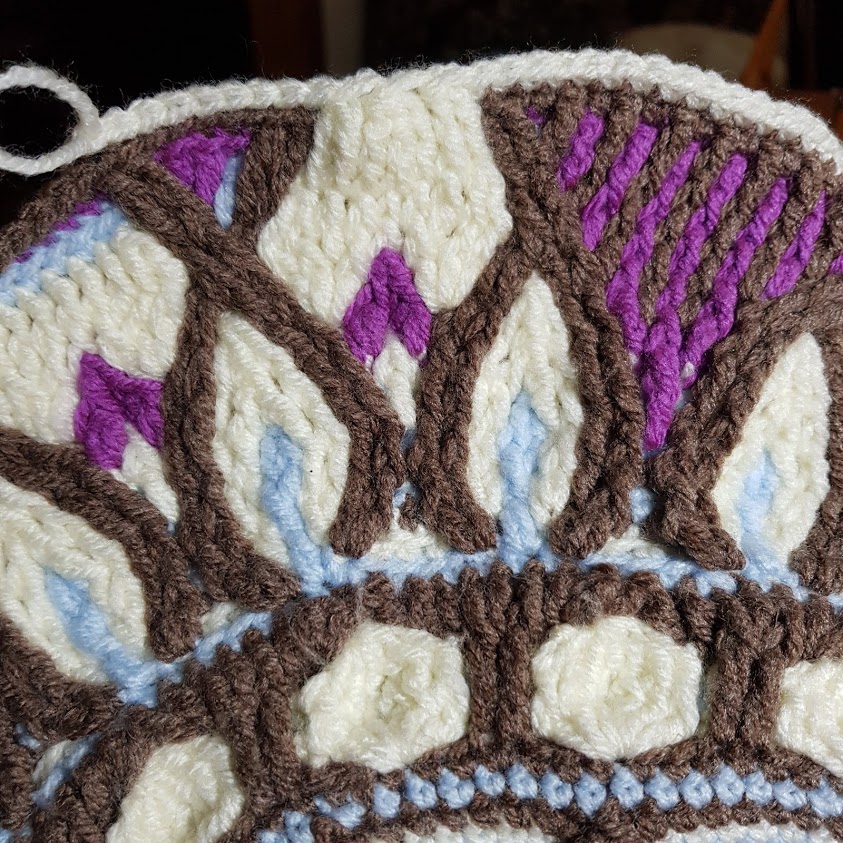
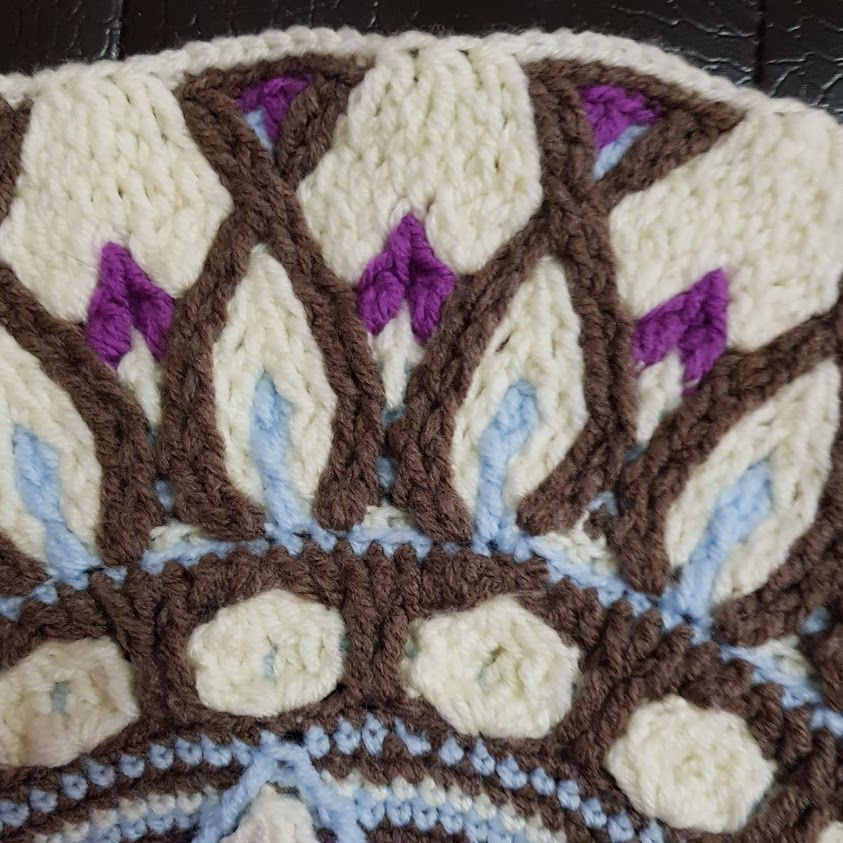
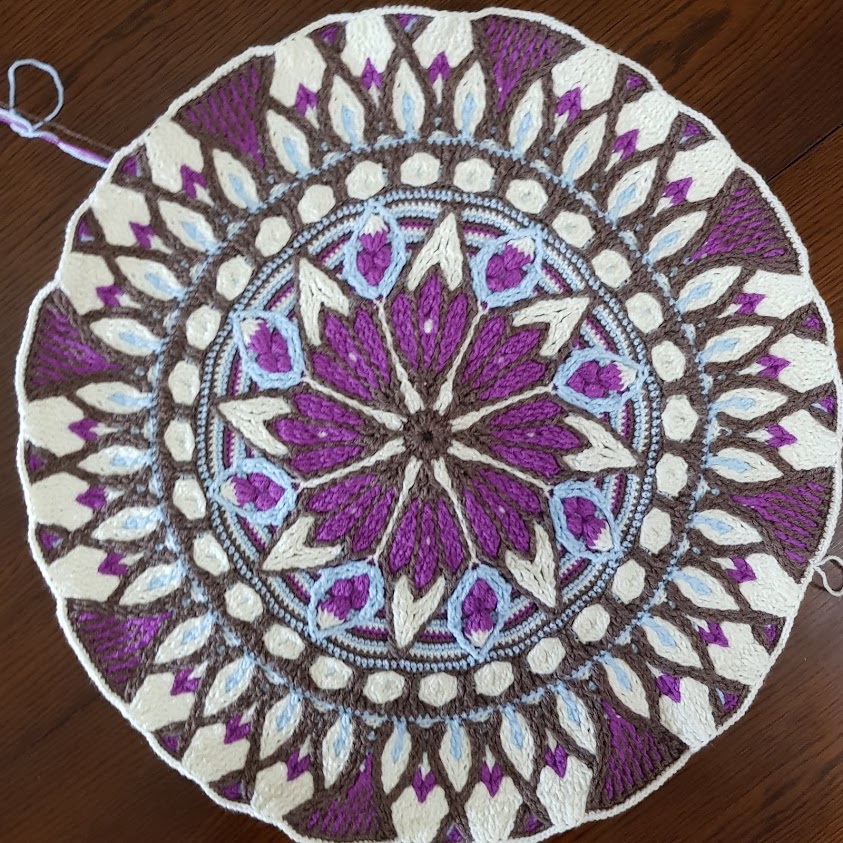
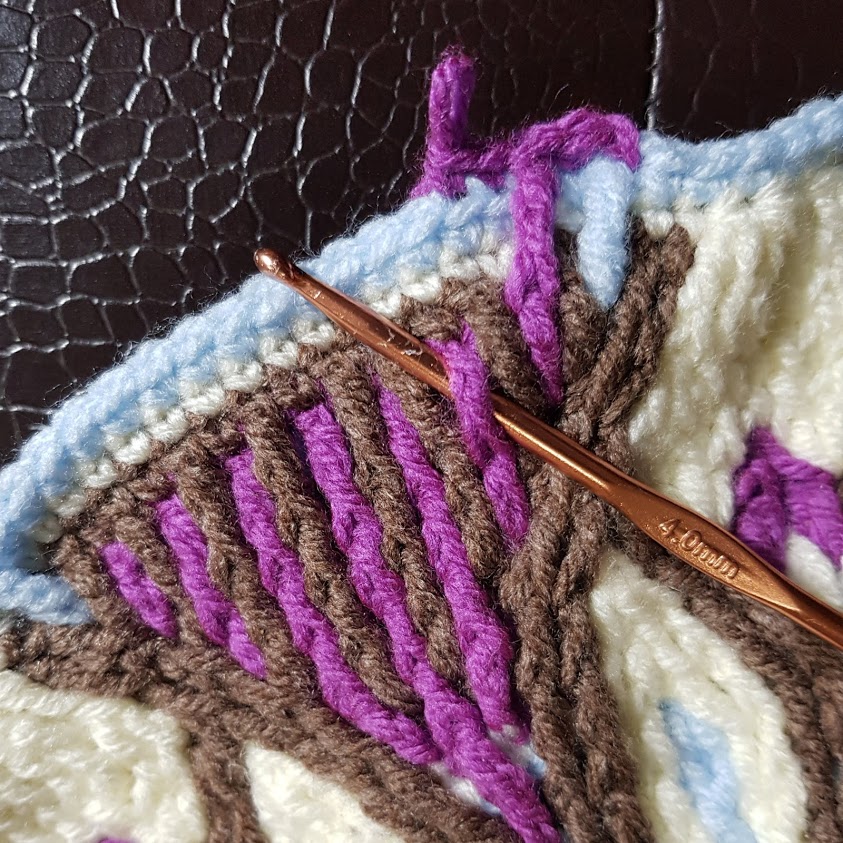
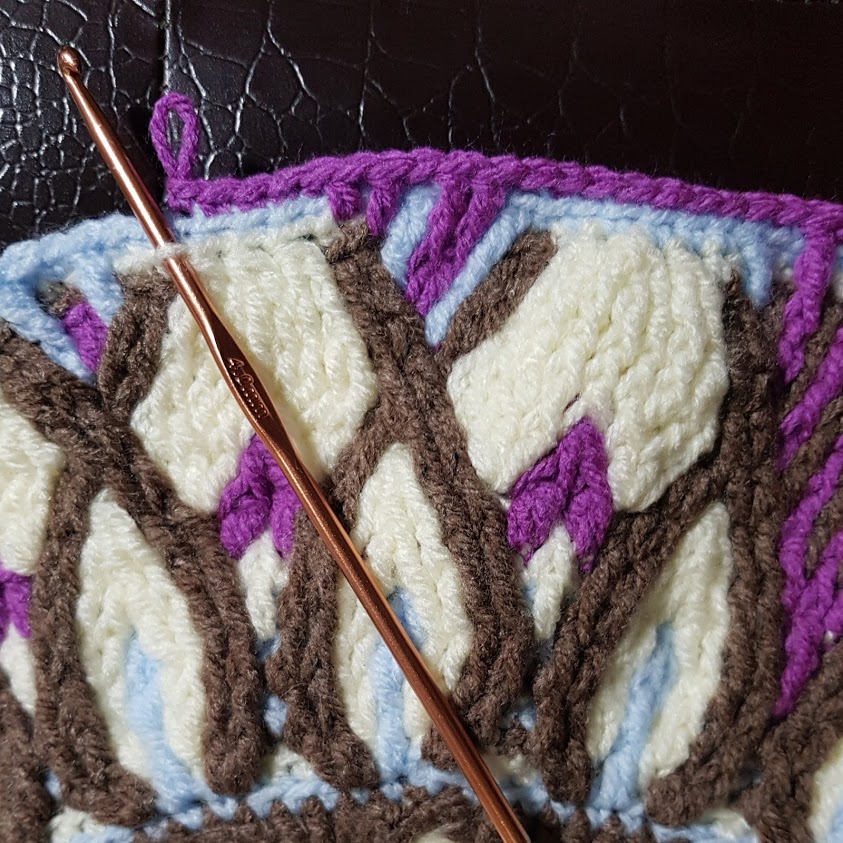
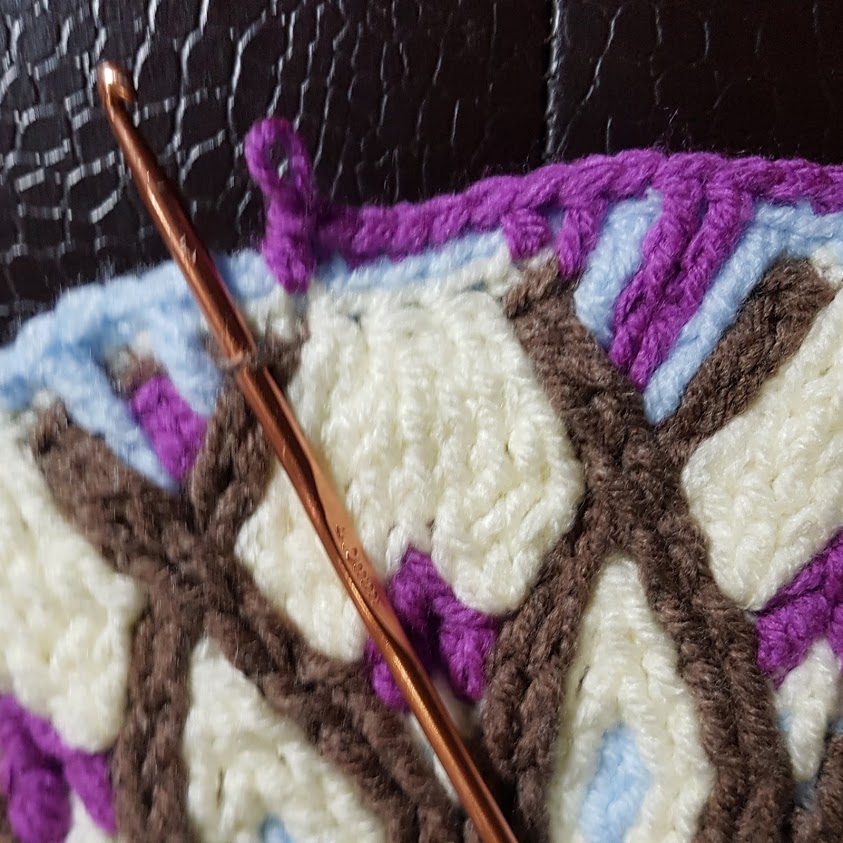
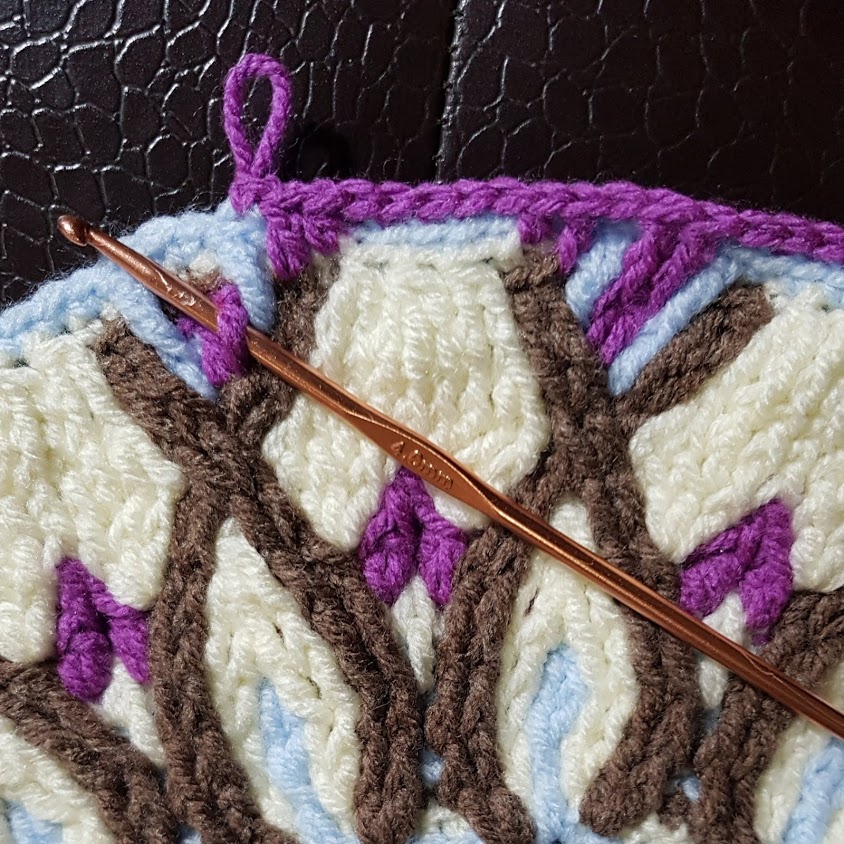
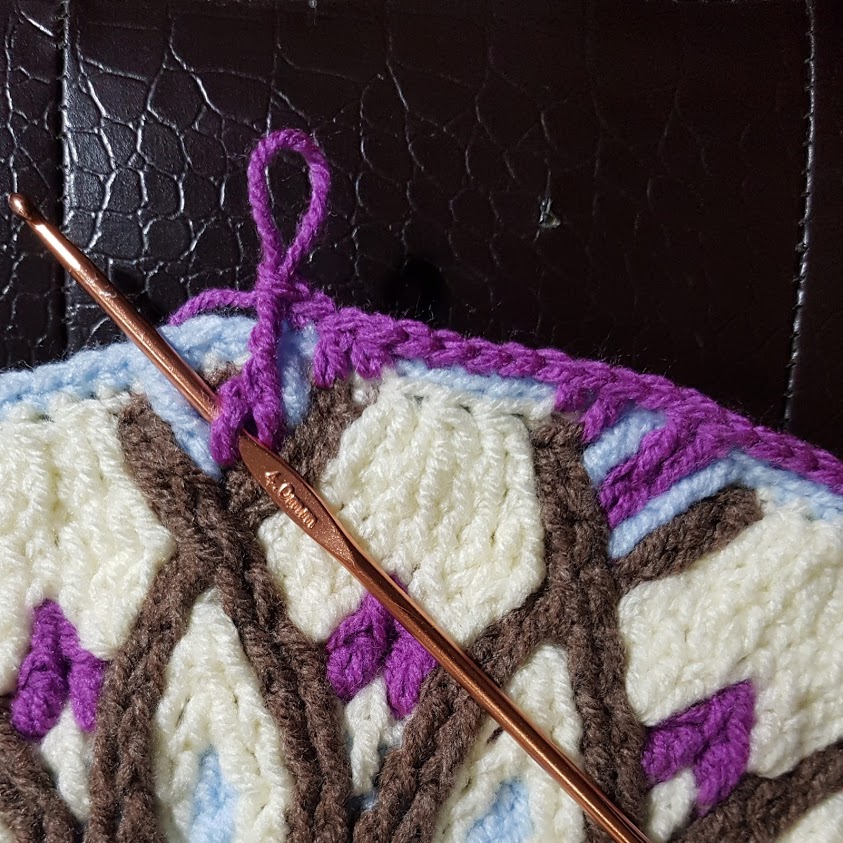
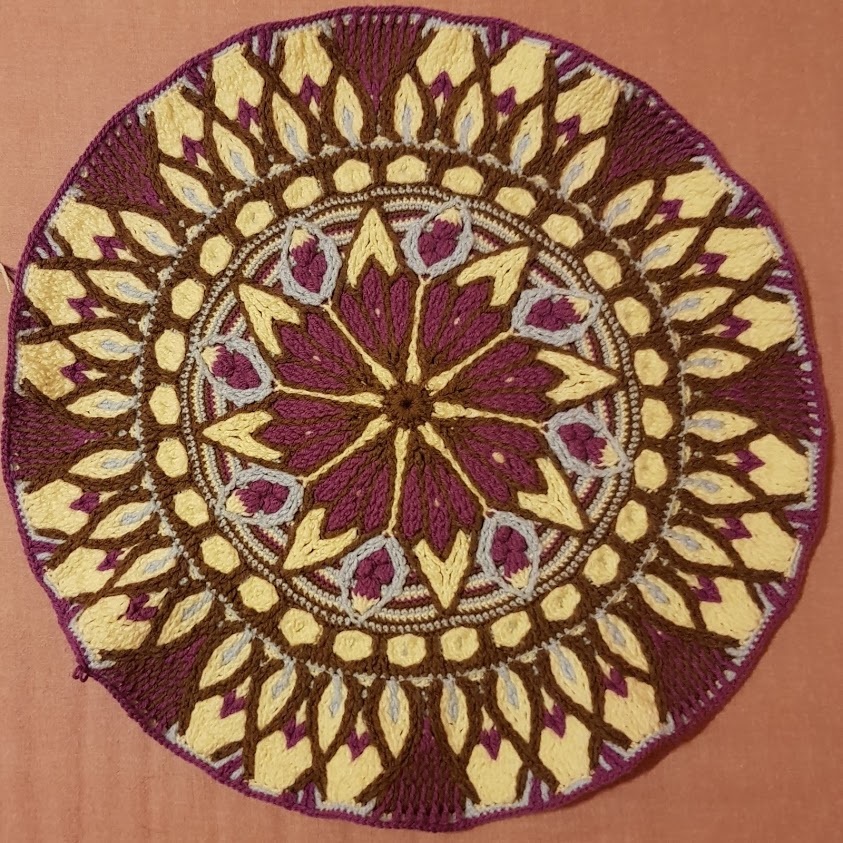
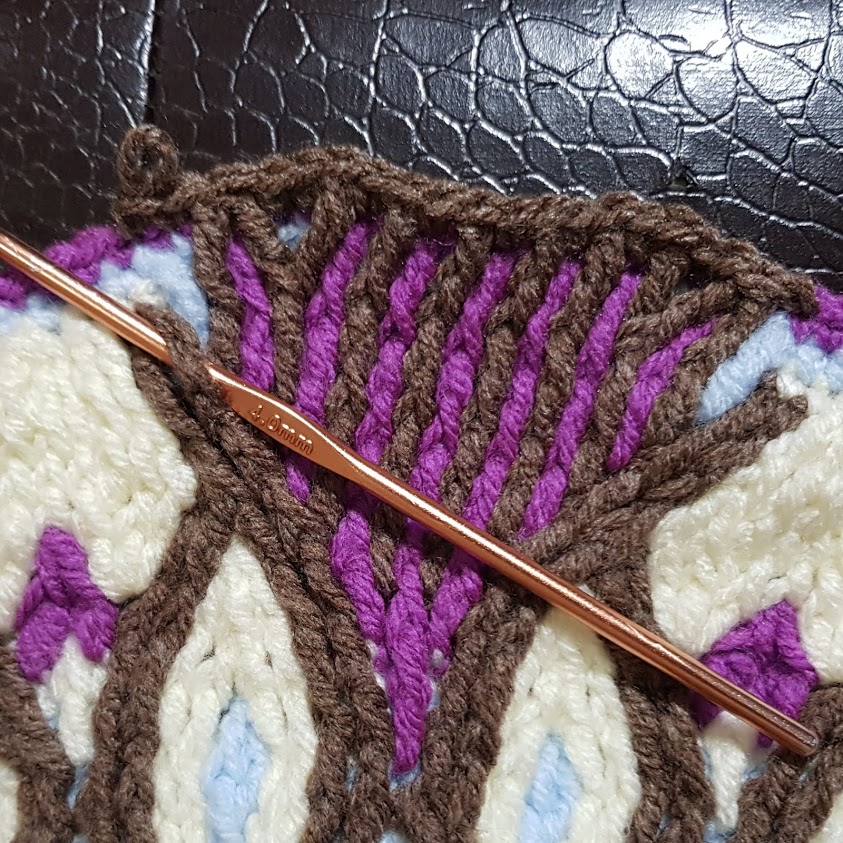
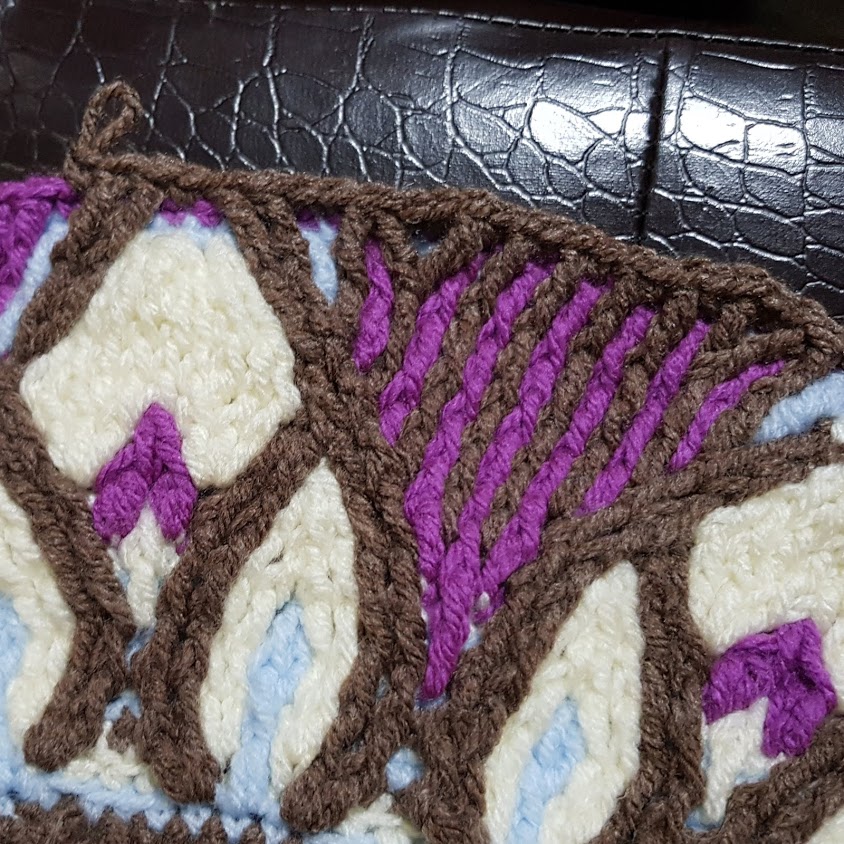
This Tote bag design is inspired by ancient Roman mosaic found in the the Domvs Romana, in Mdina Malta. The Domus (or house) is believed to have been built in 1st century BC .
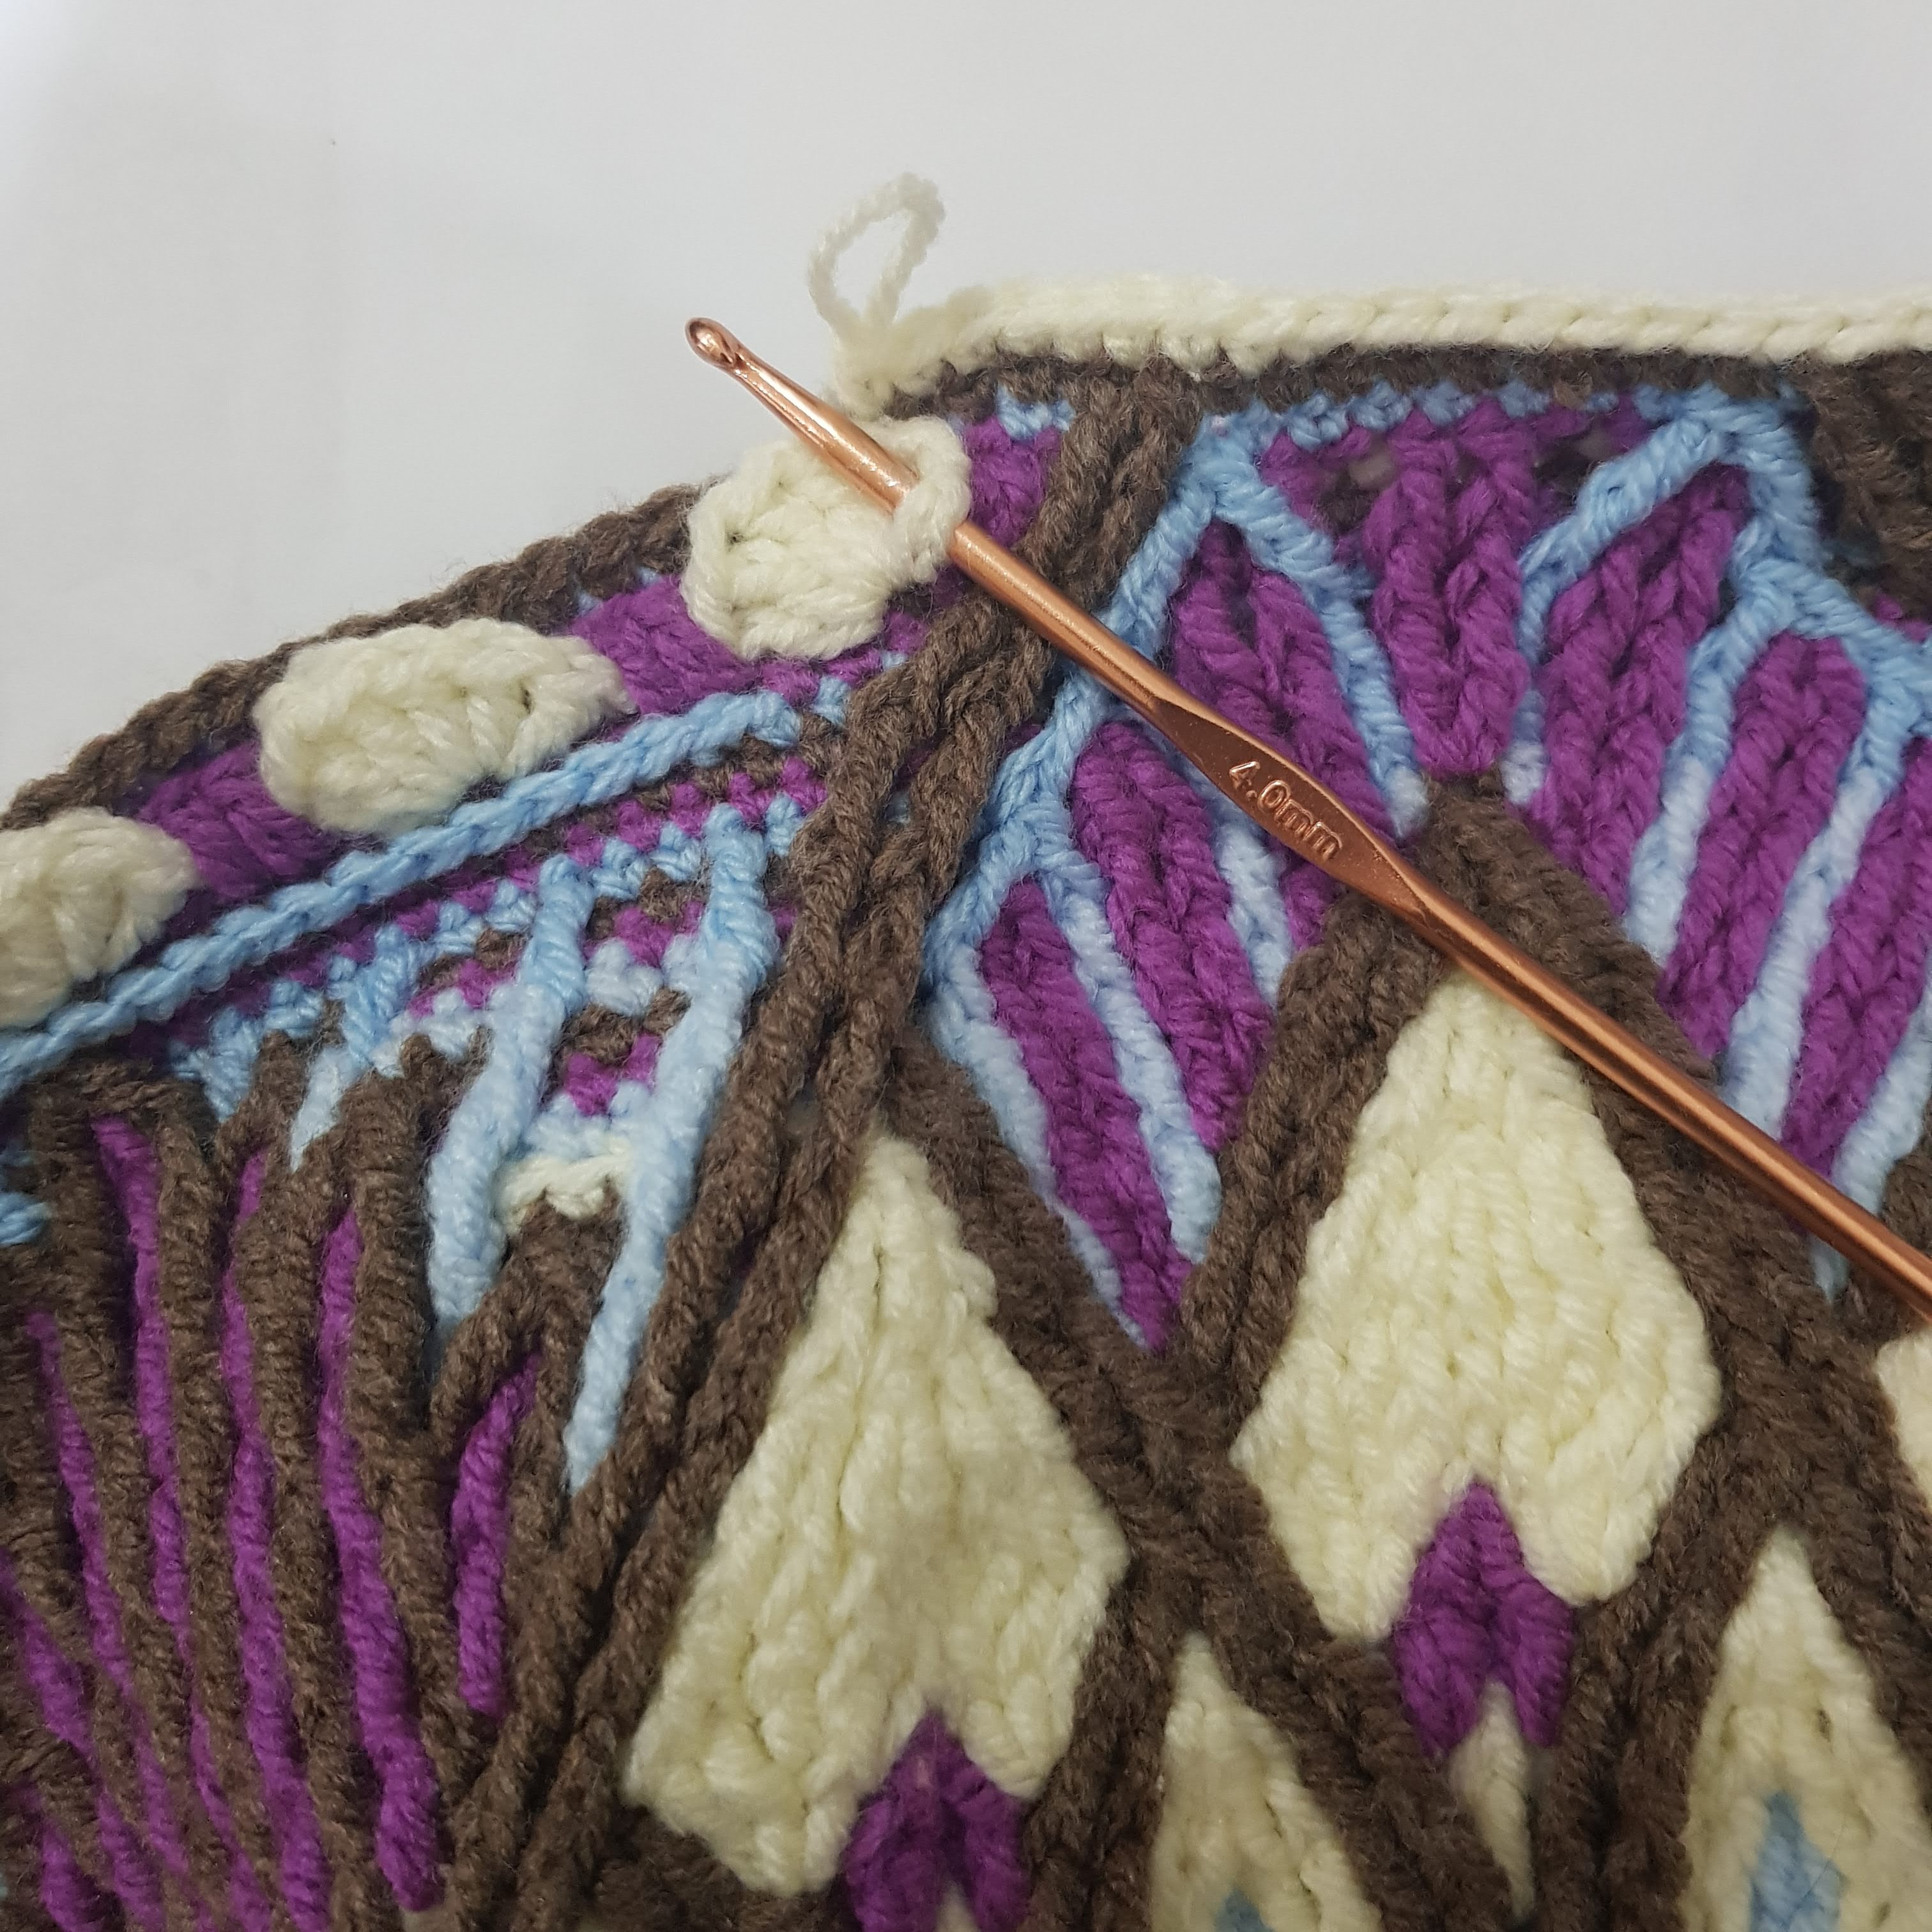
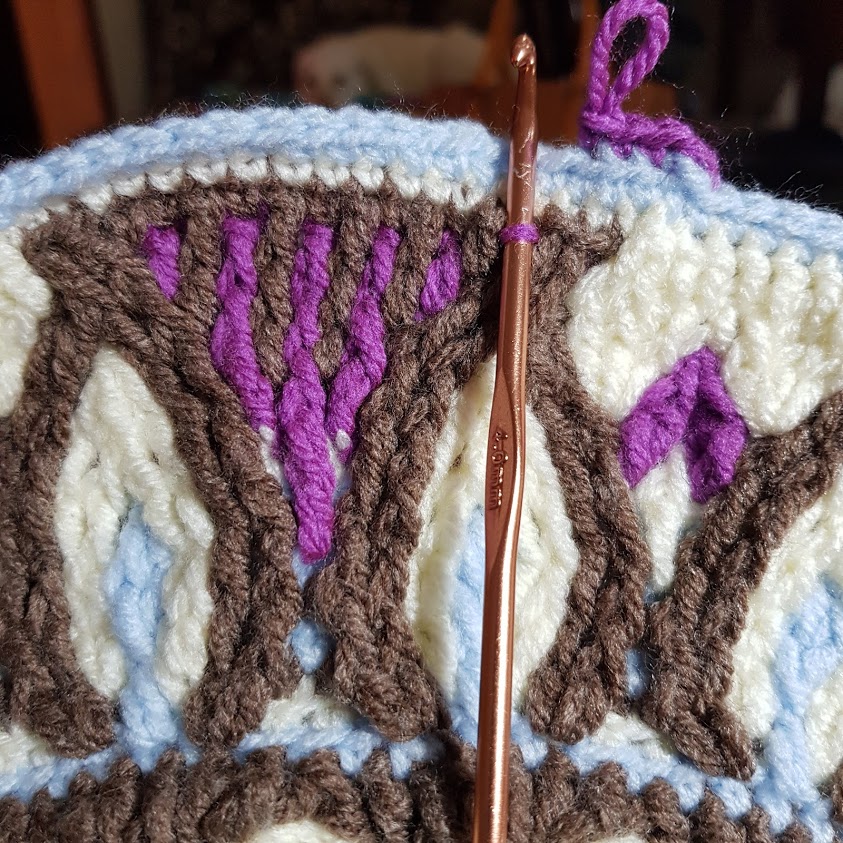
Cluster of 2 FDC (1st DC around leg of next blue DC, 2nd DC under blue cluster), skip brown stitch, 5 SC
29 SC in front brown loop
5 SC
Cluster of 2 FDC (1st DC under blue cluster, 2nd DC around leg of next blue DC), skip brown stitch, 2 SC
Repeat (DC around blue DC leg, skip 1 brown stitch, 2 SC) twice
Repeat from (2) all the way round. N.B. on last repeat, finish with 1 SC instead of 2 SC and join with slip stitch.
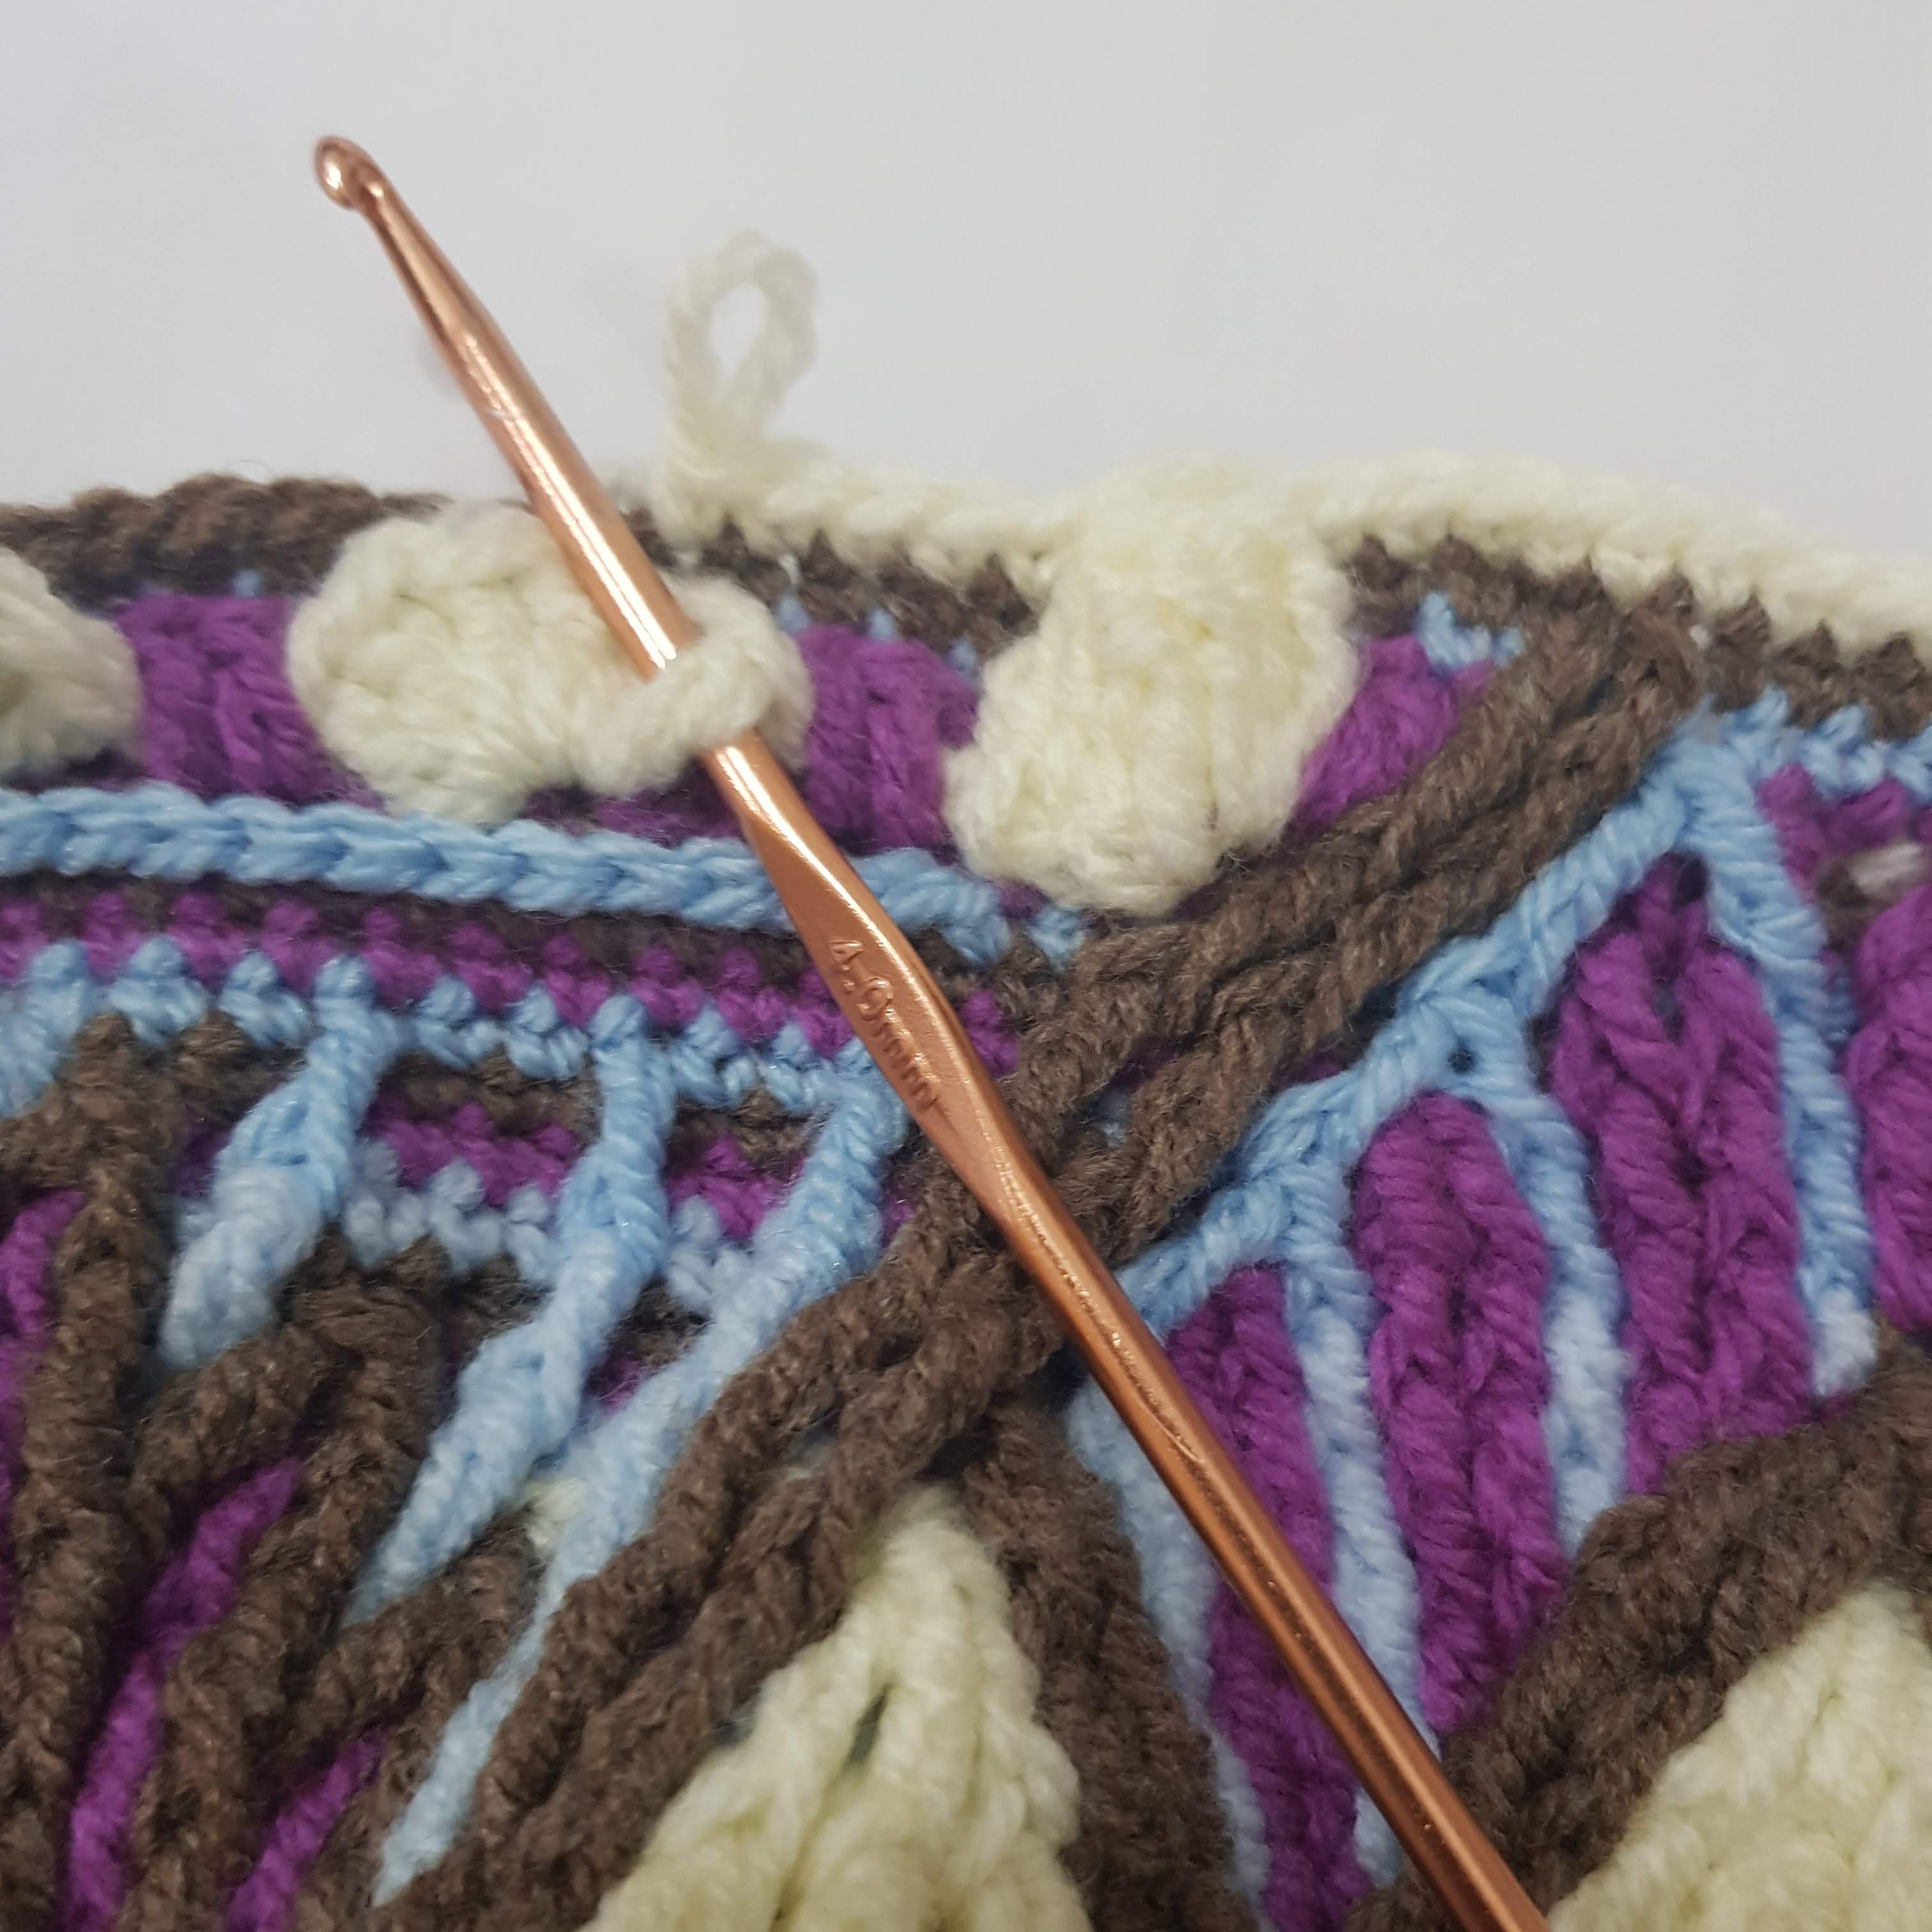
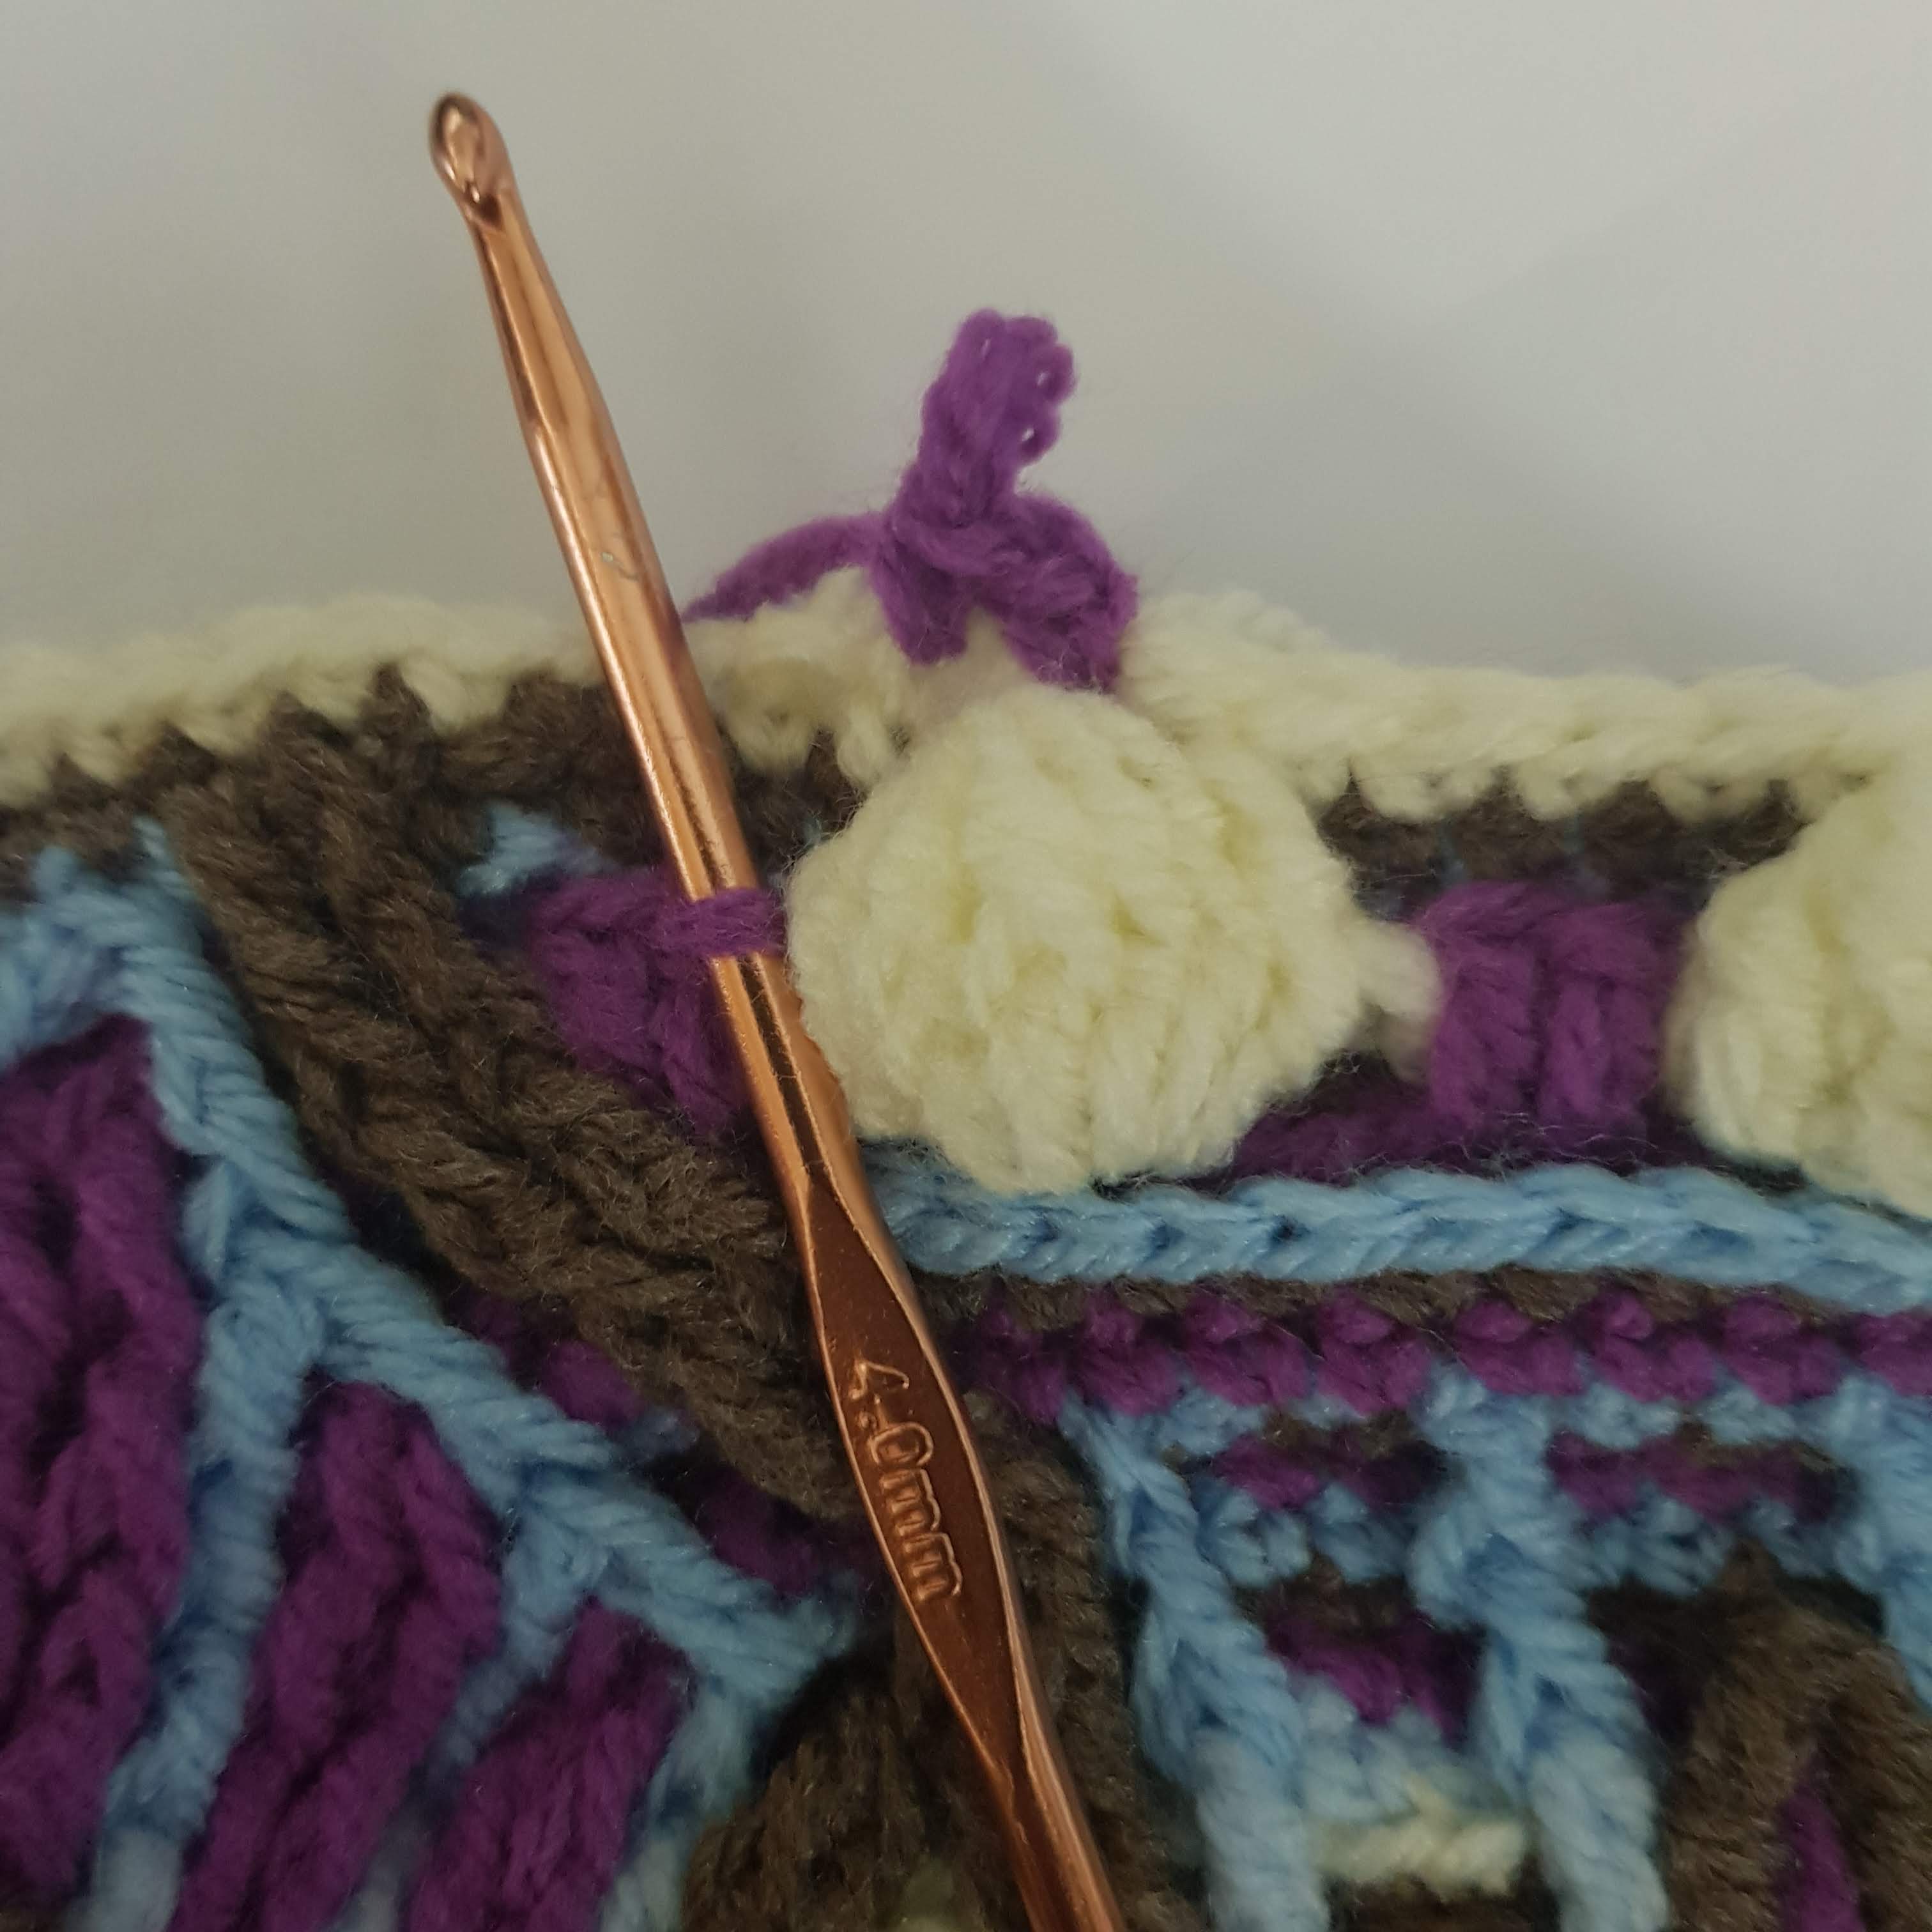
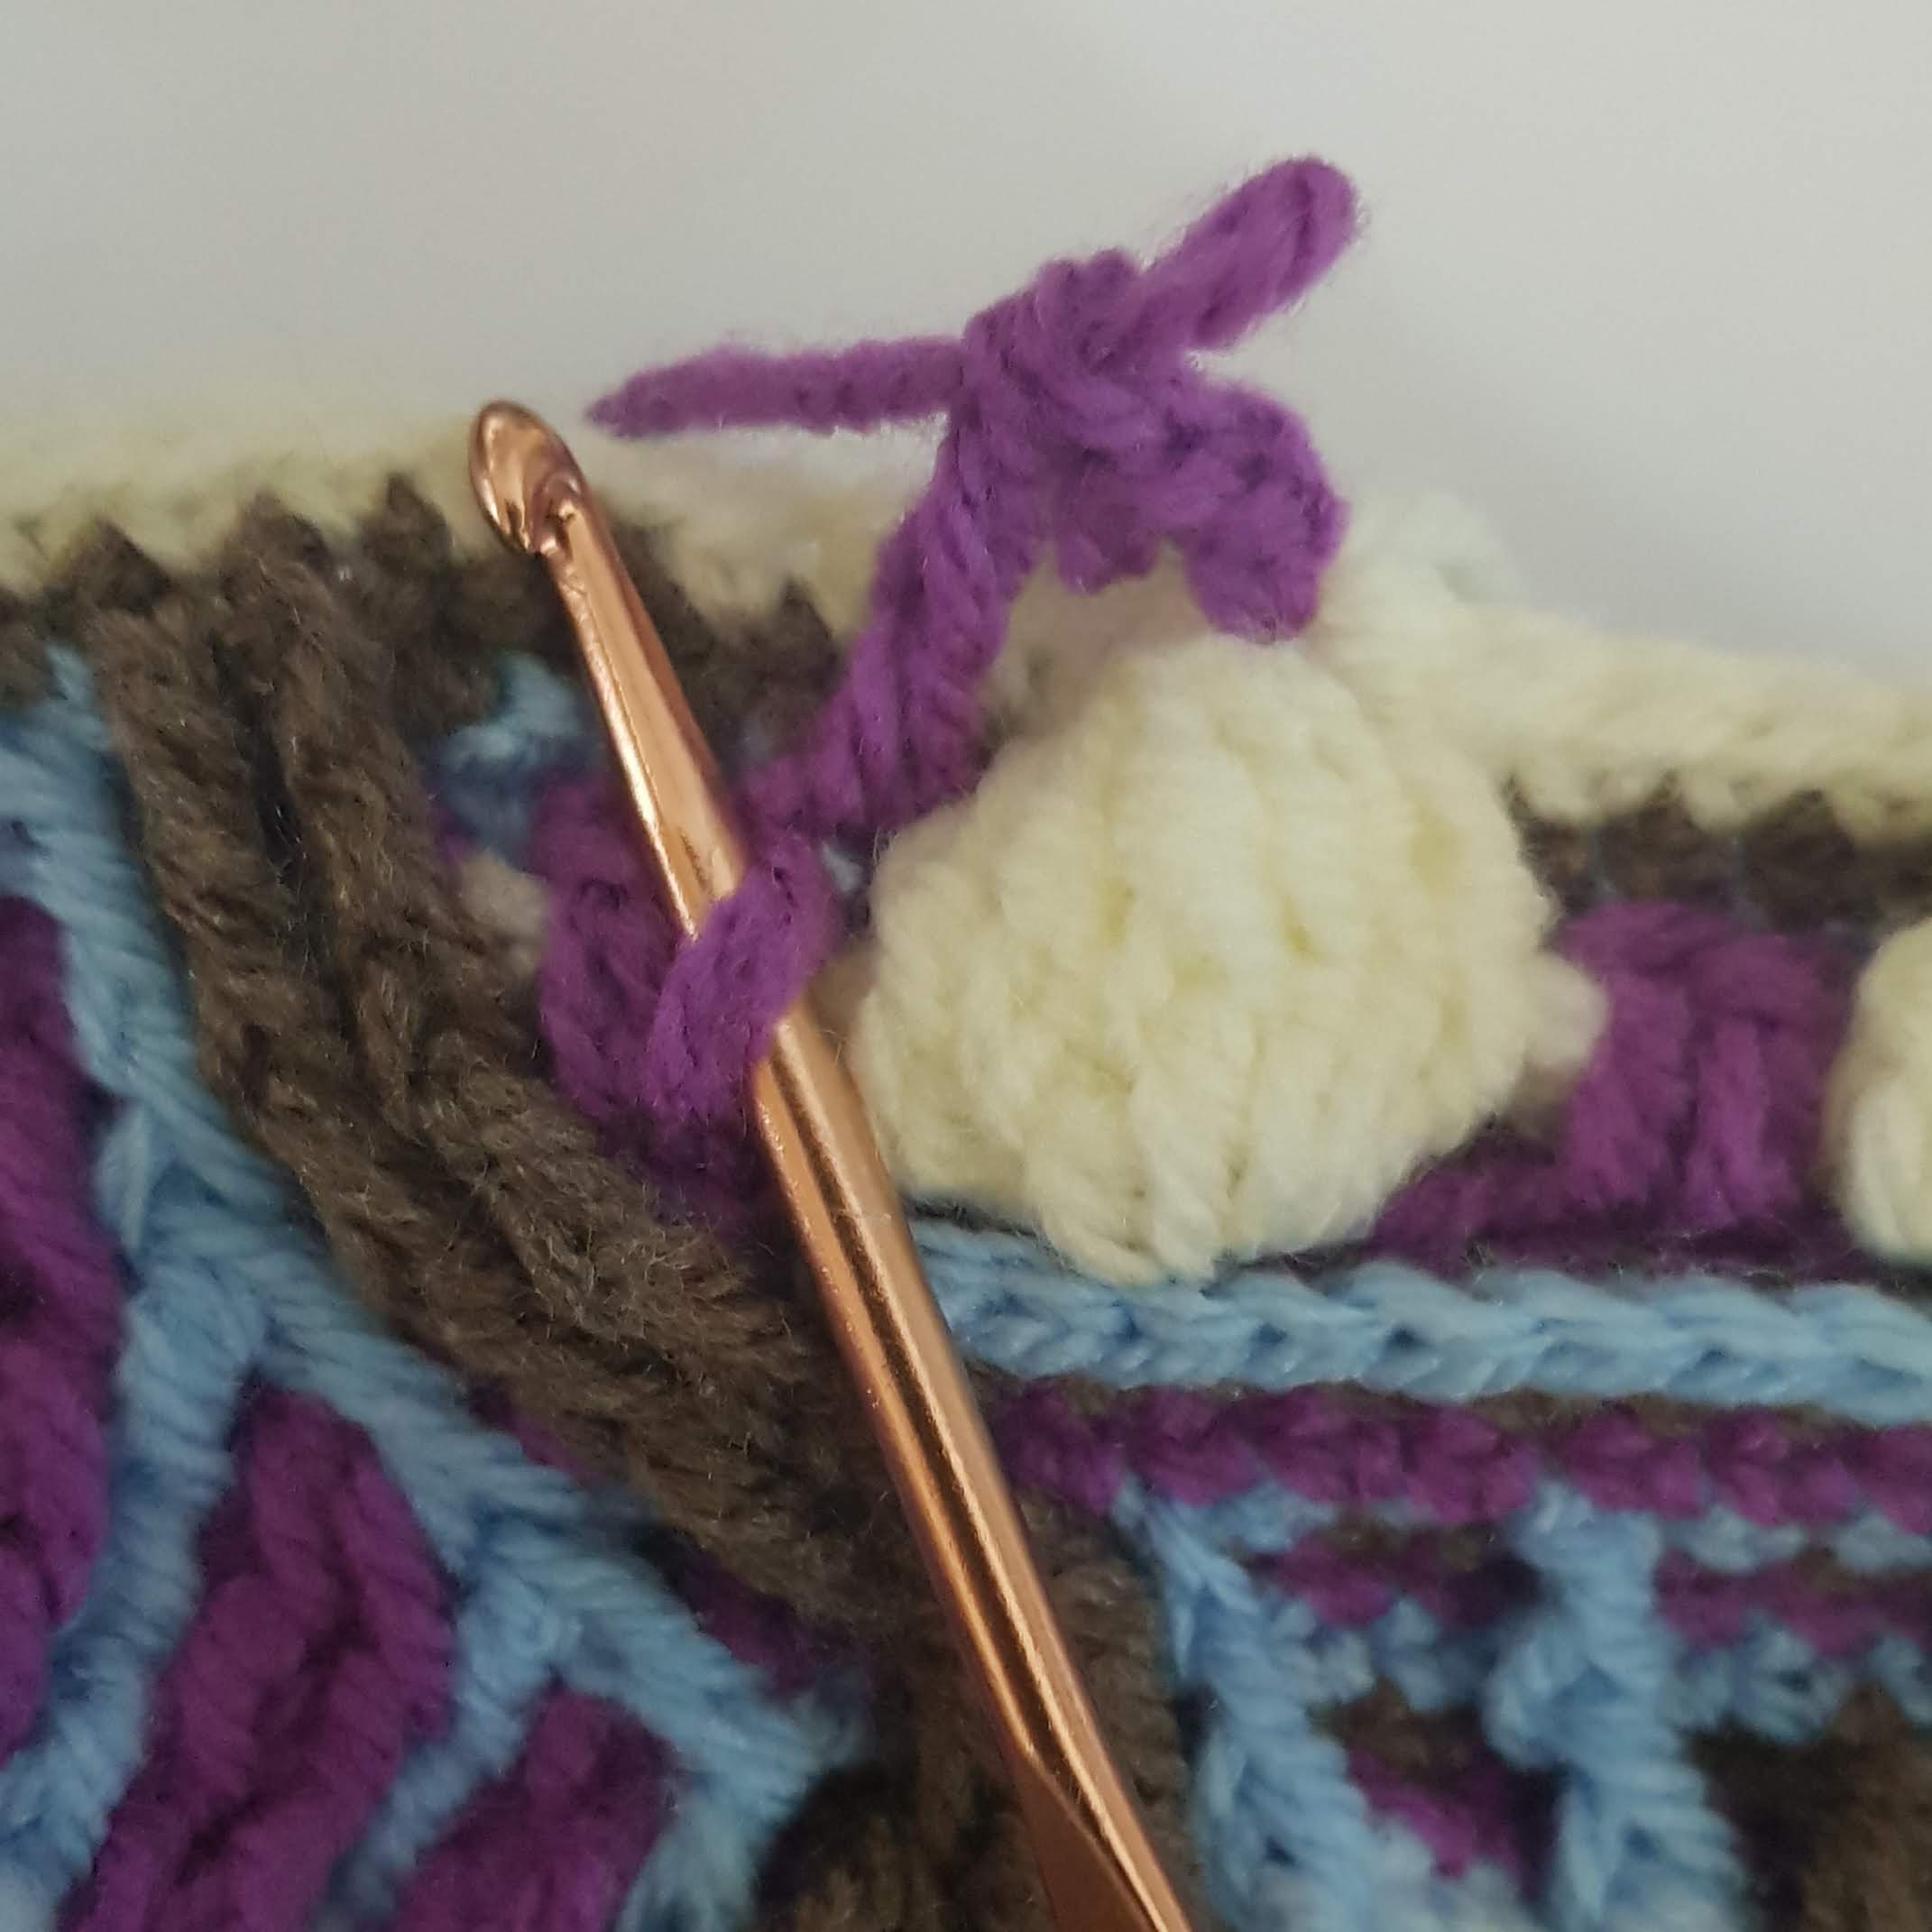
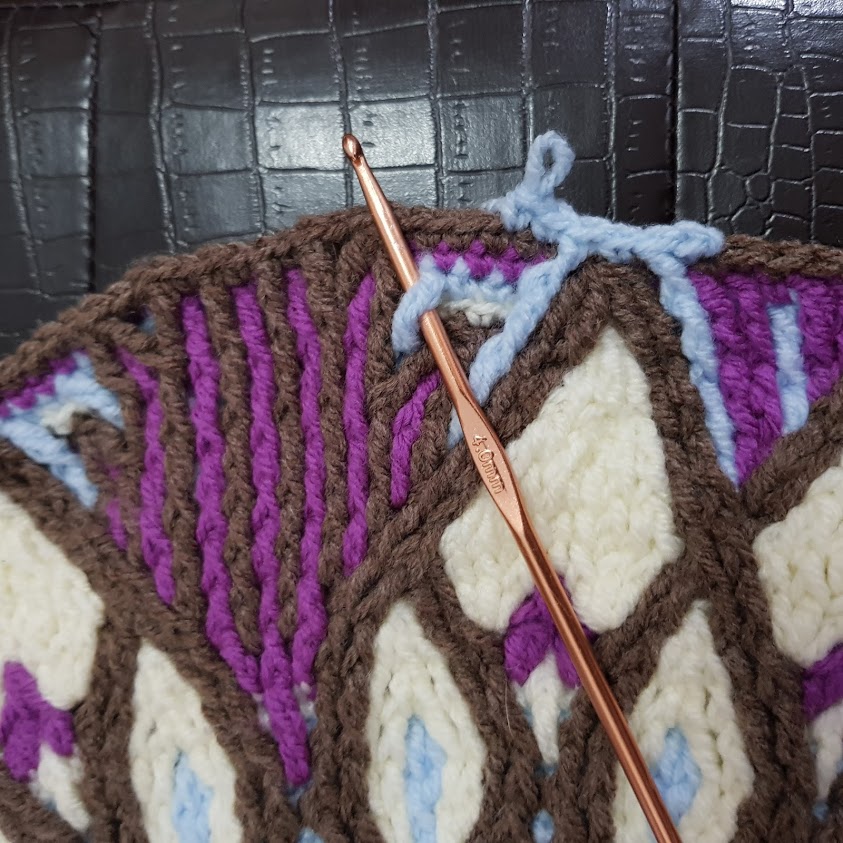
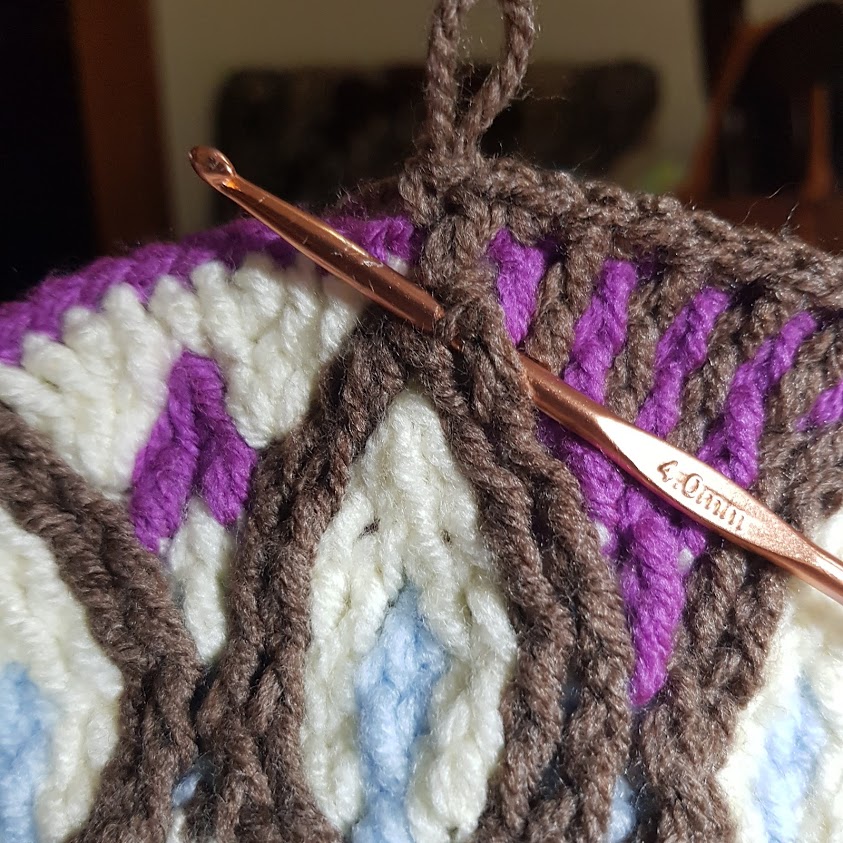
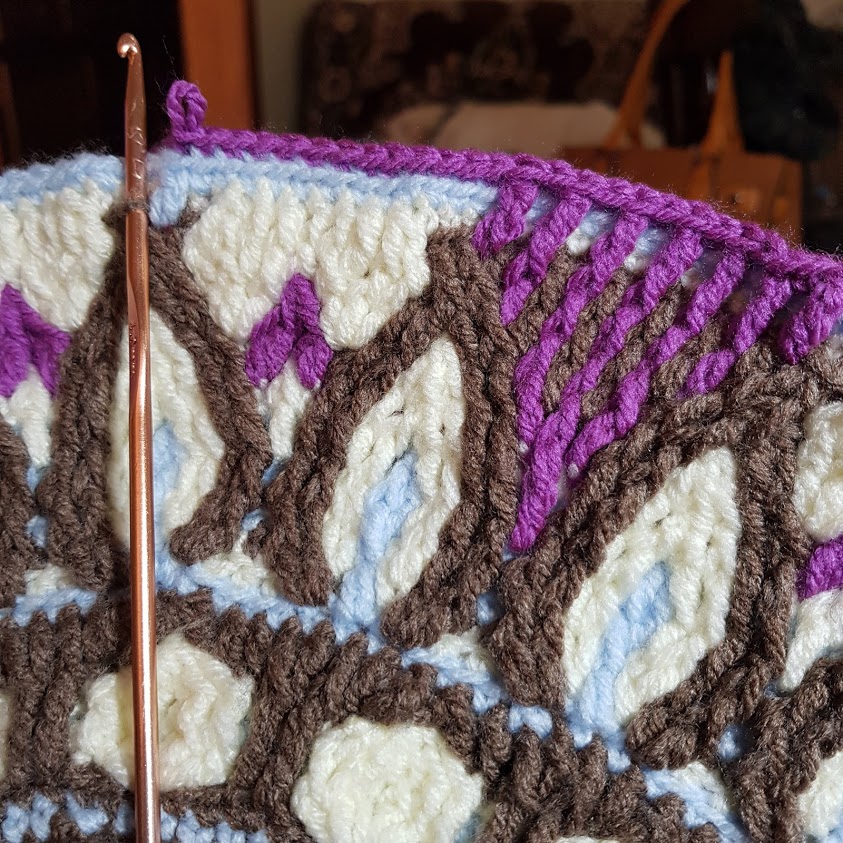
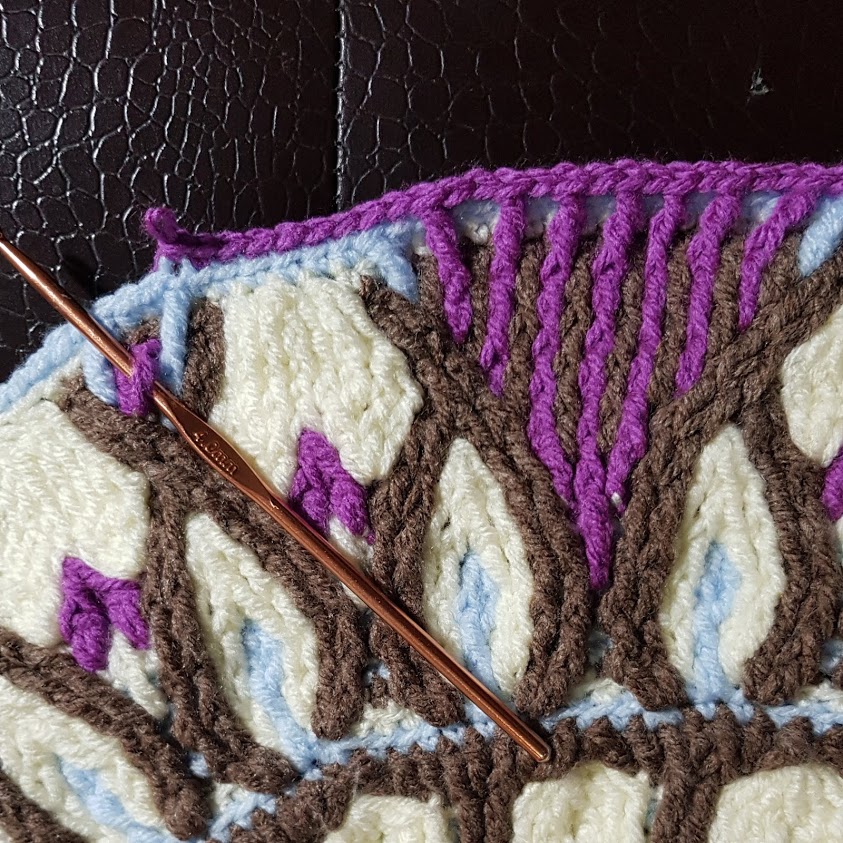
Step 91 – Purple Yarn
SC on blue DC.
2 FDC around leg of purple DC, skip 2 blue stitches, 6 SC
29 SC on back loops of brown stitches
6 SC on blue stitches
2 FDC around leg of purple DCs, skip 2 green stitches, SC
2 FDC around leg of purple DC, skip 2 stitches
Repeat from (1) all the way round and join with slip stitch.
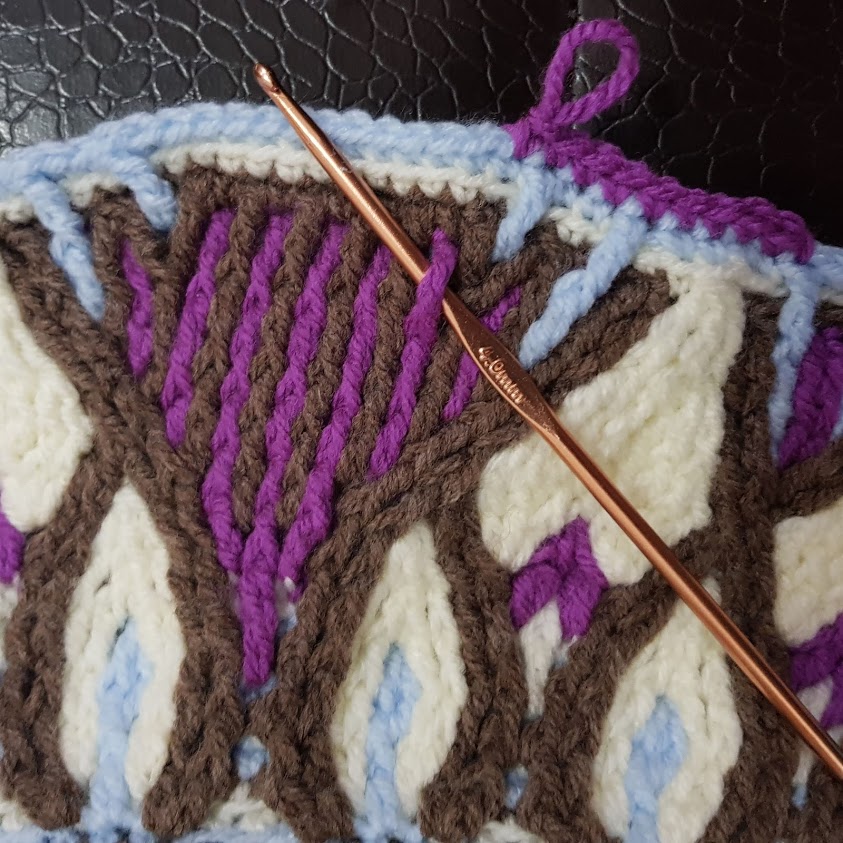
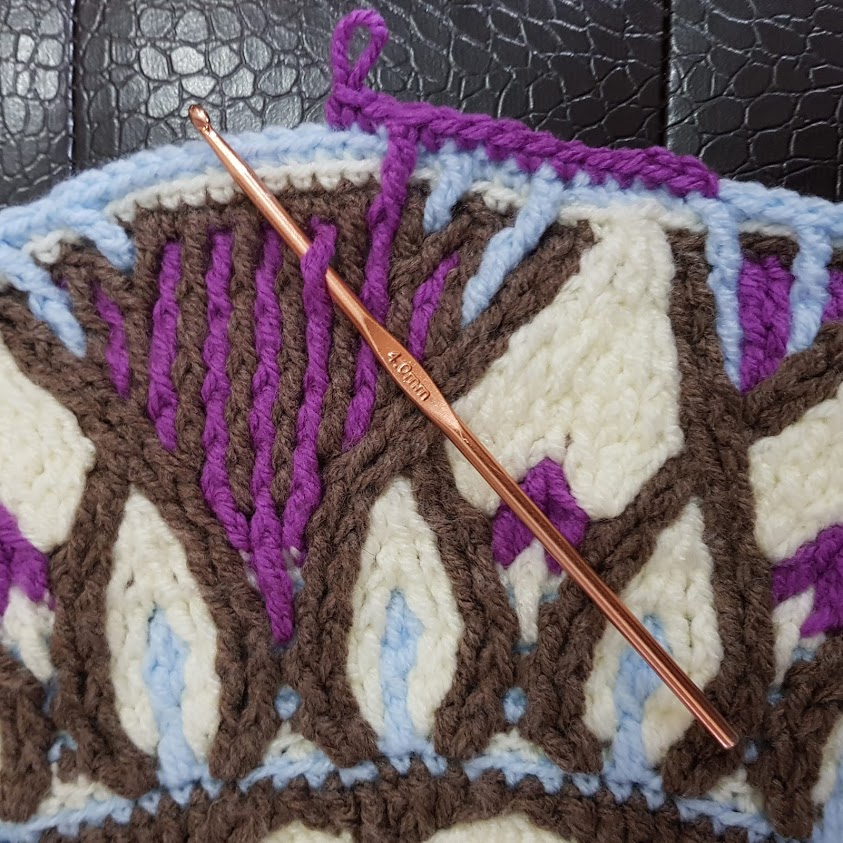
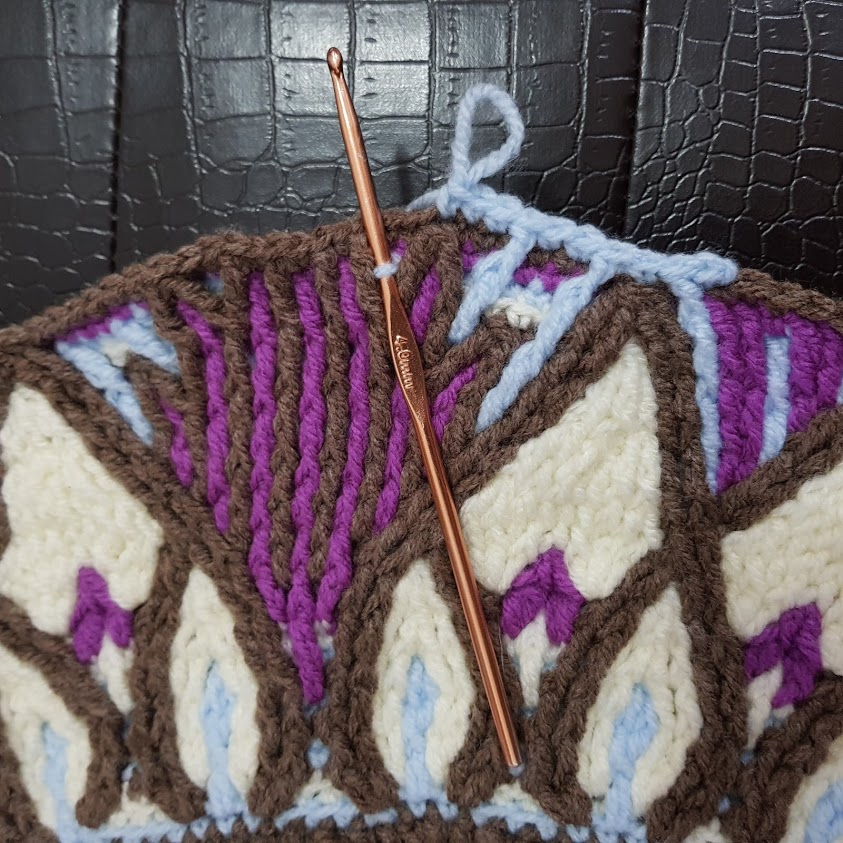
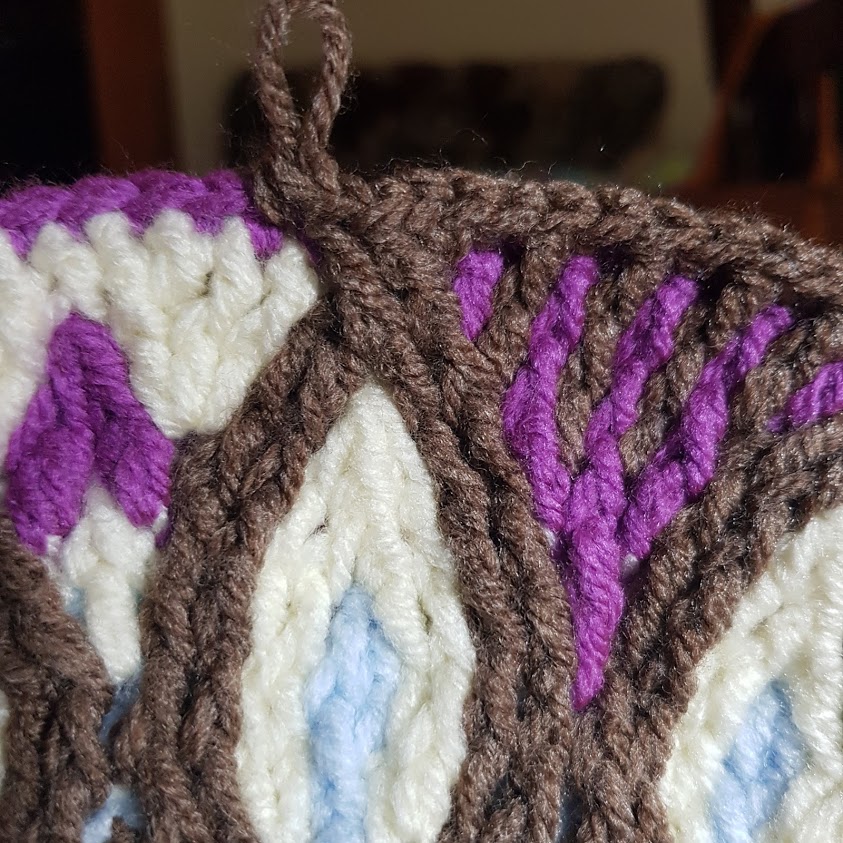
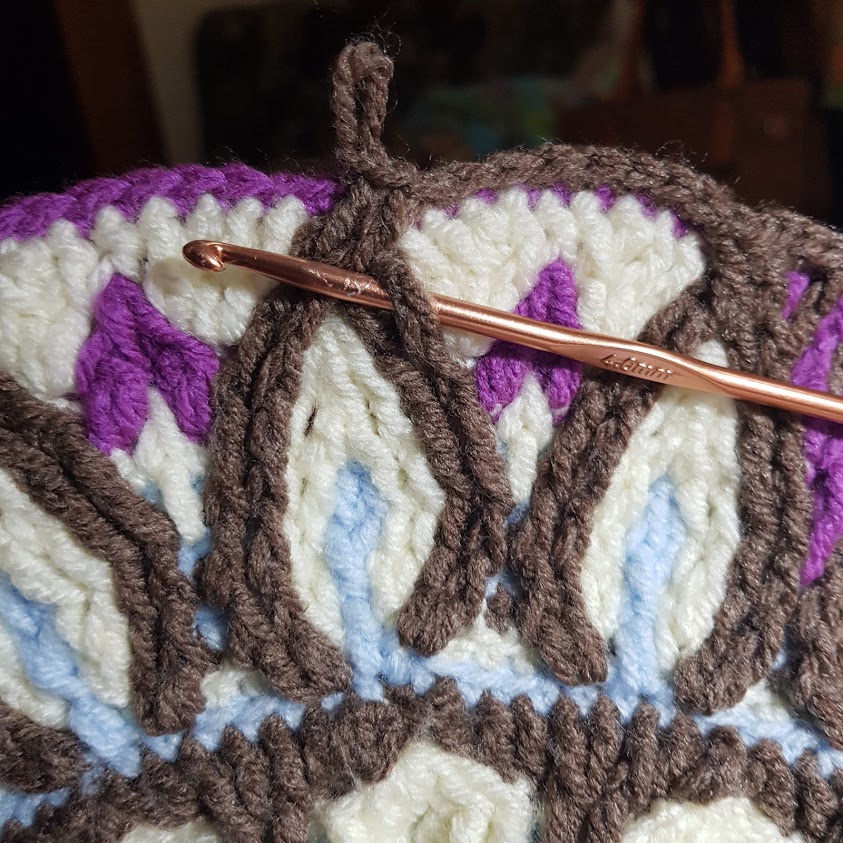
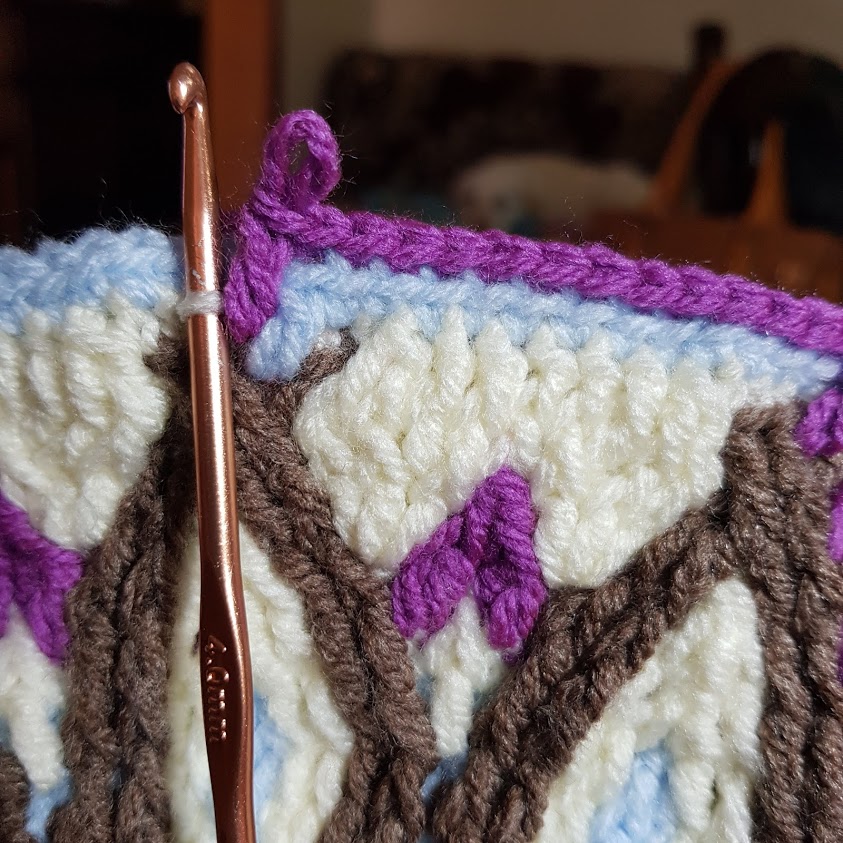
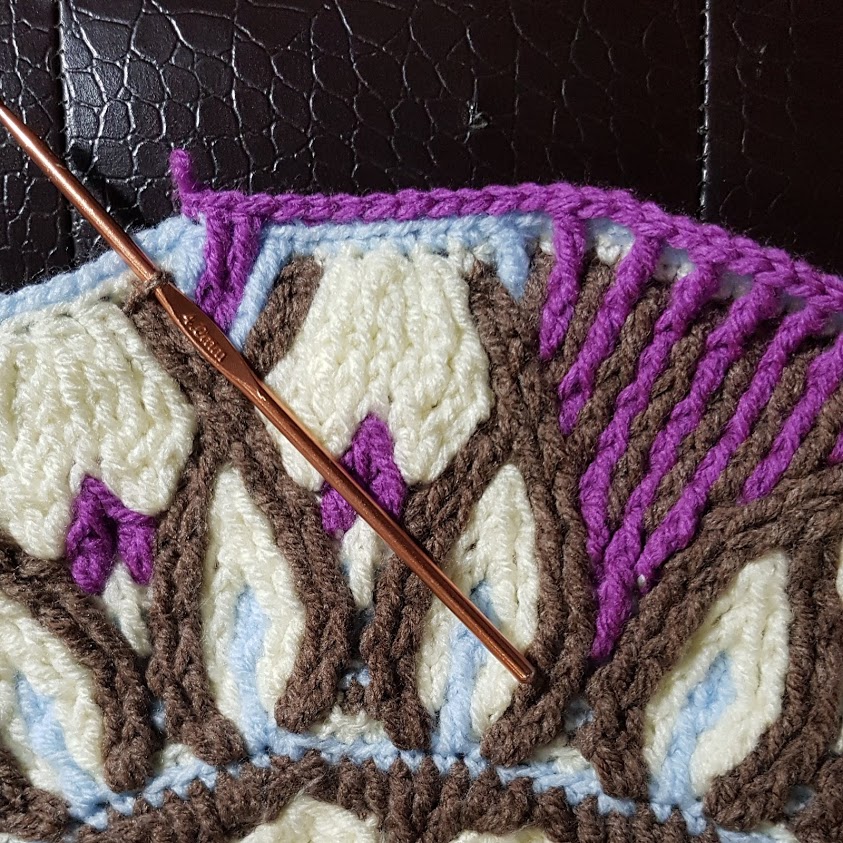
Step 92 – Brown Yarn
5 SC (1st, 3rd & 4th on pueple DC).
2 FTR around legs of next 2 brown DCs. Skip 2 stitches
35 SC in back loops of purple stitches
2 FTR in next 2 brown DCs, skip 2 purple stitches, 10 SC
Repeat from (2) all the way round. N.B. on last repeat, finish with 5 SC instead of 10 SC and join with slip stitch.
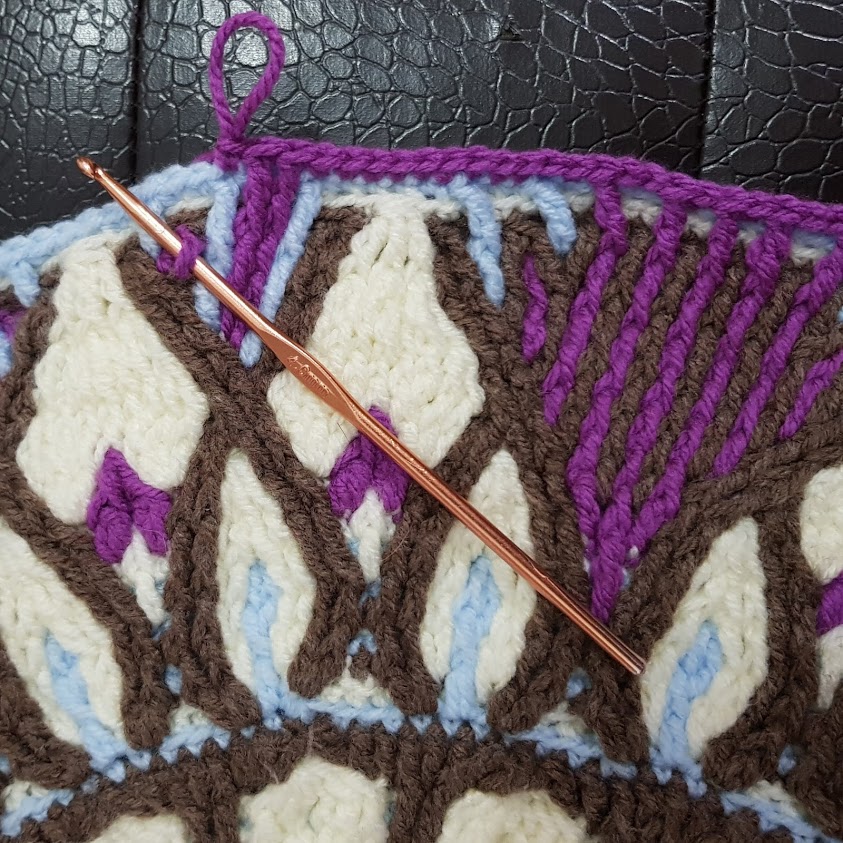
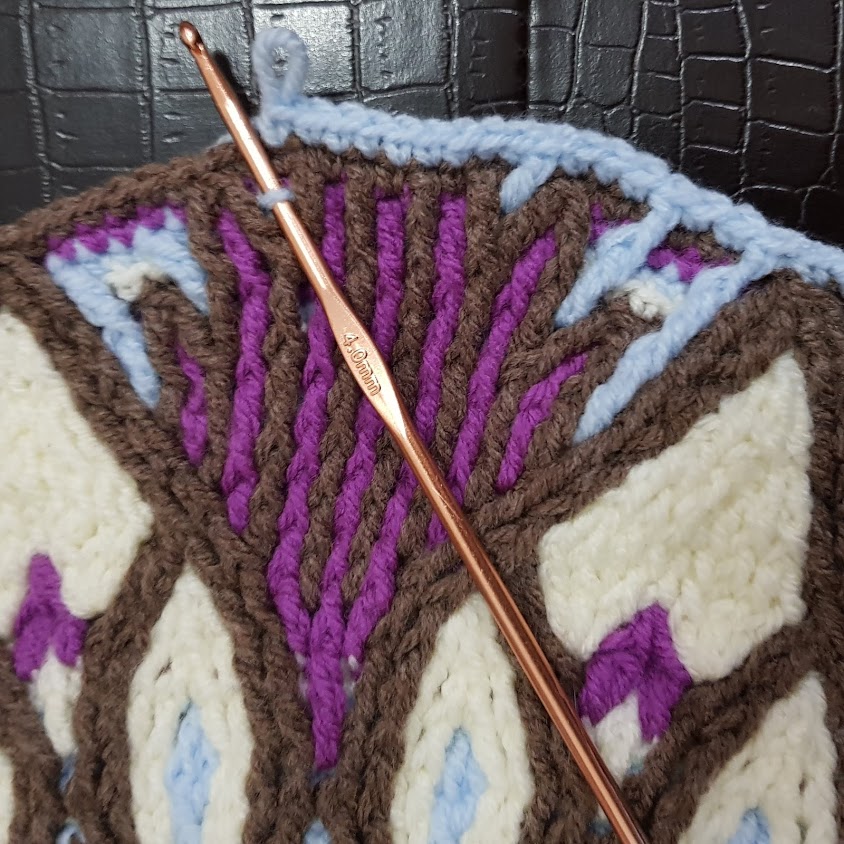
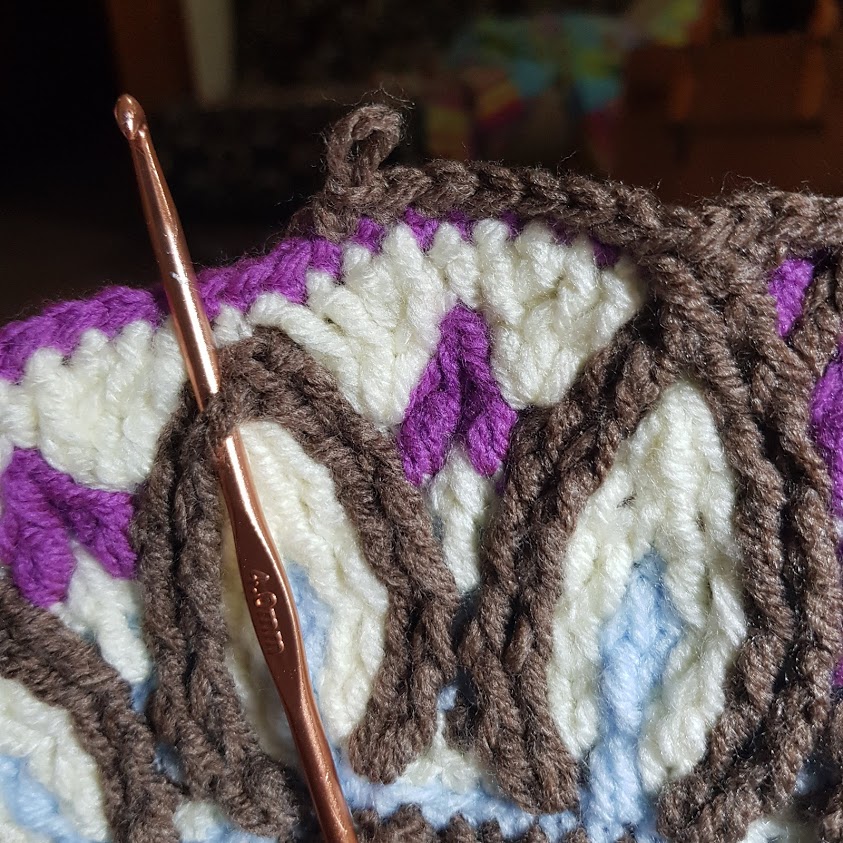
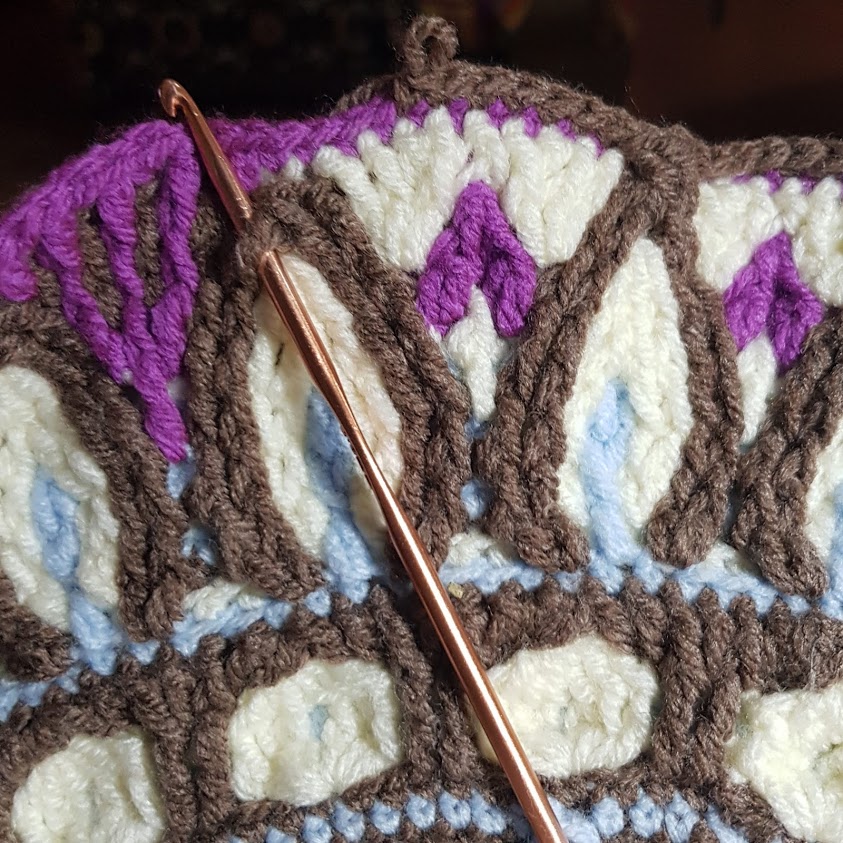
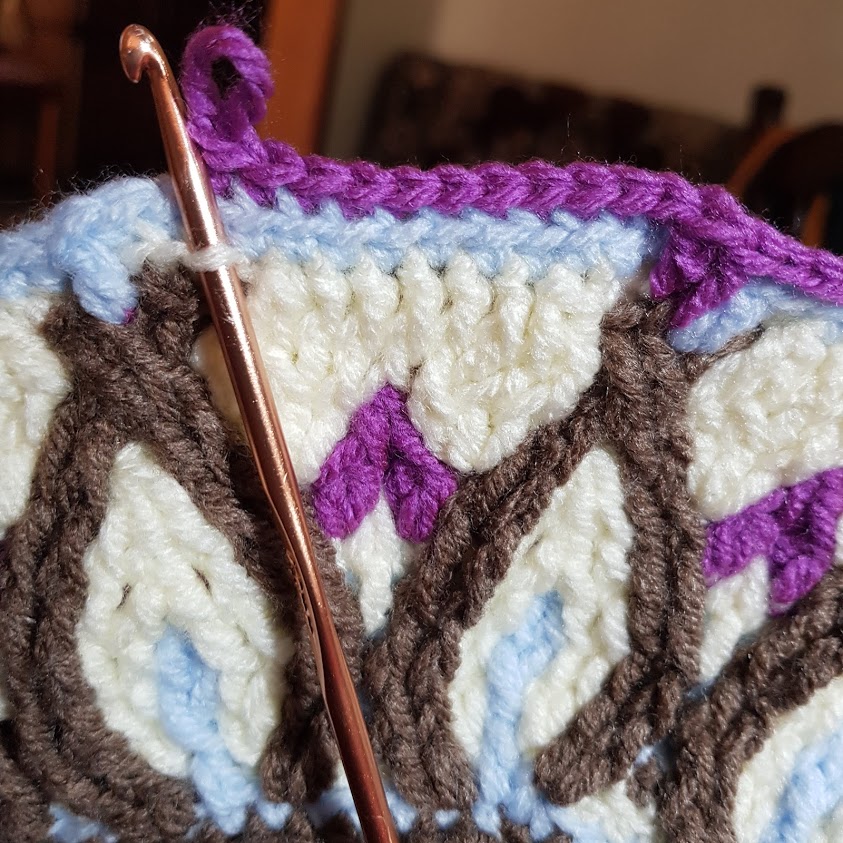
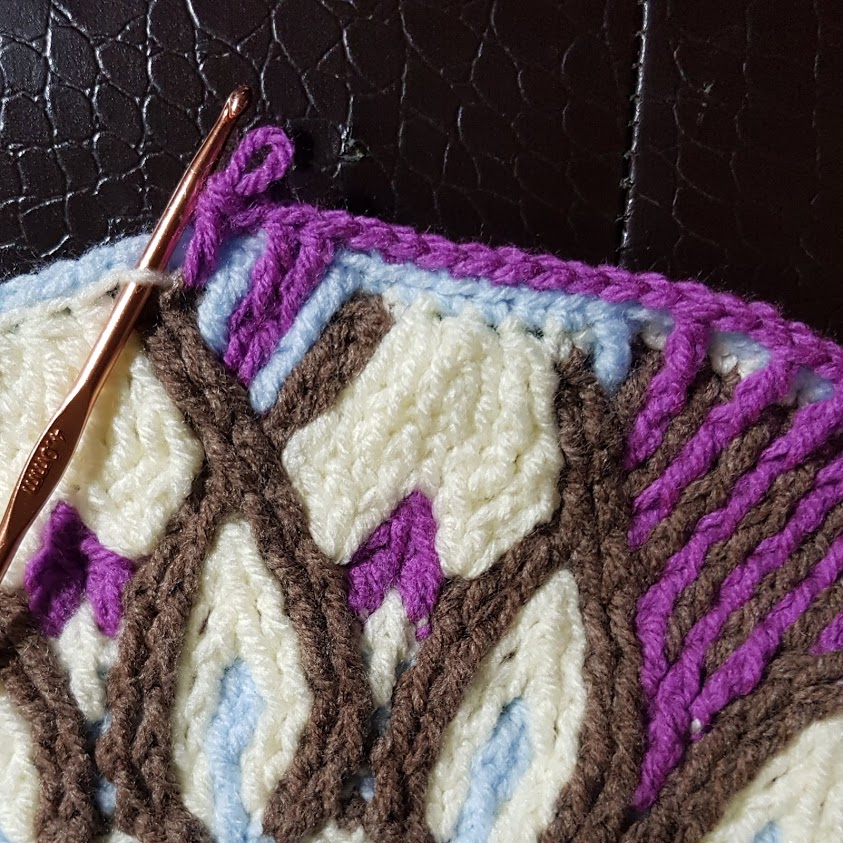
Step 93 – White Yarn
9 SC (7th & 8th on brown DC).
Group of 6 DC into single purple front loop (the 1st of 29 SC from Step 91), skip 5 stitches, 2 SC
Repeat (Group of 6 DC into single purple front loop (the 7th from previous group), skip 5 stitches, 2 SC) 4 times
14 SC
Repeat from (2) all the way round. N.B. on last repeat, finish with 7 SC instead of 14 SC and join with slip stitch.
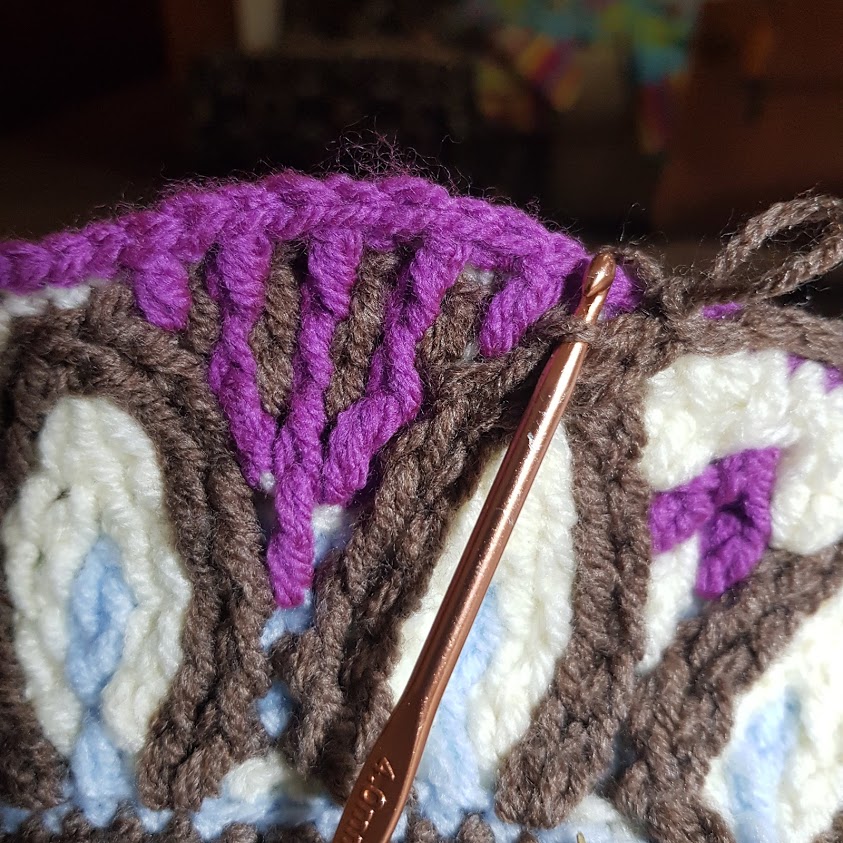
Step 94 – Purple Yarn
SC (on 4th SC from white DC).
2 FDC around legs of purple DCs, skip 3 stitches, SC
Repeat (2 FDC around legs of purple DCs, skip 2 stitches, SC) 2 times, SC
2 DC in front purple loop, skip 2 stitches.
(5 SC behind white DCs (in brown stitches), 2 DC in 3rd and 4th purple loop in front of white DC) 4 times,
5 SC behind white DCs (in brown stitches), 2 DC in front loop of purple stitches, skip 2 stitches, 2SC
Repeat from (2) all the way round and join with slip stitch.
Step 95 – Blue Yarn
3 SC (3rd on purple DC).
Cluster of 2 FTR (1st TR aroud blue cluster and the 2nd around leg of blue DC), 7 SC
Cluster of 2 FTR (1st TR aroud leg of blue DC and the 2nd around blue cluster), 3 SC
36 SC in back loop of blue
Repeat from (1) all the way round and join with slip stitch.
Step 96 – Brown Yarn
2 SC.
2 FTR around legs of brown DCs, skip 1 blue stitch, 9 SC (1st and 9th on blue clusters)
2 FTR around legs of brown DCs, skip 1 blue stitch, 40 SC
Repeat from (2) all the way round. N.B. on last repeat, finish with 38 SC instead of 40 SC and join with slip stitch.
Step 97 – White Yarn
21 SC (5th, 6th, 16th & 17th on brown DC).
Repeat [Cluster of 6 columns (1st and 6th being FTRs and the ones in between FDCs – i.e. FTR, 4FDCs, FTR ) around the legs of the white DCs, skip 2 stitches, 5SC] 5 times
18 SC (1st and 2nd, 12th and 13th on brown DC)
Repeat from (2) all the way round. N.B. on last repeat, finish with 2 SC instead of 5 SC and join with slip stitch. Cast off the white yarn.
Step 98 – Purple Yarn
2 SC (both on same white cluster).
TR in front loop of 1st purple DC.
FTR around leg of the same purple DC as in step 2.
TR in front loop of 2nd purple DC.
FTR around leg of the same purple DC as in step 4.
skip 6 stitches, 4SC
2 FDC around legs of purple DCs, skip 2 stitches, 4 SC
FTR around leg of the 1st purple DC.
TR in front loop of the same purple DC as in step 8.
FTR around leg of the 2nd purple DC.
TR in front loop of the same purple DC as in step 10.
skip 6 stitches
Repeat (2 SC, DC in front purple loop, FDC around leg of same purple DCs, skip 4 stitches) 4 times
Repeat from (1) all the way round and join with slip stitch. Cast-off the purple yarn.
Step 99 – Blue Yarn
12 SC in front loop.
Cluster of 2 TR (each TR around green cluster), skip 2 stitches
42 SC in front loops.
Repeat from (2) all the way round. N.B. on last repeat, finish with 30 SC instead of 42 SC and join with slip stitch. Cast off the blue yarn.
Step 100 – Brown Yarn
SC (before blue cluster from last round).
Cluster of 4 FTR around legs of a brown DCs. skip 1 stitch, SC
SC all the way till you get to the stitch before the next blue cluster from last round, closing pockets as you go along.
Repeat from (1) all the way round, join with slip stitch and cast off.
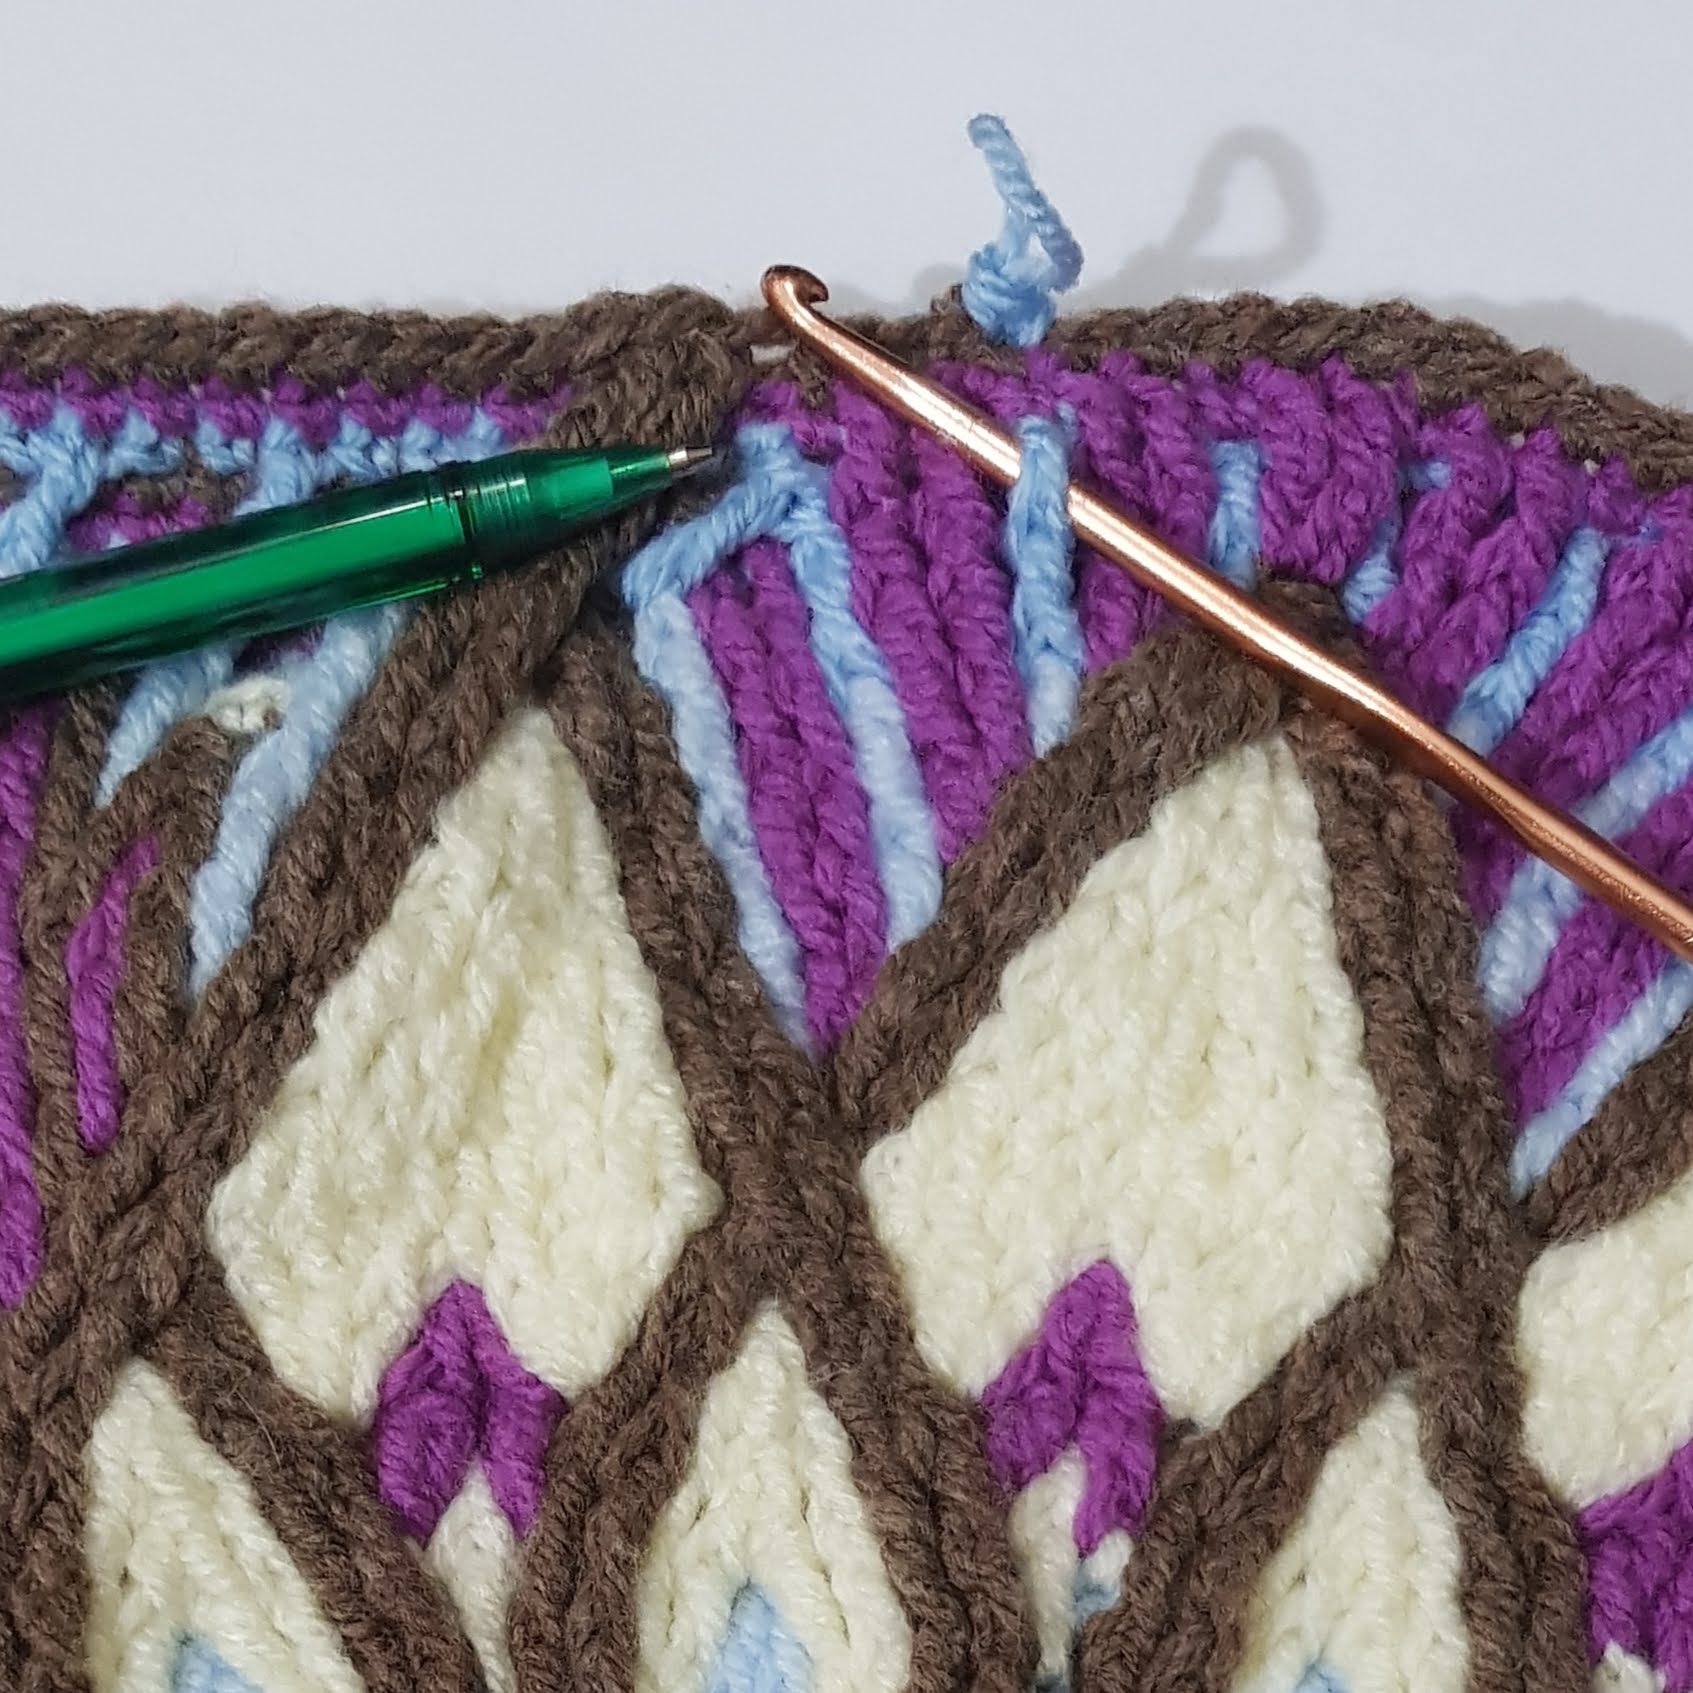
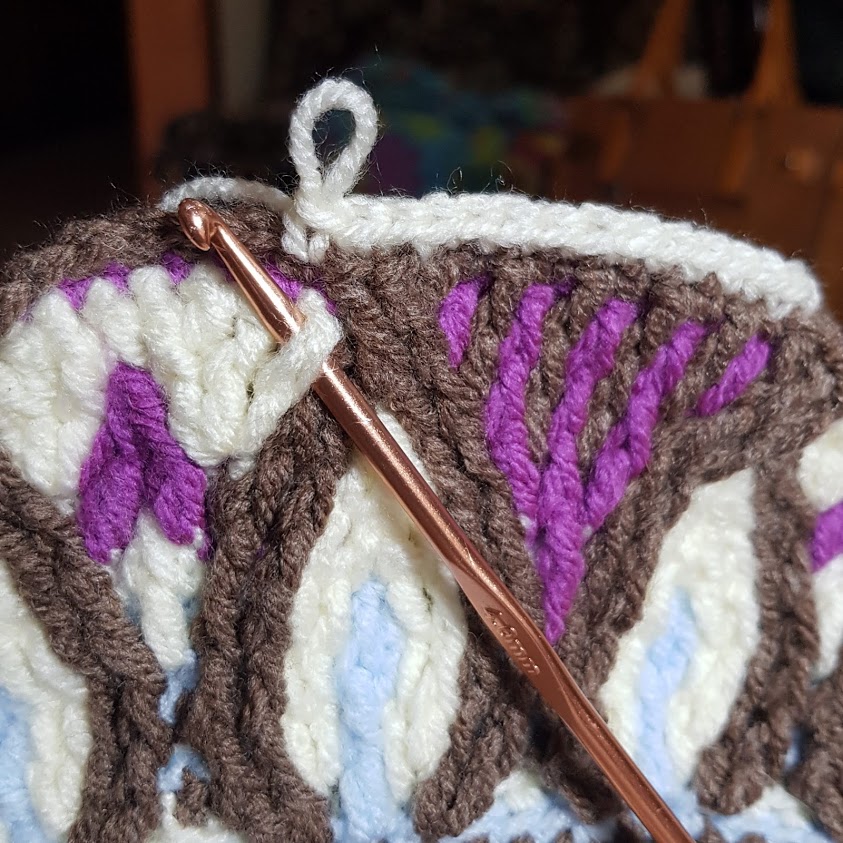
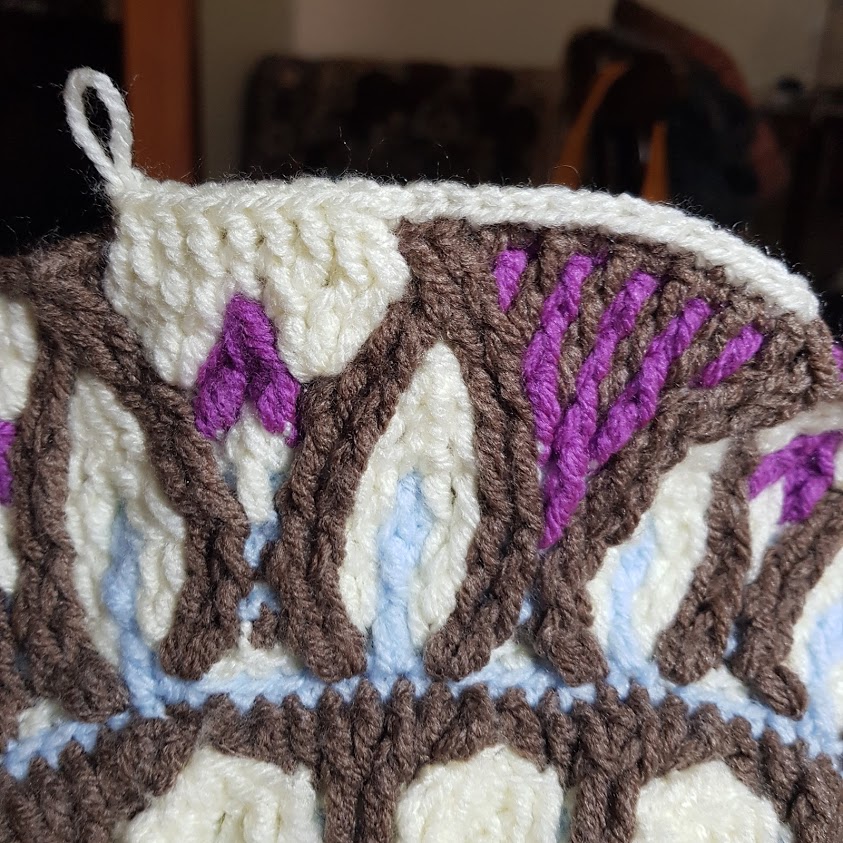
Once it is complete, you will need to steam iron this on the reverse side to smooth it out. And you are done! Please leave your feedback and get in touch in case you have any questions.