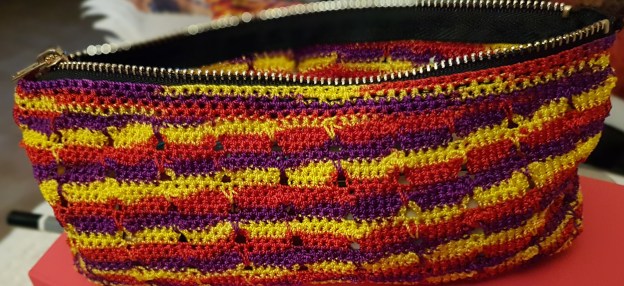
Hey all! Hope you are doing fine and churning out fabulous projects! If you need some inspiration, here is an easy one which I designed and made from nylon crochet thread (the same that I used to make the belt in my previous project ). Again, thanks to the stiff and abrasive nature, it lends itself really well to this pouch / case. The pattern is quite straightforward – it’s mainly single crochet (US Terms). Here is the pattern :
Original pattern by Manjri’s Place
I used a 1.4mm crochet hook for this project.
CH – chain stitch
SC – single crochet
YO – yarn over
Start with 61 CH
Row 1: skip first chain and 1 SC into remaining 60 CH, CH 1 and turn
Row 2-9: 1 SC into each of the 60 SC from previous round, CH 1 and turn.
By the end of the last round, you will now have a rectangular piece, which will be the base of the pouch/case.
Row 10: In this round, you will be working all around the rectangular piece just made. 1 SC into the back loop only of each of the 59 SC from previous round. Make 3 SC in the last SC from previous round. 7 SC down the short side of the rectangle, 3 SC in the first stitch of the long side, 1 SC in each of the next 59 SC, 3 SC in last stitch of long side, 7 SC down the other short side. Slip stitch into the first chain made at end of round 9. CH 1 and turn.
Row 11: SC in the first SC from last round. Place a stitch marker between the CH and the SC just made as it will become hard to identify end of a row since we will be working all around. 4 SC, 3 CH, skip 1 stitch. (5 SC, 3 CH, skip 1 stitch) all the way round – N.B. you will end with 2 or 3 SC. Slip stitch into first CH. Remove stitch marker.
Row 12-13: CH1, SC in the first SC from last round. Place a stitch marker between the CH and the SC just made. 4 SC, 3 CH, skip ch space made in last round. (5 SC, 3 CH, skip 1 stitch) all the way round – N.B. you will end with 2 or 3 SC. Slip stitch into first CH. Remove stitch marker.
Row 14: CH 1, SC in the first SC from last round. Place a stitch marker between the CH and the SC just made. 4 SC, SC over the 3 chain spaces from rows 11-13, into the Stitch skipped in round 11. (5 SC, SC over the 3 chain spaces from rows 11-13, into the Stitch skipped in round 11) all the way round – N.B. you will end with 2 or 3 SC. Slip stitch into first CH. Remove stitch marker.
Rows 15-42: Repeat Rows 11-14 7 more times.
Row 43-47: CH 1, SC in the first SC from last round. Place a stitch marker between the CH and the SC just made. SC into each stitch from row 42. Slip stitch into first CH. Remove Stitch marker. Cast off.
If you would prefer a deeper pouch, repeat rows 11-14 until you get the desired size.
Once ready, sew in a zipper and voila! Your pouch is ready! It’s fantastic for school – but you could also use it as a make-up bag, or for keeping toiletries.


