I’ve been awfully quiet lately because I have been very busy working on my biggest project to date – and it is now done! But, more on that in a future post – after I take some good photos – so stay tuned and check back soon!
This week, my daughter showed me a really cute frog hat she came across for sale online and asked me if I could make one for her. Of course! I’m always up for a challenge and after “frogging it” a few times (pun totally intended – ha ha!) here it is! I really had fun making this and will be making some more 🙂
Some notes on the design: firstly, it is 100% crochet, including the ribbing you see in the photo. It’s quite common to see ribbing in knitting projects, and for all you “crocheters”, who also knit, the concept is the same. I’ll try to describe it here. I used HDC – Half-double crochet (US terms). Here is an example of how to do this – you can adapt to your own projects. To start this, you need a foundation row, so let’s say we have a row of 6 DC (Double crochet) already done. Here are the following rows:
Row 1: CH2, Repeat (FPHDC {Front Post HDC}, BPHDC {Back Post HDC}) x 3. Turn. Row 2: CH2, Repeat (BPHDC, FPHDC) x 3. Turn. Rows 3 onwards : Repeat from Row 1 until you reach the desired length.
Simple! Might be an idea to experiment with using DC instead of HDC – let me know how you get on. Till then, peace out folks!
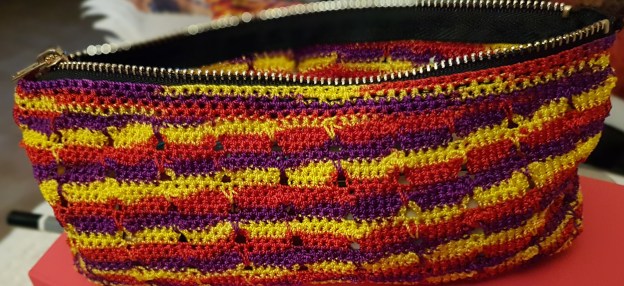
Hey all! Hope you are doing fine and churning out fabulous projects! If you need some inspiration, here is an easy one which I designed and made from nylon crochet thread (the same that I used to make the belt in my previous project ). Again, thanks to the stiff and abrasive nature, it lends itself really well to this pouch / case. The pattern is quite straightforward – it’s mainly single crochet (US Terms). Here is the pattern :
Original pattern by Manjri’s Place
I used a 1.4mm crochet hook for this project.
CH – chain stitch
SC – single crochet
YO – yarn over
Start with 61 CH
Row 1: skip first chain and 1 SC into remaining 60 CH, CH 1 and turn
Row 2-9: 1 SC into each of the 60 SC from previous round, CH 1 and turn.
By the end of the last round, you will now have a rectangular piece, which will be the base of the pouch/case.
Row 10: In this round, you will be working all around the rectangular piece just made. 1 SC into the back loop only of each of the 59 SC from previous round. Make 3 SC in the last SC from previous round. 7 SC down the short side of the rectangle, 3 SC in the first stitch of the long side, 1 SC in each of the next 59 SC, 3 SC in last stitch of long side, 7 SC down the other short side. Slip stitch into the first chain made at end of round 9. CH 1 and turn.
Row 11: SC in the first SC from last round. Place a stitch marker between the CH and the SC just made as it will become hard to identify end of a row since we will be working all around. 4 SC, 3 CH, skip 1 stitch. (5 SC, 3 CH, skip 1 stitch) all the way round – N.B. you will end with 2 or 3 SC. Slip stitch into first CH. Remove stitch marker.
Row 12-13: CH1, SC in the first SC from last round. Place a stitch marker between the CH and the SC just made. 4 SC, 3 CH, skip ch space made in last round. (5 SC, 3 CH, skip 1 stitch) all the way round – N.B. you will end with 2 or 3 SC. Slip stitch into first CH. Remove stitch marker.
Row 14: CH 1, SC in the first SC from last round. Place a stitch marker between the CH and the SC just made. 4 SC, SC over the 3 chain spaces from rows 11-13, into the Stitch skipped in round 11. (5 SC, SC over the 3 chain spaces from rows 11-13, into the Stitch skipped in round 11) all the way round – N.B. you will end with 2 or 3 SC. Slip stitch into first CH. Remove stitch marker.
Rows 15-42: Repeat Rows 11-14 7 more times.
Row 43-47: CH 1, SC in the first SC from last round. Place a stitch marker between the CH and the SC just made. SC into each stitch from row 42. Slip stitch into first CH. Remove Stitch marker. Cast off.
If you would prefer a deeper pouch, repeat rows 11-14 until you get the desired size.
Once ready, sew in a zipper and voila! Your pouch is ready! It’s fantastic for school – but you could also use it as a make-up bag, or for keeping toiletries.
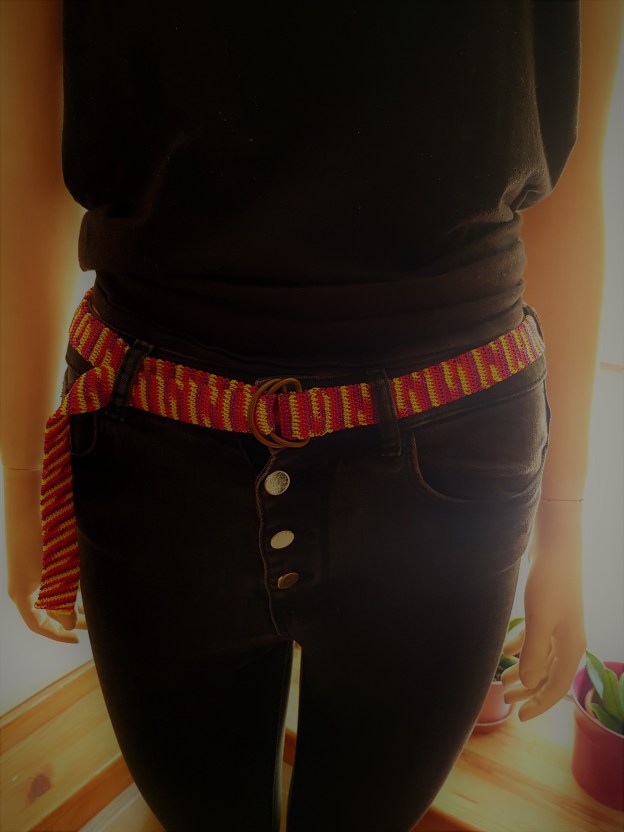
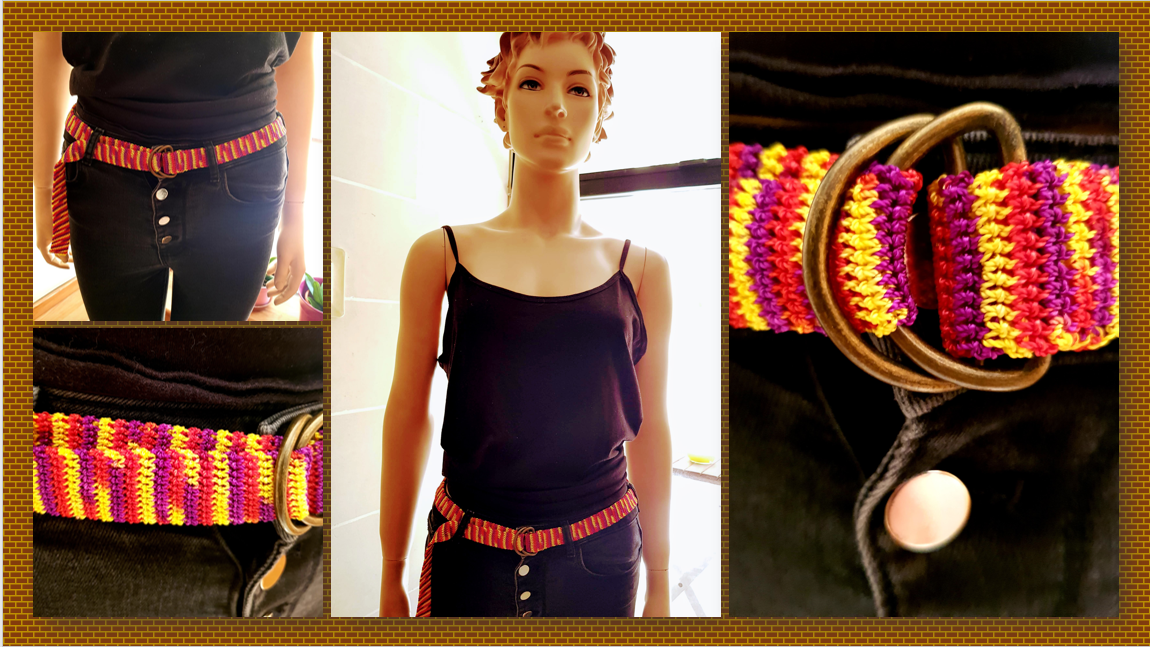
I recently bought some rather nice nylon crochet thread because I really liked the colours. Nylon is quite stiff and abrasive, so you have to be careful what you use it for — but I thought it would be perfect for a belt.
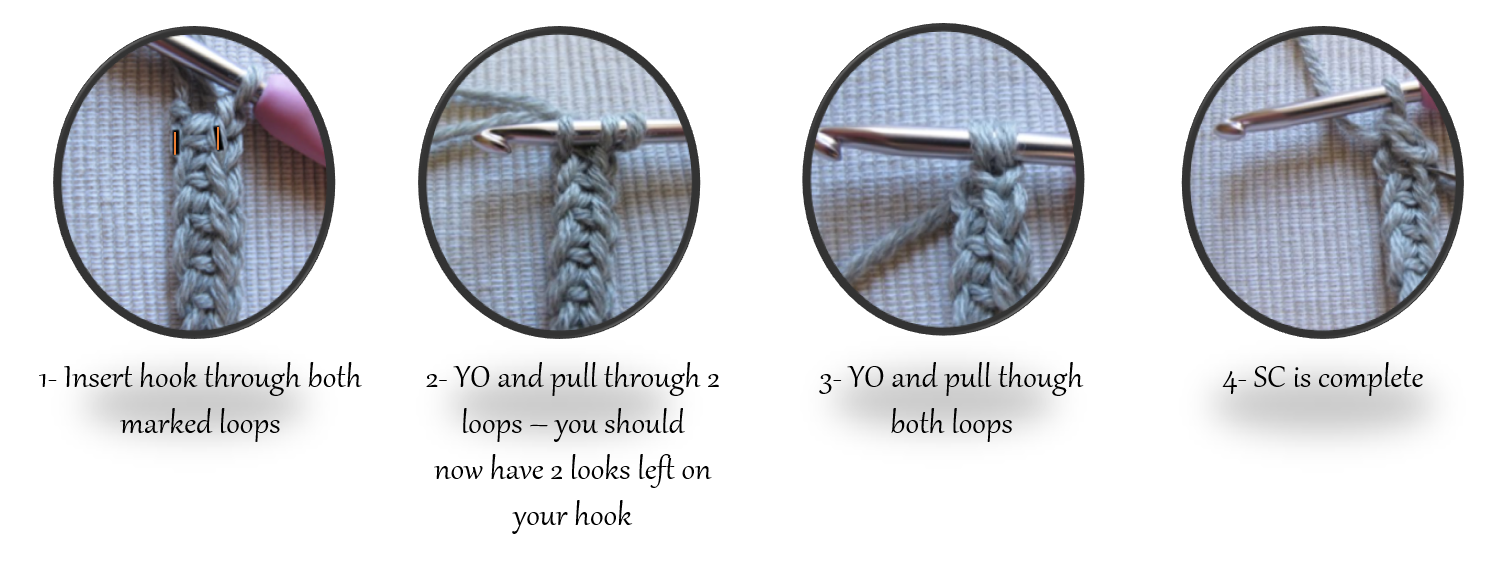
This is a simple free crochet belt pattern, worked mainly in single crochet (US terms). I used a double-layer technique to give the belt some extra structure, and I’ve included step-by-step photos below to show how I worked it.
Original pattern by Manjri’s Place
I used a 1.4mm crochet hook for this project.
CH – chain stitch SC – single crochet
YO – yarn over
Start with 11 CH
Row 1: skip first chain and 1 SC into remaining 10 CH, CH 1 and turn
Row 2: To create a double layer SC, put hook through the back loop only of the SC made on row 1 and also the loop left over from initial chain stitch (see marked image below). Repeat until end of row, CH 1 and turn.
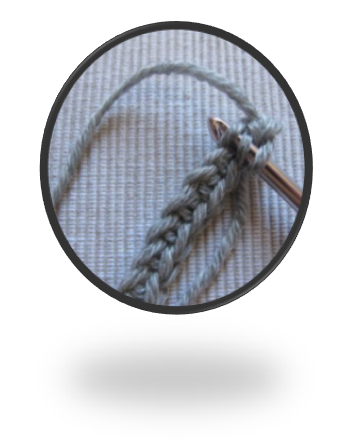
Row 3: From now on, the double layer SC will be easier to make. Insert hook through the leftmost loop in the SC just made on last row, and in the remaining loop in the corresponding stitch in the previous row. Repeat until end of the row, CH 1 and turn.
Keep working this way until you reach the desired length.
For the buckle, I used 2 brass hoops, recycled from an old handbag.
Hope this has given you some ideas!
Happy crocheting!
Where the crochet journey led… This pattern comes from the earlier days of Manjri’s Place. Years of experimenting with crochet, colour and different techniques eventually grew into Studio Manjri, my creative studio in Malta, where I now make handmade crochet creations, accessories and plenty of other little ideas that begin with a hook and some yarn.
Update — September 2026: I originally shared this project in 2020, when the Seaside Wrap pattern was available free. The pattern is no longer available free, but I’ve kept this post as part of my crochet archive and to share my version of the wrap.
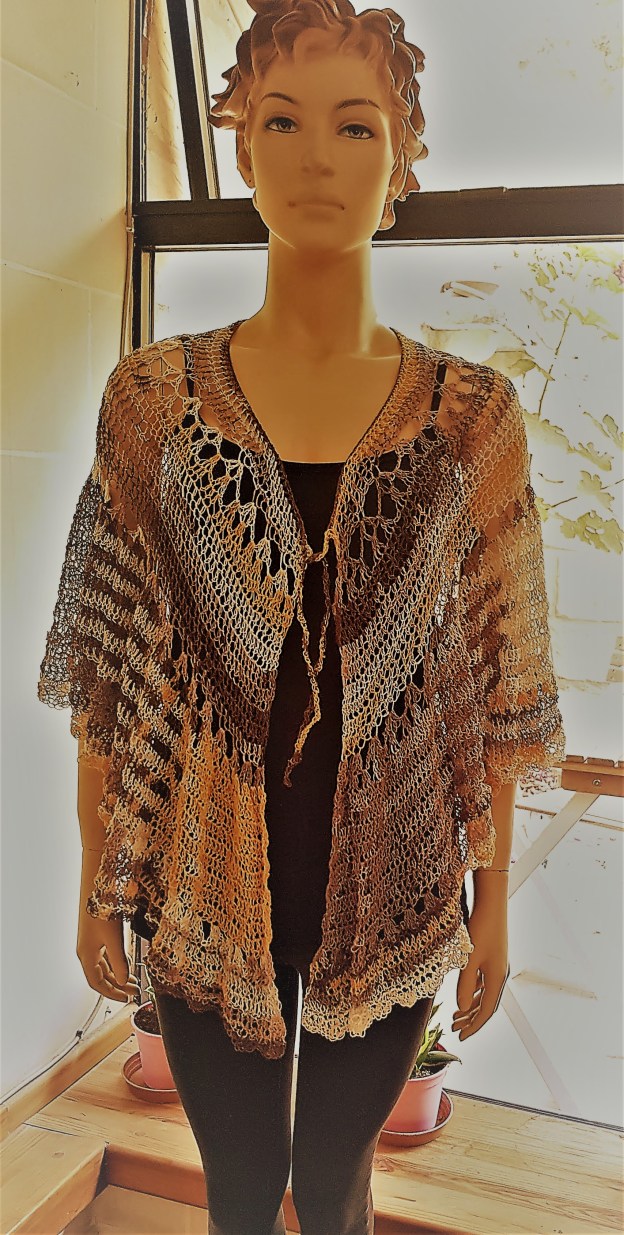
I came across this beautiful boho-inspired wrap and decided to make my own version. I used a different yarn and hook size, which explains the difference in size from the original — but I loved how it turned out!
As you can see, it can be worn 2-ways:
1 – over the shoulders as a wrap,
2 – as a skirt-wrap – perfect for the beach.
The original design is the Seaside Wrap. The pattern is no longer available free, but you can still find the pattern page on Ravelry here: Seaside Wrap pattern
Hope this gives you a little inspiration for your own summer crochet projects. 😊
Hey everyone! Hope you are all enjoying summer and safe! I might have mentioned once or twice, or a hundred times that I love winter – I am totally a winter person. I love being able to snuggle with soft, warm woolly things – so it is no surprise that I make a lot of winter projects.
Firstly, a little disclaimer about the title of this post and the name of this pattern i.e. “The Virus Shawl” – this name and pattern has been around for years and has nothing to do with COVID-19.
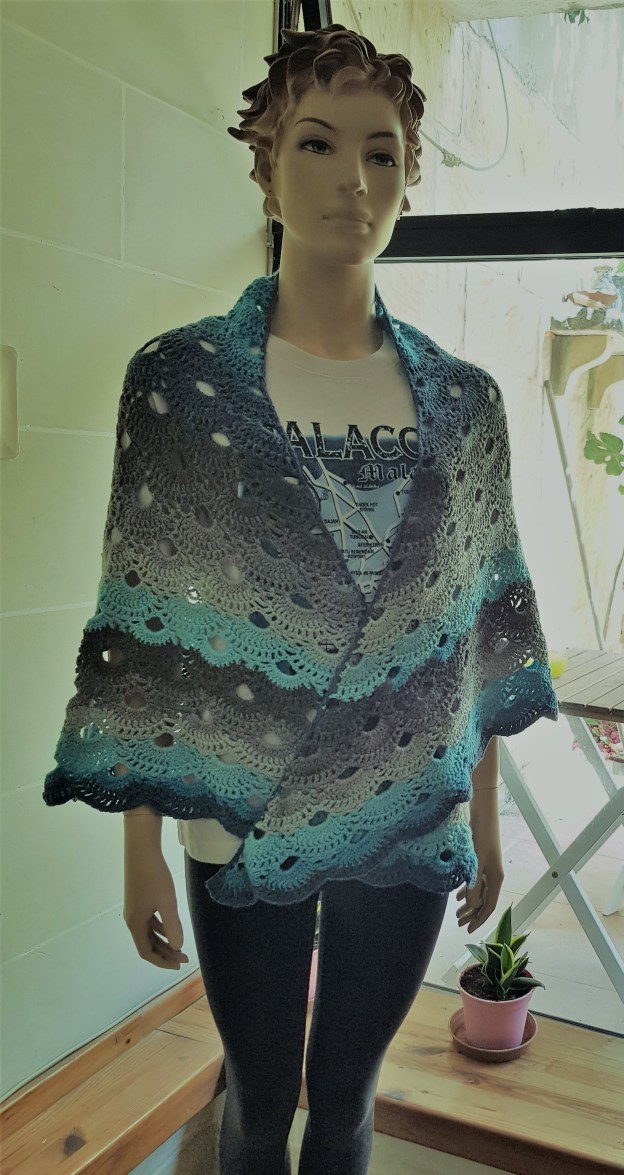
I have made a few shawls so far, but it’s always been a challenge to properly showcase these without a model. I have asked politely, then begged and even tried to bribe my lovely daughter into being my model – but with no luck. So, I now am a proud owner of a mannequin!
Here is one of the shawls that I made. There are several free versions of the Virus Shawl pattern available online. If you’d like to try making one yourself, Hobbii has a free version with a detailed visual guide and video tutorials:
Update – September 2026: The original graph pattern I used for this project is no longer available at the link included when I first wrote this post in 2020.
The beach dress was originally based on a Katia graph pattern for a size 8–10 dress. As I found the graph quite difficult to follow, I worked through it and prepared the written, row-by-row version below while making my own dress.
I also experimented with making the dress as one continuous piece rather than creating separate front and back pieces, but after quite a bit of frogging 😊 I found that working the two pieces separately was much easier for maintaining the symmetry. That’s the version I’ve written out below.
I also changed the straps, making fixed straps for my version.
The original Katia graph is no longer available at the link I originally shared, so I’ve removed the broken link. I’ve kept my written version here as part of the Manjri’s Place crochet archive.
Enjoy! 🧶
Crochet hook size used: 3mm and 4mm
Yarn: Katia Jaipur cake
Stitches:
CH – chain stitch SC – single crochet DC – double crochet DC3tog – DC 3 together
We will be making the front and back of the dress (which are identical) separately and then stitch them together at the end.
In addition, the pattern calls for making 4 straps and then stitching them to the back and front pieces.
STRAPS (make 4) Using the 4mm crochet hook and 3 strands of yarn, work a strip of chain stitch measuring 40cm long. Cut the yarn and fasten off.
BACK Using 3mm crochet hook, CH 83.
Row 1: CH 3, DC3tog (1st DC is CH 3, 2nd DC is made in CH 5 from hook) , 38 DC, 5 DC in next CH, 38 DC, DC3tog
Row 2 – 4: DC3tog (1st DC is CH 3) , 38 DC, 5 DC in next DC, 38 DC, DC3tog
Row 5: CH, [(SC, CH, skip DC) x 20], (SC, CH, SC) in next DC, [(CH, skip DC, SC) X 20], SC.
Row 6 : CH, SC, [(SC, CH, skip DC) x 20], (SC, CH, SC) in next CH, [(CH, skip DC, SC) X 21].
Row 7: CH 3, 42 DC, 5 DC in next CH, 43 DC
Row 8: CH 3, 44 DC, 5 DC in next DC, 45 DC
Row 9: CH 3, 46 DC, 5 DC in next DC, 47 DC
Row 10: CH 3, 48 DC, 5 DC in next DC, 49 DC
Row 11: CH, [(SC, CH, skip DC) x 25], (SC, CH, SC) in next DC, [(CH, skip DC, SC) X 25], SC.
Row 12 : CH, SC, [(SC, CH, skip DC) x 25], (SC, CH, SC) in next CH, [(CH, skip DC, SC) X 26].
Row 13: CH 3, 52 DC, 5 DC in next CH, 53 DC
Row 14: CH 3, 54 DC, 5 DC in next DC, 55 DC
Row 15: CH 3, 56 DC, 5 DC in next DC, 57 DC
Row 16: CH 3, 58 DC, 5 DC in next DC, 59 DC
Row 17: CH, [(SC, CH, skip DC) x 30], (SC, CH, SC) in next DC, [(CH, skip DC, SC) X 30], SC.
Row 18 : CH, SC, [(SC, CH, skip DC) x 30], (SC, CH, SC) in next CH, [(CH, skip DC, SC) X 31].
Row 19: DC3tog (1st DC is CH 3) , 61 DC, 5 DC in next CH, 60 DC, DC3tog
Row 20: DC3tog (1st DC is CH 3) , 60 DC, 5 DC in next DC, 61 DC, DC3tog
Row 21: DC3tog (1st DC is CH 3) , 61 DC, 5 DC in next DC, 60 DC, DC3tog
Row 22: DC3tog (1st DC is CH 3) , 60 DC, 5 DC in next DC, 61 DC, DC3tog
Row 23 : CH, SC, [(SC, CH, skip DC) x 31], (SC, CH, SC) in next DC, [(CH, skip DC, SC) X 31], SC.
Row 24 : CH, SC, [(SC, CH, skip DC) x 31], (SC, CH, SC) in next SC, [(CH, skip DC, SC) X 31], SC.
Row 25: DC3tog (1st DC is CH 3) , 63 DC, 5 DC in next CH, 62 DC, DC3tog
Row 26: DC3tog (1st DC is CH 3) , 62 DC, 5 DC in next DC, 63 DC, DC3tog
Row 27: DC3tog (1st DC is CH 3) , 63 DC, 5 DC in next DC, 62 DC, DC3tog
Row 28: DC3tog (1st DC is CH 3) , 62 DC, 5 DC in next DC, 63 DC, DC3tog
Row 29 : CH, SC, [(SC, CH, skip DC) x 32], (SC, CH, SC) in next DC, [(CH, skip DC, SC) X 32], SC.
Row 30 : CH, SC, [(SC, CH, skip DC) x 32], (SC, CH, SC) in next CH, [(CH, skip DC, SC) X 32], SC.
Row 31: DC3tog (1st DC is CH 3) , 65 DC, 5 DC in next CH, 64 DC, DC3tog
Row 32: DC3tog (1st DC is CH 3) , 64 DC, 5 DC in next DC, 65 DC, DC3tog
Row 33: DC3tog (1st DC is CH 3) , 65 DC, 5 DC in next DC, 64 DC, DC3tog
Row 34: DC3tog (1st DC is CH 3) , 64 DC, 5 DC in next DC, 65 DC, DC3tog
Row 35 : CH, [(SC, CH, skip DC) x 33], (SC, CH, SC) in next DC, [(CH, skip DC, SC) X 33], SC.
Row 36 : CH, SC, [(SC, CH, skip DC) x 33], (SC, CH, SC) in next CH, [(CH, skip DC, SC) X 34].
Row 37: CH 3, 68 DC, 5 DC in next CH, 69 DC
Row 38: DC3tog (1st DC is CH 3) , 68 DC, 5 DC in next DC, 68 DC, DC3tog
Row 39: CH 3, 70 DC, 5 DC in next DC, 71 DC
Row 40: DC3tog (1st DC is CH 3) , 70 DC, 5 DC in next DC, 70 DC, DC3tog
Row 41 : CH, [(SC, CH, skip DC) x 36], (SC, CH, SC) in next DC, [(CH, skip DC, SC) X 36], SC.
Row 42 : CH, SC, [(SC, CH, skip DC) x 36], (SC, CH, SC) in next CH, [(CH, skip DC, SC) X 36].
Row 43: CH 3, 74 DC, 5 DC in next CH, 75 DC
Row 44: DC3tog (1st DC is CH 3) , 74 DC, 5 DC in next DC, 74 DC, DC3tog
Row 45: CH 3, 76 DC, 5 DC in next DC, 77 DC
Row 46: DC3tog (1st DC is CH 3) , 76 DC, 5 DC in next DC, 76 DC, DC3tog
Row 47 : CH, [(SC, CH, skip DC) x 39], (SC, CH, SC) in next DC, [(CH, skip DC, SC) X 39], SC.
Row 48 : CH, SC, [(SC, CH, skip DC) x 39], (SC, CH, SC) in next CH, [(CH, skip DC, SC) X 40].
Row 49 – 52: DC3tog (1st DC is CH 3) , 78 DC, 5 DC in next DC, 78 DC, DC3tog
Row 53 : CH, [(SC, CH, skip DC) x 40], (SC, CH, SC) in next DC, [(CH, skip DC, SC) X 40], SC.
Row 54 : CH, SC, [(SC, CH, skip DC) x 40], (SC, CH, SC) in next CH, [(CH, skip DC, SC) X 41].
Row 55: DC3tog (1st DC is CH 3) , 80 DC, 5 DC in next CH, 80 DC, DC3tog
Row 56 – 58: DC3tog (1st DC is CH 3) , 80 DC, 5 DC in next DC, 80 DC, DC3tog
Row 59 : CH, [(SC, CH, skip DC) x 41], (SC, CH, SC) in next DC, [(CH, skip DC, SC) X 41], SC.
Row 60 : CH, SC, [(SC, CH, skip DC) x 41], (SC, CH, SC) in next CH, [(CH, skip DC, SC) X 42].
Row 61: DC3tog (1st DC is CH 3) , 82 DC, 5 DC in next CH, 82 DC, DC3tog
Row 62 – 64: DC3tog (1st DC is CH 3) , 82 DC, 5 DC in next DC, 82 DC, DC3tog
Row 65 : CH, [(SC, CH, skip DC) x 42], (SC, CH, SC) in next DC, [(CH, skip DC, SC) X 42], SC.
Row 66 : CH, SC, [(SC, CH, skip DC) x 42], (SC, CH, SC) in next CH, [(CH, skip DC, SC) X 43].
Row 67: DC3tog (1st DC is CH 3) , 84 DC, 5 DC in next CH, 84 DC, DC3tog
Row 68 – 70: DC3tog (1st DC is CH 3) , 84 DC, 5 DC in next DC, 84 DC, DC3tog
FRONT Work the same as the Back.
FINISHING Sew on straps: Attach one strap to each end of the starting row of Front and Back pieces. Sew the sides: align the back and front pieces and sew from end (row 70) up until row 16.
A little note: I originally wrote this post in May 2020, when the Fruit Garden CAL was just getting underway. I’ve kept the original post below as part of my crochet journal, so references to pattern releases and dates reflect what was happening at the time.
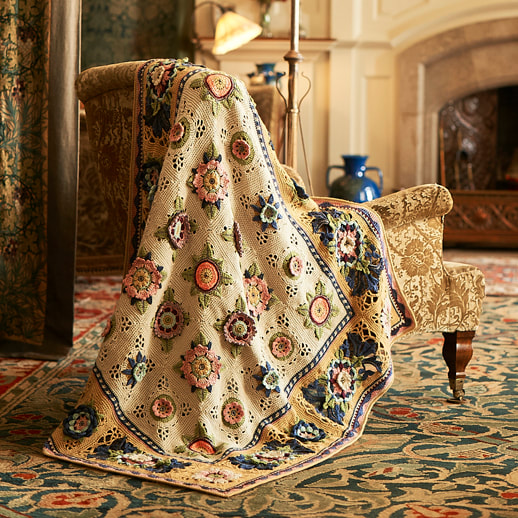
I recently came across a post in one of the Facebook crochet groups for a most beautiful Crochet-Along (CAL) project inspired by embroidery works by May Morris, daughter of William Morris. I could not resist – so I signed up, bought the yarn pack and have just started.
As we have just started, only the first part of the pattern has been released, and I can say that it is written very clearly. The designer has also provided a Youtube video, in which she has shared some really good tips. I will surely be applying some of the tips to all my projects henceforth – so very worth taking a look.
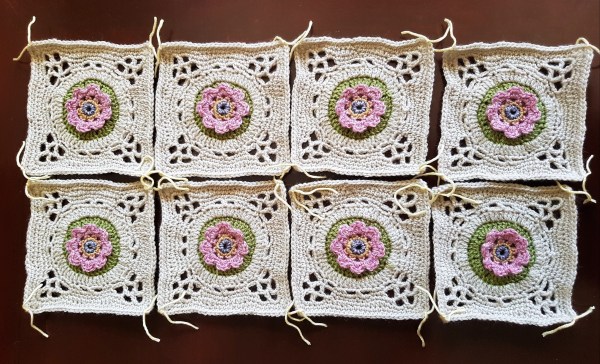
Here is my first set of tiles. (Note that these are not blocked yet as we will be blocking them at the end of the project. Also, the threads you see in the corners are actually being used as stitch markers.)
I find the most efficient approach to making multiple tiles in the same pattern is to first do one completely, so you familiarise yourself with the pattern, and then work on the remaining colour by colour. So, in this set, I did one tile completely, and for the remaining 7 tiles, I first crocheted 7 flowers, then did the green background for all 7, then proceeded to do the parchment part. There is no rule about how you should do this, it’s just a matter of preference.
At the time I started the CAL, the pattern was available in two colour recipes, with another version planned for the second run later in 2020. Of course, you could also come up with your own colour combination. I even saw a monochrome version of the tile which someone tried — and it was quite pretty — but I love colours, so it wasn’t for me. 🙂
If you want to give it a try, the pattern remains available to download, free of charge, from the Stylecraft Yarns website here.
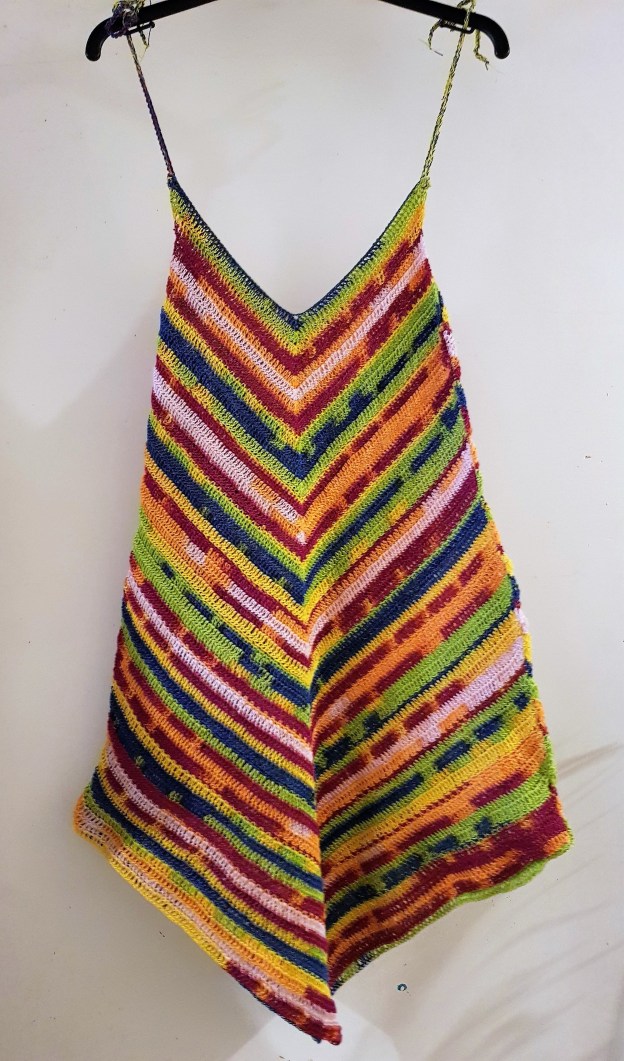
Summer is round the corner — so here is my first creation for summer: a stylish multi-coloured beach dress. It’s made using Katia Jaipur Cake cotton yarn.
The original design was based on a pattern published by Katia. The original pattern link is no longer available, but I later prepared my own written version, including the modifications I made:
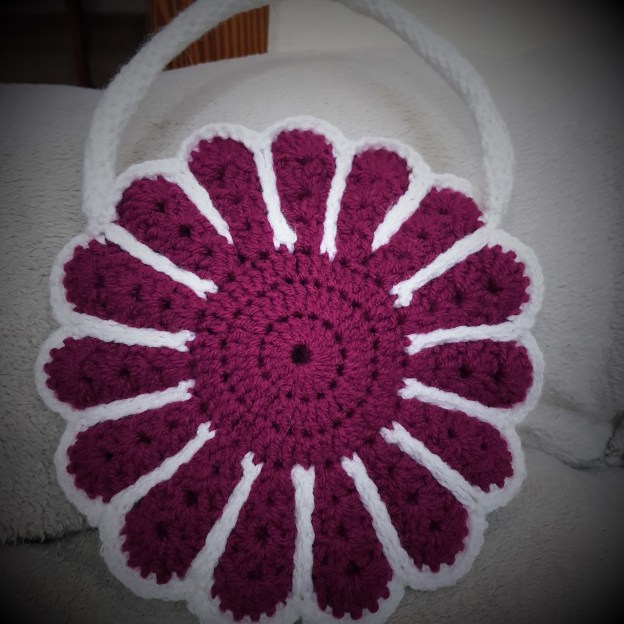
In a previous post called Pretty Petals Coasters →, I shared a cute coaster pattern. I adapted that to make a little handbag for a little girl.
I made four large coasters and joined two together by crocheting the white outline through both layers. That way, I ended up with two rather sturdy sides. I then joined the two sides together using white yarn.
For the handles, I made simple crochet cords, and to finish, I added snap buttons.